

KitchenAid KESC300, KERC600, KERC601, YKESC300, YKERC600 Owner's Manual
...
Use and Care Guide
A Note to You........................................... 2
Range Safety............................................ 3
Parts and Features .................................. 6
Using and Caring for Your Cooktop .... 10
Using the surface cooking areas ......... 10
Cookware tips ...................................... 12
Characteristics of cookware materials .. 12
Home canning information................... 13
Caring for your cooktop ....................... 13
Cleaning your cooktop ......................... 14
Using and replacing the surface light .. 15
Using and Caring for Your Oven.......... 16
Using the electronic oven control......... 16
Setting the clock .................................. 24
Using the timer..................................... 24
Cooking tips ......................................... 26
Bake or Roast ...................................... 28
Broil...................................................... 29
Adjusting the oven temperature........... 31
Timed cooking ..................................... 33
Cleaning your oven and controls ......... 40
Oven lights........................................... 42
Using the Self-Cleaning Cycle ............. 43
Before you start ................................... 43
Before setting the controls ................... 44
Setting the controls .............................. 44
For best cleaning results...................... 46
How the cycle works ............................ 46
Troubleshooting .................................... 47
Requesting Assistance or Service ...... 50
Warranty................................................. 52
In the U.S.A. for assistance or service,
call the Consumer Assistance center:
®
®
TO THE INSTALLER: PLEASE LEAVE THIS
INSTRUCTION BOOK WITH THE UNIT.
TO THE CONSUMER: PLEASE READ
AND KEEP THIS BOOK FOR FUTURE
REFERENCE.
KITCHENAID® Electric Ranges
Models: KESC300 KERC600 KERC601
YKESC300 YKERC600 YKERC601
9753845
1-800-422-1230
In Canada, for assistance or service,
see page 51.
www.kitchenaid.com
A
Note to You
Thank you for buying a KITCHENAID
KitchenAid designs the best tools for the most important room in your house. To
ensure that you enjoy many years of trouble-free operation, we developed this Use
and Care Guide. It contains valuable information concerning how to operate and
maintain your new appliance properly and safely. Please read it carefully. Also,
please complete and mail the enclosed Product Registration Card.
Please record your model’s information.
Whenever you call our Consumer
Assistance Center at 1-800-422-1230 (in
Canada, 1-800-461-5681) or request
service for your appliance, you need to
know your complete model number and
serial number. You can find this information
on the model and serial number plate (see
diagram on page 6 for location of plate).
Please also record the purchase
information.
NOTE: You must provide proof of purchase
or installation date for in-warranty service.
Keep this book and the sales slip together in a safe place for future reference.
®
appliance!
Model Number __________________________
Serial Number __________________________
Purchase/
Installation Date ________________________
Builder/Dealer
Name _________________________________
Address _______________________________
Phone _________________________________
The anti-tip bracket
The range will not tip during normal use. However, tipping can occur if you apply too much
force or weight to the open door without the anti-tip bracket properly secured.
wWARNING
Tip Over Hazard
A child or adult can tip the range and be killed.
Connect anti-tip bracket to rear range foot.
Reconnect the anti-tip bracket, if the range is moved.
See the installation instructions for details.
Failure to follow these instructions can result in death or
serious burns to children and adults.
Anti-Tip Bracket
Range Foot
2
Making sure the anti-tip bracket is installed:
• Slide range forward.
• Look for the anti-tip bracket securely attached to floor.
• Slide range back so rear range foot is under anti-tip bracket.
R
ange Safety
Your safety and the safety of others is very important.
We have provided many important safety messages in this manual and on your
appliance. Always read and obey all safety messages.
This is the safety alert symbol.
This symbol alerts you to hazards that can kill or hurt you and others.
All safety messages will be preceded by the safety alert symbol and the
word “DANGER” or “WARNING.” These words mean:
You will be killed or seriously injured
wDANGER
wWARNING
All safety messages will identify the hazard, tell you how to reduce the chance of injury,
and tell you what can happen if the instructions are not followed.
if you don’t follow instructions.
You can be killed or seriously injured
if you don’t follow instructions.
IMPORTANT SAFETY INSTRUCTIONS
WARNING: To reduce the risk of
fire, electrical shock, injury to persons,
or damage when using the range,
follow basic precautions, including
the following:
WARNING – TO REDUCE THE
•
RISK OF TIPPING OF THE RANGE,
THE RANGE MUST BE SECURED
BY PROPERLY INSTALLED ANTITIP DEVICES. TO CHECK IF THE
DEVICES ARE INSTALLED PROPERLY, SLIDE RANGE FORWARD,
LOOK FOR ANTI-TIP BRACKET
SECURELY ATTACHED TO
FLOOR, AND SLIDE RANGE BACK
SO REAR RANGE FOOT IS UNDER
ANTI-TIP BRACKET.
CAUTION – Do not store items
•
of interest to children in cabinets
above a range or on the backguard
of a range – children climbing on the
range to reach items could be
seriously injured.
Proper Installation – Be sure the range
•
is properly installed and grounded by a
qualified technician.
Never Use the Range for Warming or
•
Heating the Room.
Do Not Leave Children Alone – Children
•
should not be left alone or unattended
in area where the range is in use. They
should never be allowed to sit or stand
on any part of the range.
Wear Proper Apparel – Loose-fitting or
•
hanging garments should never be worn
while using the range.
User Servicing – Do not repair or replace
•
any part of the range unless specifically
recommended in the manual. All other
servicing should be referred to a qualified
technician.
Storage in or on the Range – Flammable
•
materials should not be stored in an oven
or near surface units.
Do Not Use Water on Grease Fires –
•
Smother fire or flame or use dry chemical
or foam-type extinguisher.
SAVE THESE INSTRUCTIONS
3

Range Safety
IMPORTANT SAFETY INSTRUCTIONS
Use Only Dry Potholders – Moist or
•
damp potholders on hot surfaces
may result in burns from steam. Do
not let potholder touch hot heating
elements. Do not use a towel or
other bulky cloth.
DO NOT TOUCH SURFACE UNITS
•
OR AREAS NEAR UNITS – Surface
units may be hot even though they
are dark in color. Areas near surface
units may become hot enough to
cause burns. During and after use,
do not touch, or let clothing or other
flammable materials contact surface
units or areas near units until they
have had sufficient time to cool.
Among those areas are the cooktop
and surfaces facing the cooktop.
Use Proper Pan Size – The range is
•
equipped with one or more surface
units of different size. Select utensils
having flat bottoms large enough to
cover the surface unit heating
element. The use of undersized
utensils will expose a portion of the
heating element to direct contact and
may result in ignition of clothing.
Proper relationship of utensil to
burner will also improve efficiency.
Never Leave Surface Units
•
Unattended at High Heat Settings –
Boilover causes smoking and
greasy spillovers that may ignite.
Protective Liners – Do not use
•
aluminum foil to line oven bottoms,
except as suggested in the manual.
Improper installation of these liners
may result in a risk of electric shock,
or fire.
Glazed Cooking Utensils – Only certain
•
types of glass, glass/ceramic, ceramic,
earthenware, or other glazed utensils
are suitable for range-top service without
breaking due to the sudden change in
temperature.
Utensil Handles Should Be Turned
•
Inward and Not Extend Over Adjacent
Surface Units – To reduce the risk of
burns, ignition of flammable materials,
and spillage due to unintentional contact
with the utensil, the handle of a utensil
should be positioned so that it is turned
inward, and does not extend over
adjacent surface units.
Do Not Cook on Broken Cooktop –
•
If cooktop should break, cleaning solutions and spillovers may penetrate the
broken cooktop and create a risk of
electric shock. Contact a qualified
technician immediately.
Clean Cooktop With Caution – If a wet
•
sponge or cloth is used to wipe spills on
a hot cooking area, be careful to avoid
steam burn. Some cleaners can produce
noxious fumes if applied to a hot surface.
Use Care When Opening Door – Let hot
•
air or steam escape before removing or
replacing food.
Do Not Heat Unopened Food Containers
•
– Build-up of pressure may cause
container to burst and result in injury.
Keep Oven Vent Ducts Unobstructed.
•
Placement of Oven Racks – Always
•
place oven racks in desired location
while oven is cool. If rack must be moved
while oven is hot, do not let potholder
contact hot heating element in oven.
– SAVE THESE INSTRUCTIONS –
4

Range Safety
IMPORTANT SAFETY INSTRUCTIONS
DO NOT TOUCH HEATING ELE-
•
MENTS OR INTERIOR SURFACES
OF OVEN – Heating elements may
be hot even though they are dark in
color. Interior surfaces of an oven
become hot enough to cause burns.
During and after use, do not touch,
or let clothing or other flammable
materials contact heating elements
or interior surfaces of oven until they
have had sufficient time to cool.
Other surfaces of the appliance may
become hot enough to cause burns
– among these surfaces are oven
vent openings and surfaces near
these openings, oven doors, and
windows of oven doors.
For self-cleaning ranges –
Do Not Clean Door Gasket – The door
•
gasket is essential for a good seal. Care
should be taken not to rub, damage, or
move the gasket.
Do Not Use Oven Cleaners – No
•
commercial oven cleaner or oven liner
protective coating of any kind should be
used in or around any part of the oven.
Clean Only Parts Listed in Manual.
•
Before Self-Cleaning the Oven –
•
Remove broiler pan and other utensils.
For units with ventilating hood –
Clean Ventilating Hoods Frequently –
•
Grease should not be allowed to
accumulate on hood or filter.
When flaming foods under the hood,
•
turn the fan on.
– SAVE THESE INSTRUCTIONS –
5
P
arts and Features
Feature locations
(Slide-in models)
Oven vent
(p. 8)
Surface cooking
area controls
(pp. 10, 11)
Anti-tip
bracket
(p. 2)
Model and
serial number
plate
(p. 2)
Broiler pan
support
Surface cooking area
(pp. 10, 11)
Electronic oven control
H
F
I
F
O
O
L
I
H
F
H
F
O
I
O
L
STARTSTART
M
3
L
NTRO
E
2
CO
CONTROL
K
C
O
L
LOCK
1
O
4
ON
HRMIN MINSEC
DELAYDELAY
TIMEDTIMED
CLEANCLEAN
PROBEPROBE
F
F
O
O
F
F
O
H
L
I
O
L
E
L
I
G
H
N
I
D
E
M
M
E
D
L
O
D
E
M
REAR
TEMPTEMP
STOPSTOP
CONTROLCONTROL
TIMERTIMER
LOCKEDLOCKED
COOKCOOK
DOORDOOR
?
STARTSTART
O
COOKCOOK
F
TIMETIME
CLOCKCLOCK
STARTSTART
•
SETSET
L
R
E
A
IM
TIMER
T
CLEAN CLEAN
CANCELCANCEL
U
STARTSTART
BROIL BROIL
•
SETSET
D
BAKE BAKE
S
H
I
O
L
FRONT
D
L
6
5
9
8
7
CANCELCANCEL
OFFOFF
OVENOVEN
LIGHTLIGHT
0
SURFACESURFACE
LIGHTLIGHT
STOPSTOP
TIMETIME
D
E
M
M
I
E
H
D
L
D
O
E
D
E
M
M
REARREAR
O
D
E
M
FRONTFRONT
(pp. 16-25)
Automatic
oven light
switch
(p. 42)
Broil element
(not shown)
Bake element
Removable
storage drawer
(p. 9)
Surface cooking area controls
F
F
O
O
L
M
E
D
L
O
H
I
I
H
D
E
M
M
E
D
REAR FRONT
Left rear
control knob
F
F
O
O
L
E
L
G
N
I
S
H
I
L
O
Left front
control knob
H
I
L
A
U
D
O
L
M
E
D
L
O
Right front
control knob
F
O
M
E
FRONT
F
H
I
I
H
D
E
M
D
F
F
O
O
L
M
E
D
L
O
H
I
I
H
D
E
M
M
E
D
REAR
Right rear
control knob
6
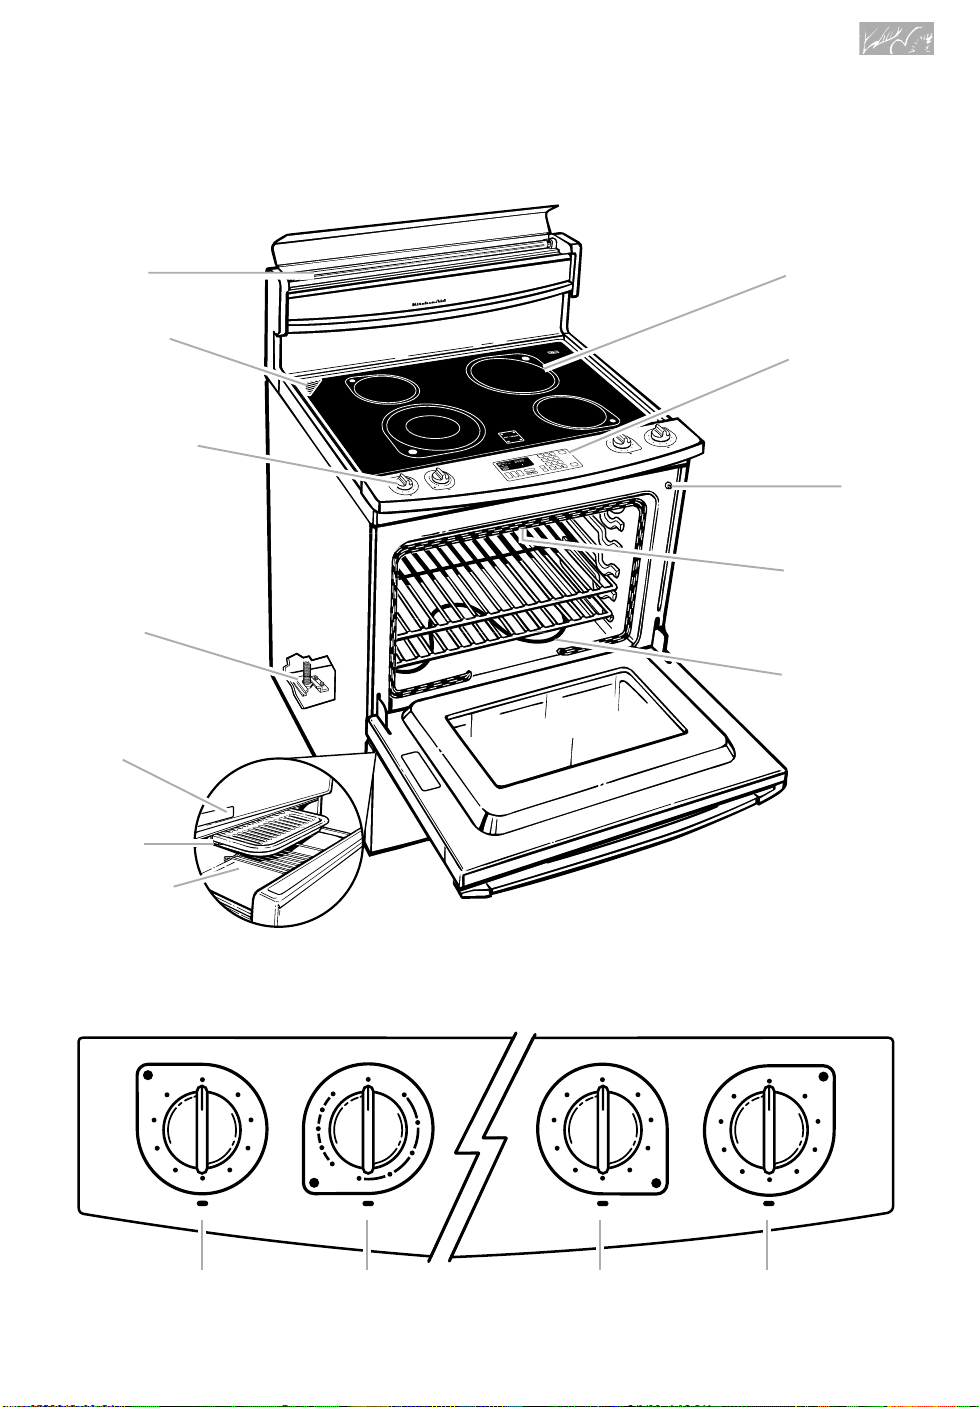
Feature locations
(Freestanding models)
Surface light
(some freestanding
models)
(p. 15)
Parts and Features
Surface
cooking area
(pp. 10, 11)
Oven vent
(p. 8)
Surface cooking
area controls
(pp. 10, 11)
Anti-tip
bracket
(p. 2)
Model and
serial number
plate
(p. 2)
Broiler pan
support
Removable
storage
drawer
(p. 9)
Electronic
oven control
(pp. 16-25)
H
I
F
F
O
O
I
L
H
D
H
F
F
I
O
O
L
M
E
D
START
3
L
TRO
N
O
C
CONTROL
2
LOCKLOCK
1
6
5
O
4
9
8
DELAYDELAY
ON
HRHRMINMIN MINMINSECSEC
TIMEDTIMED
CLEANCLEAN
7
PROBE
PROBE
STOPSTOP
CANCELCANCEL
TEMP
TEMP
F
F
O
OFF
TIMERTIMER
CONTROLCONTROL
N
E
V
COOKCOOK
O
OVEN
LOCKEDLOCKED
T
H
?
IG
K
DOORDOOR
LIGHT
L
O
O
C
COOK
0
STARTSTART
E
IM
T
TIME
O
SURFACESURFACE
T
F
H
IG
LIGHT
L
K
C
O
L
P
CLOCK
C
O
T
T
R
S
STOP
A
T
S
START
E
•
T
E
IM
S
SET
TIME
F
F
O
O
L
F
F
H
O
I
L
A
U
E
D
L
O
L
G
I
N
I
H
S
D
E
H
I
M
O
L
M
E
D
L
FRONTFRONT
O
D
E
M
REAR
T
R
E
L
E
C
TIM
TIMER
N
A
C
CANCEL
N
IL
A
O
E
R
L
B
BROIL
C
CLEAN
STARTSTART
•
I
SETSET
X
A
M
•MAXI
•
O
N
O
C
E
•
•
••ECONO
E
K
A
B
BAKE
E
M
I
M
E
H
D
D
L
O
D
E
E
M
M
REAR
L
O
D
E
M
FRONT
Automatic
oven light
switch
(p. 42)
Broil element
(not shown)
Bake element
Surface cooking area controls
F
F
O
O
L
M
E
D
L
O
H
I
I
H
D
E
M
M
E
D
REAR FRONT
Left rear
control knob
F
F
O
O
L
E
L
G
N
I
S
H
I
L
O
Left front
control knob
H
I
L
A
U
D
O
L
M
E
D
L
O
Right front
control knob
F
O
M
E
FRONT
F
H
I
I
H
D
E
M
D
F
F
O
O
L
M
E
D
L
O
H
I
I
H
D
E
M
M
E
D
REAR
Right rear
control knob
7
Parts and Features
The oven vent
Hot air and moisture escape from the oven
through a vent in the left rear corner of the
cooktop. Do not block the vent by using
large pans or covers. Poor baking/roasting
can result.
NOTE: Plastic utensils left over the vent
can melt.
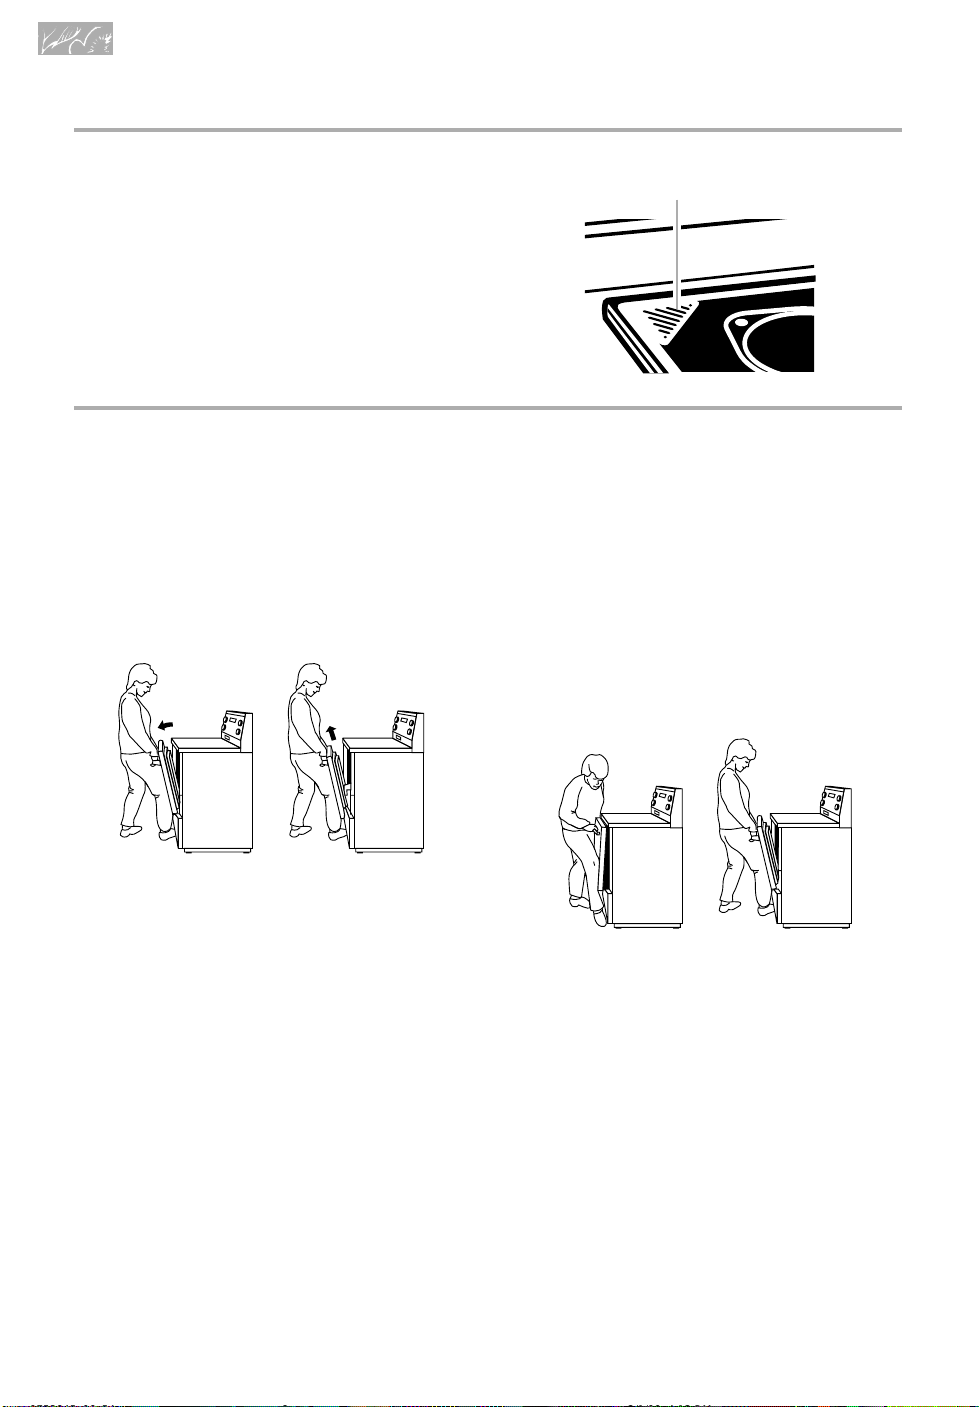
The oven door
Oven vent
Removing the oven door:
1. Open the door to the Broil Stop position
(open about 4" [10 cm]).
2. Lift door slightly and pull out and back until
hinges come out to the catch position.
3. Push door down and pull straight out to
remove door completely.
4" (10 cm)
4"
Replacing the oven door:
1. Holding the door by the handle, place the
top of the door under the cooktop overhang
and use your leg to apply pressure to slide
hinges into the slots as far as possible.
2. Open door to the broil position or slightly
past it.
3. Using the side of your leg, apply pressure
to the bottom of the door front. Lift the door
slightly while applying pressure to push,
until the hinges have gone in fully.
8
Parts and Features
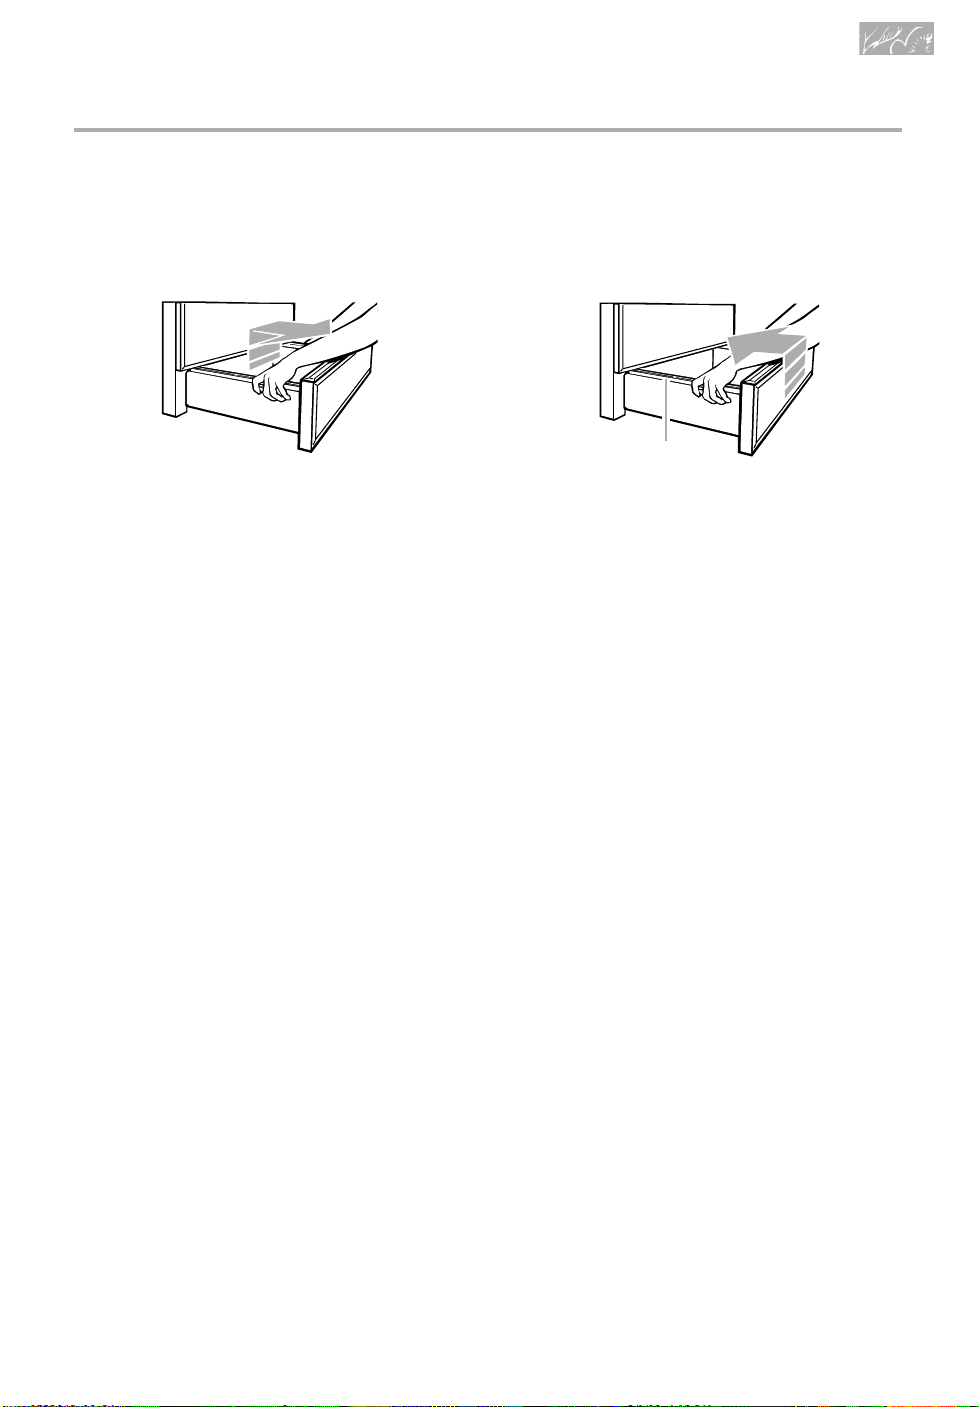
The storage drawer
You can remove the storage drawer to make it easier to clean under the range. Use care
when handling the drawer.
Removing the storage drawer:
1. Empty drawer of any pots and pans
before removing drawer. Use recessed
area on top edge of drawer to pull drawer
straight out to the first stop. Lift front and
pull out to the second stop.
2. Lift back slightly and slide drawer all the
way out.
Replacing the storage drawer:
Drawer slide rail
1. Fit ends of drawer slide rails into the
drawer guides on both sides of
opening.
2. Lift drawer front and press in until metal
stops on drawer slide rails clear white
stops on drawer guides. Lift drawer front
again to clear second stop and slide
drawer closed.
9
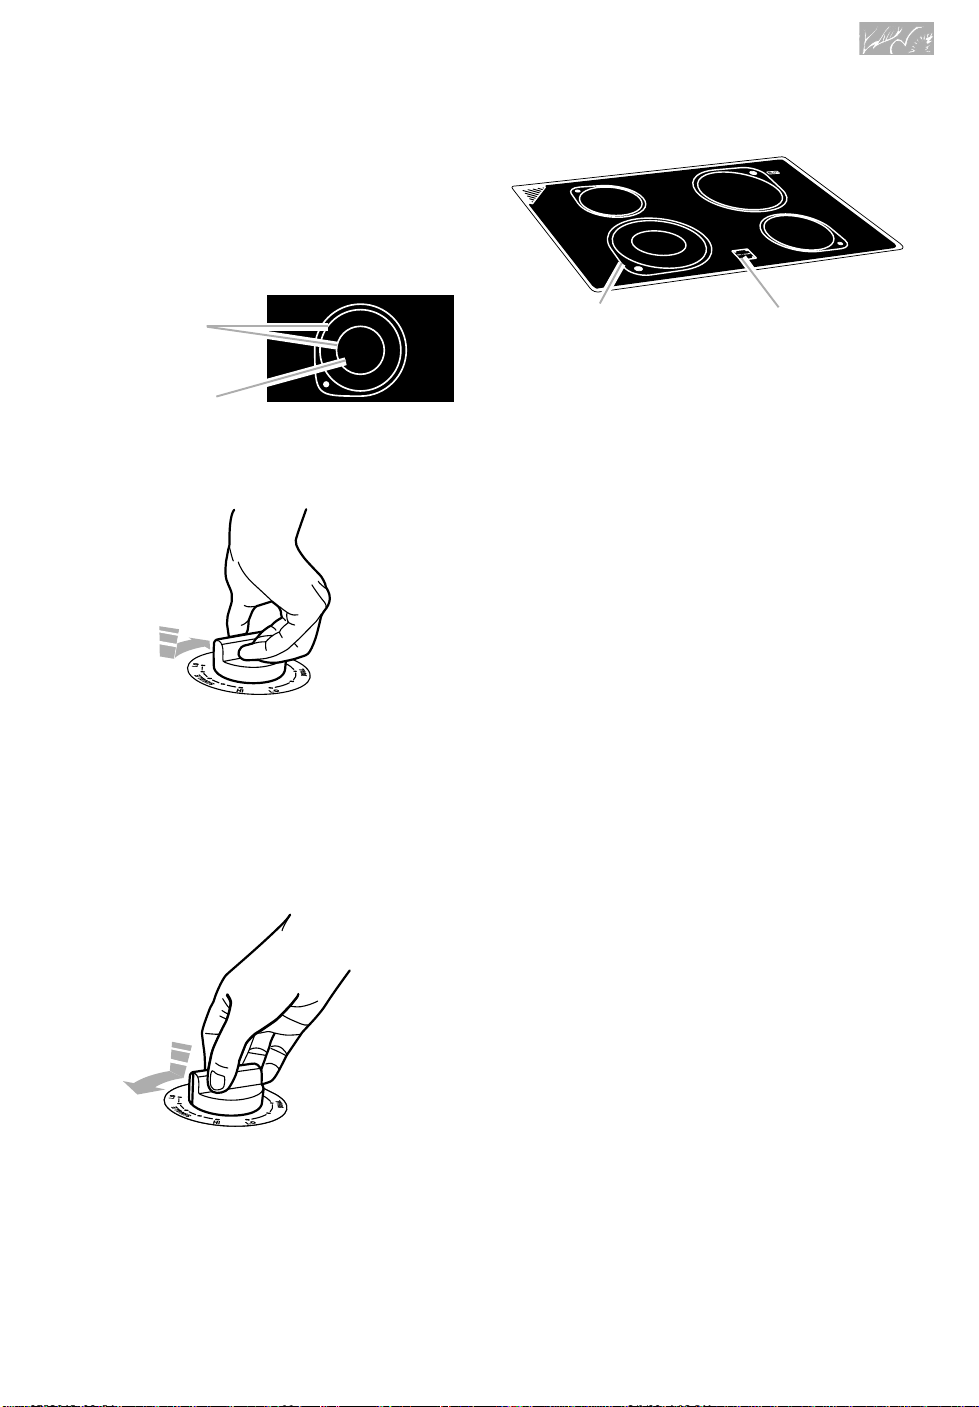
U
sing and Caring for Your
Cooktop
Using the surface cooking areas
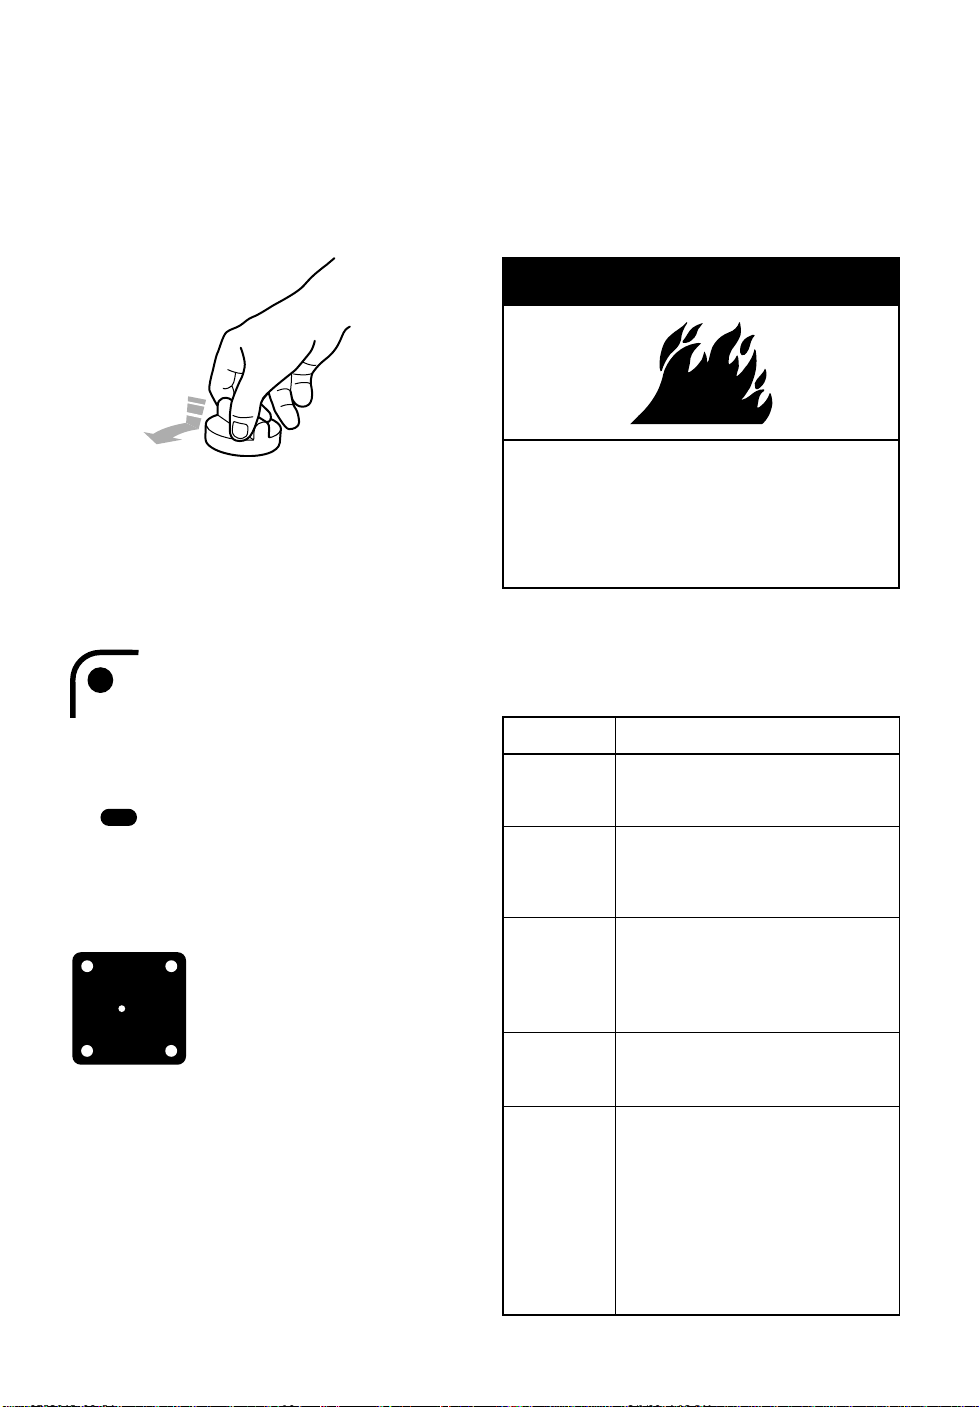
Control knobs
Push in control knobs before turning them
to a setting. Set them anywhere between HI
and OFF.
Turn off all controls when done
cooking.
Failure to do so can result in death
or fire.
wWARNING
Fire Hazard
Surface cooking area markers
The solid dot in the surface cooking area
marker shows which surface
cooking area is turned on by
that knob.
Power on lights
When you use a control knob to turn on
a surface cooking area, the Power
On Light by that knob will glow.
FRONT
Hot surface indicator lights
The Hot Surface Indicator Lights on the
cooktop surface will glow
when any of the surface
HOT CHAUD
(“CHAUD”
is French
for “HOT”)
cooking areas are hot. The
Indicator Lights will continue
to glow as long as the surface
cooking areas are too hot to
touch, even after they are
turned off.
Control setting guide
For best results, start cooking at the high
setting; then turn the control knob down to
continue cooking.
SETTING
HI or
MAX
MED-HI
or 6-8
MED
or 5
MED-LO
or 2-4
LO or 1
RECOMMENDED USE
• To start food cooking.
• To bring liquid to a boil.
• To hold a rapid boil.
• To quickly brown or sear
meat.
• To mainta in a slow bo il.
• To fry poultry or meat.
• To make pudding, sauce,
or gravy.
• To stew or steam food.
• To simmer food.
• To keep food warm. Set the
heat higher or lower within
the LO (or 1) band to keep
food at the temperature
you want.
• To mainta in liq uid j ust belo w
simmer.
• To melt chocolate or butter.
10
Using and Caring for Your Cooktop
Using the dual-size surface
cooking area
(on some models)
You can use the left front surface cooking
area as either a small diameter, lower
wattage element or large diameter, full
wattage element.
Use both elements
for larger pans
Use small element
for smaller pans
To use both elements
(for larger pans):
• Push in and turn the control knob to the
right (clockwise) to the desired setting in
the area marked “DUAL.”
NOTE: You can turn the control knob in
either direction to reach “OFF.”
To use the small element
(for smaller pans):
• Push in and turn the control knob to the
left (counterclockwise) to the desired
setting in the area marked “SINGLE.”
Using the ceramic glass cooktop
Dual-size surface
cooking area
(on some models)
Cooking on the ceramic glass cooktop is
almost the same as cooking on coil surface
units. There are, however, a few differences:
• The cooking surface area will glow red
when the element is turned on. You will
see the element cycling on and off – even
on the HI setting – to help the area stay at
the temperature setting you choose.
• Make sure the bottoms of pots and pans
are clean and dry before cooking. Food
and water particles left on the bottoms can
leave deposits on the cooktop when it is
heated.
• Wiping off the cooktop before and after
each use will help keep the surface free
from stains and give you the most even
heating. See the “Cleaning tips” section.
• Do not cook foods directly on the cooktop.
• Lift pots and pans onto and off of the
cooktop. Sliding pots and pans on the
cooktop could leave marks that are difficult
to remove or could leave permanent marks.
• Do not cook popcorn that comes in
prepackaged aluminum containers on the
cooktop. The container could leave aluminum marks on the cooktop that cannot be
removed completely.
• Do not use the cooktop as a cutting board.
• Do not allow anything that could melt,
such as plastic or aluminum foil, to come
in contact with the cooktop while it is hot.
• Dropping a heavy or hard object on the
cooktop could crack it. Be careful when
using heavy skillets and large pots. Do
not store jars or cans above the cooktop.
• Sugary spills and soils can cause pitting.
See the “Cleaning tips” section.
Hot surface
indicator
lights
11

Using and Caring for Your Cooktop
Cookware tips
• Select a pan that is about the same s ize
as the surface cooking area. Cookware
should not extend more than 1 inch
(2.5 cm) outside the area.
• For best results and greater energy
efficiency, use only flat-bottomed
cookware that makes good contact with
the surface cooking area. Cookware with
rounded, warped, ribbed (such as some
porcelain enamelware), or dented bottoms
could cause uneven heating and poor
cooking results.
• Cookware designed with slightly indented
bottoms or small expansion channels can
be used.
• Cookware with non-stick finish has
heating characteristics of the base material.
• Check for rough spots on the bottom of
metal or glass cookware which will scratch
the ceramic glass surface.
• Use flat bottom cookware for best heat
conduction from the surface cooking area
to the cookware. Determine flatness with
the ruler test. Place the edge of a ruler
across the bottom of the cookware. Hold it
up to the light. No light should be visible
under the ruler. Rotate the ruler in all
directions and look for any light.
• Do not leave empty cookware, or
cookware that has boiled dry, on a hot
surface cooking area. The cookware
could overheat, causing damage to the
cookware or the surface cooking area.
Characteristics of cookware materials
The pan material affects how fas t heat transfers from the surface cooking area through t he pan
material and how evenly heat spreads over the pan bottom. Choose pans that provide the
best cooking results.
Aluminum
Cast iron
Ceramic or
ceramic glass
Copper
Earthenware
Porcelain enamel-on-steel
or enamel-on-cast iron
Stainless steel
12
• Heats quickly and evenly.
• Use for all types of cooking.
• Medium or heavy thickness is best for most cooking.
• Used as a core or base in cookware to provide even heating.
• Heats slowly and evenly.
• Good for browning and frying.
• Maintains heat for slow cooking.
• Can be coated with porcelain enamel.
• Heats s low ly a nd uneve nly.
• Use on low to medium settings.
• Follow manufacturer’s instructions.
• Heats very quickly and evenly.
• Used as a core or base in cookware to provide even heating.
• Can be used for cooktop cooking if recommended by the
manufacturer.
• Use on low settings.
• See cast iron and stainless steel.
• Heats q uick ly but une ve nly.
• A core or base of aluminum or copper on the cookware
provides even heating.
• Can be coated with porcelain enamel.

Using and Caring for Your Cooktop
Home canning information
Center over
surface unit
Pan
Surface
unit
• Use the entire surface (“DUAL” setting) of the
left front surface cooking area for best
results.
• Use flat-bottomed canners on all types of
cooktops, especially ceramic glass.
Canners with rippled or ridged bottoms do not
allow good contact with the surface.
• Center the canner over the largest surface
cooking area. Do not extend more than 1
inch (2.5 cm) outside the surface cooking
area. Large diameter canners/pans, if not
centered correctly, will trap heat and result
in damage to the cooktop. Do not place on
two surface cooking areas at the same time.
• The type of material the canner is made of
determines the length of heating time. Refer
to the “Characteristics of cookware materials”
chart later in this section for more information.
Caring for your cooktop
This cooktop is designed for easy care.
However, ceramic glass cooktops need
to be maintained differently than standard
electric coil elements. Foods spilled directly
on the cooktop will not burn off as on coil
elements. Because of this, the surface should
be dust-free and soil-free before heating.
• When canning for long periods of time, allow
elements and the surrounding surfaces to
cool down.
• Alternate use of the surface cooking areas
between batches or prepare small batches at
a time.
• Start with hot water, cover with a lid, and bring
to a boil; then reduce heat to maintain a boil
or required pressure levels in a pressure
canner.
• For up-to-date information on canning,
contact your local U.S. Government
Agricultural Department Extension Office
or companies who manufacture home
canning products.
Your cooktop has been prepolished at
the factory for improved protection and
cleanability. The Cooktop Polishing Creme,
a paper towel or a sponge is all you need to
clean your cooktop. For proper cleaning
methods, please review the “How to keep
your cooktop looking like new” chart. Follow
this chart after each use to ensure top
performance and to preserve that uniquely
elegant look.
NOTE: Let cooktop cool before cleaning.
13

Using and Caring for Your Cooktop
Cleaning your cooktop
Cleaning tips
What to use:
• Cooktop Polishing Creme included with
your cooktop with a paper towel or clean,
damp sponge. This creme has been
developed especially for cleaning and
polishing your cooktop. When using, follow
instructions on container.
• Razor scraper – Use to remove cooked-
on soils from your ceramic glass cooktop.
To avoid scratches, keep the razor blade
as flat against the cooktop as possible.
Store razor blades out of reach of
children.
• Do not use steel wool, plastic cleaning
pads, abrasive powdered cleansers,
chlorine bleach, rust remover, ammonia,
or glass cleaning products with ammonia.
These products could damage the cooktop
surface.
Steps to follow:
1. Most spills can be wiped off easily
using a paper towel or clean, damp
sponge as soon as Hot Surface
Indicator Light goes off.
2. For stubborn spills, rub Cooktop
Polishing Creme into cooked-on soil
using a paper towel. If some soil remains,
leave some creme on the spot(s) and
follow Step 3.
3. Carefully scrape spots with the razor
scraper.
4. Finish by polishing entire cooktop
with Cooktop Polishing Creme and a
paper towel.
To order Cooktop Polishing Creme
(Part No. 3184477) or Razor Scraper (Part
No. 3183488), call 1-800-422-1230 (in
Canada, 1-800-461-5681) and follow the
instructions and telephone prompts you
hear.
NOTE: Always wipe and dry your cooktop
thoroughly after using cleanser to prevent
streaking or staining.
How to keep your cooktop
looking like new:
IF THERE ARE
Sugary spills
and soils (such
as jellies and
candy syrups)
Burned-on
soils
Dark streaks,
specks, and
discoloration
Metal marks
(from copper or
aluminum pans)
Tiny scratches
or abrasions
WHAT TO DO
To prevent pitting on
the cooktop, wipe up
with a paper towel or
clean, damp sponge
while ceramic glass
surface is still warm.
Remove as soon as
possible after spill
occurs.
Rub Cooktop Polishing
Creme or nonabrasive
cleanser into soil using
a paper towel. Reapply
creme to spots remaining. Hold razor scraper
as flat to surface as
possible, scrape spots.
Polish entire cooktop
with creme and paper
towel. Rinse and dry.
Store razor blades out
of reach of children.
Use Cooktop Polishing
Creme or nonabrasive
cleanser with a damp
paper towel or sponge.
Use Cooktop Polishing
Creme or nonabrasive
cleanser with a damp
paper towel or sponge
before heating the
cooktop again. If heated
before cleaning, metal
marks may not come
off.
Scratches and abrasions do not affect
cooking. In time, they
will become less visible
as a result of cleaning.
To prevent scratches
and abrasions, use
Cooktop Polishing
Creme regularly.
14
Using and Caring for Your Cooktop
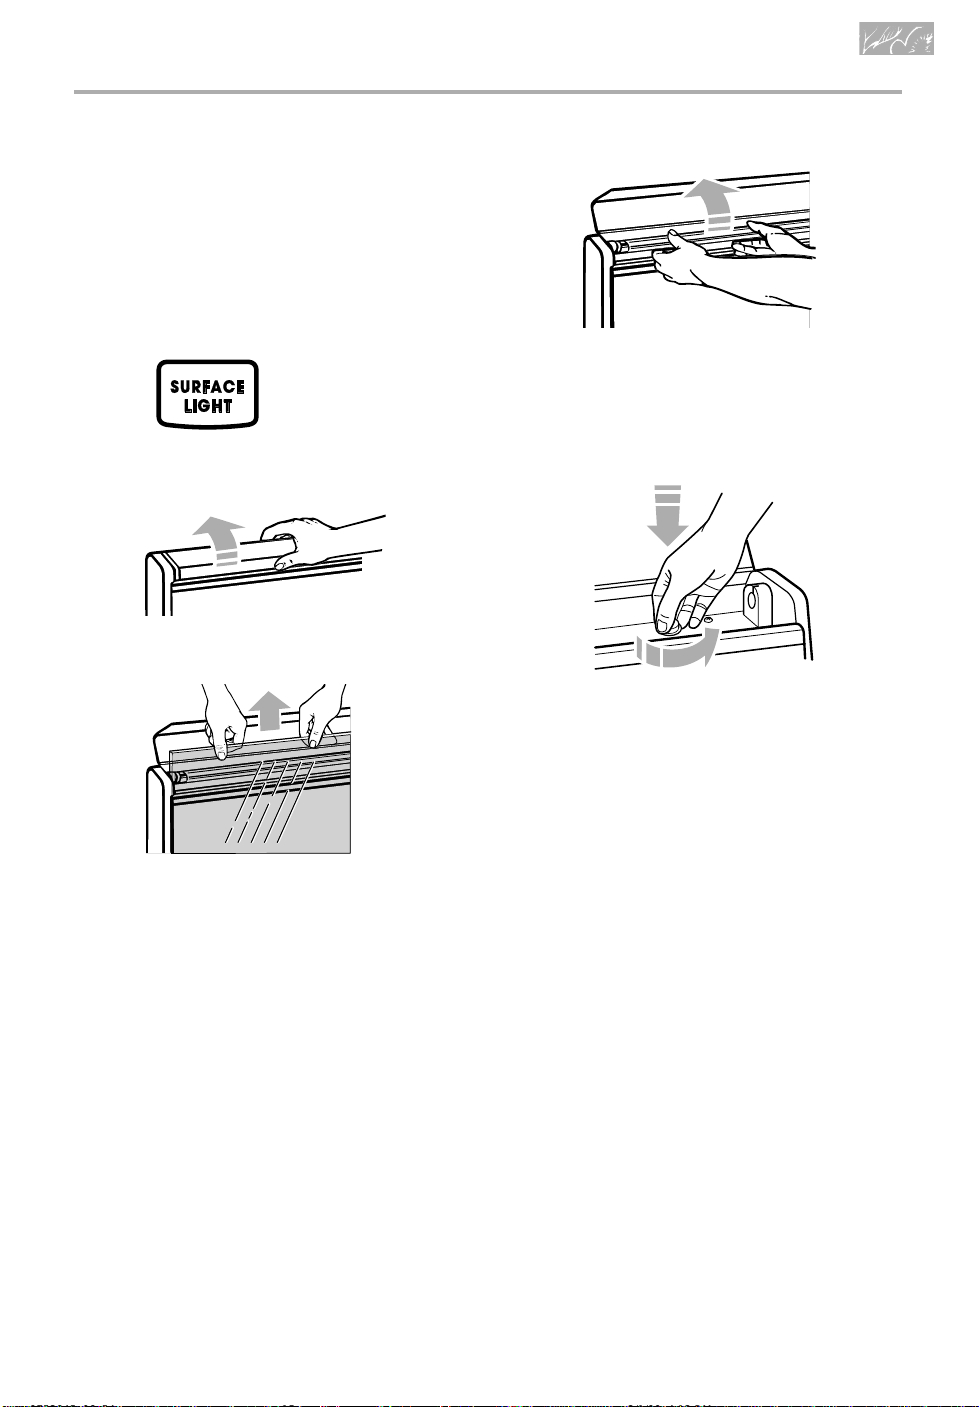
Using and replacing the surface light
(Some freestanding models)
The surface light is in the backguard. It is
controlled by the Surface Light Command
Pad on the control panel. See “Using the
electronic oven control” section for location
information.
To turn the surface light on or off:
PRESS
Replacing the surface light:
1. Unplug range or disconnect power.
4. Grasp the fluorescent light tube at both
ends. Turn the tube approximately 90°
in either direction until both ends come
out of the receptacles. Replace with a
20-watt cool-white fluorescent light tube.
2. Flip up the top of the backguard.
3. Pull up glass on front of backguard.
5. If the surface light still does not work,
you may need to replace the starter. The
starter is a knob-shaped part located on
the right side of the backguard, under the
light tube. To remove and replace the
starter, first remove light tube. Push
starter in and turn approximately 90°
counterclockwise. Pull starter out of
recessed area. You can find replacement
starters at stores that sell fluorescent light
tubes.
6. Replace glass and close the top panel.
7. Plug in range or reconnect power.
15
U
sing and Caring for Your
Oven
This section tells you, step by step, how to operate all oven functions controlled by the
electronic control. Carefully follow these instructions, along with the cooking tips and cleaning
information, for successful use of your range.
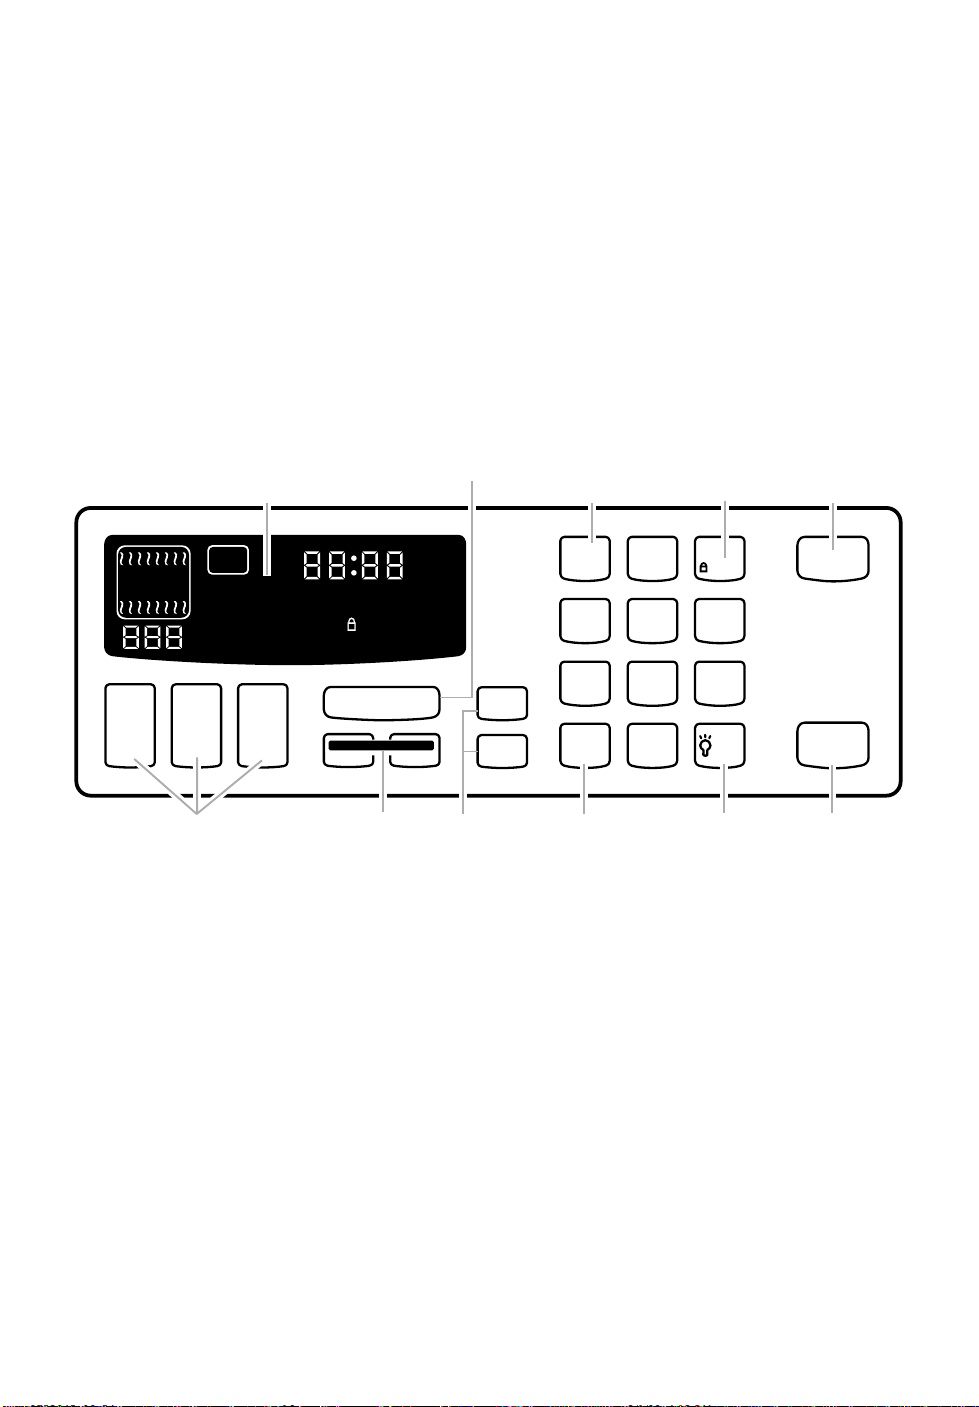
Using the electronic oven control
(Freestanding models)
Display
(see below)
Clock set/
start pad
(p. 24)
Number
pads
Control Lock
(p. 20) Location
of Control lock
will differ on
slide-in and
stainless steel
models
Start pad
TIMED
DELAY
CLEAN
STOP
TIMER
COOK
CLOCK
SET START
•
TIMER
CANCEL
O
Timed and
delayed
cooking pads
ON
O
F
BROIL
BAKE CLEAN
MAXI
•
ECONO
••
Oven setting
pads
(pp. 28, 29, 43)
HR MIN MIN SEC
CONTROL
LOCKEDDOOR
?
START
SET START
•
Timer pads
(pp. 24-25)
(pp. 33, 34, 35)
Display/clock
• When you first plug in the range, a tone
will sound, the display will be fully lit for a
few seconds, and the display will show the
last time set and “PF” (power failure). If,
after you set the clock (see “Setting the
clock” later in this section), the display
again shows “PF,” your electricity was off
for a while. Reset the clock.
• The time display will show “Err” and
3 short tones will sound if a time or
temperature is incorrectly entered.
3
CONTROL
LOCK
6
9
OVEN
LIGHT
Oven
light pad
(p. 42)
START
CANCEL
COOK
TIME
STOP
TIME
1
4
7
SURFACE
LIGHT
2
5
8
0
Surface light pad
(some freestanding models)
(p. 15)
NOTE: You have to hold the pad down a
short time to get it to work, and you have
to allow a short time between each pad
entry. If you press a command pad
several times, the pad can stop working.
If you wait a few seconds, you can use
the pad again.
OFF
Cancel/off
pad
16

Using and Caring for Your Oven
Fahrenheit/Celsius
To set your oven to cook in Celsius instead
of Fahrenheit:
1. Open the door.
2. Press CANCEL/OFF.
3. Press the Number Pads 1, 2,
and 3, in that order.
4. Press BROIL.
5. Start oven.
NOTES:
• Press BAKE to confirm that you are
using Celsius.
• Only the temperature and a flashing
degree symbol will appear in the
temperature display area when you
set your oven to cook in Celsius.
PRESS
CANCEL
OFF
PRESS
1
2
33
PRESS
BROIL
MAXI
•
ECONO
••
PRESS
START
Repeat the steps above to change
from Celsius to Fahrenheit.
17
Using and Caring for Your Oven
If you need to convert temperatures from
Celsius to Fahrenheit or vice versa, you
can refer to this chart:
Temperature replacement values
38°C=100°F
60°C=140°F
66°C=150°F
77°C=170°F
93°C=200°F
121°C=250°F
135°C=275°F
149°C=300°F
163°C=325°F
177°C=350°F
191°C=375°F
204°C=400°F
218°C=425°F
232°C=450°F
246°C=475°F
260°C=500°F
Disable/enable audible signals
Audible signals tell you if a function is
entered correctly or not. They also tell you
when a cycle is completed. To turn off key
entry tone, end-of-cycle tone, and reminder
tones, follow these steps:
1. Open the door.
2. Press CANCEL/OFF.
PRESS
CANCEL
OFF
18

Using and Caring for Your Oven
3. Press the Number Pads 1, 2,
and 3, in that order.
4. Press TIMER SET/START.
5. Start oven.
“Snd” and “Off” will appear on the
display.
Repeat Steps 1-5 to turn the signals
back on.
“Snd” and “On” will appear on the display.
PRESS
1
2
33
PRESS
PRESS
START
19
START
?
LOCK
CONTROL
Using and Caring for Your Oven
Using the control lock
The control lock prevents unwanted use
of the oven by disabling the control panel
command pads.
NOTES:
• Control lock is only available when oven
is not active or set.
• Control lock will not disable the Timer.
• Set control lock when cleaning the
control panel to prevent oven from
accidentally turning on.
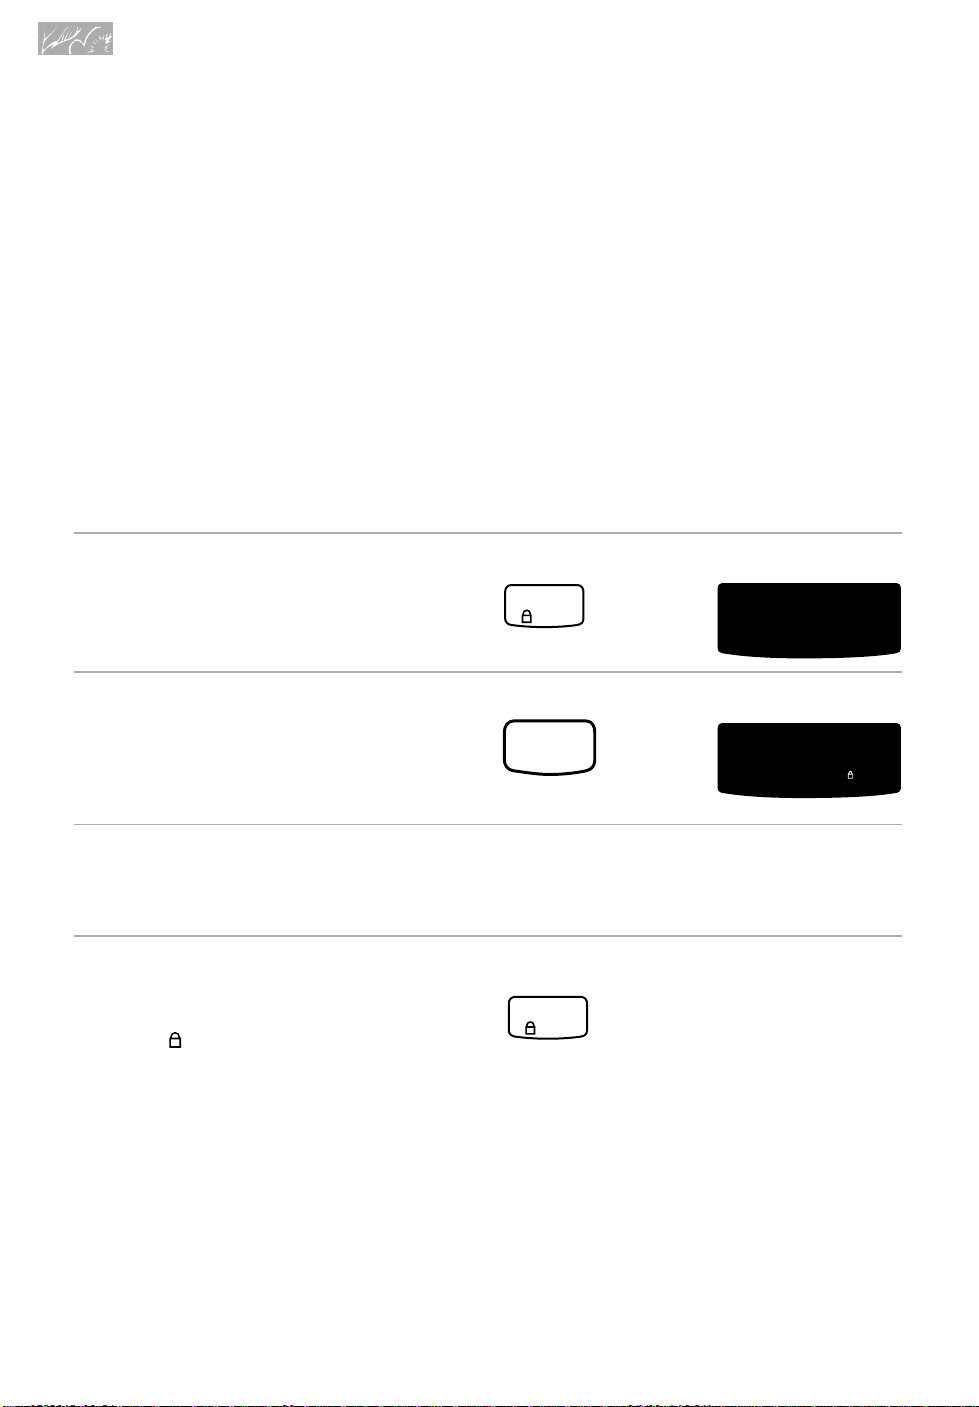
To lock or deactivate the
control panel:
1. Open the door.
2. Press and hold CONTROL
LOCK for 5 seconds.
A single tone will sound and “START?”
will appear on the display.
3. Press START.
To unlock the control panel:
1. Open the door.
2. Press and hold CONTROL
LOCK for 5 seconds.
A single tone will sound and “CONTROL
LOCK ” will disappear from the display.
PRESS YOU SEE
CONTROL
LOCK
PRESS YOU SEE
START
PRESS
CONTROL
LOCK
20
Using and Caring for Your Oven
Using the Sabbath mode
What your oven will do while in the
Sabbath mode:
• The time display will show “SAb” to tell
you that the oven is in the Sabbath mode.
• The ON Indicator Light will light up when
the burner turns on and ON will go off
when the burner turns off.
• To prevent accidental key presses, the
key pads will only work after you press
them for 1 second.
• No tones will sound.
To enable the Sabbath mode:
1. Open the door.
2. Press CANCEL/OFF.
3. Press the Number Pads 7, 8,
and 9, in that order.
4. Press Number Pad 6.
5. Press START.
“SAb” and “On” will appear on the
display.
PRESS
CANCEL
OFF
PRESS
7
8
9
PRESS
6
PRESS
START
To disable the Sabbath mode:
Repeat the steps above to disable the
Sabbath mode. “SAb” and “Off” will appear
on the display.
21
Using and Caring for Your Oven
Setting your range for the Sabbath
If you want to set your range to meet “no
work” requirements for the Sabbath, first
turn on the Sabbath mode (see “To enable
the Sabbath mode” earlier in this section).
Then follow these steps:
1. Turn the oven light and/or surface light (if available) on or off.
NOTE: See “Using and replacing the
surface light” in the “Using and Caring for
Your Cooktop” section and “Using and
replacing the oven light(s)” in the “Using
and Caring for Your Oven” section for
more information.
These lights will stay turned on or off
(whichever you set) while in the Sabbath
mode. Opening the door will not turn on
the oven light if it is programmed to be off.
2. Open the door.
3. Press BAKE.
4. Press Number Pads to set the
temperature you want.
Example for 325°F (163°C):
5. Start oven.
PRESS
BAKE
PRESS
3
2
5
PRESS
START
22
Using and Caring for Your Oven
ON
O
F
TIME
START
?
ON
TIME
START
6. Press and hold Number Pad 6
for 5 seconds.
“START?” appears on the display.
7. Press START.
“SAb” appears on the display.
To end the Sabbath mode and turn
off the oven:
1. Open the door.
2. Press and hold Number Pad 6
for 5 seconds.
Starting an operation
After programming a function, you must
press START to start the
START
show on the display as a reminder.
function. If you do not press
START within 5 seconds of
programming, “START?” will
PRESS YOU SEE
6
PRESS YOU SEE
START
PRESS
6
Canceling an operation
CANCEL/OFF will cancel any function,
except for the CLOCK SET/
CANCEL
OFF
show the time of day or, if the Timer is also
being used, the time remaining.
START and Timer functions.
When you press CANCEL/
OFF, the large display will
23
Using and Caring for Your Oven
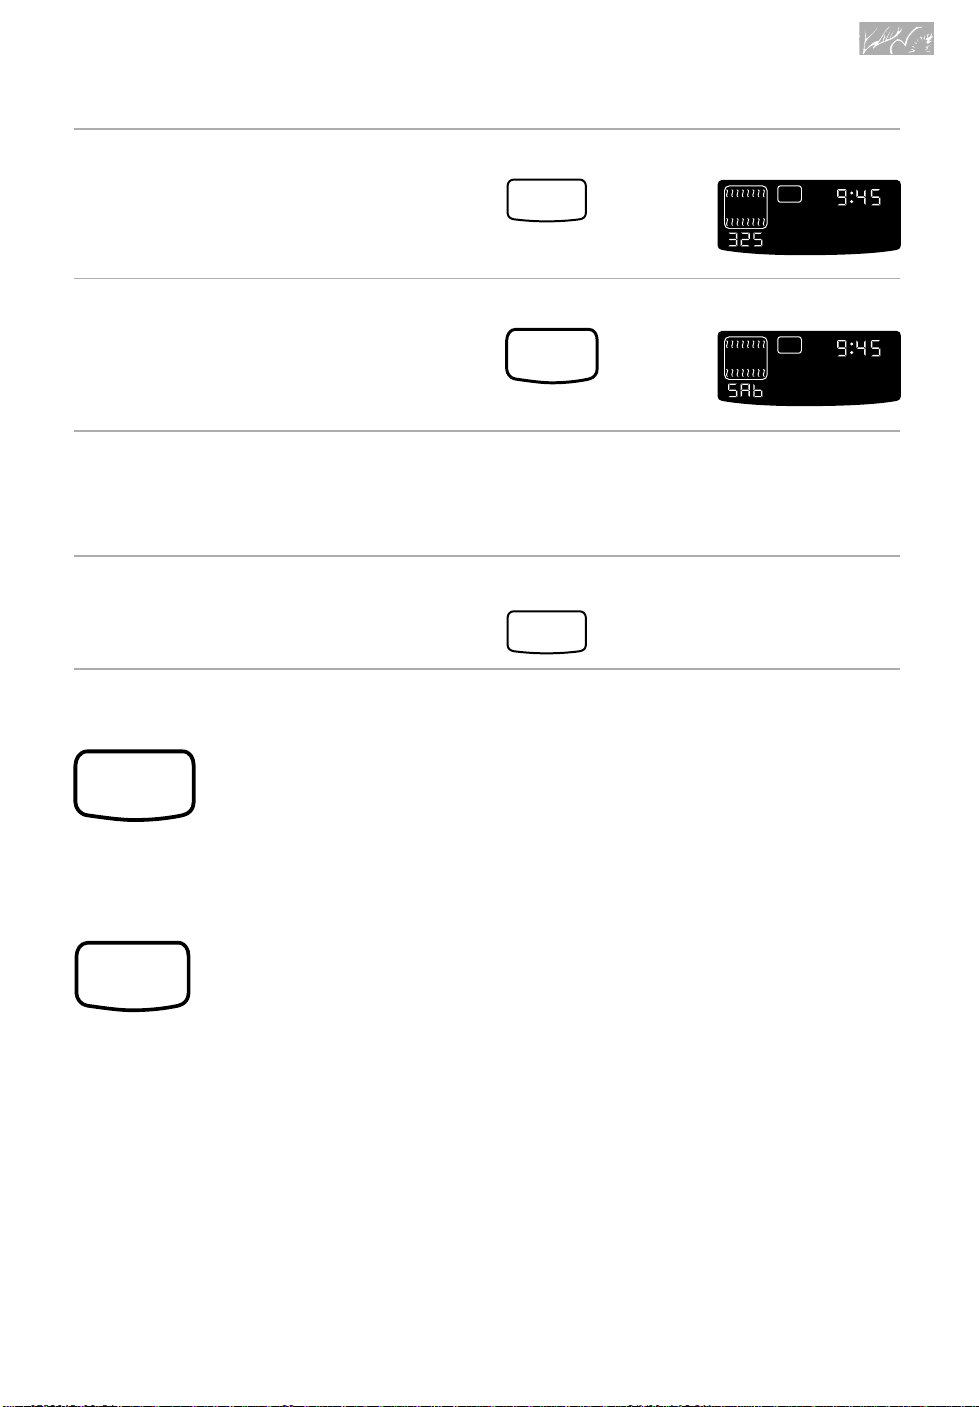
Setting the clock
NOTE: If an oven function is active or programmed, you cannot change the clock.
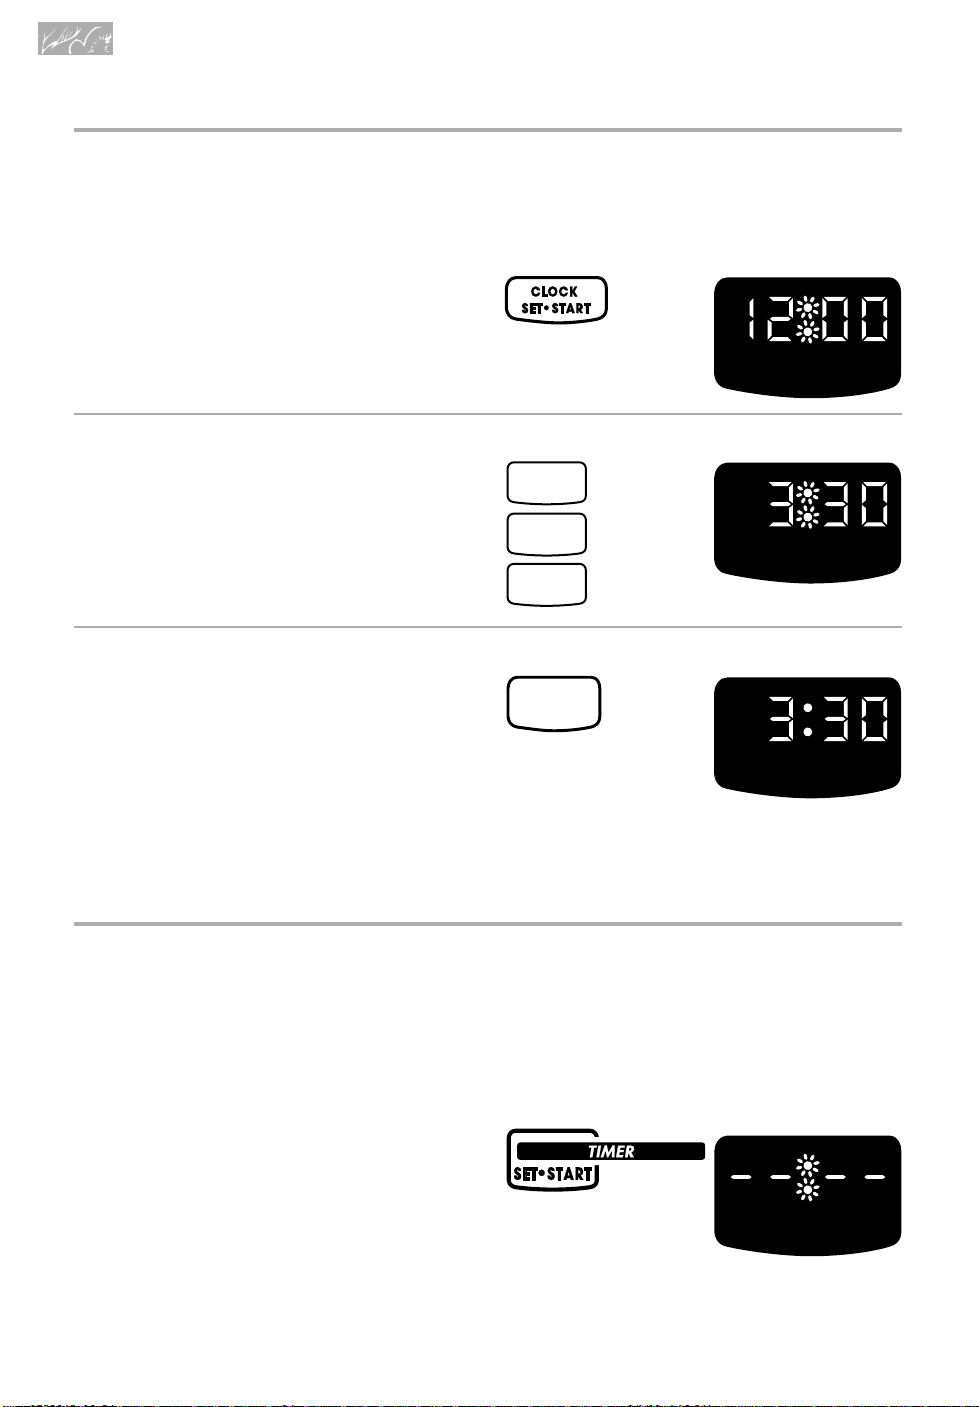
1. Press CLOCK SET/START.
2. Set time.
3. Start clock.
If time has not been entered correctly,
3 short tones will sound and “Err”
will be displayed. The display will show
the closest valid time. Repeat Steps
2 and 3 to re-enter the time of day.
NOTE: You can clear the time of day
from the display by opening the door,
then pressing and holding CLOCK SET/
START for 5 seconds. Repeat to see
time of day on display again.
PRESS YOU SEE
HR MIN MIN SEC
PRESS YOU SEE
3
3
0
PRESS YOU SEE
START
MIN SEC
MIN SEC
Using the timer
The Timer does not start or stop the oven.
It works like a regular kitchen timer. It can
be set in hours and minutes up to 99 hours,
59 minutes or in minutes and seconds up to
99 minutes, 59 seconds.
1. Press TIMER SET/START.
• Once to set hours and minutes
• Twice to set minutes and seconds
24
PRESS YOU SEE
HR MIN
(example shows hours
and minutes)
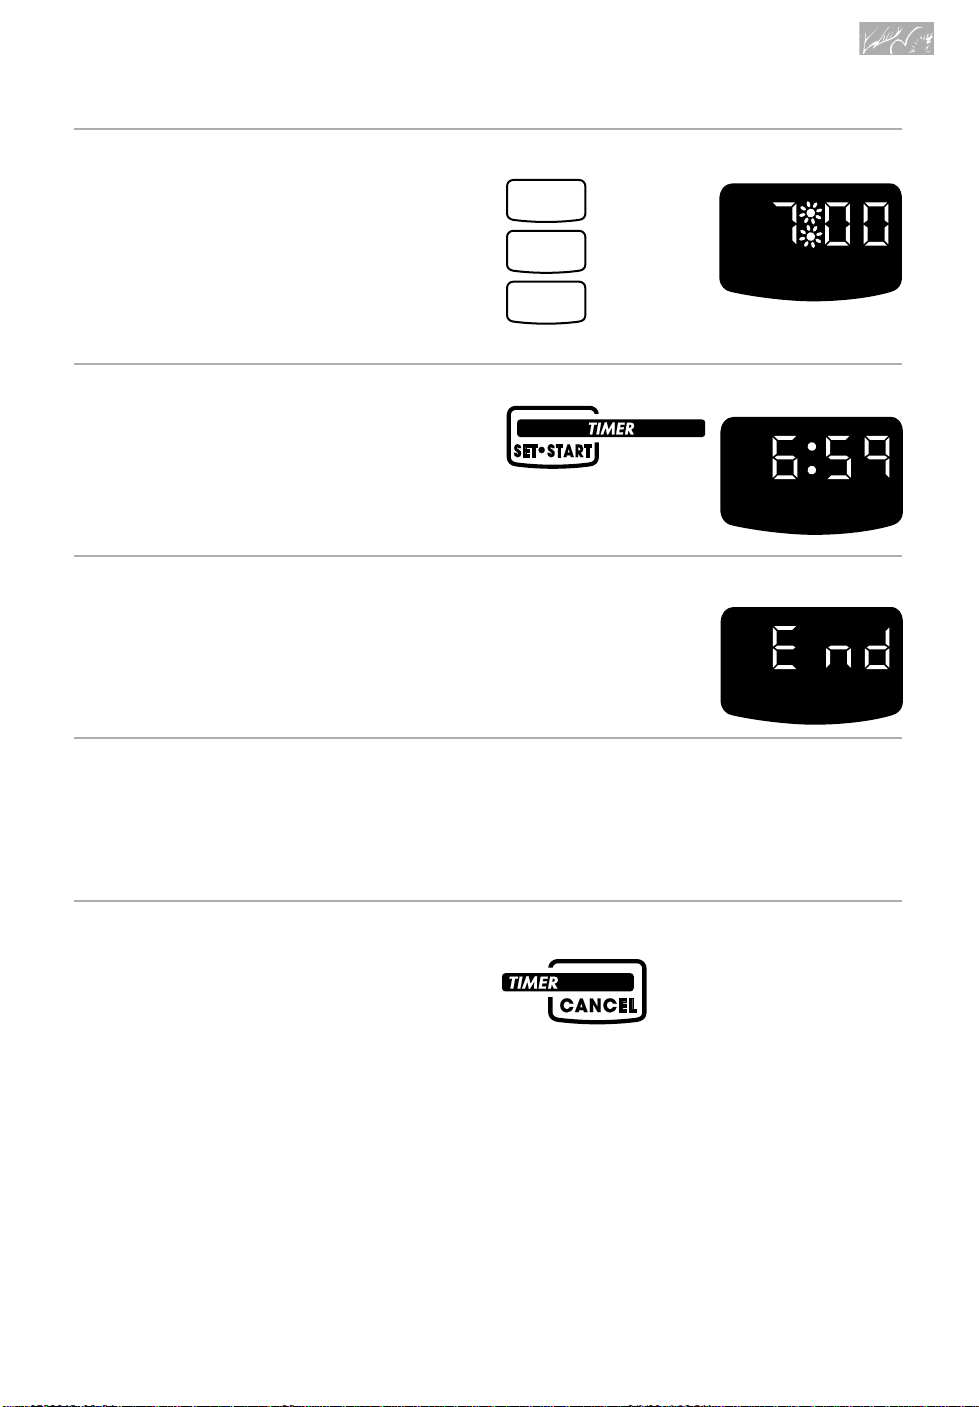
Using and Caring for Your Oven
HR MIN
2. Set time.
3. Start Timer.
The Timer will begin counting down
immediately after you press
TIMER SET/START or START.
4. When time is up, turn off Timer.
When time is up, you will hear four tones
(unless the audible signals have been
disabled). Press TIMER CANCEL to clear
the display.
PRESS YOU SEE
7
0
0
(example shows a
7-hour timer setting)
PRESS YOU SEE
HR MIN
YOU SEE
To change the timer during
its operation:
1. Press TIMER SET/START.
2. Enter new desired time.
3. Press TIMER SET/START.
To cancel the timer during
its operation:
You can cancel the Timer any time during
its operation. Press TIMER CANCEL.
PRESS
25
Using and Caring for Your Oven
Cooking tips
Baking tips
The hot air must circulate around the pans in
the oven for even heat to reach all parts of
the oven. This results in better baking.
For best air circulation:
• Place the pans so that one is not directly
over the other.
11/2"-2"
(3.7 - 5 cm)
• For best results, allow 11⁄2 to 2 inches
(3.7-5 cm) of space around each pan and
between pans and oven walls.
• When baking with one pan, place pan in
the center of the oven rack.
• When baking with two pans, place pans
in opposite corners of the oven rack.
NOTE: “Oven peeking” may cause heat
loss, longer cooking times, and unsatisfactory baking or roasting results. Rely on
your timer.
Rack positions
1
1
(3.7 - 5 cm)
/2"-2"
For proper cooking, follow these
guidelines:
• When using one rack, place the rack so
the top of the food will be centered in the
oven.
• When using two racks, place one rack in
position 1 and the other rack in position 3.
• Use only one cookie sheet in the oven at
a time when using the BAKE setting.
Bakeware tips
• When baking with insulated cookie
sheets or baking pans, place them in the
bottom third of the oven. You may need to
increase the recommended baking times,
so test for doneness before removing from
the oven.
• When using ovenproof glassware or
dark bakeware, reduce the oven tempera-
ture by 25°F (14°C), but use the same
baking time. Because these pans absorb
heat, producing darker bottom browning
and crispier crusts, place the rack in the
center of the oven. When baking pies and
bread, you can use the temperature
suggested in the recipe.
Rack placement for specific
foods:
(For rack positions, see “Rack positions” in
previous column.)
RACK
FOOD
POSITION
Your oven has two straight racks and five
rack positions. Rack position 5 is the highest
position, or farthest from the bottom of the
oven. Rack position 1 is the lowest position,
or closest to the bottom of the oven.
26
Frozen pies
Angel food and bundt
cakes, most quick
breads, yeast breads,
casseroles, meats
Cookies, biscuits,
muffins, cakes,
nonfrozen pies
2
1 or 2
2 or 3
Using and Caring for Your Oven
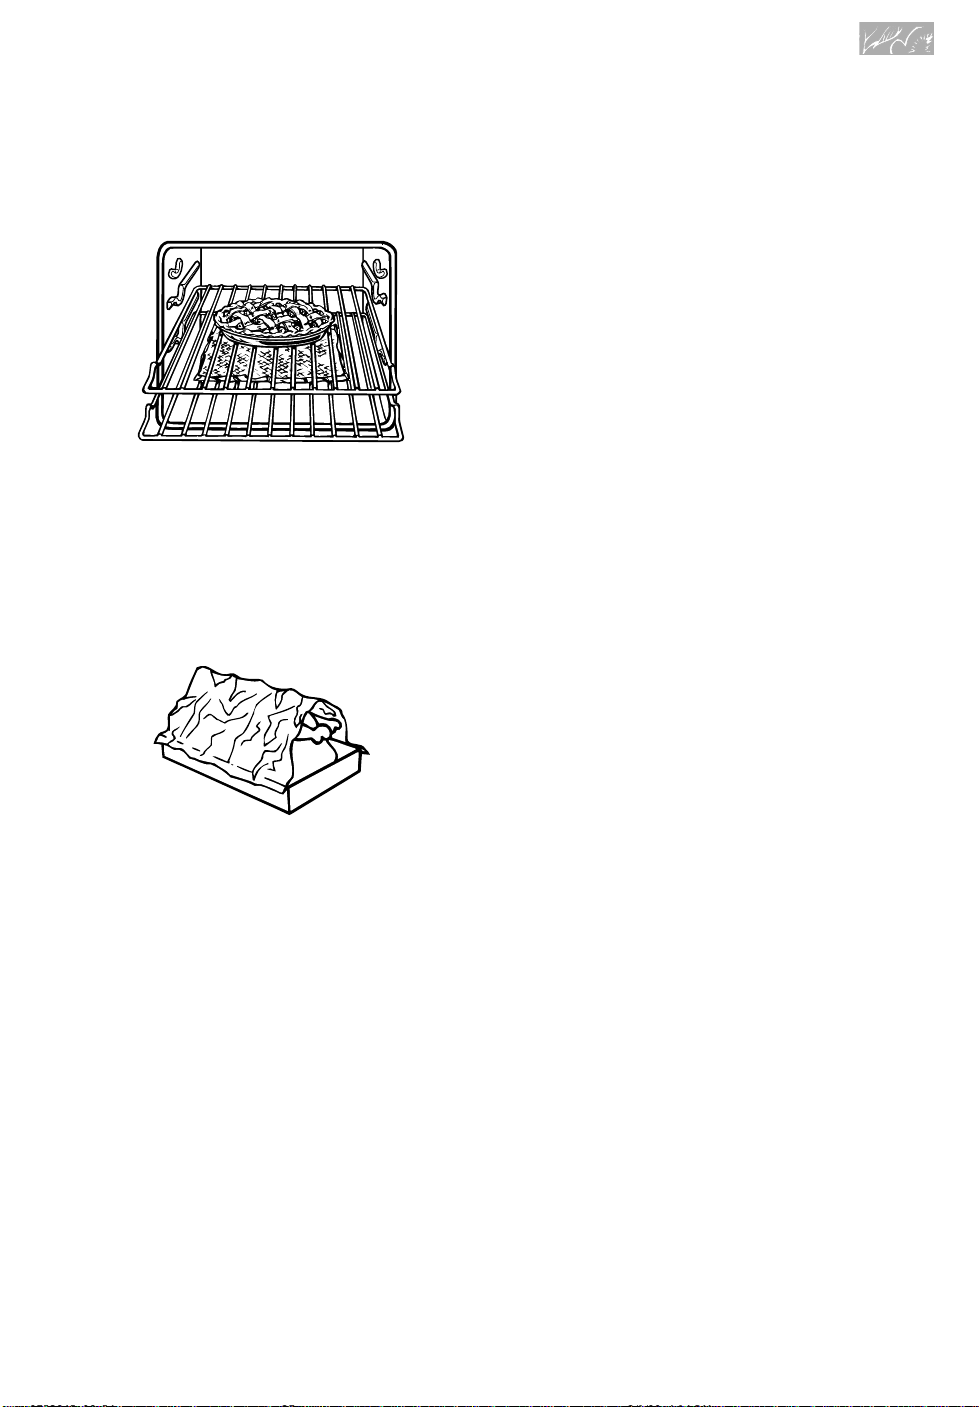
Using aluminum foil in the oven
NOTE: Do not line the oven bottom with foil
or other liners. It could affect the oven
surface as well as the quality of your baking.
• Do not cover the entire rack with alumi-
num foil. It will reduce air circulation and
cause poor cooking results.
• Use aluminum foil to catch spillovers
from pies or casseroles by placing foil on
the oven rack below. Foil should be turned
up at edges and be at least 1 inch (2.5 cm)
larger than dish.
• Place tent-shaped foil loosely over meat
or poultry to slow down surface browning
for long-term roasting. Remove foil for the
last 30 minutes.
• Use narrow strips of foil to shield piecrust
edges if browning too quickly.
Roasting tips
• Roast meats fat-side up in a shallow pan
using a roasting rack.
• Use a roasting pan that fits the size of the
food to be roasted. Meat juices may overflow the sides of a pan that is too small.
Too large of a pan will result in increased
oven spatter.
• Spatter can be reduced by lining the
bottom of the roasting pan with lightly
crushed aluminum foil.
• Use an accurate meat thermometer to
determine when meat has reached desired
degree of doneness. Insert the thermometer into the center of the thickest portion
of the meat or inner thigh or breast of
poultry. For an accurate reading, the tip
of the thermometer should not touch fat,
bone, or gristle.
• After reading the thermometer once,
push it further into the meat 1⁄2 inch
(1.2 cm) or more and read again. If the
temperature drops, return the meat to the
oven for more cooking.
• Check pork and poultry with a thermom-
eter in two to three places to ensure
adequate doneness.
• Poultry and roasts will be easier to
carve if loosely covered with foil and
allowed to stand 10-15 minutes after
removal from the oven.
NOTE: See “Bake or Roast” in this section
for additional roasting tips.
27
Using and Caring for Your Oven
Bake or Roast
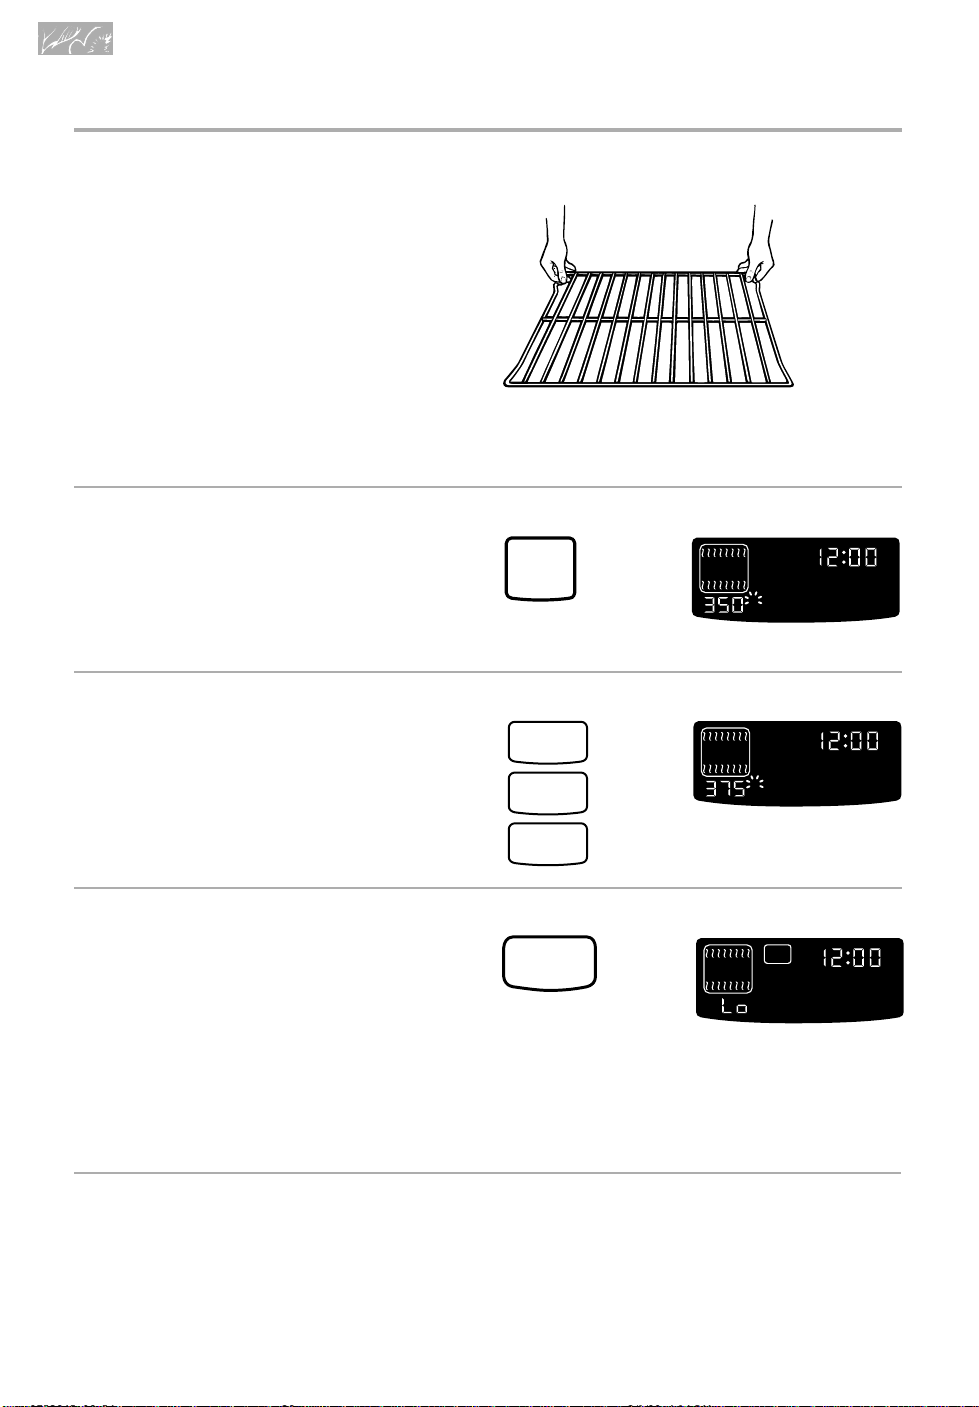
1. Position racks.
For correct rack placement, see “Rack
positions” and the “Rack placement”
chart in this section.
NOTES:
• Before turning oven on always place
oven racks where you need them.
• Be sure the rack(s) is level.
• Use pot holders or oven mitts to
protect hands if rack(s) must be
moved while oven is hot.
• Do not let pot holder or oven mitt touch
hot elements.
2. Choose baking/roasting setting.
3. Set temperature (optional).
Do this step if you want to set a temperature other than 350°F (177°C).
NOTE: See a reliable cookbook for
temperature recommendations.
4. When baking, preheat oven.
After the temperature reaches 170°F
(77°C), the temperature display will
show the actual oven temperature at
each 5°F (3°C) increase and stop at the
set temperature. One long tone will
sound when oven is preheated.
NOTE: When roasting, preheating is
not needed unless your recipe
recommends it.
PRESS YOU SEE
BAKE
O
F
(or 177°C)
PRESS YOU SEE
3
O
7
F
(example for Bake
5
at 375°F [191°C])
PRESS YOU SEE
START
O
F
(“Lo” is displayed after
5 seconds if oven
temperature is below
170°F [77°C])
ON
ON
ON
HR MIN MIN SEC
PROBETEMP
CONTROL
LOCKEDDOOR
?
START
HR MIN MIN SEC
PROBETEMP
CONTROL
LOCKEDDOOR
?
START
HR MIN MIN SEC
PROBETEMP
CONTROL
LOCKEDDOOR
?
START
TIMED
TIMED
COOK
COOK
TIMED
COOK
DELAY
CLEAN
STOP
TIMER
DELAY
CLEAN
STOP
TIMER
CLEAN
STOP
O
O
O
DELAY
TIMER
5. Put food in oven.
NOTE: If you want to change the
baking temperature after baking has
begun, repeat Steps 2, 3, and 4.
28
Using and Caring for Your Oven
6. After cooking, turn off oven.
Broil
NOTE: Preheating is not necessary when
broiling, unless your recipe recommends it.
1. Position rack.
See the “Broiling chart” later in this
section for recommended rack positions.
2. Put food in oven.
Place food on grid in broiler pan and
place in center of the oven rack.
PRESS YOU SEE
CANCEL
OFF
Broiler grid
(display will go blank)
Broiler pan
3. Position door.
Close the door to the Broil Stop
position (open about 6 inches [15 cm]).
The door will stay open by itself. Door
must be partly open for the oven to
maintain proper temperatures.
29
Using and Caring for Your Oven
4. Press BROIL.
Once for MAXI BROIL
OR
Twice for ECONO BROIL
5. Set temperature (optional).
Do this step if you want to use variable
temperature broiling (see “Variable
temperature broiling” later in this section).
NOTE: See “Broiling chart”
later in this section for temperature
recommendations.
PRESS YOU SEE
BROIL
MAXI
•
ECONO
••
O
F
(example shows 500°F
[260°C] for Maxi Broil)
PRESS YOU SEE
BROIL
MAXI
•
ECONO
••
BROIL
MAXI
•
ECONO
••
O
F
(example shows 500°F
[260°C] for Econo Broil)
PRESS YOU SEE
3
O
2
5
F
(example shows 325°F
[163°C] broiling temperature for Maxi Broil)
ON
ON
ON
HR MIN MIN SEC
PROBETEMP
CONTROL
LOCKEDDOOR
?
START
HR MIN MIN SEC
PROBETEMP
CONTROL
LOCKEDDOOR
?
START
HR MIN MIN SEC
PROBETEMP
CONTROL
LOCKEDDOOR
?
START
TIMED
TIMED
COOK
TIMED
COOK
COOK
DELAY
CLEAN
STOP
CLEAN
STOP
DELAY
CLEAN
STOP
TIMER
O
TIMER
O
DELAY
TIMER
O
6. Start oven.
NOTE: If you want to change the broiling
temperature after broiling has begun,
repeat Steps 4, 5, and 6.
7. When broiling is done,
turn off oven.
Variable temperature broiling
• If food is cooking too fast or you want the
food to broil slower from the start, set the
broil temperature between 170°F (77°C)
and 325°F (163°C). These temperature
settings allow the broil heating element to
cycle and to slow cooking. The lower the
temperature, the slower the cooking.
30
PRESS YOU SEE
START
(example for Maxi Broil)
ON
HR MIN MIN SEC
TIMED
PROBETEMP
CONTROL
O
F
START
LOCKEDDOOR
COOK
?
PRESS YOU SEE
CANCEL
OFF
(display will go blank)
• Thicker cuts and unevenly-shaped
pieces of meat, fish and poultry may cook
better if you use lower broiling temperatures. (See “Broiling chart” for temperature
recommendations).
DELAY
CLEAN
STOP
TIMER
O
 Loading...