

KITCHENAID KDSDM 82143 (UK) Daily Reference Guide

Instruction for use

2

Installation ............................................................................................................................................ 4
Product description .............................................................................................................................. 5
First time use ......................................................................................................................................... 6
Advice and tips ..................................................................................................................................... 8
Loading the racks ................................................................................................................................ 8
Selecting a cycle and options ..............................................................................................................10
Cycle table ........................................................................................................................................... 11
Options and settings .......................................................................................................................... 12
Settings menu .................................................................................................................................... 13
Care and maintenance ....................................................................................................................... 14
Troubleshooting .................................................................................................................................. 15
After-sales service ............................................................................................................................. 17
3
Before using the appliance carefully read Health and Safety guide.
INSTALLATION
ATTENTION: If the appliance must be moved at any time, keep it in an upright position; if absolutely necessary, it may be tilted onto its back.
CONNECTING THE WATER SUPPLY
Adaptation of the water supply for installation should only be performed by a qualied technician.
The water inlet and outlet hoses may be positioned towards the right
or the left in order to achieve the best possible installation.
Make sure the dishwasher does not bend or squash the hoses.
CONNECTING THE WATER INLET HOSE
• Run the water until it is perfectly clear.
• Screw the inlet hose tightly into position and turn on the tap.
If the inlet hose is not long enough, contact a specialist store or an
authorised technician.
The water pressure must be within the values indicated in the Technical Data table - otherwise the dishwasher may be function properly.
Make sure the hose is not bent or compressed.
SPECIFICATIONS FOR THE CONNECTION OF THE WATER SUPPLY HOSE:
WATER SUPPLY cold or hot (max. 60°C)
WATER INTAKE 3/4”
POWER OF WATER PRESSURE
0,05 ÷ 1 MPa (0.5 ÷ 10 bar)
7,25 – 145 psi
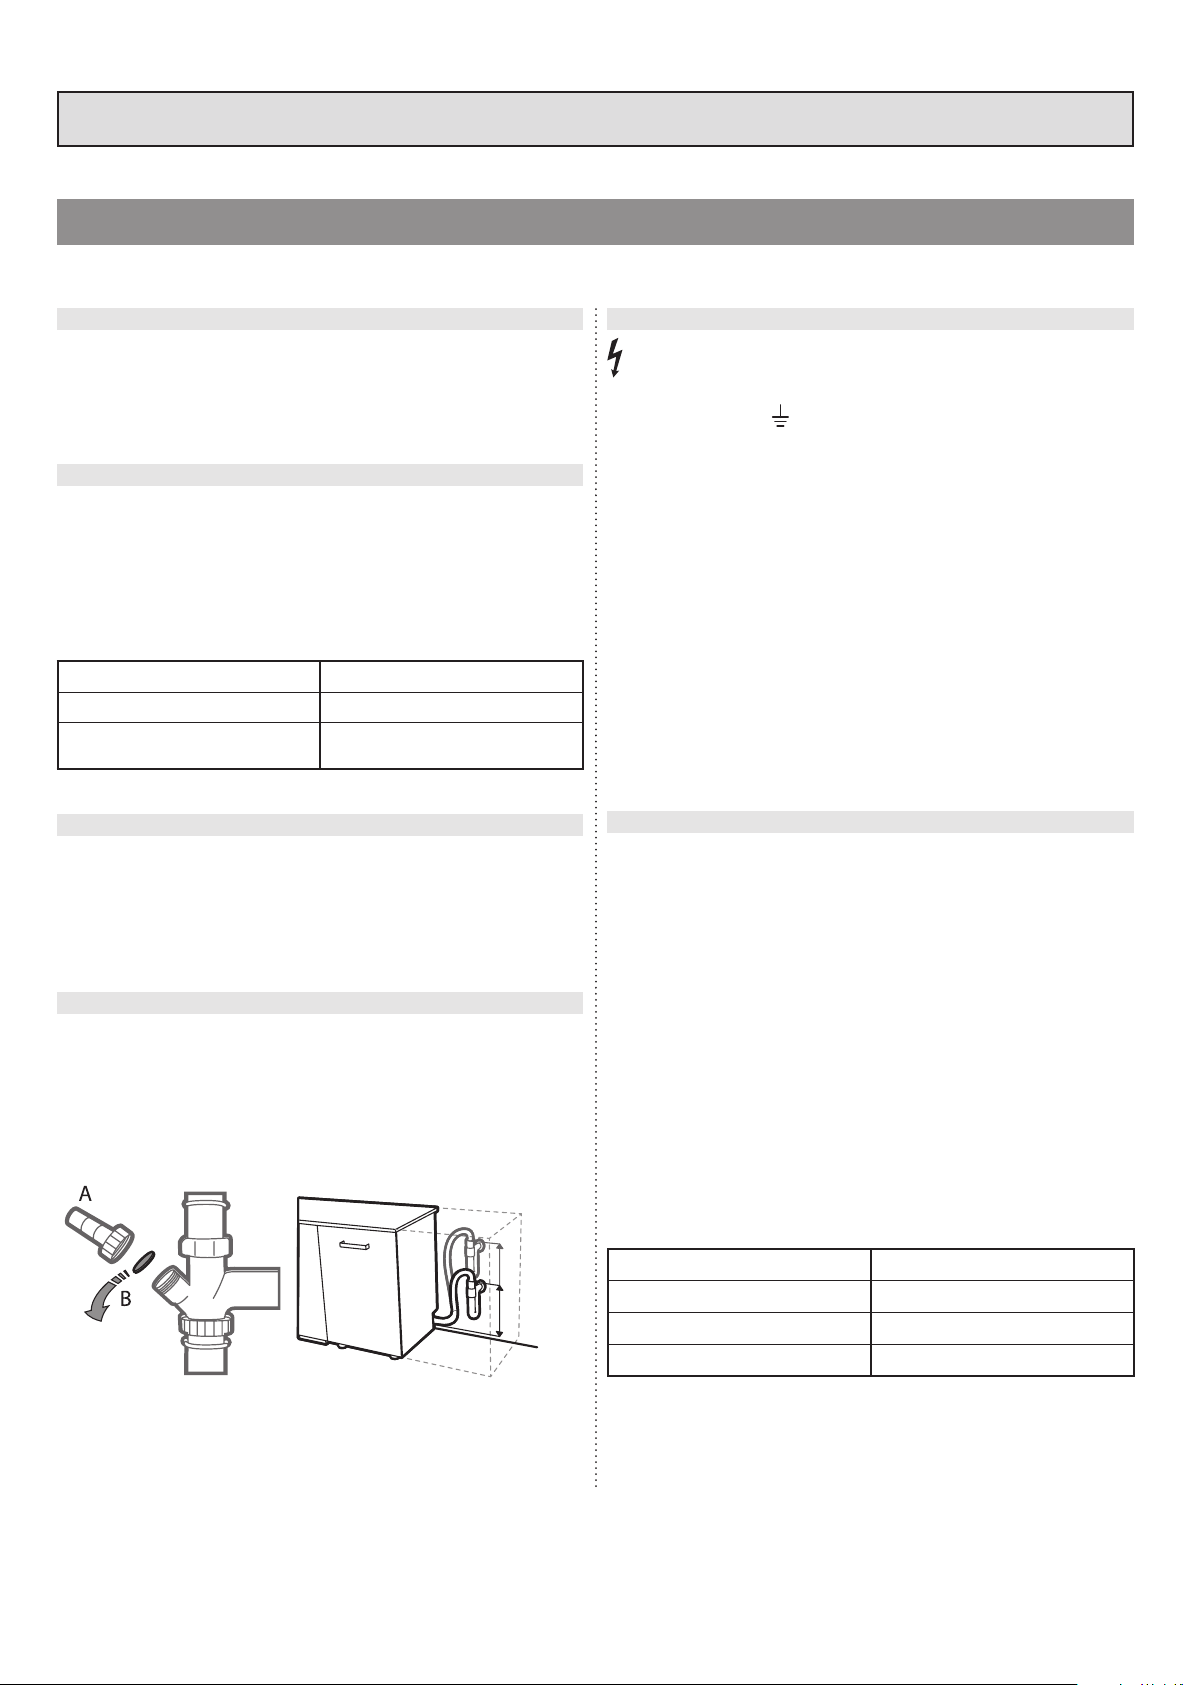
CONNECTING THE WATER OUTLET HOSE
Connect the outlet hose to a drain duct with a minimum diameter of
2 cm A.
The outlet hose connection must be at a height ranging from 40 to
80 cm from the oor or surface where the dishwasher rests.
Before connecting the water outlet hose to the sink drain, remove the
plastic plug B.
ANTI-FLOODING PROTECTION
Anti-ooding protection. To ensure oods do not occur, the dishwasher:
- is provided with a special system which blocks the water supply in
the event of anomalies or leaks from inside the appliance.
Some models are also equipped with the supplementary safety device
New Aqua Stop, which guarantees anti-ooding protection even in
the event of a supply hose rupture.
Under no circumstances should the water inlet hose be cut as it contains live electrical parts.
ELECTRICAL CONNECTION
WARNING: Under no circumstances should the water inlet hose
be cut as it contains live electrical parts.
Before inserting the plug into the electrical socket, make sure that:
• The socket is earth and complies with current regulations;
• The socket can withstand the maximum load of the appliance as
shown on the data plate located on the inside of the door (see
PRODUCT DESCRIPTION).
• The power supply voltage falls within the values indicated on the
data plate on the inside of the door.
• The socket is compatible with the plug of the appliance.
If this is not the case, ask an authorised technician to replace the plug
(see AFTER-SALES SERVICE). Do not use extension cables or multiple
sockets. Once the appliance has been installed, the power supply
cable and the electrical socket should be easily accessible.
The cable should not be bent or compressed.
If the power supply cable is damaged, have it replaced by the manufacturer or its authorised Technical Assistance Service in order to
prevent all potential hazards.
The Company shall not be held responsible for any incidents, if these
regulations are not observed.
POSITIONING AND LEVELLING
1. Position the dishwasher on a level sturdy oor. If the oor is uneven,
the front feet of the appliance may be adjusted until it reaches
a horizontal position. If the appliance is levelled correctly, it will be
more stable and much less likely to move or cause vibrations and
noise while it is operating.
2. Before recessing the dishwasher, stick the adhesive transparent strip
under the wooden shelf in order to protect it from any condensation
which may form.
3. Place the dishwasher so that its sides or back panel are in contact
with the adjacent cabinets or the wall. This appliance can also be
recessed under a single worktop.
4. To adjust the height of the rear foot, turn the red hexagonal bushing
on the lower central part at the front of the dishwasher using a
hexagonal spanner with an opening of 8 mm. Turn the spanner in
a clockwise direction to increase the height and in an anticlockwise
direction to decrease it.
MAX 80 cm
MIN 40 cm
DIMENSIONS AND CAPACITY:
WIDTH 595 mm
HEIGHT 820 mm
DEPTH 555 mm
CAPACITY 14 standard place-settings
4

F105773
F105774,
F105777,
F105779
A B C
I H G F
D
E
The control panel of this dishwasher activates pushing by ON/OFF button.
For energy saving the control panel deactivates automatically after 10 minutes if no cycle has started.
PRODUCT DESCRIPTION
1. Upper rack
10
11
1
8
2
9
3
4
5
2. Cutlery rack
3. Foldable aps
4. Upper rack height adjuster
5. Upper sprayer arm
6. Dynamic Clean support
7. Lower rack
8. Lower sprayer arm
9. Filter Assembly
10. Salt reservoir
11. Detergent and Rinse Aid dispensers
12. Rating plate
13. Control panel
6
7
12
Service:
0000 000 00000
13
CONTROL PANEL
1 2 3 4 5 6 7 8 9 10
1. ON-OFF button
2. CYCLES 6 buttons for direct acces popular cycles
3. EXTRA CYCLES button. Access to other cycles
4. INFO button. Provide info for selected cycle
5. DISPLAY - Indicators area
6. DISPLAY - Information area
7. PREVIOUS button for options/settings
8. SET button. Select/change options and settings
9. NEXT button for options/settings
10. START button
DISPLAY - INDICATORS
A. START DELAY
B. ECO CYCLE
C. MULTIZONE - Cutlery rack
D. CLOSED WATER TAP
E. ADD SALT
F. MULTIZONE - Upper Rack
G. MULTIZONE - Lower Rack
H. ADD RINSE AID
I. TABLET
5
FIRST TIME USE
M
A
X
A
B
35
25
After connecting the appliance to the power supply for the rst time,
the display will guide you to set up the appliance for rst use.
1. The language selection
LANGUAGE: ENGLISH?
<> = CHANGE OK = YES
ENGLISH
SELECTED
After language conrmation, the appliance will go through the rst
time use conguration menu.
To select preferred language please
press button „<” or „>”.
Conrm by pressing „SET” button.
2. Setting the water hardness
WATER HARDNESS
(1=MIN, 5=MAX)
WATER HARDNESS = 3
<> = CHANGE OK = YES
To allow the water softener to work in a perfect way, it is essential that
the water hardness setting is based on the actual water hardness in your
house. This information can be obtained from your local water supplier.
The water hardness is by default
set to level 3. To change water
hardness level press button „<” or „>”
repeatedly.
To conrm your choice press „SET”
button. The level must be set
according to the table below.
Make sure the cap is screwed on tightly, so that no detergent can get
into the container during the wash program (this could damage the
water softener beyond repair).
Once done, proceed to the next step by pressing „SET” button.
Only use salt that has been specically designed for dishwashers.
Whenever you need to add salt, we recommend carrying out the
procedure just before the washing cycle is started.
Residual saline solution or grains of salt can lead to corrosion,
irreparably damaging the stainless steel components.
The guarantee is not applicable if faults are caused by such
circumstances.
If the salt container is not lled, the water softener and the
heating element may be damaged as a result.
4. Setting the brightness level
ADJUST BRIGHTNESS
(1=MIN, 5=MAX)
BRIGHTNESS = 5
<> = CHANGE OK = YES
The brightness level is by default set
to level 4. To change brightness level
press button „<” or „>” repeatedly.
To conrm Your choice press „SET”
button.
Water Hardness Table
Level
German
degrees °dH
1 Soft 0 - 6 0 - 10
2 Medium 7 - 11 11 - 20
3 Average 12 - 17 21 - 30
4 Hard 17 - 34 31 - 60
5 Very hard 35 - 50 61 - 90
French
degrees °fH
3. Filling the water softener
POUR WATER
OPERATION
INSERT 1,5 LITER OF
OK = DONE
WATER IN THE
OK = DONE
WATER SOFTENER
OK = DONE
INSERT SALT
OPERATION
ADD 1KG OF SALT
OK = DONE
IN THE SALT DISPENSER
OK = DONE
When water hardness is set, it is
required to ll water softener with
water and special regeneration salt.
Remove the lower rack and unscrew
the reservoir cap (anticlockwise)
As a rst step it is needed to ll
reservoir with water ( ~1.5 litres).
Once done, proceed to the next
step by pressing „SET” button.
5. Detergent type operation
DETERGENT TYPE
OPERATION
DO YOU USE
<> = NO OK = YES
“ALL IN ONE”
<> = NO OK = YES
DETERGENT?
<> = NO OK = YES
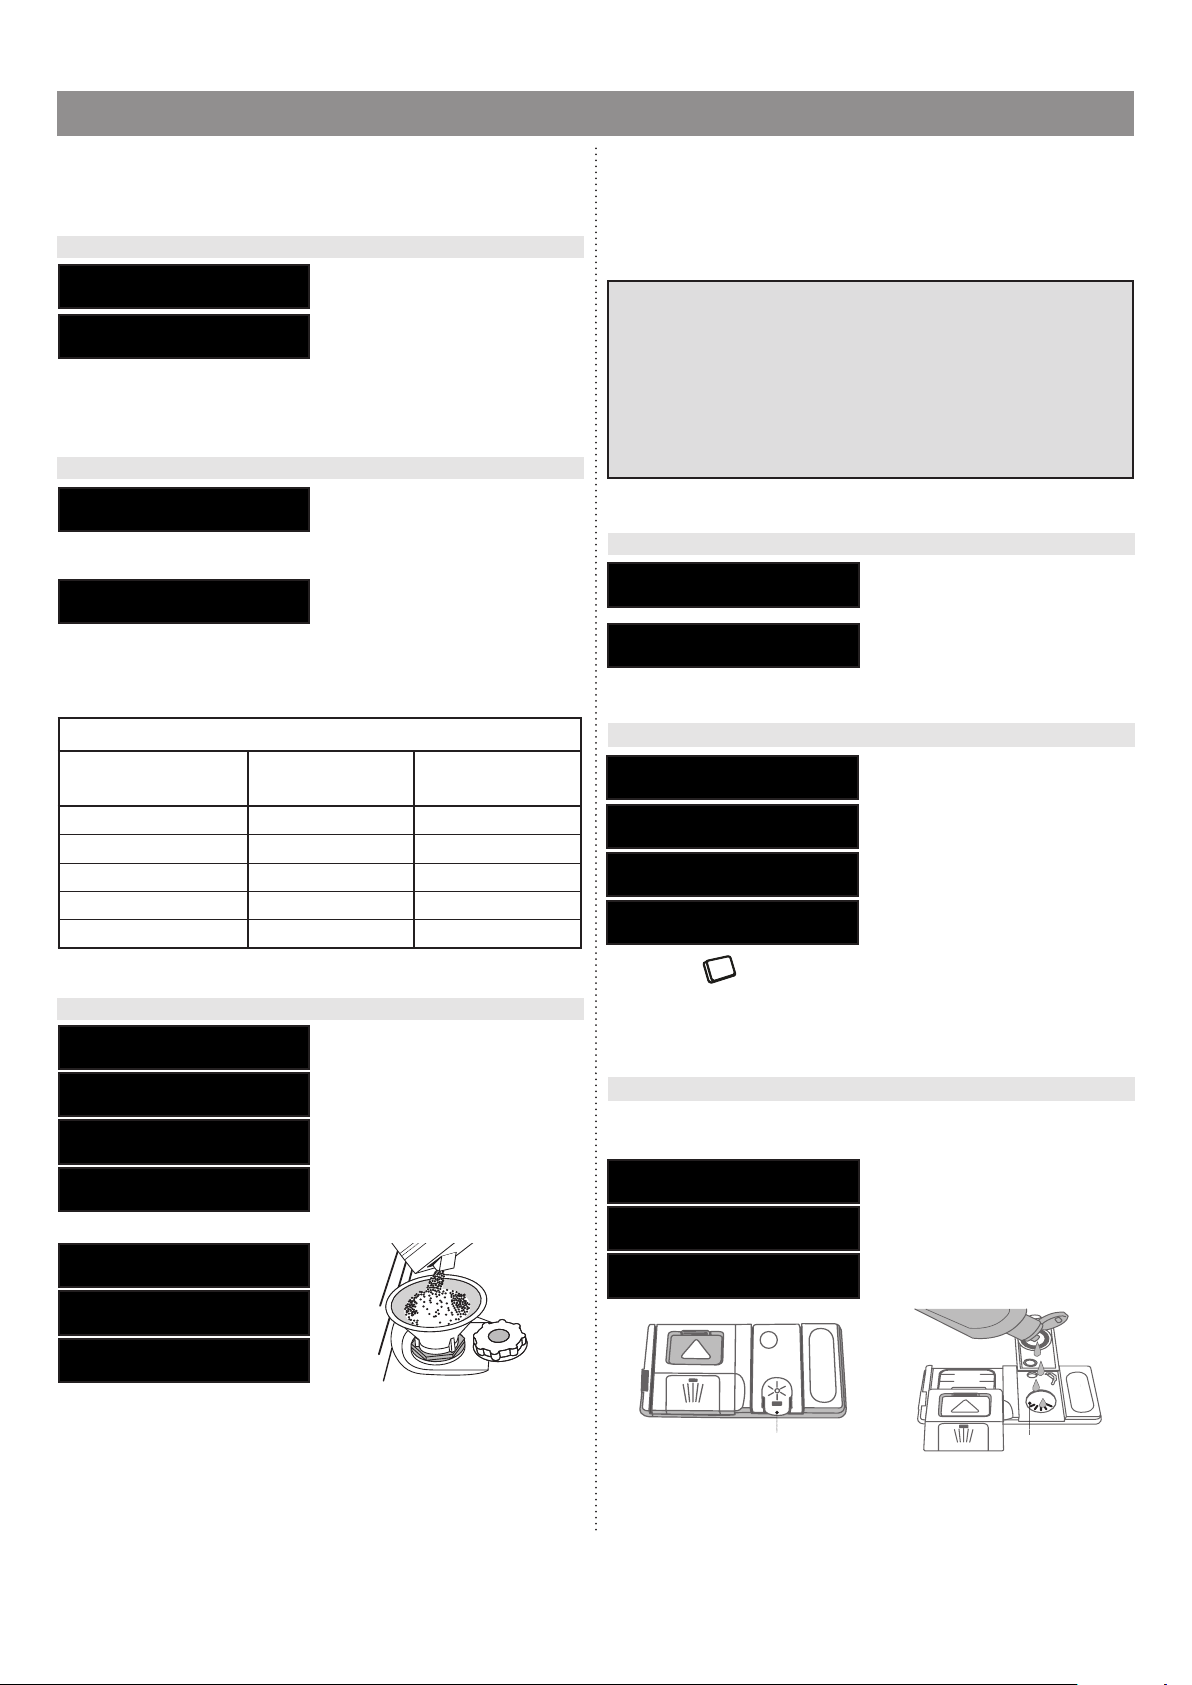
The symbol on display will be lit. If you prefer to use gel or powder detergent for washing, press „<” or „>”, then go to step 6. Rinse
aid operation.
In this step it is very important to
choose what type of detergent will
be used (tablet/capsule or
gel/powder).
If you prefer to use All-in-one
detergent in tablet or capsule for
washing - press „SET”, then go to
step 7. Open tap operation on the
next page.
6. Rinse aid operation*
*If All-in-one detergent was chosen in the previous step, this step will
be skipped by the appliance.
RINSE AID
OPERATION
INSERT RINSE AID
IN THE DISPENSER
OK = DONE
OK = DONE
Position the funnel (see gure) and ll the salt reservoir right up to its
edge (approximately 1 kg); it is not unusual for some water will spill out.
Remove the funnel and wipe any salt residue away from the opening.
6
 Loading...