

Page 1
This attachment has been approved for use with
all KitchenAid
®
household stand mixers
FVSFGA/FVSP
*
KitchenAid
St. Joseph, Michigan USA
Off Stir 2 4 6 8 10
Solid State Speed Control
®
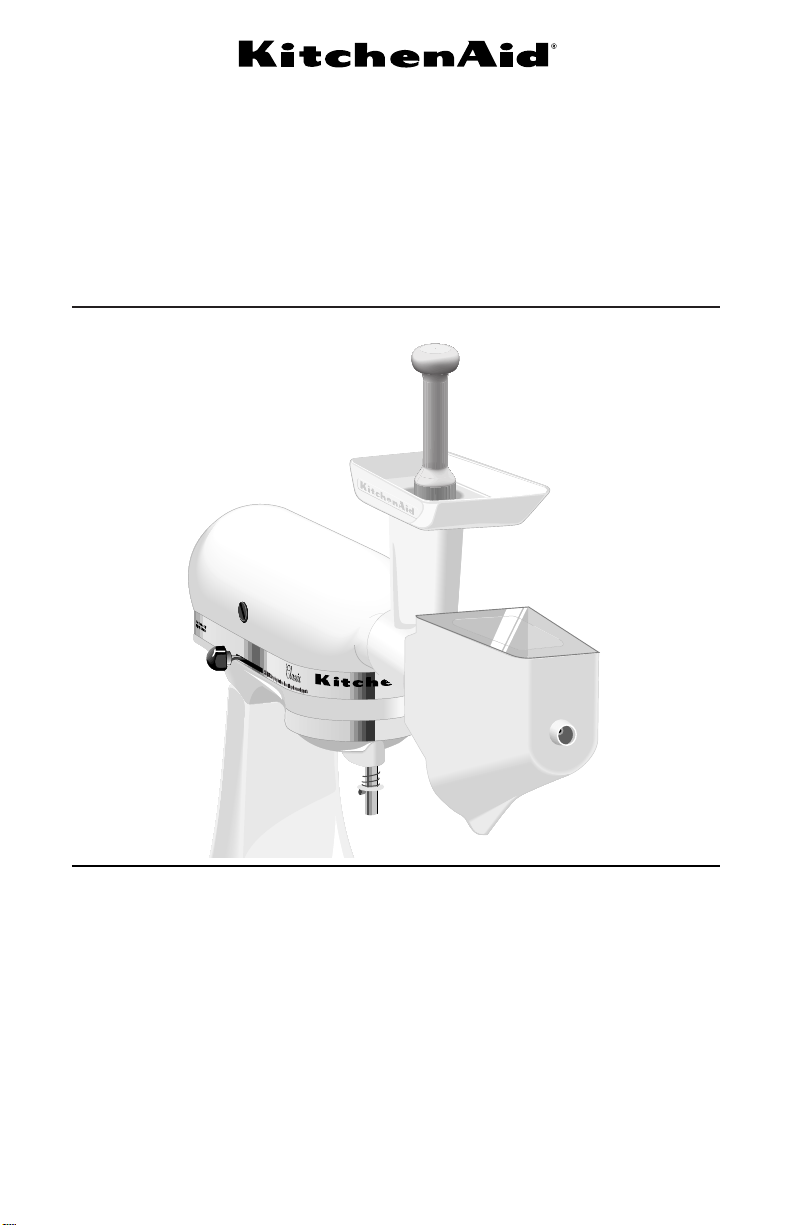
FRUIT/VEGETABLE
STRAINER
*Fruit/Vegetable Strainer Parts (Model FVSP) are available to convert a Model
FGA Food Grinder to a Fruit/Vegetable Strainer.
Page 2

2
arb
IMPORTANT SAFEGUARDS
When using electrical appliances, basic safety precautions should always be
followed including the following:
1. Read all instructions.
2. To protect against risk of electrical shock, do not put mixer in water or other
liquid.
3. Close supervision is necessary when any appliance is used near children.
4. Unplug from outlet when not in use, before putting on or taking off parts, and
before cleaning.
5. Avoid contacting moving parts. Keep fingers out of discharge opening.
6. Do not operate the mixer with a damaged cord or plug or after the mixer
malfunctions, or is dropped or damaged in any manner. Return the mixer to
the nearest Authorized Service Center for examination, repair or electrical or
mechanical adjustment.
7. The use of attachments not recommended or sold by KitchenAid may cause
fire, electric shock or injury.
8. Do not use the mixer outdoors.
9. Do not let the cord hang over the edge of table or counter.
10. Never feed food by hand. Always use food pusher.
11. This product is designed for household use only.
SAVE THESE INSTRUCTIONS
Your safety and the safety of others is very important.
We have provided many important safety messages in this manual and on
your appliance. Always read and obey all safety messages.
This is the safety alert symbol.
This symbol alerts you to hazards that can kill or hurt you and
others.
All safety messages will be preceded by the safety alert symbol
and the word “DANGER” or “WARNING.” These words mean:
You will
be killed or seriously injured
if you don’t follow instructions.
You can
be killed or seriously injured
if you don’t follow instructions.
All safety messages will identify the hazard, tell you how to reduce the chance
of injury, and tell you what can happen if the instructions are not followed.
ý
!
ý
WARNING
!
ý
DANGER
!
Page 3
3
TO USE:
After attaching unit to mixer, place
mixer bowl under strainer tray to catch
strained food and a smaller bowl under
open end to catch food waste. Cut
food into pieces that will fit in the hopper. Turn mixer to Speed 4 and feed
food into hopper using stromper.
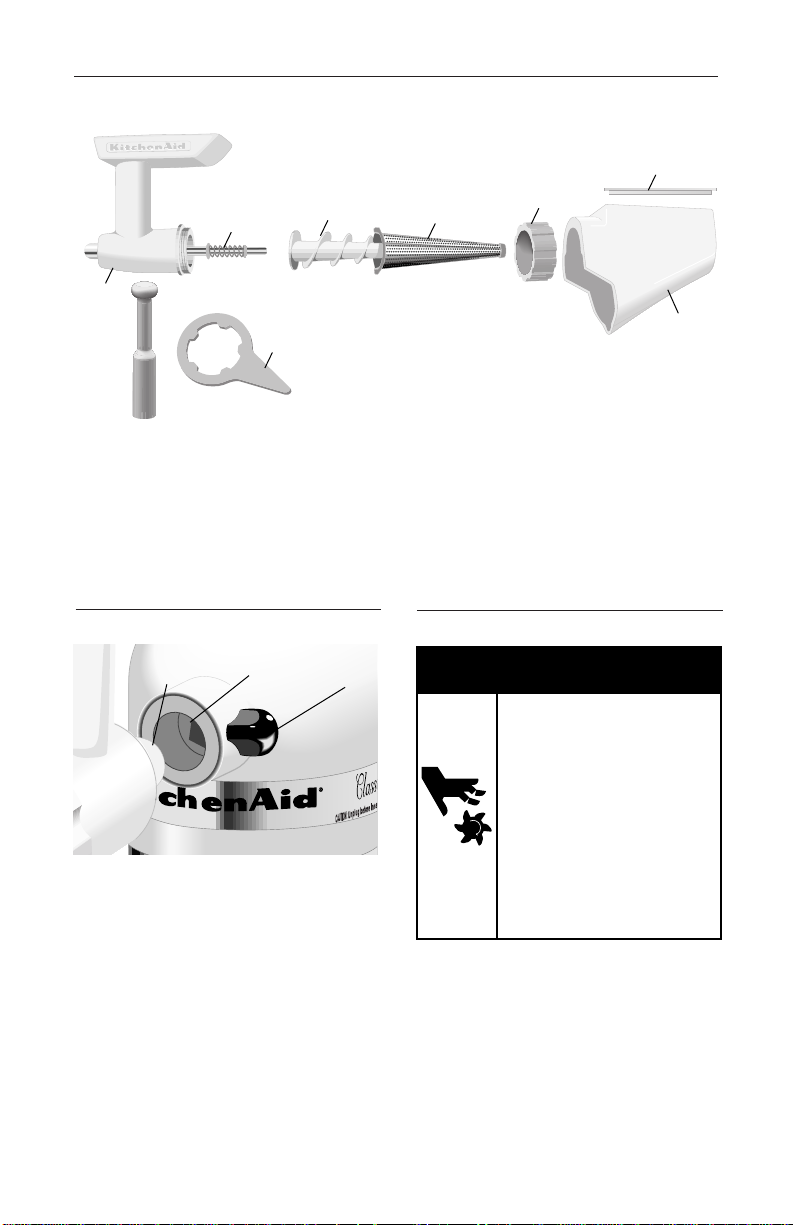
TO ATTACH:
Before attaching accessory, turn off
and unplug unit.
Loosen attachment knob (1) by turning
it counterclockwise. Remove attachment hub cover. Insert attachment
shaft housing (2) into attachment hub
(3) making certain that attachment
power shaft fits into square hub socket.
Rotate attachment back and forth if
necessary. When attachment is in
proper position, the pin on the attachment will fit into the notch on the hub.
Tighten attachment knob until attachment is completely secured to mixer.
arb
TO ASSEMBLE:
®
A
B
C
D
E
F
G
H
Slide smaller end of spring and shaft assembly (A) into opening in larger worm (B)
until secured firmly in place. Insert the larger worm into the grinder body (C).
Attach strainer cone (D) over the exposed end of the worm matching the tabs of
the cone with the notches in the grinder body. Place ring (E) onto grinder body,
turning by hand until finger tight but not overtightened.
Note: Do not use wrench (F) to tighten ring, only to remove. Slide the strainer tray
(G) over the cone and latch on top of ring. Place splash shield (H) on strainer tray.
2
3
1
Rotating Blade Hazard
Always use food
pusher.
Keep fingers out of
openings.
Keep away from
children.
Failure to do so can
result in cuts or other
injury.
WARNING
ý
!
Page 4

TO STRAIN FRUITS AND
VEGETABLES:
• Cut into pieces that will fit into
hopper.
• Remove tough, thick skin or rind,
i.e., oranges.
• Remove all large pits or seeds, i.e.,
apples, peaches.
• Remove hulls or stems, i.e.,
strawberries, grapes.
• Cook all tough or firm fruits and
vegetables before straining.
Note: Liquid may appear in hopper
when processing large amounts of
high moisture foods such as tomatoes
or grapes. To drain liquid, continue
to operate mixer. Do not process
additional food until liquid has
drained from hopper; damage to mixer
may result.
Labruscan or slip-skin type grapes
such as Concord, Catawba and
Ontario grapes should not be
processed in the Fruit/Vegetable
Strainer. Damage to the attachment
and/or mixer may result. Only
Ninifera family grapes such as Tokay
and Thompson Seedless may be
processed.
TO LOOSEN THE RING:
If ring is too tight to remove by hand,
slip the wrench over the grooves.
Turn wrench handle counterclockwise.
Note: Never use wrench to attach ring
to grinder body. Damage to the
attachment may result.
TO CLEAN:
The grinder body housing, worm,
strainer cone, strainer tray and splash
shield are dishwasher safe. Some
foods may stain certain parts. These
stains may be removed by using one
of the following methods: (1) place
parts in dishwasher and use cycle for
normally soiled dishes, or (2) rub a
small amount of oil or shortening over
the stains, wash in warm sudsy water
and rinse. The stomper should be
washed in warm sudsy water, rinsed
and dried. A small bottle brush can
be used to help remove pulp from the
strainer cone.
Note: Fruit/Vegetable Strainer Parts
(Model FVSP) are available to convert
a Model FGA Food Grinder to a Fruit/
Vegetable Strainer.
4
arb
Page 5

5
GOLDEN PEACH CHUTNEY
a~b
QQQQQQQQQQ s QQQQQQQQQQ
4 large peaches, peeled
and cut into chunks or
1 package (16 oz.)
frozen peaches, thawed
1
⁄2cup vinegar
2 tablespoons finely
chopped onion
1
⁄4cup dried fruit bits
1
⁄
2
cup firmly packed
brown sugar
1
⁄4cup sugar
2 tablespoons finely
chopped crystallized
ginger
1
⁄4teaspoon cloves
1
⁄4teaspoon allspice
Assemble Fruit/Vegetable Strainer and attach to
mixer. Turn to Speed 4 and strain peaches into
large saucepan placed under strainer. Add all
remaining ingredients. Heat to boiling. Reduce
heat to low. Cook about 20 minutes, or until
thick, stirring frequently.
Yield: 24 servings (1 tablespoon per serving).
Per serving: About 40 cal, 0 g pro, 11 g carb,
0 g fat, 0 mg chol, 3 mg sod.
1 envelope unflavored
gelatin
1
⁄4cup cold water
1 package (12 oz.) frozen
raspberries, thawed, or
3 cups fresh raspberries
1 package (16 oz.) frozen
rhubarb, thawed and
drained, or 2 cups fresh
rhubarb, chopped
3
1
⁄2cups sugar
Sprinkle gelatin over water in small bowl to
soften. Set aside.
Assemble Fruit/Vegetable Strainer and attach to
mixer. Turn to Speed 4 and strain raspberries into
large saucepan placed under strainer. Add
rhubarb and sugar. Heat to boiling. Reduce heat
to medium. Cook about 5 minutes, or until sugar
is dissolved and rhubarb is very soft, stirring
frequently. Remove from heat. Add softened
gelatin; mix. Let mixture stand at room
temperature 24 hours. Spoon into containers and
store in refrigerator or freezer.
Yield: About 5 cups (1 teaspoon per serving).
Per serving: About 12 cal, 0 g pro, 3 g carb,
0 g fat, 0 mg chol, 0 mg sod.
RASPBERRY-RHUBARB FREEZER JAM
QQQQQQQQQQ s QQQQQQQQQQ
Page 6

6
HARVEST APPLE BUTTER
a~b
QQQQQQQQQQ s QQQQQQQQQQ
3 lbs. cooking apples, cut
into fourths
3
⁄4cup apple cider
1
⁄2cup vinegar
2 cups sugar
2 teaspoons cinnamon
1
⁄2teaspoon cloves
1
1
⁄2teaspoon allspice
Place apples, cider, and vinegar in large
saucepan or Dutch oven. Cook over medium heat
about 15 minutes, or until very soft, stirring
occasionally.
Assemble Fruit/Vegetable Strainer and attach to
mixer. Turn to Speed 4 and strain cooked apples
into mixer bowl placed under strainer. Return
apples to pan. Add sugar and spices; mix well.
Cook over low heat until sugar is dissolved,
stirring constantly. Cook 15 to 20 minutes longer,
or until thick, stirring frequently. Ladle into hot,
sterilized
1
⁄
2
-pint jars. Process 10 minutes in
boiling water bath. Remove jars from water. Cool;
check seals.
Yield: About 5 cups (2 teaspoons per serving).
Per serving: About 21 cal, 0 g pro, 5 g carb,
0 g fat, 0 mg chol, 0 mg sod.
Page 7

Page 8

9704320
Printed in U.S.A.
dZw(1297)
Length of
Warranty:
One Year Full warranty
from date of purchase.
KitchenAid
Will Pay For:
Replacement parts and
repair labor costs to correct
defects in materials or
workmanship. Service must
be provided by an
Authorized KitchenAid
Service Center.
OR
Total Replacement
Warranty.
KitchenAid
Will Not Pay For:
A.Repairs when
attachment/accessory is
used in other than normal home use.
B. Damage resulting from
accident, alteration,
misuse or abuse.
C. Any incidental
shipping or handling
costs to deliver your
attachment/accessory to
an Authorized
KitchenAid Service
Center.
D.Replacement parts or
repair labor costs for
attachments/accessories
operated outside the
United States.
KITCHENAID DOES NOT ASSUME ANY RESPONSIBILITY FOR
INCIDENTAL OR CONSEQUENTIAL DAMAGES. Some states do not allow the
exclusion or limitation of incidental or consequential damages, so this exclusion or limitation may not apply to you. This warranty gives you specific legal rights and you may also
have other rights which vary from state to state.
HOW TO ARRANGE FOR SERVICE
To arrange for service, call the KitchenAid Customer Satisfaction Center, toll-free at
1-800-541-6390.
Missing a part? Call 1-800-541-6390 for immediate handling of your problem.
WARRANTY
St. Joseph, Michigan 49085 U.S.A
®KITCHENAID is a registered trademark of KitchenAid, U.S.A.
We’re so confident the quality of our products meets the exacting standards of
KitchenAid that, if your attachment/accessory should fail within the first year of ownership, KitchenAid will arrange to deliver a
replacement attachment/accessory to your
door free of charge and arrange to have
your “failed” attachment/accessory returned
to us. Your replacement unit is covered by
our one year full warranty. Please follow
these instructions to receive this quality
service.
If you reside in the United States and
your KitchenAid attachment/accessory
should fail within the first year of ownership, simply call our toll-free Customer
Satisfaction Center at 1-800-541-6390.
Give the consultant your complete shipping
address. (No P.O. Box Numbers, please.)
KitchenAid will arrange to deliver a
replacement attachment/accessory and have
your “failed” attachment/accessory returned
to us.
Put your “failed” attachment/accessory in
the original shipping carton along with a
sheet of paper with your name and address
on it, and proof of purchase (register
receipt, credit card charge slip, etc.)
TOTAL REPLACEMENT WARRANTY
 Loading...