

KitchenAid ChefsChoice User Manual

Premium Food Grinder Attachment
Accessoire de broyeur d’aliments
de qualité supérieure
Model 796 · Modèle 796
Designed especially for your
KitchenAid® stand mixer.
Conçu spécifiquement pour votre
batteur sur socle KitchenAid®.

2
IMPORTANT SAFEGUARDS
When using electrical appliances, basic safety precautions should always be followed,
including the following:
1. Please follow all KitchenAid® stand mixer safety instructions.
2. Read all instructions for this grinder attachment carefully before using it, to maximize results and to
avoid injury.
3. Use grinder attachment only in fully assembled form, including food hopper and food pusher.
4. When grinder attachment is powered, place hands only on recommended surfaces; finger, hand or
body contact with the moving parts can result in serious injury. When power is off, touch cutting blade
only to remove and clean according to instructions. Do not touch the blade’s edge.
5. Close supervision is necessary when any appliance is used by or near children.
6. Unplug power cord of stand mixer from outlet when not in use, before putting on or taking off parts and
before cleaning.
7. Avoid contacting moving parts. Never feed food by hand. Always use completely assembled grinder with
hopper and food pusher.
8. Never put your fingers near the feed tube while grinder is operating.
9. Keep loose clothing, hair and kitchen utensils away from moving parts to reduce the risk of personal injury
or damage to the grinder.
10. Cutting blade and grinding plate are very sharp. Handle carefully when cleaning. Avoid contact with
cutting edges.
11. Do not attempt to grind or extrude any non-food material with this grinder attachment.
12. Do not attempt to use this attachment with other brand stand mixers.
SAVE THESE INSTRUCTIONS
This premium quality grinder has been designed especially to fit the KitchenAid® stand mixers. It is being
supplied as part of the Chef’sChoice® line of food grinders in order to meet a recognized need of owners of the
KitchenAid® stand mixers.

3
YOU
MADE A
GOOD
CHOICE!
Congratulations on your selection of the Chef’sChoice®
Premium Food Grinder Attachment. As an owner of this
Chef’sChoice® attachment, you have the finest and
easiest-to-use product for grinding meat and other
foods. You can be assured that this grinder attachment
will perform superbly and be a joy to own.
Installing the Food Grinder Attachment to the Stand Mixer
Note: Clean all grinder parts before first use (see section on “Cleaning and Maintenance”).
1. Always make sure stand mixer speed control is “off” and the stand mixer is not plugged in during installation or
detachment of the grinder attachment.
2. Loosen the locking knob (A in Figure 2), by turning it counterclockwise.
3. If present, remove the attachment hub cover or flip up the hub cover.
4. Insert the assembled grinder attachment (items 1 to 5 in
Figure 1) into the attachment hub (B in Figure 2) of the
stand mixer. Make sure the locking knob (A) screw is
fully retracted and does not interfere with the insertion.
Slightly twist the grinder attachment back and forth
to ensure that the grinder shaft (C in Figure 2) seats
properly into the square hub sockets of the stand mixer
hub. When the grinder attachment is properly positioned,
the pin on its housing will fit into the notch on the hub
rim. Tighten the locking knob snugly until the grinder
attachment is properly secured in the motor housing.
Do not over tighten the locking knob.
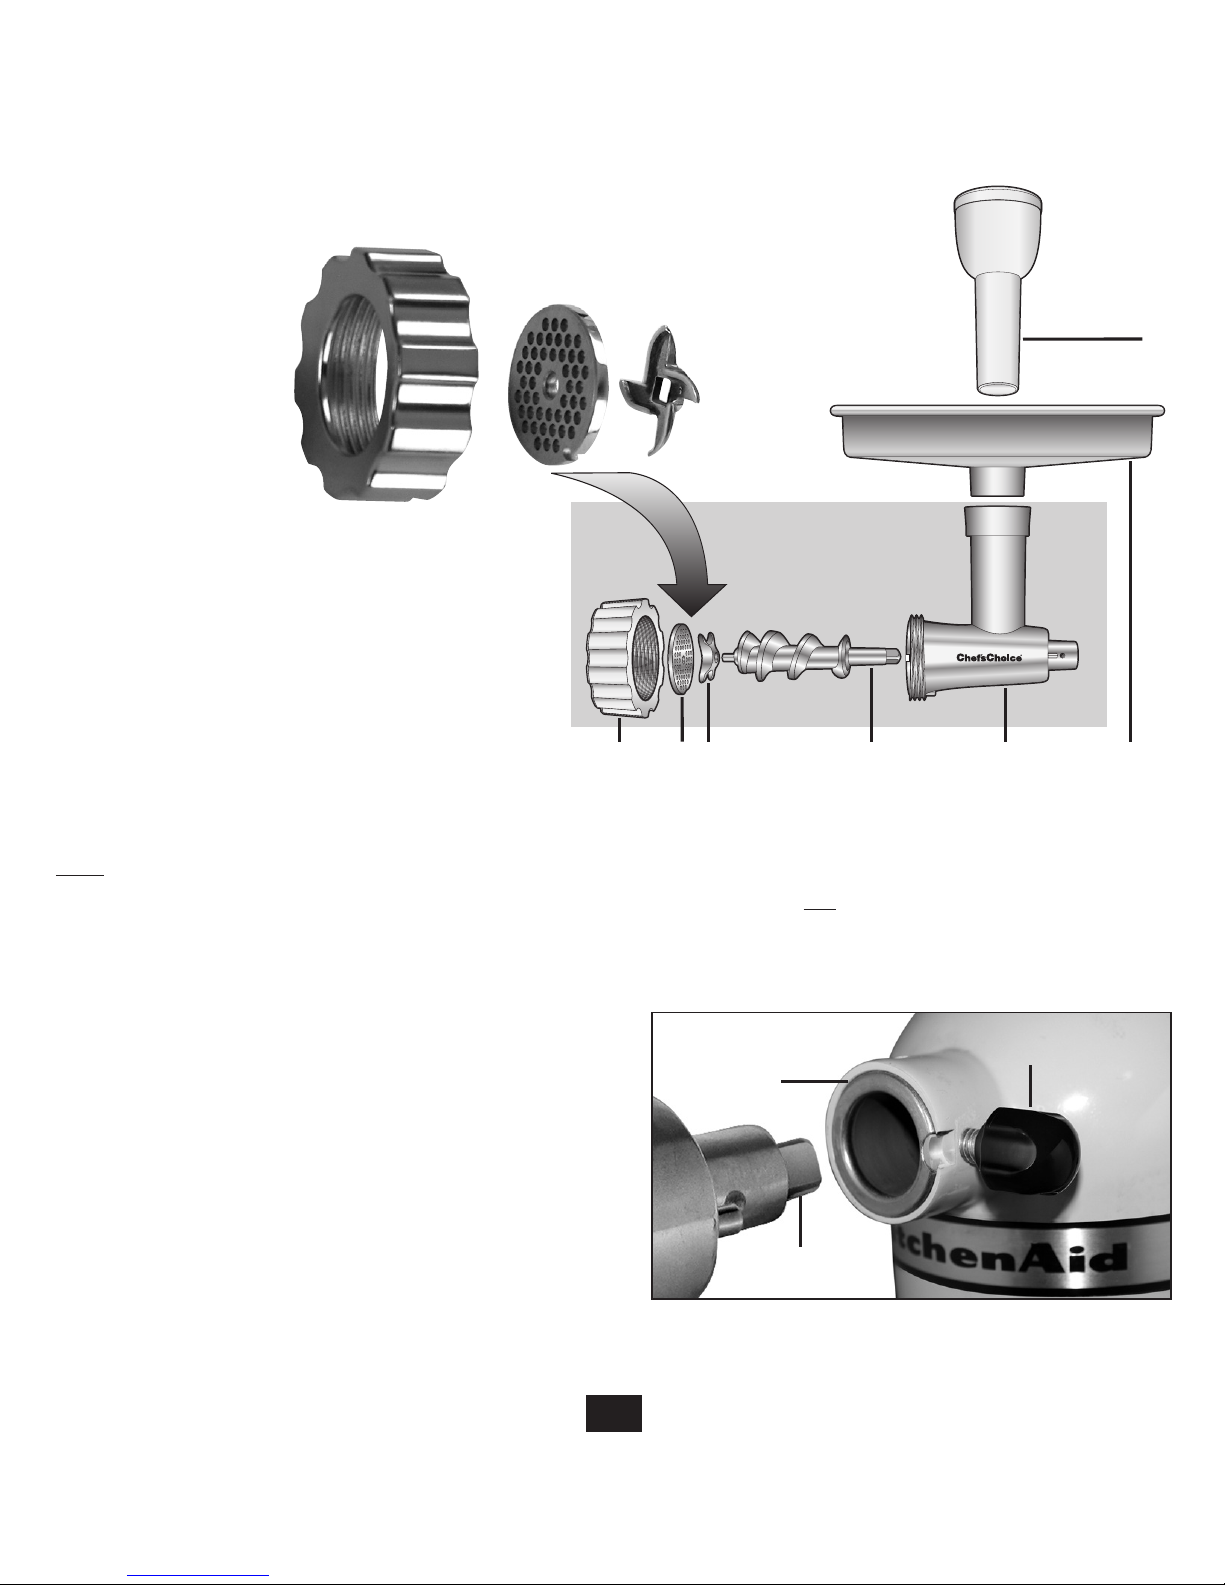
Figure 1. The food grinder attachment assembly.
4
Important! Assemble cutting blade
correctly, as shown. Flat side against
grinding blade.
Figure 2. Installing the food grinder attachment to
the stand mixer.
C
B
A
Parts List
1. Locking (retaining) ring
2. Grinding plate
3. Cutting blade
4. Auger (feed screw)
5. Feed/grinder tube (cylinder)
6. Hopper (food tray)
7. Food pusher (also stores extra grinding plates)
Grinder
Assembly
1 2 3 4 5 6
7
 Loading...