

KitchenAid BOTTOM MOUNT REFRIGERATOR Use And Care Manual
BOTTOM MOUNT
REFRIGERATOR
Use & Care Guide
For questions about features, operation/performance, parts,
accessories or service, call: 1-800-422-1230 or visit our
In Canada, call: 1-800-807-6777 or visit our website at
website at www.kitchenaid.com
www.kitchenaid.ca
Table of Contents.................2
RÉFRIGÉRATEUR
SUPERPOSÉ
Guide d’utilisation et
d’entretien
Au Canada, pour assistance, installation ou service composez
le 1-800-807-6777 ou visitez notre site web à
www.kitchenaid.ca
Table des matières................2
501973702000/D

TABLE OF CONTENTS
REFRIGERATOR SAFETY...........................................................................3
Proper Disposal of Your Old Refrigerator................................................. 3
INSTALLATION INSTRUCTIONS ...............................................................4
Unpack the Refrigerator ..........................................................................4
Before Use ...............................................................................................4
Location Requirements.............................................................................5
Electrical Requirements............................................................................5
Reverse Door Swing (optional) .................................................................6
Install Door Handles..................................................................................9
REFRIGERATOR USE ............................................................................... 10
Using the Controls ..................................................................................10
TABLE DES MATIÈRES
SÉCURITÉ DU RÉFRIGÉRATEUR ...........................................................18
Mise au rebut adéquate de votre vieux réfrigérateur.............................18
INSTRUCTIONS D’INSTALLATION .........................................................19
Déballage du réfrigérateur ...................................................................... 19
Avant utilisation ...................................................................................... 19
Exigences d'emplacement .....................................................................20
Spécifications électriques....................................................................... 20
Inversion du sens d'ouverture de la porte (facultatif)............................. 21
Installation des poignées de porte .........................................................24
UTILISATION DU RÉFRIGÉRATEUR.......................................................25
Utilisation des commandes .................................................................... 25
REFRIGERATOR FEATURES................................................................... 11
Refrigerator Shelves ............................................................................... 11
Cooler Compartment.............................................................................. 11
Fan .......................................................................................................... 12
Freezer Compartment ............................................................................12
REFRIGERATOR CARE ............................................................................ 12
Cleaning..................................................................................................12
Defrosting................................................................................................12
Lights ...................................................................................................... 13
Vacation and Moving..............................................................................13
TROUBLESHOOTING ............................................................................... 14
Accessories.............................................................................................15
WARRANTY ............................................................................................... 16
CARACTÉRISTIQUES DU RÉFRIGÉRATEUR ........................................ 26
Tablettes du réfrigérateur ....................................................................... 27
Compartiment de refroidissement.......................................................... 27
Ventilation ............................................................................................... 27
Compartiment de congélation................................................................ 27
ENTRETIEN DU RÉFRIGÉRATEUR......................................................... 27
Nettoyage ............................................................................................... 27
Décongélation......................................................................................... 28
Lampes ................................................................................................... 28
Vacances ou déménagement................................................................. 28
DÉPANNAGE ............................................................................................. 29
Accessoires.............................................................................................31
GARANTIE..................................................................................................31
2
REFRIGERATOR SAFETY
You can be killed or seriously injured if you don't immediately
You
can be killed or seriously injured if you don't
follow
All safety messages will tell you what the potential hazard is, tell you how to reduce the chance of injury, and tell you what can
happen if the instructions are not followed.
Your safety and the safety of others are very important.
We have provided many important safety messages in this manual and on your appliance. Always read and obey all safety
messages.
This is the safety alert symbol.
This symbol alerts you to potential hazards that can kill or hurt you and others.
All safety messages will follow the safety alert symbol and either the word “DANGER” or “WARNING.”
These words mean:
follow instructions.
instructions.
DANGER
WARNING
IMPORTANT SAFETY INSTRUCTIONS
WARNING:
To reduce the risk of fire, electric shock, or injury when using your refrigerator, follow these basic precautions:
SAVE THESE INSTRUCTIONS
■ Plug into a grounded 3 prong outlet.
■ Do not remove ground prong.
■ Do not use an adapter.
■ Do not use an extension cord.
■ Disconnect power before servicing.
■ Replace all parts and panels before operating.
■ Remove doors from your old refrigerator.
■ Use nonflammable cleaner.
■ Keep flammable materials and vapors, such as gasoline,
away from refrigerator.
■ Use two or more people to move and install refrigerator.
■ Disconnect power before cleaning fan cover (on some
models).
■ Disconnect power before installing ice maker (on ice maker
kit ready models only).
■ Use a sturdy glass when dispensing ice (on some models).
■ Do not hit the refrigerator glass doors (on some models).
■ If the power supply cord is damaged, it must be replaced
by the manufacturer or its service agent or a similarly
qualified person, in order to avoid a hazard.
WARNING
Suffocation Hazard
Remove doors from your old refrigerator.
Failure to do so can result in death or brain damage.
Important information to know about disposal of
refrigerants:
Dispose of refrigerator in accordance with Federal and Local
regulations. Refrigerants must be evacuated by a licensed,
EPA certified refrigerant technician in accordance with
established procedures.
Proper Disposal of Your Old Refrigerator
IMPORTANT: Child entrapment and suffocation are not problems
of the past. Junked or abandoned refrigerators are still dangerous
– even if they will sit for “just a few days.” If you are getting rid of
your old refrigerator, please follow these instructions to help
prevent accidents.
Before You Throw Away Your Old Refrigerator or Freezer:
■ Take off the doors.
■ Leave the shelves in place so that children may not easily
climb inside.
3
INSTALLATION INSTRUCTIONS
WARNING
Excessive Weight Hazard
Use two or more people to move and install
refrigerator.
Failure to do so can result in back or other injury.
When Moving Your Refrigerator:
Your refrigerator is heavy. When moving the refrigerator for
cleaning or service, be sure to cover the floor with
cardboard or hardboard to avoid floor damage. Always pull
the refrigerator straight out when moving it. Do not wiggle or
“walk” the refrigerator when trying to move it, as floor
damage could occur.
A
Important information to know about glass shelves
and covers:
Do not clean glass shelves or covers with warm water when
they are cold. Shelves and covers may break if exposed to
sudden temperature changes or impact, such as bumping.
Tempered glass is designed to shatter into many small,
pebble-size pieces. This is normal. Glass shelves and covers
are heavy. Use both hands when removing them to avoid
dropping.
Unpack the Refrigerator
■ Fit the spacers (if supplied) on the upper part of the condenser
at the back of the refrigerator, as shown.
Remove the Packaging
■ Remove tape and glue residue from surfaces before turning
on the refrigerator. Rub a small amount of liquid dish soap
over the adhesive with your fingers. Wipe with warm water
and dry.
■ Do not use sharp instruments, rubbing alcohol, flammable
fluids, or abrasive cleaners to remove tape or glue. These
products can damage the surface of your refrigerator. For
more information, see “Refrigerator Safety.”
■ Dispose of/recycle all packaging materials.
Before Use
IMPORTANT:
■ To ensure best use of your refrigerator, read the instructions,
which contain a description of the refrigerator and other useful
information.
■ Any work on the refrigerator must be carried out by a qualified
service technician.
■ Wait at least 2 hours before connecting the refrigerator to a
power supply to ensure that the refrigerant circuit is fully
efficient.
■ During installation, keep the power cord out of the way, to
avoid damage.
■ The refrigerator must be level and not tilted to the rear.
A. Spacers
Clean Before Using
After you remove all of the packaging materials, clean the inside of
your refrigerator before using it. See the cleaning instructions in
“Refrigerator Care.”
4

Location Requirements
WARNING
Explosion Hazard
Keep flammable materials and vapors, such as
gasoline, away from refrigerator.
Failure to do so can result in death, explosion, or fire.
A B
2" (5.1 cm)
Electrical Shock Hazard
Plug into a grounded 3 prong outlet.
Do not remove ground prong.
Do not use an adapter.
Do not use an extension cord.
Failure to follow these instructions can result in death,
fire, or electrical shock.
WARNING
IMPORTANT:
■ This refrigerator is designed for indoor, household use only.
■ Keep the refrigerator ventilation openings clear.
Ventilation and Clearance
To ensure proper ventilation, allow for 2" (5.1 cm) of space
between the top of the refrigerator and overhead cabinets and
between the back of the refrigerator and the wall. If your
refrigerator has an ice maker, allow extra space at the back for the
water line connections.
To allow the door to swing open when installing your refrigerator
next to a fixed wall, the minimum amount of space required
between the side of the refrigerator and the fixed wall, depends on
how far the wall protrudes into the room.
Te m p er a t u re
This refrigerator is intended for use in a location where the
temperature ranges from a minimum of 50°F (10°C) to a maximum
of 110°F (43°C). The preferred room temperature range for
optimum performance, which reduces electricity usage and
provides superior cooling, is between 61°F (16°C) and 110°F
(43°C). It is recommended that you do not install the refrigerator
near a heat source, such as an oven or radiator.
Electrical Requirements
Before you move your refrigerator into its final location, it is
important to make sure you have the proper electrical
connection.
Recommended Grounding Method
A 115 volt, 60 Hz, AC only 15- or 20-amp fused, grounded
electrical supply is required. It is recommended that a separate
circuit serving only your refrigerator be provided. Use an outlet
that cannot be turned off by a switch. Do not use an
extension cord.
NOTE: Before performing any type of installation, cleaning, or
removing a light bulb disconnect the refrigerator from the
electrical source. When you have finished, reconnect the
refrigerator to the electrical source.
Fixed Wall (B) Minimum Space (A)
24⁷⁄₈" (63.2 cm) or less None
More than 24⁷⁄₈" (63.2 cm),
but less than 47⁷⁄₈" (121.6 cm)
47⁷⁄₈" (121.6 cm) or more 4" (10.2 cm)
2" (5.1 cm)
5
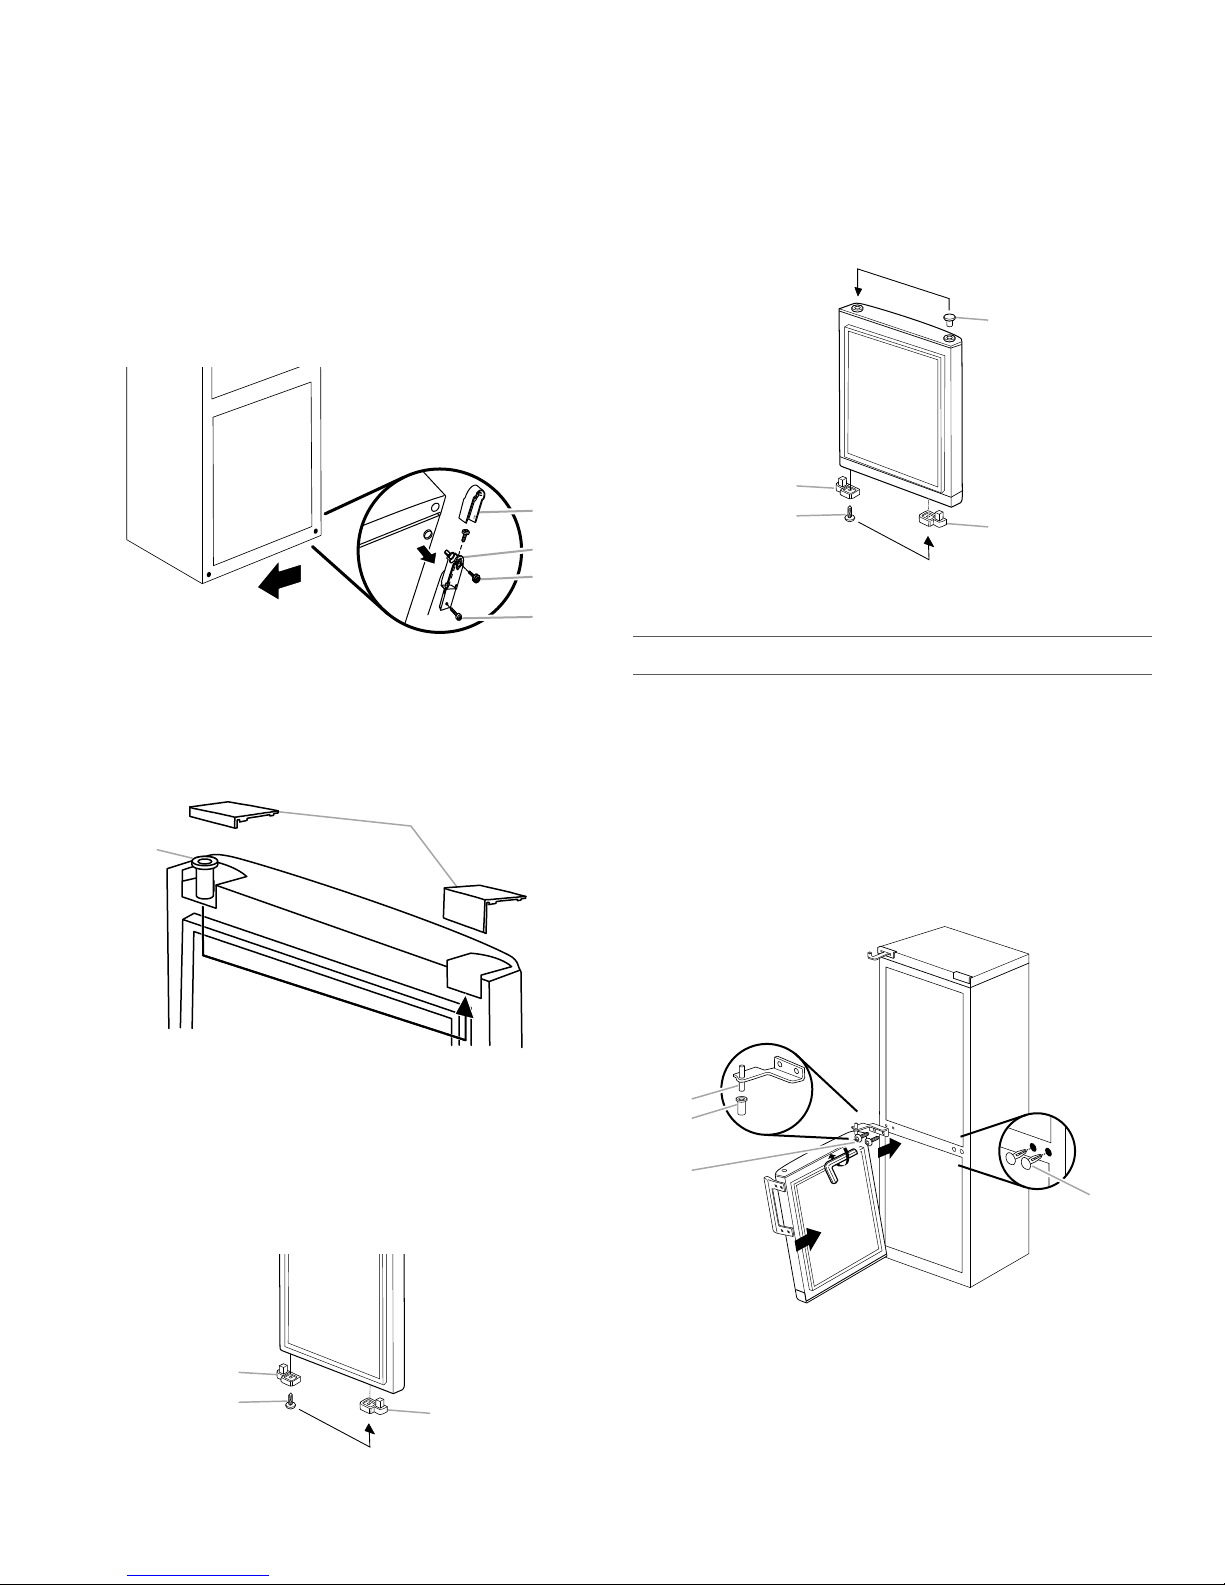
Reverse Door Swing (optional)
Hinges
E. Foot
B.
Plastic Cover
A. Bottom Hinge
C. Leveler
D. Internal Hex Head Screws
Bottom Hinge
Top Hinge
A. Center Hinge
B.
Bushing
C.
Internal Hex Head Screws
A. Hole Plug
B. Top Hinge
C. Internal Hex Head Screws
Center Hinge
Door Swing Reversal (optional)
A. Door Hinge Hole Plugs
2
5
A. Cabinet Hinge Hole Plugs
(from kit)
A.
Handle Plugs
1
A
B
C
A
B
C
A
A. Door Stop (remove and
discard)
3
C
A
B
B. Door Stop Screw
C.
Door Stop (reversibility kit)
A. Cabinet Hinge Hole Plug
4
A
B. Bushing
B
B.
Handle Screws
A
D
D
E
C
B
C
B
A
B
B
A
A
If you want to reverse the direction of the door swing, so that the freezer and refrigerator doors open from the opposite side, see the
following instructions.
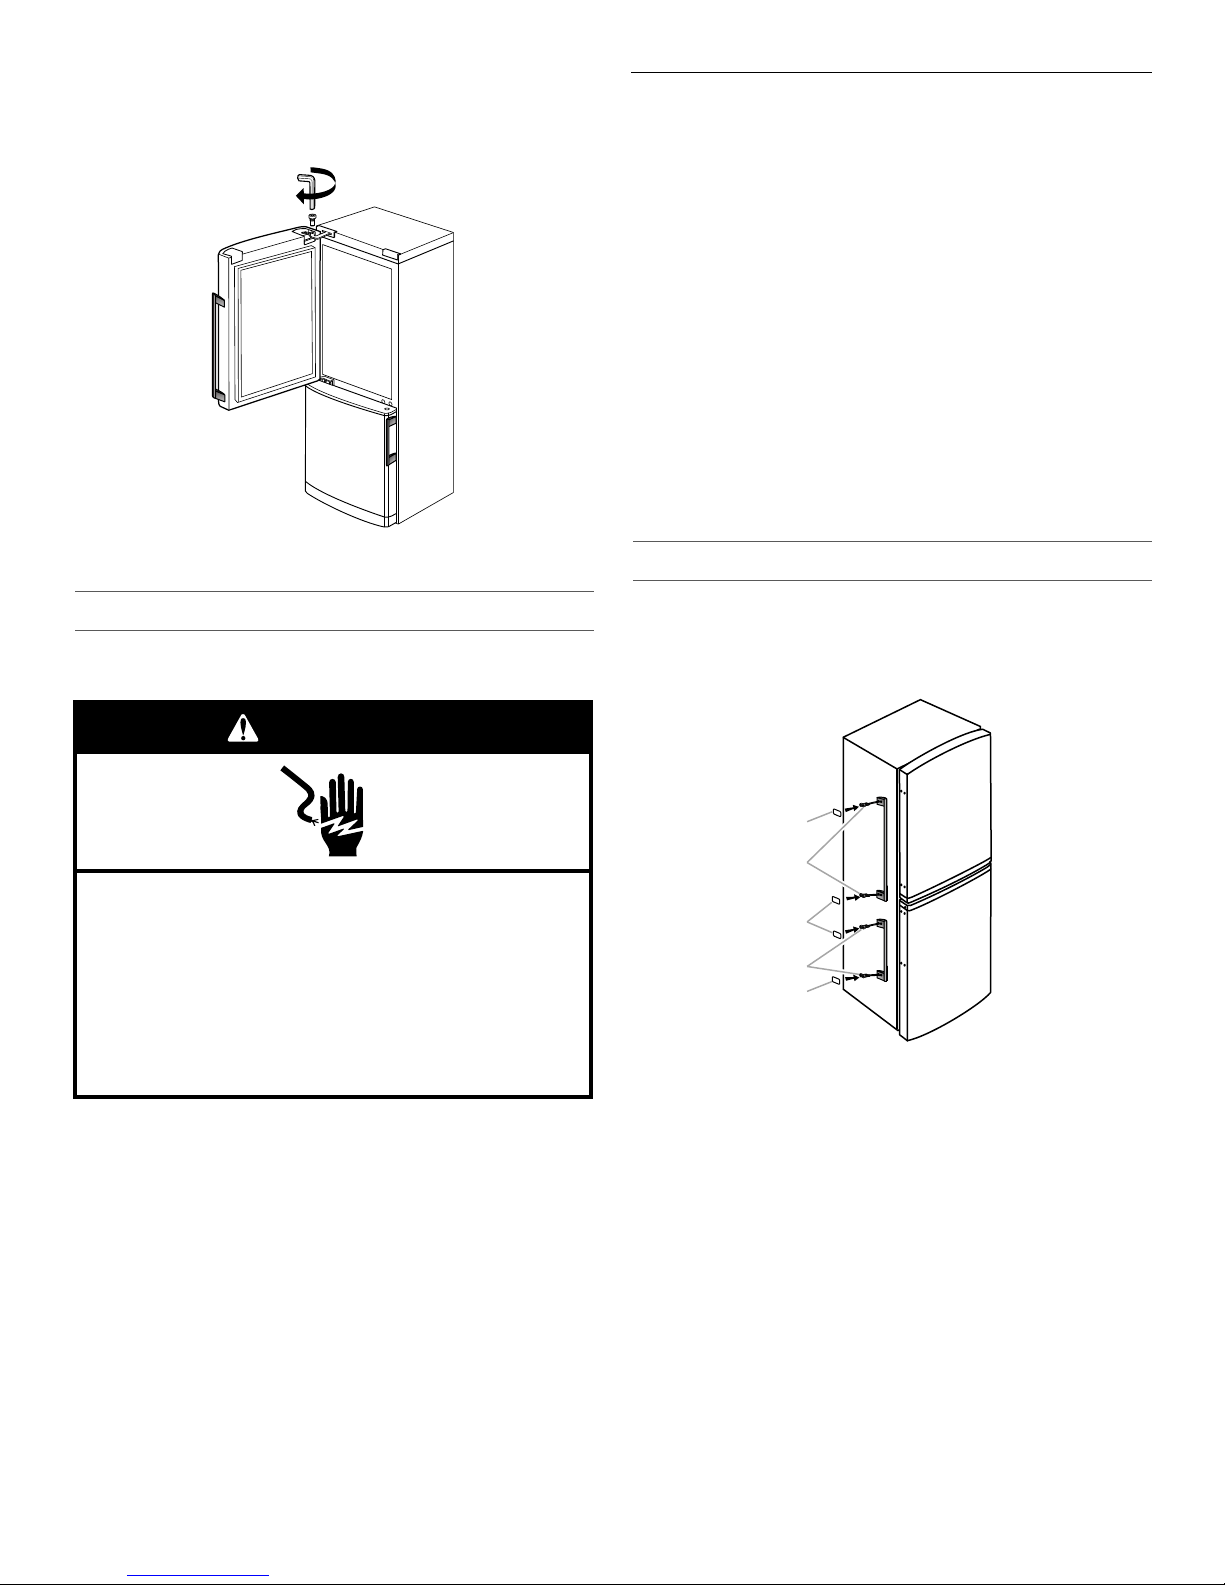
IMPORTANT: Before you begin, unplug refrigerator or disconnect power, and remove food and door trays from the doors.
Gather the required tools and read all instructions before removing doors.
Parts Supplied: Locate the Reversibility Kit (provided) in the crisper drawer. The kit contains (2) door stops, (3) cabinet hole plugs and
(8) handle hole plugs.
Tools Needed: ³⁄₁₆" hex key, #2 Phillips screwdriver and a flat-blade screwdriver
6
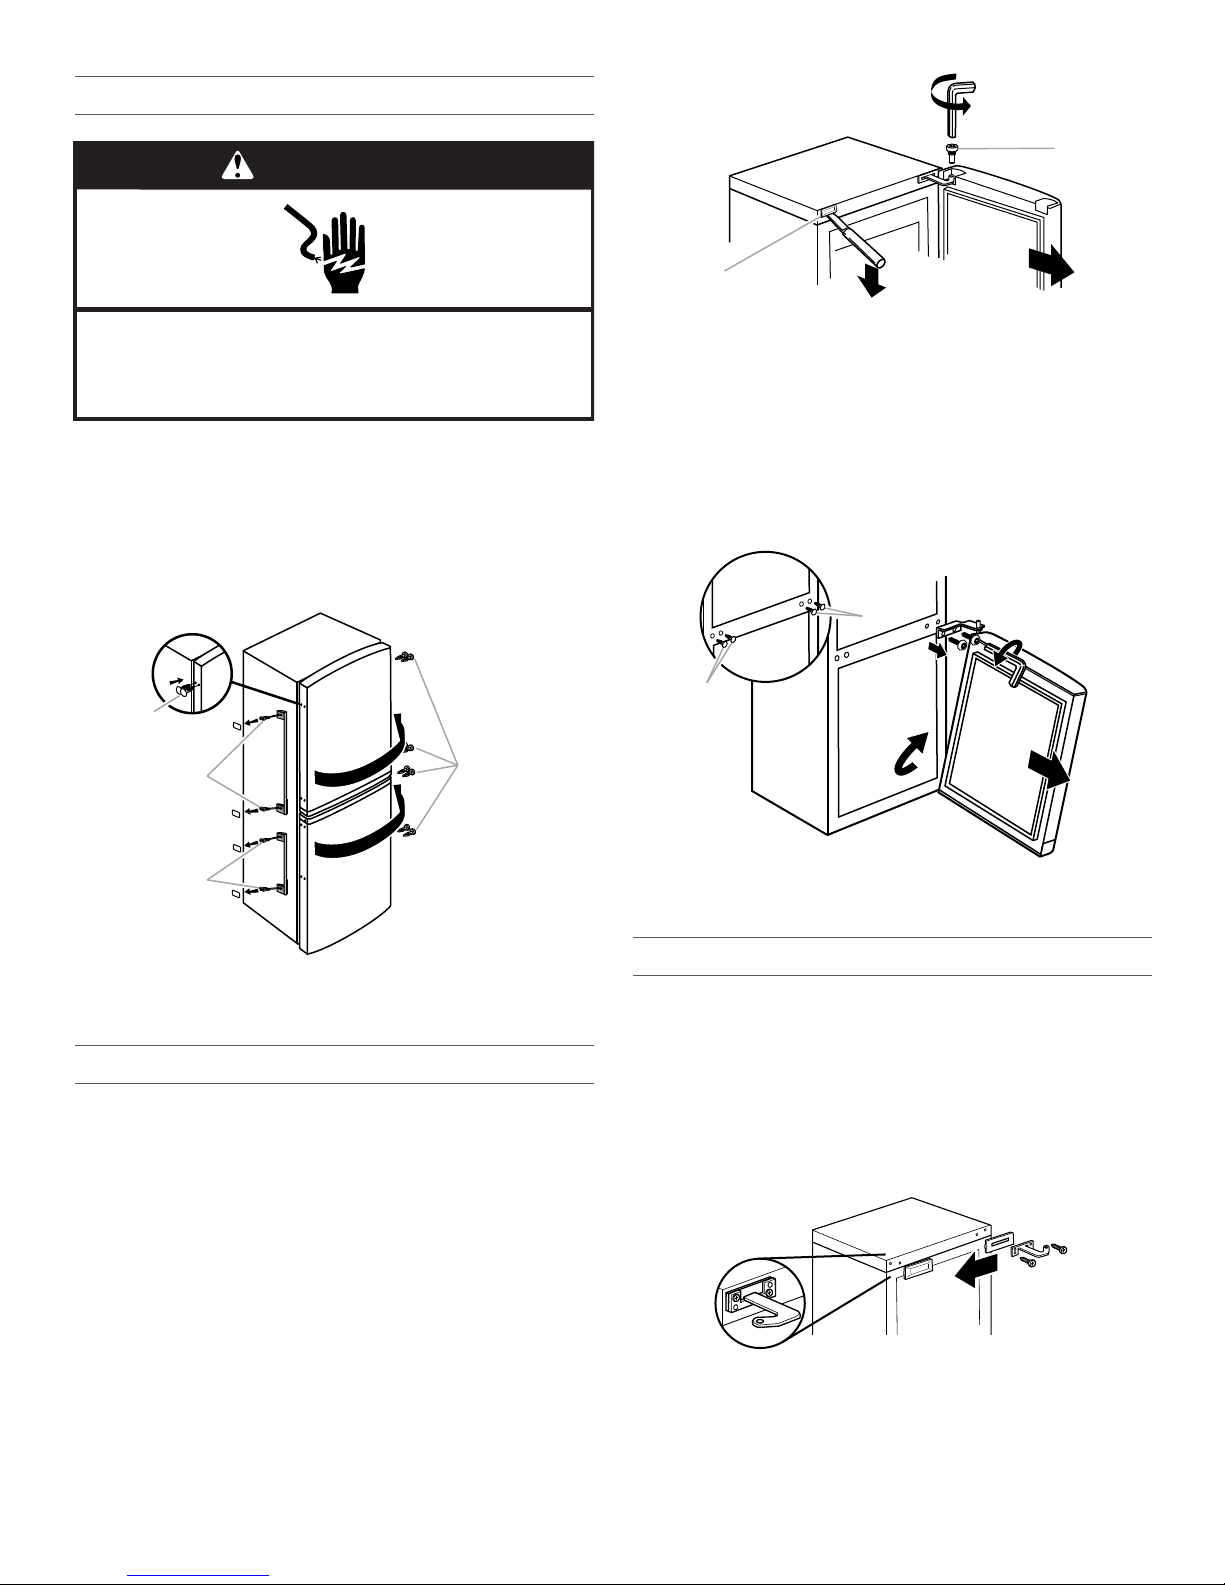
Reverse Handles (if previously installed)
WARNING
Electrical Shock Hazard
Disconnect power before removing doors.
Failure to do so can result in death or electrical shock.
B
B
C
A
A
B
A
B
1. Unplug refrigerator or disconnect power.
2. Using a screwdriver, remove the handle plugs and then the
handles from the left-hand side of the door and remove the
hole plugs from the right-hand side.
3. Insert the hole plugs (from the Reversibility Kit) into the holes
remaining after the removal of the handles.
4. Install the door handles with their handle plugs to the opposite
side of the door.
A. Cabinet hole plug
B. Top hinge screw
Freezer Door
1. Using a hex key, remove the center hinge. See Center Hinge
graphic.
2. Lift the freezer door from the bottom hinge.
3. Remove and discard the two center hinge hole plugs from the
left-hand side of the cabinet.
4. Insert two cabinet hole plugs, from the Reversibility Kit, into
the holes remaining from the removal of the center hinge.
A. New hole plugs (from Reversibility Kit)
B. Handle screws
C. Hole plugs (remove and discard)
Remove the Doors
NOTES:
■ Keep the doors closed until you are ready to lift them free from
the cabinet.
■ Provide additional support for the doors while the hinges are
being removed. Do not depend on the door gasket magnets
to hold the doors in place while you are working.
Refrigerator Door
1. Using a hex key, remove the screw attaching the refrigerator
door to the top hinge. Lift the refrigerator door from the center
hinge.
2. Using a flat-blade tool, remove the cabinet hole plug. Set
aside.
A. Hole plugs (remove and discard)
B. Hole plugs (from Reversibility Kit)
Reverse the Hinges
Cabinet
1. Using a hex key, remove the top hinge and hole plug from the
right-hand side of the cabinet. See Top Hinge graphic.
2. Move the bushing to the opposite side of the cabinet. See
Graphic 2.
3. Turn the hinge over, so that it is facing the opposite direction,
and install it on the left-hand side of the cabinet.
4. Insert the rectangular cabinet hole plug, removed earlier, into
the holes remaining after the removal of the top hinge.
5. Using two or more people, push against the top, front of the
refrigerator to tilt it slightly backward.
6. At the bottom, left-hand side of the cabinet, remove the
plastic cover and the foot. Unscrew the leveler, and using the
hex key, remove the front and bottom foot screws.
NOTE: You may need to use a flat-edged tool to pry the
plastic cover from the foot.
7
7. At the bottom, right-hand side of the cabinet, remove the
D
C
B
A
A
B
C
A
B
C
D
A
B
B
A
C
D
plastic cover and the hinge. Unscrew the leveler, and using the
hex key, remove the front and bottom hinge screws.
NOTE: You may need to use a flat-edged tool to pry the
plastic cover from the hinge.
8. Move the bottom hinge and the foot to the opposite sides of
the cabinet.
9. Using the hex key, place the hex screws into the holes of the
bottom hinge and fasten the hinge to the cabinet. Replace the
plastic cover and reinstall the leveler. See Bottom Hinge
graphic.
10. Using the hex key, place the hex screws into the foot holes
and fasten the foot to the cabinet. Replace the plastic cover
and reinstall the leveler.
Freezer Door
1. Move the hole plug from the top of the freezer door to the
opposite side. See Graphic 4.
2. Using a Phillips screwdriver, remove and discard the door stop
from the bottom of the freezer door. Set aside door stop
screw.
3. Insert a door stop, from the Reversibility Kit, into the holes in
the bottom, left-hand side of the freezer door. Fasten with the
screw removed in Step 2. See Graphic 3.
A. Plastic cover
B. Bottom hinge
C. Leveler
D. Hinge screws
Doors
Refrigerator Door
1. Move the hole plug from the top of the refrigerator door to the
opposite side. See Graphic 2.
A. Door hinge hole plug B. Bushing
2. Using a Phillips screwdriver, remove and discard the door stop
from the bottom of the refrigerator door. Set aside door stop
screw.
3. Insert a door stop, from the Reversibility Kit, into the holes in
the bottom, left-hand side of the refrigerator door. Fasten with
the screw removed in Step 2. See Graphic 3.
A. Door stop (remove and discard)
B. Door stop screw
C. Hole plug
D. Door stop (Reversibility Kit)
Reinstall the Doors
Freezer Door
1. Set the freezer door onto the bottom hinge pin.
2. Move the bushing from the top of the center hinge pin to the
bottom of the center hinge pin. Insert the hinge pin into the
top of the freezer door.
3. Using the hex key, and the two internal hex head screws,
removed earlier, install the center hinge to the left-hand side of
the cabinet.
4. Insert two hole plugs, from the Reversibility Kit, into the holes
remaining after the removal of the center hinge. See
Graphic 5.
A. Door stop (remove and discard)
B. Door stop screw
8
C. Door stop (Reversibility Kit)
A. Center hinge pin
B. Bushing
C. Internal hex head screws
D. Hole plugs (Reversibility Kit)
Refrigerator Door
Electrical Shock Hazard
Plug into a grounded 3 prong outlet.
Do not remove ground prong.
Do not use an adapter.
Do not use an extension cord.
Failure to follow these instructions can result in death,
fire, or electrical shock.
WARNING
B
B
A
A
A
1. Place the refrigerator door onto the center hinge pin.
2. Using the hex key and the internal hex head screw, removed
earlier, fasten the top hinge to the top of the refrigerator door.
3. Reinstall the hinge hole plug on the opposite side of the
refrigerator door.
Final Steps
1. Check all holes to make sure that hole plugs and screws are in
place and are fully tightened.
Install Door Handles
(on some models)
On some models the door handles are factory-installed. If your
refrigerator does not have factory-installed handles, see the
following instructions.
IMPORTANT: If you want to reverse the direction of the door
swing, so that the freezer and refrigerator doors open from the
opposite side, see “Reverse Door Swing” before installing the
door handles.
Parts Supplied: The door handles are packed inside the freezer
compartment, and the Reversibility kit containing the screws and
hole plugs is in the crisper drawer in the refrigerator compartment.
Parts Location
■ Door handles (2) Freezer compartment
■ Handle screws (4) Crisper drawer
■ Handle plugs (4) Crisper drawer
Gather the required tools.
Tools Needed: Phillips screwdriver
Install Handles
1. Remove the door handles from the packaging. Remove the
screws and hole plugs from the Reversibility Kit.
2. Using the screws, fasten the handles to the doors.
3. Insert the handle plugs to cover the screws.
2. Plug into a grounded 3 prong outlet.
3. Return all removable door parts to door and food to
refrigerator.
A. Handle plugs
B. Handle screws
9
REFRIGERATOR USE
A
A B
Using the Controls
The control panel is located at the top front of the refrigerator
compartment.
IMPORTANT:
■ After you plug in the refrigerator, it automatically begins to
cool.
■ The indicator LEDs on the control panel light up for
approximately 1 second, and following the initialization
process the temperature set point is displayed.
■ The recommended temperature setting should be correct for
normal household refrigerator use. The controls are set
correctly when milk or juice is as cold as you like and when ice
cream is firm.
■ Wait at least 24 hours for your refrigerator to cool completely
before adding food. If you add food before the refrigerator has
cooled completely, your food may spoil.
NOTE: Adjusting the refrigerator and freezer temperature
controls to a colder than recommended setting will not cool
the compartments any faster.
■ If the temperature is too warm or too cold in the refrigerator or
freezer, first check the air vents to be sure they are not
blocked before adjusting the controls.
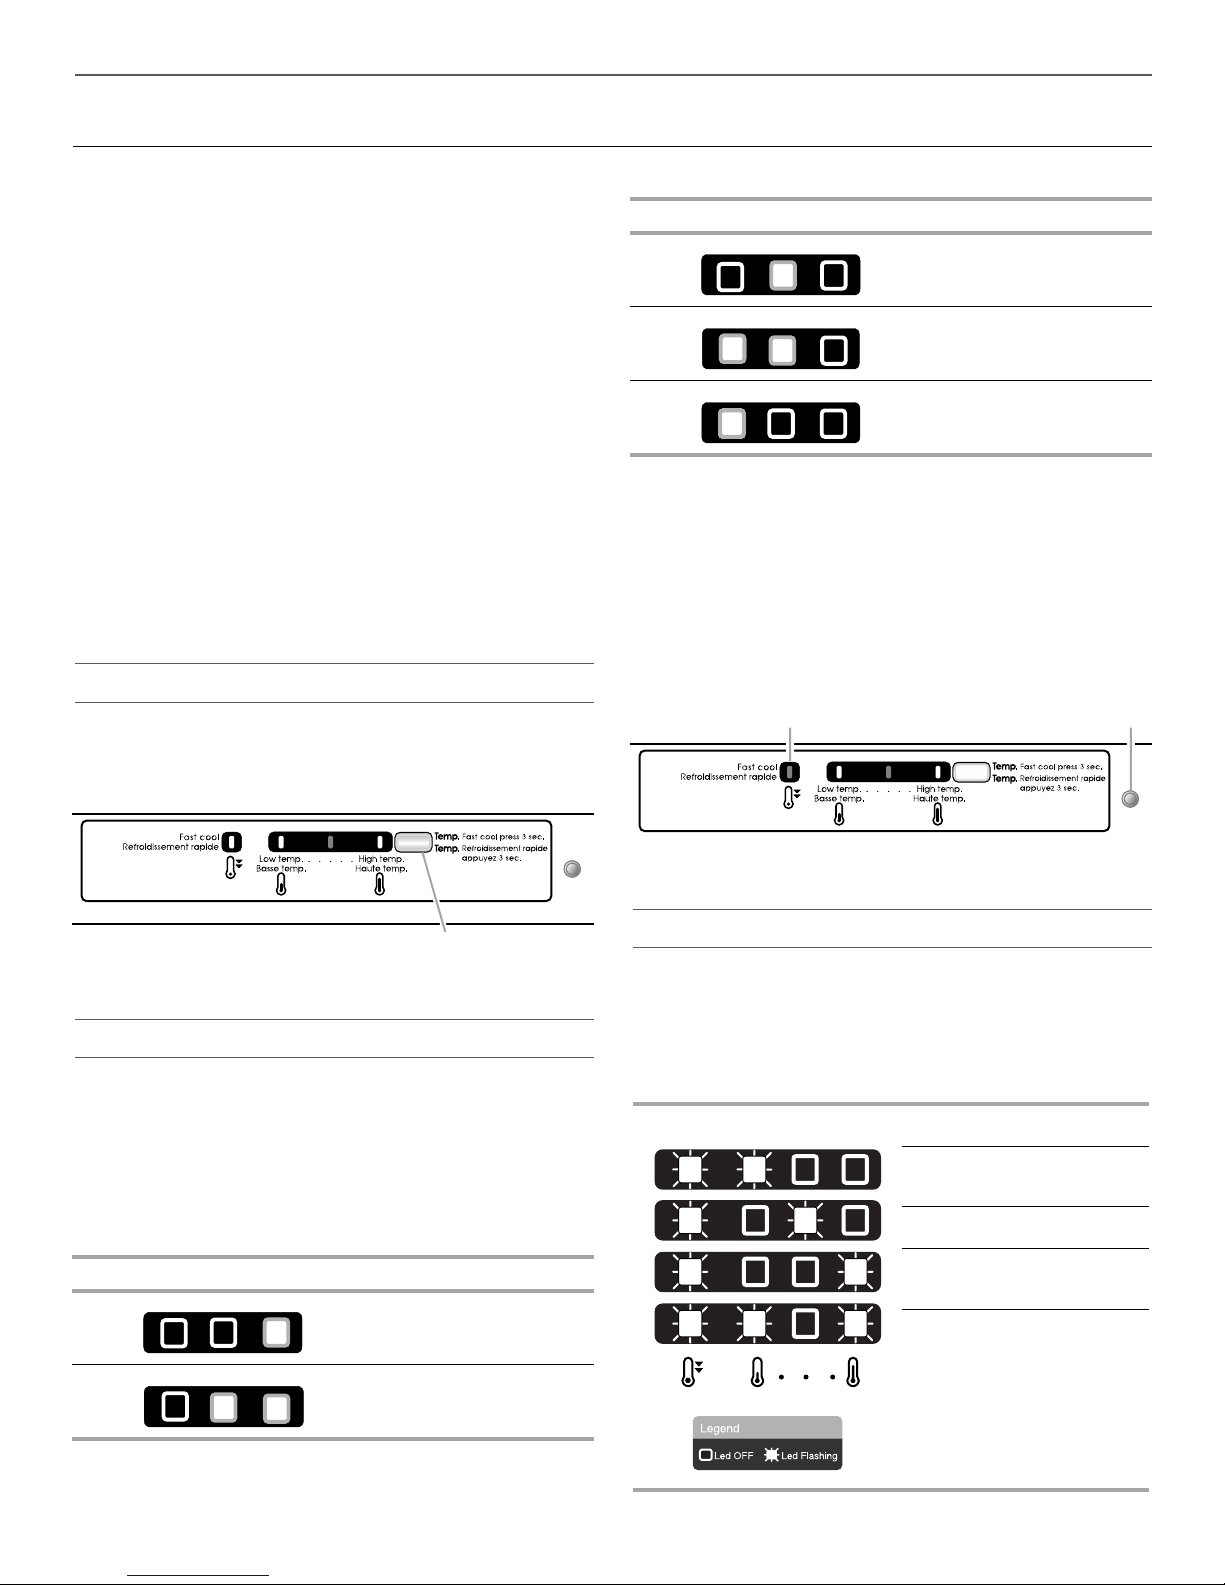
Temperature Controls
DISPLAY TEMPERATURE
Middle (Recommended)
Mid-Low
Low
Fast Cool
The Fast Cool feature increases the cooling speed when a large
amount of food is placed in the refrigerator, or fresh food to be
frozen is placed in the freezer.
■ Press and hold the button for 3 seconds until the Fast Cool
(yellow LED) illuminates.
■ The Fast Cool feature will remain on for 6 hours unless it is
manually turned off.
■ Manually turn off Fast Cool by pressing and holding the
control button for 3 seconds until the (yellow LED) is off.
For your convenience, the temperature control is preset at the
factory. When you first install your refrigerator, make sure the
controls are still set to the recommended setting as shown.
Recommended Setting “Middle”
A. Temperature control button
Temperature Selection
If you want to adjust the temperature in both the freezer and
refrigerator compartments, use the temperature settings listed in
the chart below as a guide.
Press the temperature control button to toggle through the
temperature selections from High (least cold) to Middle (colder) to
Low (coldest).
NOTE: Do not adjust the control more than one setting at a time.
Wait 24 hours between adjustments for the temperature to
stabilize.
DISPLAY TEMPERATURE
High
A. Fast Cool LED
B. Internal light switch
Failure Alarms
After the refrigerator is plugged in, during the first 10 minutes of its
performance, possible temperature sensor failure will be
displayed as shown in the following chart. Although the
refrigerator will continue to cool, it is necessary to call Service and
provide the alarm code. See either the front cover or the Warranty
for contact information.
Failure Alarm Codes
Evaporator
Refrigerator
Refrigerator and Evaporator
Heater Connections
Mid-High (Eco Green)
10
 Loading...