

MODEL
4KPCB348
& 4KPCB148
BLENDERS
Table of Contents ...............................3
Blender Safety ....................................5
Important Safeguards.........................6
Proof of Purchase & Registration.........7
Electrical Requirements.......................8
Introduction
Section Contents
1
INTRODUCTION
P RO L INE™S ERIES
2
The KitchenAid
®
PRO LINE™ Series Chef’s Blender and
Bar Blender can be summed up in a word: performance. The
rugged, commercial-quality design will satisfy the most
demanding home chef.
Start with the die-cast metal base – it stands up to the most
intensive use while providing incredible stability. Inside the base
is a 21,000 rpm motor that generates more than 1 peak
horsepower. It thoroughly blends frozen drinks and purées
sauces and soups in about 20 seconds.
Above the base, you’ll find a 48 oz. (1.5 liter) stainless steel or
polycarbonate jar. The blade assembly and seals are built into
the jar for water-tight performance, and the patented, one-piece
stainless steel blade rides on ball bearings for maximum efficiency.
Performance demands precise control, so the Chef’s Blender has three blending speeds and a Pulse
feature for extraordinary versatility. The Bar Blender combines high-speed operation optimized for
blending frozen drinks and crushing ice with a low-speed Pulse mode that offers additional flexibility
and control.
Advanced electronics provide capabilities not found in most blenders. An electronic mixing sensor
automatically adjusts power to compensate for light or heavy ingredients. The Step Start®feature
reduces splattering by starting the blender slowly and then quickly stepping up to the selected speed.
The KitchenAid®PRO LINE™ Series: commercial quality for the discriminating home chef. From the
company distinguished by its legendary craftsmanship.

TABLE OF CONTENTS
INTRODUCTION
3
BLENDER RECIPES
Cocktails & Dessert Drinks
Brandy Alexander
..........................................................26
Caramel Irish Coffee Froth
............................................27
Egg Nog Shake
............................................................28
Frozen Daiquiri
............................................................29
Frozen Peach Daiquiri
................................................29
Frozen Strawberry Basil Daiquiri
....................................29
Frozen Dark Russian
....................................................30
Frozen White Russian
..................................................30
Hard Cranberry Orange Breeze
....................................31
Mango Peach Flip
........................................................32
Margarita
..................................................................33
Peach Margarita
..........................................................33
Strawberry Margarita
..................................................33
Mojito Slush
................................................................34
Peach Bellini
................................................................35
Peppered Grasshopper
................................................36
Raspberry Bellini
..........................................................37
Rum Mocha Freeze
......................................................38
Hot Drinks
Hot Mexican Mocha
......................................................39
Triple Hot Chocolate
....................................................40
INTRODUCTION
Introduction ....................................................................................2
Blender Safety........................................................................5
Important Safeguards ............................................................6
Proof of Purchase & Product Registration..............................7
Electrical Requirements..........................................................8
FEATURES AND OPERATION
Blender Features..............................................................................10
Using the Blender
Before First Use..................................................................13
Operating the Blender............................................................13
Using the Pulse Feature ..................................................15
Using the Ingredient Cap
............................................15
Overload, Jam, & Thermal Safeguards
..........................15
Power-On Safeguard
..................................................15
Speed Control Guide
................................................16
Operating Tips
....................................................................17
Food Prep Tips......................................................................19
Care & Cleaning
................................................................22
Troubleshooting....................................................................23
Continued…

4
TABLE OF CONTENTS
Soups
Avocado Lime Soup
....................................................60
Cheddar Potato Leek Soup
..........................................61
Curried Carrot Soup
....................................................62
Gazpacho
..................................................................63
Mushroom Soup
..........................................................64
Roasted Butternut & Apple Soup
..................................65
Pancakes & Waffles
Basic Pancakes
..............................................................66
Basic Waffles
..............................................................67
Buttermilk Pancakes
....................................................68
Oatmeal-Raisin Pancakes
..................................................69
Toasted Walnut Pumpkin Waffles
..................................70
WARRANTY AND SERVICE INFORMATION
To tal Satisfaction Warranty for Canada ................................72
Arranging for Warranty Service....................................................73
Arranging for Service After the Warranty Expires..................74
Smoothies
Fresh Berry Malt
..........................................................41
Mango Ginger Shake
..................................................42
Banana Ginger Shake
..................................................42
Peanut Butter-Banana Breakfast Shake
..........................43
Raspberry Breakfast Refresher
......................................44
Sherbet Melon Cooler
..................................................45
Lime Sherbet Melon Cooler
..........................................45
Strawberry-Banana Smoothie
......................................46
Dips & Spreads
Baba Ghanoush
..........................................................47
Cardamom-Orange Fruit Dip
........................................48
Crab Spread
................................................................49
Hummus
....................................................................50
Layered Mexican Dip
....................................................51
Mixed Olive Tapenade
..................................................52
Roasted Red Pepper Basil Spread
..................................53
Sauces & Dressings
Blue Cheese Dressing
..................................................54
Cardamom-Orange Salad Dressing
................................55
Chipolté Tomato Dressing
............................................56
Raspberry Balsamic Vinaigrette
....................................57
Roasted Tomatillo Salsa
..............................................58
Three-Herb Pesto
........................................................59

INTRODUCTION
5
BLENDER SAFETY
Your safety and the safety of others are very important.
We have provided many important safety messages in this manual and on your appliance.Always read
and obey all safety messages.
This is the safety alert symbol.
This symbol alerts you to potential hazards that can kill or hurt you and others.
All safety messages will follow the safety alert symbol and either the word “DANGER” or
“WARNING.”These words mean:
You can be killed or seriously injured if you don’t immediatel
y
follow instructions.
You can be killed or seriously injured if you don’t follow
instructions.
All safety messages will tell you what the potential hazard is, tell you how to reduce the chance of injury,
and tell you what can happen if the instructions are not followed.
DANGER
WARNING

6
When using electrical appliances, basic safety precautions
should always be followed, including the following:
1. Read all instructions.
2. To protect against the risk of electrical shock, do not put the
Blender in water or other liquids.
3. Close supervision is necessary when any appliance is used
by or near children.
4. Unplug the Blender from the outlet when not in use, before
putting on or taking off parts, and before cleaning.
5. Avoid contact with moving parts.
6. Do not operate any appliance with a damaged cord or plug,
or after the appliance malfunctions or has been dropped or
damaged in any manner. Return appliance to the nearest
authorized service facility for examination, repair, or electrical
or mechanical adjustment.
IMPORTANT SAFEGUARDS
SAVE THESE INSTRUCTIONS
7. Do not use outdoors.
8. Do not let the cord hang over the edge of a table or counter.
9. Keep hands and utensils out of the container while
blending to reduce the risk of severe injury to persons or
damage to the Blender. A scraper may be used, but must
be used only when the Blender is not running.
10. Blades are sharp. Handle carefully.
11. Always operate the Blender with the cover in place.
12. When blending hot liquids, remove the center piece of the
two-piece cover.
13. The use of attachments, including canning jars, not
recommended by KitchenAid Canada may cause a risk of
injury to persons.
14. This product is cUL listed for household use only.

INTRODUCTION
7
Always keep a copy of the sales receipt showing the date of
purchase of your Blender. Proof of purchase will assure you of
in-warranty service.
Before you use your Blender, please fill out and mail your
product registration card packed with the unit. This card will
enable us to contact you in the unlikely event of a product
safety notification. This card does not verify your warranty.
PROOF OF PURCHASE
& PRODUCT REGISTRATION
Please complete the following for your personal records:
Model Number: Chef’s Blender – 4KPCB348
Bar Blender – 4KPCB148
Date Purchased__________________________________________
Dealer’s Name___________________________________________
Address ________________________________________________
Phone__________________________________________________
8
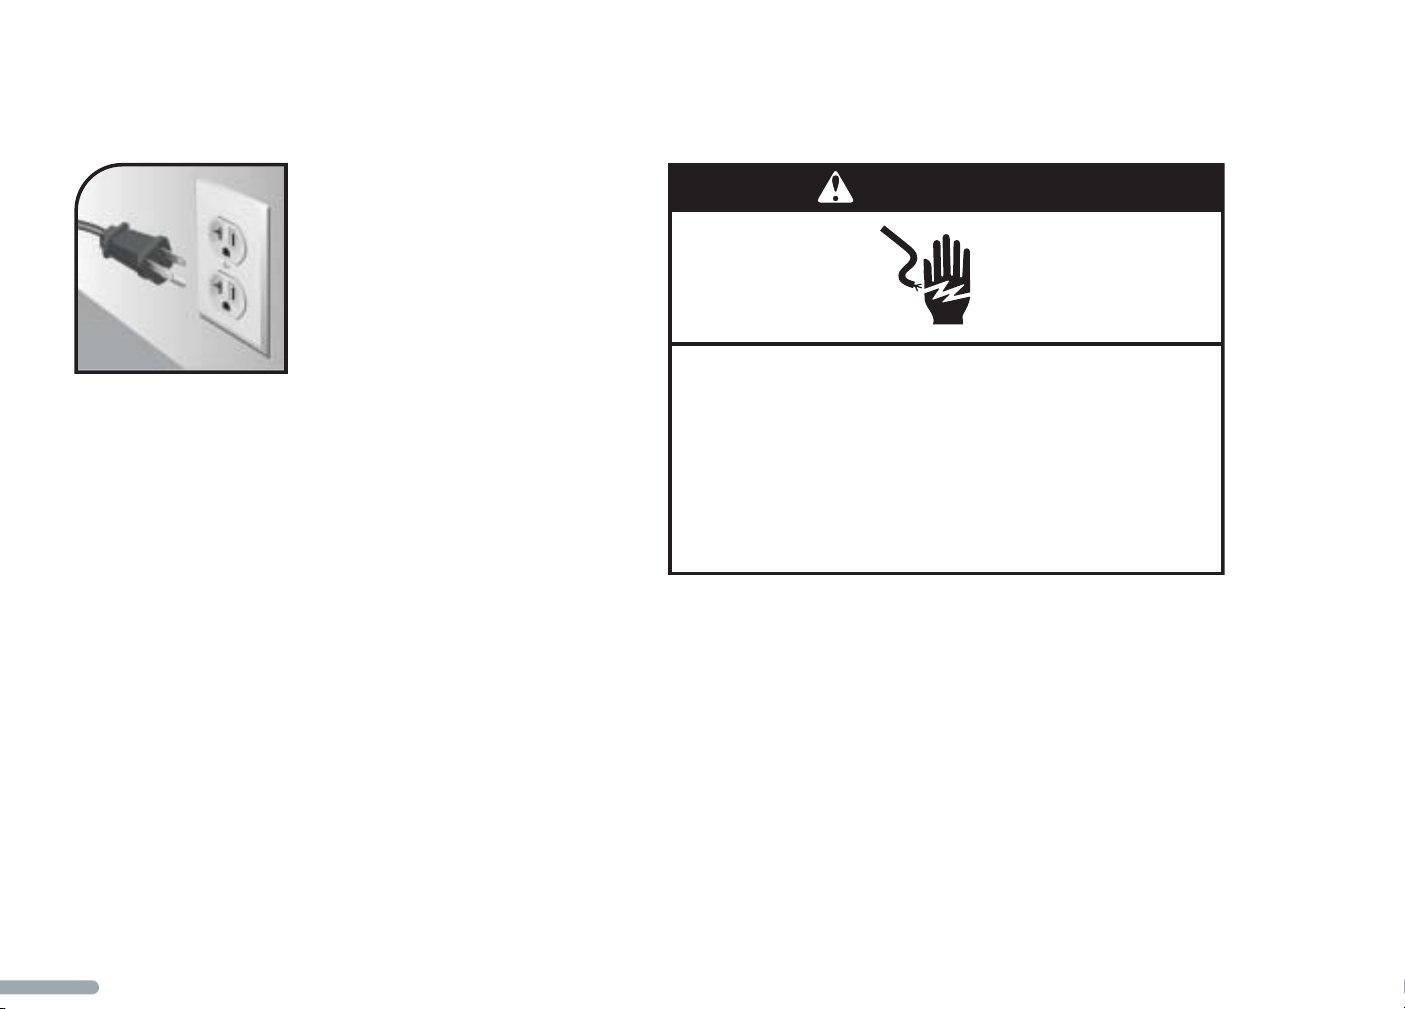
Volts: 120 V.A.C. only.
Hertz: 60 Hz
NOTE: This Blender has a 3 prong
grounded plug. To reduce the risk of
electrical shock, this plug will fit in an
outlet only one way. If the plug does
not fit in the outlet, contact a
qualified electrician. Do not modify the plug in any way.
Do not use an extension cord. If the power supply cord is
too short, have a qualified electrician or serviceman install an
outlet near the appliance.
ELECTRICAL REQUIREMENTS
WARNING
Electrical Shock Hazard
Plug into a grounded 3 prong outlet.
Do not remove ground prong.
Do not use an adapter.
Do not use an extension cord.
Failure to follow these instructions can result in death,
fire, or electrical shock.
9
FEATURES
AND
OPERATION
P RO L INE™S ERIES
Blender Features ................................10
Using the Blender
Before First Use.............................13
Operating the Blender....................13
Using the Pulse Feature.................15
Using the Ingredient Cap..............15
Safeguards ....................................15
Speed Control Guide.....................16
Operating Tips..............................17
Food Prep Tips..................................19
Care & Cleaning ..............................22
Troubleshooting................................23
Features and Operation
Section Contents
FEATURES AND OPERATION
MODEL 4KPCB348 & 4KPCB148
BLENDER FEATURES
10
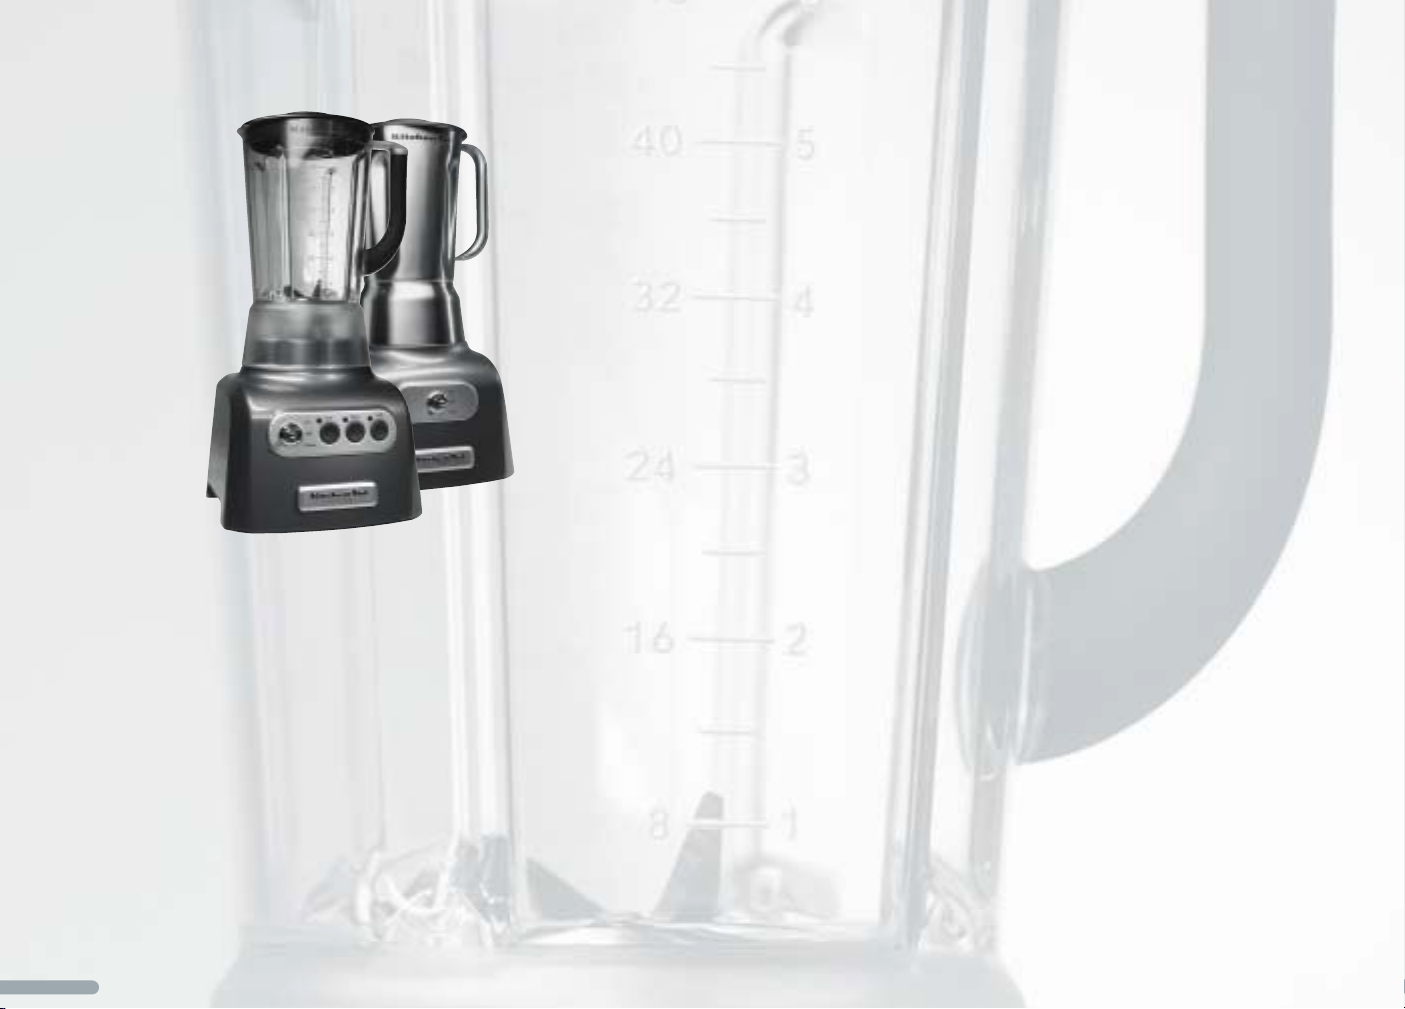
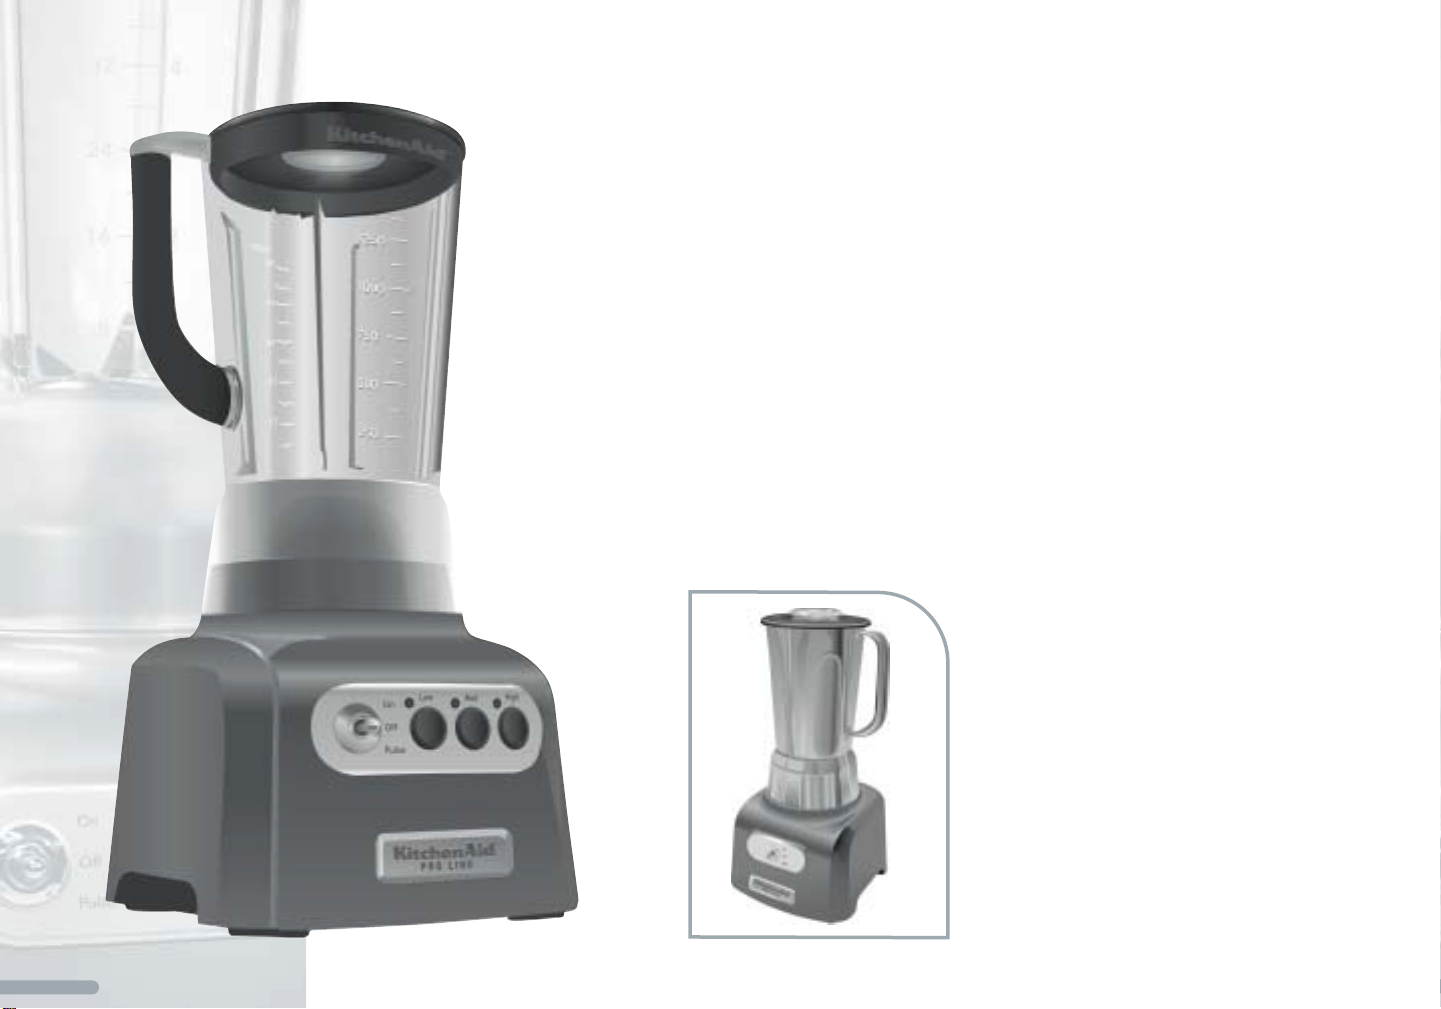
Model 4KPCB348
Chef’s Blender
Outstanding Performance
Designed to provide commercial durability for the home chef, the
robust design handles job after job with outstanding results. It
thoroughly blends frozen drinks and purées sauces and soups in
about 20 seconds.
Die-Cast Metal Base
Incredibly stable, the metal base stands up to the most intensive
use while providing quiet operation. Rubber feet protect the
countertop and eliminate “walk” during blending.
Powerful Motor
Motor generates more than 1 peak horsepower and is capable of
speeds up to 21,000 rpm. High-efficiency fan and airflow design
ensures cool operation.
Model 4KPCB148
Bar Blender
FEATURES AND OPERATION
11
48 oz. (1.5 liter) Clear Polycarbonate or Stainless Steel Jar
The 48 oz. (1.5 liter) jars are dishwasher-safe. Each features a
comfortable handle. The polycarbonate jar includes a durable,
soft-grip handle covering for additional comfort. The jar collar,
blade assembly, and seals are built into the jar for strength,
durability, and water-tight performance.
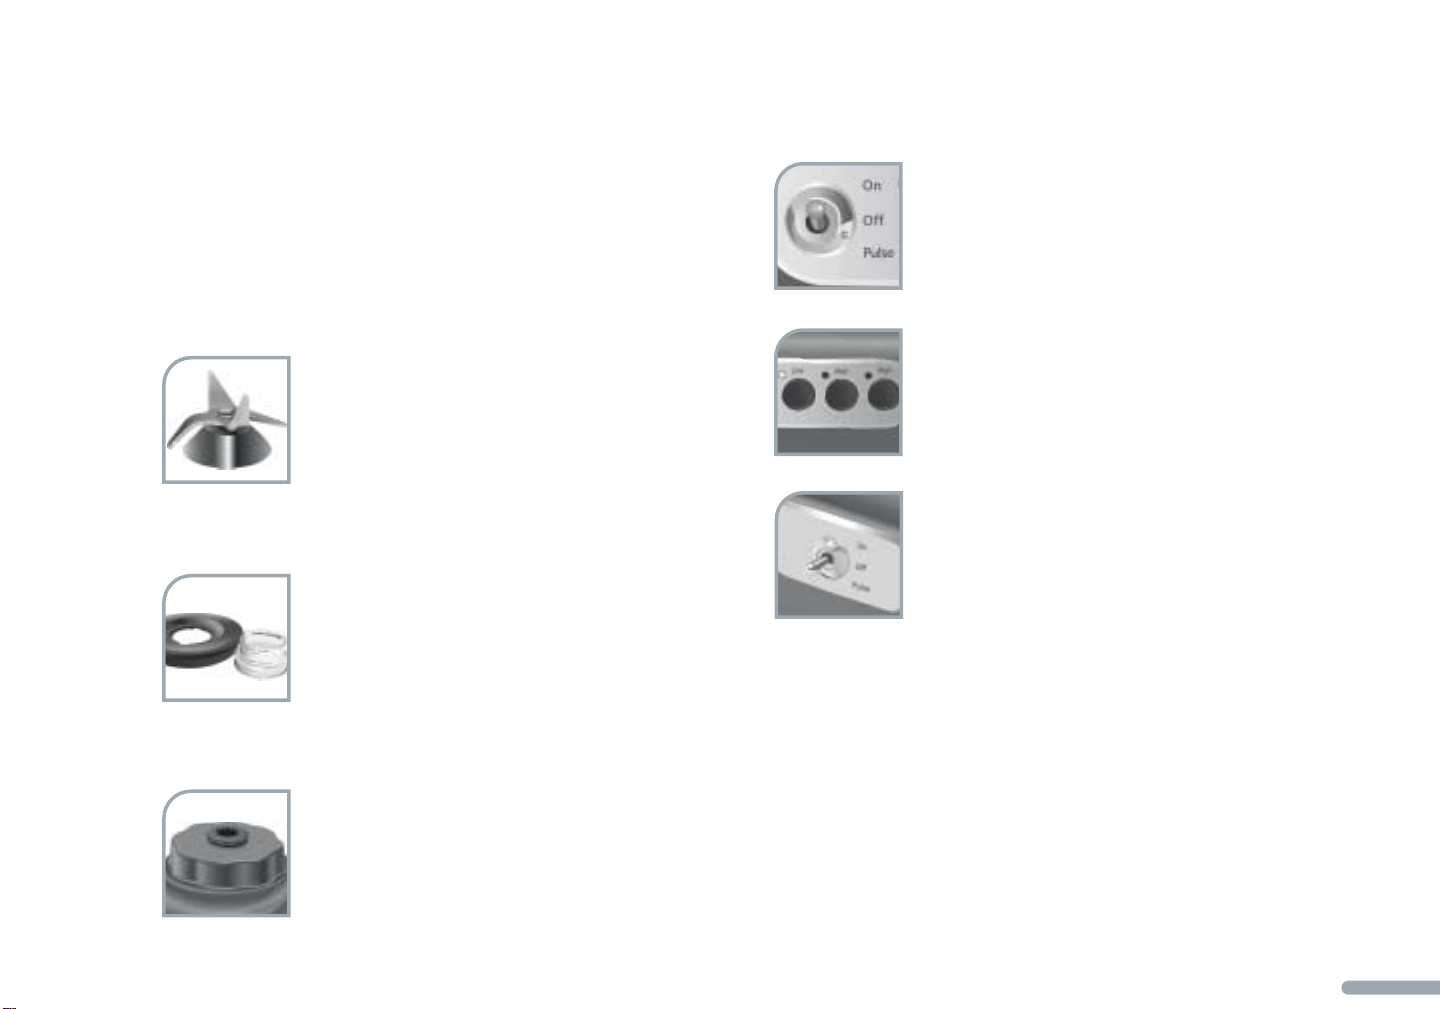
Patented One-Piece Blade
Extra-thick, corrosion-resistant stainless steel blade
has sharpened edges and high blade angles for
extreme performance and long life. The blade is
specially balanced to reduce vibration and minimize
bearing wear. The all stainless steel blade assembly includes ball
bearings for maximum efficiency and durability.
Jar Lid with Removable 2 oz. (60 ml)
Ingredient Cap
Jar lid provides a strong seal, yet is easy to
remove. The lid’s convenient ingredient cap makes
adding ingredients to the blender easy. With 1 and
2 oz. (30 and 60 ml) volume lines, the cap doubles as a handy
measuring cup.
Scalloped Inner Jar Collar and Base
The jar can be conveniently placed in any of
8 different positions on the base. The scalloped
design provides an incredibly stable and
secure coupling.
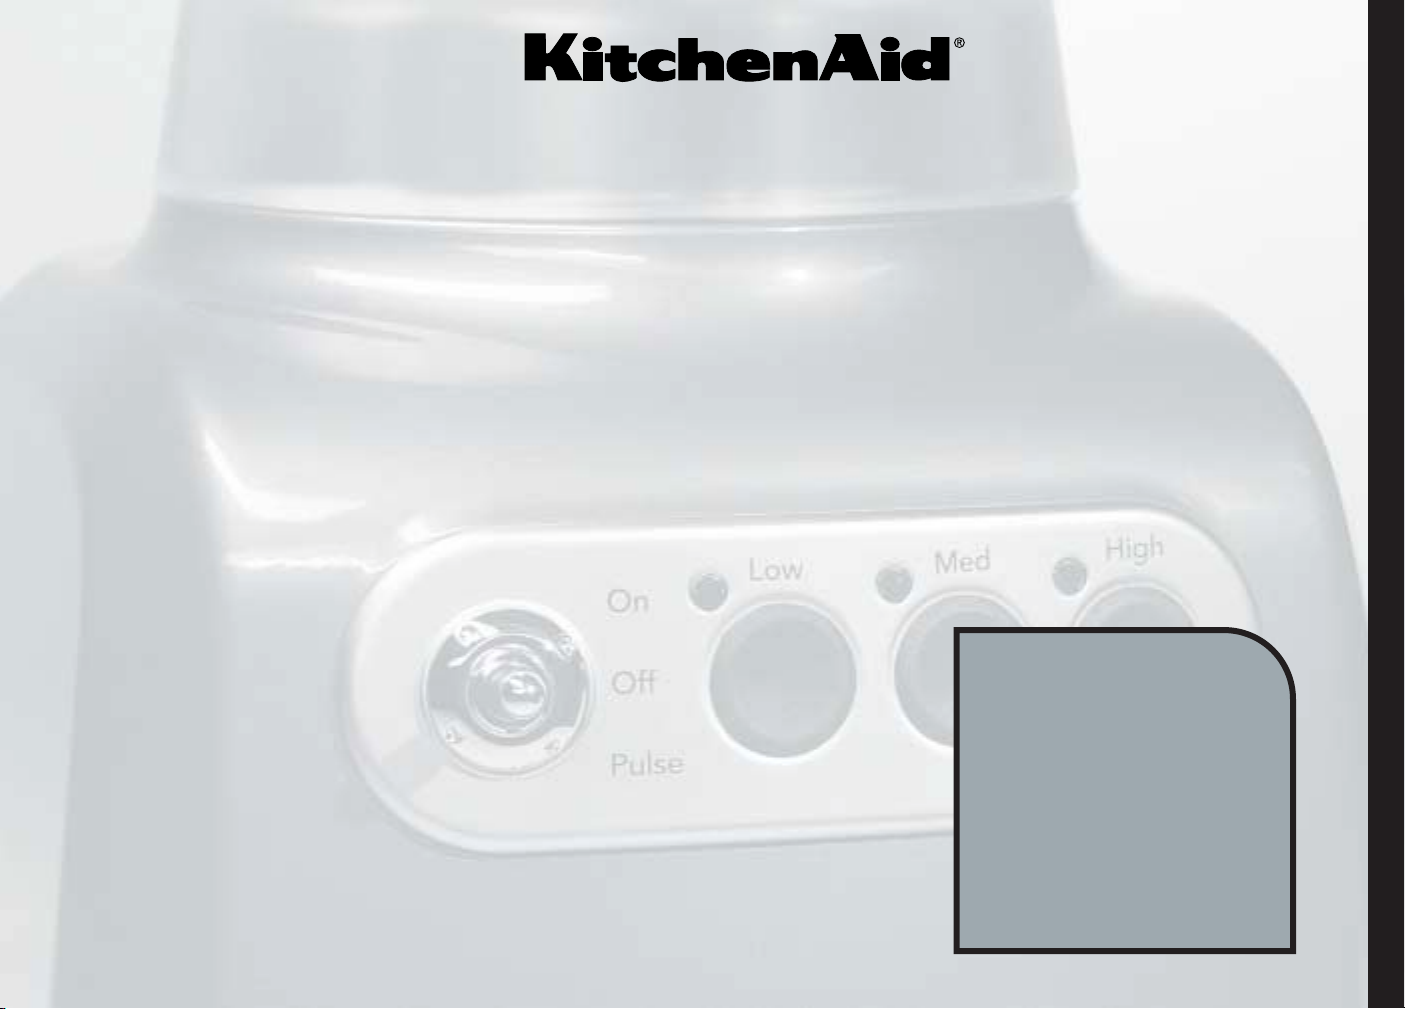
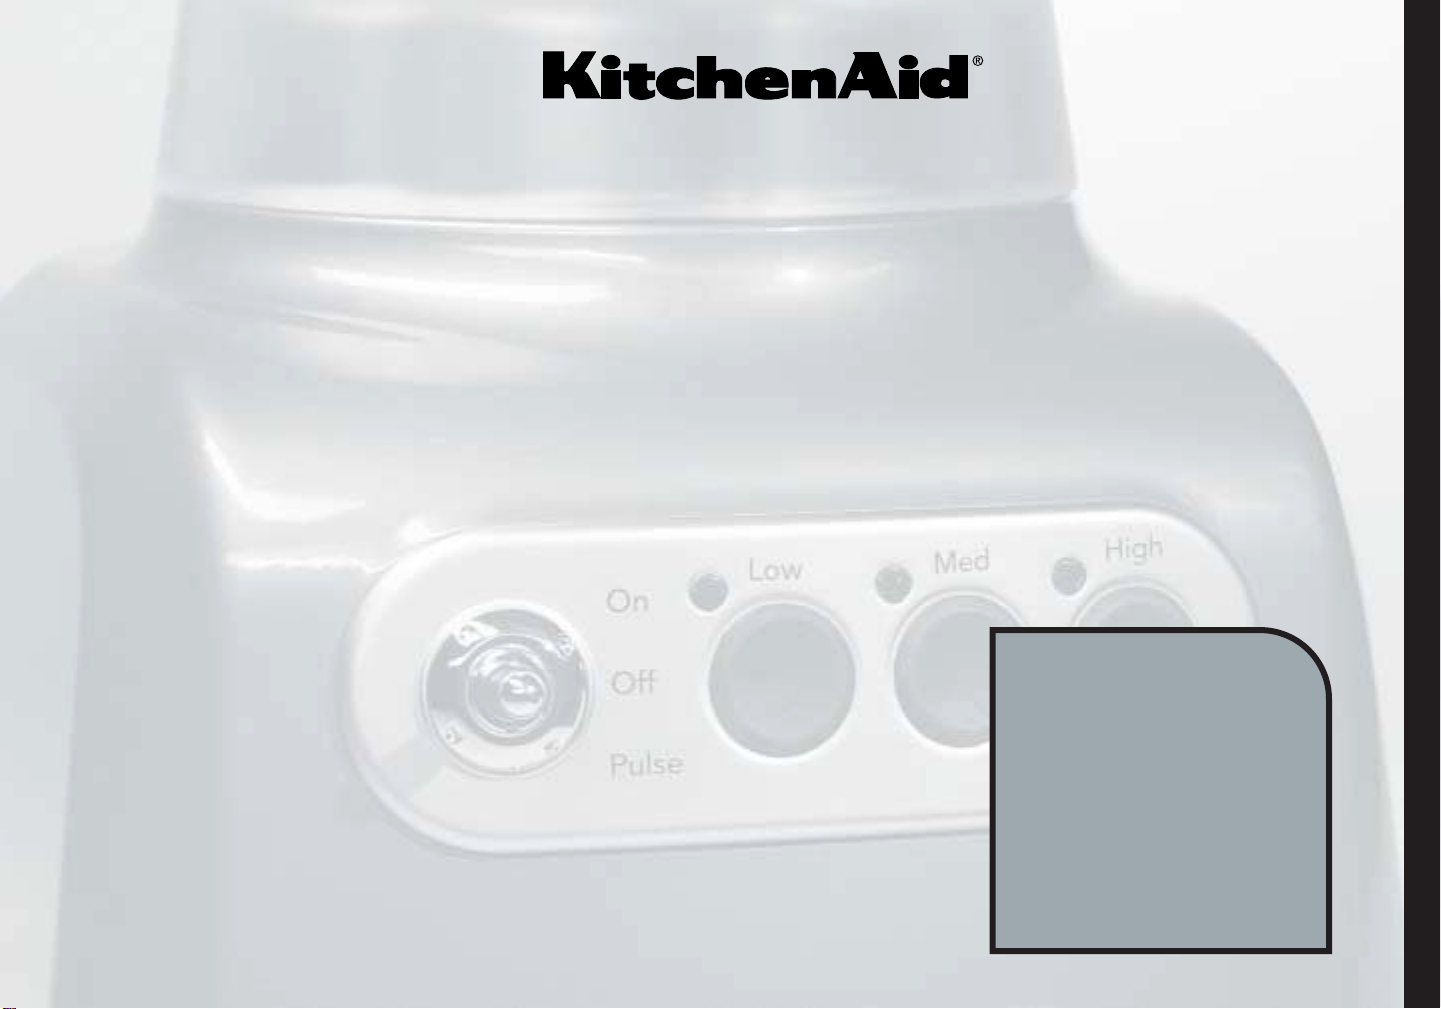
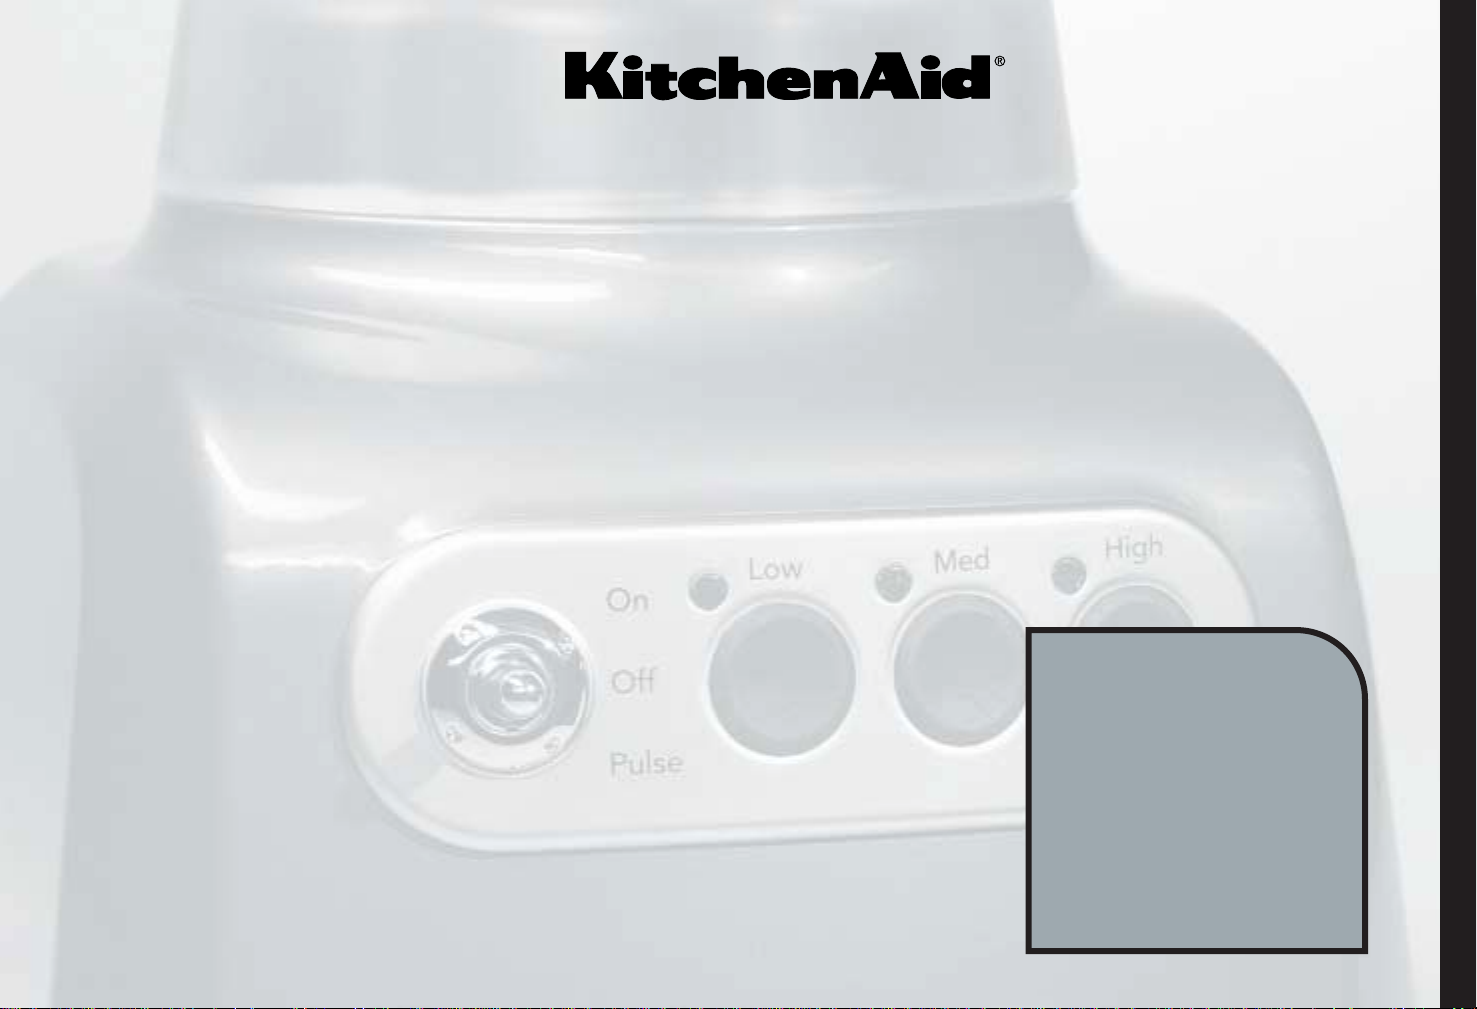
On/Off/Pulse Switch
Heavy-duty toggle switch turns the blender on and
off. Blender can be pulsed by pressing the switch
down momentarily. When pulsed, the blender
operates at low speed for maximum control.
Speed Selection Buttons (Chef’s Blender only)
Low, Medium, and High speeds provide versatility
for every culinary task, from puréeing sauces and
soups to blending frozen drinks. Indicator lights
show the speed selected.
Single Speed Operation (Bar Blender only)
The Bar Blender’s single speed is optimized for
quickly blending frozen drinks and crushing ice. To
produce similar results with the Chef’s Blender, use
the High speed setting.
One-Step Operation
Move the on/off/pulse switch to “On” or “Pulse”, and the blender
starts immediately. The Chef’s Blender automatically starts at the
Low speed setting; the Bar Blender will operate at high speed in
the “On” position or low speed in the “Pulse” position. To start
the Chef’s Blender at the Medium or High speed settings, turn on
the blender while pressing the desired speed selection button.
Continued…

12
Step Start®Feature and Mixing Sensor
Blender automatically starts at a slow speed to minimize
splattering, then quickly steps up to the selected speed. The
electronic mixing sensor adjusts power automatically when
blending to compensate for light or heavy ingredients.
Overload, Jam, Thermal, and Power-On Safeguards
If the blender is jammed, overloaded, or overheated, special
electronic controls will shut off the unit to prevent damage. The
power-on safeguard will prevent the blender from starting if it is
plugged-in with the on/off/pulse switch in the “On” position.
Under Base Cord Wrap
Wrap keeps excess cord out of sight and out of the way.
Easy-to-Clean Design
The smooth base and round power cord are easy to wipe clean.
The jar and lid are dishwasher-safe. The blade assembly does not
need to be removed from the jar for cleaning.
MODEL 4KPCB348 & 4KPCB148
BLENDER FEATURES
USING THE PRO LINE
™
SERIES
BLENDER
Before First Use
Before using the blender for the first time, wash the blender
jar, lid, and ingredient cap in hot soapy water, then rinse and
dry. These parts can also be washed in the top or bottom rack
of a dishwasher.
Operating the Blender
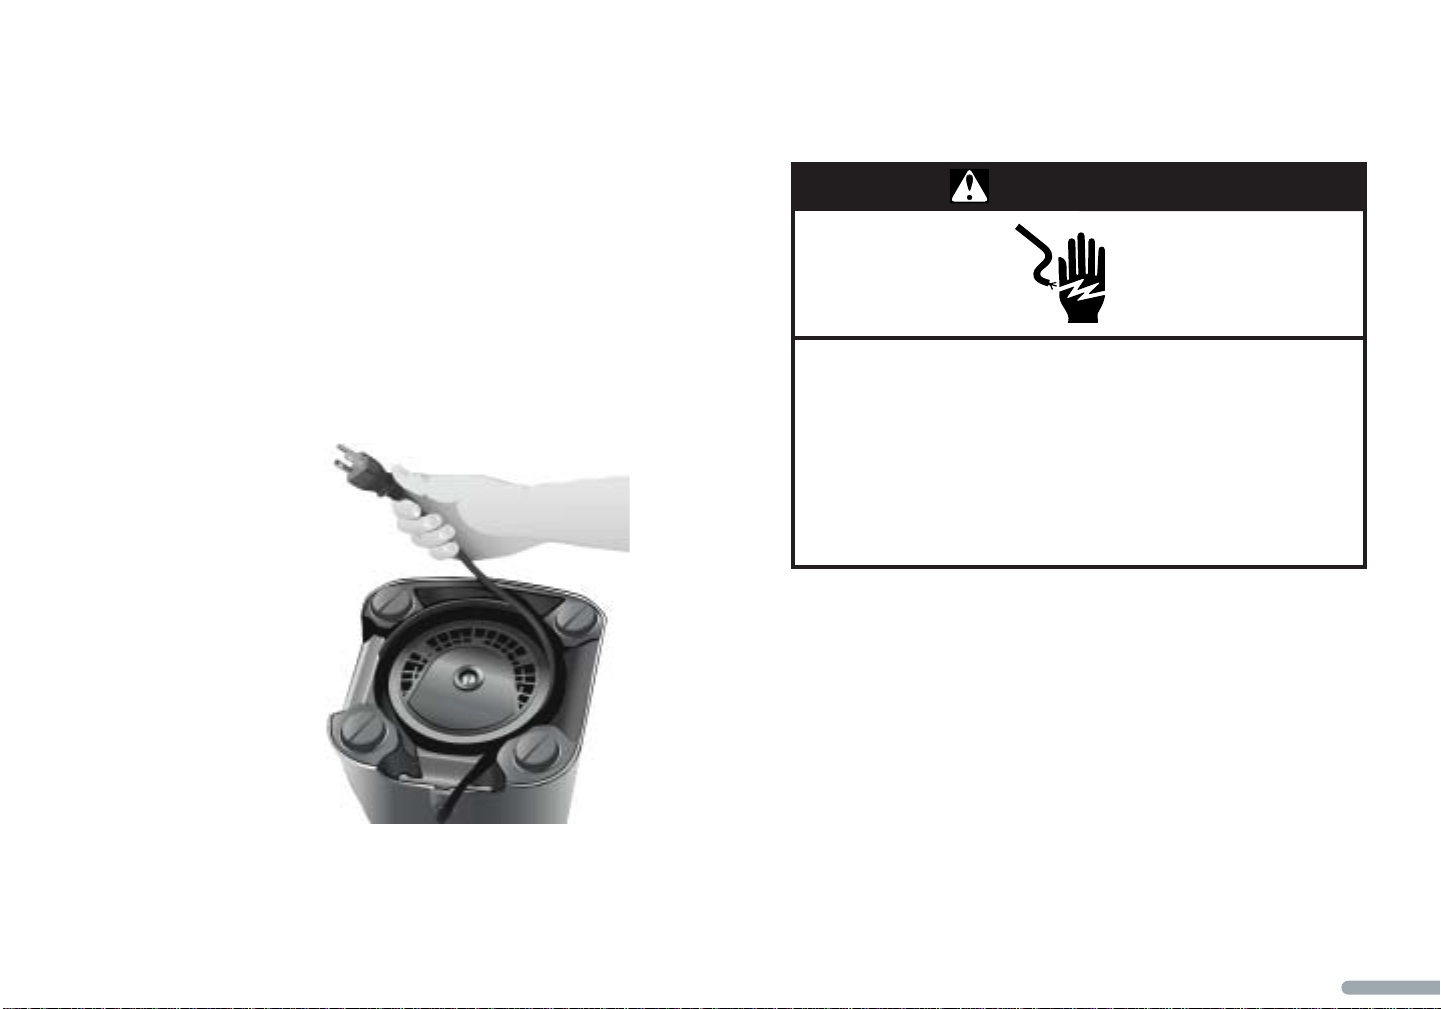
1. Uncoil the power cord from the storage area on the bottom of
the blender base.
2. Make certain the On/Off/Pulse Switch is in the “Off” position.
3. Plug the power cord into a grounded 3 prong outlet.
FEATURES AND
OPERATION
13
Continued…
WARNING
Electrical Shock Hazard
Plug into a grounded 3 prong outlet.
Do not remove ground prong.
Do not use an adapter.
Do not use an extension cord.
Failure to follow these instructions can result in death,
fire, or electrical shock.
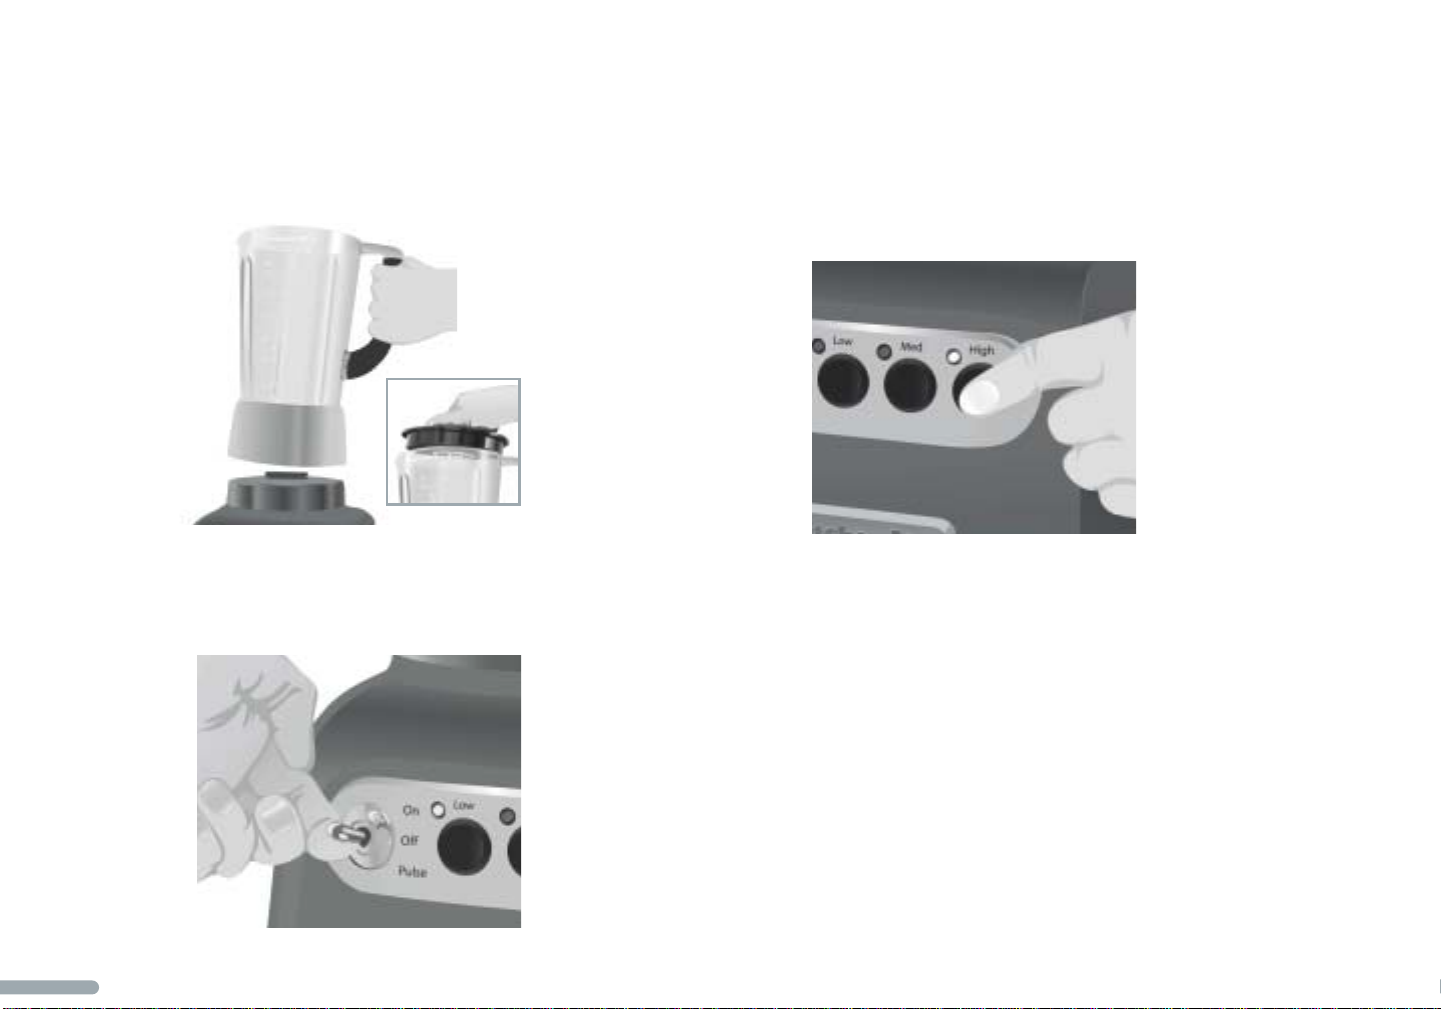
4. Place the jar on the blender base and add the desired
ingredients. Place the lid on the blender jar.
5. Move the On/Off/Pulse Switch to the “On” position to begin
blending. The Chef’s Blender will automatically start at the Low
speed setting.* The Bar Blender will run at high speed.
6. Select other speeds on the Chef’s Blender by pushing the
appropriate Speed Selection Button. The indicator lights will
show the current speed selected.
7. To stop blending, move the On/Off/Pulse Switch to the
“Off” position.
USING THE PRO LINE
™
SERIES
BLENDER
*
To start the Chef’s Blender at the Medium (Med) or High speed settings, move the
On/Off/Pulse Switch to the “On” position while pressing the desired Speed
Selection Button.
14

15
Continued…
Using the Pulse Feature
To pulse the ingredients in the blender, move the On/Off/Pulse
Switch to the “Pulse” position and hold it for the desired length
of time. The switch will instantly return to the “Off” position
when released and the blender will stop. When pulsed, the
blender operates at low speed for maximum control. The Pulse
feature is great for blending jobs which require a delicate touch.
Using the Ingredient Cap
Ingredients can be added to the blender by removing the
ingredient cap from the lid. To remove, rotate the cap
counter-clockwise 1⁄2 turn and lift. Featuring 1 and 2 oz.
(30 and 60 ml) volume lines, the cap can be used as a
convenient measuring cup.
NOTE: When operating the blender at higher speeds, with a full
jar, or with hot contents, stop blender before adding ingredients.
Overload, Jam, and Thermal Safeguards
The electronic controls of the blender will automatically shut off
the unit when:
• The blender becomes overloaded due to a too-heavy
ingredient mixture.
• The blender blades are jammed and will not rotate.
• The motor becomes overheated.
Please refer to the troubleshooting section on page 23 for more
information.
Power-On Safeguard
If the blender is plugged in with the On/Off/Pulse Switch in the
“On” position, the blender will not start. Please refer to the
troubleshooting section on page 24 for more information.
FEATURES AND
OPERATION

16
Speed Control Guide
NOTE: The Bar Blender runs at the equivalent of High speed in
the “On” position and Low speed in the “Pulse” position.
Cheesecake ...........................................................High
Chopped fruit .......................................................Low or Pulse
Chopped ice..........................................................Low or Pulse
Chopped vegetables..............................................Low
Crushed/shaved ice................................................Any Speed
Fruit juice from frozen concentrate........................Low or Pulse
Fruit-based drink...................................................High
Grated hard cheese...............................................High
Gravy (to remove lumps) .......................................Low
Ice cream/frozen yogurt/sherbet based drink .........High
Mousse.................................................................High
Pancake or waffle batter .......................................Med or Pulse
Puréed cooked vegetables .....................................Med or High
Puréed fruit...........................................................Med or High
Smooth ricotta or cottage cheese..........................Med or Pulse
Streusel or crumb topping.....................................Low
Superfine sugar.....................................................Low or Pulse
White sauce..........................................................Low
USING THE PRO LINE
™
SERIES
BLENDER
Blending Tip
Ice can be crushed or shaved at any speed. Process up to one
standard ice cube tray or 12 to 14 standard ice cubes at a time.
No liquid needs to be added for processing.

FEATURES AND
OPERATION
17
PRO LINE™ SERIES BLENDER
OPERATING TIPS
Keep the lid on the blender jar while blending. Do not remove the blender jar from
the base while the blender is running.
1
3
Thorough blending usually requires only a few seconds of operation. Be careful not to
over-process foods.
5
Stop the blender and unplug before using utensils in the blender jar. Do not use metal
utensils – they can scratch the jar or damage the blade.
2
Add food to the blender jar in larger quantities than you would with other blenders –
you can add 3 to 4 cups (750 ml to 1 liter) at a time versus 1 cup (250 ml) portions.
4
When chopping dry ingredients, make sure the blender jar, lid, and blade are
completely dry.
6
Continued…
Remove the center ingredient cap before blending warm or hot liquids, and blend using
the Low speed or Pulse setting. Increase speed if necessary. Cool hot foods, if possible,
before blending.

18
With foods that tend to stick to the jar, use the Pulse feature.
7
For many ingredient mixtures, start the blending process at the Low speed setting to combine
the ingredients thoroughly, then increase to a higher speed if necessary.
9
PRO LINE™ SERIES BLENDER
OPERATING TIPS
Blend at the High speed setting if you’re making beverages using large amounts of
ice. For smaller quantities, use the Medium (Med) or Pulse setting.
8
The ingredient cap can be removed and liquid or ice added to the Chef’s Blender at the
Low speed setting. When operating the blender at higher speeds, with a full jar, or
with hot contents, stop the blender before adding ingredients.
10
Blenders are not suitable for beating egg whites, kneading yeast doughs, or mashing
potatoes. Visit KitchenAid.ca to see the complete collection of KitchenAid®products,
including Stand Mixers and Food Processors. You’ll also find additional recipes.
11

FEATURES AND
OPERATION
19
Speeds listed are for the Chef’s Blender. The Bar Blender runs at
the equivalent of High speed in the “On” position and Low speed
in the “Pulse” position.
Reconstitute Frozen Juice
For a 6 or 12-oz. (180 or 360-ml) can of frozen orange juice
concentrate, combine the juice and the correct amount of water
in the blender jar. Cover and blend at the Low or Pulse speed
setting until thoroughly combined, about 10 to 15 seconds.
Make Cookie and Graham Cracker Crumbs
Break larger cookies into pieces about 11⁄2 inches (3.75 cm) in
diameter. Use smaller cookies as is. Place in blender jar. Cover and
pulse the blender a few times (about 3 seconds each time) until
the desired consistency is reached. Use the crumbs to make a
quick topping for frozen yogurt, pudding, or a fruit compote. To
make a finer crumb for pie and dessert crusts, pulse a total of
about 20 to 30 seconds, or until desired consistency is reached.
Make Cracker or Bread Crumbs
Follow the procedure for cookies and graham crackers. Use to top
or as an ingredient in main dish casseroles and vegetable dishes.
Chop Fruits and Vegetables
Place 2 cups (500 ml) of fruit or vegetable chunks in blender jar.
Cover and pulse the blender a few times (about 2 to 3 seconds
each time) until the desired consistency is reached.
Purée Fruits
Place 2 cups (500 ml) of canned or cooked fruit in blender jar.
Add 2 to 4 tablespoons (30 to 60 ml) of fruit juice or water per
cup of fruit. Cover and blend at the Medium (Med) or Pulse
speed setting about 5 to 10 seconds.
Purée Vegetables
Place 2 cups (500 ml) of canned or cooked vegetables in blender
jar. Add 2 to 4 tablespoons (30 to 60 ml) of broth, water, or milk
per cup of vegetables. Cover and blend at the Medium (Med) or
Pulse speed setting about 10 to 20 seconds.
Purée or Finely Chop Meats
Place cooked, cubed, tender meat in blender jar. Add 2 to
4 tablespoons (30 to 60 ml) of broth, water, or milk per cup of
meat. Cover and blend on the Low speed setting 10 seconds. Stop
and scrape the sides of the blender jar. Cover and blend on the
Medium (Med) or Pulse speed setting 10 to 20 seconds longer.
FOOD PREP TIPS
Continued…

Purée Cottage Cheese or Ricotta Cheese
Place cottage cheese or ricotta cheese in blender jar. Cover and
blend at the Medium (Med) or Pulse speed setting until smooth,
about 15 to 25 seconds. If necessary, add 1 tablespoon (15 ml)
of skim milk per cup of cottage cheese. Use as a base for lowfat
dips and spreads.
Combine Liquid Ingredients for Baked Goods
Pour liquid ingredients into blender jar. Cover and blend at the
High speed setting until well mixed, about 1 minute. Pour liquid
mixture over dry ingredients and stir well.
Take Lumps Out of Gravy
If sauce or gravy becomes lumpy, place in blender jar. Place lid
on jar, remove center ingredient cap, and blend at the Low or
Pulse speed setting until smooth, about 5 to 10 seconds. Reheat
if necessary.
Combine Flour and Liquid for Thickening
Place flour and liquid in blender jar. Cover and blend at the Low
speed setting until smooth, about 3 to 5 seconds.
Prepare White Sauce
Place milk, flour, and salt, if desired, in blender jar. Cover and
blend at the Low speed setting until well mixed, about 3 to
5 seconds. Pour into saucepan, add other ingredients, heat, and
stir until thickened.
Prepare Pancake or Waffle Batter from Mix
Place mix and other ingredients in blender jar. Cover and blend at
the Medium (Med) or Pulse speed setting until well mixed – about
10 to 20 seconds; scrape sides of blender jar, if necessary.
Grate Hard Cheese
Bring cheese to room temperature. Cut cheese into 1⁄2 to 1-inch
(13 to 25 mm) cubes. Place 2 to 3 oz. (57 to 85 g) cheese in the
blender jar. Cover and blend at the High speed setting about 15 to
20 seconds.
Make Oatmeal for a Baby
Place uncooked rolled oats in blender jar. Pulse the blender
about 5 to 10 seconds, or until very finely chopped. Place in
saucepan with liquid, and cook as usual.
2020
FOOD PREP TIPS

21
Make Baby Food from Adult Food
Place prepared adult food in blender jar. Cover and blend at the
Low speed setting about 10 seconds. Then blend at the Medium
(Med) or Pulse speed setting about 10 to 30 seconds, or until
desired texture is reached.
Make Superfine Sugar
Place 1 cup (250 ml) of sugar in blender jar. Cover and blend at
the Low or Pulse speed setting for 8 to 10 seconds. Use to
sweeten cold liquids, such as frozen blender drinks, because it
dissolves almost immediately. May substitute cup for cup with
granulated sugar.
FEATURES AND
OPERATION

22
CARE AND CLEANING
• Clean the blender thoroughly after every use.
• Do not immerse the blender base or cord in water.
• Do not use abrasive cleansers or scouring pads.
To clean the blade assembly, place the jar on the blender
base, fill halfway with warm – not hot – water, and add
1 or 2 drops of dishwashing liquid. Place the lid on the jar and
run the blender for 15 seconds at the Low (or Pulse) speed
setting. Remove the blender jar and empty contents. Rinse the
blade assembly with warm water until clean.
Wash the blender jar, jar lid, and ingredient cap in warm
soapy water, then rinse and dry thoroughly. These parts
can also be washed in the top or bottom rack of a dishwasher.
The blade assembly does not need to be removed from the jar
for cleaning.
Unplug the blender before cleaning the base and cord.
Wipe the blender base and cord with a warm, sudsy cloth;
wipe clean with a damp cloth and dry with a soft cloth.
For storage, the cord can be coiled into the cord-wrap on the
bottom of the base.
1
2
3
4

FEATURES AND
OPERATION
23
TROUBLESHOOTING
• If the blender does not operate when switched on:
– Check to see if the blender is plugged into a grounded
3 prong outlet. If it is, unplug the blender, then plug it into
the same outlet again. If the blender still does not work,
check the fuse or circuit breaker on the electrical circuit the
blender is connected to and make sure the circuit is closed.
– The blender may be jammed or overheated. Move the
On/Off/Pulse Switch to the “Off” position and refer to the
troubleshooting instructions in the remainder of this section.
• If the blender stops while blending:
– The blender may be jammed. If a foreign object or blender
ingredients jam the blades, the blender will shut off to
prevent damage to the motor. Move the On/Off/Pulse
Switch to the “Off” position to reset the blender. Remove
the jar from the base and free the blades by breaking-up
or removing the contents at the bottom of the jar.
On the Chef’s Blender, the high speed
indicator light will flash when the
blender is jammed or overheated.
– The blender may be overheated. If the motor exceeds a certain
temperature, the thermal safeguard will engage to prevent
damage. This may happen when blending multiple jars of
heavy ingredients for a prolonged period. Move the
On/Off/Pulse Switch to the “Off” position. The thermal
safeguard will prevent the blender from running until it is cool
enough to operate safely. Let the blender cool for 30 minutes,
then resume blending. If the blender does not start, move the
On/Off/Pulse Switch back to the “Off” position and let the
blender cool for an additional 30 minutes.
On the Chef’s Blender, the high speed
indicator light will flash when the
blender is overheated or jammed.
– The blender may be overloaded. If the blender slows
excessively when blending heavy ingredients, it will shut
off to prevent damage. Move the On/Off/Pulse Switch to
the “Off” position to reset the blender. Remove the jar
from the base and divide the jar contents into smaller
batches. Adding liquid to the jar may also reduce the load
on the blender.
On the Chef’s Blender, the low speed
indicator light will flash when the
blender is overloaded.
Continued…

24
• If the blender is plugged in with the On/Off/Pulse Switch
in the “On” position:
– The power-on safeguard will engage and the blender will not
start. To reset the blender, move the On/Off/Pulse Switch to
the “Off” position. The blender will now operate normally.
On the Chef’s Blender, all three speed
indicator lights will flash when the
power-on safeguard is engaged.
If the problem cannot be fixed with the steps in this section,
see the KitchenAid Canada Warranty and Service section on
page 71.*
* Do not return the Blender to the retailer – they do not provide service.
TROUBLESHOOTING
25
BLENDER
RECIPES
P RO L INE™S ERIES
BLENDER RECIPES
Cocktails & Dessert Drinks.................26
Hot Drinks........................................39
Smoothies ........................................41
Dips & Spreads.................................47
Sauces & Dressings...........................54
Soups...............................................60
Pancakes & Waffles...........................66
Blender Recipe
Section Contents

26
11⁄4 cups (310 ml) brandy*
1
1
⁄4 cups (310 ml) dark crème
de cacao*
5 cups (1.25 liter) vanilla
ice cream
*For thicker drink, reduce
brandy and crème de cacao to
1 cup (250 ml) each.
CHEF’S BLENDER
Place ingredients in blender jar. Cover and blend at High about 10 seconds, or until blended.
BAR BLENDER
Follow directions for Chef’s Blender. The Bar Blender runs at the equivalent of High speed
in the “On” position.
Yield: 8 servings (3⁄4 cup [175 ml] per serving).
Per Serving: About 410 cal, 3 g pro, 37 g carb, 9 g total fat, 6 g sat fat,
35 mg chol, 70 mg sod.
BRANDY ALEXANDER

27
BLENDER RECIPES
1 cup (250 ml) milk
3
⁄
4 cup (175 ml) caramel
drink syrup
1
⁄2 cup (125 ml) cold water
1
⁄2 cup (125 ml) Irish whiskey
2 tablespoons (30 ml) instant
coffee granules
cups (625–875 ml) ice cubes
CHEF’S BLENDER
Place all ingredients except ice cubes in blender jar. Add ice cubes to bring liquid level to
41⁄2 cups (1.13 liters). Cover and blend at High 5 to 10 seconds, or until smooth.
BAR BLENDER
Follow directions for Chef’s Blender. The Bar Blender runs at the equivalent of High speed
in the “On” position.
Yield: 6 servings (1 cup [250 ml] per serving).
Per Serving: About 150 cal, 1 g pro, 23 g carb, 1 g total fat, 0.5 g sat fat,
5 mg chol, 30 mg sod.
CARAMEL IRISH COFFEE FROTH
21⁄
2 –3
1
⁄
2

28
1 cup (250 ml) milk
3 pasteurized eggs
1
⁄
3 cup (75 ml) sugar
1
⁄2 teaspoon (2 ml) nutmeg,
if desired
1
⁄
8 teaspoon (0.5 ml) salt
1
⁄2 cup (125 ml) brandy or rum
5 cups (1.25 liters) vanilla
ice cream
1
⁄2 teaspoon (125 ml) vanilla
CHEF’S BLENDER
In small saucepan over medium heat, heat milk until very hot but not boiling, stirring often.
Meanwhile, place eggs, sugar, nutmeg, if desired, and salt in blender jar. Blend at Low
8 to 10 seconds. Remove jar lid ingredient cap. With blender running at Low, slowly pour
heated milk through opening in jar lid; blend 5 to 8 seconds, or until mixed. Add brandy.
Chill in covered blender jar at least 1 hour.
Add ice cream and vanilla to milk mixture. Blend at High about 10 seconds, or until smooth.
BAR BLENDER
Prepare milk as directed for Chef’s Blender. Meanwhile, place eggs, sugar, nutmeg, if
desired, and salt in blender jar. Blend at On about 5 seconds. Remove jar lid ingredient cap.
With blender running at On, slowly pour heated milk through opening in jar lid; blend 3 to
5 seconds, or until mixed. Add brandy. Continue with Chef’s Blender directions.
Yield: 6 servings (1 cup [250 ml] per serving).
Per Serving: About 370 cal, 8 g pro, 40 g carb, 15 g total fat, 9 g sat fat,
160 mg chol, 190 mg sod.
EGG NOG SHAKE

29
BLENDER RECIPES
11⁄4
cups (310 ml) rum
1
⁄
4 cup (60 ml) fresh lime juice
1
⁄
2 cup (125 ml) superfine sugar
(see tips on page 21)
1 tablespoon (15 ml) grated
lime peel
6 cups (1.5 liters) ice cubes
FROZEN DAIQUIRI
CHEF’S BLENDER
Place ingredients in blender jar. Cover and blend at High 10 to 15 seconds, or until slushy.
BAR BLENDER
Follow directions for Chef’s Blender. The Bar Blender runs at the equivalent of High speed
in the “On” position.
Yield: 6 servings (1 cup [250 ml] per serving).
Per Serving: About 180 cal, 0 g pro, 18 g carb, 0 g total fat, 0 g sat fat,
0 mg chol, 5 mg sod.
VARIATION: FROZEN
STRAWBERRY BASIL DAIQUIRI
Replace lime peel with 2 tablespoons
(30 ml) chopped fresh basil; substitute
3 cups (750 ml) fresh strawberries or
frozen unsweetened (partially thawed)
strawberries for 11⁄2 cups (375 ml) ice
cubes. Follow directions above.
Yield: 6 servings (1 cup [250 ml] per serving).
Per Serving: About 200 cal, 1 g pro,
23 g carb, 0 g total fat, 0 g sat fat,
0 mg chol, 5 mg sod.
VARIATION: FROZEN PEACH
DAIQUIRI
Omit lime peel; substitute 3 cups (750 ml)
fresh peaches or frozen unsweetened
(partially thawed) peaches for 11⁄2 cups
(375 ml) ice cubes. Follow directions above.
Yield: 6 servings (1 cup [250 ml] per serving).
Per Serving: About 220 cal, 1 g pro,
27 g carb, 0 g total fat, 0 g sat fat,
0 mg chol, 0 mg sod.

30
1 cup (250 ml) milk
1
⁄2 cup (125 ml) coffee-flavoured
liqueur
1
⁄
2 cup (125 ml) vodka
2 teaspoons (10 ml) instant
coffee granules
cups (375–500 ml) ice cubes
2 cups (500 ml) vanilla
ice cream
FROZEN WHITE RUSSIAN
CHEF’S BLENDER
Place all ingredients except ice cubes and ice cream in blender jar. Add ice to bring liquid
level to 3 cups (750 ml). Cover and blend at High 10 seconds. Add ice cream. Cover and
blend at High about 5 seconds, or until smooth.
BAR BLENDER
Follow directions for Chef’s Blender. The Bar Blender runs at the equivalent of High speed
in the “On” position.
Yield: 5 servings (1 cup [250 ml] per serving).
Per Serving: About 280 cal, 4 g pro, 28 g carb, 7 g total fat, 4 g sat fat,
25 mg chol, 70 mg sod.
VARIATION: FROZEN DARK RUSSIAN
Substitute chocolate ice cream for vanilla ice cream.
Yield: 5 servings (1 cup [250 ml] per serving).
Per Serving: About 290 cal, 4 g pro, 31 g carb, 7 g total fat, 4 g sat fat,
20 mg chol, 70 mg sod.
11⁄2 –2

31
BLENDER RECIPES
1can (11.5 – 12 oz.)
(345–360 g) frozen cranberry
juice cocktail concentrate
1 large seedless orange, peeled
and sectioned
1 cup (250 ml) vodka
1teaspoon (5 ml) grated
orange peel
6 cups (1.5 liters) ice cubes
CHEF’S BLENDER
Place ingredients in blender jar. Cover and blend at High 15 to 20 seconds, or until slushy.
BAR BLENDER
Follow directions for Chef’s Blender. The Bar Blender runs at the equivalent of High speed
in the “On” position.
Yield: 6 servings (1 cup [250 ml] per serving).
Per Serving: About 220 cal, 0 g pro, 33 g carb, 0 g total fat, 0 g sat fat,
0 mg chol, 10 mg sod.
HARD CRANBERRY ORANGE BREEZE

32
1 ripe mango, peeled, seeded,
and cut into chunks
(about 1–1
1
⁄2 cups)
(250–375 ml)
1 cup (250 ml) peach or apricot
brandy or peach liqueur
cups (250–375 ml) ice cubes
1 cup (250 ml) mango or
peach sorbet
CHEF’S BLENDER
Place all ingredients except sorbet in blender jar. Cover and blend at High 10 to 20 seconds,
or until smooth. Add sorbet. Cover and blend at High 5 to 10 seconds, or until smooth.
BAR BLENDER
Follow directions for Chef’s Blender. The Bar Blender runs at the equivalent of High speed
in the “On” position.
Yield: 4 servings (1 cup [250 ml] per serving).
Per Serving: About 230 cal, 0 g pro, 24 g carb, 0 g total fat, 0 g sat fat,
0 mg chol, 0 mg sod.
MANGO PEACH FLIP
11⁄2 –2

33
BLENDER RECIPES
1 cup (250 ml) tequila
1
⁄
4 cup (60 ml) orange-flavoured
liqueur
1 cup (250 ml) fresh lime juice
1 cup (250 ml) superfine sugar
(see tips on page 21)
1–2 teaspoons (5–10 ml) grated
lime peel
6 cups (1.5 liters) ice cubes
CHEF’S BLENDER
Place ingredients in blender jar. Cover and blend at High 15 to 20 seconds, or until slushy.
BAR BLENDER
Follow directions for Chef’s Blender. The Bar Blender runs at the equivalent of High speed
in the “On” position.
Yield: 6 servings (1 cup [250 ml] per serving).
Per Serving: About 250 cal, 0 g pro, 41 g carb, 0 g total fat, 0 g sat fat,
0 mg chol, 5 mg sod.
MARGARITA
VARIATION: STRAWBERRY
MARGARITA
Add 2 cups (500 ml) fresh strawberries in
place of 11⁄2 cups (375 ml) ice cubes; follow
directions above.
Yield: 6 servings (1 cup [250 ml] per serving).
Per Serving: About 260 cal, 0 g pro,
44 g carb, 0 g total fat, 0 g sat fat,
0 mg chol, 5 mg sod.
VARIATION: PEACH MARGARITA
Add 2 cups (500 ml) sliced fresh peaches
in place of 11⁄
2 cups (375 ml) ice cubes;
follow directions above.
Yield: 6 servings (1 cup [250 ml] per serving).
Per Serving: About 270 cal, 1 g pro,
47 g carb, 0 g total fat, 0 g sat fat,
0 mg chol, 5 mg sod.

34
1
⁄4 cup (60 ml) packed fresh
mint leaves
1
⁄2
cup (125 ml) sugar
1
⁄
2 cup (125 ml) fresh lime juice
3
⁄4 cup (175 ml) water
1 cup (250 ml) white rum
cups (875 ml–1 liter) ice cubes
2–3 cups (500–750 ml) lemon-lime
flavoured carbonated
beverage, chilled
6 fresh mint sprigs
CHEF’S BLENDER
Place mint leaves, sugar, lime juice, water, and rum in blender jar. Cover and blend at Low
10 seconds. Strain lime mixture, and discard mint leaves; return lime mixture to blender jar.
Add ice cubes to bring liquid level to 4 cups (1 liter). Cover and blend at High 8 to
10 seconds, or until slushy.
Divide among six 8 oz. (250 ml) glasses. Add carbonated beverage to fill glasses. Garnish
with mint sprigs.
BAR BLENDER
Place mint leaves, sugar, lime juice, water, and rum in blender jar. Cover and blend at Pulse
10 seconds. Strain lime mixture, and discard mint leaves; return lime mixture to blender jar.
Add ice cubes to bring liquid level to 4 cups (1 liter). Cover and blend at On for 8 to 10
seconds, or until slushy. Continue with Chef’s Blender directions.
Yield: 6 servings (1 cup [250 ml] per serving).
Per Serving: About 200 cal, 0 g pro, 27 g carb, 0 g total fat, 0 g sat fat,
0 mg chol, 15 mg sod.
MOJITO SLUSH
31⁄2 –4

35
BLENDER RECIPES
1 cup (250 ml) peeled cut-up
fresh white or yellow peaches
or frozen, thawed peaches
tablespoons (30–45 ml)
orange juice*
1 tablespoon (15 ml) sugar
1 bottle (750 ml) brut
champagne or sparkling white
wine, chilled
* Fresh peaches will require
larger amount of juice.
CHEF’S BLENDER
Place peaches, orange juice, and sugar in blender jar. Cover and blend at Medium 15 to
20 seconds, or until smooth.
Divide peach mixture among 8 champagne flutes (about 11⁄
2 [23 ml] tablespoons per glass).
Fill with champagne; stir gently.
BAR BLENDER
Place peaches, orange juice, and sugar in blender jar. Cover and blend at Pulse 3 to
4 times, 4 to 6 seconds each time. Continue with Chef’s Blender directions.
Yield: 8 servings (1⁄2 cup [125 ml] per serving).
Per Serving: About 80 cal, 0 g pro, 5 g carb, 0 g total fat, 0 g sat fat,
0 mg chol, 0 mg sod.
PEACH BELLINI
2–3

36
11⁄4 cups (310 ml) green crème
de menthe*
1
1
⁄4
cups (310 ml) white crème
de cacao*
5 cups (1.25 liter) vanilla
ice cream
1 teaspoon (5 ml) cracked
black pepper
* For thicker drink, reduce crème
de menthe and crème de cacao
to 1 cup (250 ml) each.
CHEF’S BLENDER
Place ingredients in blender jar. Cover and blend at High about 10 seconds, or until blended.
BAR BLENDER
Follow directions for Chef’s Blender. The Bar Blender runs at the equivalent of High speed
in the “On” position.
Yield: 8 servings (3⁄4 cup [175 ml] per serving).
Per Serving: About 480 cal, 3 g pro, 55 g carb, 9 g total fat, 6 g sat fat,
35 mg chol, 70 mg sod.
PEPPERED GRASSHOPPER

37
BLENDER RECIPES
1 box (10 oz.) (300 g) frozen
raspberries in light syrup,
thawed
1tablespoon (15 ml)
orange juice
1 bottle (750 ml) brut
champagne or sparkling white
wine, chilled
1
⁄4 cup (60 ml) fresh raspberries
CHEF’S BLENDER
Place thawed raspberries and orange juice in blender jar. Cover and blend at Low 5 to
10 seconds, or until smooth.
Strain seeds from raspberry mixture. Divide raspberry mixture among 8 champagne flutes
(about 11⁄
2 tablespoons [23 ml] per glass). Fill with champagne; stir gently. Garnish with
fresh raspberries.
BAR BLENDER
Place thawed raspberries and orange juice in blender jar. Cover and blend at Pulse 2 times,
3 to 5 seconds each time. Continue with Chef’s Blender directions.
Yield: 8 servings (1⁄2 cup [125 ml] per serving).
Per Serving: About 120 cal, 0 g pro, 15 g carb, 0 g total fat, 0 g sat fat,
0 mg chol, 15 mg sod.
RASPBERRY BELLINI

38
1 cup (250 ml) cold water
cup (125–175 ml) dark rum
2 tablespoons (30 ml) sugar
2 teaspoons (10 ml) instant
coffee granules
cups (375–625 ml) ice cubes
3 cups (750 ml) chocolate
ice cream
CHEF’S BLENDER
Place water, rum, sugar, and coffee granules in blender jar. Add ice to bring liquid level to
3 cups (750 ml). Cover and blend at High about 15 seconds, or until smooth. Add ice
cream. Cover and blend at High 5 to 8 seconds, or until smooth.
BAR BLENDER
Follow directions for Chef’s Blender. The Bar Blender runs at the equivalent of High speed
in the “On” position.
Yield: 5 servings (1 cup [250 ml] per serving).
Per Serving: About 250 cal, 3 g pro, 27 g carb, 9 g total fat, 5 g sat fat,
25 mg chol, 65 mg sod.
RUM MOCHA FREEZE
11⁄2 –21⁄2
1
⁄2 –3⁄4

39
BLENDER RECIPES
21⁄2
cups (625 ml) milk
2 cups (500 ml) water
1 package (8 oz.) (240 g)
bittersweet or semisweet
chocolate, cut into pieces
3
⁄4 teaspoon (3 ml) cinnamon
1
⁄4 cup (60 ml) instant espresso
or coffee granules
1
⁄
2 teaspoon (2 ml) vanilla
1
⁄8 teaspoon (0.5 ml) salt
CHEF’S BLENDER
In small saucepan over medium heat, heat milk and water until very hot but not boiling,
stirring often.
Meanwhile, place chocolate, cinnamon, espresso, vanilla, and salt in blender jar. Add half
of heated milk mixture. Cover and blend at Low 10 to 15 seconds. Add remaining milk
mixture. Cover and blend at Low 10 to 15 seconds, or until smooth.
BAR BLENDER
Heat milk and water as directed for Chef’s Blender. Meanwhile, place chocolate, cinnamon,
espresso, vanilla, and salt in blender jar. Add half of heated milk mixture. Cover and blend
at Pulse 10 to 15 seconds. Add remaining milk mixture. Cover and blend at Pulse 10 to
15 seconds, or until smooth.
Yield: 5 servings (1 cup [250 ml] per serving).
Per Serving: About 300 cal, 8 g pro, 30 g carb, 22 g total fat, 11 g sat fat,
10 mg chol, 125 mg sod.
HOT MEXICAN MOCHA

40
1
⁄2 cup (125 ml) sugar
2 ounces (60 ml) semisweet
chocolate, cut into chunks
1 ounce (30 ml) bittersweet
chocolate, cut into chunks
1 ounce (30 ml) white baking
chocolate, cut into chunks
4 cups (1 liter) milk, heated to
simmering, divided
1 teaspoon (5 ml) vanilla
CHEF’S BLENDER
Place sugar, semisweet chocolate, bittersweet chocolate, white chocolate, 2 cups (500 ml)
milk, and vanilla in blender jar. Cover and blend at Low 10 seconds. Add remaining 2 cups
(500 ml) milk. Cover and blend at Low 5 to 10 seconds, or until smooth.
BAR BLENDER
Follow directions for Chef’s Blender, but use Pulse instead of Low. The Bar Blender runs at
the equivalent of Low speed in the “Pulse” position.
Yield: 4 servings (about 1 cup [250 ml] per serving).
Per Serving: About 370 cal, 10 g pro, 53 g carb, 15 g total fat, 9 g sat fat,
20 mg chol, 130 mg sod.
TRIPLE CHOCOLATE HOT CHOCOLATE

41
BLENDER RECIPES
2 cups (500 ml) fresh berries
(blackberries, strawberries
and/or raspberries)*
1 cup (250 ml) milk*
tablespoons (45– 60 ml)
malt powder
4 cups (1 liter) vanilla ice cream,
slightly softened
* For a chunkier malt, reserve
1
⁄
3 cup (75 ml) berries to Pulse
in at end of blending. For a
thinner malt, add an additional
1
⁄4 to 1⁄2 (60 to 125 ml) cup
milk to finished malt. Blend at
High 5 to 8 seconds, or until
mixed.
CHEF’S BLENDER
Place berries, milk, and malt in blender jar. Cover and blend at Pulse about 5 seconds, or
until blended (some chunks may remain). Add ice cream. Cover and blend at High 20 to
25 seconds, or until desired consistency; scrape sides of blender jar if necessary.
BAR BLENDER
Follow directions for Chef’s Blender. The Bar Blender runs at the equivalent of High speed
in the “On” position.
Yield: 6 servings (1 cup [250 ml] per serving).
Per Serving: About 270 cal, 6 g pro, 37 g carb, 12 g total fat, 7 g sat fat,
45 mg chol, 140 mg sod.
FRESH BERRY MALT
3–4

42
1 fresh mango, peeled, seeded,
and cut into chunks*
1 cup (250 ml) milk
teaspoon (1–2 ml)
ground ginger
1
⁄2 teaspoon (2 ml) vanilla
3 cups (750 ml) vanilla
ice cream
* For a chunkier shake, reserve
1
⁄3
cup (75 ml) mango to Pulse
in at end of blending.
CHEF’S BLENDER
Place mango, milk, ginger, and vanilla in blender jar. Cover and blend at Pulse about
5 seconds, or until mixed (some chunks may remain). Add ice cream. Cover and blend at
High 20 to 25 seconds, or until desired consistency.
BAR BLENDER
Follow directions for Chef’s Blender. The Bar Blender runs at the equivalent of High speed
in the “On” position.
Yield: 4 servings (1 cup [250 ml] per serving).
Per Serving: About 270 cal, 5 g pro, 35 g carb, 12 g total fat, 7 g sat fat,
50 mg chol, 110 mg sod.
VARIATION: BANANA GINGER SHAKE
Substitute 11⁄
2 cups (375 ml) sliced bananas for mango.
Yield: 4 servings (1 cup [250 ml] per serving).
Per Serving: About 290 cal, 6 g pro, 40 g carb, 12 g total fat, 8 g sat fat,
50 mg chol, 110 mg sod.
MANGO GINGER SHAKE
1
⁄4 –1⁄2

43
BLENDER RECIPES
2 cups (500 ml) milk
3 large or 4 medium bananas,
broken into quarters
1
⁄2 cup (125 ml) wheat germ
1
⁄2 cup (125 ml) peanut butter
2
1
⁄2 cups (625 ml) frozen nonfat
vanilla yogurt
CHEF’S BLENDER
Place milk, bananas, wheat germ, and peanut butter in blender jar. Cover and blend at High
5 seconds. Add frozen yogurt. Cover and blend at High 5 to 10 seconds, or until smooth.
BAR BLENDER
Follow directions for Chef’s Blender. The Bar Blender runs at the equivalent of High speed
in the “On” position.
Yield: 6 servings (1 cup [250 ml] per serving).
Per Serving: About 350 cal, 16 g pro, 44 g carb, 14 g total fat, 3.5 g sat fat,
10 mg chol, 200 mg sod.
PEANUT BUTTER-BANANA
BREAKFAST SHAKE

44
3cups (750 ml) orange juice
1 box (10 oz.) (300 g) frozen
raspberries in light syrup,
slightly thawed and broken
into chunks
3 large or 4 medium bananas,
broken into quarters
CHEF’S BLENDER
Place ingredients in blender jar. Cover and blend at High 8 to 10 seconds, or until smooth.
BAR BLENDER
Follow directions for Chef’s Blender. The Bar Blender runs at the equivalent of High speed
in the “On” position.
Yield: 6 servings (1 cup [250 ml] per serving).
Per Serving: About 170 cal, 2 g pro, 42 g carb, 0 g total fat, 0 g sat fat,
0 mg chol, 0 mg sod.
RASPBERRY BREAKFAST REFRESHER

45
BLENDER RECIPES
3 cups (750 ml) cubed
cantaloupe (about
1
⁄2 of a
large melon)
1 cup (250 ml) half-and-half
or milk
1
⁄2 teaspoon (2 ml) ginger
4 cups (1 liter) orange sherbet
CHEF’S BLENDER
Place ingredients in blender jar. Blend at High 15 to 20 seconds, or until smooth; scrape
sides of blender jar if necessary.
BAR BLENDER
Follow directions for Chef’s Blender. The Bar Blender runs at the equivalent of High speed
in the “On” position.
Yield: 6 servings (1 cup [250 ml] per serving).
Per Serving: About 220 cal, 3 g pro, 39 g carb, 7 g total fat, 4 g sat fat,
20 mg chol, 70 mg sod.
VARIATION: LIME SHERBET MELON COOLER
Substitute honeydew melon for cantaloupe; substitute lime or lemon sherbet for
orange sherbet.
Yield: 6 servings (1 cup [250 ml] per serving).
Per Serving: About 220 cal, 3 g pro, 40 g carb, 7 g total fat, 4 g sat fat,
20 mg chol, 70 mg sod.
SHERBET MELON COOLER

46
21⁄2 cups (625 ml) milk
3 large or 4 medium bananas,
broken into quarters
1
⁄
4 cup (60 ml) frozen orange
juice concentrate
1 box (10 oz.) (300 g) frozen
strawberries in light syrup,
slightly thawed and broken
into chunks
CHEF’S BLENDER
Place ingredients in blender jar. Cover and blend at High 5 to 10 seconds, or until smooth.
BAR BLENDER
Follow directions for Chef’s Blender. The Bar Blender runs at the equivalent of High speed
in the “On” position.
Yield: 6 servings (1 cup [250 ml] per serving).
Per Serving: About 170 cal, 4 g pro, 35 g carb, 2.5 g total fat, 1.5 g sat fat,
10 mg chol, 55 mg sod.
STRAWBERRY-BANANA SMOOTHIE

47
BLENDER RECIPES
2 tablespoons (30 ml) olive oil
1 large clove garlic, cut into
quarters
1
⁄2 cup (125 ml) tahini (stir well
before measuring)
1
⁄3 cup (75 ml) lemon juice
1
⁄2 teaspoon (2 ml) salt
Chopped fresh parsley,
if desired
Olives, if desired
CHEF’S BLENDER
Prick 1 medium (about 1 lb. [480 g]) eggplant all over with fork. Place in baking pan, and
bake at 400º F (205º C) for 40 to 50 minutes, or until soft. Cool 10 minutes; peel and cut
into chunks, reserving any liquid. Place baked eggplant with liquid and remaining ingredients
except parsley and olives in blender jar. Cover and blend at High about 10 seconds, or until
smooth; scrape sides of jar if necessary. Garnish with parsley and olives, if desired.
BAR BLENDER
Follow directions for Chef’s Blender. The Bar Blender runs at the equivalent of High speed
in the “On” position.
Yield: 16 servings (2 tablespoons [30 ml] per serving).
Per Serving: About 70 cal, 2 g pro, 4 g carb, 6 g total fat, 1 g sat fat,
0 mg chol, 75 mg sod.
BABA GHANOUSH

48
CHEF’S BLENDER
Place ingredients in blender jar. Cover and blend at Medium 15 to 20 seconds, or until
combined.
BAR BLENDER
Place ingredients in blender jar. Cover and blend at On for 10 to 15 seconds, or until
combined.
Yield: 16 servings (2 tablespoons (30 ml) per serving).
Per Serving: About 90 cal, 2 g pro, 4 g carb, 8 g total fat, 5 g sat fat,
25 mg chol, 50 mg sod.
CARDAMOM-ORANGE FRUIT DIP
1 cup (250 ml) sour cream
tablespoons (30–45 ml) sugar
1 package (8 oz.) (240 g) cream
cheese, cut into 1-inch
(2.5 cm) pieces
1
⁄3 cup (75 ml) fresh orange juice
teaspoons (7–10 ml) grated
orange peel
1
⁄2
teaspoon (2 ml) ground
cardamom*
* Cardamom may be replaced
with
1
⁄4 teaspoon (1ml) nutmeg.
2–3
1
1
⁄2 –2

49
BLENDER RECIPES
1
⁄2
medium shallot, cut into halves
2 tablespoons (30 ml)
fresh parsley
1
⁄4 cup (60 ml) butter, softened
4 ounces (125 ml) light
cream cheese
2 cans (6 oz. each) (180 g)
crabmeat, drained
1
⁄
8 teaspoon (0.5 ml) salt
Hot pepper sauce
CHEF’S BLENDER
Place shallot and parsley in blender jar. Cover and blend at Pulse 2 times, 5 seconds each
time; scrape sides of blender jar if necessary. Add butter, cream cheese, crabmeat, salt,
and a few drops of pepper sauce. Blend at Pulse 5 to 7 times, 3 to 5 seconds each time,
or until blended; scrape sides of blender jar each time. Refrigerate at least 1 hour to
combine flavours.
BAR BLENDER
Follow directions for Chef’s Blender.
Yield: 14 servings (2 tablespoons [30 ml] per serving).
Per Serving: About 70 cal, 5 g pro, 1 g carb, 5 g total fat, 3 g sat fat,
30 mg chol, 135 mg sod.
CRAB SPREAD

50
1 can (15 oz.) (450 g) garbanzo
beans, rinsed and drained
1
⁄4
cup (60 ml) water
2 tablespoons (30 ml) olive oil
1 large clove garlic, cut into
quarters
1
⁄2 cup (125 ml) tahini
(stir well before measuring)
1
⁄3 cup (75 ml) lemon juice
1
⁄2
teaspoon (2 ml) salt
Chopped fresh parsley,
if desired
Olives, if desired
CHEF’S BLENDER
Place all ingredients in blender jar except parsley and olives. Cover and blend at High 20 to
30 seconds, or until smooth; scrape sides of blender jar if necessary. Garnish with parsley
and olives, if desired.
BAR BLENDER
Follow directions for Chef’s Blender. The Bar Blender runs at the equivalent of High speed
in the “On” position.
Yield: 16 servings (2 tablespoons [30 ml] per serving).
Per Serving: About 90 cal, 3 g pro, 7 g carb, 6 g total fat, 1 g sat fat,
0 mg chol, 75 mg sod.
HUMMUS

51
BLENDER RECIPES
2 tablespoons (30 ml) water
1 jalapeno pepper, stem and
seeds removed and cut into
quarters
1 can (15 oz.) (450 g) black
beans, rinsed and drained
4 ounces (125 ml) light
cream cheese
1
⁄2 teaspoon (2 ml) cumin
1
⁄2 teaspoon (2 ml) salt
4 green onions, thinly sliced
1
⁄4 small red bell pepper, diced
1 cup (250 ml) finely shredded
Mexican cheese blend
1
⁄4 cup (60 ml) chopped fresh
cilantro, stems removed
CHEF’S BLENDER
Place water and jalapeno pepper in blender jar. Cover and blend at Medium 10 seconds;
scrape sides of blender jar. Add beans, cream cheese, cumin, and salt. Cover and blend at
Low about 20 seconds, or until smooth.
Spread in 9-inch (23 cm) pie plate or other shallow dish. Top evenly with remaining
ingredients in order given.
BAR BLENDER
Place water and jalapeno pepper in blender jar. Cover and blend at Pulse 2 times, 10 seconds
each time; scrape sides of jar. Add beans, cream cheese, cumin, and salt. Cover and blend at
Pulse about 20 seconds, or until smooth. Continue with Chef’s Blender directions.
Yield: 16 servings (2 tablespoons [30 ml] per serving).
Per Serving: About 80 cal, 4 g pro, 7 g carb, 4 g total fat, 2 g sat fat,
10 mg chol, 190 mg sod.
LAYERED MEXICAN DIP

52
1
⁄4 cup (60 ml) drained capers
1 large clove garlic
2 tablespoons (30 ml)
fresh parsley
1 tablespoon (15 ml) coarsely
chopped fresh basil leaves
1
1
⁄2 cups (375 ml) pitted
kalamata olives
1
⁄2 cup (125 ml) pitted ripe olives
1 tablespoon (15 ml) extra
virgin olive oil
1 tablespoon (15 ml) fresh
lemon juice
1 can (2 oz.) (60 g) anchovies,
rinsed and drained, if desired
Baguette slices, if desired
CHEF’S BLENDER
Place capers, garlic, parsley, and basil in blender jar. Cover and blend at Pulse 5 seconds, or
until chopped. Add remaining ingredients except baguette slices. Cover and blend at Pulse
3 times, 3 to 5 seconds each time, or until blended; scrape sides of blender jar if necessary.
Serve as spread with baguette, if desired.
BAR BLENDER
Follow directions for Chef’s Blender.
Yield: 12 servings (2 tablespoons [30 ml] per serving).
Per Serving: About 70 cal, 0 g pro, 2 g carb, 7 g total fat, 1 g sat fat,
0 mg chol, 430 mg sod.
MIXED OLIVE TAPENADE

53
BLENDER RECIPES
1 clove garlic, peeled
1 jar (7 oz.) (210 g) roasted red
peppers, well drained
4 ounces (125 ml) cream
cheese, cut into 1-inch
(2.5 cm) pieces and slightly
softened
1
⁄2 cup butter or margarine,
cut into 1-inch (2.5 cm) pieces
and slightly softened
3 tablespoons (45 ml) loosely
packed fresh basil leaves or
1
1
⁄2 teaspoons (7 ml) dry
basil leaves
1
⁄8 teaspoon (0.5 ml) cayenne
Baguette slices, if desired
Fresh vegetables, if desired
CHEF’S BLENDER
Place garlic in blender jar. Cover and blend at High 5 to 8 seconds. Add remaining
ingredients except bread and vegetables. Blend at High 10 to 15 seconds, or until
combined. Chill. Serve with baguette and/or fresh vegetables, if desired.
BAR BLENDER
Follow directions for Chef’s Blender. The Bar Blender runs at the equivalent of High speed
in the “On” position.
Yield: 12 servings (2 tablespoons [30 ml] per serving).
Per Serving: About 110 cal, 1 g pro, 1 g carb, 11 g total fat, 7 g sat fat,
30 mg chol, 90 mg sod.
EASY ROASTED
RED PEPPER BASIL SPREAD

54
1
⁄2 medium shallot, cut into
quarters
1 small clove garlic
1
⁄
2 cup (125 ml) sour cream*
1
⁄3 cup (75 ml) mayonnaise*
3 tablespoons (45 ml) milk
1
⁄2 teaspoon (2 ml) dry mustard
1
⁄4 teaspoon (1ml) salt
2 ounces (60 ml) blue cheese,
crumbled
*Light sour cream and/or light
mayonnaise may be substituted.
CHEF’S BLENDER
Place shallot and garlic in blender jar. Cover and blend at Low 3 seconds; scrape sides of
blender jar if necessary. Add remaining ingredients. Cover and blend at Medium about
10 seconds, or until combined.
BAR BLENDER
Place shallot and garlic in blender jar. Cover and blend at Pulse 2 times, 3 seconds each
time; scrape sides of blender jar if necessary. Add remaining ingredients. Blend at Pulse
2 times, about 5 seconds each time, or until combined.
Yield: 8 servings (2 tablespoons [30 ml] per serving).
Per Serving: About 130 cal, 2 g pro, 3 g carb, 13 g total fat, 4 g sat fat,
20 mg chol, 230 mg sod.
BLUE CHEESE DRESSING

55
BLENDER RECIPES
1 cup (250 ml) sour cream
tablespoons (30– 45 ml) sugar
1package (8 oz.) (240 g)
cream cheese, cut into 1-inch
(2.5 cm) pieces
1
⁄3 cup (75 ml) fresh orange juice
1
⁄4 cup (60 ml) milk
2 teaspoons (10 ml) grated
orange peel
3
⁄4 teaspoon (3 ml) ground
cardamom*
* Cardamom may be replaced
with
1
⁄4 teaspoon (1 ml) nutmeg.
CHEF’S BLENDER
Place ingredients in blender jar. Cover and blend at Medium 15 to 20 seconds, or until
combined. Serve over fresh fruit salad.
BAR BLENDER
Place ingredients in blender jar. Cover and blend at On for 10 to 15 seconds, or until
combined. Serve over fresh fruit salad.
Yield: 18 servings (2 tablespoons [30 ml] per serving).
Per Serving: About 80 cal, 2 g pro, 3 g carb, 7 g total fat, 4.5 g sat fat,
20 mg chol, 45 mg sod.
CARDAMOM-ORANGE
SALAD DRESSING
2–3

56
1 tomato, peeled and seeded
1 small chipotlé chile in
adobo sauce (from a 7 or
11-oz. can [210 or 330 g] )
1 teaspoon (5 ml) adobo sauce
1 garlic clove
1 tablespoon (15 ml) sugar
1
⁄4 teaspoon (1 ml) salt
1
⁄4 cup (60 ml) cider vinegar
1
⁄4 cup (60 ml) vegetable oil or
olive oil
1
⁄2 cup (125 ml) tomato juice
CHEF’S BLENDER
Place ingredients in blender jar. Cover and blend at Medium about 20 seconds, or
until smooth.
BAR BLENDER
Place ingredients in blender jar. Cover and blend at Pulse 2 times, 5 seconds each time.
Blend at On about 5 seconds, or until smooth.
Yield: 12 servings (2 tablespoons [30 ml] per serving).
Per Serving: About 50 cal, 0 g pro, 3 g carb, 4.5 g total fat, 1 g sat fat,
0 mg chol, 110 mg sod.
CHIPOTLÉ TOMATO DRESSING

57
BLENDER RECIPES
1
⁄2
cup (125 ml) fresh or frozen
unsweetened raspberries,
thawed
1 tablespoon (15 ml) sugar
2 tablespoons (30 ml)
balsamic vinegar
1
⁄4 cup (60 ml) water
1
⁄2
cup (125 ml) vegetable oil
CHEF’S BLENDER
Place ingredients in blender jar. Cover and blend at Low 15 to 20 seconds, or until smooth.
BAR BLENDER
Place ingredients in blender jar. Cover and blend at Pulse 2 times, 8 to 10 seconds each
time, or until smooth.
Yield: 8 servings (2 tablespoons [30 ml] per serving).
Per Serving: About 130 cal, 0 g pro, 3 g carb, 14 g total fat, 2.5 g sat fat,
0 mg chol, 0 mg sod.
RASPBERRY BALSAMIC VINAIGRETTE

58
1 pound (480 g) tomatillos,
husked and rinsed
1
⁄2
medium onion,
cut into quarters
2 serrano or jalapeno peppers,
cut into halves and seeded
2 cloves garlic, peeled
3 tablespoons (45 ml) loosely
packed fresh cilantro leaves
1
⁄2 teaspoon (2 ml) grated lime
peel, if desired
1 tablespoon (15 ml) fresh
lime juice
3
⁄4 teaspoon (3 ml) salt
CHEF’S BLENDER
Place tomatillos, onion, peppers, and garlic in shallow baking pan. Broil 4 to 6 inches
(10–15 cm) from heat for 10 to 15 minutes, or until blackened, turning occasionally. Place
in blender jar, including any pan juices. Add remaining ingredients. Cover and blend at Pulse
2 to 3 times, about 3 seconds each time, or until desired consistency. Serve warm or chilled.
BAR BLENDER
Follow directions for Chef’s Blender.
Yield: 12 servings (2 tablespoons [30 ml] per serving).
Per Serving: About 15 cal, 0 g pro, 3 g carb, 0 g total fat, 0 g sat fat,
0 mg chol, 150 mg sod.
ROASTED TOMATILLO SALSA

59
BLENDER RECIPES
1
⁄3
cup (75 ml) chopped walnuts
or pine nuts
2 cloves garlic, peeled
1
3
⁄4 cups (425 ml) loosely packed
fresh parsley leaves
1 cup (250 ml) loosely packed
fresh basil leaves
3 tablespoons (45 ml) loosely
packed fresh cilantro leaves,
if desired
3
⁄
4 cup (175 ml) shredded
Parmesan cheese
1 teaspoon (5 ml) fresh
lemon juice
1
⁄4 teaspoon (1 ml) salt
1
⁄2 cup (125 ml) extra virgin olive
oil, divided
Cooked pasta and/or
vegetables, if desired
CHEF’S BLENDER
On baking sheet, place walnuts in single layer. Bake at 375° F (190° C) for 4 to 7 minutes,
or until light brown and aromatic. Set aside.
Place garlic in blender jar. Cover and blend at High 3 to 5 seconds, or until chopped. Add
parsley, basil, cilantro, if desired, cheese, lemon juice, salt, 1⁄
4 cup (60 ml) oil, and walnuts.
Cover and blend at High 5 to 10 seconds, or until chopped; scrape sides of blender jar if
necessary. With blender running at High, slowly add remaining
1
⁄
4 cup (60 ml) olive oil
through opening in jar lid; blend 5 to 10 seconds, or until combined. If desired, serve
tossed with hot pasta and/or vegetables. Refrigerate or freeze leftovers.
BAR BLENDER
Follow directions for Chef’s Blender. The Bar Blender runs at the equivalent of High speed
in the “On” position.
Yield: About 7 servings (2 tablespoons [30 ml] per serving).
Per Serving: About 220 cal, 5 g pro, 2 g carb, 22 g total fat, 4 g sat fat,
5 mg chol, 230 mg sod.
THREE-HERB PESTO

60
4 cups (1 liter) reduced-sodium
chicken broth, chilled
1
⁄2
cup (125 ml) sour cream or
plain yogurt
1
⁄
4 cup (60 ml) fresh lime juice
2 medium ripe avocados,
peeled, pitted, and cut into
quarters
1 tablespoon (15 ml) fresh dill
or 1 teaspoon (5 ml) dried dill
1
⁄2 teaspoon (2 ml) salt
1
⁄4 teaspoon (1 ml) black pepper
CHEF’S BLENDER
Place ingredients in blender jar. Cover and blend at Low 20 to 25 seconds, or until smooth.
Refrigerate 2 to 3 hours, or until well chilled.
BAR BLENDER
Place ingredients in blender jar. Cover and blend at Pulse 2 times, about 10 seconds each
time, or until smooth. Refrigerate 2 to 3 hours, or until well chilled.
Yield: 6 servings (1 cup [250] per serving).
Per Serving: About 160 cal, 4 g pro, 8 g carb, 13 g total fat, 4.5 g sat fat,
15 mg chol, 280 mg sod.
AVOCADO LIME SOUP

61
BLENDER RECIPES
5 cups (1.25 liter) chicken
broth, divided
1
⁄4 teaspoon (1 ml) black pepper
4 cups (1 liter) diced russet
potatoes (peeled, if desired)
1 large leek, cut into halves
and washed
1
⁄4
cup (60 ml) butter or
margarine
1
⁄3 cup (75 ml) sliced onion
2 cups (500 ml) shredded sharp
Cheddar cheese, divided
CHEF’S BLENDER
In large saucepan over high heat, combine 21⁄2 cups (625 ml) broth, pepper, and potatoes.
Bring to a boil; reduce heat and simmer 10 to 15 minutes, or until potatoes are tender.
Meanwhile, slice white and light green portions of leek; discard tops. In large skillet over
medium heat, melt butter. Add leek and onion; cook and stir 3 to 5 minutes, or until
vegetables are soft. Set aside.
Place potato mixture in blender jar. Add 11⁄2 cups (375 ml) cheese. Cover and blend at Pulse
4 to 5 times, about 5 seconds each time, or until cheese is melted. Add leek mixture. Cover
and blend at High 5 to 8 seconds, or until desired consistency.
Return mixture to saucepan; add remaining 21⁄2 cups (625 ml) broth. Simmer until
thoroughly heated, stirring frequently. Divide remaining 1⁄2 cup (125 ml) cheese among
individual servings for garnish.
BAR BLENDER
Follow directions for Chef’s Blender. The Bar Blender runs at the equivalent of High speed
in the “On” position.
Yield: 7 servings (1 cup [250 ml] per serving).
Per Serving: About 320 cal, 12 g pro, 29 g carb, 18 g total fat, 11 g sat fat,
45 mg chol, 930 mg sod.
CHEDDAR POTATO LEEK SOUP

62
1 tablespoon (15 ml)
vegetable oil
1
⁄2
cup (125 ml) chopped onion
1 teaspoon (5 ml) curry powder
3 cups (750 ml) water
1
⁄
2 cup (125 ml) orange juice
4 cups (about 1 lb.) (480 g)
peeled and sliced carrots
2 teaspoons (10 ml) coarsely
chopped gingerroot
2 teaspoons (10 ml) sugar
1
1
⁄2 teaspoons (7 ml) salt
1 cup (250 ml) sour cream or
plain yogurt
Chopped cashews, if desired
CHEF’S BLENDER
Heat oil in large saucepan over medium-high heat. Add onion and curry powder; cook 1 to
2 minutes. Add remaining ingredients except sour cream and cashews. Bring to a boil.
Reduce heat and simmer, uncovered, 10 to 15 minutes, or until carrots are tender. Cool
5 minutes.
Pour half of carrot mixture into blender jar. Cover and blend at Low 5 seconds. Add
remaining carrot mixture. Cover and blend at Medium about 10 seconds, or until smooth.
Add sour cream. Cover and blend at Low about 5 seconds, or until combined.
Return to saucepan; simmer until thoroughly heated. Garnish with cashews, if desired.
BAR BLENDER
Prepare, cook, and cool as directed for Chef’s Blender. Pour half of carrot mixture into
blender jar. Cover and blend at Pulse 2 times, 3 seconds each time. Add remaining carrot
mixture. Cover and blend at On for 5 to 8 seconds, or until smooth. Add sour cream. Cover
and blend at Pulse 2 times, about 3 seconds each time, or until combined. Continue with
Chef’s Blender directions.
Yield: 5 servings (1 cup [250 ml] per serving).
Per Serving: About 190 cal, 3 g pro, 19 g carb, 13 g total fat, 6 g sat fat,
25 mg chol, 790 mg sod.
CURRIED CARROT SOUP

63
BLENDER RECIPES
2 cans (141⁄2
oz. each) (435 g)
peeled tomatoes
1 medium cucumber, peeled,
seeded, and cut into chunks
1 small onion, peeled and cut
into chunks
1 small green pepper, seeded
and cut into chunks
1
⁄4 cup (60 ml) loosely packed
fresh parsley, stems removed
1 clove garlic
3 tablespoons (45 ml) olive oil
3 tablespoons (45 ml)
red wine vinegar
1
1
⁄
2 cups (375 ml) tomato-
vegetable juice cocktail
3
⁄4 teaspoon (3 ml) salt
1
⁄8 teaspoon (0.5 ml)
black pepper
Hot pepper sauce, if desired
CHEF’S BLENDER
Place all ingredients except vegetable juice, salt, black pepper, and hot pepper sauce in
blender jar. Cover and blend at Medium 10 to 15 seconds, or until finely chopped.
Pour into large bowl. Stir in vegetable juice, salt, black pepper, and a few drops of hot
pepper sauce, if desired. Refrigerate 6 to 8 hours, or until well chilled.
BAR BLENDER
Place all ingredients except vegetable juice, salt, black pepper, and hot pepper sauce in
blender jar. Cover and blend at Pulse 3 times, 5 to 8 seconds each time. Blend at On for
about 10 seconds, or until finely chopped. Continue with Chef’s Blender directions.
Yield: 7 servings (1 cup [250 ml] per serving).
Per Serving: About 90 cal, 2 g pro, 9 g carb, 6 g total fat, 1 g sat fat,
0 mg chol, 600 mg sod.
GAZPACHO

64
1
⁄2 medium onion, cut into
1-inch (2.5 cm) pieces
1
⁄2
rib celery, cut into 1-inch
(2.5 cm) pieces
1
⁄
4 cup (60 ml) butter or
margarine
1
⁄4 cup (60 ml) all-purpose flour
1 can (14 oz.) (420 g)
chicken broth
1
⁄2 cup (125 ml) water
4 cups (1 liter) sliced fresh
button or shiitake mushrooms*
1 cup (250 ml) half-and-half
1
⁄
2 teaspoon (2 ml) dried
marjoram
1
⁄4 teaspoon (1 ml) salt
1
⁄8 teaspoon (0.5 ml) black pepper
cup (60–125 ml) dry sherry,
if desired
Sour cream, if desired
* For chunkier soup, reserve
1 cup (250 ml) mushrooms
to add to saucepan along
with half-and-half and
seasonings. Simmer until
mushrooms are tender.
CHEF’S BLENDER
Place onion and celery in blender. Cover and blend at Pulse 2 to 3 times, 3 seconds each
time. In large saucepan over medium-high heat, heat butter. Add onion mixture; cook,
uncovered, 3 to 5 minutes. Add flour; blend well. Stir in broth and water. Add mushrooms;
bring to a boil. Reduce heat and simmer, uncovered, until mushrooms are tender, about
10 to 15 minutes. Cool 5 minutes.
Pour cooled mushroom mixture into blender jar. Cover and blend at Pulse 3 to 4 times,
2 seconds each time. Return mixture to saucepan; add half-and half, marjoram, salt,
pepper, and sherry, if desired. Simmer until thoroughly heated. If desired, top individual
servings with dollop of sour cream.
BAR BLENDER
Follow directions for Chef’s Blender.
Yield: 5 servings (1 cup [250 ml] per serving).
Per Serving: About 200 cal, 5 g pro, 11 g carb, 16 g total fat, 9 g sat fat,
40 mg chol, 500 mg sod.
MUSHROOM SOUP
1
⁄4 –1⁄2

65
BLENDER RECIPES
1 large butternut squash (about
2
1
⁄2 lbs. [1.3 kg]), peeled,
seeded, and cut into 1
1
⁄2 -inch
(3.75 cm) pieces
2 medium carrots, peeled and cut
into
3
⁄4
-inch (2 cm) pieces
1large yellow onion, cut into
thin wedges
2 tablespoons (30 ml) vegetable oil
1
⁄4 cup (60 ml) butter or margarine
2 apples, peeled, cored,
and sliced
2 teaspoons (10 ml) finely
chopped gingerroot, if desired
2 tablespoons (30 ml)
brown sugar
2 tablespoons (30 ml)
balsamic vinegar
4 cups (1liter) chicken broth,
divided
teaspoon (1–2 ml)
cayenne pepper
1 cup (250 ml) whipping cream*
* One additional cup chicken
broth may be substituted for
whipping cream.
CHEF’S BLENDER
Place squash, carrots, and onion in 15x10-inch (38x25.5 cm) baking pan with sides. Drizzle
with oil; toss to coat. Bake at 425° F (220° C) for 1 to 11⁄2 hours, or until vegetables are very
tender, stirring occasionally.
Meanwhile, in large skillet over medium heat, melt butter. Add apples and gingerroot, if
desired; mix to coat. Cook about 15 minutes, or until apples begin to soften, stirring
frequently. Add brown sugar and vinegar; mix well. Reduce heat to medium-low, and cook
20 to 25 minutes, or until apples are very soft, stirring frequently. Add 1 cup (250 ml)
broth; cook and stir until browned bits are removed from skillet bottom. Add mixture to
roasted vegetables in baking pan, stirring to remove browned bits from pan bottom.
Place squash and apple mixture in blender jar. Add 1 cup (250 ml) broth and cayenne
pepper. Cover and blend at Medium 10 seconds. Increase speed to High; blend about
30 seconds, or until smooth.
Pour mixture into large saucepan. Add cream and remaining 2 cups (500 ml) broth.
Simmer until thoroughly heated, stirring frequently.
BAR BLENDER
Prepare and cook as directed for Chef’s Blender. Place squash and apple mixture in
blender jar. Add 1 cup (250 ml) broth and cayenne pepper. Cover and blend at Pulse
4 times, 5 seconds each time. Blend at On about 30 seconds, or until smooth. Continue
with Chef’s Blender directions.
Yield: 8 servings (1 cup [250 ml] per serving).
Per Serving: About 290 cal, 3 g pro, 26 g carb, 21 g total fat, 11 g sat fat,
55 mg chol, 530 mg sod.
ROASTED BUTTERNUT
AND APPLE SOUP
1
⁄4 –1⁄2

66
2 eggs
1
3
⁄4 cups (425 ml) milk
2 tablespoons (30 ml) sugar
2 tablespoons (30 ml)
vegetable oil
2 teaspoons (10 ml)
baking powder
1
⁄2 teaspoon (2 ml) salt
1
3
⁄4 cups (425 ml)
all-purpose flour
CHEF’S BLENDER
Place eggs, milk, sugar, and oil in blender jar. Cover and blend at Low 10 seconds. Add
remaining ingredients. Cover and blend at Medium about 10 seconds, or just until mixed;
scrape sides of blender jar if necessary.
Heat griddle to medium; pour batter onto griddle for individual pancakes. Cook until bubbles
form on surface and edges begin to dry. Turn; cook until underside is light golden brown.
BAR BLENDER
Place eggs, milk, sugar, and oil in blender jar. Cover and blend at On for 5 seconds. Add
remaining ingredients. Cover and blend at Pulse 3 times, about 3 seconds each time, or just
until mixed; scrape sides of blender jar if necessary. Continue with Chef’s Blender directions.
Yield: About 9 servings (two 4-inch [10 cm] pancakes per serving).
Per Serving: About 160 cal, 6 g pro, 23 g carb, 5 g total fat, 1.5 g sat fat,
50 mg chol, 260 mg sod.
BASIC PANCAKES

67
BLENDER RECIPES
2 eggs
1
3
⁄
4 cups (425 ml) milk
2 tablespoons (30 ml) sugar
1
⁄4 cup (60 ml) vegetable oil
2 teaspoons (10 ml)
baking powder
1
⁄2 teaspoon (2 ml) salt
2 cups (500 ml) all-purpose flour
CHEF’S BLENDER
Place eggs, milk, sugar, and oil in blender jar. Cover and blend at Low 10 seconds. Add
remaining ingredients. Cover and blend at Medium about 10 seconds, or just until mixed;
scrape sides of blender jar if necessary.
Bake in hot waffle iron until steaming stops and waffles are golden brown.
BAR BLENDER
Place eggs, milk, sugar, and oil in blender jar. Cover and blend at On for 5 seconds. Add
remaining ingredients. Cover and blend at Pulse 3 times, about 3 seconds each time, or just
until mixed; scrape sides of blender jar if necessary. Continue with Chef’s Blender directions.
Yield: About 6 servings (two 4-inch [10 cm] waffles per serving).
Per Serving: About 300 cal, 9 g pro, 38 g carb, 13 g total fat, 3 g sat fat,
75 mg chol, 390 mg sod.
BASIC WAFFLES

68
2 eggs
1
3
⁄4 cups (425 ml) buttermilk
2 tablespoons (30 ml) sugar
2 tablespoons (30 ml)
vegetable oil
2 teaspoons (10 ml)
baking powder
1
⁄2 teaspoon (2 ml) baking soda
1
⁄2 teaspoon (2 ml) salt
1
3
⁄4 cups (425 ml) all-purpose flour
CHEF’S BLENDER
Place eggs, buttermilk, sugar, and oil in blender jar. Cover and blend at Low 10 seconds.
Add remaining ingredients. Cover and blend at Medium about 10 seconds, or just until
mixed; scrape sides of blender jar if necessary.
Heat griddle to medium; pour batter onto griddle for individual pancakes. Cook until bubbles
form on surface and edges begin to dry. Turn; cook until underside is light golden brown.
BAR BLENDER
Place eggs, buttermilk, sugar, and oil in blender jar. Cover and blend at On for 5 seconds.
Add remaining ingredients. Cover and blend at Pulse 3 times, about 3 seconds each
time, or just until mixed; scrape sides of blender jar if necessary. Continue with Chef’s
Blender directions.
Yield: About 9 servings (two 4-inch [10 cm] pancakes per serving).
Per Serving: About 160 cal, 6 g pro, 23 g carb, 5 g total fat, 1.5 g sat fat,
50 mg chol, 260 mg sod.
BUTTERMILK PANCAKES

69
BLENDER RECIPES
2 eggs
1
1
⁄
2 cups (375 ml) buttermilk
2 tablespoons (30 ml)
vegetable oil
1
1
⁄4 cups (310 ml) all-purpose flour
1
⁄2 cup (125 ml) whole wheat flour
2 tablespoons (30 ml) sugar
2 teaspoons (10 ml)
baking powder
1 teaspoon (5 ml) baking soda
1
⁄2 teaspoon (2 ml) cinnamon
1
⁄2 teaspoon (2 ml) salt
1 cup (250 ml) rolled oats
1
⁄2 cup (125 ml) raisins
Maple syrup, if desired
Raisins, if desired
CHEF’S BLENDER
Place eggs in blender jar. Cover and blend at Low 3 to 5 seconds. Add buttermilk and oil.
Cover and blend at Medium 3 to 5 seconds, or until mixed. Add all-purpose flour, whole
wheat flour, sugar, baking powder, baking soda, cinnamon, and salt. Cover and blend at
Medium 5 to 8 seconds. Add oats and 1⁄2 cup (125 ml) raisins. Cover and blend at
Medium 5 to 10 seconds, or just until mixed and raisins are chopped; scrape sides of
blender jar if necessary.
Heat griddle to medium; pour batter onto griddle for individual pancakes. Cook until bubbles
form on surface and edges begin to dry. Turn; cook until underside is light golden brown. Stir
batter briefly between batches. Serve with maple syrup and additional raisins, if desired.
BAR BLENDER
Place eggs in blender jar. Cover and blend at Pulse 3 to 5 seconds. Add buttermilk and oil.
Cover and blend at Pulse 5 to 8 seconds, or until mixed. Add all-purpose flour, whole wheat
flour, sugar, baking powder, baking soda, cinnamon, and salt. Cover and blend at On for 3 to
5 seconds; scrape sides of blender jar if necessary. Add oats and 1⁄
2 cup (125 ml) raisins. Cover
and blend at On for 3 to 6 seconds, or just until mixed and raisins are chopped; scrape sides
of blender jar if necessary. Continue with Chef’s Blender directions.
Yield: About 8 servings (two 4-inch [10 cm] pancakes per serving).
Per Serving: About 240 cal, 8 g pro, 40 g carb, 6 g total fat, 1.5 g sat fat,
55 mg chol, 470 mg sod.
OATMEAL-RAISIN PANCAKES

70
CHEF’S BLENDER
On baking sheet, place 1⁄3 cup (75 ml) walnuts in single layer. Bake at 375° F (190° C) for
4 to 7 minutes, or until light brown and aromatic. Set aside.
Place eggs in blender jar. Cover and blend at Low 3 to 5 seconds. Add milk, pumpkin, and
butter. Blend at Medium 3 to 5 seconds, or until mixed. Add all-purpose flour, whole
wheat flour, brown sugar, baking powder, cinnamon, salt, nutmeg, and cloves. Cover and
blend at High 10 to 20 seconds; scrape sides of blender jar if necessary. Add toasted
walnuts. Cover and blend at Medium 5 to 8 seconds, or until just mixed.
Bake in preheated waffle iron until waffles are deep golden brown, about 3 to 7 minutes.
Serve immediately with maple syrup and additional walnuts, if desired.
BAR BLENDER
Prepare walnuts as directed for Chef’s Blender. Place eggs in blender jar. Cover and blend at
Pulse 3 to 5 seconds. Add milk, pumpkin, and butter. Blend at Pulse 4 to 6 seconds, or
until mixed. Add all-purpose flour, whole wheat flour, brown sugar, baking powder,
cinnamon, salt, nutmeg, and cloves. Cover and blend at On for 10 to 20 seconds; scrape
sides of blender jar if necessary. Add toasted walnuts. Cover and blend at On for 3 to
5 seconds, or just until mixed. Continue with Chef’s Blender directions.
Yield: About 5 servings (two 4-inch [10 cm] waffles per serving).
Per Serving: About 430 cal, 13 g pro, 55 g carb, 19 g total fat, 8 g sat fat,
115 mg chol, 470 mg sod.
TOASTED WALNUT
PUMPKIN WAFFLES
1
⁄3 cup (75 ml) chopped walnuts
2 eggs
1
3
⁄
4 cups (425 ml) milk
1 cup (250 ml) canned pumpkin
1
⁄4 cup (60 ml) melted butter or
margarine
1
1
⁄2 cups (375 ml) all-purpose flour
1
⁄2 cup (125 ml) whole wheat flour
3 tablespoons (45 ml)
brown sugar
2 teaspoons (10 ml)
baking powder
1
⁄2 teaspoon (2 ml) cinnamon
1
⁄2 teaspoon (2 ml) salt
1
⁄
4 teaspoon (1 ml) nutmeg
1
⁄
8 teaspoon (0.5 ml) cloves
Maple syrup, if desired
Chopped walnuts, if desired

WARRANTY AND SERVICE INFORMATION
71
Total Satisfaction
Warranty for Canada. .......................72
Arranging for
Warranty Service...............................73
Arranging for Service
After the Warranty Expires................74
Warranty Information
Section Contents
WARRANTY
AND SERVICE
INFORMATION
P RO L INE™S ERIES

72
KITCHENAID CANADA DOES NOT ASSUME ANY RESPONSIBILITY FOR INCIDENTAL OR
CONSEQUENTIAL DAMAGES. Some provinces do not allow the exclusion or limitation of incidental or
consequential damages, so this exclusion may not apply to you. This warranty gives you specific legal
rights and you may also have other rights which may vary from province to province.
KitchenAid Canada
Will Pay For:
Replacement parts and
repair labour costs to correct
defects in materials and
workmanship. Service must
be provided by a designated
KitchenAid Canada Servicer.
OR
Replacement of your
KitchenAid®PRO LINE™ small
appliance will be arranged if
deemed unserviceable at the
sole discretion of KitchenAid
Canada. See page 73 for how
to arrange for warranty service.
KitchenAid Canada Will
Not Pay For:
A. Repairs when KitchenAid
®
PRO LINE™
small appliance is used in other than
normal single family home use.
B. Damage resulting from accident,
alteration, misuse or abuse, fire,
floods, acts of God, or use of
products not approved by
KitchenAid Canada.
C. Any incidental shipping or
handling cost to deliver your
KitchenAid®PRO LINE™ small
appliance to a designated
KitchenAid Canada Servicer.
D. Replacement parts or repair labour
costs for KitchenAid®PRO LINE™ small
appliance operated outside Canada.
Length of
Warranty:
Two Years Full
Warranty for
Household Use, from
date of purchase.
TOTAL SATISFACTION WARRANTY
FOR CANADA

73
WARRANTY AND SERVICE INFORMATION
ARRANGING FOR
WARRANTY SERVICE
• First review the Troubleshooting section on page 23, to possibly
avoid the need for service or visit our web site at
www.KitchenAid.ca
• If you reside in Canada and your KitchenAid®PRO LINE™ Series small
appliance should fail within the first two years of ownership, simply
call our toll-free Customer Interaction Centre at 1-800-461-5681
Monday through Friday, 8 a.m. to 6 p.m. (Eastern Time), Saturday,
8:30 a.m. to 4:30 p.m. or email cac@whirlpool.com
• KitchenAid Canada will arrange for service of your KitchenAid
®
PRO LINE™ Series small appliance through a designated KitchenAid
Canada Servicer or should the product be deemed unserviceable, at the
sole discretion of KitchenAid Canada, the unit may be replaced with an
identical or comparable replacement to your door free of charge.
KitchenAid Canada will also provide directions on how to return your
failed KitchenAid®PRO LINE™ Series small appliance to us. Your
replacement unit will also be covered by our two year full warranty.
• When you receive your replacement KitchenAid®PRO LINE™ Series
small appliance, use the carton and packing materials to pack-up
your failed KitchenAid®PRO LINE™ Series small appliance. In the
carton, include your name and address on a sheet of paper along
with a copy of the proof of purchase (register receipt, credit card
charge slip, etc…).

74
ARRANGING FOR SERVICE AFTER
THE WARRANTY EXPIRES
• First review the Troubleshooting section on page 23 or visit our web
site at KitchenAid.ca
• If you do not have access to the internet, consult your telephone
directory for a designated KitchenAid Canada Servicer near you. If
one is not listed contact KitchenAid Canada Service from anywhere
in Canada at 1-800-807-6777.
• Take the KitchenAid®PRO LINE™ Series small appliance or ship
prepaid and insured to a designated KitchenAid Canada Servicer.
Your repaired KitchenAid®PRO LINE™ Series small appliance will be
returned prepaid and insured.
• All out-of-warranty service should be handled by a designated
KitchenAid Canada Servicer.
For more information on your KitchenAid®PRO LINE™ Series small
appliance please visit our web site at KitchenAid.ca
WARNING
Electrical Shock Hazard
Unplug before servicing.
Failure to do so can result in death or electrical shock.

® Registered Trademark/™ Trademark of KitchenAid, U.S.A.
KitchenAid Canada licensee in Canada. © 2004. All rights reserved.
Specifications subject to change without notice.
dZw404
FOR THE WAY IT’S MADE.
®
®

MODÈLES
DE MÉLANGEURS
4KPCB348
ET 4KPCB148
Table des matières ..............................3
Sécurité – mélangeur..........................5
Consignes de sécurité importantes......6
Preuve d’achat et enregistrement
du produit..........................................7
Alimentation électrique.......................8
Introduction
Cette section comprend :
1
INTRODUCTION
S ÉRIE P RO L INE
™

2
Le mélangeur de chef et le mélangeur de bar de série
KitchenAid
®
PRO LINETMse résument en un mot : rendement.
Le modèle robuste de qualité commerciale saura satisfaire le
chef maison le plus exigeant.
Commençons par le socle métallique moulé sous pression — il
résiste à l’utilisation la plus intensive tout en assurant une
stabilité incroyable. À l’intérieur, un moteur d’une capacité de
pointe de plus d’un cheval-vapeur permet d’atteindre des
vitesses allant jusqu’à 21 000 tours/minute. Il mélange de façon
homogène les boissons glacées et réduit en purée les sauces et
les soupes en 20 secondes environ.
Au-dessus du socle, vous trouverez un récipient en acier
inoxydable ou en polycarbonate de 1,5 litre (48 oz). Le bloc de
coupe et les joints d’étanchéité sont intégrés au récipient pour assurer l’étanchéité, et la lame monobloc
brevetée en acier inoxydable sur roulements à billes offre une efficacité maximale.
Le rendement implique un contrôle précis ; le mélangeur de chef présente donc trois vitesses de
mélange et une fonction pulsation pour une polyvalence extraordinaire. Le mélangeur de bar allie un
fonctionnement à haute vitesse optimal pour mélanger les boissons glacées et une fonction pulsation à
la vitesse basse pour broyer de la glace, assurant ainsi une polyvalence et une maîtrise accrues.
Les fonctions électroniques évoluées offrent des possibilités inégalées par la plupart des autres
mélangeurs. Un capteur de mélange électronique règle automatiquement la puissance selon la
consistance des ingrédients. La fonction Step Start®démarre automatiquement à faible vitesse pour
minimiser les éclaboussures, puis accélère rapidement jusqu’à la vitesse souhaitée.
La série KitchenAid®PRO LINETM: une qualité commerciale pour le chef maison exigeant. Fabriquée par
une entreprise reconnue pour son savoir-faire légendaire.

TABLE DES MATIÈRES
INTRODUCTION
3
RECETTES À PRÉPARER À L’AIDE DU MÉLANGEUR
Cocktails et boissons desserts
Brandy Alexander
..........................................................26
Café irlandais au caramel
............................................27
Lait de poule frappé
....................................................28
Daïquiri glacé
..............................................................29
Daïquiri glacé aux pêches
..........................................29
Daïquiri glacé aux fraises et au basilic
..........................29
Black Russian glacé
....................................................30
White Russian glacé
....................................................30
Corsé aux canneberges et à l’orange
............................31
Flip aux mangues et aux pêches
..................................32
Margarita
..................................................................33
Margarita aux pêches
..................................................33
Margarita aux fraises
..................................................33
Mojito glacé
................................................................34
Bellini aux pêches
........................................................35
Sauterelle poivrée
......................................................36
Bellini aux framboises
..................................................37
Rhum moka glacé
........................................................38
Boissons chaudes
Moka mexicain chaud
........................................................39
Triple chocolat chaud
..........................................................40
INTRODUCTION
Introduction ..........................................................................2
Sécurité – mélangeur......................................................................5
Consignes de sécurité importantes ........................................6
Preuve d’achat et enregistrement du produit ........................7
Alimentation électrique..........................................................8
CARACTÉRISTIQUES ET FONCTIONNEMENT
Caractéristiques du mélangeur ..............................................10
Utilisation du mélangeur
Avant d’utiliser pour la première fois..............................13
Fonctionnement du mélangeur ......................................13
Utilisation de la fonction pulsation ................................15
Utilisation du bouchon doseur
....................................15
Dispositifs de sécurité en cas de surcharge,
de blocage et de surchauffe
........................................15
Dispositif de sécurité de mise sous tension
..................15
Guide de réglage de la vitesse
..................................16
Conseils d’utilisation
................................................17
Conseils pour la préparation des aliments ............................19
Entretien et nettoyage
......................................................22
Dépannage ..........................................................................23
Suite…

4
TABLE DES MATIÈRES
Potage aux avocats et à la lime....................................60
Potage aux poireaux, pommes de terre et cheddar
........61
Potage aux carottes et au cari
....................................62
Gaspacho
..................................................................63
Soupe aux champignons
..............................................64
Potage à la courge et aux pommes grillées
..................65
Crêpes et gaufres
Crêpes classiques
..........................................................67
Gaufres classiques
......................................................68
Crêpes au babeurre
....................................................69
Crêpes à l’avoine et aux raisins
....................................70
Gaufres aux noix grillées et à la citrouille
......................72
GARANTIE ET INFORMATION SUR LE SERVICE
APRÈS-VENTE
Garantie de satisfaction totale au Canada............................76
Comment vous prévaloir du service après-vente
couvert par la garantie ......................................................77
Comment vous prévaloir du service après-vente
après l’expiration de la garantie..........................................78
Frappés
Lait malté aux baies fraîches
........................................41
Frappé à la mangue et au gingembre
..........................42
Frappé aux bananes et au gingembre
..........................42
Frappé matinal au beurre d’arachide et aux bananes
....43
Boisson matinale rafraîchissante aux framboise
............44
Boisson rafraîchissante sorbet et melon
........................45
Boisson rafraîchissante lime et sorbet melon
................45
Frappé aux fraises et aux bananes
................................46
Trempettes et tartinades
Baba ghanoush
..........................................................47
Trempette cardamome-orange pour les fruits
................48
Trempette au crabe
......................................................49
Hoummos
..................................................................50
Trempette mexicaine étagée
........................................51
Tapenade aux olives mélangées
....................................52
Tartinade facile aux poivrons rouges grillés et au basilic
....53
Sauces et vinaigrettes
Vinaigrette au bleu
....................................................54
Coulis à la cardamome et à l’orange
............................55
Vinaigrette au chipotle et à la tomate
..........................56
Vinaigrette à la framboise et au vinaigre balsamique
....57
Salsa de tomatillos grillés
............................................58
Pesto aux trois herbes
................................................59
Soupes

INTRODUCTION
5
SÉCURITÉ – MÉLANGEUR
Votre sécurité et celle des autres est très importante.
Nous donnons de nombreux messages de sécurité importants dans ce manuel et sur votre
appareil ménager. Assurez-vous de toujours lire tous les messages de sécurité et de vous y
conformer.
Voici le symbole d’alerte de sécurité.
Ce symbole d’alerte de sécurité vous signale les dangers potentiels de décès et
de blessures graves à vous et à d’autres.
Tous les messages de sécurité suivront le symbole d’alerte de sécurité et le mot
“DANGER” ou “AVERTISSEMENT”. Ces mots signifient :
Risque possible de décès ou de blessure
DANGER
AVERTISSEMENT
Tous les messages de sécurité vous diront quel est le danger potentiel et vous disent comment
réduire le risque de blessure et ce qui peut se produire en cas de non-respect des instructions.
grave si vous ne suivez pas immédiatement
les instructions.
Risque possible de décès ou de blessure
grave si vous ne suivez pas les instructions.

6
Lors de l’utilisation d’appareils électriques, il est important
d’observer en tout temps certaines précautions élémentaires,
notamment :
1. Veuillez lire toutes les directives.
2. N’immergez pas le mélangeur dans l’eau ni tout autre liquide
pour éviter les risques de choc électrique.
3. Une surveillance attentive est nécessaire lorsque tout appareil
est utilisé par des enfants ou à proximité de ceux-ci.
4. Débranchez le mélangeur après l’usage, avant de mettre ou
de retirer des pièces et avant de le nettoyer.
5. Évitez de toucher les pièces en mouvement.
6. Ne branchez aucun appareil qui présente un défaut de
fonctionnement, qui est tombé par terre ou qui a été
endommagé de quelque façon que ce soit ou dont la fiche ou
le cordon d’alimentation est endommagé. Retournez l’appareil
au Centre de service après-vente autorisé le plus proche pour
le faire inspecter ou réparer, ou pour y faire effectuer des
réglages électriques ou mécaniques.
CONSIGNES DE SÉCURITÉ
IMPORTANTES
CONSERVEZ CES DIRECTIVES
7. N’utilisez pas l’appareil à l’extérieur.
8. Ne laissez pas le cordon d’alimentation pendre d’une table ou
d’un comptoir.
9. Gardez les mains et les ustensiles hors du bol pendant le
mélange des aliments pour réduire le risque de blessures
graves ou de dommages au mélangeur. Il est possible
d’utiliser un grattoir, mais seulement lorsque le mélangeur
n’est pas en marche.
10. Les lames sont acérées. Veuillez les manipuler avec précaution.
11. Assurez-vous que le couvercle est bien en place avant
d’utiliser l’appareil.
12. Lorsque vous mélangez des liquides chauds, retirez la pièce
centrale du couvercle deux pièces.
13. L’ utilisation d’accessoires, y compris de récipients à
conserves non recommandés par KitchenAid Canada, peut
entraîner des blessures.
14. Ce produit est homologué UL pour usage domestique
seulement.

INTRODUCTION
7
Gardez toujours une copie du reçu de caisse indiquant la date
d’achat du mélangeur. Une preuve d’achat est requise pour
bénéficier du service après-vente couvert par la garantie.
Avant d’utiliser votre mélangeur, veuillez remplir la carte
d’enregistrement emballée avec le produit et nous retourner
celle-ci par la poste. Cette carte nous permet de vous contacter
dans le cas peu probable d’un avis de sécurité. Cette carte n’est
pas une confirmation de votre garantie.
PREUVE D’ACHAT
ET ENREGISTREMENT DU PRODUIT
Veuillez inscrire les renseignements suivants que vous pourrez
conserver dans vos dossiers personnels :
Numéro de modèle: Mélangeur de chef – 4KPCB348
Mélangeur de bar – 4KPCB148
Date d’achat ____________________________________________
Nom du détaillant _______________________________________
Adresse ________________________________________________
Téléphone ______________________________________________

8
Volts : 120 c.a. uniquement.
Hertz : 60
REMARQUE : Ce mélangeur a une
fiche de terre à trois broches. Pour
réduire le risque de choc électrique, il
n’y a qu’une façon d’introduire cette
fiche dans une prise. Si la fiche n’entre
pas entièrement dans la prise, contactez un électricien qualifié.
Ne modifiez la fiche d’aucune façon.
Un cordon d’alimentation court est fourni pour réduire les
risques d’entortillement et de chute associés à un long cordon.
N’utilisez pas de rallonge. Si le cordon d’alimentation est trop
court, demandez à un électricien qualifié ou à un technicien du
service après-vente d'installer une prise à proximité de l'appareil.
ALIMENTATION ÉLECTRIQUE
AVERTISSEMENT
Risque de choc électrique
Brancher sur une prise à 3 alvéoles reliée à la terre.
Ne pas enlever la broche de
Ne pas utiliser un adaptateur.
Ne pas utiliser un câble de rallonge.
Le non-respect de ces instructions peut causer un
décès, un incendie ou un choc électrique.
liaison à la terre.

9
CARACTÉRISTIQUES ET FONCTIONNEMENT
CARACTÉRISTIQUES
ET
FONCTIONNEMENT
S ÉRIE P RO L INE
™
Caractéristiques du mélangeur..........10
Utilisation du mélangeur
Avant d’utiliser pour la
première fois ................................13
Fonctionnement du mélangeur.....13
Utilisation de la
fonction pulsation .......................15
Utilisation du bouchon doseur......15
Dispositifs de sécurité ..................15
Guide de réglage de la vitesse.......16
Conseils d’utilisation .....................17
Conseils pour la préparation
des aliments .....................................19
Entretien et nettoyage ......................22
Dépannage.......................................23
Caractéristiques
et fonctionnement
Cette section comprend :

10
Modèle de
mélangeur de chef
4KPCB348
Rendement optimal
Conçu pour offrir une durabilité commerciale au chef maison, ce
modèle robuste donne des résultats remarquables à tout coup. Il
permet de mélanger de façon homogène les boissons glacées et de
préparer des sauces et des soupes onctueuses en 20 secondes à peine.
Socle métallique moulé sous pression
Incroyablement stable, le socle métallique résiste à l’utilisation la
plus intensive tout en assurant un fonctionnement silencieux. Des
pieds en caoutchouc protègent le comptoir et éliminent le
mouvement pendant le mélange.
Moteur puissant
Le moteur d’une capacité de pointe de plus d’un cheval-vapeur
peut atteindre des vitesses allant jusqu’à 21 000 tours/min. Le
ventilateur à haute efficacité et la
conception favorisant
l’écoulement de l’air empêchent
la surchauffe.
Modèle de
mélangeur de bar
4KPCB148
CARACTÉRISTIQUES DES
MODÈLES DE MÉLANGEURS
4KPCB348 ET 4KPCB148

CARACTÉRISTIQUES ET FONCTIONNEMENT
11
Récipient en polycarbonate transparent ou en acier
inoxydable de 1,5 L (48 oz)
Les récipients de 1,5 L (48 oz) sont lavables au lave-vaisselle. Chacun
présente une poignée tout confort. Le récipient en polycarbonate
présente une poignée tout confort au revêtement souple et durable.
Le col, le bloc de coupe et les joints d’étanchéité sont intégrés au
récipient pour assurer sa force, sa durabilité et son étanchéité.
Lame monobloc brevetée
La lame en acier inoxydable très épaisse résiste à la
corrosion et se distingue par des arêtes vives et des
angles de lame élevés pour un rendement optimal et
une longue durée. La lame est spécialement
équilibrée de façon à réduire la vibration et l’usure des roulements.
Le bloc de coupe entièrement en acier inoxydable présente des
roulements à billes pour une efficacité et une durabilité optimales.
Couvercle du récipient à bouchon doseur
amovible de 60 mL (2 oz)
Le couvercle du récipient assure l’étanchéité, mais
demeure facile à enlever. Son bouchon doseur
amovible facilite l’ajout d’ingrédients. Grâce aux repères
de 30 et de 60 mL (1 et 2 oz), il peut aussi servir de
tasse à mesurer.
Col interne du récipient et socle dentelés
Le récipient peut être placé à n’importe laquelle
des huit positions différentes sur le socle. Le
modèle dentelé assure un raccord incroyablement
stable et sûr.
Commutateur de mise en marche, d’arrêt et
de fonction pulsation
Le commutateur à bascule service intensif met le
mélangeur sous tension et hors tension. Pour utiliser
la fonction de pulsation, il suffit d’appuyer sur le
commutateur et de le relâcher. En mode pulsation, le mélangeur
fonctionne à la vitesse basse pour une maîtrise optimale.
Touches de réglage des vitesses (mélangeur
de chef seulement)
Les vitesses basse, moyenne et élevée assurent une
grande polyvalence, quelle que soit la tâche à
accomplir, de la préparation de sauces et de soupes
onctueuses au mélange de boissons glacées. Des voyants
indiquent la vitesse sélectionnée.
Vitesse unique (mélangeur de bar seulement)
La vitesse unique du mélangeur de bar est optimisée
pour mélanger rapidement les boissons glacées et
broyer la glace. Pour obtenir des résultats similaires
avec le mélangeur de chef, utilisez la vitesse élevée.
Suite...

12
Fonctionnement en une étape
Réglez le commutateur de mise en marche, d’arrêt et de fonction
pulsation sur « On » ou sur « Pulse », et le mélangeur démarre
immédiatement. Le mélangeur de chef démarre
automatiquement à une faible vitesse ; le mélangeur de bar
fonctionne à la vitesse élevée lorsqu’il est réglé à « On » et à la
vitesse basse lorsqu’il est réglé à « Pulse ». Pour démarrer le
mélangeur de chef à la vitesse moyenne ou élevée, mettez le
mélangeur sous tension en appuyant simultanément sur la
touche de réglage de vitesse désirée.
Fonction Step Start
®
et capteur de mélange
Le mélangeur démarre automatiquement à la vitesse basse pour
minimiser les éclaboussures, puis accélère rapidement jusqu’à la
vitesse souhaitée. Le capteur de mélange électronique règle
automatiquement la puissance selon la consistance des ingrédients.
Dispositifs de sécurité en cas de surcharge, de blocage, de
surchauffe et de mise sous tension
En cas de blocage, de surcharge ou de surchauffe, des
commandes électroniques spéciales arrêtent automatiquement le
mélangeur pour éviter les dommages. Le dispositif de sécurité de
mise sous tension empêche le démarrage du mélangeur s’il est
branché alors que le commutateur de mise en marche, d’arrêt et
de fonction pulsation est réglé sur la position « On ».
Range-cordon sous le socle
Le cordon inutilisé s’enroule discrètement sous le socle, hors
de portée.
Modèle facile à nettoyer
Le socle lisse et le cordon rond s’essuient facilement. Le récipient
et le couvercle vont au lave-vaisselle. Il n’est pas nécessaire de
retirer le bloc de coupe du récipient pour le nettoyage.
CARACTÉRISTIQUES DES
MODÈLES DE MÉLANGEURS
4KPCB348 ET 4KPCB148

UTILISATION DU MÉLANGEUR
DE SÉRIE PRO LINE
™
Avant d’utiliser pour la première fois
Avant d’utiliser le mélangeur pour la première fois, lavez le
récipient, le couvercle et le bouchon doseur du mélangeur à
l’eau chaude savonneuse, puis rincez et essuyez. Ces pièces
peuvent également être lavées dans le panier supérieur ou
inférieur du lave-vaisselle.
Fonctionnement du mélangeur
1. Sortez le cordon du range-cordon sous le socle en le déroulant.
2. Assurez-vous que le commutateur de mise en marche, d’arrêt
et de fonction pulsation est sur la position « Off ».
3. Branchez le cordon dans une prise à la terre à trois broches.
CARACTÉRISTIQUES ET FONCTIONNEMENT
13
Suite...
AVERTISSEMENT
Risque de choc électrique
Brancher sur une prise à 3 alvéoles reliée à la terre.
Ne pas enlever la broche de
Ne pas utiliser un adaptateur.
Ne pas utiliser un câble de rallonge.
Le non-respect de ces instructions peut causer un décès,
un incendie ou un choc électrique.
liaison à la terre.

4. Placez le récipient sur le socle du mélangeur et ajoutez les
ingrédients désirés. Mettez le couvercle sur le récipient du
mélangeur.
5. Réglez le commutateur de mise en marche, d’arrêt et de fonction
pulsation sur la position « On » pour commencer à mélanger. Le
mélangeur de chef démarre automatiquement à la vitesse basse.*
Le mélangeur de bar fonctionne à la vitesse élevée.
6. Pour sélectionner une autre vitesse du mélangeur de chef,
appuyez sur la touche de réglage appropriée. Les voyants
indiquent la vitesse sélectionnée.
7. Pour arrêter de mélanger, réglez le commutateur de mise en
marche, d’arrêt et de fonction pulsation sur la position « Off ».
*
Pour démarrer le mélangeur de chef à la vitesse moyenne ou élevée, réglez le
commutateur de mise en marche, d’arrêt et de fonction pulsation sur la position « On
» tout en appuyant sur la touche de réglage de vitesse désirée.
14
UTILISATION DU MÉLANGEUR
DE SÉRIE PRO LINE
™

15
Suite...
Utilisation de la fonction pulsation
Pour une action intermittente, réglez le commutateur de mise en
marche, d’arrêt et de fonction pulsation sur la position « Pulse » et
maintenez-le enfoncé pendant la durée désirée. Le commutateur se
remet automatiquement à la position « Off » lorsqu’on le relâche, et
le mélangeur s’arrête. En mode pulsation, le mélangeur fonctionne
à la vitesse basse pour une maîtrise optimale. La fonction pulsation
est parfaite pour les mélanges exigeant une touche délicate.
Utilisation du bouchon doseur
Il est possible d’ajouter des ingrédients en retirant le bouchon
doseur du couvercle. Pour ce faire, tournez le bouchon d’un demitour vers la gauche et soulevez. Grâce aux repères de 30 et de
60 mL (1 et 2 oz), le bouchon peut aussi servir de tasse à mesurer.
REMARQUE: Lorsque vous utilisez le mélangeur à la vitesse
élevée alors que le récipient est plein ou que le contenu est chaud,
arrêtez le mélangeur avant d’ajouter des ingrédients.
Dispositifs de sécurité en cas de surcharge, de
blocage et de surchauffe
Les commandes électroniques du mélangeur arrêtent
automatiquement l’appareil dans les cas suivants :
• Si le mélangeur est surchargé par un mélange trop épais ;
• Si la lame du mélangeur est bloquée et ne tourne pas ;
• Si le moteur surchauffe.
Veuillez consulter la section Dépannage à la page 23 pour de plus
amples renseignements.
Dispositif de sécurité de mise sous tension
Si le mélangeur est branché alors que le commutateur de mise en
marche, d’arrêt et de fonction pulsation est réglé sur la position «
On », il ne démarre pas. Veuillez consulter la section Dépannage à
la page 24 pour de plus amples renseignements.
CARACTÉRISTIQUES ET FONCTIONNEMENT

16
Guide de réglage de la vitesse
REMARQUE : Le mélangeur de bar fonctionne à la vitesse élevée
lorsqu’il est réglé sur la position « On » et à la vitesse basse
lorsqu’il est réglé sur la position « Pulse ».
Gâteau au fromage......................................Élevée
Hachage des fruits .......................................Basse ou pulsation
Concassage de la glace ................................Basse ou pulsation
Hachage des légumes ..................................Basse
Broyage de la glace......................................N’importe laquelle
Jus de fruits de concentré congelé................Basse ou pulsation
Boisson à base de fruits................................Élevée
Râpage du fromage à pâte dure...................Élevée
Sauce (pour éliminer les grumeaux)..............Basse
Boisson à base de crème ou de
yogourt glacés, ou de sorbet........................Élevée
Mousse ........................................................Élevée
Pâte à crêpes ou à gaufres ...........................Moyenne ou pulsation
Purée de légumes cuits.................................Moyenne ou élevée
Purée de fruits..............................................Moyenne ou élevée
Ricotta lisse ou cottage ................................Moyenne ou pulsation
Streusel ou garniture en miettes...................Basse
Sucre ultrafin ...............................................Basse ou pulsation
Sauce blanche..............................................Basse
Conseil de mélange
La glace peut être broyée à n’importe quelle vitesse. Vous pouvez
broyer jusqu’à un moule à glaçons standard ou 12 à 14 glaçons
standards à la fois. Il n’est pas nécessaire d’ajouter de liquide.
UTILISATION DU MÉLANGEUR
DE SÉRIE PRO LINE
™

CARACTÉRISTIQUES ET FONCTIONNEMENT
17
CONSEILS D’UTILISATION
DU MÉLANGEUR DE SÉRIE PRO LINE™
Laissez le couvercle sur le récipient du mélangeur pendant le mélange. Ne retirez pas
le récipient du socle pendant que le mélangeur est en marche.
1
3
Il ne faut habituellement que quelques secondes pour obtenir un mélange homogène.
Faites attention de ne pas trop mélanger les aliments.
5
Arrêtez le mélangeur et débranchez-le avant d’insérer des ustensiles dans le récipient.
N’utilisez pas d’ustensiles de métal ; ils pourraient rayer le récipient ou endommager
la lame.
2
Ajoutez les aliments en plus grosses quantités que pour d’autres mélangeurs – vous
pouvez ajouter jusqu’à 750 mL ou 1 L (3 ou 4 tasses) à la fois, par rapport à 250 mL
(1 tasse).
4
Lorsque vous hachez des ingrédients secs, assurez-vous que le récipient, le couvercle
et la lame sont bien secs.
6
Suite...
Retirez le bouchon doseur avant de mélanger des liquides chauds ou brûlants, et
mélangez à la vitesse basse ou en mode pulsation en augmentant la vitesse au besoin. Si
possible, laissez refroidir les aliments chauds avant de les mélanger.

18
Pour les aliments qui ont tendance à coller au récipient, utilisez la fonction pulsation.
7
Pour les mélanges comprenant de nombreux ingrédients, commencez à mélanger à la vitesse
basse pour bien combiner les ingrédients, puis augmentez la vitesse au besoin.
9
Mélangez à la vitesse élevée si vous préparez des boissons en utilisant de grandes
quantités de glace. Pour les petites quantités, réglez le mélangeur sur la vitesse
moyenne ou sur la fonction pulsation.
8
Vous pouvez retirer le bouchon doseur et ajouter des liquides ou de la glace dans le
mélangeur de chef à la vitesse basse. Lorsque le mélangeur fonctionne à la vitesse
élevée et que le récipient est plein ou que le contenu est chaud, arrêtez le mélangeur
avant d’ajouter des ingrédients.
10
Les mélangeurs ne conviennent pas pour battre des blancs d’œufs, pétrir de la pâte à
levure ou réduire des pommes de terre en purée. Visitez KitchenAid.ca pour voir la
collection complète de produits KitchenAid®, y compris les batteurs sur socle et les
robots culinaires. Vous y trouverez également d’autres recettes.
11
CONSEILS D’UTILISATION
DU MÉLANGEUR DE SÉRIE PRO LINE™

CARACTÉRISTIQUES ET FONCTIONNEMENT
19
Les vitesses indiquées sont pour le mélangeur de chef. Le
mélangeur de bar fonctionne à la vitesse élevée lorsqu’il est réglé
sur la position « On » et à la vitesse basse lorsqu’il est réglé sur la
position « Pulse ».
Pour reconstituer du jus congelé
Pour une boîte de jus d’orange de concentré congelé de 180 ou
de 360 mL (6 ou 12 oz), combinez le jus et la quantité d’eau
requise dans le récipient du mélangeur. Couvrez et mélangez à la
vitesse basse ou en mode pulsation jusqu’à l’obtention d’un
mélange homogène, soit pendant environ 10 à 15 secondes.
Pour faire des miettes de biscuits
Cassez les gros biscuits en morceaux d’environ 3,75 cm (1 po 1⁄
2)
de diamètre. Laissez les petits biscuits tels quels. Placez-les dans le
récipient du mélangeur et appuyez à quelques reprises sur la
commande de pulsation (environ 3 secondes chaque fois) jusqu’à
l’obtention de la consistance désirée. Utilisez les miettes pour
garnir rapidement les yogourts glacés, les crèmes-desserts ou les
compotes. Pour obtenir des miettes fines pour les croûtes à tarte
et à dessert, appuyez sur la commande de pulsation pendant
environ 20 à 30 secondes au total, ou jusqu’à l’obtention de la
consistance désirée.
Pour faire des miettes de craquelins ou de pain
Suivez la procédure indiquée pour les biscuits. Utilisez pour
garnir ou comme ingrédient dans les plats en cocotte et les plats
de légumes.
Pour hacher les fruits et les légumes
Placez 500 mL (2 tasses) de gros morceaux de fruits ou de légumes
dans le récipient du mélangeur. Couvrez et appuyez à quelques
reprises sur la commande de pulsation (environ 2 ou 3 secondes
chaque fois) jusqu’à l’obtention de la consistance désirée.
Pour réduire des fruits en purée
Placez 500 mL (2 tasses) de fruits en conserve ou cuits dans le
récipient du mélangeur. Ajoutez de 30 à 60 mL (2-4 c. à soupe)
de jus de fruits ou d’eau pour chaque tasse de fruits. Couvrez et
mélangez à la vitesse moyenne (Med) ou en mode pulsation
pendant environ 5 à 10 secondes.
Pour réduire des légumes en purée
Placez 500 mL (2 tasses) de légumes en conserve ou cuits dans le
récipient du mélangeur. Ajoutez de 30 à 60 mL (2-4 c. à soupe)
de bouillon, d’eau ou de lait pour chaque tasse de légumes.
Couvrez et mélangez à la vitesse moyenne (Med) ou en mode
pulsation pendant environ 10 à 20 secondes.
CONSEILS POUR LA PRÉPARATION
DES ALIMENTS
Suite...

Pour réduire de la viande en purée ou hacher fin
Placez les cubes de viande cuite tendre dans le récipient du
mélangeur. Ajoutez de 30 à 60 mL (2-4 c. à soupe) de bouillon,
d’eau ou de lait pour chaque tasse de viande. Couvrez et mélangez
à la vitesse basse pendant 10 secondes. Arrêtez et raclez les parois
du récipient. Couvrez et mélangez à la vitesse moyenne (Med) ou
en mode pulsation pendant encore 10 à 20 secondes.
Pour réduire du cottage ou du ricotta en purée
Placez le cottage ou le ricotta dans le récipient du mélangeur.
Couvrez et mélangez à la vitesse moyenne (Med) ou en mode
pulsation jusqu’à l’obtention d’une consistance lisse, soit pendant
environ 15 à 25 secondes. Au besoin, ajoutez 15 mL (1 c. à
soupe) de lait écrémé pour chaque tasse de cottage. Utilisez pour
préparer des trempettes et des tartinades à faible teneur en gras.
Pour combiner les ingrédients liquides des
produits de boulangerie
Versez les ingrédients liquides dans le récipient du mélangeur.
Couvrez et mélangez à la vitesse élevée jusqu’à l’obtention d’un
mélange homogène, soit pendant environ 1 minute. Versez le
mélange liquide sur les ingrédients secs et remuez bien.
Pour éliminer les grumeaux d’une sauce
Si la sauce fait des grumeaux, placez-la dans le mélangeur.
Mettez le couvercle du récipient après avoir enlevé le bouchon
doseur et mélangez à la vitesse basse ou en mode pulsation
jusqu’à l’obtention d’une consistance lisse, soit pendant environ
5 à 10 secondes. Réchauffez au besoin.
Pour combiner de la farine et du liquide pour
faire épaissir
Placez la farine et le liquide dans le récipient du mélangeur.
Couvrez et mélangez à la vitesse basse jusqu’à l’obtention d’une
consistance lisse, soit pendant environ 3 à 5 secondes.
Pour préparer une sauce blanche
Placez le lait, la farine et le sel, si désiré, dans le récipient du
mélangeur. Couvrez et mélangez à la vitesse basse jusqu’à
l’obtention d’un mélange homogène, soit pendant environ 3 à
5 secondes. Versez dans une casserole, ajoutez les autres
ingrédients, faites chauffer et remuez jusqu’à ce que la sauce
épaississe.
2020
CONSEILS POUR LA PRÉPARATION
DES ALIMENTS

21
Pour préparer de la pâte à crêpes ou à gaufres
Placez la préparation et les autres ingrédients dans le récipient du
mélangeur. Couvrez et mélangez à la vitesse moyenne (Med) ou
en mode pulsation jusqu’à l’obtention d’un mélange homogène,
soit pendant environ 10 à 20 secondes ; raclez les parois du
récipient au besoin.
Pour râper du fromage à pâte dure
Amenez le fromage à la température ambiante. Coupez-le en
cubes de 13 à 25 mm (1⁄2-1 po). Placez de 57 à 85 g (2-3 oz) de
fromage dans le récipient du mélangeur. Couvrez et mélangez à la
vitesse élevée pendant environ 15 à 20 secondes.
Pour préparer du gruau pour bébé
Placez les flocons d’avoine crus dans le récipient du mélangeur.
Appuyez sur la commande de pulsation pendant environ 5 à 10
secondes, ou jusqu’à ce que les flocons soient hachés très fin.
Placez dans une casserole avec du liquide et faites cuire comme
d’habitude.
Pour préparer des aliments pour bébé à partir
d’aliments ordinaires
Placez les aliments ordinaires dans le récipient du mélangeur.
Couvrez et mélangez à la vitesse basse pendant environ 10
secondes. Mélangez ensuite à la vitesse moyenne (Med) ou en
mode pulsation pendant environ 10 à 30 secondes ou jusqu’à
l’obtention de la texture désirée.
Pour faire du sucre ultrafin
Placez 250 mL (1 tasse) de sucre dans le récipient du mélangeur.
Couvrez et mélangez à la vitesse basse ou en mode pulsation
pendant 8 à 10 secondes. Utilisez pour sucrer les liquides froids,
par exemple les boissons glacées préparées à l’aide du
mélangeur, car il se dissout presque immédiatement. Remplace
le sucre granulé en quantité égale.
CARACTÉRISTIQUES ET FONCTIONNEMENT

22
ENTRETIEN ET NETTOYAGE
• Nettoyez bien le mélangeur après chaque usage.
• N’immergez pas le socle du mélangeur ou le cordon dans l’eau.
• N’utilisez pas de nettoyants abrasifs ou de tampons à récurer.
Pour laver le bloc de coupe, placez le récipient sur le socle,
remplissez-le à moitié d’eau chaude – et non bouillante – et
ajoutez une ou deux gouttes de détergent à vaisselle. Placez le
couvercle sur le récipient et faites tourner le mélangeur pendant
15 secondes à la vitesse basse (ou en mode pulsation). Retirez le
récipient du mélangeur et videz le contenu. Rincez le bloc de
coupe à l’eau chaude jusqu’à ce qu’il soit propre.
Lavez le récipient du mélangeur, le couvercle du récipient
et le bouchon doseur dans l’eau chaude savonneuse,
puis rincez et séchez complètement. Ces pièces peuvent
également être lavées dans le panier supérieur ou inférieur du
lave-vaisselle. Il n’est pas nécessaire de retirer le bloc de coupe
du récipient pour le nettoyage.
Débranchez le mélangeur avant de nettoyer le socle et
le cordon.
Nettoyez le socle du mélangeur et le cordon avec un
chiffon humecté d’eau chaude savonneuse, essuyez avec
un chiffon humide, puis séchez avec un chiffon doux. Pour le
rangement, vous pouvez enrouler le cordon dans le range-cordon
sous le socle.
1
2
3
4

CARACTÉRISTIQUES ET FONCTIONNEMENT
23
DÉPANNAGE
• Si le mélangeur ne fonctionne pas lorsqu’il est mis
sous tension :
– Vérifiez que le mélangeur est branché sur une prise à la terre
à trois broches. S’il est branché, débranchez-le, puis
rebranchez-le sur la même prise. S’il ne fonctionne toujours
pas, vérifiez les fusibles ou le disjoncteur du circuit électrique
sur lequel le mélangeur est branché et assurez-vous que le
circuit est fermé.
– Le mélangeur peut être bloqué ou surchauffer. Réglez le
commutateur de mise en marche, d’arrêt et de pulsation sur
la position « Off » et consultez les directives contenues dans
la présente section Dépannage.
• Si le mélangeur s’arrête pendant que vous mélangez :
– Le mélangeur est peut-être bloqué. Si un objet étranger ou
les ingrédients bloquent la lame, le mélangeur s’arrête pour
empêcher que le moteur ne soit endommagé. Réglez le
commutateur de mise en marche, d’arrêt et de pulsation sur
la position « Off » pour remettre le mélangeur à l’état initial.
Retirez le récipient du socle et dégagez la lame en divisant
ou en enlevant les ingrédients au fond du récipient.
Dans le cas du mélangeur de chef, le
voyant de vitesse élevée clignote lorsque
le mélangeur est bloqué ou surchauffe.
– Le mélangeur surchauffe peut-être. Si le moteur dépasse une
certaine température, le dispositif de sécurité en cas de
surchauffe s’enclenche pour empêcher les dommages. Cela
peut se produire lorsque vous mélangez plusieurs
préparations d’ingrédients épais pendant une période
prolongée. Réglez le commutateur de mise en marche,
d’arrêt et de pulsation sur la position « Off ». Le dispositif de
sécurité en cas de surchauffe empêchera le mélangeur de
fonctionner jusqu’à ce qu’il ait assez refroidi pour
fonctionner sans danger. Laissez refroidir le mélangeur
pendant 30 minutes, puis recommencez à mélanger. Si le
mélangeur ne démarre pas, réglez le commutateur de mise
en marche, d’arrêt et de pulsation sur la position « Off » et
laissez le mélangeur refroidir encore 30 minutes.
Dans le cas du mélangeur de chef, le
voyant de vitesse élevée clignote lorsque
le mélangeur est bloqué ou surchauffe.
Suite...

– Le mélangeur est peut-être surchargé. Si le mélangeur
ralentit de façon excessive lorsque vous mélangez des
ingrédients épais, il s’arrêtera pour empêcher les
dommages. Réglez le commutateur de mise en marche,
d’arrêt et de pulsation sur la position « Off » pour
réinitialiser le mélangeur. Retirez le récipient du socle et
divisez le contenu du récipient en portions plus petites.
L’ajout de liquide peut également alléger la charge du
mélangeur.
Dans le cas du mélangeur de chef, le
voyant de vitesse basse clignote lorsque
le mélangeur est surchargé.
• Si le mélangeur est branché alors que le commutateur
de mise en marche, d’arrêt et de pulsation est réglé sur
la position « On » :
– Le dispositif de sécurité de mise en marche s’enclenche et le
mélangeur ne démarre pas. Pour remettre le mélangeur à
l’état initial, réglez le commutateur de mise en marche,
d’arrêt et de pulsation sur la position « Off » ; le mélangeur
fonctionnera normalement par la suite.
Dans le cas du mélangeur de chef, les
trois voyants de vitesse clignotent lorsque
le dispositif de sécurité de mise en
marche est enclenché.
Si le problème n’est pas corrigé après l’application des mesures
énoncées dans la présente section, consultez la section
Garantie et information sur le service après-vente KitchenAid
Canada à la page 74.*
* Ne retournez pas le mélangeur au détaillant – les détaillants n’offrent pas le
service après-vente.
24
DÉPANNAGE

25
RECETTES À
PRÉPARER À L’AIDE DU
MÉLANGEUR
RECETTES A PRÉPARER A L’AIDE DU MÉLANGEUR
Cocktails et boissons desserts ...........26
Boissons chaudes..............................39
Frappés ............................................41
Trempettes et tartinades ...................47
Sauces et vinaigrettes .......................54
Soupes .............................................60
Crêpes et gaufres .............................67
Recettes à préparer à
l’aide du mélangeur
Cette section comprend :
S ÉRIE P
RO L INE
™
 Loading...