

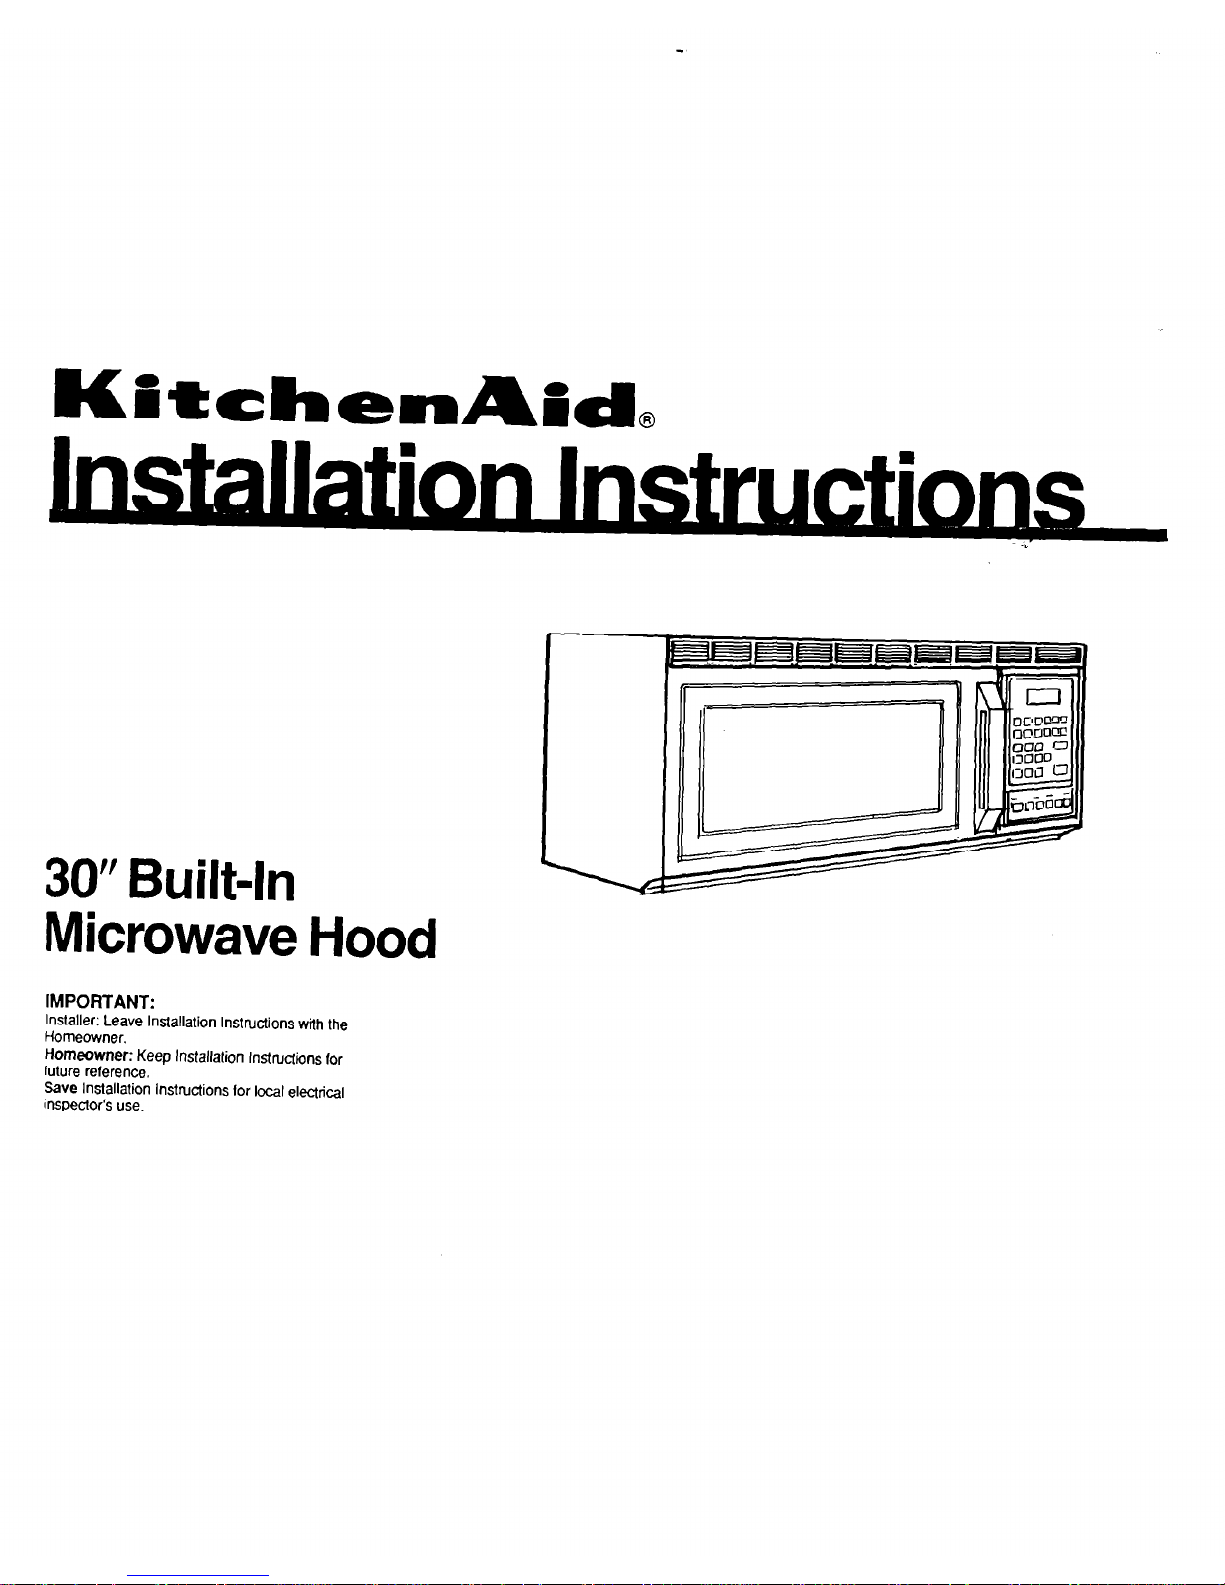
KitchenAid 30” Built-in Microwave Hood Installation Instructions Manual
UatchenA;d,
30” Built-h
Microwave Hood
IMPORTANT:
Installer: Leave lnslallation lnstnxtions with the
Homeowner.
Homeowner: Keep lnstallafion lnstruclions for
future reference.
Save Installation lnsin,clions for local el~rical
nspector’s use.
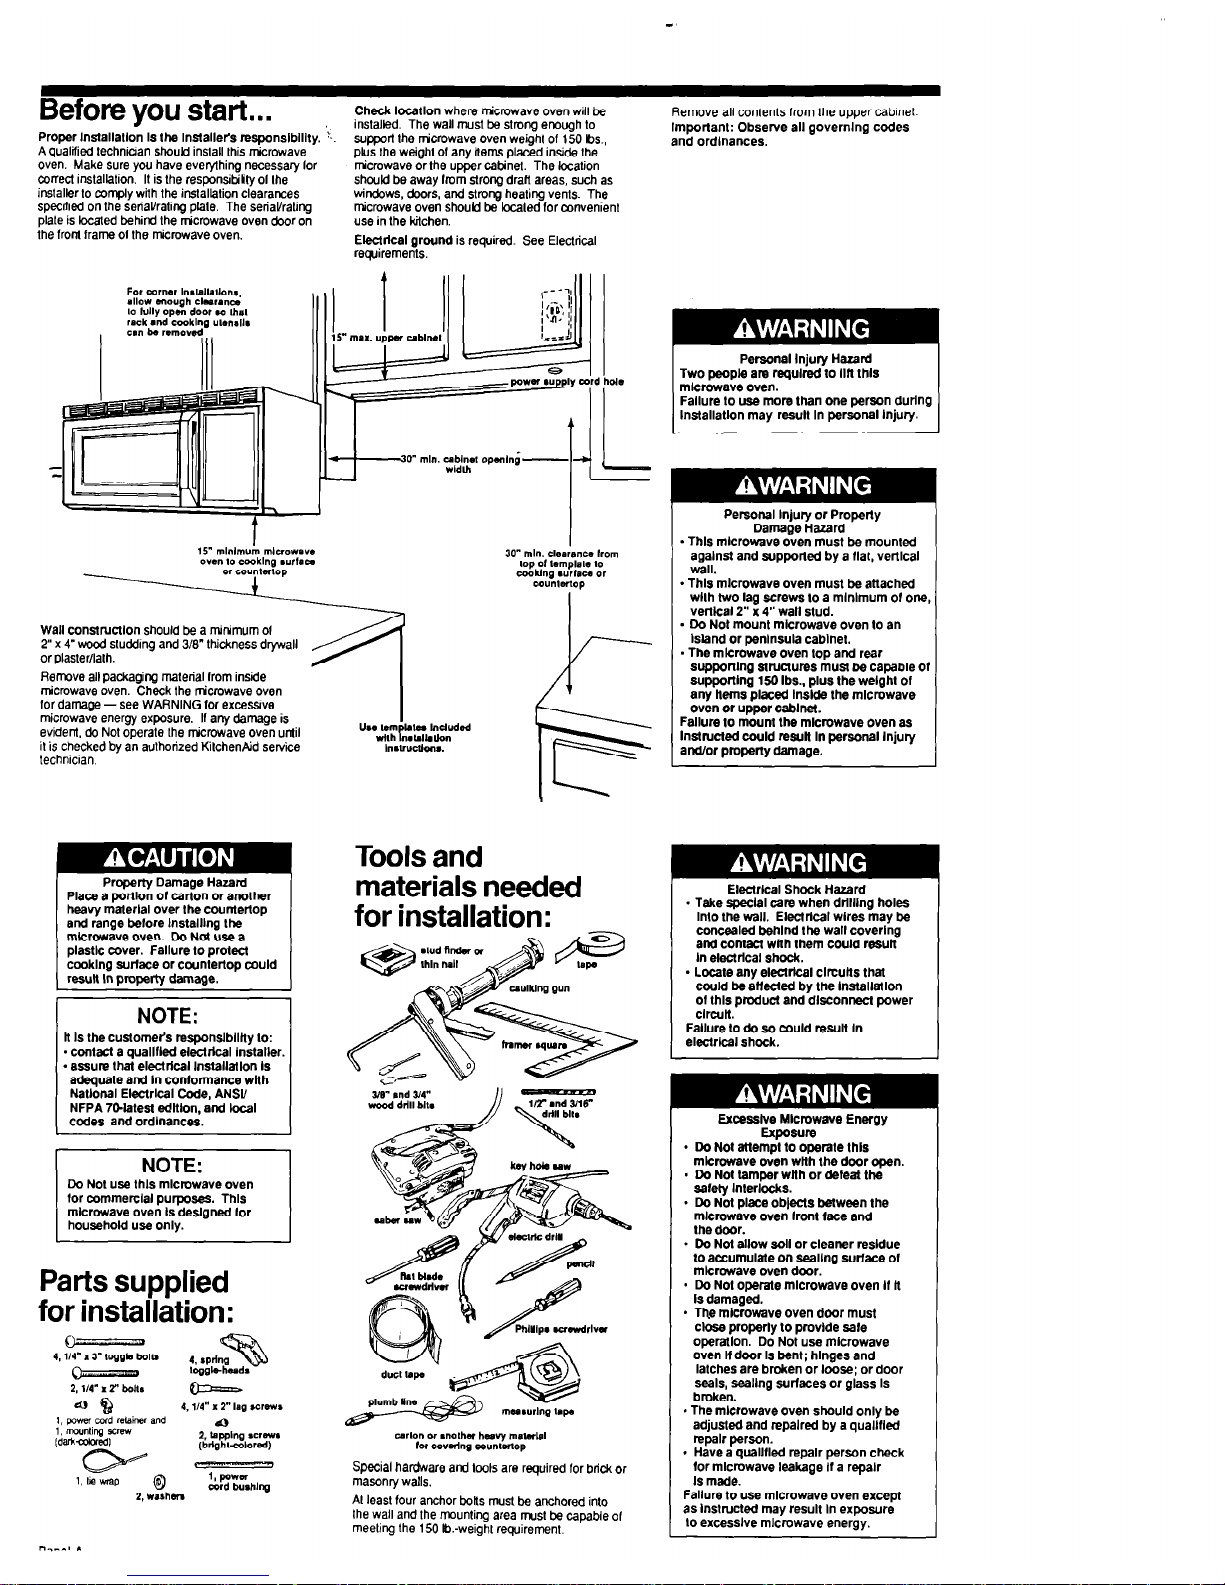
Before you start.. .
Proper lnstallatlon Is the Installers responslblllty.
A qualiiied technician should inslall lhis rr&rowave
oven. Make sure you have everything necessary lor
conecl installation. If is Ihe responsitiby 01 Ihe
installer lo comply with the instakalion clearances
specified on the seriaUrating plale. The seriaVraling
plale is kxated behind the n-&owave oven door on
the fronl frame 01 the tirowave oven.
Check locatlon where ticrowave oven will be
installed. The wall must be strong enough lo
support the ticrowave
oven weigh1 of 150 Ibs.,
plus the weigh1 of any kerns placed
inside
Ihe
ticmwave or the upper cabinel. The location
should be away horn strong draft areas, such as
windows. doors, and strong heating vents. The
microwave oven should ba localed for convenlenl
use in Ihe kitchen.
Electrkal ground is required See Electrical
rewiremenls.
Remove all conlents from Ihe upper cablnel
Important: Observe all governlng codes
and ordinances.
For coma, In,~IIa,hm,,
allow mlmough clrrmce
10 lully open door u) ,hr,l
rack and cmklng ~lm,,l,
Cl” be rmlowd
-I-‘L-
0” min. co&a1 opmln~-
oven 10 cooklng wrlaa
~~ ~~ ~.~~.
Wall constructlon should be a mitimum 01
2” x 4’wocd sluddstg and 3/S” thickness drywall
orplaster/lalh.
Remove all packaging malerial from inside
microwave oven. Check the ticrowave oven
for damage -see WARNING for excessrve
microwave energy exposure. If any damage is
evident, dc Not operale Ihe timwave oven until
it is checked by an authorized KilchenAid service
usw Iem
k,, Llduded
wllh ~IaIlaLkn
In~vucfk.-u.
lechnician
Property Damage Hazard
Place a porlkn of carton or another
heavy material over Ihe countertop
and ranae before lnstalllna the
mkrow&e oven. Do Nol use a
plastic cover. Fallure IO pro&cl
cooklng surtace or countertop could
resutt In ~rooertv darnaoe.
NOTE:
h Is the customeh responslblltty to:
- contact a quallfled electrkal Installer.
- assure that electrkal lnstallatlon Is
adsquate and In contormance wtlh
Natlonal Electrkal Code, ANSU
NFPA 7CMatesl edltlon, and local
cedes and ordinances.
NOTE:
I
Do Not use lhls mlcrowave oven
tOr commercial purposes. This
mlcrowave oven Is deslgned lor
household use
only.
Parts supplied
for installation:
4,114” I 3”
loggb bob
2, 114” x T boil.
QQ
4, l/4” x2” fag screw*
I, power c&i r&ii and
1, rrcunling mew
Q
ld=‘-wkW
2, tspphg screw.
(brlghl-oolored)
CD@==- -
1, 118 slap
@
1, powm
2. wa%hsn
cord b”shlrq
JO” min. dssrsnce born
top Of tmplsl~ 10
CookIng .ur,ace 0,
u)““IETlOP
Tools and
materials needed
for installation:
YI- md J/4”
wood ddll bit.
~rlon 01 .raLha, hmaq ma&al
for covedng co”nlarlOp
Special hardware and loots are required for brick or
masonry walls.
Al least four anchor botrs must be anchored inlo
Ihe wall and the mounting area must be capable of
meeling the 150 Lx-weigh1 requirement.
Fallure lo use more than one person dudng
lnstallatlon may result In personal Injury.
Personal Injury or Property
Damage Hard
- This mlcrowave oven must be mounted
agalnsl and supported by a flat, vertical
wall.
- This mlcrowave oven must be attached
wllh two lag screws to a mlnlmum 01 one
venkal2” x 4” wall stud.
- Do Not mount mlcrowave oven to an
tsland or peninsula cablnel.
- The mkrowave oven top and rear
supporllng structures musl be capable 01
supportIng 150 Ibs.. plus the welght of
any Hems placed lnstde the mlcrowave
oven or upper cablnet.
Failure to mourn the mkrowave oven as
Insttucled could result In personal Injury
and/or property damage.
Electrkal Shock Hazard
- Take special care when drllllng holes
Inlo the wall. Electrkal wires may be
concealed benlnd lhe wall coverlng
and contact with them could result
In electrkal shock.
- Locate any eleotrkal clroutts that
could be attected by lhe lnstsllatlon
01 this product and disconnect power
clrcult.
Failure lo do so could result In
electrkal shock.
Excasslve Mkrowave Energy
Exposure
- Do Not attempt to opetale this
mkrowave oven wlth the door open.
- Do Not tamper wlth or Meal the
safety Interlocks.
- IX Not place objects between the
mlcrowave Oven lront lace and
the door.
- Do Not allow sol1 or cleaner residue
to accumulate on seallna sutiace of
mkrowave oven door. -
- Do Not operate mlcrowave oven If H
Is damaged.
- The mlcrowave oven door must
close properly to provide sale
operation: Do Not use mlcrowave
oven If door Is bent: hlnaes and
latches are broken or l&e; or door
seals, sealing surtaces or glass Is
broken.
* The mlcrowave oven should only be
adjusted and repalred by a quallfled
repalr person.
- Have a quallfled repalr person check
lor mlcmwave leakage If a repalr
Is made.
Fallure to use mlcrowave oven except
as instructed may result In exposure
lo excessive mlcrowave energy.
I
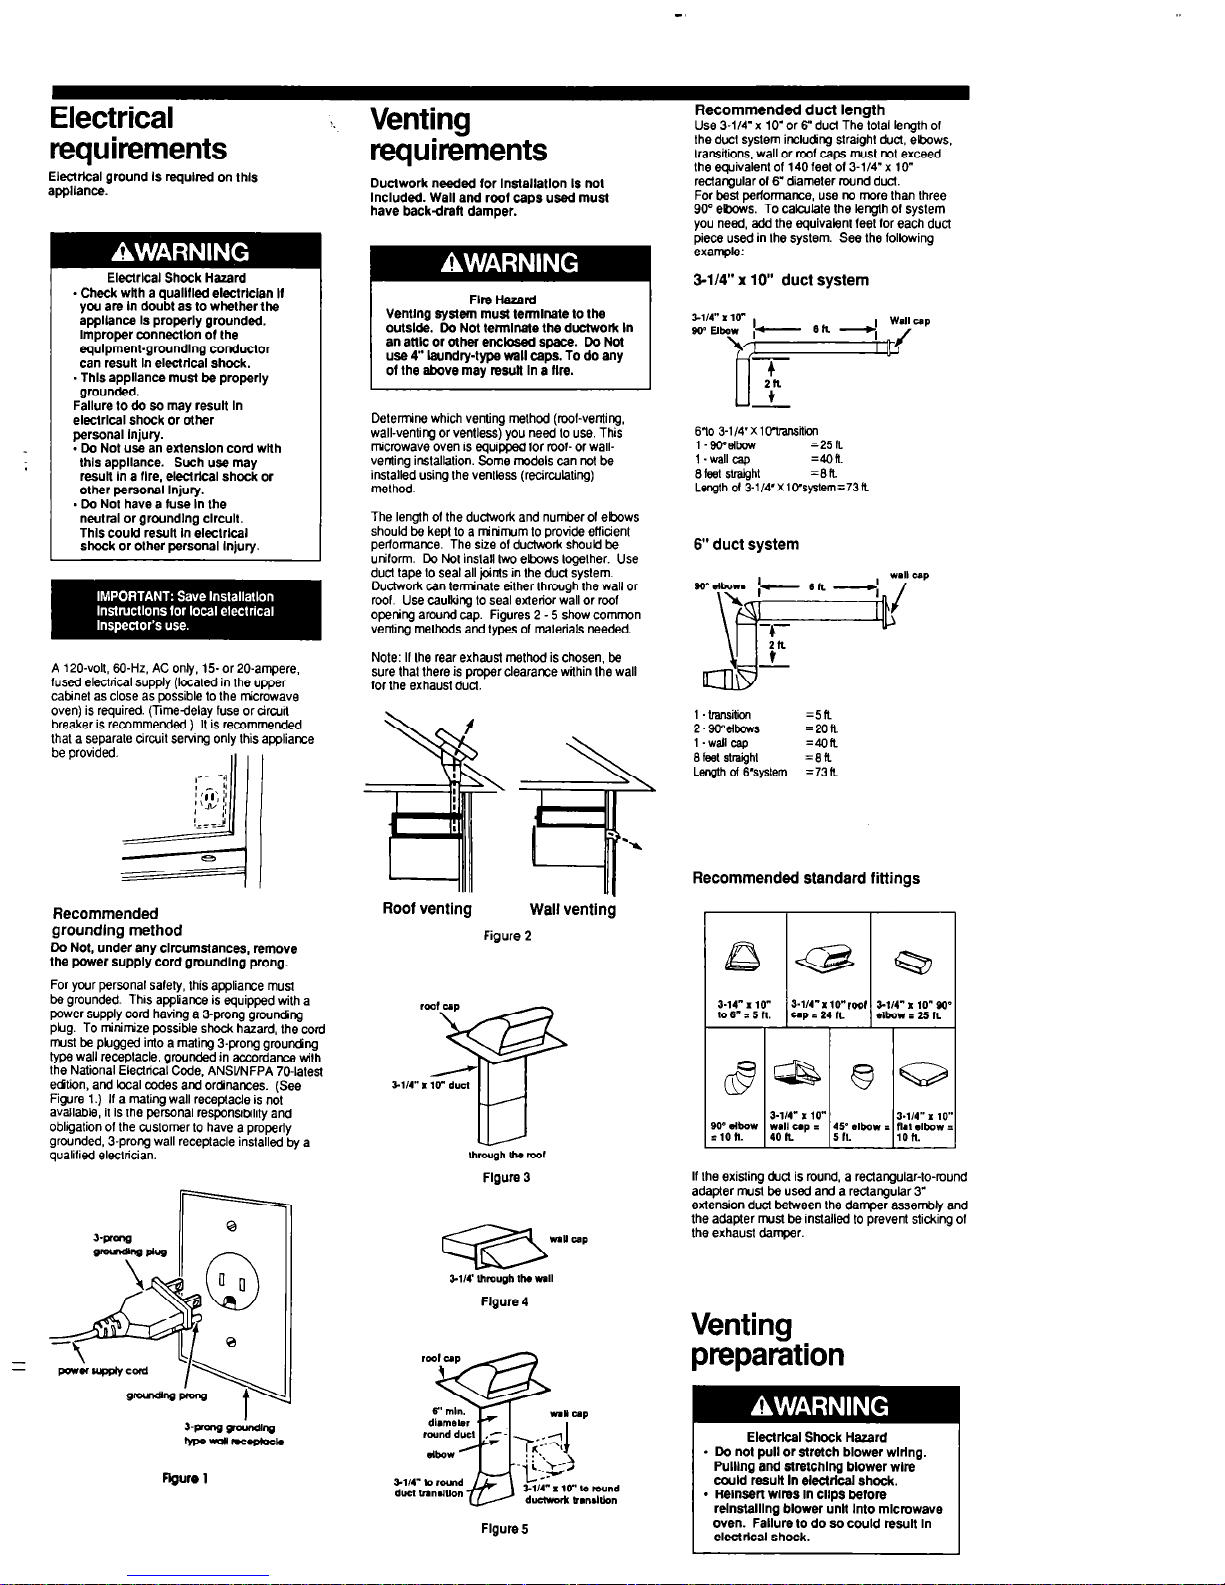
Electrical
>. Venting
requirements
Use 3-114” X lo’or 6” duct
Thelolal length of
the duct syslem including straight duct, elbows,
Iransilions, wall or roof caps must not exceed
Ihe equivalenl of 140 feel 013114” x 10
reclargularof 6” diameter round duel.
For best performance, use no more lhan three
90” ebnvs. To calculate the length of system
you need, add the equivalent feel lor each duct
piece used in Ihe system. See the lollowing
exarnpta:
3-M” x lo” duct system
requirements
Electrical ground Is required on lhls
appliance.
Ductwork needed tor lnstallatlon Is not
Included. Wall and root caps used must
have backdratt damper.
Electrkal Shock Hazard
- Check with a qualllled electrlclan I1
yw are In doubt as to whether the
appliance Is properly grounded.
Improper connection of the
equlpmenl-groundlng conductor
can result In electrical shock.
- Thls appliance must be properly
grounded.
Failure lo do so may result In
eleclrkal shock or other
personal Injury.
- Do Not use an exlenslon cord with
lhls aoollance. Such use mav
re&I’n a flre, electrical shock or
other personal Injury.
- Do Not have
a fuse
In the
neutral or groundlng clrcull.
Thls could result In eleclrkal
shock or other personal Injury.
Flte Hazard
Venting system must temrlnale lo the
oulslde. Do Not lerrnlnate the ductwork In
an attlc or other enclosed space. Do Not
use 4” laundry-type wall caps. To do
any
of
the
above may rewll
In a fire.
6”iO 3-1/4”x1Owmiiion
l -QOWXW
=25n
1 . wall cap
=4Ofl.
8teestraQhl
=an
Lenglh 01 3-1/4,X l(rsyslem=73 It
Delemrine which venting melhod (rool-venting.
wall-venlim or ventless) vou need lo use. This
microwave-oven is equipped lor tool- or wallventing inslalbtion. Some models can not be
installed using the venlless (rackcuhling)
method
The length 01 the ductwork and number 01 ebows
should be kept lo a rrWr!um lo provide etlicienl
periomwvce. The size of ductwork should be
uniform. Do Not inslall two elbows logelher. Use
dud tape lo seal all joints in Ihe duct syslem.
Ductwork can tetinale eilher lhrouah the wall or
roof. Use caulking lo seal edenor &I or roof
opening around cap. Figures 2 - 5 show cornnon
venlmg melhods and lypes of malerials needed.
6” duct system
9o”dbowm I-
I
6k -4;
wall up
1
-
-- 4
,b/
2n
t
Note: II Ihe rear exhaust method is chosen, be
sure that there is proper clearance within Ihe wall
lor the exhaust duct.
A 120~voll, 60.Hz. AC onty. 15 or 20.ampere,
fused electrical supply (localed in the upper
cabinel as close as possible lo the ticrowave
oven) is required. (Timedelay fuse ordrcurt
breaker is recommended) II is recommended
that a separale ckcuil sewng only this appliance
be provided.
.----/,Il I I
1 ~transiiizl
=5n
2’%%YJwS
=2on
I-Wallcap =4Ot
8faelelMghl
=i3n
Length ol6”syslem
=73n
Recommended
groundlng method
Co Not, under any circumstances, remove
the power supply cord gmundlng prong.
For your personal salely, lhis appliance musl
be grounded. Thus apptance is equipped wilh a
power supply cord having a 3prong~groundng
Dkl.
To minimize wssible shock hazard. the cord
inil b2 plugged into a mating 3-pro~grOun&g
type wall receplacle, grounded in accordance wilh
Ihe National Electrical Code, ANSVNFPA 70-lalesi
edtiin, and local codes and ordnances. (See
Figxe 1.) If a mating wall receptacle is nol
available, it is Ihe personal responsrbilily and
obligalion of the cuslomer lo have a properly
grounded, 3-prong wall receptacle inslalled by a
qualified eleckician.
Recommended standard fittings
Roof venting
Wall venting
Figure 2
r
3.14" x 10"
2.114" x 10" rod
to 6" i s n. Up.24".
3-c; f g?'
roof up
37
11N” I lo” d”cl
A--l--l
a@-
3-l/4' X10"
3.1/4" x lo"
wall up i
45' elbow i R., db.aW =
40 Il. 5 Il.
lOIt.
&
900 how
=lOH.
ew.xgtl Ihe tsar
Flgure 3
If Ihe existing duct is round, a rectangular-to-round
adapler nusi be used at-d a rectangular 3
extension duct between Ihe damper assembly and
the adapter must be inslalled to prevenl sticking of
Ihe exhaust damper.
r--==Yl
m--G-
&J
g-yuw, (FJ
I
-iLm.d @
I
W-J-w m
t
&l/4’ lhmugh tha -11
Flgure 4
Ver
P=
ting
3atation
-
-
J-F-w&@hl
~~m-Ploc*
Electrkal Shock Hazard
- Co not pull or stretch blower wlrlng.
Pulling and etrelchlng blower wire
could result In etectrkal shock.
- Reinsert wins In clips before
rdnstalllng blower untt Into mlcrowave
oven. Fallum lo do so could result In
electrical shock.
91,4- b round
duct hn.l"on
SlN" I lo" u) mund
d- bmshbn
Flpe I
Flgure 5
 Loading...