


REFRIGERATOR
Use & Care Guide
For questions about features, operation/performance, parts, accessories or service, call: 1-800-422-1230
In Canada, call for assistance 1-800-461-5681, for installation and service, call: 1-800-807-6777 or visit our website at...
www.kitchenaid.com or www.KitchenAid.ca
RÉFRIGÉRATEUR
Guide d’utilisation et d’entretien
Au Canada, pour assistance composez le 1-800-461-5681, pour installation ou service composez le 1-800-807-6777 ou visitez notre site web à...
www.KitchenAid.ca
Table of Contents/Table des matières.............................................................................2
2311008

TABLE OF CONTENTS
TABLE DES MATIÈRES
REFRIGERATOR SAFETY .............................................................3
Proper Disposal of Your Old Refrigerator....................................3
INSTALLATION REQUIREMENTS................................................4
Location Requirements................................................................4
Electrical Requirements ...............................................................4
INSTALLATION INSTRUCTIONS..................................................5
Unpacking ....................................................................................5
Install the Leveling Legs (optional)...............................................5
Door Closing.................................................................................6
Caster Installation (optional).........................................................6
REFRIGERATOR USE....................................................................7
Normal Sounds ............................................................................7
Using the Control .........................................................................7
REFRIGERATOR FEATURES ........................................................8
Refrigerator Shelves.....................................................................8
Refrigerator Baskets ....................................................................8
REFRIGERATOR CARE .................................................................8
Cleaning........................................................................................8
Changing the Light Bulb ..............................................................9
Vacation and Moving Care...........................................................9
Winterizing....................................................................................9
TROUBLESHOOTING ..................................................................10
ASSISTANCE OR SERVICE.........................................................11
In the U.S.A. ...............................................................................11
In Canada ...................................................................................11
Accessories................................................................................11
WARRANTY ..................................................................................12
SÉCURITÉ DU RÉFRIGÉRATEUR ..............................................14
Mise au rebut de votre vieux réfrigérateur.................................14
EXIGENCES D’INSTALLATION...................................................15
Exigences d'emplacement.........................................................15
Spécifications électriques ..........................................................15
INSTRUCTIONS D’INSTALLATION.............................................16
Déballage....................................................................................16
Installation des pieds de nivellement (facultatif)........................16
Fermeture de la porte.................................................................17
Installation des roulettes (facultatif)............................................17
UTILISATION DU RÉFRIGÉRATEUR..........................................18
Sons normaux ............................................................................18
Utilisation de la commande........................................................18
CARACTÉRISTIQUES DU RÉFRIGÉRATEUR ...........................19
Tablettes du réfrigérateur...........................................................19
Paniers du réfrigérateur..............................................................19
ENTRETIEN DU RÉFRIGÉRATEUR ............................................19
Nettoyage ...................................................................................19
Changement de l’ampoule d’éclairage......................................20
Précautions à prendre pour les vacances
et avant un déménagement .......................................................20
Préparation pour l'hiver..............................................................20
DÉPANNAGE.................................................................................21
ASSISTANCE OU SERVICE.........................................................22
Accessoires ................................................................................22
GARANTIE.....................................................................................23
2

REFRIGERATOR SAFETY
Your safety and the safety of others are very important.
We have provided many important safety messages in this manual and on your appliance. Always read and obey all safety
messages.
This is the safety alert symbol.
This symbol alerts you to potential hazards that can kill or hurt you and others.
All safety messages will follow the safety alert symbol and either the word “DANGER” or “WARNING.”
These words mean:
You can be killed or seriously injured if you don't immediately
DANGER
WARNING
All safety messages will tell you what the potential hazard is, tell you how to reduce the chance of injury, and tell you what can
happen if the instructions are not followed.
IMPORTANT SAFETY INSTRUCTIONS
WARNING:
■
Plug into a grounded 3 prong outlet.
■
Do not remove ground prong.
■
Do not use an adapter.
■
Do not use an extension cord.
■
Disconnect power before servicing.
■
Replace all parts and panels before operating.
To reduce the risk of fire, electric shock, or injury when using your refrigerator, follow these basic precautions:
SAVE THESE INSTRUCTIONS
follow instructions.
can be killed or seriously injured if you don't
You
instructions.
■
Remove doors from your old refrigerator.
■
Use nonflammable cleaner.
■
Keep flammable materials and vapors, such as gasoline,
away from refrigerator.
■
Use two or more people to move and install refrigerator.
follow
Proper Disposal of Your Old Refrigerator
WARNING
Suffocation Hazard
Remove doors from your old refrigerator.
Failure to do so can result in death or brain damage.
IMPORTANT: Child entrapment and suffocation are not problems
of the past. Junked or abandoned refrigerators are still dangerous
– even if they will sit for “just a few days.” If you are getting rid of
your old refrigerator, please follow these instructions to help
prevent accidents.
Before you throw away your old refrigerator or freezer:
■ Take off the door.
■ Leave the shelves in place so that children may not easily
climb inside.
3
INSTALLATION REQUIREMENTS
Location Requirements
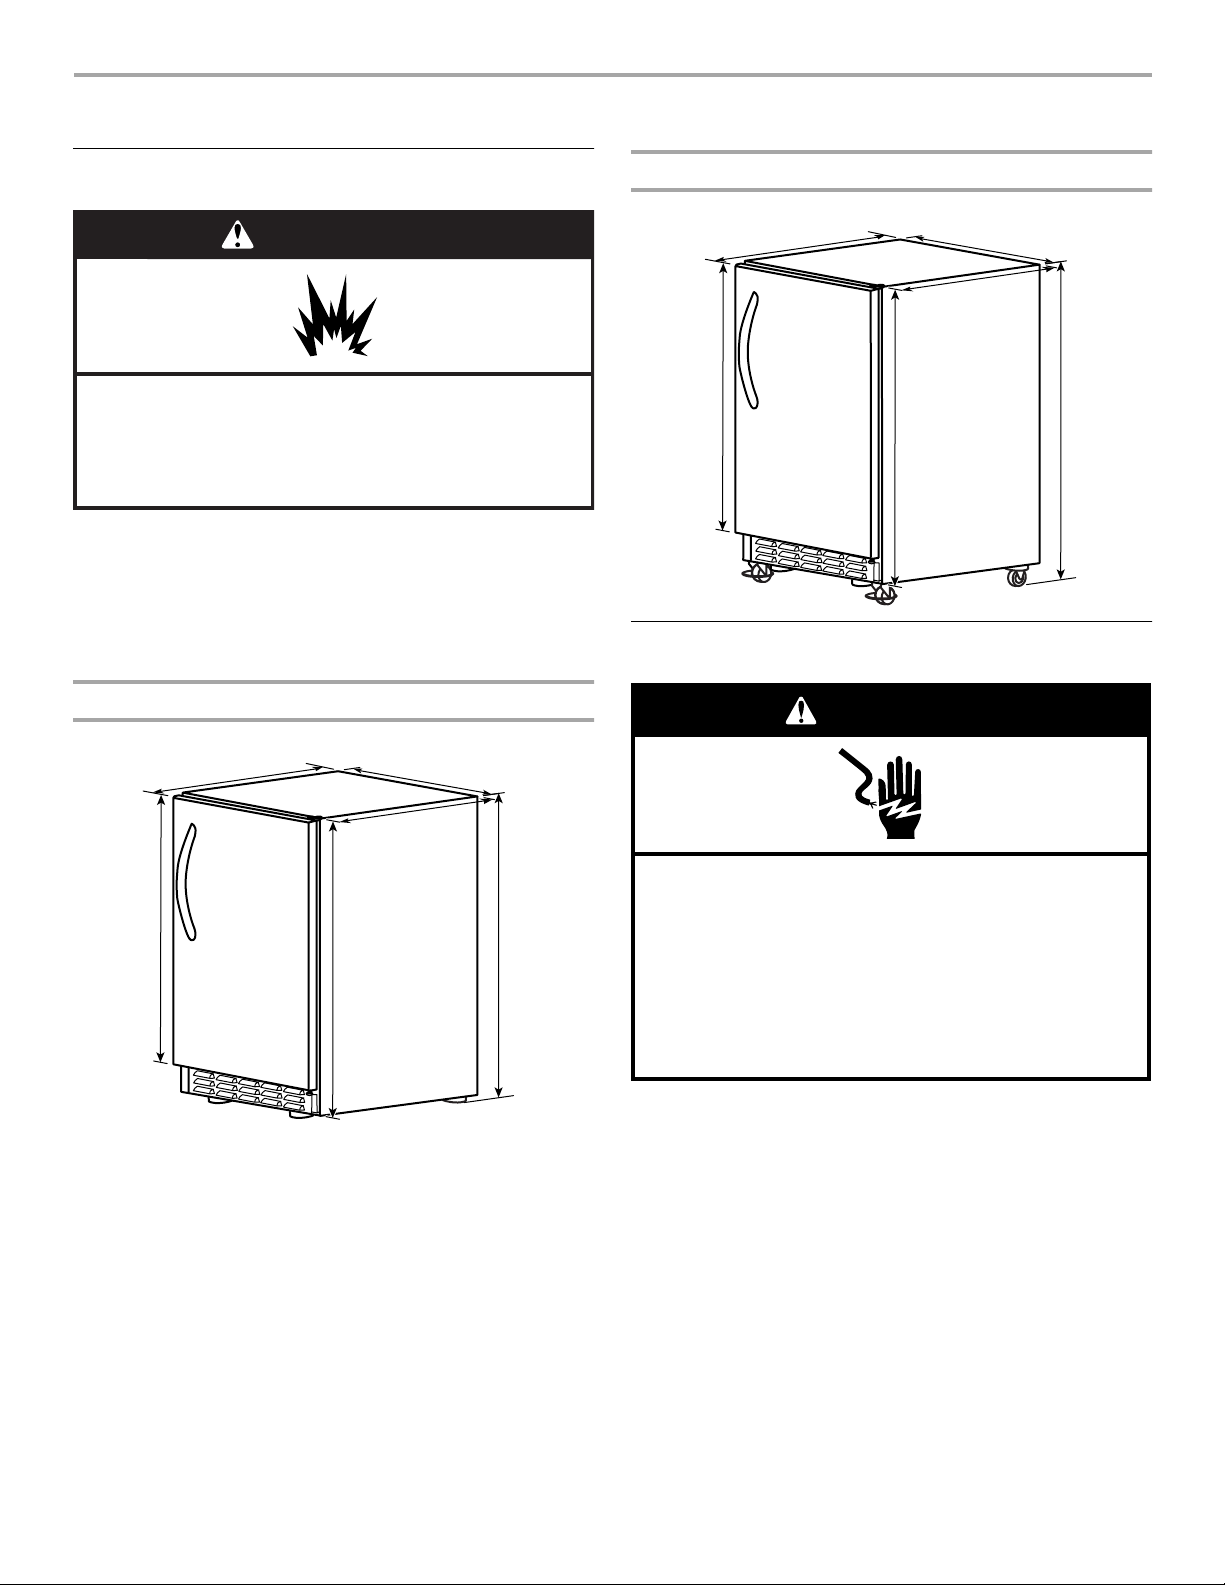
WARNING
Explosion Hazard
Keep flammable materials and vapors, such as
gasoline, away from refrigerator.
Failure to do so can result in death, explosion, or fire.
Your refrigerator operates most efficiently when located in an
area where the temperature is normally between 15°F (-9°C) and
120°F (49°C).
The refrigerator is equipped with a heater to keep contents from
freezing in cold outside temperatures below 32°F (0°C) and
above 15°F (-9°C). If the temperature falls below 15°F (-9°C)
remove contents from refrigerator. See “Winterizing.”
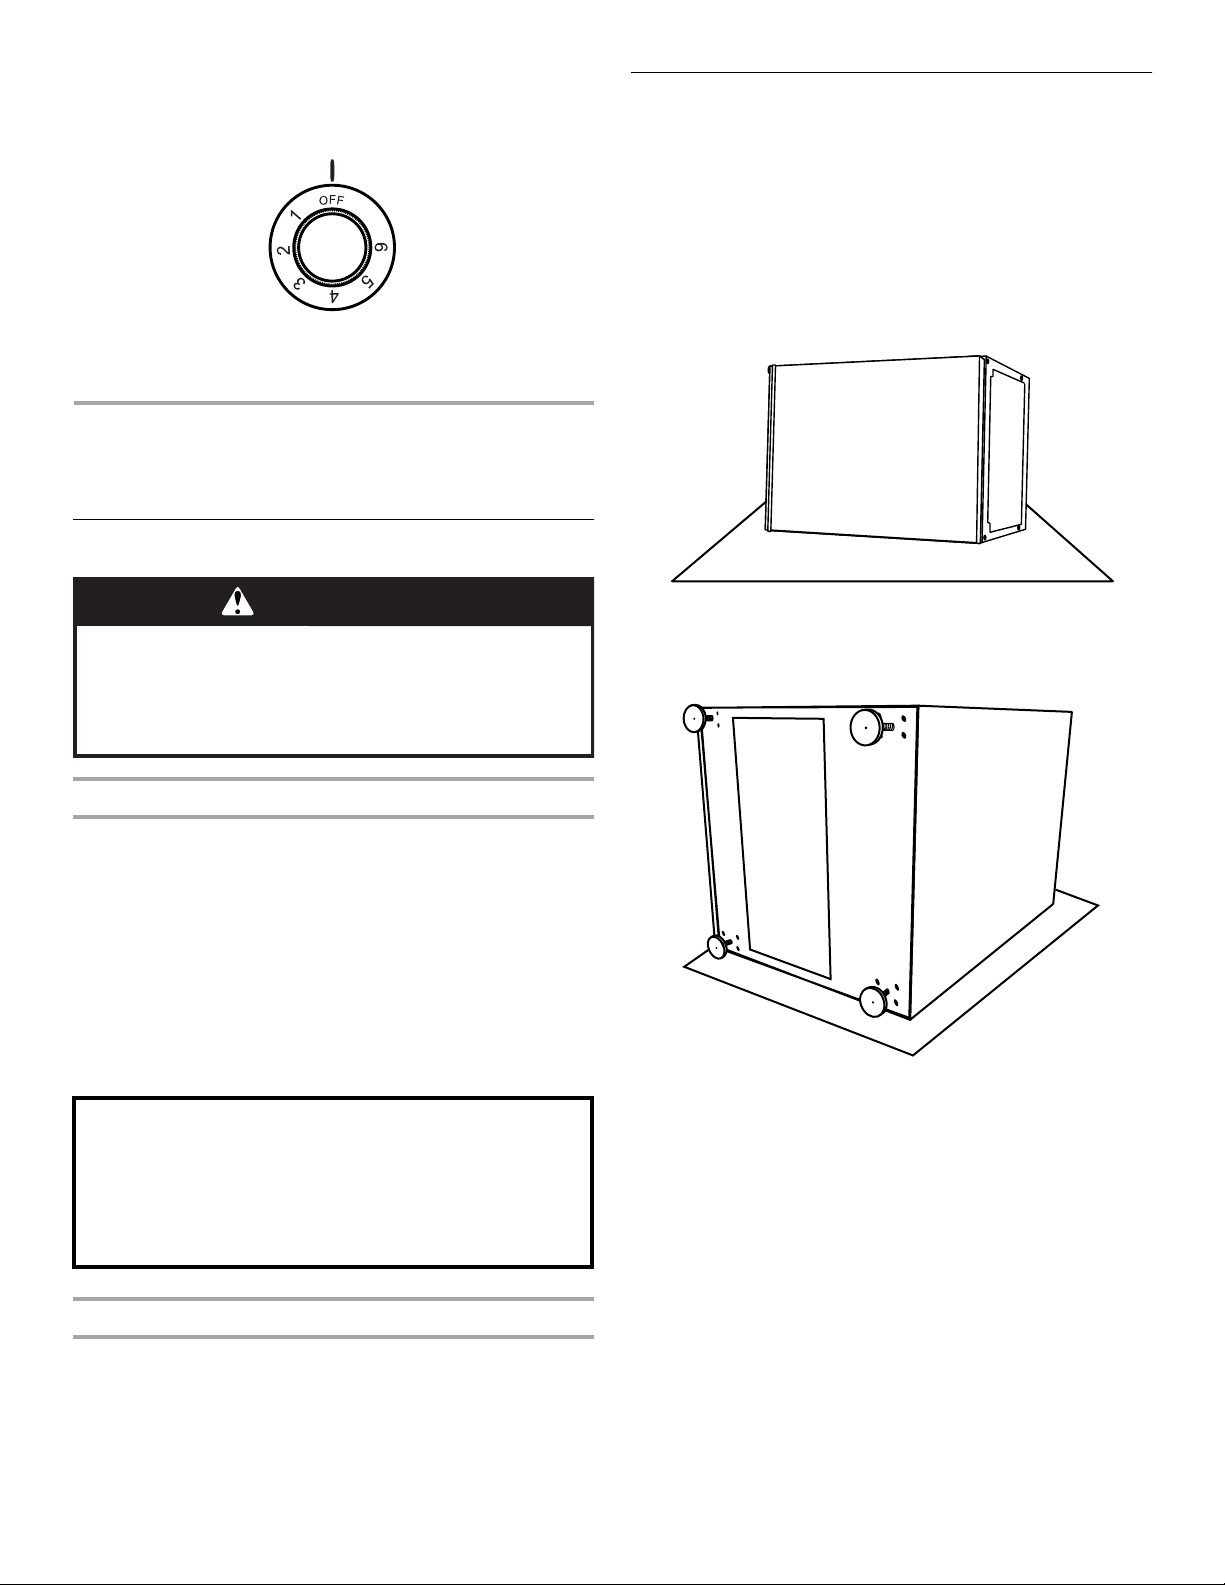
Dimensions with Leveling Legs Installed
Dimensions with Casters Installed
¹⁄₈"
26
(66.4 cm)
31"
(78.7 cm)
¹⁄₂"
34
(87.6 cm)
Electrical Requirements
WARNING
24"
(61.0 cm)
³⁄₄"
23
(60.3 cm)
37"
(94.2 cm)
31"
(78.7 cm)
¹⁄₈"
26
(66.4 cm)
¹⁄₂"
34
(87.6 cm)
23
(60.3 cm)
24"
(61.0 cm)
³⁄₄"
35¹⁄₈"
(89.2 cm)
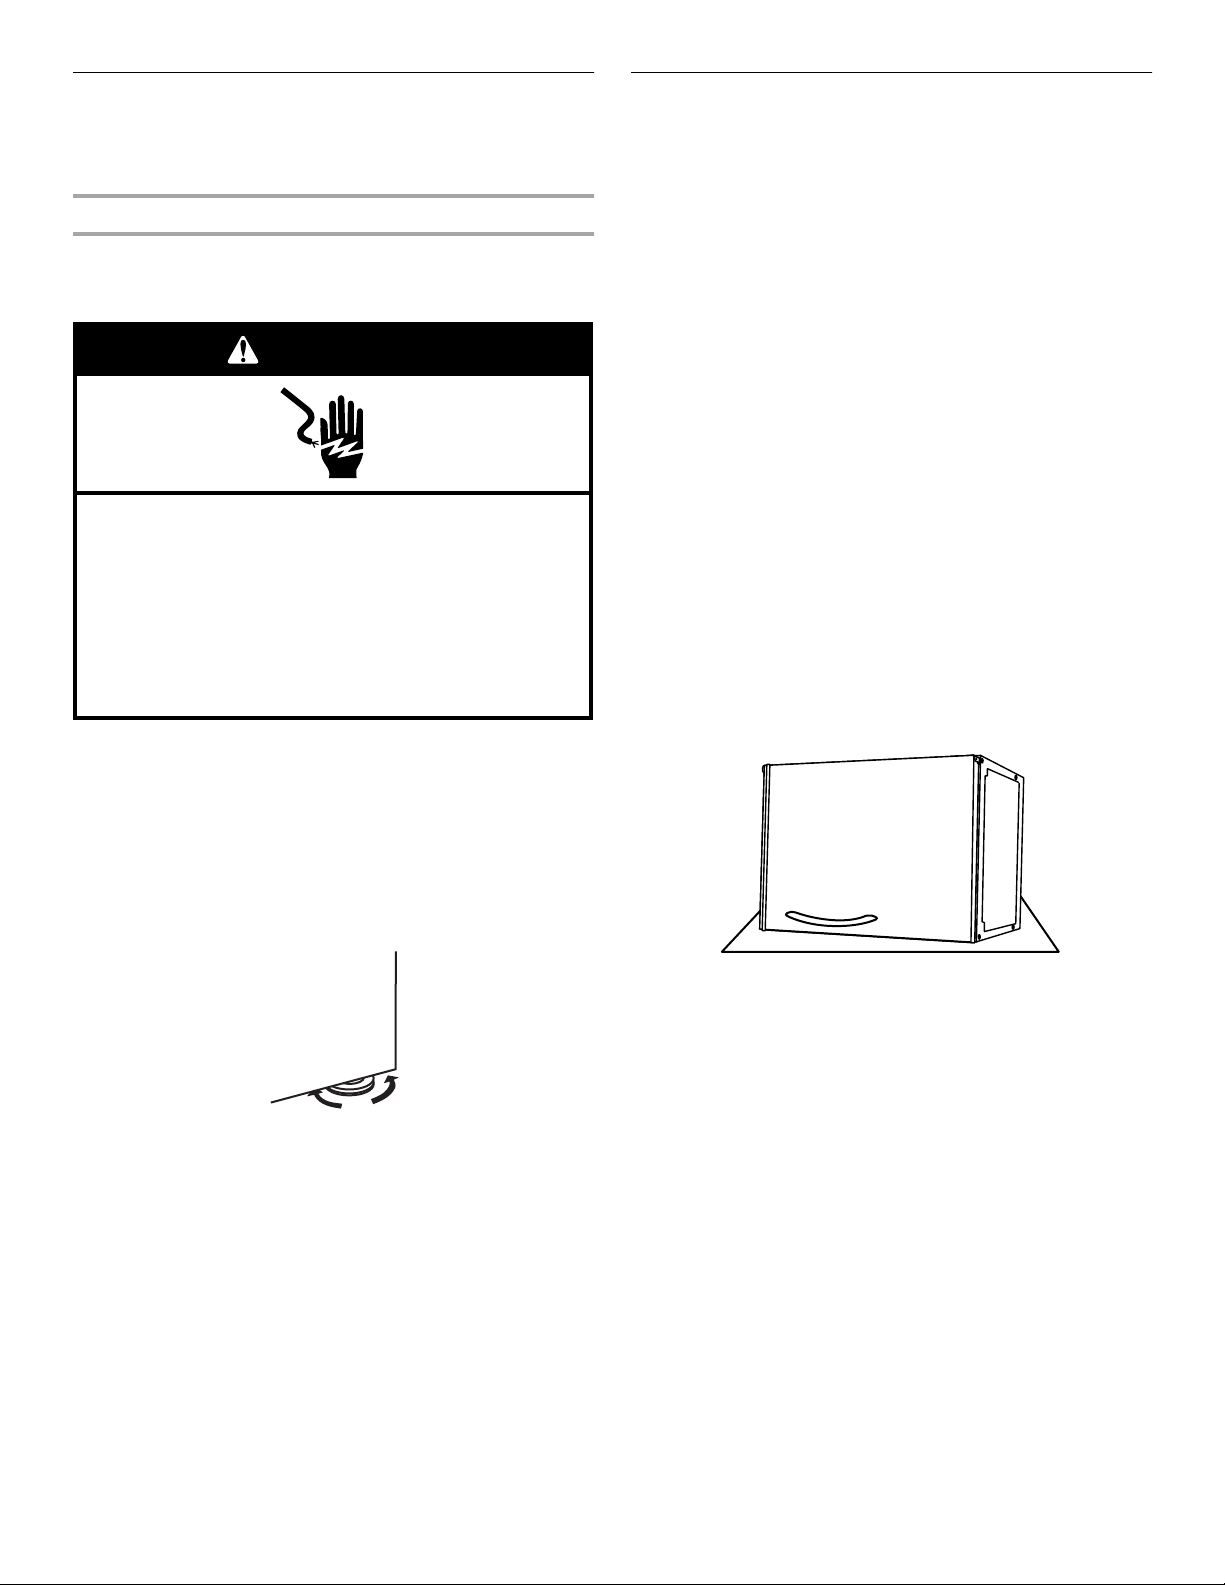
Electrical Shock Hazard
Plug into a grounded 3 prong outlet.
Do not remove ground prong.
Do not use an adapter.
Do not use an extension cord.
Failure to follow these instructions can result in death,
fire, or electrical shock.
Before you move your refrigerator into its final location, it is
important to make sure you have the proper electrical
connection:
Recommended grounding method
A 115 Volt, 60 Hz., AC only 15– or 20–amp fused, grounded
electrical supply is required. It is recommended that a separate
circuit serving only your refrigerator be provided. Use an outlet
that cannot be turned off by a switch. Do not use an
extension cord.
4
NOTE: Before performing any type of installation, cleaning, or
removing a light bulb, turn the control to the Off position as
shown and then disconnect the refrigerator from the electrical
source.
When you are finished, reconnect the refrigerator to the electrical
source and reset the control to the desired setting. See “Using
the Control.”
INSTALLATION
INSTRUCTIONS
Unpacking
Install the Leveling Legs (optional)
IMPORTANT:
■ Always lay the refrigerator with the hinge facing upward
during the leveling leg installation. If you lay the refrigerator
on its back, you can damage the refrigerator.
■ Do not place refrigerator on its top. It may damage the
compressor.
■ Allow the refrigerator to sit upright for 4 hours before plugging
into an electrical outlet.
1. Using two or more people, lay the refrigerator on its side.
WARNING
Excessive Weight Hazard
Use two or more people to move and install
refrigerator.
Failure to do so can result in back or other injury.
Removing packaging materials
■ Using a T–16 torque wrench, remove skids from the bottom
of the refrigerator and properly discard the attachment bolts.
■ Remove tape and glue residue from surfaces before turning
on the refrigerator. Rub a small amount of liquid dish soap
over the adhesive with your fingers. Wipe with warm water
and dry.
■ Do not use sharp instruments, rubbing alcohol, flammable
fluids, or abrasive cleaners to remove tape or glue. These
products can damage the surface of your refrigerator. For
more information, see the “Refrigerator Safety” section.
■ Dispose of all packaging materials properly.
When Moving Your Refrigerator:
Your refrigerator is heavy. When moving the refrigerator
for cleaning or service, be sure to protect the floor.
Always pull the refrigerator straight out when moving it.
Do not wiggle or “walk” the refrigerator when trying to move
it, as floor damage could occur.
Clean Before Using
After you remove all of the packaging materials, clean the inside
of your refrigerator before using it. See the cleaning instructions
in the “Refrigerator Care” section.
2. Screw two leveling legs into the bottom of the refrigerator at
the front.
3. Screw two leveling legs into the bottom of the refrigerator at
the rear.
4. Using two or more people, stand the refrigerator upright.
5. Allow the refrigerator to sit upright for 4 hours.
IMPORTANT: To prevent floor damage, keep the cardboard
shipping piece or plywood under the refrigerator until it is
installed in the operating position.
6. Move the refrigerator to its final location. Be sure to move the
refrigerator straight back and evenly into the opening.
7. Lower the front legs just enough to lift the cabinet up off of
the floor.
8. Adjust the legs to level the refrigerator:
■ Turn the leveling leg to the right (clockwise) to lower that
side of the refrigerator.
■ Turn the leveling leg to the left (counterclockwise) to raise
that side of the refrigerator.
5
Door Closing
NOTE: You can install either the leveling legs or the casters on
your refrigerator. Shims can be placed under the casters to level
a refrigerator that has casters installed.
Door Closing
Your refrigerator has four leveling legs. If your refrigerator seems
unsteady or you want the door to close more easily, adjust the
refrigerator tilt using the instructions below:
WARNING
Electrical Shock Hazard
Plug into a grounded 3 prong outlet.
Do not remove ground prong.
Do not use an adapter.
Do not use an extension cord.
Failure to follow these instructions can result in death,
fire, or electrical shock.
1. Plug into a grounded 3 prong outlet.
2. Move the refrigerator into its final location.
3. Turn the leveling leg to the right to lower that side of the
refrigerator or turn the leveling leg to the left to raise that side.
It may take several turns of the leveling leg to adjust the tilt of
the refrigerator.
NOTE: Having someone push against the top of the
refrigerator takes some weight off the leveling legs. This
makes it easier to adjust the screws.
Caster Installation (optional)
Casters are an optional accessory. To order, call
1-800-442-9991 or contact your authorized KitchenAid dealer. In
Canada, call, 1-800-807-6777.
W
IMPORTANT:
■ Always lay the refrigerator with hinge facing upward during
the caster installation. If you lay the refrigerator on its back,
you can damage the refrigerator.
■ Do not place refrigerator on its top. It may damage the
compressor.
■ Allow the refrigerator to sit upright for 4 hours before plugging
into an electrical outlet.
1. Unpack the casters with hardware from the small box.
2. Verify contents.
■ Swivel Casters with
Brakes (2)
■ Swivel Casters (2)
3. Unplug refrigerator or disconnect power.
4. Remove food and any adjustable shelves from refrigerator.
5. Lay a piece of cardboard or other protective material on the
floor. This will protect the refrigerator from scratches.
6. Using two or more people, place the refrigerator on its side
with the hinge facing upward on top of the cardboard or
protective material. Be sure the door hinge is facing upward.
IMPORTANT: It is important that the door hinge face upward
during the entire caster installation.
■ 1³⁄₁₆" Wrench
4. Open the door again and check to make sure that it closes as
easily as you like. If not, tilt the refrigerator slightly more to the
rear by turning both leveling screws to the right. It may take
several more turns, and you should turn both leveling screws
the same amount.
6
7. Attach both locking casters to the refrigerator front. Using the
1³⁄₁₆" wrench, tighten the locking casters.
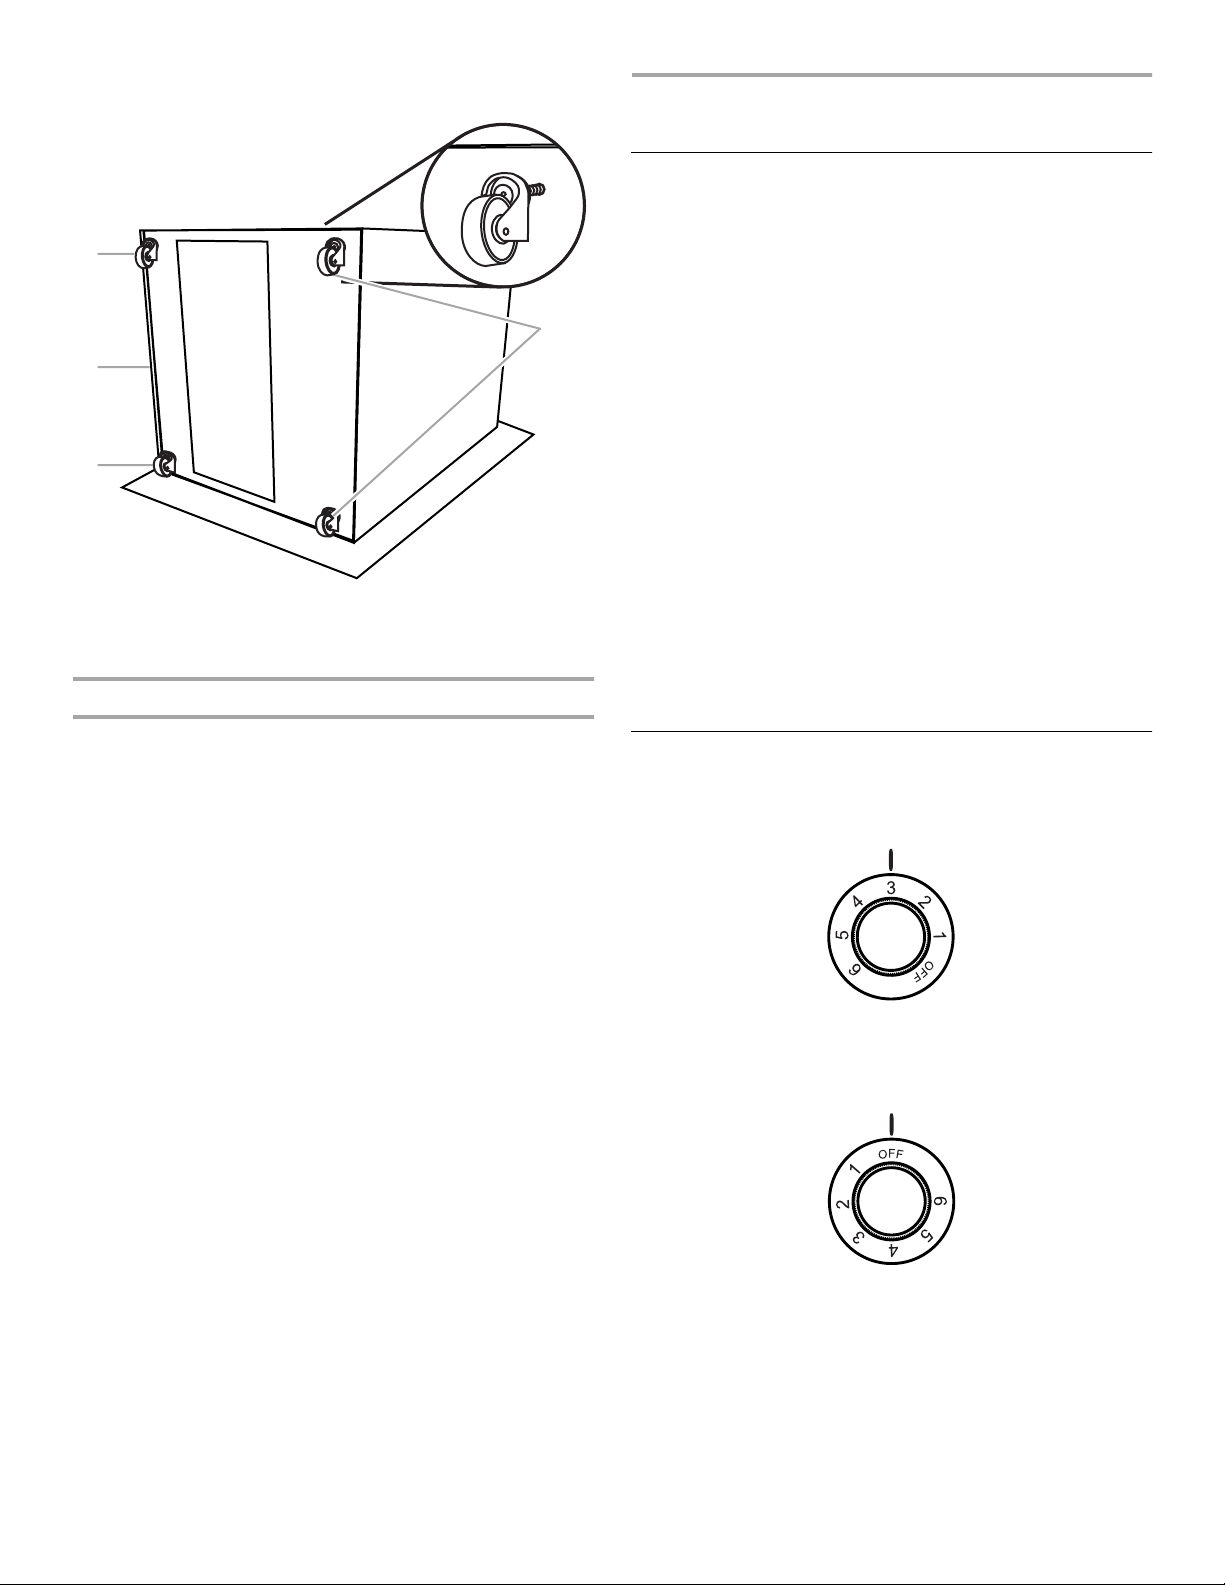
8. Attach both swivel casters to the refrigerator back. Using the
1³⁄₁₆" wrench, tighten the swivel casters.
A
C
B
A
A. Locking casters
B. Refrigerator front
C. Swivel casters
Complete the Assembly
1. Lock the front caster wheels.
NOTE: Locking the casters will help prevent the refrigerator
from moving while being lifted.
2. Using two or more people, stand the refrigerator upright.
3. Unlock the wheels and move the refrigerator into its desired
location.
4. After the refrigerator is in location, relock the wheels.
5. Allow the refrigerator to sit upright for 4 hours.
6. Plug in refrigerator or reconnect power.
REFRIGERATOR USE
Normal Sounds
Your new refrigerator may make sounds that your old one didn’t
make. Because the sounds are new to you, you might be
concerned about them. Most of the new sounds are normal. Hard
surfaces, such as the flooring and surrounding structures, can
make the sounds seem louder. The following describes the kinds
of sounds and what may be making them.
■ Your refrigerator is designed to run more efficiently to keep
your food items at the desired temperatures and to minimize
energy usage. The high efficiency compressor and fans may
cause your refrigerator to run longer than your old one. You
may also hear a pulsating or high-pitched sound from the
compressor or fans adjusting to optimize performance.
■ The evaporator fan runs continuously. This defrosts the
evaporator, keeps a constant temperature inside the
refrigerator and makes the refrigerator more energy efficient.
■ Rattling noises may come from the flow of refrigerant or items
stored inside the refrigerator.
■ As each cycle ends, you may hear a gurgling sound due to
the refrigerant flowing in your refrigerator.
■ You may hear water running into the drain pan when the
refrigerator is defrosting.
■ You may hear clicking sounds when the refrigerator starts or
stops running.
Using the Control
For your convenience, your refrigerator control is preset at the
factory. When you first install your refrigerator, make sure that the
control is still preset to the mid-setting.
To turn your refrigerator Off, turn the refrigerator control to the off
position.
NOTE: Your product will not cool when the refrigerator control is
in the Off position.
7
Adjusting Controls
The mid-setting indicated in the previous section should be
correct for normal usage. The control is set correctly when
beverages are as cold as you like.
If you need to adjust the temperature, wait at least 24 hours
between adjustments and then recheck the temperature.
To make the refrigerator colder, adjust the control to the next
higher setting. To make the refrigerator less cold, adjust the
control to the next lower setting.
REFRIGERATOR FEATURES
Refrigerator Shelves
Your outdoor refrigerator has two adjustable shelves. Each shelf
will fit in any of the four positions in the refrigerator.
To install shelves:
1. Remove the shelf by lifting the entire shelf slightly and move it
all the way to one side. Tilt the other side up and out of the
shelf supports.
2. Replace the shelf by inserting one end all the way into the
center of the shelf supports. Then, lower the other end of the
shelf and insert it into the shelf supports.
NOTE: The shelf should lower slightly and lock into place. If the
shelf does not appear stable, make sure both ends of the shelf
are inserted into the shelf supports.
Refrigerator Baskets
Your outdoor refrigerator has two attached wire baskets for
storage.
REFRIGERATOR CARE
Cleaning
WARNING
Explosion Hazard
Use nonflammable cleaner.
Failure to do so can result in death, explosion, or fire.
Clean the refrigerator about once a month to prevent odors from
building up. Wipe up spills immediately.
To clean your refrigerator:
1. Unplug refrigerator or disconnect power.
2. Remove all removable parts from inside, such as shelves, etc.
3. Hand wash, rinse, and dry removable parts and interior
surfaces thoroughly. Use a clean sponge or soft cloth and a
mild detergent in warm water.
■ Do not use abrasive or harsh cleaners such as window
sprays, scouring cleansers, flammable fluids, cleaning
waxes, concentrated detergents, bleaches or cleansers
containing petroleum products on plastic parts, interior
and door liners or gaskets. Do not use paper towels,
scouring pads, or other harsh cleaning tools. These can
scratch or damage materials.
■ To help remove odors, you can wash interior walls with a
mixture of warm water and baking soda (2 tbs. to 1 qt.
[26 g to 0.95 L] of water).
4. Wash exterior with a clean sponge or soft cloth and a mild
detergent in warm water. Do not use abrasive or harsh
cleaners. Dry thoroughly with a soft cloth.
■ To keep your stainless steel refrigerator looking like new
and to remove minor scuffs or marks, it is suggested that
you use the manufacturer’s approved Stainless Steel
Cleaner & Polish.
IMPORTANT: This cleaner is for stainless steel parts only!
■ Do not allow the Stainless Steel Cleaner & Polish to come
into contact with any plastic parts such as the trim pieces
or door gaskets. If accidental contact does occur, clean
plastic part with a sponge and mild detergent in warm
water. Dry thoroughly with a soft cloth. To order the
cleaner, see the “Accessories” section.
5. Replace the removable parts.
6. Clean the condenser coils regularly. They are located at the
back of the cabinet. Coils may need to be cleaned as often as
every other month. This may help save energy.
■ Use a vacuum with an extended attachment to clean the
condenser coils when they are dusty or dirty.
7. Plug in refrigerator or reconnect power.
8

Changing the Light Bulb
NOTE: Not all bulbs will fit your refrigerator. Be sure to replace
the bulb with one of the same size, shape and wattage.
1. Unplug refrigerator or disconnect power.
2. Using a Phillips screwdriver, remove the four screws that
secure the light shield.
A
A. Screws
3. Replace the light bulb with an appliance bulb of the same
wattage.
4. Using a Phillips screwdriver and the four screws, reattach the
light shield.
5. Plug in refrigerator or reconnect power.
Vacation and Moving Care
Moving
When you are moving your refrigerator to a new home, follow
these steps to prepare it for the move.
1. Remove all food from the refrigerator.
2. Turn the refrigerator control to the off position. See “Using the
Control.”
3. Unplug the refrigerator.
4. Clean, wipe, and dry it thoroughly.
5. Take out all removable parts, wrap them well, and tape them
together so they don’t shift and rattle during the move.
6. Tape the doors shut and tape the power cord to the
refrigerator cabinet.
When you get to your new home, put everything back and refer to
the “Installation Instructions” section for preparation instructions.
Winterizing
Your refrigerator is equipped with a heater to keep it functioning
normally in temperatures as low as 15°F (-9°C). If the temperature
drops below 15°F (-9°C), remove all items from the refrigerator to
prevent them from freezing.
Vac ations
If you choose to leave the refrigerator on while you’re away, use
up any perishables and freeze other items.
If you choose to turn the refrigerator off before you leave, follow
these steps.
1. Remove all food from the refrigerator.
2. Turn the refrigerator control to the off position. See “Using the
Control.”
3. Unplug the refrigerator.
4. Clean the refrigerator. See “Cleaning.”
5. Tape a rubber or wood block to the top of the door to prop it
open far enough for air to get in. This stops odor and mold
from building up.
9

TROUBLESHOOTING
Try the solutions suggested here first in order to avoid the cost of an unnecessary service call.
Your refrigerator will not operate
■ Is the power supply cord unplugged? Plug into a grounded
3 prong outlet.
■ Has a household fuse blown, or has a circuit breaker
tripped? Replace the fuse or reset the circuit.
■ Is the Refrigerator Control turned to the OFF position?
See “Using the Control.”
The lights do not work
■ Is the power supply cord unplugged? Plug into a grounded
3 prong outlet.
■ Is a light bulb loose in the socket? Turn the refrigerator
control to the off position. Disconnect the refrigerator from
the electrical supply. Gently remove the bulb and reinsert.
Then reconnect the refrigerator to the electrical supply and
reset the refrigerator control.
■ Has a light bulb burned out? Replace with an appliance
bulb of the same wattage, size, and shape. See “Changing
the Light Bulb.”
There is water in the defrost drain pan
■ Is the refrigerator defrosting? The water will evaporate. It is
normal for water to drip into the defrost pan.
■ Is it more humid than normal? Expect that the water in the
defrost pan will take longer to evaporate. This is normal when
it is hot or humid.
Temperature is too warm
■ Is the door opened often? Be aware that the refrigerator will
warm when this occurs. In order to keep the refrigerator cool,
try to get everything you need out of the refrigerator at once,
keep food organized so it is easy to find, and close the door
as soon as the food is removed.
■ Has a large amount of food just been added to the
refrigerator? Adding a large amount of food warms the
refrigerator. It can take several hours for the refrigerator to
return to the normal temperature.
■ Is the control set correctly for the surrounding
conditions? See “Using the Control.”
There is interior moisture buildup
■ Is the door opened often? To avoid humidity buildup, try to
get everything you need out of the refrigerator at once, keep
food organized so it is easy to find, and close the door as
soon as the food is removed. When the door is opened,
humidity from the room air enters the refrigerator. The more
often the door is opened, the faster humidity builds up,
especially when the room itself is very humid.
■ Is it humid? It is normal for moisture to build up inside the
refrigerator when the air is humid.
■ Is the food packaged correctly? Check that all food is
securely wrapped. Wipe off damp food containers before
placing in the refrigerator.
■ Is the control set correctly for the surrounding
conditions? See “Using the Control.”
The motor seems to run too much
■ Is the temperature outside hotter than normal? Expect the
motor to run longer under warm conditions. At normal
outdoor temperatures, expect your motor to run about 40%
to 80% of the time. Under warmer conditions, expect it to run
even more of the time.
■ Has a large amount of food just been added to the
refrigerator? Adding a large amount of food warms the
refrigerator. It is normal for the motor to run longer in order to
cool the refrigerator back down.
■ Is the door opened often? Expect the motor to run longer
when this occurs. In order to conserve energy, try to get
everything you need out of the refrigerator at once, keep food
organized so it is easy to find, and close the door as soon as
the food is removed.
■ Is the control set correctly for the surrounding
conditions? See “Using the Control.”
■ Is the door closed completely? Push the doors firmly shut.
If they will not shut all the way, see “The door will not close
completely” later in this section.
■ Are the condenser coils dirty? This prevents air transfer and
makes the motor work harder. Clean the condenser coils. See
“Cleaning.”
■ Is the evaporator fan running? The evaporator fan is
designed to run continously. See “Normal Sounds.”
The door is difficult to open
■ Is the gasket dirty or sticky? Clean the gasket and the
surface that it touches. Rub a thin coat of paraffin wax on the
gasket following cleaning.
The door will not close completely
■ Are food packages blocking the door open? Rearrange
containers so that they fit more tightly and take up less
space.
■ Are the shelves out of position? Put the shelves back into
their correct positions. See “Refrigerator Use” for more
information.
■ Is the gasket sticking? Clean the gasket and the surface
that it touches. Rub a thin coat of paraffin wax on the gasket
following cleaning.
10

ASSISTANCE OR SERVICE
Before calling for assistance or service, please check
“Troubleshooting.” It may save you the cost of a service call. If
you still need help, follow the instructions below.
When calling, please know the purchase date and the complete
model and serial number of your appliance. This information will
help us to better respond to your request.
If you need replacement parts
If you need to order replacement parts, we recommend that you
only use factory specified replacement parts. Factory specified
replacement parts will fit right and work right because they are
made with the same precision used to build every new
KITCHENAID
To locate factory specified replacement parts in your area, call us
our your nearest Customer Interaction Center telephone number
or your nearest designated service center.
Call the KitchenAid Customer eXperience Center
toll free: 1-800-422-1230.
Our consultants provide assistance with:
■ Features and specifications on our full line of appliances.
■ Installation information.
■ Use and maintenance procedures.
■ Accessory and repair parts sales.
■ Specialized customer assistance (Spanish speaking, hearing
impaired, limited vision, etc.).
■ Referrals to local dealers, repair parts distributors, and
service companies. KitchenAid designated service
technicians are trained to fulfill the product warranty and
provide after-warranty service, anywhere in the United States.
To locate the KitchenAid designated service company in your
area, you can also look in your telephone directory Yellow
Pages.
®
appliance.
In the U.S.A.
For further assistance
If you need further assistance, you can write to KitchenAid with
any questions or concerns at:
KitchenAid Brand Home Appliances
Customer eXperience Center
553 Benson Road
Benton Harbor, MI 49022-2692
Please include a daytime phone number in your correspondence.
In Canada
Call the KitchenAid Canada Customer Interaction Centre toll free:
1-800-461-5681 Monday to Friday 8:00 a.m. - 6:00 p.m. (EST).
Saturday 8:30 a.m. - 4:30 p.m. (EST).
Our consultants provide assistance with:
■ Features and specifications on our full line of appliances.
■ Referrals to local dealers.
For service in Canada
Call 1-800-807-6777. KitchenAid Canada designated service
technicians are trained to fulfill the product warranty and provide
after-warranty service, anywhere in Canada.
For further assistance
If you need further assistance, you can write to KitchenAid
Canada with any questions or concerns at:
KitchenAid Canada
Customer Interaction Centre
1901 Minnesota Court
Mississauga, Ontario L5N 3A7
Please include a daytime phone number in your correspondence.
Accessories
To order accessories, call 1-800-442-9991 and ask for the
appropriate part number listed below or contact your authorized
KitchenAid dealer. In Canada, call 1-800-807-6777.
Stainless Steel Cleaner & Polish
Order Part #4396095
Replacement Light Bulb
Order Part #8206651
Casters
Order Part #4396337
Vinyl Cover
Order Part #4396334
11

KITCHENAID® REFRIGERATOR WARRANTY
ONE-YEAR FULL WARRANTY ON REFRIGERATOR
For one year from the date of purchase, when this refrigerator is operated and maintained according to instructions attached to or
furnished with the product, KitchenAid or KitchenAid Canada will pay for factory specified replacement parts and repair labor costs to
correct defects in materials or workmanship. Service must be provided by a KitchenAid designated service company.
CAVITY LINER AND SEALED REFRIGERATION SYSTEM PARTS AS LISTED
In the second through fifth years from the date of purchase, when this refrigerator is operated and maintained according to instructions
attached to or furnished with the product, KitchenAid or KitchenAid Canada will pay for replacement or repair of the refrigerator/freezer
cavity liner (including labor costs) if the part cracks due to defective materials or workmanship. Service must be provided by a
KitchenAid designated service company.
Also, in the second through fifth years from the date of purchase, KitchenAid or KitchenAid Canada will pay for factory specified
replacement parts and repair labor costs to correct defects in materials or workmanship in the sealed refrigeration system. These parts
are: compressor, evaporator, condenser, dryer, and connecting tubing. Service must be performed by a KitchenAid designated service
company.
KitchenAid or KitchenAid Canada will not pay for:
1. Service calls to correct the installation of your refrigerator, to instruct you how to use your refrigerator, to replace house fuses or
correct house wiring or plumbing, to replace light bulbs, or replacement water filters other than as noted above.
2. Repairs when your refrigerator is used in other than normal, single-family household use.
3. Pickup and delivery. Your refrigerator is designed to be repaired in the home.
4. Damage resulting from accident, alteration, misuse, abuse, fire, flood, improper installation, acts of God, or use of products not
approved by KitchenAid or KitchenAid Canada.
5. Any food loss due to product failure.
6. Repairs to parts or systems resulting from unauthorized modifications made to the appliance.
7. Replacement parts or repair labor costs for units operated outside the United States or Canada.
8. In Canada, travel or transportation expenses for customers who reside in remote areas.
KITCHENAID OR KITCHENAID CANADA SHALL NOT BE LIABLE FOR INCIDENTAL OR CONSEQUENTIAL DAMAGES.
Some states or provinces do not allow the exclusion or limitation of incidental or consequential damages, so this exclusion or limitation
may not apply to you. This warranty gives you specific legal rights, and you may also have other rights which vary from state to state or
province to province.
Outside the 50 United States and Canada, this warranty does not apply. Contact your authorized KitchenAid dealer to
determine if another warranty applies.
If you need service, first see the “Troubleshooting” section of this book. After checking “Troubleshooting,” additional help can be found
by checking the “Assistance or Service” section or by calling the KitchenAid Customer eXperience Center, 1-800-422-1230 (toll-free),
from anywhere in the U.S.A. In Canada, contact your designated KitchenAid Canada service company or call 1-800-807-6777. 11/04
SECOND THROUGH FIFTH YEAR FULL WARRANTY ON
Keep this book and your sales slip together for future
reference. You must provide proof of purchase or installation
date for in-warranty service.
Write down the following information about your refrigerator to
better help you obtain assistance or service if you ever need it.
You will need to know your complete model number and serial
number. You can find this information on the model and serial
number label located on the inside wall of the refrigerator
compartment.
12
Dealer name____________________________________________________
Address ________________________________________________________
Phone number __________________________________________________
Model number __________________________________________________
Serial number __________________________________________________
Purchase date __________________________________________________

Notes
13

SÉCURITÉ DU RÉFRIGÉRATEUR
Votre sécurité et celle des autres est très importante.
Nous donnons de nombreux messages de sécurité importants dans ce manuel et sur votre appareil ménager. Assurez-vous de
toujours lire tous les messages de sécurité et de vous y conformer.
Voici le symbole d’alerte de sécurité.
Ce symbole d’alerte de sécurité vous signale les dangers potentiels de décès et de blessures graves à vous
et à d’autres.
Tous les messages de sécurité suivront le symbole d’alerte de sécurité et le mot “DANGER” ou
“AVERTISSEMENT”. Ces mots signifient :
Risque possible de décès ou de blessure grave si vous ne
DANGER
AVERTISSEMENT
Tous les messages de sécurité vous diront quel est le danger potentiel et vous disent comment réduire le risque de blessure et
ce qui peut se produire en cas de non-respect des instructions.
IMPORTANTES INSTRUCTIONS DE SÉCURITÉ
AVERTISSEMENT :
réfrigérateur, prendre quelques précautions fondamentales, y compris les suivantes :
■ Brancher l'appareil sur une prise à 3 alvéoles reliée à la terre.
■ Ne pas enlever la broche de liaison à la terre.
■ Ne pas utiliser un adaptateur.
■ Ne pas utiliser un câble de rallonge.
■ Utiliser deux ou plus de personnes pour déplacer et installer
le réfrigérateur.
■ Débrancher la source de courant électrique avant l'entretien.
Pour réduire les risques d'incendie, de choc électrique ou des blessures lors de l'utilisation du
suivez pas immédiatement les instructions.
Risque possible de décès ou de blessure grave si vous
ne suivez pas les instructions.
■ Replacer pièces et panneaux avant de faire la remise en
marche.
■ Utiliser un produit de nettoyage ininflammable.
■ Garder les matériaux et les vapeurs inflammables, telle que
l'essence, loin du réfrigérateur.
■ Enlever les portes de votre vieux réfrigérateur.
CONSERVEZ CES INSTRUCTIONS
Mise au rebut de votre vieux réfrigérateur
AVERTISSEMENT
Risque de suffoquer
Enlever les portes de votre vieux réfrigérateur.
Le non-respect de cette instruction peut causer
un décès ou des lésions cérébrales.
IMPORTANT : L’emprisonnement et l’étouffement des enfants ne
sont pas un problème du passé. Les réfrigérateurs jetés ou
abandonnés sont encore dangereux, même s’ils sont laissés
abandonnés pendant “quelques jours seulement”. Si vous vous
débarrassez de votre vieux réfrigérateur, veuillez suivre les
instructions suivantes pour aider à éviter les accidents.
Avant de jeter votre vieux réfrigérateur ou congélateur :
■ Enlever les porte.
■ Laisser les tablettes en place de sorte que les enfants ne
peuvent pas y pénétrer facilement.
14

EXIGENCES D’INSTALLATION
Exigences d'emplacement
AVERTISSEMENT
Risque d'explosion
Garder les matériaux et les vapeurs inflammables, telle
que l'essence, loin du réfrigérateur.
Le non-respect de cette instruction peut causer
un décès, une explosion ou un incendie.
Votre réfrigérateur fonctionne à son efficacité maximale lorsqu’il
se trouve dans un endroit où la température est normalement
entre 15°F (-9°C) et 120°F (49°C).
Le réfrigérateur est équipé d'un élément thermique pour
empêcher le contenu du réfrigérateur de geler à des
températures extérieures inférieures à 32°F (0°C) et supérieures à
15°F (-9°C). Si la température tombe en-dessous de 15°F (-9°C),
retirer le contenu du réfrigérateur. Voir “Préparation pour l'hiver”.
Dimensions avec pieds de nivellement installés
Dimensions avec roulettes installées
¹⁄₈"
26
(66,4 cm)
31"
(78,7 cm)
¹⁄₂"
34
(87,6 cm)
Spécifications électriques
AVERTISSEMENT
24"
(61,0 cm)
³⁄₄"
23
(60,3 cm)
37"
(94,2 cm)
31"
(78,7 cm)
¹⁄₈"
26
(66,4 cm)
¹⁄₂"
34
(87,6 cm)
23
(60,3 cm)
24"
(61,0 cm)
³⁄₄"
35¹⁄₈"
(89,2 cm)
Risque de choc électrique
Brancher sur une prise à 3 alvéoles reliée à la terre.
Ne pas enlever la broche de liaison à la terre.
Ne pas utiliser un adaptateur.
Ne pas utiliser un câble de rallonge.
Le non-respect de ces instructions peut causer
un décès, un incendie ou un choc électrique.
Avant de placer le réfrigérateur à son emplacement final, il est
important de vous assurer d'avoir la connexion électrique
appropriée :
Méthode recommandée de mise à la terre
Une source d'alimentation de 115 volts, 60 Hz, type 15 ou
20 ampères CA seulement, protégée par fusible et adéquatement
mise à la terre est nécessaire. Il est recommandé d'utiliser un
circuit distinct pour alimenter uniquement votre réfrigérateur.
Utiliser une prise murale qui ne peut pas être mise hors circuit à
l'aide d'un commutateur. Ne pas utiliser de rallonge.
15

REMARQUE : Avant de procéder à tout type d’installation, de
nettoyage ou de changement d’une ampoule, tourner la
commande sur la position d’arrêt (Off) tel qu’illustré puis
déconnecter le réfrigérateur de la source de courant électrique.
Une fois l'opération terminée, reconnecter le réfrigérateur à la
source de courant électrique et remettre la commande au réglage
désiré. Voir “Utilisation de la commande”.
INSTRUCTIONS
D’INSTALLATION
Déballage
AVERTISSEMENT
Risque du poids excessif
Utiliser deux ou plus de personnes pour déplacer et
installer le réfrigérateur.
Le non-respect de cette instruction peut causer
une blessure au dos ou d'autre blessure.
Nettoyage avant utilisation
Après avoir enlevé tous les matériaux d’emballage, nettoyer
l’intérieur du réfrigérateur avant de l’utiliser. Voir les instructions
de nettoyage dans la section “Entretien du réfrigérateur”.
Installation des pieds de nivellement
(facultatif)
IMPORTANT :
■ Toujours faire reposer le réfrigérateur savec la charnière face
vers le haut pendant l'installation des pieds de nivellement.
Le réfrigérateur peut être endommagé s'il repose sur l'arrière.
■ Ne pas reposer le réfrigérateur sur sa partie supérieure. Le
compresseur pourrait être endommagé.
■ Laisser le réfrigérateur à la position verticale pendant
4 heures avant de le connecter à la source de courant
électrique.
1. À deux personnes ou plus, faire reposer le réfrigérateur sur le
côté.
Enlèvement des matériaux d’emballage
■ En utilisant une clé dynamométrique T–16, enlever les cales
se trouvant en bas du réfrigérateur et jeter les boulons de
fixation de façon appropriée.
■ Enlever tout résidu de ruban adhésif et de colle des surfaces
du réfrigérateur avant de le mettre en marche. Frotter une
petite quantité de savon liquide à vaisselle sur l’adhésif avec
les doigts. Rincer à l’eau tiède et sécher.
■ Ne pas utiliser d’instruments coupants, d’alcool à friction, de
liquides inflammables ou de nettoyants abrasifs pour enlever
le ruban adhésif ou la colle. Ces produits peuvent
endommager la surface de votre réfrigérateur. Pour plus de
renseignements, voir la section “Sécurité du réfrigérateur”.
■ Jeter tout le matériel d’emballage de façon appropriée.
Déplacement de votre réfrigérateur :
Votre réfrigérateur est lourd. Lors du déplacement du
réfrigérateur pour le nettoyage ou le service, veiller à protéger l
le plancher. Toujours tirer le réfrigérateur tout droit lors du
déplacement. Ne pas incliner le réfrigérateur d’un côté ou de
l’autre ni le “faire marcher” en essayant de le déplacer car le
plancher pourrait être endommagé.
2. Visser deux pieds de nivellement en bas du réfrigérateur à
l'avant.
3. Visser deux pieds de nivellement en bas du réfrigérateur à
l'arrière.
16

4. A l'aide de deux personnes ou plus, mettre le réfrigérateur en
position verticale.
5. Laisser le réfrigérateur en position verticale pendant 4 heures.
IMPORTANT : Pour éviter d'endommager le plancher, laisser
le carton d'expédition ou le contreplaqué sous le réfrigérateur
jusqu'à ce qu'il soit installé en position de fonctionnement.
6. Déplacer le réfrigérateur jusqu'à son emplacement final.
Veiller à déplacer le réfrigérateur bien droit en arrière et bien
en face de l'ouverture.
7. Abaisser les pieds avant juste assez pour soulever la caisse
au-dessus du sol.
8. Ajuster les pieds pour niveler le réfrigérateur :
■ Tourner le pied de nivellement vers la droite (dans le sens
horaire) pour abaisser ce côté du réfrigérateur.
■ Tourner le pied de nivellement vers la gauche (dans le
sens antihoraire) pour soulever ce côté du réfrigérateur.
Fermeture de la porte
REMARQUE : On peut installer soit les pieds de nivellement soit
les roulettes sur le réfrigérateur. Il est possible de placer des
cales sous les roulettes pour niveler le réfrigérateur avec roulettes
installées.
Fermeture de la porte
Le réfrigérateur a quatre pieds de nivellement. Si votre
réfrigérateur semble instable ou si vous désirez que la porte se
ferme plus facilement, ajuster l'inclinaison du réfrigérateur en
observant les instructions ci-dessous :
AVERTISSEMENT
Risque de choc électrique
Brancher sur une prise à 3 alvéoles reliée à la terre.
Ne pas enlever la broche de liaison à la terre.
Ne pas utiliser un adaptateur.
Ne pas utiliser un câble de rallonge.
Le non-respect de ces instructions peut causer
un décès, un incendie ou un choc électrique.
1. Brancher sur une prise à 3 alvéoles reliée à la terre.
2. Déplacer le réfrigérateur à son emplacement final.
3. Tourner le pied de nivellement vers la droite pour abaisser ce
côté du réfrigérateur ou vers la gauche pour soulever ce côté.
Il peut être nécessaire de tourner les pieds de plusieurs tours
pour ajuster l’inclinaison du réfrigérateur.
REMARQUE : Si une autre personne pousse le haut du
réfrigérateur, le poids devient moins lourd sur les pieds de
nivellement, ce qui rend plus facile l'ajustement des vis.
4. Ouvrir la porte de nouveau et vérifier pour s’assurer qu’elle
ferme comme vous le désirez. Sinon, incliner le réfrigérateur
un peu pIus vers l’arrière en tournant les deux vis de
nivellement vers la droite. Plusieurs tours peuvent être
nécessaires et vous devez tourner les deux vis de nivellement
de façon égale.
Installation des roulettes (facultatif)
Les roulettes sont un accessoire optionnel. Pour commander,
appeler le 1-800-442-9991 ou contacter votre revendeur agréé
KitchenAid. Au Canada, composer le 1-800-807-6777.
IMPORTANT :
■ Toujours faire reposer le réfrigérateur avec la charnière face
vers le haut pendant l'installation des pieds de nivellement.
Le réfrigérateur peut être endommagé s'il repose sur l'arrière.
■ Ne pas reposer le réfrigérateur sur sa partie supérieure. Le
compresseur pourrait être endommagé.
■ Laisser le réfrigérateur à la position verticale pendant
4 heures avant de le connecter à la source de courant
électrique.
1. Déballer les roulettes et le matériel de la petite boîte.
2. Vérifier le contenu.
■ Roulettes pivotantes
avec freins (2)
■ Roulettes pivotantes (2)
3. Débrancher le réfrigérateur ou déconnecter la source de
courant électrique.
4. Enlever la nourriture et toutes les tablettes ajustables du
réfrigérateur.
5. Placer un morceau de carton ou de matériel de protection sur
le plancher. Ceci protégera votre réfrigérateur des
égratignures.
■ Clé de 1³⁄₁₆"
17

6. À deux personnes ou plus, placer le réfrigérateur sur le côté
avec la charnière face vers le haut sur le carton ou le matériel
de protection. S'assurer que la charnière de la porte est
orientée vers le haut.
IMPORTANT : Il est important que la charnière de la porte
soit orientée vers le haut pendant toute la durée de
l'installation des roulettes.
7. Fixer les deux roulettes bloquantes à l'avant du réfrigérateur.
À l'aide de la clé de 1³⁄₁₆", serrer les roulettes bloquantes.
8. Fixer les deux roulettes pivotantes à l'arrière du réfrigérateur.
À l'aide de la clé de 1³⁄₁₆", serrer les roulettes pivotantes.
A
C
B
A
UTILISATION DU
RÉFRIGÉRATEUR
Sons normaux
Il est possible que le réfrigérateur neuf émette des sons que
l’appareil précédent ne produisait pas. Comme ces sons sont
nouveaux, ils peuvent vous inquiéter. La plupart de ces nouveaux
sons sont normaux. Les sons peuvent vous sembler plus forts
avec des surfaces dures comme le sol ou les structures à la
périphérie. Les descriptions suivantes indiquent les genres de
sons et leur cause possible.
■ Le réfrigérateur est conçu pour fonctionner plus efficacement
afin de conserver les aliments aux températures désirées et
de minimiser l’utilisation d’énergie. Le compresseur et le
ventilateur très efficaces peuvent faire fonctionner votre
réfrigérateur neuf plus longtemps que l’ancien. Il se peut
également que vous entendiez un bruit saccadé ou aigu en
réglant le compresseur ou les ventilateurs pour optimiser la
performance.
■ Le ventilateur d'évaporation fonctionne de manière continue.
Ceci dégivre l'évaporateur, maintient une température
constante à l'intérieur du réfrigérateur et rend le réfrigérateur
plus efficace.
■ Des vibrations sonores peuvent provenir de l’écoulement du
réfrigérant ou d’articles placés dans le réfrigérateur.
■ À la fin de chaque programme, vous pouvez entendre un
gargouillement attribuable au réfrigérant qui se trouve dans
votre réfrigérateur.
■ Vous pouvez entendre l’écoulement de l’eau dans le bac de
récupération d’eau de dégivrage lorsque le réfrigérateur
dégivre.
■ Vous pouvez entendre des déclics lorsque le réfrigérateur se
met en marche ou s’arrête.
A. Roulettes bloquantes
B. Avant du réfrigérateur
C. Roulettes pivotantes
Fin de l’assemblage
1. Bloquer les roulettes à l'avant.
REMARQUE : Bloquer les roulettes aidera à empêcher le
réfrigérateur de se déplacer au moment d'être soulevé.
2. À deux personnes ou plus, remettre le réfrigérateur en
position verticale.
3. Débloquer les roues et déplacer le réfrigérateur à
l'emplacement désiré.
4. Une fois le réfrigérateur en place, rebloquer les roues.
5. Laisser le réfrigérateur en position verticale pendant
4heures.
6. Brancher le réfrigérateur ou reconnecter la source de courant
électrique.
Utilisation de la commande
Pour votre commodité, la commande du réfrigérateur est
préréglée à l’usine. Lors de l’installation initiale du réfrigérateur,
s’assurer que la commande est encore préréglée au réglage
moyen.
Pour éteindre le réfrigérateur, tourner la commande du
réfrigérateur sur la position d'arrêt (Off).
REMARQUE : Votre produit ne se refroidira pas si la commande
du réfrigérateur est sur la position d'arrêt (Off).
18

Ajustement des commandes
Les réglages moyens indiqués à la section précédente doivent
convenir à l’utilisation normale du réfrigérateur. La commande est
réglée correctement lorsque les boissons sont à la température
idéale.
S'il est nécessaire d'ajuster la température, attendre au moins
24 heures entre chaque ajustement puis revérifier la température.
Pour rendre le réfrigérateur plus froid, ajuster la commande au
réglage plus élevé suivant. Pour rendre le réfrigérateur moins
froid, ajuster la commande au réglage plus bas suivant.
CARACTÉRISTIQUES DU
ENTRETIEN DU
RÉFRIGÉRATEUR
Nettoyage
AVERTISSEMENT
RÉFRIGÉRATEUR
Tablettes du réfrigérateur
Le réfrigérateur d'extérieur a deux tablettes ajustables. Chaque
tablette conviendra à l'une quelconque des quatre positions dans
le réfrigérateur.
Installation des tablettes :
1. Enlever la tablette en la soulevant complètement et en la
déplaçant entièrement sur un côté. Incliner l’autre côté vers le
haut et la sortir des supports de tablette.
2. Réinstaller la tablette en insérant une extrémité
complètement au centre des supports de tablette. Puis
abaisser l’autre extrémité de la tablette et l’insérer dans les
supports.
REMARQUE : La tablette doit s’abaisser légèrement et se
verrouiller en place. Si la tablette ne semble pas stable, s’assurer
que les deux extrémités sont insérées dans les supports.
Paniers du réfrigérateur
Le réfrigérateur d'extérieur comporte deux paniers métalliques
fixes pour le rangement.
Risque d'explosion
Utiliser un produit de nettoyage ininflammable.
Le non-respect de cette instruction peut causer un décès,
une explosion ou un incendie.
Nettoyer le réfrigérateur environ une fois par mois pour empêcher
une accumulation d'odeurs. Essuyer les renversements
immédiatement.
Nettoyage du réfrigérateur :
1. Débrancher le réfrigérateur ou déconnecter la source de
courant électrique.
2. Retirer toutes les pièces amovibles de l'intérieur, telles que
les tablettes, etc.
3. Laver à la main, rincer et sécher les pièces amovibles et les
surfaces internes à fond. Utiliser une éponge propre ou un
linge doux et un détergent doux dans de l'eau tiède.
■ Ne pas utiliser de nettoyants abrasifs tels que les
nettoyants à vitre en atomiseurs, nettoyants à récurer,
liquides inflammables, cires nettoyantes, détergents
concentrés, eaux de Javel ou nettoyants contenant du
pétrole sur les pièces en plastique, les garnitures
intérieures et de portes ou les joints de portes. Ne pas
utiliser d'essuie-tout, tampons à récurer ou autres outils
de nettoyage abrasifs. Ces produits risquent d'égratigner
ou d'endommager les matériaux.
■ Pour aider à éliminer les odeurs, on peut laver les parois
intérieures avec un mélange d'eau tiède et de
bicarbonate de soude (2 c. à soupe pour 1 pinte
[26 g pour 0,95 L] d'eau).
19

4. Laver les surfaces extérieures avec une éponge propre ou un
linge doux et un détergent doux dans de l'eau tiède. Ne pas
utiliser de nettoyants abrasifs. Sécher à fond avec un linge
doux.
■ Pour que votre réfrigérateur en acier inoxydable conserve
son aspect neuf et pour enlever les petites égratignures
ou marques, il est suggéré d’utiliser le Nettoyant et poli
pour acier inoxydable approuvé par le fabricant.
IMPORTANT : Ce nettoyant doit être utilisé sur les pièces en
acier inoxydable uniquement!
■ Veiller à ce que le nettoyant et poli pour acier inoxydable
n'entre pas en contact avec les pièces de plastique telles
que garnitures ou joints de porte. En cas de contact
accidentel, nettoyer la pièce de plastique avec une
éponge et un détergent doux et de l'eau tiède. Sécher à
fond avec un linge doux. Pour commander le nettoyant,
voir la section “Accessoires”.
5. Réinstaller les parties amovibles.
6. Nettoyer régulièrement les serpentins du condenseur. Ils sont
situés à l’arrière de la caisse. Il se peut que les serpentins
aient besoin d'être nettoyés tous les deux mois. Ce nettoyage
peut aider à économiser de l'énergie.
■ Employer un aspirateur avec un accessoire long pour
nettoyer les serpentins du condenseur lorsqu'ils sont
sales ou poussiéreux.
7. Brancher le réfrigérateur ou reconnecter la source de courant
électrique.
Changement de l’ampoule d’éclairage
REMARQUE : Toutes les ampoules ne conviennent pas à votre
réfrigérateur. S’assurer de faire le remplacement par une ampoule
de grosseur, de forme et de puissance semblables.
1. Débrancher le réfrigérateur ou déconnecter la source de
courant électrique.
2. À l'aide d'un tournevis Phillips, retirer les quatre vis qui fixent
le protège-ampoule.
Précautions à prendre pour les vacances et
avant un déménagement
Vacances
Si vous laissez votre réfrigérateur allumé pendant votre absence,
consommer tous les denrées périssables et congeler les autres
aliments avant de partir.
Si vous choisissez d'arrêter le réfrigérateur avant de partir, suivre
ces étapes.
1. Enlever tous les aliments du réfrigérateur.
2. Tourner la commande du réfrigérateur sur la position d'arrêt.
Voir “Utilisation de la commande”.
3. Débrancher le réfrigérateur.
4. Nettoyer le réfrigérateur. Voir “Nettoyage”.
5. Placer un bloc de caoutchouc ou de bois dans la partie
supérieure de la porte de façon à ce qu'elle soit suffisamment
ouverte pour permettre l'entrée de l'air à l'intérieur, afin
d'éviter l'accumulation d'odeur ou de moisissure.
Déménagement
Lorsque vous déménagez votre réfrigérateur dans une nouvelle
habitation, suivre ces étapes pour préparer le déménagement.
1. Enlever tous les aliments du réfrigérateur.
2. Tourner la commande du réfrigérateur sur la position d'arrêt.
Voir “Utilisation de la commande”.
3. Débrancher le réfrigérateur.
4. Bien nettoyer, essuyer et sécher.
5. Retirer toutes les pièces amovibles, bien les envelopper et les
attacher ensemble avec du ruban adhésif pour qu'elles ne
bougent ni ne s'entrechoquent durant le déménagement.
6. Fermer les portes à l'aide de ruban adhésif et fixer le cordon
d'alimentation à la caisse du réfrigérateur.
Lorsque vous arriverez à votre nouvelle habitation, remettre tout
en place et consulter la section “Instructions d'installation” pour
les instructions de préparation.
A
A. Vis
3. Remplacer l'ampoule par une ampoule pour appareils
ménagers de même puissance.
4. À l'aide d'un tournevis Phillips et des quatre vis, réinstaller le
protège-ampoule.
5. Brancher le réfrigérateur ou reconnecter la source de courant
électrique.
20
Préparation pour l'hiver
Votre réfrigérateur est équipé d'un chauffage qui lui permet de
fonctionner normalement à des températures aussi basses que
15°F (-9°C). Si la température descend au-dessous de 15°F
(-9°C), retirer tous les articles du réfrigérateur pour éviter qu'ils
gèlent.

DÉPANNAGE
Essayer les solutions suggérées ici d'abord afin d'éviter le coût d'une visite de service non nécessaire.
Votre réfrigérateur ne fonctionne pas
■ Le cordon d'alimentation est-il débranché? Brancher sur
une prise reliée à la terre (à trois alvéoles).
■ Un fusible est-il grillé ou un disjoncteur s'est-il ouvert?
Remplacer le fusible ou remettre le disjoncteur en fonction.
■ La commande du réfrigérateur est-elle réglée à la
position OFF (arrêt)? Voir “Utilisation de la commande”.
Les lumières ne fonctionnent pas
■ Le cordon d'alimentation est-il débranché? Brancher sur
une prise reliée à la terre (à trois alvéoles).
■ Une ampoule est-elle desserrée dans la douille? Tourner la
commande du réfrigérateur sur la position d'arrêt.
Déconnecter le réfrigérateur de la source de courant
électrique. Enlever délicatement l'ampoule et la réinsérer.
Reconnecter ensuite le réfrigérateur à la source de courant
électrique et régler de nouveau la commande.
■ Une ampoule est-elle grillée? La remplacer par une
ampoule pour appareils ménagers de la même taille, forme et
puissance. Voir “Changement de l'ampoule d'éclairage”.
Il y a de l'eau dans le bac de dégivrage
■ Le réfrigérateur est-il en train de se dégivrer? L'eau
s'évaporera. C'est normal que l'eau dégoutte dans le bac de
dégivrage.
■ Y-a-t-il plus d'humidité que d'habitude? Prévoir que l'eau
dans le plat de dégivrage prenne plus de temps à s'évaporer.
Ceci est normal quand il fait chaud ou humide.
Le moteur semble trop tourner
■ La température extérieure est-elle plus élevée que la
normale? Prévoir que le moteur fonctionne plus longtemps
dans des conditions de chaleur. À des températures
extérieures normales, prévoir que le moteur fonctionne à peu
près 40 % à 80 % du temps. Dans des conditions plus
chaudes, prévoir un fonctionnement encore plus fréquent.
■ Vient-on d'ajouter une grande quantité d'aliments au
réfrigérateur? Ajouter une grande quantité d'aliments fait
réchauffer le réfrigérateur. Il est normal que le moteur
fonctionne plus longtemps pour refroidir le réfrigérateur.
■ La porte est-elle ouverte fréquemment? Prévoir que le
moteur fonctionne plus longtemps dans ce cas. Afin de
conserver l'énergie, essayer de sortir tout ce dont vous avez
besoin du réfrigérateur en une fois, garder les aliments
organisés de sorte qu'ils soient faciles à trouver et fermer la
porte dès que les aliments sont retirés.
■ Le réglage est-il correct pour les conditions existantes?
Voir “Utilisation de la commande”.
■ La porte est-elle bien fermée? Bien fermer la porte. Si elle
ne ferme pas complètement, voir “La porte ne ferme pas
complètement” plus loin dans cette section.
■ Les serpentins du condenseur sont-ils sales? Cette
situation empêche le transfert de l'air et fait travailler
davantage le moteur. Nettoyer les serpentins du condenseur.
Voir “Nettoyage”.
■ Le ventilateur d'évaporation fonctionne-t-il? Le ventilateur
d'évaporation est conçu pour fonctionner en permanence.
Voir “Sons normaux”.
La température est trop élevée
■ La porte est-elle ouverte fréquemment? Prévoir que le
réfrigérateur deviendra tiède dans ce cas. Pour garder le
réfrigérateur froid, essayer de sortir tout ce dont vous avez
besoin du réfrigérateur en une fois, garder les aliments bien
rangés de sorte qu'il soit facile de les trouver et fermer la
porte dès que les aliments sont retirés.
■ Vient-on d'ajouter une grande quantité d'aliments au
réfrigérateur? Ajouter une grande quantité d'aliments fait
réchauffer le réfrigérateur. Plusieurs heures peuvent être
nécessaires pour que le réfrigérateur revienne à la
température normale.
■ Le réglage est-il correct pour les conditions existantes?
Voir “Utilisation de la commande”.
Il y a une accumulation d'humidité à l'intérieur
■ La porte est-elle ouverte fréquemment? Pour éviter
l'accumulation d'humidité, essayer de sortir tout ce dont
vous avez besoin du réfrigérateur à la fois, garder les aliments
bien rangés de sorte qu'il soit facile de les trouver et fermer la
porte dès que les aliments sont retirés. Lorsque la porte est
ouverte, l'humidité de l'air extérieur pénètre dans le
réfrigérateur. Plus la porte est ouverte, plus l'humidité
s'accumule rapidement, surtout lorsque la pièce est très
humide.
■ La pièce est-elle humide? Il est normal que de l'humidité
s'accumule à l'intérieur du réfrigérateur lorsque l'air est
humide.
■ Les aliments sont-ils bien emballés? Vérifier que tous les
aliments sont bien emballés. Essuyer les contenants humides
d'aliments avant de les placer dans le réfrigérateur.
■ Le réglage est-il correct pour les conditions existantes?
Voir “Utilisation de la commande”.
La porte est difficile à ouvrir
■ Le joint colle-t-il ou est-il sale? Nettoyer le joint et la
surface avec laquelle il est en contact. Frotter une fine
couche de paraffine sur le joint après le nettoyage.
La porte ne ferme pas complètement
■ Les aliments emballés empêchent-ils la porte de fermer?
Réorganiser les contenants de sorte qu'ils soient plus
rapprochés et prennent moins d'espace.
■ Les tablettes sont-elles bien en place? Remettre les
tablettes en bonne position. Voir “Utilisation du réfrigérateur”
pour plus de renseignements.
■ Le joint colle-t-il? Nettoyer le joint et la surface avec laquelle
il est en contact. Frotter une fine couche de paraffine sur le
joint après le nettoyage.
21

ASSISTANCE OU SERVICE
Avant de demander une assistance ou un service, veuillez vérifier
la section “Dépannage”. Cette vérification peut vous faire
économiser le coût d’une visite de réparation. Si vous avez
encore besoin d’aide, suivre les instructions ci-dessous.
Lors d’un appel, veuillez connaître la date d’achat et les numéros
au complet de modèle et de série de votre appareil. Ces
renseignements nous aideront à mieux répondre à votre
demande.
Si vous avez besoin de pièces de rechange
Si vous avez besoin de commander des pièces de rechange,
nous vous recommandons d’utiliser seulement des pièces de
rechange spécifiées par l'usine. Les pièces de rechange
spécifiées par l'usine conviendront et fonctionneront bien parce
qu’elles sont fabriquées selon les mêmes spécifications précises
utilisées pour construire chaque nouvel appareil KITCHENAID
Pour localiser des pièces de rechange spécifiées par l'usine dans
votre région, téléphoner à notre Centre d’interaction avec la
clientèle ou au centre de service désigné le plus proche.
Téléphoner sans frais au
KitchenAid Canada au :
1-800-461-5681 Du lundi au vendredi - de 8 h 00 à 18 h 00
(HNE). Samedi - de 8 h 30 à 16 h 30 (HNE).
Nos consultants fournissent de l'assistance pour :
■ Caractéristiques et spécifications sur notre gamme complète
d’appareils électroménagers.
■ Références aux concessionnaires locaux.
Centre d’interaction avec la clientèle de
Pour service au Canada
Composer le 1-800-807-6777. Les techniciens de service
désignés par KitchenAid Canada sont formés pour remplir la
garantie des produits et fournir un service après la garantie
partout au Canada.
®
.
Pour plus d’assistance
Si vous avez besoin de plus d’assistance, vous pouvez écrire à
KitchenAid Canada en soumettant toute question ou tout
problème à :
KitchenAid Canada
Centre d'interaction avec la clientèle
1901 Minnesota Court
Mississauga, Ontario L5N 3A7
Dans votre correspondance, veuillez indiquer un numéro de
téléphone où on peut vous joindre dans la journée.
Accessoires
Pour commander des accessoires, composer le 1-800-442-9991
et demander le numéro de pièce approprié ci-dessous ou
contacter votre marchand KitchenAid autorisé. Au Canada,
composer le 1-800-807-6777.
Nettoyant et poli pour acier inoxydable
Commander le n° de pièce 4396095
Ampoule de rechange
Commander le n° de pièce 8206651
Roulettes
Commander le n° de pièce 4396337
Revêtement en vinyle
Commander le n° de pièce 4396334
22

GARANTIE DU RÉFRIGÉRATEUR KITCHENAID
GARANTIE COMPLÈTE DE UN AN SUR LE RÉFRIGÉRATEUR
Pour une période de un an à partir de la date d’achat, lorsque ce réfrigérateur est utilisé et entretenu conformément aux instructions
jointes à ou fournies avec le produit, KitchenAid ou KitchenAid Canada paiera pour les pièces de rechange spécifiées par l’usine et les
frais de main-d'oeuvre pour corriger les vices de matériaux ou de fabrication. Les travaux doivent être effectués par une compagnie de
service désignée par KitchenAid.
®
GARANTIE COMPLÈTE DE LA DEUXIÈME À LA CINQUIÈME ANNÉE INCLUSIVEMENT SUR LA GARNITURE DE LA CAVITÉ
De la deuxième à la cinquième année inclusivement à partir de la date d’achat, lorsque ce réfrigérateur est utilisé et entretenu
conformément aux instructions jointes à ou fournies avec le produit, KitchenAid ou KitchenAid Canada paiera pour le remplacement et
la réparation de la garniture de la cavité intérieure du réfrigérateur/congélateur (y compris les frais de réparation) si la cavité intérieure se
fend par suite de vices de matériaux ou de fabrication. Les travaux doivent être effectués par une compagnie de service désignée par
KitchenAid.
Aussi, de la deuxième à la cinquième année inclusivement à partir de la date d’achat, KitchenAid ou KitchenAid Canada paiera pour les
pièces de rechange spécifiées par l’usine et les frais de réparation pour corriger les vices de matériaux ou de fabrication dans le
système de réfrigération scellé. Ces pièces sont : le compresseur, l’évaporateur, le condenseur, le dispositif de séchage et les tubes de
raccord. Les travaux doivent être effectués par une compagnie de service désignée par KitchenAid.
KitchenAid ou KitchenAid Canada ne paiera pas pour :
1. Les visites de service pour rectifier l’installation du réfrigérateur, montrer à l’utilisateur comment utiliser le réfrigérateur ou remplacer
des fusibles, rectifier le câblage électrique ou la plomberie du domicile, remplacer des ampoules électriques, ou les filtres à eau de
rechange sauf ce qui est indiqué ci-dessus.
2. Les réparations lorsque le réfrigérateur est utilisé à des fins autres qu’un usage unifamilial normal.
3. La prise en charge et la livraison du réfrigérateur. Le réfrigérateur est conçu pour être réparé à domicile.
4. Les dommages causés par : accident, modification, mésusage, abus, incendie, inondation, mauvaise installation, actes de Dieu, ou
l’utilisation de produits non approuvés par KitchenAid ou KitchenAid Canada.
5. Toute perte d’aliments attribuable à une défaillance du produit.
6. Les réparations de pièces ou systèmes attribuables à des modifications non autorisées de l’appareil ménager.
7. Les pièces de rechange ou les frais de réparation des appareils utilisés à l’extérieur du Canada ou des États-Unis.
8. Au Canada, les frais de déplacement ou de transport pour les clients qui habitent dans des régions éloignées.
Certains États ou certaines provinces peuvent ne pas admettre l’exclusion ou la limitation des dommages fortuits ou indirects; par
conséquent, l’exclusion ou la limitation mentionnée ci-dessus peut ne pas s’appliquer dans votre cas. Cette garantie vous confère des
droits juridiques spécifiques; vous pouvez également jouir d’autres droits, variables d’un État à un autre ou d’une province à une autre.
À l’extérieur du Canada et des 50 États des États-Unis, cette garantie ne s’applique pas. Contacter votre marchand KitchenAid
autorisé pour déterminer si une autre garantie s’applique.
Si vous avez besoin de service, consulter d’abord la section “Dépannage” dans ce manuel. Après avoir vérifié la section “Dépannage”,
une aide additionnelle peut être trouvée en vérifiant la section “Assistance ou service” ou en téléphonant au Centre pour l’eXpérience
de la clientèle KitchenAid au 1-800-422-1230 (sans frais), de n’importe où aux É.-U. Au Canada, contacter votre compagnie de service
autorisée par KitchenAid Canada ou téléphoner au 1-800-807-6777.
INTÉRIEURE ET SUR LES PIÈCES DU SYSTÈME DE RÉFRIGÉRATION SCELLÉ TEL QU'INDIQUÉ
KITCHENAID OU KITCHENAID CANADA DÉCLINE TOUTE RESPONSABILITÉ AU TITRE
DEDOMMAGESFORTUITSOUINDIRECTS.
11/04
Conserver ce manuel et le reçu de vente ensemble pour
référence ultérieure. Il faut fournir une preuve d’achat ou de
date d’installation pour le service au titre de la garantie.
Veuillez noter les renseignements suivants à propos du réfrigérateur
pour mieux obtenir assistance ou service en cas de besoin. Vous
devez connaître les numéros de modèle et de série complets. Vous
pouvez trouver cette information sur la plaque signalétique
paroi interne du compartiment de réfrigération.
sur la
Nom du marchand ______________________________________________
Adresse ________________________________________________________
Numéro de téléphone ___________________________________________
Numéro de modèle______________________________________________
Numéro de série ________________________________________________
Date d’achat____________________________________________________
23

2311008
© 2005. All rights reserved.
Tous droits réservés.
® Registered Trademark/TM Trademark of KitchenAid, U.S.A., KitchenAid Canada licensee in Canada
® Marque déposée/TM Marque de commerce de KitchenAid, U.S.A., Emploi licencié par KitchenAid Canada au Canada
Printed in U.S.A.
Imprimé aux É.-U.
1/05
 Loading...