

Kitchen WPEPO1002 User Manual

IMPORTANT NOTICE
PRESSURE OVEN
Please read operating instructions before using this
product. Please keep original box and packing materials
in the event that service is required.
For questions or concerns please contact customer service at:
Toll-free: 877-359-9747 • 9:00am - 9:00pm EST - Seven days a week
Email: wolfgangpuckoven@kitchentek.com • Website: www.puckoven.com
WPEPO1002 Series
ESSENTIAL
USE & CARE
©KitchenTek® Operating LLC. All rights reserved.
Patents pending US and foreign
PRESSURE OVEN
Printed In China
200131369Z
0.8 Cubic Foot Capacity
Photos and illustrations throughout this manual may differ slightly from actual product.
WPEPO1002 Series

IMPORTANT SAFEGUARDS
When using electrical appliances, basic safety precautions should be
followed, including:
1
Read all instructions.
2
The exterior of the oven will become very hot during use. Do not touch hot
surfaces. Use handles or knobs.
3
Close supervision is necessary when any appliance is used by or near
children.
4
To protect against electric shock, do not immerse cord, plug, or any parts of
the oven in water or other liquids.
5
Do not operate appliance with damaged cord or plug or after the appliance
malfunctions, or has been damaged in any manner. Call our toll free
consumer hotline for information on examination, repair or adjustment.
6
The use of accessory attachments not recommended by W.P. Appliances, Inc.
may cause hazard or injury.
7
Do not use outdoors.
8
Do not place on or near a hot gas or electric burner, or in a heated oven or in
a microwave oven.
9
Do not let the cord hang over the edge of table or counter, or touch hot
surfaces, including the stove.
10
When operating the oven, keep at least four inches of space on all sides of
the oven to allow for adequate air circulation.
11
Unplug from outlet when not in use and before cleaning. Allow to cool before
putting on or taking off parts, and before cleaning.
12
To disconnect, turn the TIMER KNOB to 0 (off), then remove the plug.
Always hold the plug, never pull the cord.
13
Extreme caution must be used when moving an appliance containing hot oil
or other hot liquids.
14
Do not clean with metal scouring pads. Pieces can break off the pad and
touch electrical parts, creating a risk of electric shock.
15
A fire may occur if the oven is covered, touching, or near flammable material,
including curtains, draperies, walls, and the like, when in operation. Do not
store any item on top of the oven when in operation, or before the oven
cools down.
16
Extreme caution should be used when using containers other than metal or
glass.
17
Do not cover CRUMB TRAY or any part of the oven with metal foil. This will
cause overheating. Foil can be used to cover approved cooking containers.
Do not place any of the following materials in the oven: cardboard, plastic,
paper, or anything similar.
18
Do not place eyes or face in close proximity with the tempered safety glass
door, in the event that the safety glass breaks.
19
Use extreme caution when removing trays or disposing of hot grease or
other hot liquids.
20
Do not store any materials, other than manufacturers recommended
accessories, in this oven when not in use.
21
This appliance is off when the Timer is in the 0 (off) position. When not in
use, the oven should always remain unplugged from the wall outlet.
22
Always wear protective, insulated oven mitts when inserting or removing
items from the hot oven.
23
This appliance has a tempered, safety glass door. The glass is stronger than
ordinary glass and more resistant to breakage. Tempered glass can break,
but the pieces will not have sharp edges. Avoid scratching door surface
or nicking edges. If the door has a scratch or nick, contact our toll-free
customer service line before using the oven.
24
Do not use appliance for other than intended use.
25
Always inspect VENT RELEASE VALVE and make sure it is clean of any
food particles or other obstructions
26
Before opening door, turn VENT RELEASE VALVE to VENT and wait
for pressure to dissipate, then raise SEALING LEVER to the STANDARD
position.
27
Oversize foods or metal utensils must not be inserted in an oven as they
may create a fire or risk of electric shock.
28
To ensure continued protection against risk of electric shock, connect to
properly grounded outlets.
SAVE THESE INSTRUCTIONS
HOUSEHOLD USE ONLY
Additional Safety Information
GROUNDING INSTRUCTIONS: This appliance must be grounded. It is
equipped with a 3-prong cord having a grounded plug. The plug must be
plugged into an outlet which is properly installed and grounded.
Warning: Improper use of the grounded cord can result in the risk of electric
shock. Consult a qualified electrician if necessary. Do not attempt to defeat
this safety feature by modifying plug.
A short power-supply cord is provided to reduce the hazards resulting from
entanglement or tripping over a longer cord. If it is necessary to use an
extension cord, it should be positioned such that it does not drape over the
counter or tabletop where it can be pulled on by children or tripped over
and:
A. Use only 3-prong extension cord with 3-blade grounding plug.
B. The marked rating of the extension cord must be equal to or greater than
the rating of this appliance. The electrical rating is of this appliance is 120V
1,600 watts.
Please take a few minutes to read this manual before using your oven to
become familiar with its parts and operation.
2 3

Table of Contents
In the beginning, there was
Wolfgang Puck. There were
cooks and there were kitchens
and there were people eating
food, but the world had never
seen anything like Spago—
with its California cuisine, its
casual elegance, and its chef
whose genuine warmth and
love of craft redefined the
dining experience. And they
came—from LA and from
everywhere—to experience
the future. Wolfgang Puck
shaped the modern culinary
landscape: he was the first
celebrity chef, the inventor
of fusion cuisine, the first in
farm-to-table. His work is
inspired by California living,
and an insistence on only the
freshest ingredients. From
his legendary fine dining icons, his entrepreneurial spirit has built
an empire—from dining, to catering, to products for the home—
touching the lives of millions around the globe. Today, as always,
Chef Puck is earnestly, restlessly, tirelessly at work behind the scenes
inventing what’s next. He is driven by a genuine love of his craft, a
passion for what’s possible, and its potential to change the world.
Important Safeguards
Additional Safety Information
About Wolfgang Puck
Introduction
Quick Start Guide
Know Your Wolfgang Puck Pressure Oven
Before Your First Use
Become Familiar with Your
Oven Parts
Use & Care References
Operation
Bake Function
Toast Function
Roast Function
Broil Function
Trussing Chicken
Warm Function
Helpful Hints
Cooking Chart
Troubleshooting Guide
Care & Cleaning
2
3
4
6
6
8
10
11
13
15
16
17
18
19
20
21
21
22
24
28
Limited Warranty
Contact Information
4 5
31
Back
Introduction
Congratulations on your purchase of the Wolfgang Puck Pressure
Oven, breakthrough technology in the world of cooking. After years of
development, Wolfgang Puck has teamed with KitchenTek to design
a superior countertop oven with the perfect blend of time savings
and improved performance to make your life easier and your meals
even tastier. Low pressure and even heat distribution in a sealed
oven chamber allow for faster cooking and improved flavor, without
sacrificing moisture. Imagine roasting a 10 pound turkey in under an hour
(over 2 1/2 hours in a traditional oven). Imagine getting the fullness of
baked goods without the need of convection fans or rotating pans.
Quick Start Guide (cont.)
Turn VENT RELEASE VALVE
to VENT
2
The brushed stainless steel exterior, easy to read controls, and superior
performance are a welcome addition to any kitchen countertop. Please
be sure to read all important safeguards of this manual, as well as the
helpful hints section to ensure you get all the best this innovative oven
has to offer.
Quick Start Guide
Before using this Quick Start Guide, please ensure that you have read
the Instruction Manual fully and have become familiar with the import
safeguards.
Warning: The oven exterior and door is hot during and after use. To
prevent a burn injury, we recommend always using protective hot pads
or oven mitts when adding or removing items from the oven.
To cook in PRESSURE Mode:
1
Set the FUNCTION KNOB to the desired function and preheat the oven
according to the recipe instructions.
2
Once preheated, press the DOOR RELEASE BUTTON to open door
and add food.
3
Close the oven door and lower the SEALING LEVER to the SEAL
position.
4
Turn the VENT RELEASE VALVE to the SEAL position.
5
Set the TIMER KNOB to the desired cooking time.
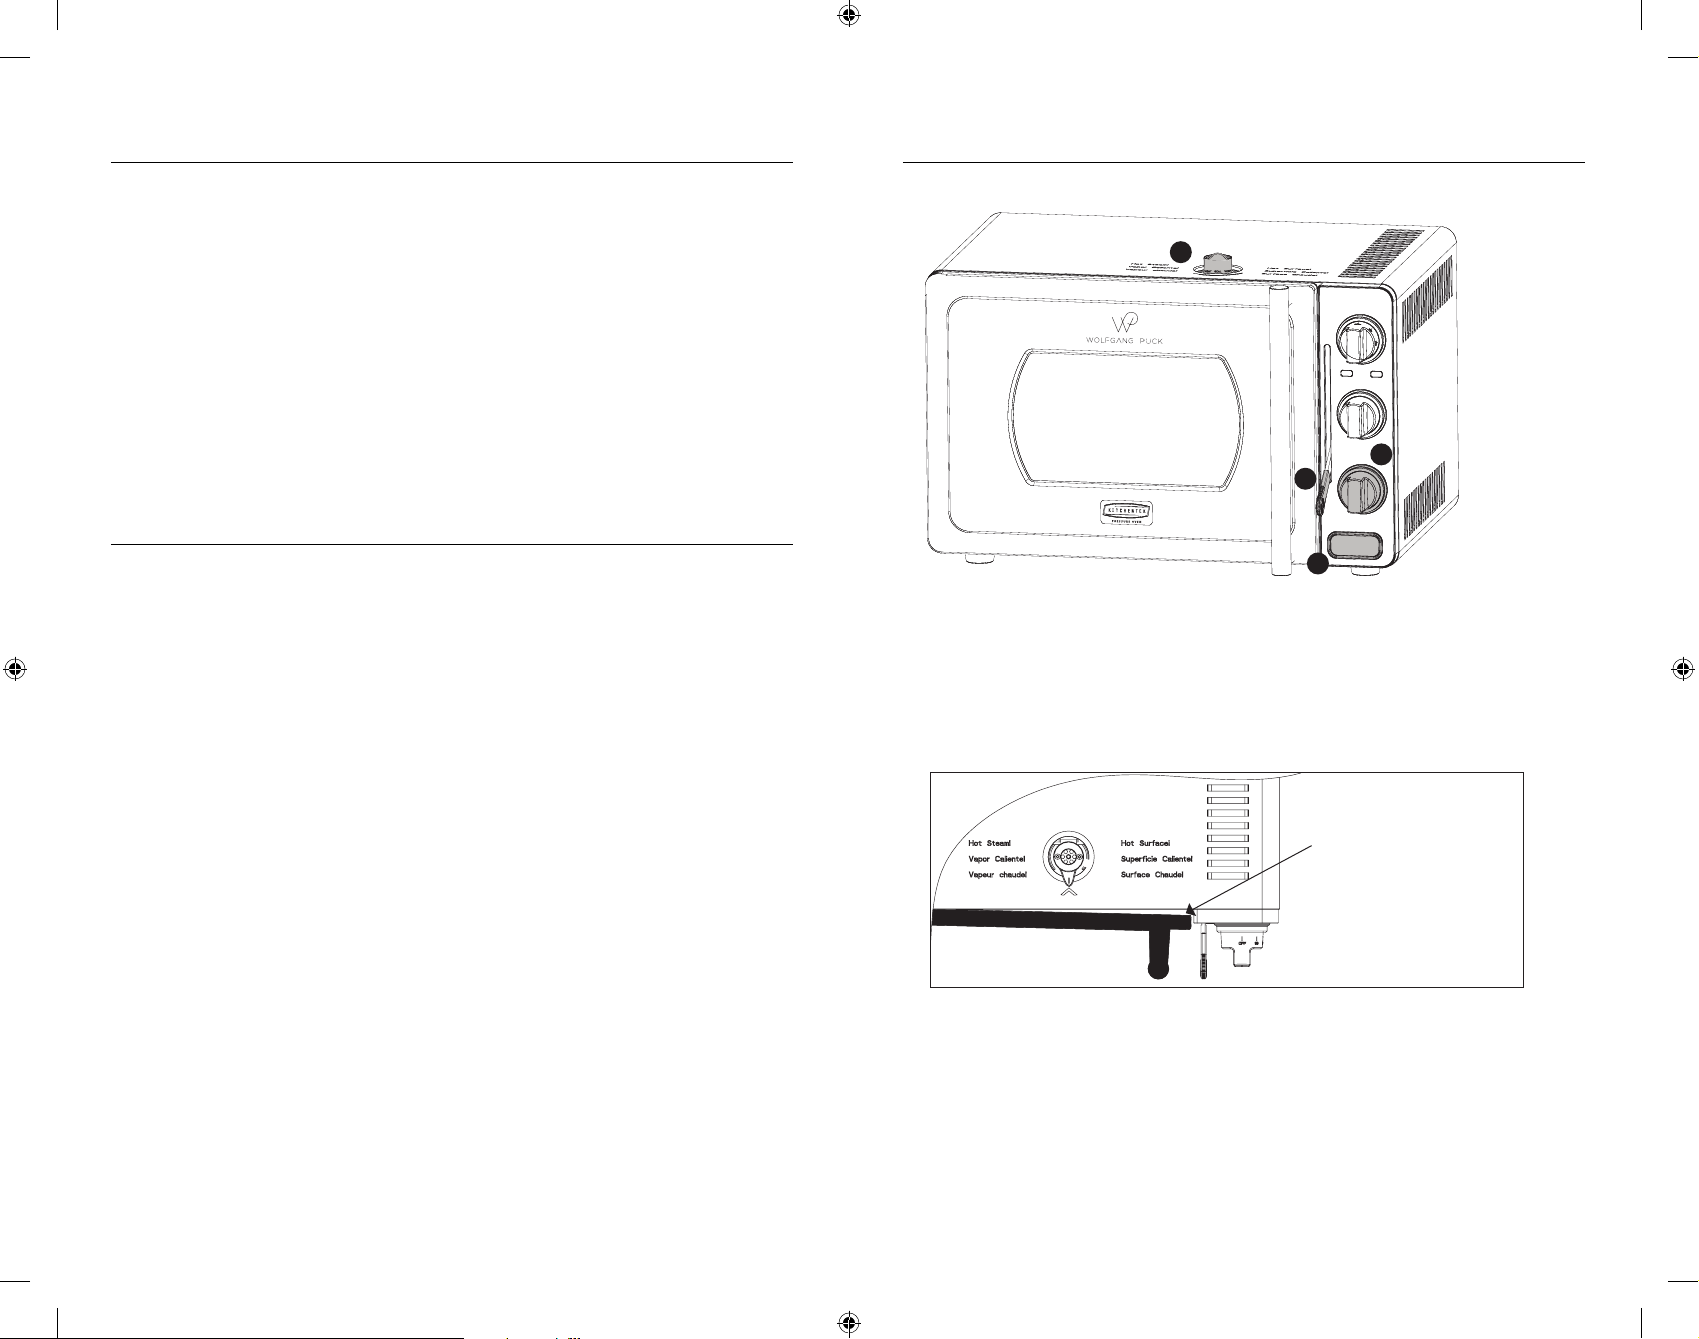
When cooking is complete in PRESSURE mode (see illustration on right)
1
Set the TIMER KNOB to 0 (unless already off).
2
Turn the VENT RELEASE VALVE to the VENT position and wait until
all steam has released.
3
Raise the SEALING LEVER to the STANDARD position.
4
Press the DOOR RELEASE BUTTON to open the door.
WARNING! Never attempt to raise the SEALING LEVER or open the
door until all steam has been vented from the VENT RELEASE VALVE.
Failure to do so could result in a scalding injury.
Set TIMER KNOB to 0 (Off)
Raise SEALING LEVER to STANDARD
To cook in STANDARD Mode:
Note: When cooking in STANDARD Mode (without pressure) the door will
remain slightly ajar on the handle side (see below) to allow the oven to
vent freely during cooking.
1
Set the FUNCTION KNOB to the desired function and preheat the oven
according to the recipe instructions.
2
Once preheated, press the DOOR RELEASE BUTTON to open door
and add food.
3
Close the oven door and leave the SEALING LEVER to the STANDARD
position.
4
Turn the VENT RELEASE VALVE to the VENT position.
5
Set the TIMER KNOB to the desired cooking time.
6
When cooking is complete, turn the TIMER to 0 (unless already off)
and press the DOOR RELEASE BUTTON to open the door.
3
4
Press DOOR RELEASE BUTTON to open
Door slightly ajar in
STANDARD Mode
1
6 7

Know Your Wolfgang Puck
Pressure Oven
1
2
3
5
10
7
4
8
11
12
15
6
1. Vent Release Valve
2. Door Handle
3. Power Indicator Light
4. Ready Light
5. Sealing Lever
6. Door Release Button
7. Temperature Knob
8. Function Knob
Actual product may differ slightly from illustrations on this page
9. Timer Knob
10. Baking Rack
11. Broil Rack Insert
12. Drip/Baking Pan
13. Roasting Pan
14. Crumb Tray
15. Rack Removal Tool
16. Control Panel
8 9
9
13
14
16
 Loading...