

Page 1
Page 2
Page 3
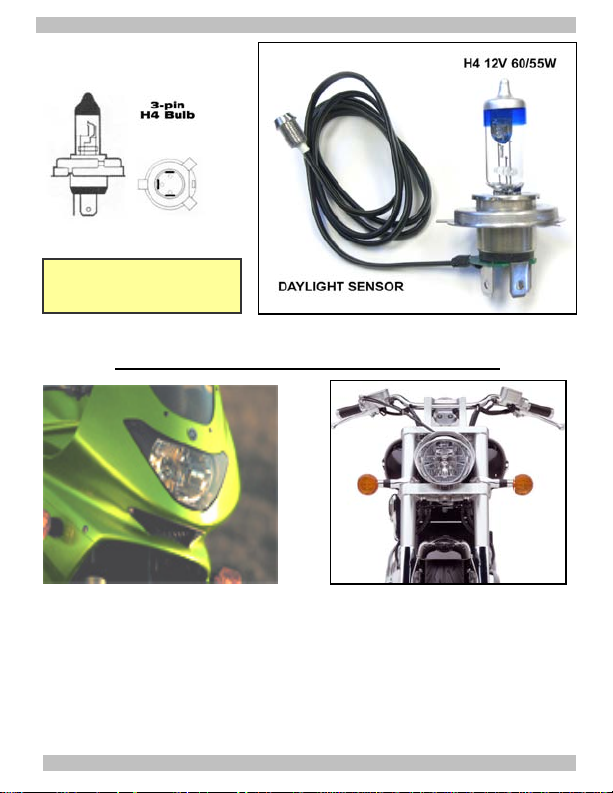
PH4
ULTRA WHITE 3600°K
MEGA BLUE 4000°K
TYPICAL SINGLE HEADLIGHT APPLICATION
PH4 pathBlazer Specifications:
Single headlight with 3-pin H4 bulb and a p43t base
Halogen bulb: almost twice as bright compared to stock bulbs
Modulates the HIGH-BEAM, when selected in daytime
Maximum load does not exceed 75W (14.5 v)
Luminous Flux: 1150 – 1900 Lumens
Lumen Maintenance: T
= 400 Hours
C
Page 4
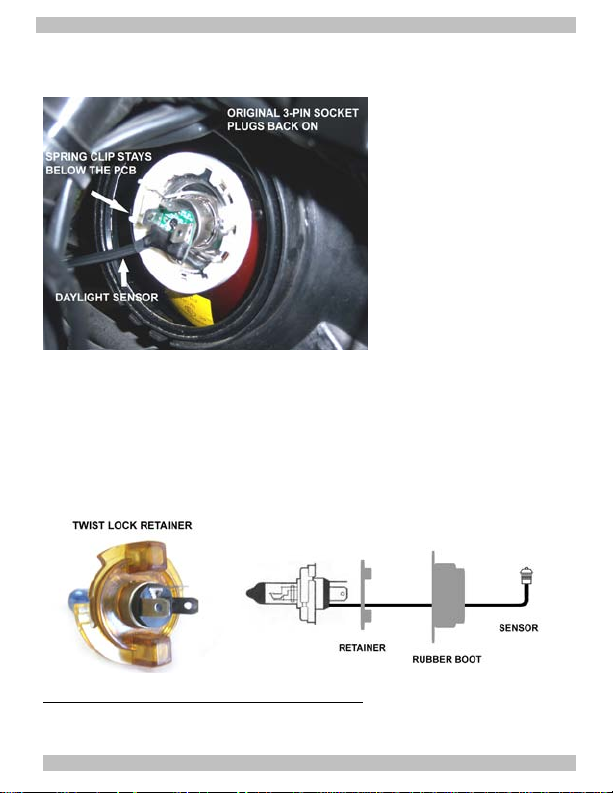
PH4 INSTALLATION:
p
Insert PH4 pathBlazer so that the (3) tabs of the bulb-mounting base
are lined-up and spring clip clears the Daylight Sensor cable.
q
Now hook the spring clip back to secure the bulb and plug in the 3-pin
socket
Note! If you have the older twist-lock style retainer instead of the spring-
clip, be sure to feed the Daylight Sensor thru’ the retainer opening.
n
Gain access to the
back of the headlight bulb
– you may have to open
up the headlight bucket or
peel back any rubber
protective boot.
o
Unplug the 3-pin
socket and unhook the
spring clip that holds the
bulb in place. Then pivot it
out of the way so that the
bulb can be removed.
Daylight Sensor is not detachable on this unit, so after installing the PH4
pathBlazer route the cable to a suitable location to mount the photo-eye
of the sensor such that it faces the sky.
Page 5
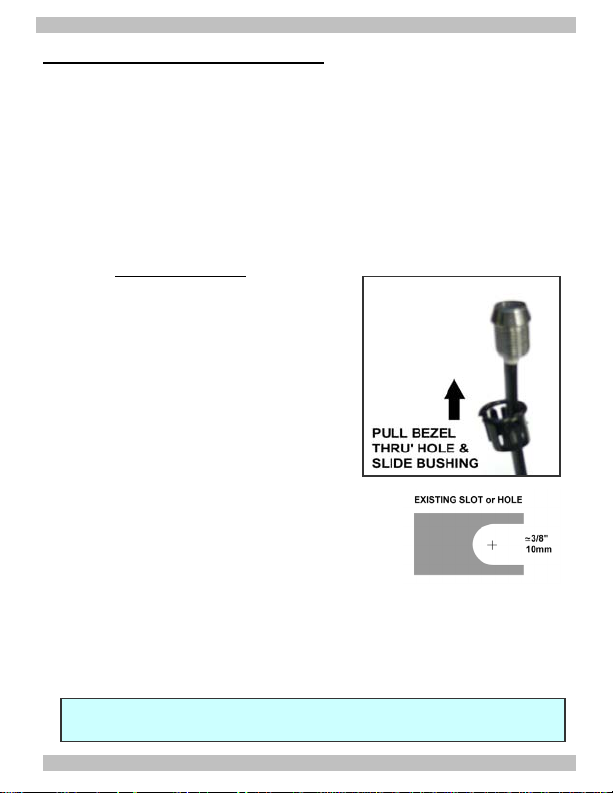
MOUNTING DAY LIGHT SENSOR
Day Light Sensor should be mounted on the dash or fairing. It should not
be facing the front of the motorcycle, in order to avoid false triggers at
night from on-coming vehicles.
You can zip-tie the Sensor to a brake cable or a bracket, as long as it
receives unobstructed sunlight. The sense head is sealed to be
waterproof.
You can also choose a permanent mount in fairing or side pockets.
FLUSH MOUNT
n
Chose an appropriate location for the
Daylight Sensor - it faces skyward and
should receive unobstructed sunlight.
o
Start with a small pilot hole. Finish with
a 3/8” -enlarged a little- (10mm) hole.
p
Feed the Sensor from behind the panel.
q
Insert the Split Bushing around the
cable, as shown.
r
Move the Bushing up toward the
threaded neck of the Sensor.
s
Push the assembly firmly in the hole,
until it locks-in - do not pull the cable.
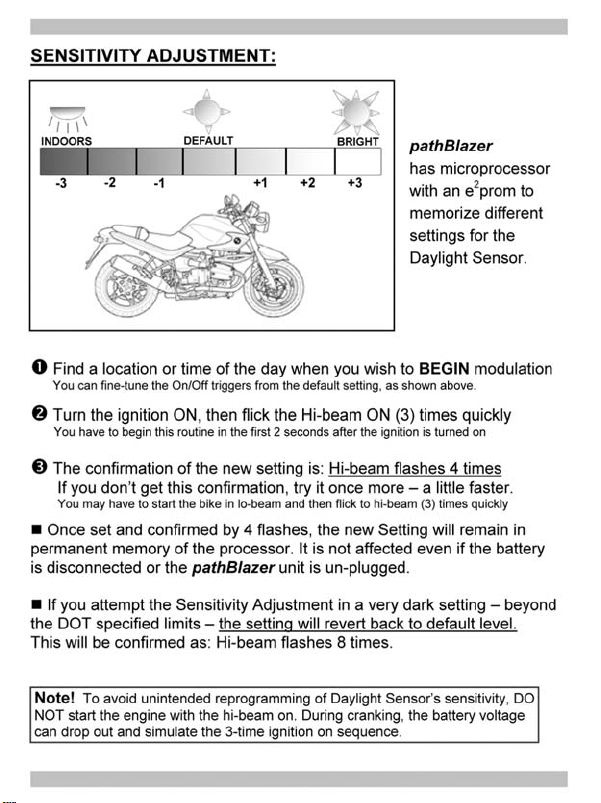
The sensitivity is adjustable for different levels of daylight. Depending on
the location you have chosen to mount the Sensor. Or due to seasonal
changes in weather conditions you may want to choose a different level.
Instructions are described in more detail on the next page.
Note!
Programming of Daylight Sensor’s sensitivity IS NOT REQUIRED. In
most cases the default factory setting will suit most common riding environment.
Page 6
Page 7

 Loading...