

Page 1
Instruction Manual
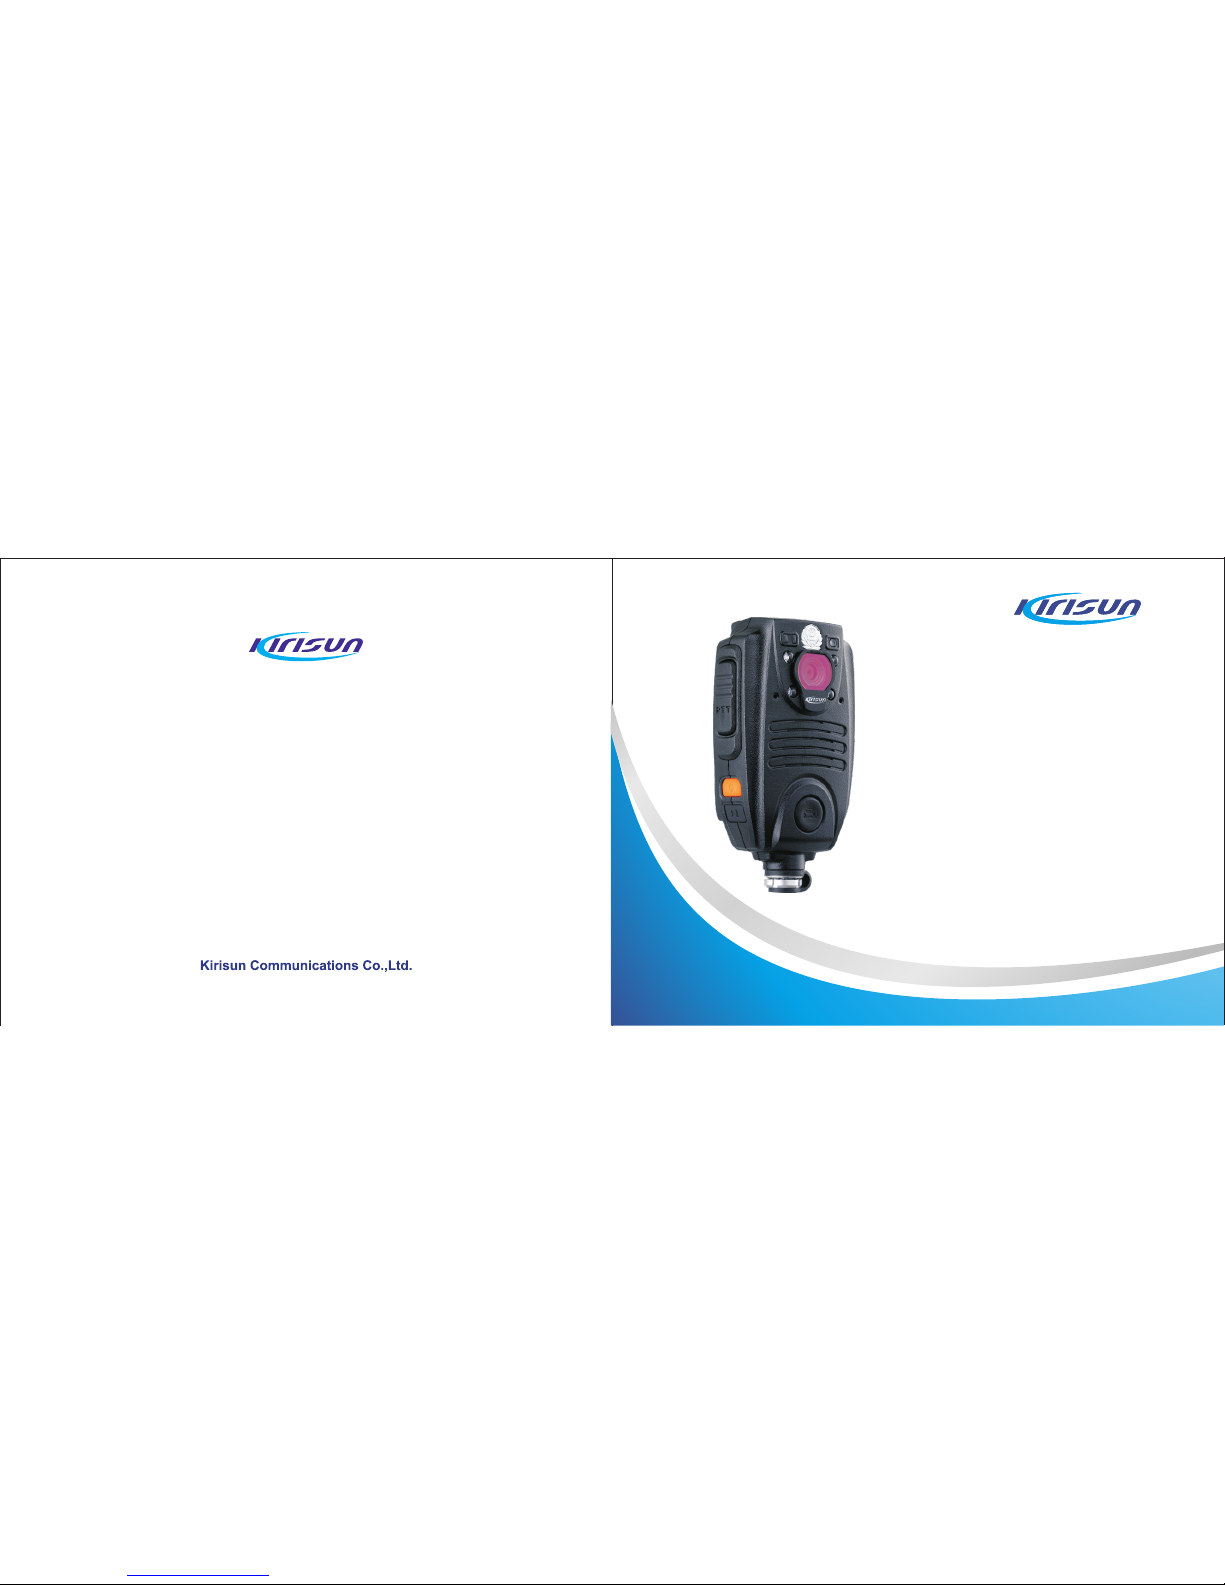
DSJ-A9
Law Enforcem ent
Vide o/Audio Recorder
Professional wireless communic ation
system solution supplier
Page 2

1
2
Contents
1
2
7
11
9
12
13
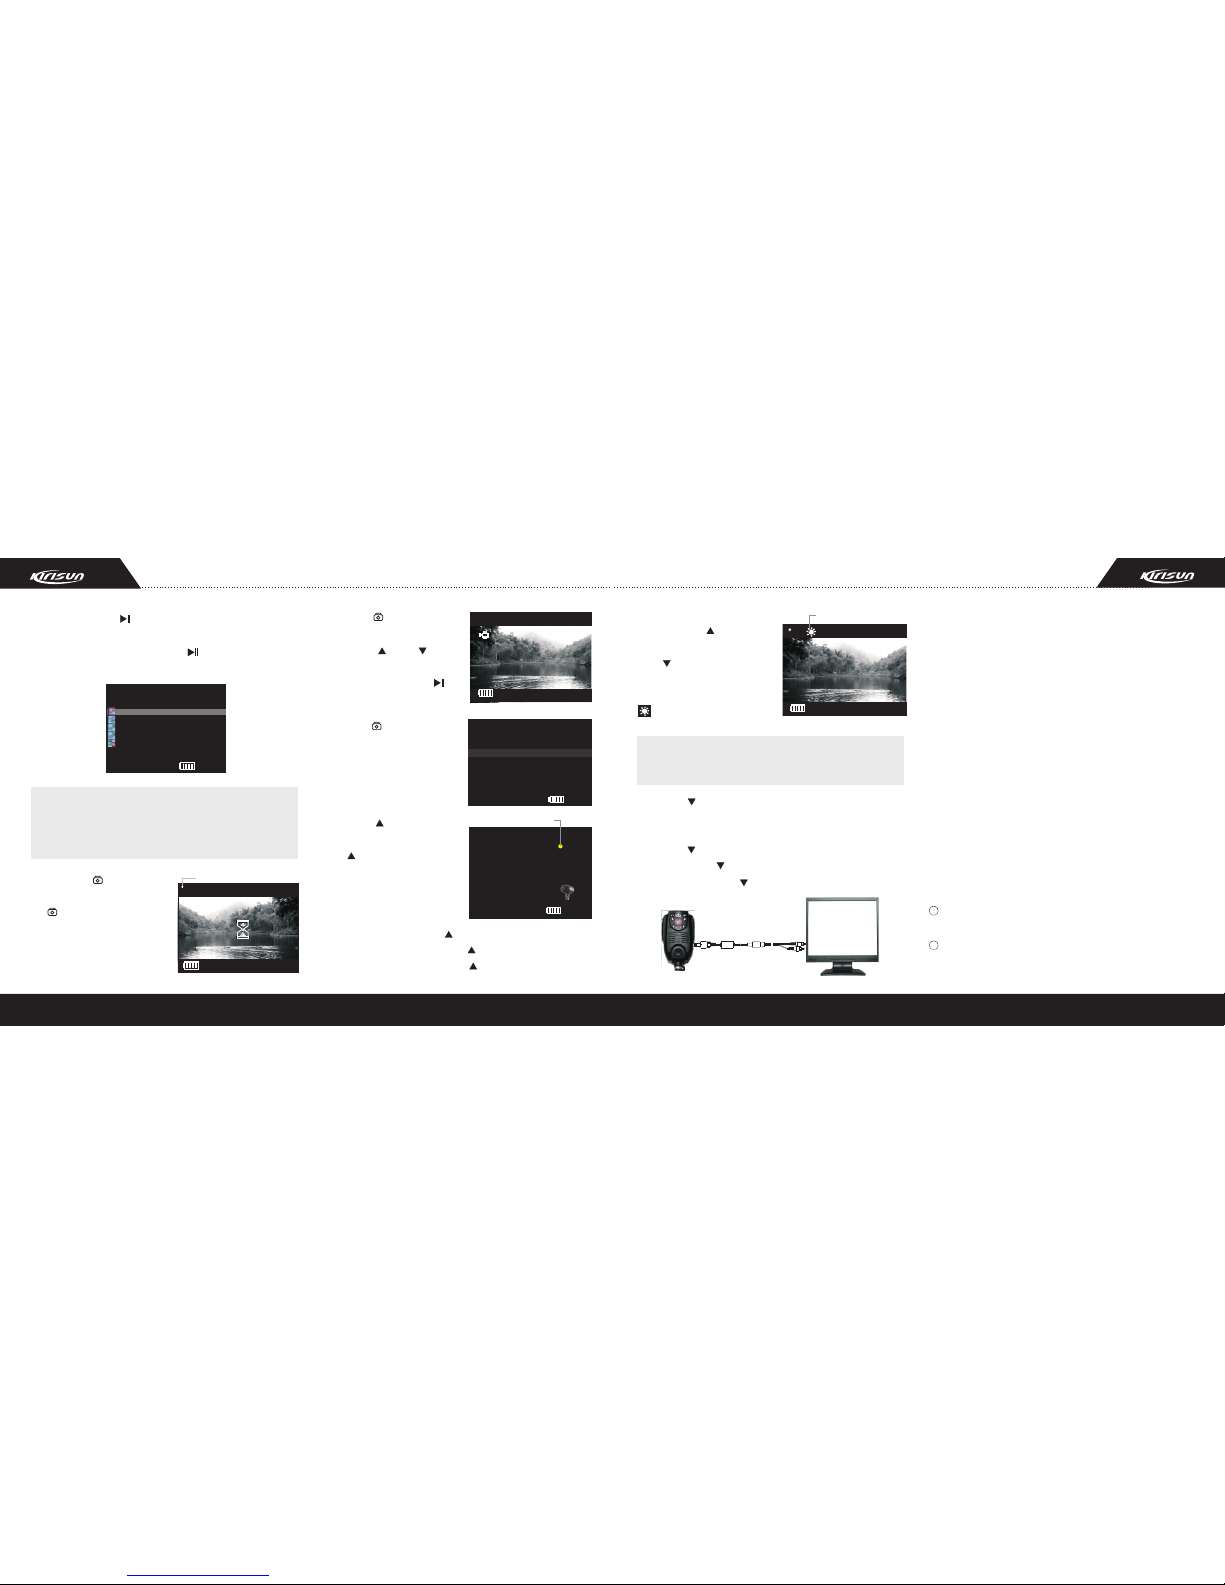
■ Recorder Overview
01. Push-to-talk (PTT) Key
02. Orange ON/OFF Key
03. File Scan Key
04. Photo Key
05. UP Key
06. DOWN Key
07. USB/Earphone Connector
08. RESET Key
09. Belt Clip
10. Playback
Speaker
11. High definition
display screen
12. Charging LED Indicator
13. Infrared
Supplement Light
14. High Resolution
Infrared Camera
15. Rotatable Infrared
Filter
16. Microphone
17. Shoulder MIC
18. Record Key
19. Connector for
connecting two-way radio
①. Push-to-talk (PTT Key)
Press it to call or transmit voice; release it to receive voice.
②. Orange ON/OFF /ESC Key
◆ ON
In the power off status, press and hold the key to turn the
recorder on; the display presents this interface and then enters
■ Basic Operation
into “picture preview” (during File Scan mode,
press the key to return to the preview mode)
◆ OFF
Press the key for 3 seconds, this picture displays,
and the recorder is turned off.
During file scan, short press key to return to the previous menu;
during the video playback and slide play, short press key to exit
the play and return to the file scan mode.
Note:
③. File Scan Key
●
After power on the recorder, short press the key to enter into
“File Scan”; short press key or key to move the cursor
and select the file (the icon in red means the file is selected).
Select one file, short press to open it. If you are playing
■ Re corde r Overv iew
■ Ba sic Ope ratio n
■ Pr ogram ming So ftwar e Setti ngs
■ Ma inten ance an d Clean ing
■ Ac cesso ries
■ Tech nical S pecif icati ons
■ Tr oub lesho oting
■ Im porta nt Noti ce
14
Page 3
3
4
2 / 6
PICT0001.AVI 289.63M
20111105-160316.WAV 798K
20111105-160242.AVI 2.75M
20111105-160232.AVI 49.74M
20111105-154450.JPG 1.3M
11.05
16.0 3
Expl orer
back a video, press to pause it.
●
When connect the recorder with the PC, the recorder enters
password input status, short press to move the cursor to
the left until the password is input.
JPG is the image file. In video review mode, green icon displays on
the up-left of the screen; WAV is audio file. In recording voice mode,
yellow icon displays on the up-right of the screen; AVI is video file.
In recording video mode, red icon displays on the up-left of the screen.
Note:
④. Photo key
In picture preview mode, press
the key one time for one
photo.The images are saved
automatically.
CAP. REC.:5 :00:00:00
2011/11/10 16:34:26
Ico n of powe ring on
CAP. REC.:3071 :02:2 1:18
2011/11/ 10 16:3 4:26
1280X 720
80 0X 60 0
72 0X 48 0
Long press for 3S to enter
the selection of video resolution
mode. Press key or key to
move the cursor and select one
resolution; and then press to
confirm it.
Upgr ade
Upgr ade. ..
SW: 00001
PN: MP6834A.C10 H.20111104
BN: 44711F18-00000 0AB
Lot: 201122SZ
FLAS H: Total 7568MB, Le ft 7309MB
15:2 9
11:14
Long press for 5S to enter
the upgrade of the software
mode. Press the key again to
exit it.
2011/11/ 10 16:3 4:26
可拍:30 71 可录:0 2:21: 18
102:18:42 00:02:55
MIC
Voice r ecord
⑤. UP Key
In picture preview mode, short
press key to record voice.
The screen displays the picture
at right. Press any key (except
PTT key) to end recording.
In File Scan mode, short press key to move to the above file;
in video playback mode, short press key to increase the volume;
in password input mode, short press key to increase the digit.
Ico n of reco rding
2011/11/ 10 16:3 4:26
CAP. REC.:3071 :02:2 1:18
⑥. DOWN Key
In picture preview mode, short
press key to turn on/off the
infrared supplement light. If
infrared light turns on, the icon
displays on the screen;
If you have selected auto turn on/off infrared supplement light in PC
software, the light turns on automatically in low light environment.
Note:
Long press for 5S to enter AV output status. Through the
special connecting cable, the files in the recorder can be
played on the TV set, projector and monitor. In File Scan mode,
short press key to move to the file below; in video playback
mode, short press key to decrease the volume; in password
input mode, short press key to decrease the digit.
AV OUT
Icon of infrared light on
⑦. USB/earphone connector: Open the cover on the
connector, and plug the USB/earphone into the connector.
A. Connect the recorder to the PC with the USB cable, data
exchange and charging can be realized.
B. Video can be output (AV OUT) through the specialized
connecting cable.
C. When using the shoulder MIC, insert the earphone to
receive the call from the same frequency.
⑧. RESET Key: Short press this key to turn off the recorder in
the case of when the recorder breaks down due to any reason.
Restart the recorder, it will be normal.
⑨. Belt clip: By adopting the 360° rotatable clip, the camera
can rotate to any angle with the user's need. The recorder can
be worn firmly in front of the shoulder or on the aiguillette.
⑩. Playback speaker
When playing back the videos in the recorder, the voice is
amplified by the speaker.
. High definition display screen: Used for displaying the
relevant files, scanning the images and playing back videos.
. Charging LED indicator: LED lights red when charging;
Light green when finishing charge.
11
12
Page 4

5 6
2011/11/ 10 16:3 4:26
Save d...
CAP. REC.:3071 :02:2 1:18
. Infrared supplement light
When the light ≤0.1LUX, the infrared supplement light can be
manually turned on to supplement light.
The effective recording distance is ≥0.5-3m.
. High definition infrared camera: CMOS 12 million pixels,
record continuously and take high definition photos. Rotatable
mechanical light filter + infrared LED light supplement,
ensures that the images taken in the dark environment will be
clear and real. In normal environment, the picture will be vivid
and real. The resolution of the record has the options of
1280*720/800*600/720*480; the resolution of the photo is
4032 x 3024.
. Rotatable infrared filter: The infrared filter is rotatable,
which is used to amend the chromatic aberration in recording.
(Note: If you turn on the infrared light under low light condition,
you need to rotate off the cover.)
. MIC Speaker: The voice is amplified through the speaker.
. Shoulder MIC: Shoulder MIC can be connected to the
recorder through the special connecting cable, and can be
used to make a call and amplify the voice.
. Record key
In any operative status (except “pass word” mode), press the
key and the display screen is activated to record the image.
The file will be saved as
AVI format. During recording,
press the key again to
“pause” it and the file will be
saved automatically.
. Charging the battery
This recorder has the large capacity built-in rechargeable Li-
polymer battery pack. Two means of charging are available.
A. Charging with adapter:
Insert the bigger USB terminal into the adapter; connect the
adapter to the appropriate AC power supply outlet; and then
insert the smaller USB terminal to USB port on the recorder.
Be sure the power is off when charging.
When USB terminal connects to the recorder, the recorder
enters into “pass word” login mode, press ON/OFF key to pass
this mode. During charging, LED indicator lights red while the
charge indicator on the down-left LCD screen rolls (the recorder
stays at operative mode);
Unlock
spring
Insert:
Hold the plug, match
the red point on the
plug to the hole on
the recorder and
push into it to finish
the connection. (See
the picture on the
left.) Note: When
completely pushed
the plug into the
connector, the plug
is automatically
locked, and cannot
be pulled out unless
pulling the right
place.
Plug off:
Hold the unlock
spring and pull
backward to pull off
the plug. (See the
picture on the left.)
14
15
16
17
18
19
. Connector for connecting two-way radio
This recorder can connect to the majority of the radios on the
market through the movable pull-push auto-lock connecting
cable. See the pictures below:
After charging for 4.5 hours, Red LED indicator lights off,
Green LED lights on, while the charge indicator on the down-
left LCD screen stops to roll and presents in full grid (the
recorder stays at operative mode), which means the battery
has been fully charged. Pull out the USB terminal to finish
charging.
B. Charging with PC USB port: Connect the recorder to PC
USB port with USB cable to charge the built-in battery.
Note:
●
The battery is not charged in the factory. Please charge the battery
completely for the first time.
● When charging the battery after buying or not using this machine
for more than two months, charge it time after time to charge it fully.
● When the battery is fully charged or “Low Battery” is not displayed,
do not charge it, otherwise it will affect the life and performance of
the battery.
13
20
Page 5

1
Login
Please enter the
administ rator pass word
7
8
◆ Files management
When the recorder connects
to PC, “pass word” need to be
input to login.
①. Connect the recorder and
the PC with the USB line, the
pass word interface displays.
②. Input the pass word: press or key to adjust the number;
press Key to move forward the cursor, press again to move
away the cursor to confirm the password; when the pass word
is confirmed, and enter into the online operation immediately.
■ Programming Software Settings
●
User's default password is 123000. You have the right to view all the
pictures, audios and videos files.
● Administrator's default password is 321000. The administrator has the
right to view, download or delete all the pictures, audio and video files.
● You must input the password every time when connecting the recorder
with PC, so as to ensure the safety of the data.
Note:
Movab le hard d isk
Pleas e press O N/OFF
key to di sconn ect fro m PC.
When the above picture displays,it means that the recorder is
connecting with PC.
◆ Login steps
User' s passwor d login
Ente r My Comp uter
Sele ct Mova ble Dis k
DCIM f ile fol der
File r eview
SETUP file folder
Admi nistr ator' s passw ord log in
Ente r My Comp uter
Sele ct Mova ble Dis k
DCIM f ile fol der
File r eview,
down load, a nd dele te
SETUP file folder
CSETUP
system settin gs
You cannot view the files in SETUP file folder when using
user's password, only using administrator's password.
Note:
◆ System setup
When logging in the system, the administrator can use Windows
programming software CSetup.exe to program the recorder.
The disk chosen in “Save to the disk” should be the one
which the recorder is registered in PC.
Note:
The main menu of setup is an optional menu, which includes 8
options.
①. Option of programming language
At the up-right of the menu; Simplified Chinese and English can
be chosen; the default language is Simplified Chinese.
②. Date and time
When connecting to PC, the recorder synchronizes the date
and time automatically with PC.
③. Recording
The resolution are 1280*720/800*600/720*480 optional;
Frame rate are 20~30 frames per second optional;
The compressibility coefficient of the video is 40~100 optional.
④. Power save mode
To prolong the battery's working time, this recorder can turn off
the backlight and power off automatically.
A. Backlight auto off (LCD standby time selection): the default
setting is disabled. You can select 30S/1 minute/5 minutes.
After selected, save it. When the backlight is off, you still can
record the video and audio. Press any key to activate the LCD
and return to standby screen (except the PTT key).
B. Power off when idle: the default setting is 10 minutes (the
recorder turns off automatically when no operation is done
within 10 minutes). You can select 1 minute/5 minutes/10
minutes. After selected, save it. Long press ON/OFF key
to turn on the recorder.
Page 6

9
10
The PTT key can still be used in power save mode.
Note:
⑤. Security (double password management)
A: User's password: the default setting is123000.
You can reset the password. Enter the new password, click
“save”, and then click “exit”.
B: Administrator's password: the default setting is 321000.
You can reset the password. Enter the new password, click
“save”, and then click “exit”.
The new password is valid when restart the recorder. You must
remember the new password to avoid unnecessary trouble.
⑥. Name the video
Use letter to represent police class, and digit to represent
police number.
⑦. Menu
Language: English and Simplified Chinese. You can choose
any of the language according to your need.
⑧. Add equipment number
Through the software, you can number the equipments. This
number will automatically display on the pictures. The
administrator can edit these numbers.
⑨. Save
The disk chosen in “Save to the disk” should be the one which
the recorder is registered in PC.
Although DSJ-A9 video/audio recorder can adapt to the severe
environment, it should be maintained carefully and operated
as the criterion requires in ordinary use, so as to realize the
best performance.
◆ Be cautious to the camera lens and all the removable
parts
Due to the special materials and construction design, camera
lens, display screen and other parts are subject to be
damaged. Therefore, do not overexert or press them when
using. In the case of when the screen breaks, please be
cautious not to be hurt by the broken glass, and to avoid of
contacting the liquid crystal in the screen with your skin or
letting them enter into your eyes and mouth.
◆ Battery
Please check the battery capacity before going out. If needed,
please charge the battery. Do not charge the battery when its
capacity is full, otherwise it will affect its performance.
■ Maintenance and Cleaning
◆ Cleaning
For lens and glass are fragile, avoid
of touching them with your hands.
Air blow plastic ball can be used to
blow off the grime or winceyette.
Clean soft cloth can be used to
erase finger mark and the smudge
which cannot be erased by the ball.
Erase them from the center of the
lens to the side.
Lens
Display screen
Surface of the recorder
If need to erase finger mark or
other smudge, please use the soft
dry cloth, and be gentle.
Blow off dust, smudge or sand
particles with the ball, and then use
soft dry cloth to clean it.
◆ Storage
If you do not intend to use the recorder for a long time, please
power off the recorder, and avoid storing it in the following
places:
● Place where it will be close to the strong magnetic
equipments.
● Place where the environmental temperature is below -10° or
above 50°.
● Place where it is not ventilated and wet.
● For the purpose of avoid going moldy, take out the recorder
at least one time a month, charge the battery, operate it and
then store it.
Page 7

11
12
■ Technical Specifications
Camera
Video resolution
Frame rate
Video format
Image resolution
Focal length
Angel
Focusing range
Normal photoing condition
Storage medium
Display screen
Electric current
Continuous working hours
Standby hours
Data port
System setup
Power supply
Size
Weight
1/2.5'' high definition CMOS sensor
Options: 1280*720/800*600/720*480
30 frame per second
AVI format
4032*3024 JPG (12million pixels)
F=6.089mm
78 °
0.3m-limitless
<0.1LUX, auto turn on infrared LED light
Built-in memorizer 8GB (Options: 16 GB/32 GB)
2.0 inch, TFT LCD
Power on: 240mA
Recording: 380mA
8 hours
12 hours (power save mode)
High-speed USB 2.0 port
Time, frame rate, continuous photo, video parameter, encryption, upgrade, etc can be set through PC
Built-in large capacity battery
119*64*39mm
205g (with belt clip)/174g (without belt clip)
◆ Optional accessories
■ A cc ess ories
DSJ- A9 Video/A udio
Reco rder
◆ Supplied accessories
Items
DSJ -A9 Vid eo/Au dio Rec order
Adapt er
USB cable
Instr uction man ual
Belt clip bra cket
QTY
1
1
1
1
1
Note
Ada pter
USB c able
Bel t clip br acket
Mob ile cha rger Ear phone
AV OUT Vi deo
con necti ng cabl e
Two- way rad io
con necti ng cabl e
Items
Mob ile cha rger
Ear phone
AV OUT Vi deo con necti ng cabl e
Two- way rad io conn ectio ng cabl e
QTY
1
1
1
1
Note
Page 8

13
14
■ Troubleshooting
Problem Causes Solutions
Cannot be powered on
The battery power may be exhausted.
Please charge the battery for 4.5 hours.
Please send to the authorized service center for
maintenance.
Press RESET key, then press ON/OFF key to turn
on the radio.
When connecting to the PC with USB cable,
the recorder will prompt you to enter the
password. Please enter the correct password, and
then confirm it to register.
Please change a new cable.
Register with the user's password, you can only check
the files. Register with administrator's password to copy
and delete the files.
Plug the USB cable to the back panel of PC.
ON/OFF key is damaged.
Self-protection
You have not registered the recorder.
USB cable is damaged.
Use the wrong password.
USB power supply of front panel is
not enough.
Cannot be read by PC
Cannot copy the files.
Data copy intermit when
connecting with PC
■ Important Notice
Kirisun and our autho rized pa rtners own the
intellectual property of all the parts of this product
(inclu de acces sories). Any desi gn and materia ls
may not be modified, copied, extracted or translated
without the authorization of Kirisun or its authorized
parities.
Due to the update or modification of the product,
Kirisun owns the right to change the specifications
of software and hardware described in this manual
without further notice. Specifications and information
contained in this manual are for reference only.
Kirisun reserves the right to interpret the mistakes
and errors occurring in this manual, though all the
contents are checked carefully.
SAFETY
The recorder meets the following product safety
and radi o disturbance ch aracter istics-limi ts and
requirements:
IEC 60065:1998 Audio, Video and Similar Electronic
Apparatus-Safety Requirements
!
IEC/CISPR 13-2001 Sound and television broadcast receivers
and associated equipment - Radio disturbance characteristics
- Limits and methods of measurement
IEC 61000-3-2:200 1 Electromagnetic compatibility (EMC)
Part3-2: limits-limits for harmonic current emissions(equipment
input current≤16A per phase)
More details please search on the internet.
Use the Designated Accessories
Use USB cable and adapter supplied or sold by Kirisun only, or
otherwise the data cannot be read or cause damag e to the
product.
If you want to purchase or replace the accessories, please
contact your local dealer or Kirisun.
Product Operation Safety
Do not attempt to disassemble or modify this recorder, or it will
get an electric shock or cause malfunction.
Keep the plug of the adapter in dry and clean condition;
otherwise it will cause fire or electric shock;
Do not discard the recorder in the fire to avoid of explosion, for
there is a built-in battery.
 Loading...