

M.2 2280 PCIe® NVMe™ SSD
Quick Start Guide
Please be s ure to check personal.kioxia.c om/support/ for the lat est rmware
updates.
SAFETY INSTRUCTIONS
Please re fer to “Instruct ion Manual for Safe ty and Comfor t”:
personal.kioxia.com/support/
NOTICE: This NVMe S SD requires a mothe rboard to suppo rt 22 x 80 M.2
specic ation. Check yo ur motherboar d manual for M.2 siz e support. Pl ease
consult y our motherboar d/laptop manual for i nstallation in structions for y our
partic ular host plat form.
KIOXIA SSD I NSTALLATION
1. To minimize stati c electricit y, touch a metal sur face before ha ndling
the SSD.
2. Connect the SSD to yo ur motherboard ’s PCIe NVMe SSD slot .
3. Insert N VMe SSD into M.2 sl ot.
4. Screw in NVMe SSD to the m otherboard’s s tando. Make sure th e
SSD is secu red.
Note: Your motherboa rd may dier. Please b e sure to check wit h your
motherb oard manufact urer’s user manual f or detailed inst ructions.
Window s Driver suppor t:
Microsoft Windows 10 nat ively suppor ts PCIe NVMe SSD s.
For safet y instructio ns, the latest dri vers, and SSD Ut ility Storag e Management
Software, please visit:
personal.kioxia.com/support/
R0000G0
1/21
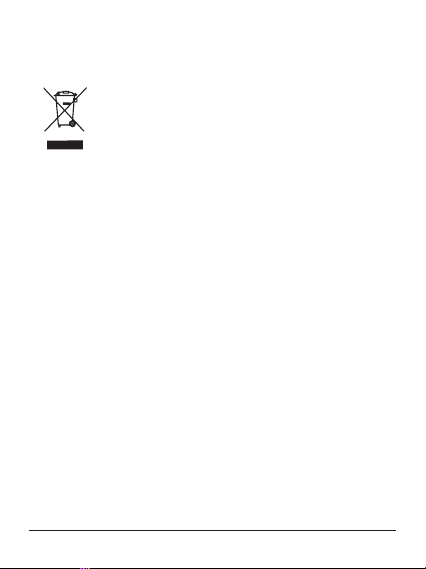
Followin g information is o nly valid for EU-me mber States:
DISPOS AL OF PRODUCTS:
This symb ol indicates tha t this product mus t not be treated
as househ old waste. By ens uring this produ ct is disposed
of corre ctly, you will help pr event potential n egative
consequ ences for the env ironment and human h ealth, which
could othe rwise be caus ed by inappropr iate waste handli ng
of this pro duct. For more de tailed informa tion about recy cling
of this pro duct, please co ntact your loc al city oce, yo ur
househo ld waste dispos al service or t he shop where you
purchas ed the product.
TECHNICAL S UPPORT
Need help?
Please co ntact us at our reg ional suppor t page: personal.kioxia.com/support/
NVM Expre ss, NVMe are trad emarks of NVM Ex press, Inc PC Ie is a trademark of P CI SIG A ll
other compa ny names, produ ct names, and ser vice names m ay be trademarks o f their respect ive
companies © 2020 KIOXIA Cor poration All r ights reser ved
2/21

FCC Information
This e quipment has been tes ted and fou nd to comp ly with t he limits f or a Class
B digita l device, p ursuant to pa rt 15 of the F CC Rules. Th ese limits ar e designed
to provide reasonable protection against harmful interference in a residential
installation. This equipment generates, uses and can radiate radio frequency
energy and, if not install ed and used in acco rdance with the instruc tions, may
cause harmful interferenc e to radio communications. Howev er, there is no
guarante e that inter ference will n ot occur in a par ticular insta llation. If th is
equipment does cause harmful interference to radio or television reception,
which c an be determi ned by turnin g the equipmen t o and on, the us er is
encouraged to try to correct the inter ference by one or more of the following
measures:
• Reorien t or relocate the re ceiving anten na.
• Increas e the separation b etween the equ ipment and recei ver.
• Connect t he equipment into an o utlet on a circuit d ierent from tha t to
which the r eceiver is conn ected.
• Consult th e dealer or an expe rienced radio/ TV technicia n for help.
Caution
Changes or modicati ons mad e to this equipment, not express ly app roved b y
KIOXIA Corporation or par ties authorized by KIOXIA Corporation could void the
user’s auth ority to oper ate the equipment .
FCC conditions
This d evice co mplies wit h part 15 of the FCC Rules. Operatio n is subj ect to th e
following two conditions: (1) This device may not cause harmful interference, and
(2) this device must accept any interference received, including interference that
may cause u ndesired oper ation.
US Conta ct
Name: KIOXIA Americ a, Inc.
Address: 2610 Orchard Par kway,
San Jose, C A 95134, USA
Phone: +1 408-526-2700
3/21

For Austr alia and New Zea land:
Warrant y Period: Five (5) ye ars from date of Pur chase How to Obt ain Service:
Your proof of purchas e is required to receive war ranty servi ce. If the Product fails
during normal and prope r use within i ts warran ty peri od, retur n the Product to
your plac e of purchase for replacement o r refund. If your p lace of purchas e is no
longer trading contact the Support Centre.
The retur n of your produ ct will result in los s of any user-gen erated data. It
includes , but not limite d to, fo r example: mus ic, photo s, video s, and other
electro nic documents . Please ensure yo u have made a back-up c opy of any data
saved on yo ur product.
Consume r Guarantees (A ustralia onl y)
Our goods and ser vices come with guarante es that cannot be excluded under the
Australi an Consumer Law. F or major failure s with the serv ice, you are entit led:
• to cancel y our service c ontract with us ; and
• to a refund fo r the unused por tion, or to compe nsation for its re duced
value.
You are also en titled to choose a refund or re placement for major failures with
goods. If a failure with the goods or a ser vice does not amount to a major failure,
you are en titled to have the failure rectied in a rea sonable time. If this is not
done, you ar e entitl ed to a refun d for the go ods and to c ancel th e contra ct for
the ser vice and obtain a r efund of any unuse d portion. You are al so entitled to be
compensated for any other reasonably foreseeable loss or damage from a failure
in the good s or service.
This Warranty is no t intende d to and doe s not limit y our right s with respect to
the Consumer Guarantee s (in Australia) or C onsumer Guarantees Act (in New
Zealand).
4/21

DE
Bitte besuchen Sie personal.kioxia.com/support/ für die neu esten Firmware Aktualisierungen.
SICHERHEITSHINWEISE
Bitte le sen Sie die „Bedie nungsanleitun g für Sicherhei t und Komfort
aufmerk sam unter: personal.kioxia.com/support/ durc h.
BITTE BEACHTEN: Für diese s Toshiba N VMe SSD-Lauf werk muss eine
Hauptpla tine verwende t werden, die den M .2-Standard (2 2x80 mm) unters tützt.
Schlage n Sie im Handbuch zu Ihr er Hauptplatine n ach, ob die M.2-G röße
unterstü tzt wird. Di e für Ihre Hostplat tform gelte nden Installati onsanweisung en
nden Sie im H andbuch zu Ihrer Hau ptplatine bzw. zu I hrem Laptop.
SSD -IN STALL ATIO N
1. Um d ie statische Ele ktrizität zu m inimieren, ber ühren Sie eine met allische
Ober äche, bevor Sie di e SSD anfassen.
2. Stecken S ie das NVMe SSD-L aufwerk in de n PCIe NVMe SSD- Steckplatz
Ihrer Hauptplatine.
3. Insérez le S SD NVMe de dans le lo gement M.2.
4. Schraub en Sie das NVMe SSD -Laufwer k gegen den Abst andsbolzen der
Hauptpla tine fest. Achte n Sie darauf, dass d as SSD-Lauf werk richtig si tzt.
Hinweis: Hauptpl atinen sind unter schiedlich ausg eführt. Des halb müssen
die ausführlichen Anweisungen im Handbuch des Hauptplatinenherstellers
beachtet werden.
Windows-Treiber-Unterstützung:
Microso ft Windows 10 unter stützt grund sätzlich PCI e NVMe SSD-Lau fwerke.
Sicherheitsanweisungen, die neuesten Treiber und die SSD Utility Storage
Manageme nt Software nden Sie auf: personal.ki oxia.com/support/
5/21

Die nachfolgenden Informationen gelten ausschließlich für EU-Mitgliedsstaaten:
ENTSORG UNG DES PRODUKT S:
Dieses S ymbol weist da rauf hin, dass das P rodukt nicht üb er
den Hausmü ll entsorgt werd en darf. Durch ei ne korrekte
Entsorgu ng des Produkt s verhindern Sie n egative Folge n
für die Umwe lt und die menschli che Gesundheit , welche
durch eine falsche Abfallbehandlung anderenfalls entstehen
können. Ausführlichere Informationen zum Recycling dieses
Produk ts erhalten Sie vo n Ihrer Stadt verwaltung, I hrem
Hausmülle ntsorger oder d em Geschäft , in dem Sie das
Produk t gekauft habe n.
TECHNISCHER SUPPORT
Brauchen Sie Hilfe?
Bitte kontaktieren Sie uns auf unserer regionalen Kundendienstseite:
personal.kioxia.com/support/
6/21

FR
Rendez-vous sur personal.kioxia.com/support/ pour obtenir les dernières
mises à jour d u rmware.
CONSIGN ES DE SÉCURITÉ
Veuillez vou s reporter au « Man uel d’utilisatio n pour votre sécur ité et votre
confor t » : personal.kioxia.com/support/
REMARQUE: Ce SSD NVM e de Toshiba nécessi te une carte mère p renant en
charge la s pécication M .2 22x80. C onsultez le manue l de votre carte m ère
pour savo ir si elle prend en ch arge le format M. 2. Veuillez consul ter le manuel
de votre ca rte mère/port able pour les dire ctives d’insta llation concer nant votre
plateforme hôte particulière.
INSTALLATION D E SSD
1. P our minimiser l’élec tricité stati que, touchez une su rface métall ique avant
de manipul er le SSD.
2. Insérez l e SSD NVMe de dans le lo gement de SSD NVMe P CIe de la carte
mère.
3. Insérez le S SD NVMe de dans le lo gement M.2.
4. Fixez le SS D NVMe de avec la vis d ans l’entretoise de l a carte mère.
Assurez- vous que le SSD est b ien xé.
Remarque: Votre car te mère peut être d iérente. Veuille z consulter le
manuel de l’u tilisateur du fabr icant de la car te mère pour obteni r des
directives détaillée s.
Prise en ch arge de Window s:
Windows 10 de Microsoft prend en charge de manière native les SSD NVMe
PCIe.
Pour les consignes de sécurité, les plus récents pilotes et le logiciel de gestion de
stockag e SSD Utility, vis itez: personal.kioxia.com/support/
7/21
 Loading...