

Kino Flo ParaZip 200, ParaZip 400 Operation Manual
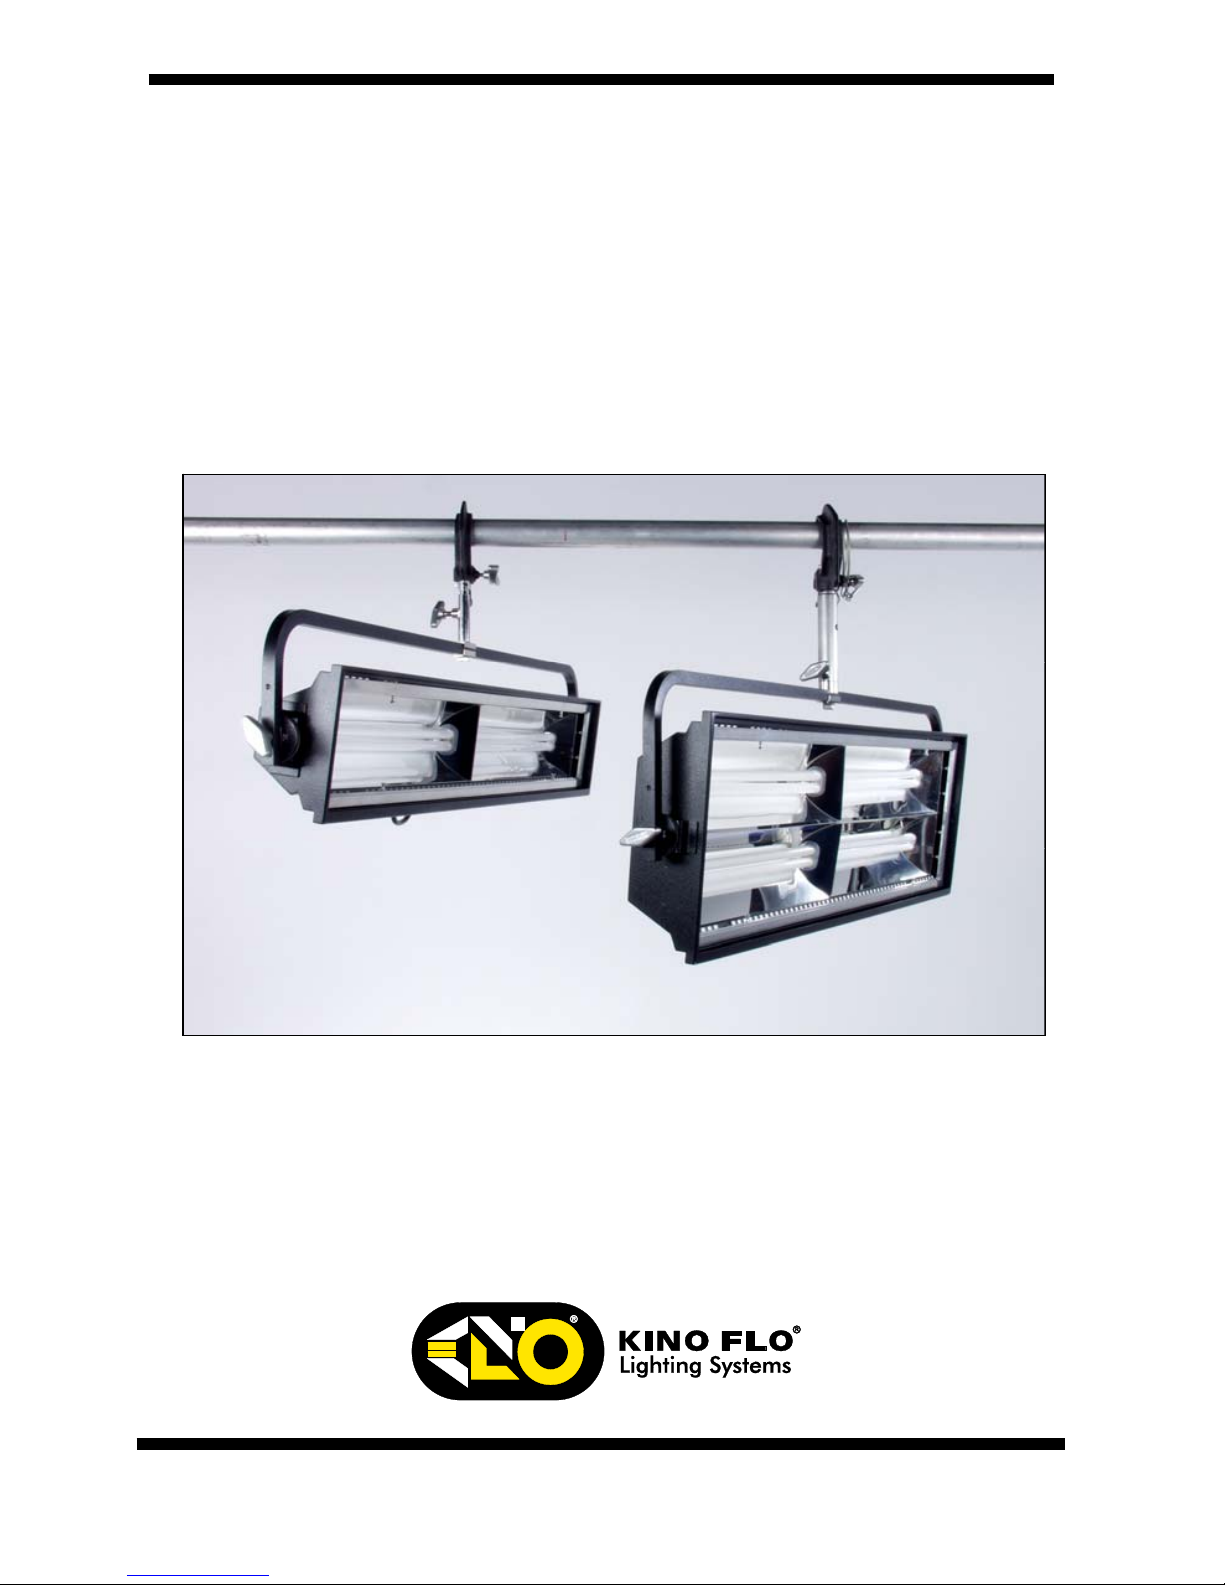
Operation Manual
ParaZip
200 & 400
Part No. 3100039 Rev B 01-07-2008
2
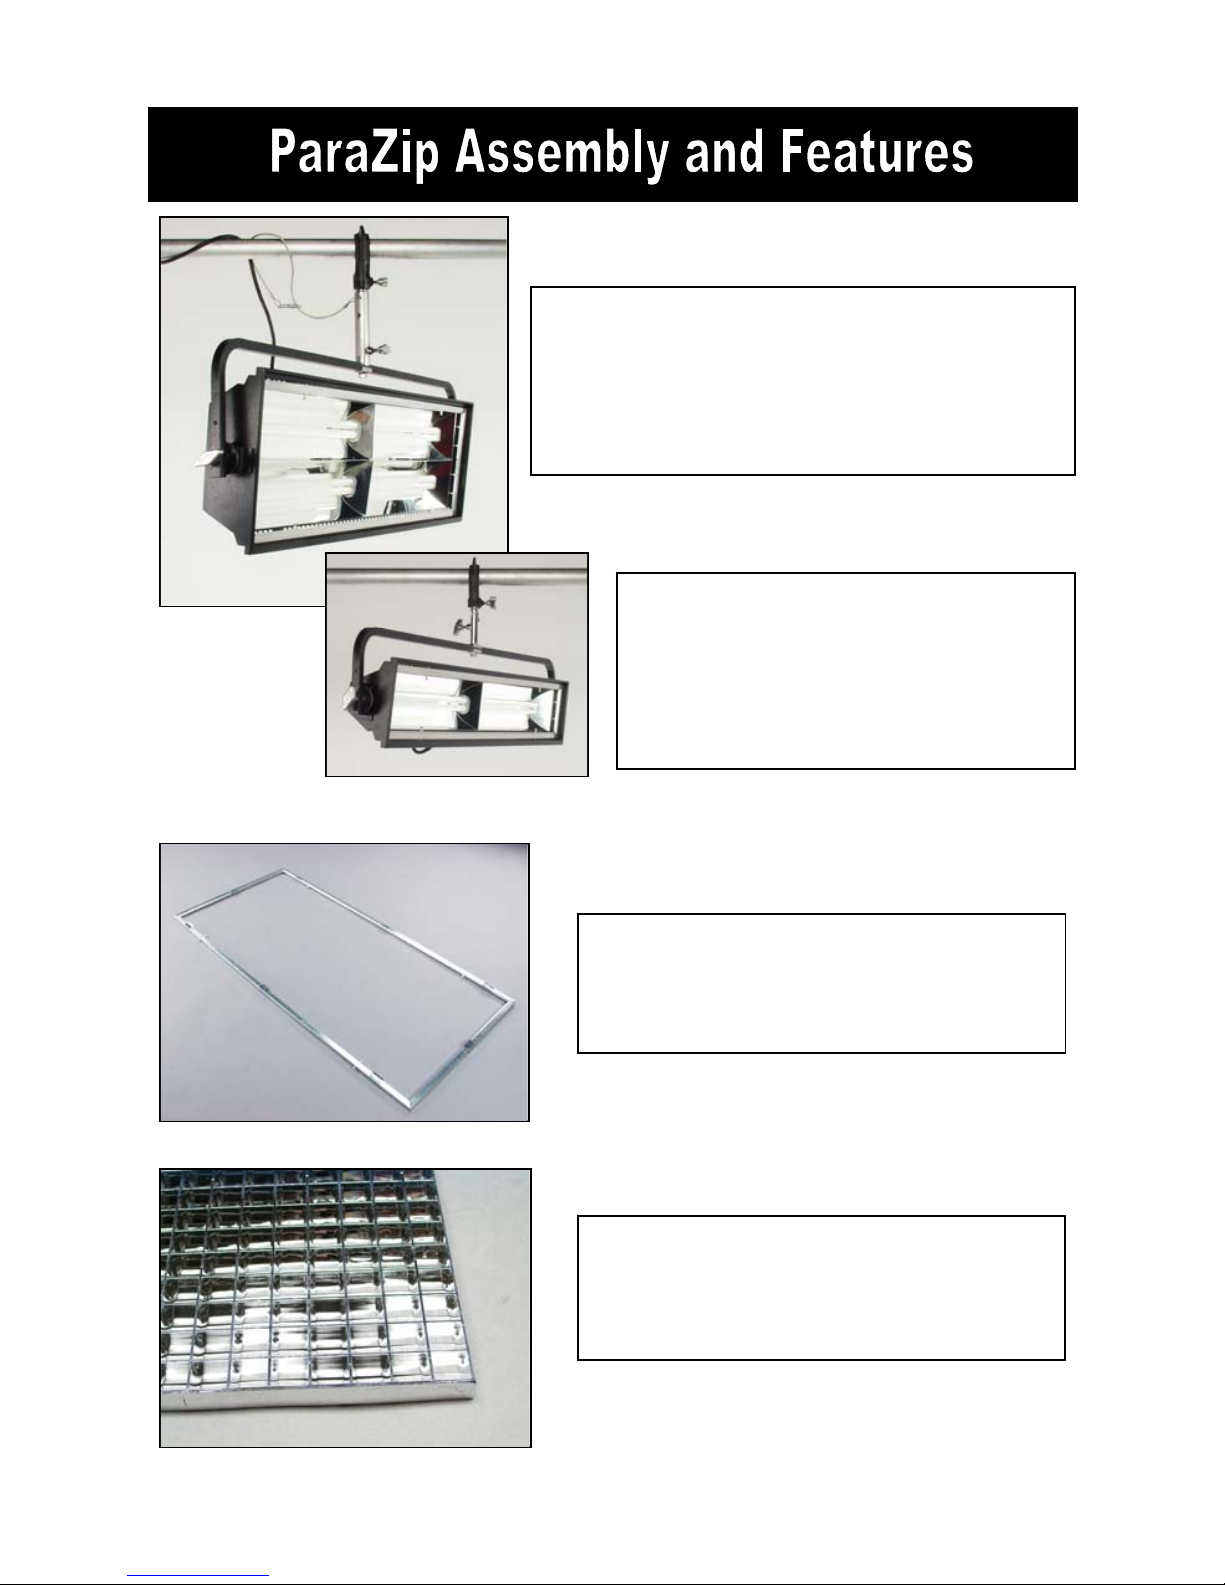
ZIP-400-120………. ParaZip 400 DMX
120VAC
ZIP-400-230………. ParaZip 400 DMX
230VAC
GFR-Z4…. ParaZip 400 Gel Frame
GFR-Z2…. ParaZip 200 Gel Frame
LVR-Z4-S….ParaZip 400 Louver/Silver
LVR-Z2-S….ParaZip 200 Louver/Silver
ZIP-200-120… ParaZip 200 DMX
120VAC
ZIP-200-230… ParaZip 200 DMX
230VAC
3
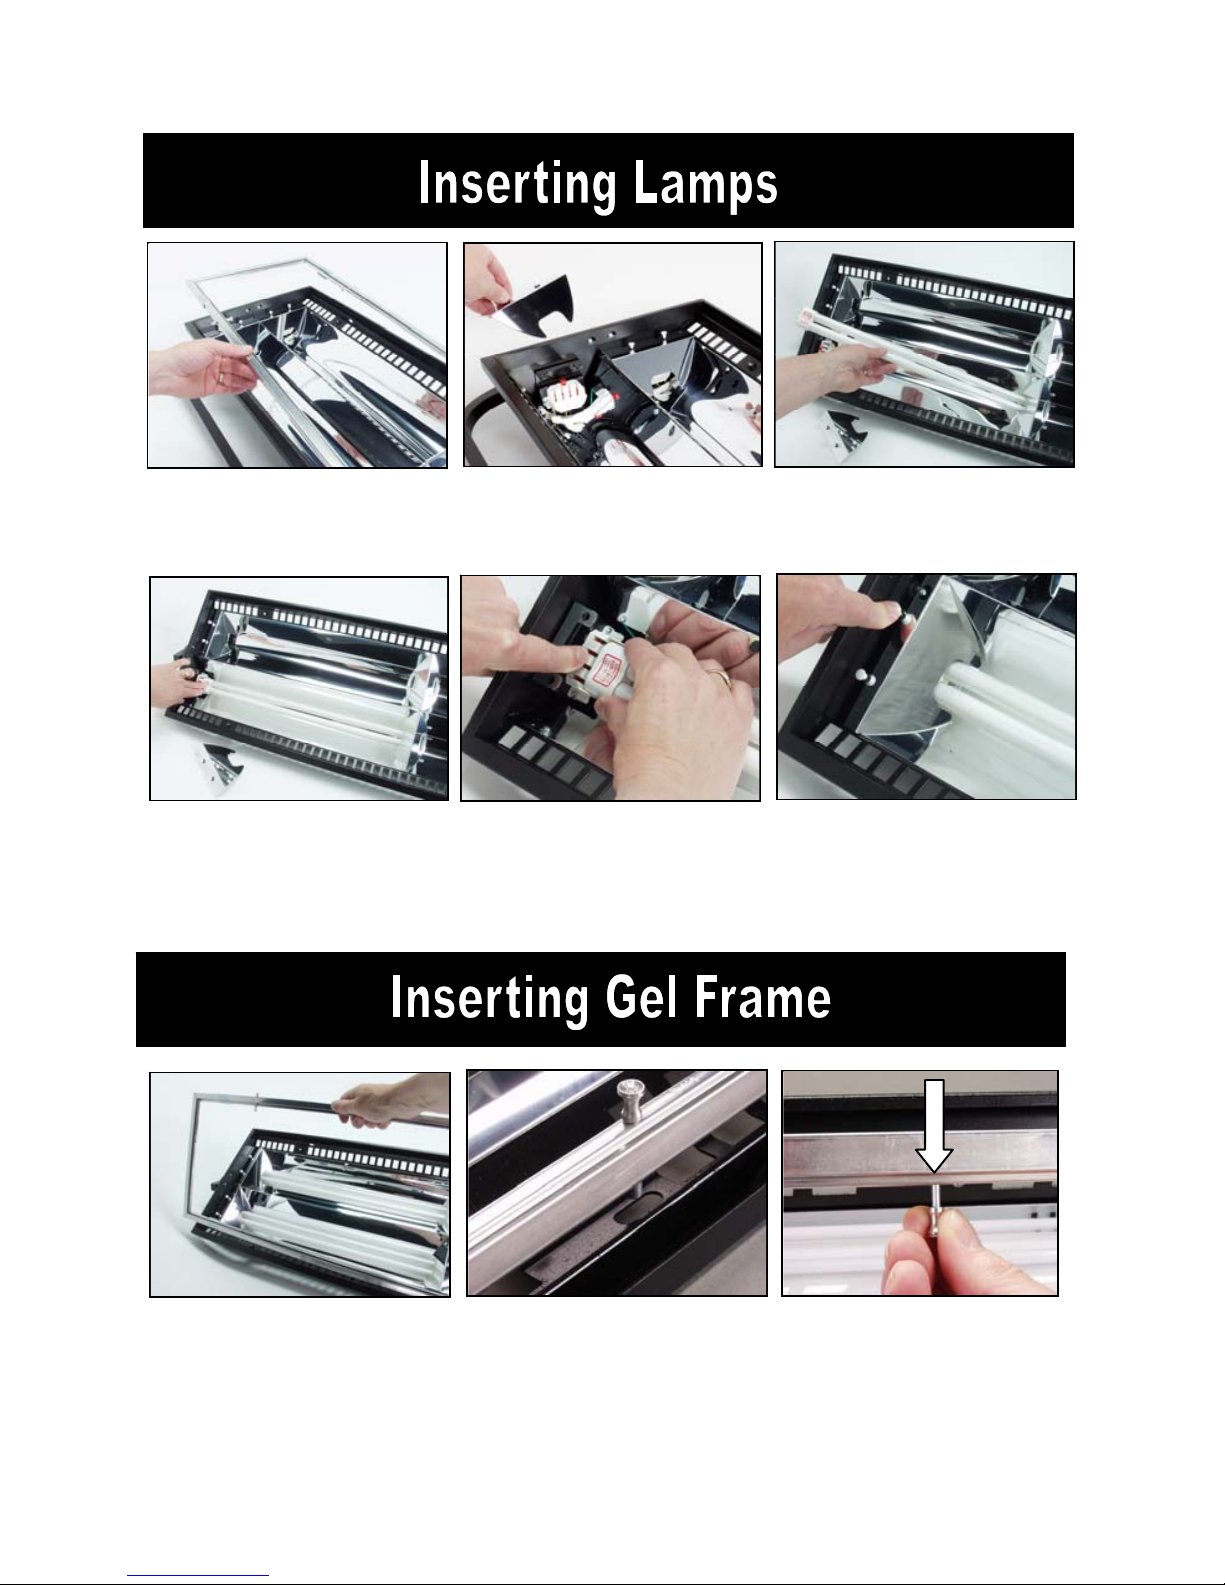
Remove Gel frame.
Remove the lamp base
cover by pulling up on
the two push-buttons.
Insert lamp tip first.
Snap lamp base into
Lamp connector.
Replace Lamp Base
Cover and push down on
pins to lock.
To release lamps, press
Red Button and lift lamp
base out.
The Gel Frame is secured to the fixture by 4 spring-loaded pins. Align the
pins of the Gel Frame with the oval receptacle holes on the edge of the
fixture. Pull back the pins and release into the receptacles to properly
secure the Gel Frame.

4
(A) (B)
A) The Gel Frame comes with
Gel Clips. Cut the gel to size and
use the Clips to fasten the gel to
the Frame.
B) Another method is to apply
transfer tape directly to the gel
frame. The clips are not
necessary when taping the gel.
Place the long edge of the Louver into the lower channel containing a set of
leaf springs. Press down on the Louver and slip the upper edge of the
louver into the upper channel of the fixture. Honeycomb louvers have tabs
on the side to enable easy handling. To remove, reverse the procedure.
Attach the Barndoors (sold separately) to the two
receptacles located along the top and bottom
edge of the fixture.
Adjust the door
tension with a Phillips
Screwdriver.
 Loading...