

Kino Flo Flathead 80 DMX User Manual
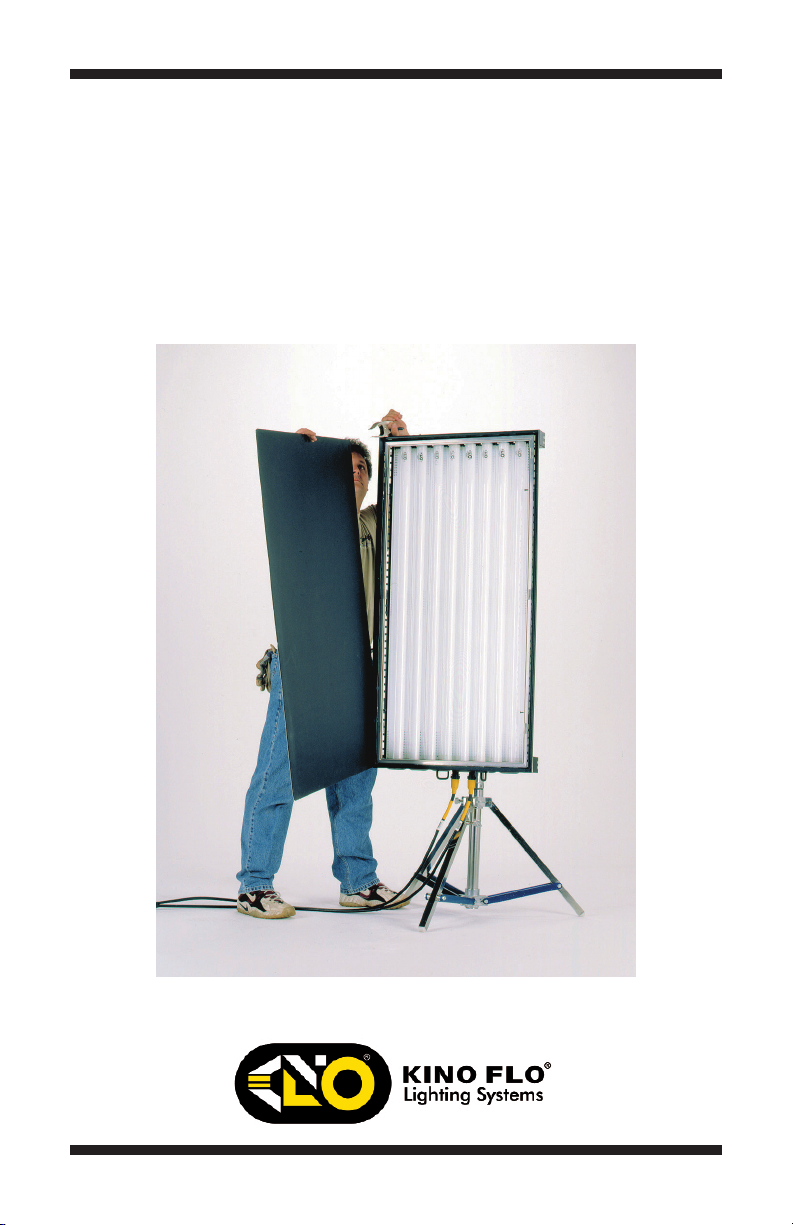
Operation Manual
Flathead 80
Flathead 80 DMX
Part No. 3100076 Rev A 01-23-2014
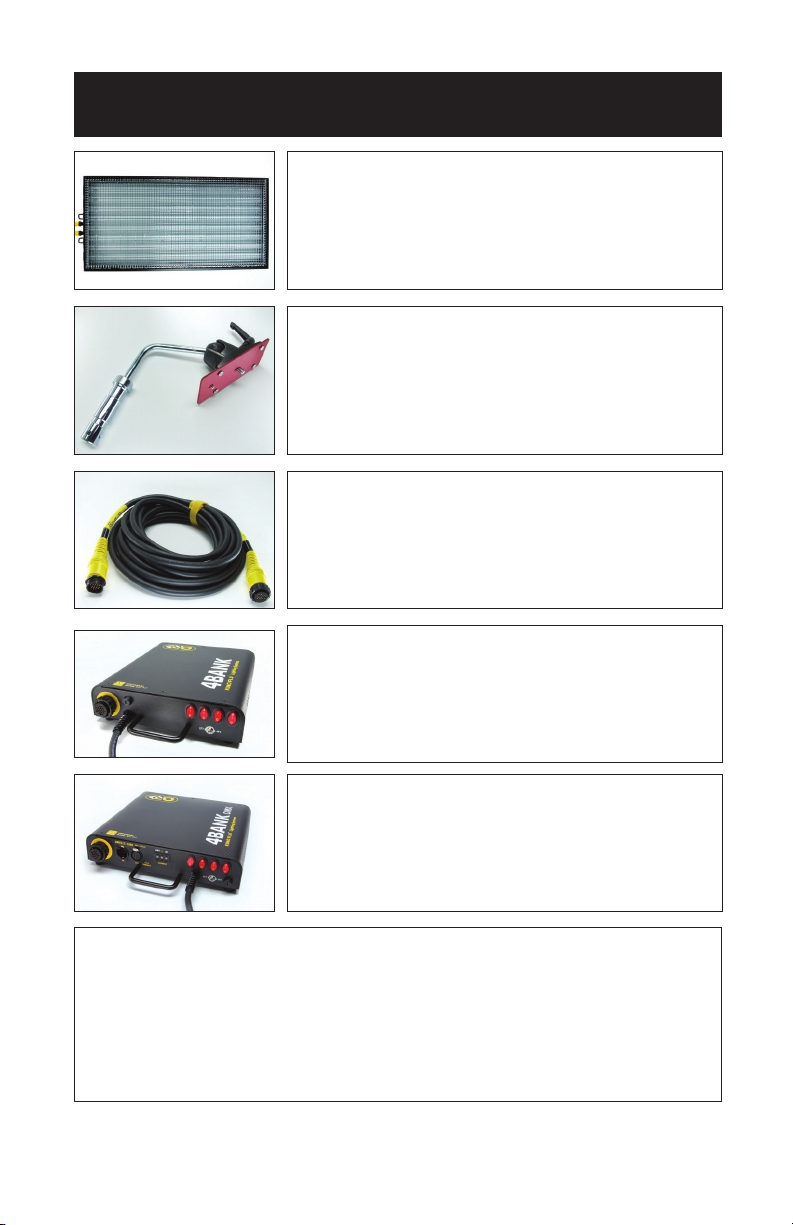
Flathead 80 System
CFX-4808
Flathead 80 Fixture
MTP-K81
Kino 81 Mount w/ Junior Pin (28mm)
X16-25
4Bank Extension, 25ft (x2)
BAL-427-120U
4Bank Ballast, Univ 120U (x2)
BAL-427-230U
4Bank Ballast, Univ 230U (x2)
BAL-457-120U
4Bank DMX Ballast, Univ 120U (x2)
BAL-457-230U
4Bank DMX Ballast, Univ 230U (x2)
Each Flathead 80 System consists of:
1 Fixture
1 Mounting Plate
2 Extension Cable
2 4Bank or 4Bank DMX Ballast
2
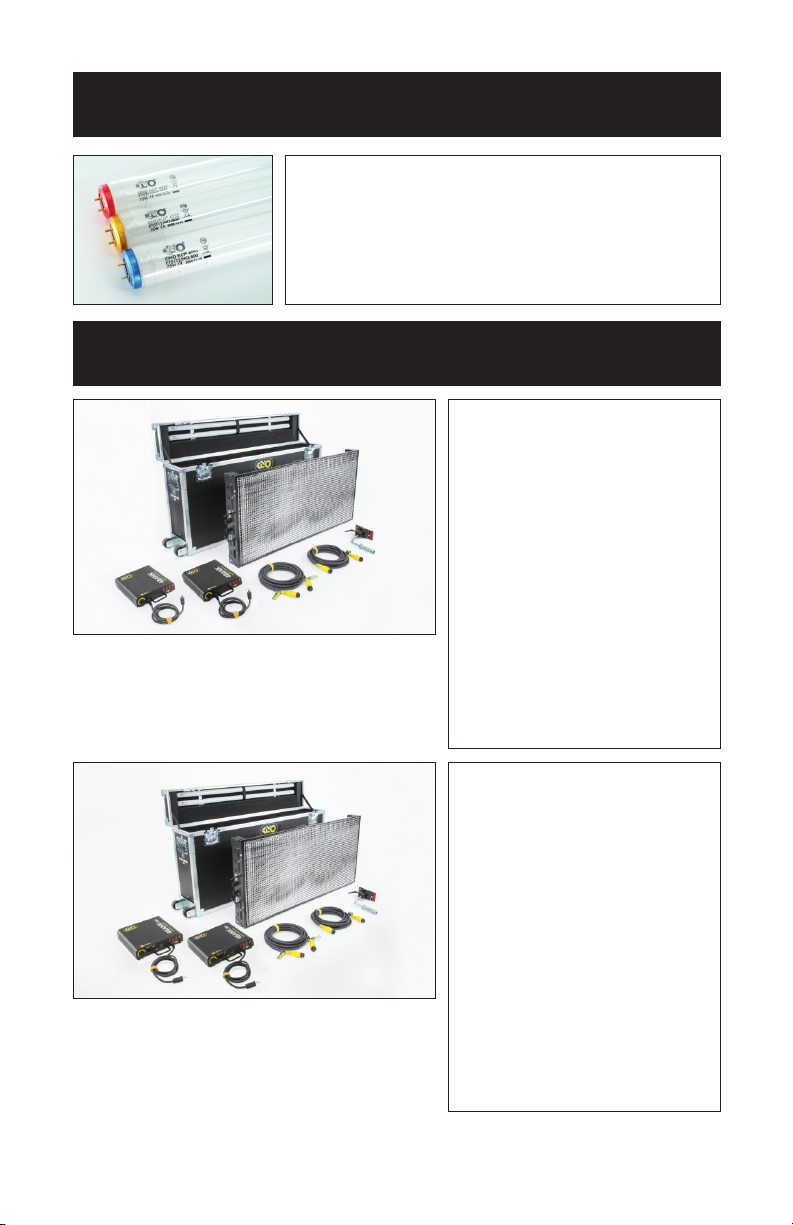
True Match Lamps
®
488-K29-S 4ft Kino KF29 Safety-Coated
488-K32-S 4ft Kino KF32 Safety-Coated
488-K55-S 4ft Kino KF55 Safety-Coated
Flathead 80 Kits
Flathead 80 Kit
KIT-F80-120U
Flathead 80 Kit, Univ 120U
KIT-F80-230U
Flathead 80 Kit, Univ 230U
Kit Contents:
1 Flathead 80 Fixture
1 Mount w/ Junior Pin (28mm)
2 4Bank Ballast
2 Extension, 25ft
1 Ship Case
Dimensions:
Weight:
57 x 10.5 x 29” 83 lb
(145 x 27 x 74cm) (38kg)
Flathead 80 DMX Kit
KIT-F80-X120U
Flathead 80 DMX Kit, Univ 120U
KIT-F80-X230U
Flathead 80 DMX Kit, Univ 230U
Kit Contents:
1 Flathead 80 Fixture
1 Mount w/ Junior Pin (28mm)
2 4Bank DMX Ballast
2 Extension, 25ft
1 Ship Case
Dimensions:
Weight:
57 x 10.5 x 29” 85 lb
(145 x 27 x 74cm) (39kg)
3
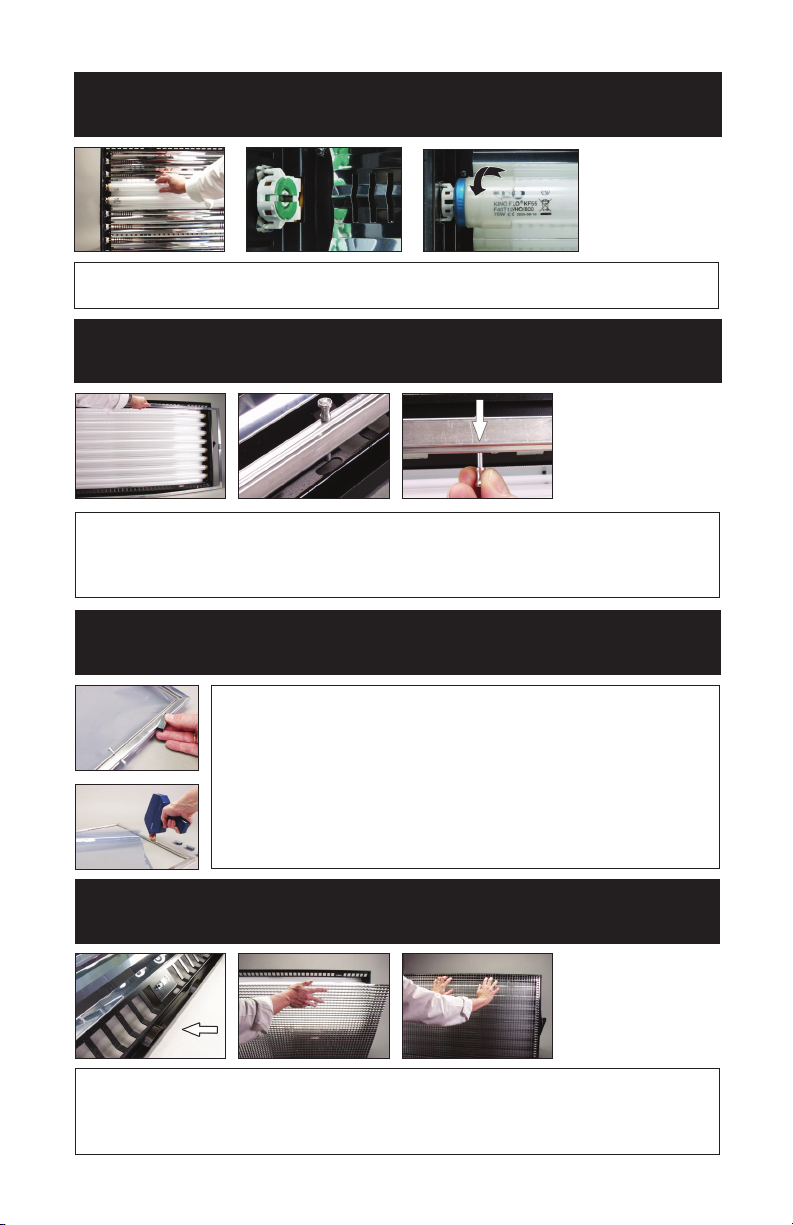
Inserting Lamps
Insert lamps into both lamp holders. Twist ¼ turn to make electrical contact.
Inserting Gel Frame
The gel frame is secured to the xture by 4 spring-loaded pins. Align the pins of the
gel frame with the oval receptacle holes on the edge of the xture. Pull back the pins
and release into the receptacles to properly secure the gel frame.
Applying Gel to Frame
Option 1 – The Gel Frame comes with gel clips. Cut the gel to size
and use the clips to fasten the gel to the frame.
Note: It is recommended to attach one clip on each side and one
clip near all four corners.
Option 2 – Another method is to apply transfer tape directly to the
gel frame. The clips are not necessary when taping the gel.
Inserting Louver
Place the long edge of the Louver (LVR-I80-S) into the lower channel containing a set
of leaf springs. Press down on the Louver and slip the upper edge of the louver into
the upper channel of the xture. To remove, reverse the procedure.
4
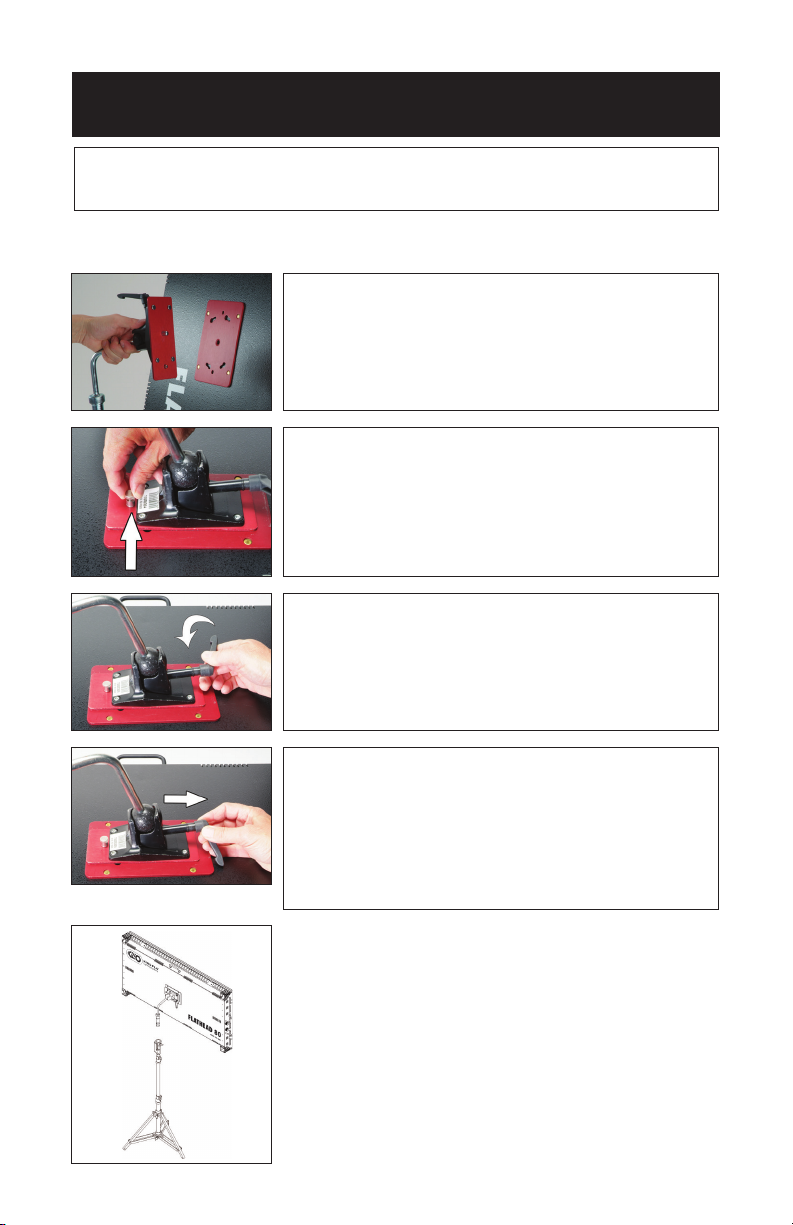
Mounting the Fixture
The Flathead 80 is designed to operate on a Junior stand, hang from a Junior pipe
hanger or mount directly to a set wall.
Mount Plate Operation
Align the center pin of the Mounting Plate (MTP-K81)
to the center hole on the mating plate. Rotate plate
clockwise until the four shoulder rivets drop into the
receptacle. A locking pin will snap into place when the
plate is properly seated.
To remove the plate, pull up on the locking pin and
reverse the mounting procedure.
To loosen or tighten the lollipop, turn lock lever.
With a 180 degree turn, the lever can be adjusted to
provide the necessary clamping strength. Reorienting
the lever allows for further tightening or loosening of the
clamp.
To reorient the lock lever, pull lever away from mount.
This disengages the lever from the screw mechanism
and allows it to be reoriented.
Note: You can also use a screwdriver to adjust the
travel. Pull back on lever and adjust the screw in the
center of the lever.
Mounted on a Junior Stand
5
 Loading...