

Kino Flo DMX-ONE Operation Manual
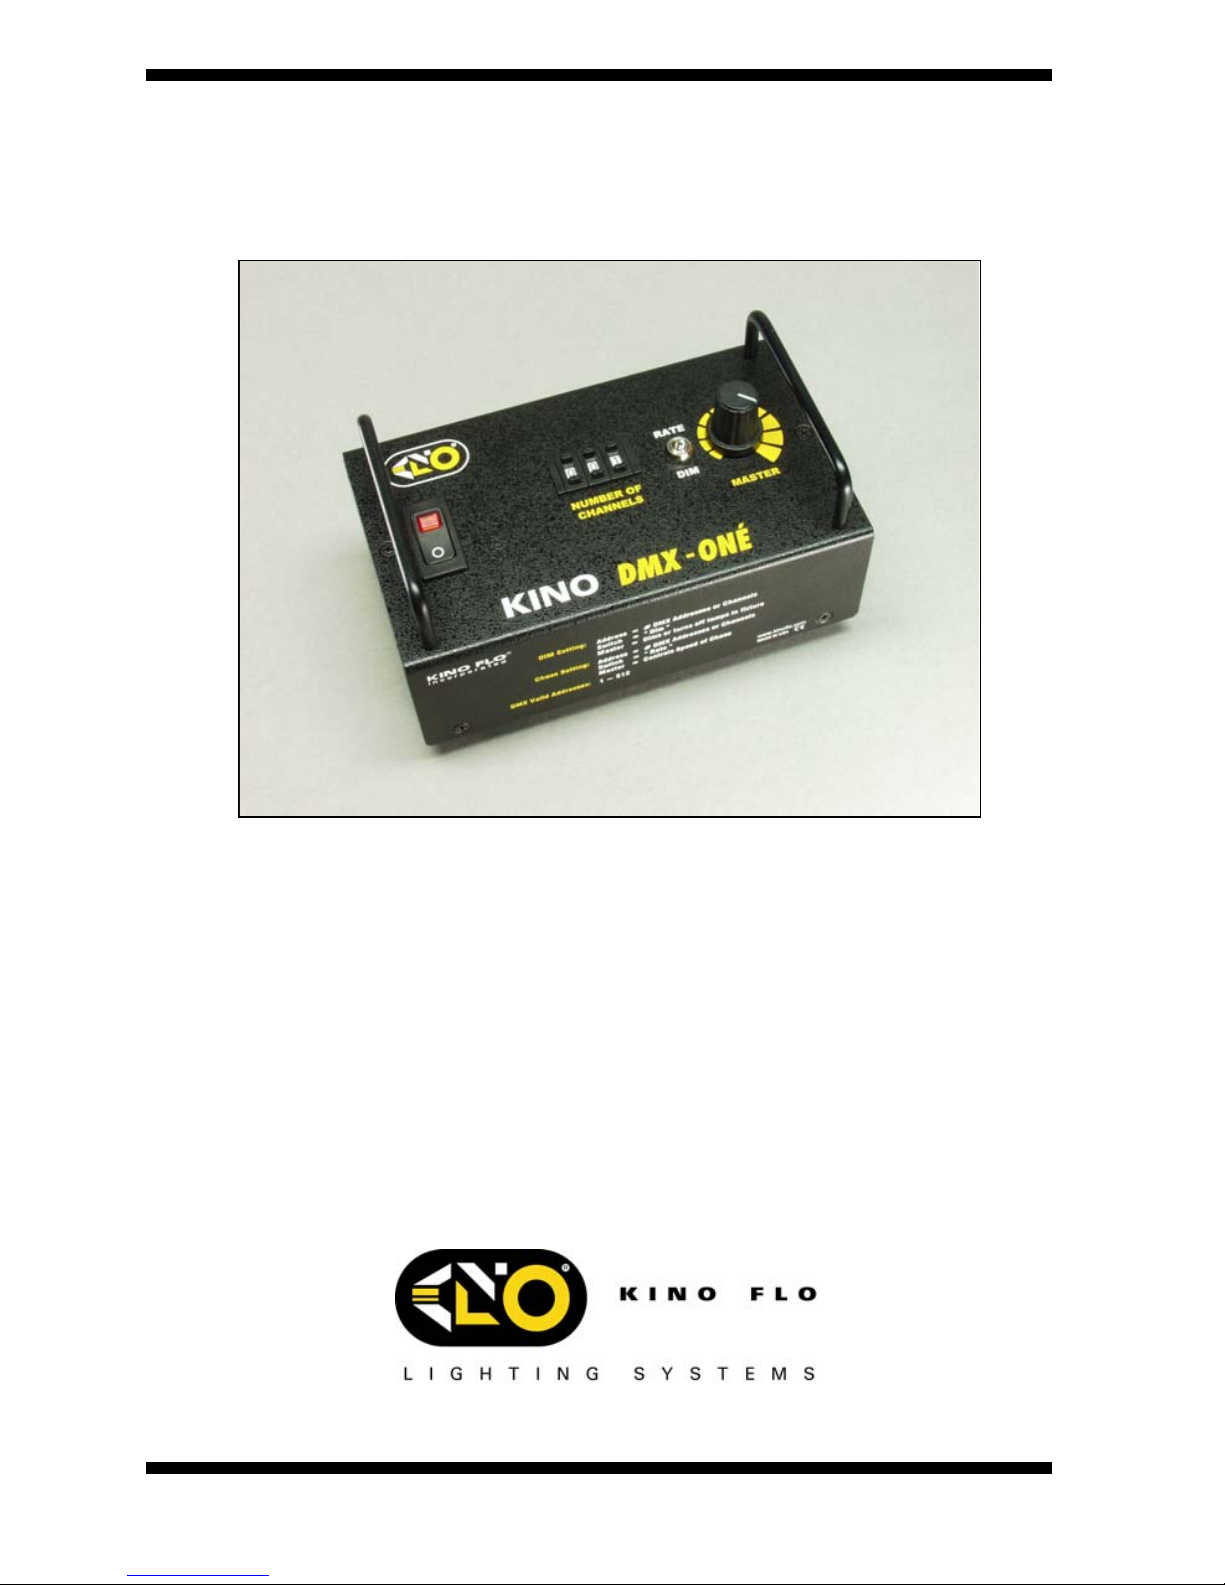
Operation Manual
DMX-ONÉ
DMX-ONÉ Signal Generator is a diagnostic tool designed to:
• Generate a DMX signal for trouble shooting
• Dim a ParaBeam
• Adjust light levels in an Image Series fixture, Wall-O-Lite and 4Bank.
• Chase lamps in an Image 80, Wall-O-Lite, Multi-Flo unit and 4Bank.
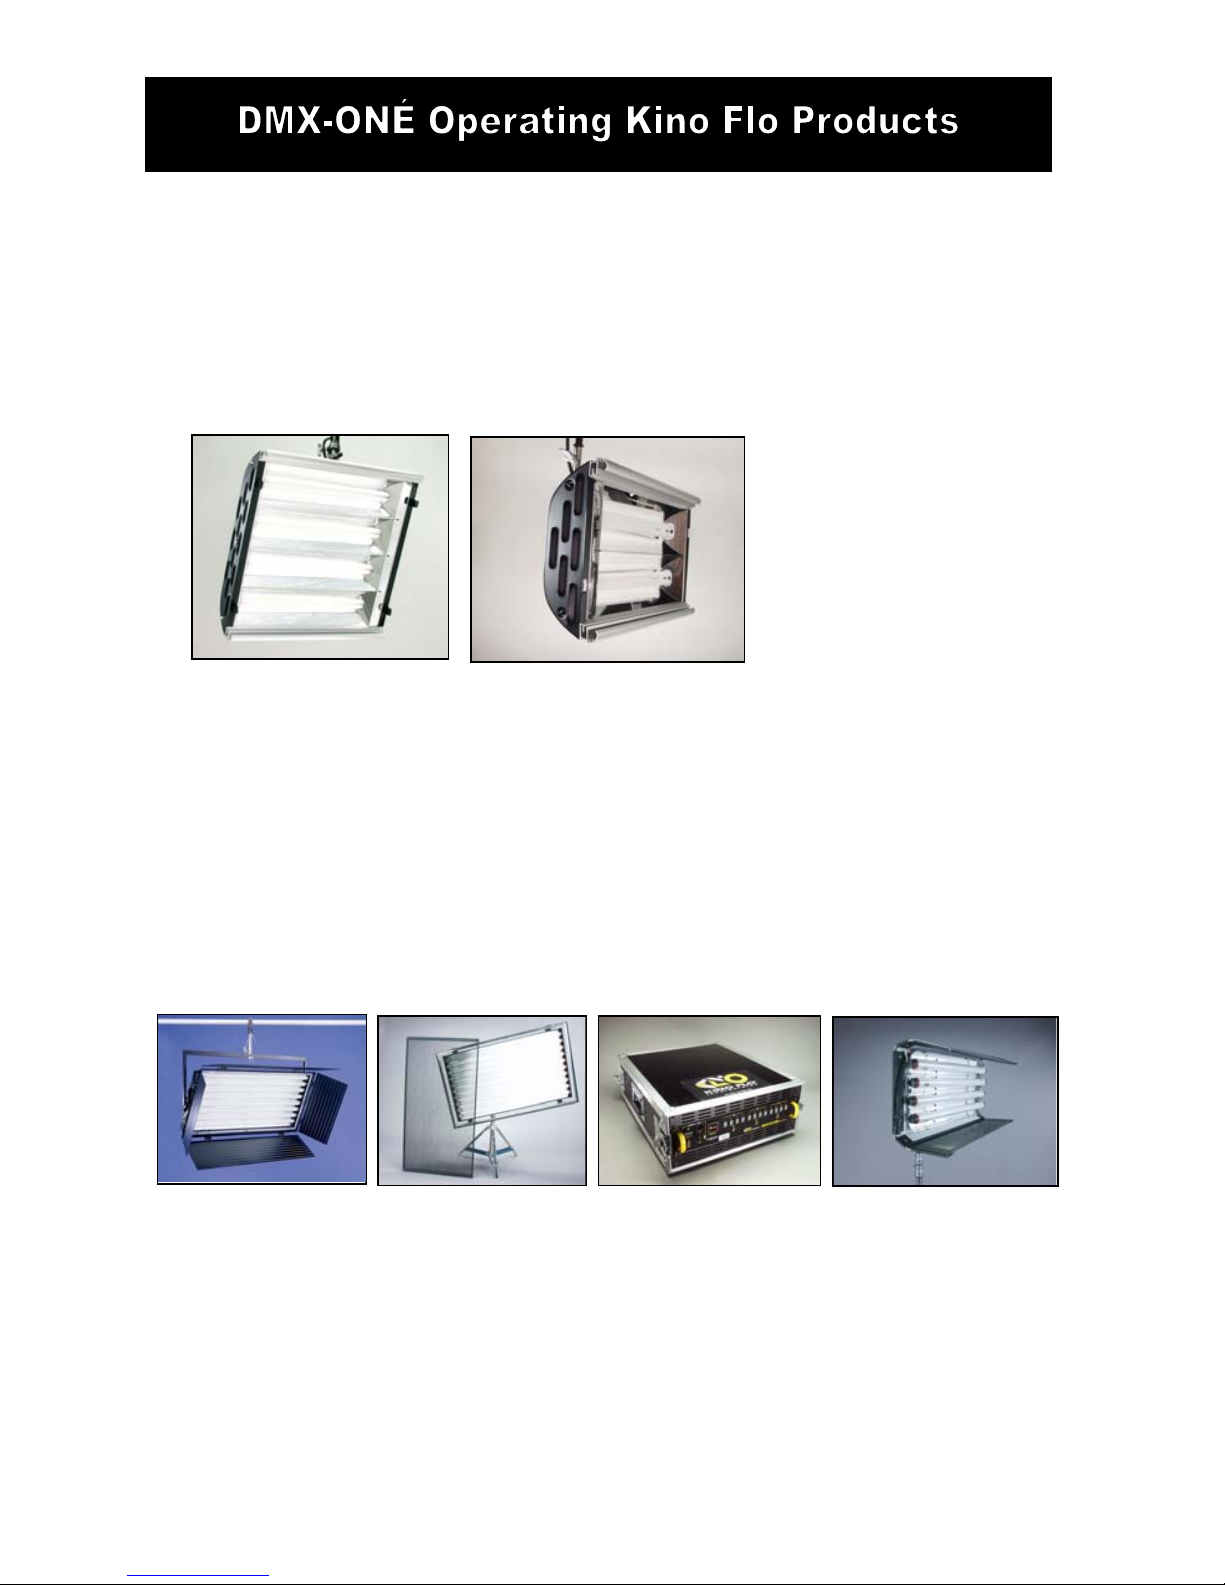
DMX DIMMING OF:
2
DMX ParaBeam 400 DMX ParaBeam 200
The DMX-ONÉ is primarily a diagnostic tool that generates a single
channel with DMX 512 Address capabilities for troubl eshooting. As a
limited secondary application it can be used in place of a dimmer board
to control a small number of fixtures. The DMX- ONÉ can be used to
provide remote dimming control for the ParaBeam 400 and 200. This is
useful for checking the dimming performance of the product prio r to
sending it out on a production.
DMX LAMP SWITCHING OF:
DMX Image Series DMX Wall-O-Light DMX Multi-Flo DMX 4Bank*
The DMX ONÉ is used for remote control of DMX lamp switching on the products
pictured above. The unit can also provide a DMX chasing control of lamps
without the necessity of a dimmer board.
*The DMX ONÉ will operate the DMX 4Bank in the 4ft setting only. Reason:
need second DMX channel to control the 2ft setting. For 2ft control of the DMX
4Bank , recommend using a DMX dimmer board.
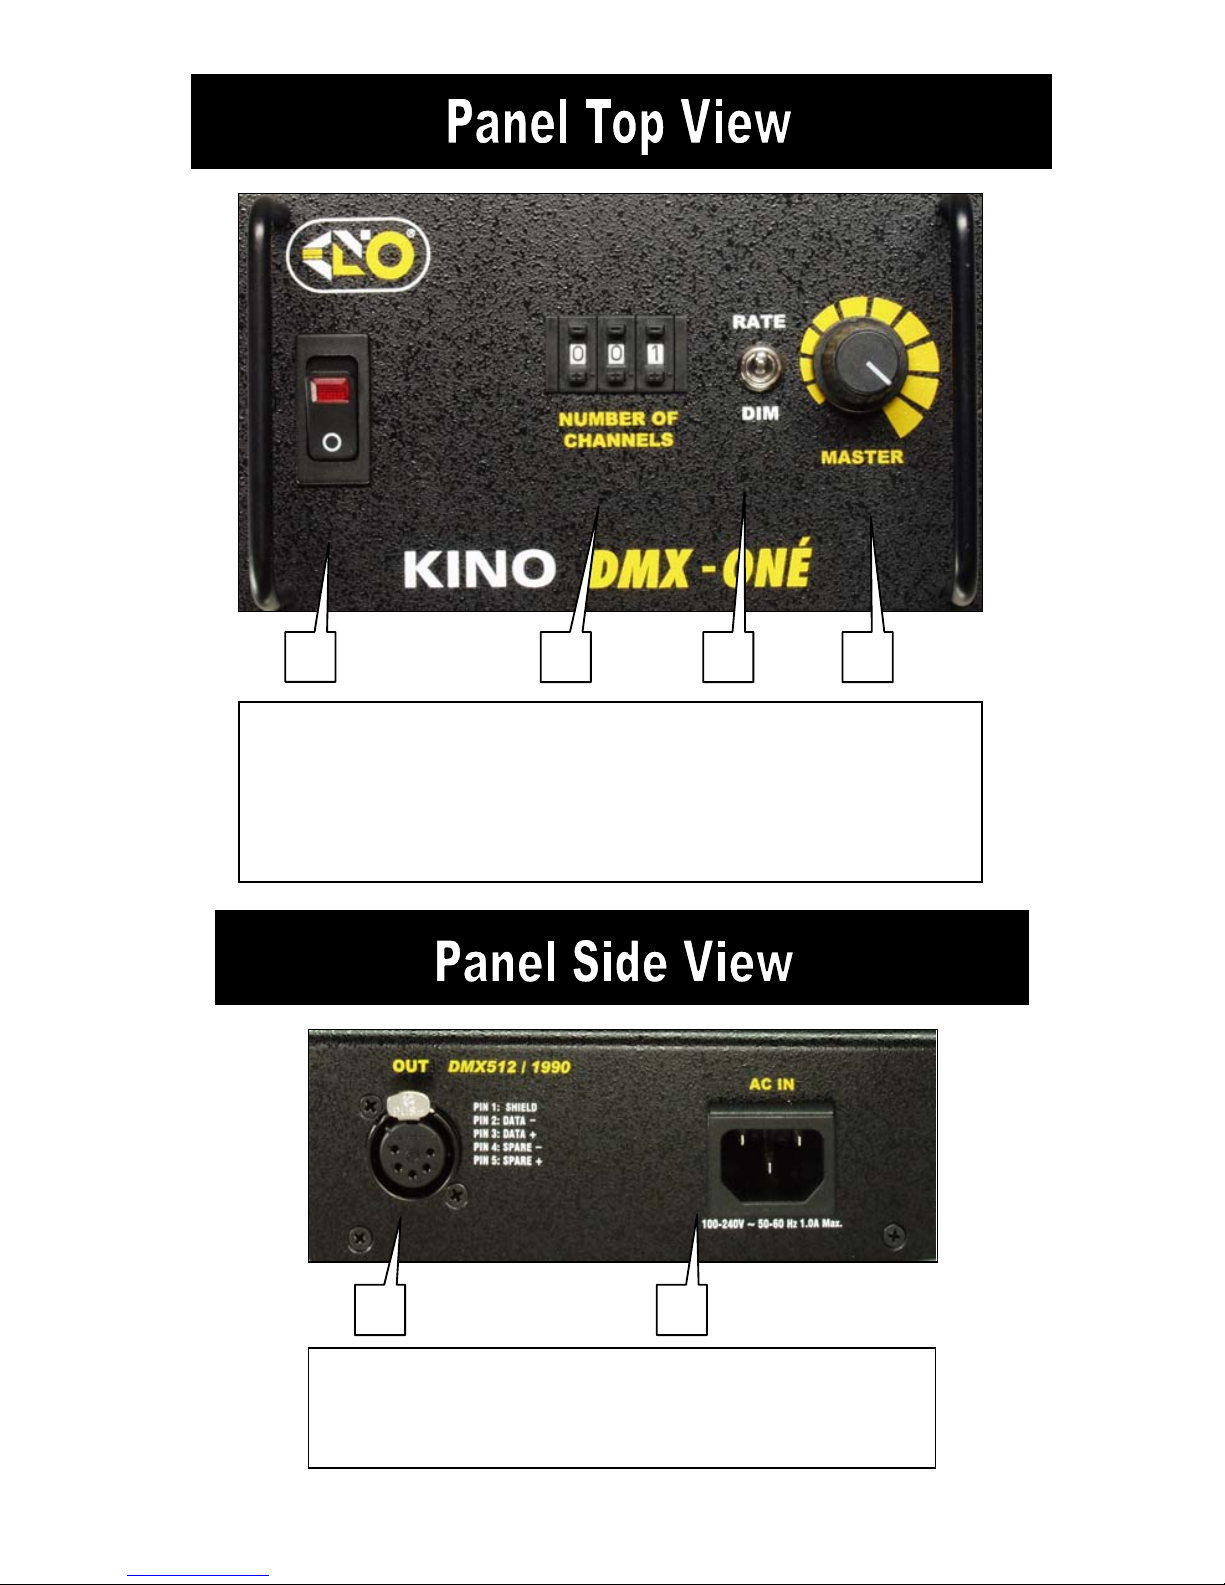
D C B A
(A) Power Switch: Built-in indicator light. Lights if AC power is present in
the power cord. “O” = Off position
(B) NUMBER OF CHANNELS: Sets number of channels being chased.
(C) RATE/DIM Switch: When set to RATE, MASTER knob controls rate
of chase. When set to DIM, MASTER knob controls dimming.
(D) MASTER Knob: Controls rate of chase or controls dimming.
B
A
3
(A) DMX Output: Transmits DMX signal.
(B) AC Input: Universal voltage input, 100-240VAC.
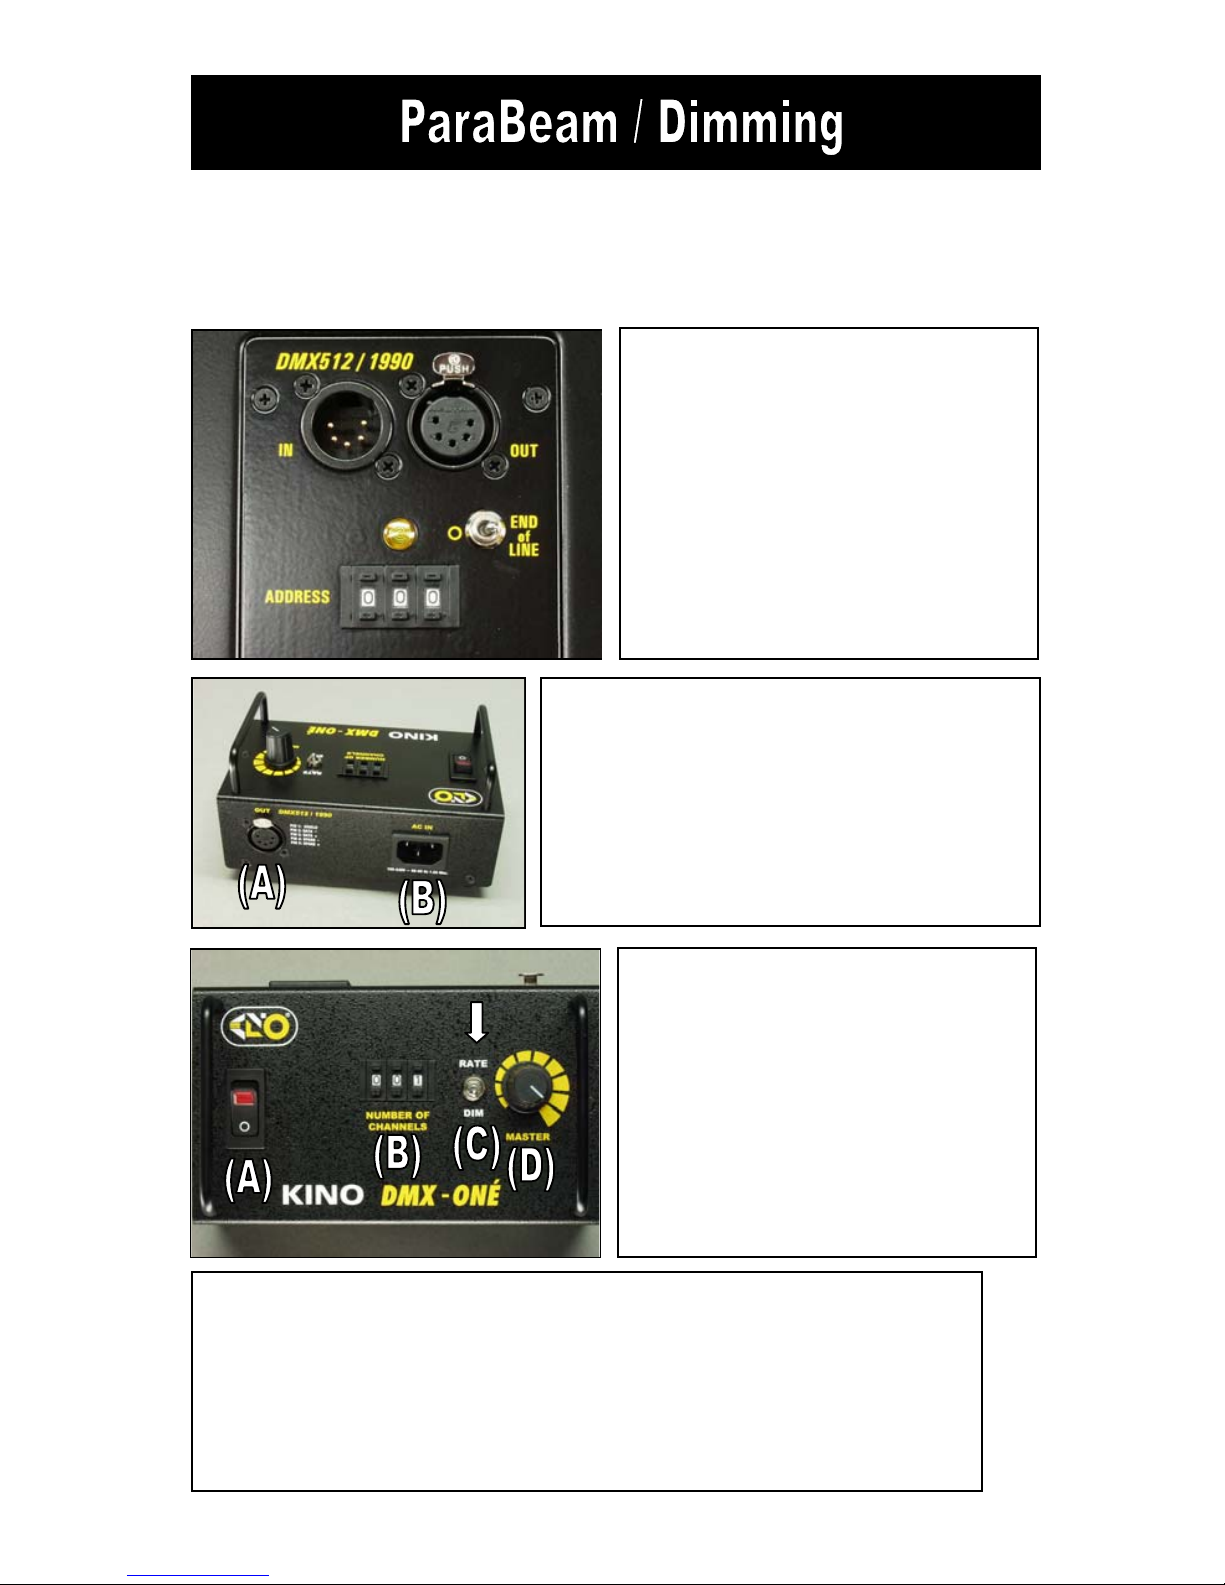
A ParaBeam can be dimmed by DMX using the DMX ONÉ. This is useful
when checking or trouble shooting a fixture. The DMX ONÉ can operate
next to the fixture in place of a dimmer board.
Note: DMX overrides all manual settings
PARABEAM CONTROL SETTINGS
• Set address “001” .
• Set toggle switch to END of
LINE .
• Turn on power switch.
Note: If multiple ParaBeams are
being tested address all to
“001”and only set the LAST
unit to “END OF LINE”.
4
DMX-ONÉ CONNECTIONS
(A) Plug in 5 pin XLR DMX cable into DMX
output plug and connect to a fixture’s
DMX Input plug.
(B) Plug in power cable to DMX-ONÉ AC
power input. (100-240 VAC, 50-60Hz)
DMX ONÉ SETTINGS
(A)Turn on power switch.
(B) Set NUMBER OF CHANNELS
to “001”
(C) Set RATE/DIM switch to DIM
(D) Use MASTER knob to control
dimming level.
NOTE: If a fixture loses its DMX signal it will hold it’s last DMX
command. For this reason it is important to turn a fixture off using the
DMX commands.
To turn off a fixture using the DMX ONÉ:
• Set RATE/DIM to DIM.
• Turn MASTER down to Minimum.
• Turn off power switch.
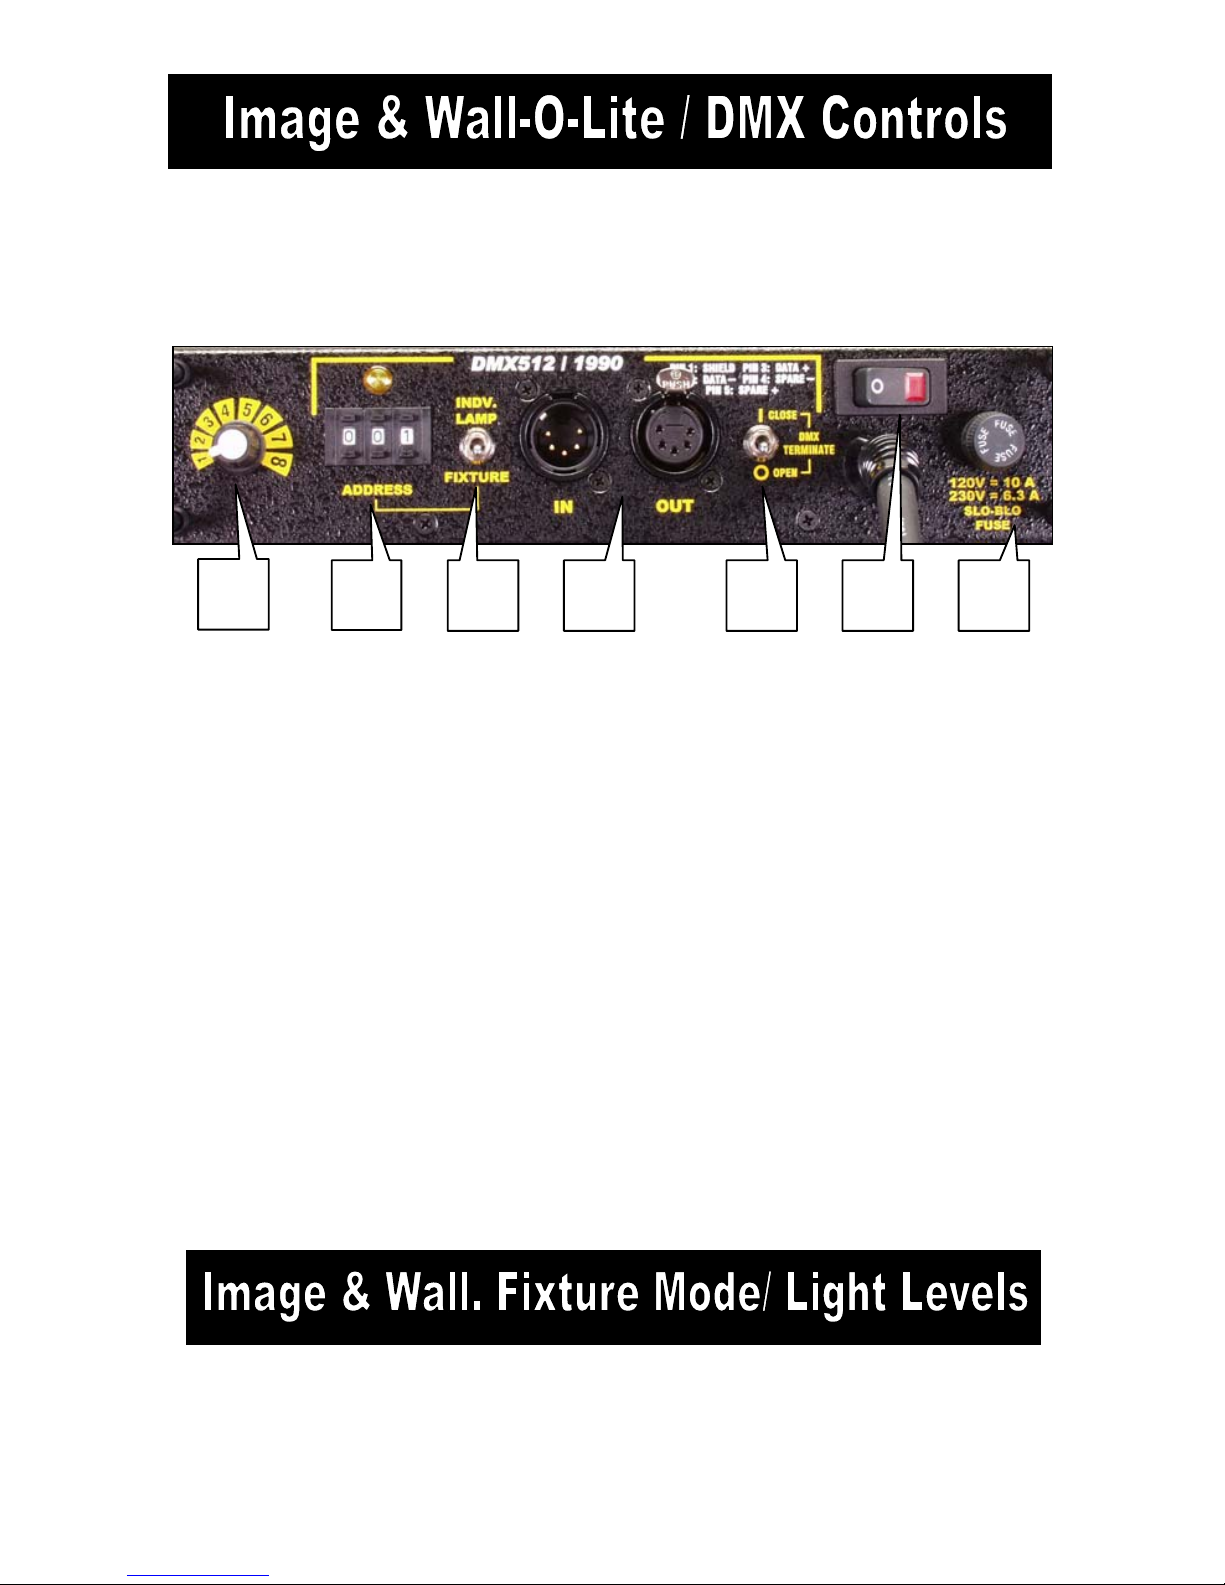
The Image Series and Wall-O-Lite share a similar control interface. The
DMX Image 80 is pictured below as an example. Image series and WallLites have 2 modes of operation. In Fixture Mode one address controls 8
lamps. In Individual Lamp Mode each lamp has a unique DMX address.
G
F E D
A C B
A) Manual Selector Dial: Turns lamps on and off manually without connecting
DMX Cable to Fixture.
Note: DMX overrides all manual controls
B) DMX Address: Sets DMX Address of Fixture.
C) Individual Lamp / Fixture Switch: Converts between INDIVIDUAL LAMP
and FIXTURE methods of DMX control.
D) DMX-In & DMX-Out: DMX-In receives DMX signals from Dimmer Board
and DMX-Out relays DMX signal through to other Fixtures or Instruments.
E) DMX TERMINATE Switch: Terminates DMX signal at the end of Fixtur e
series.
F) Power Switch: Has a built-in indicator light, which can detect if AC power is
present in power cord. "O" = OFF position.
G) Fuse: Provides circuit protection. Note: If Fuse is "blown" or "open" replace
with same type of fuse rating as marked.
5
The light level of one or more fixtures can be adjusted by turning
lamps off and on in a progressive outside in pattern.
 Loading...