

Kino Flo 82 DMX, 42DMX, 22 DMX User Manual
Operation Manual
Image
82, 42, 22
4/14/03
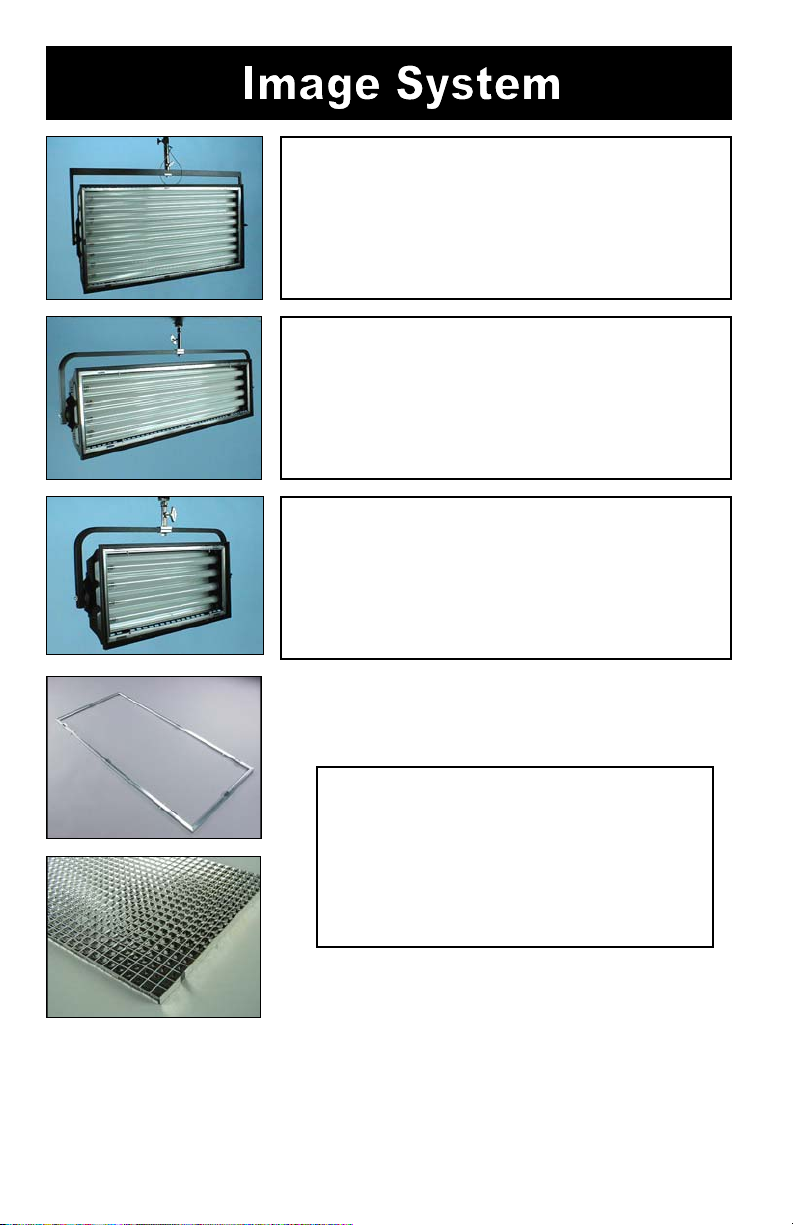
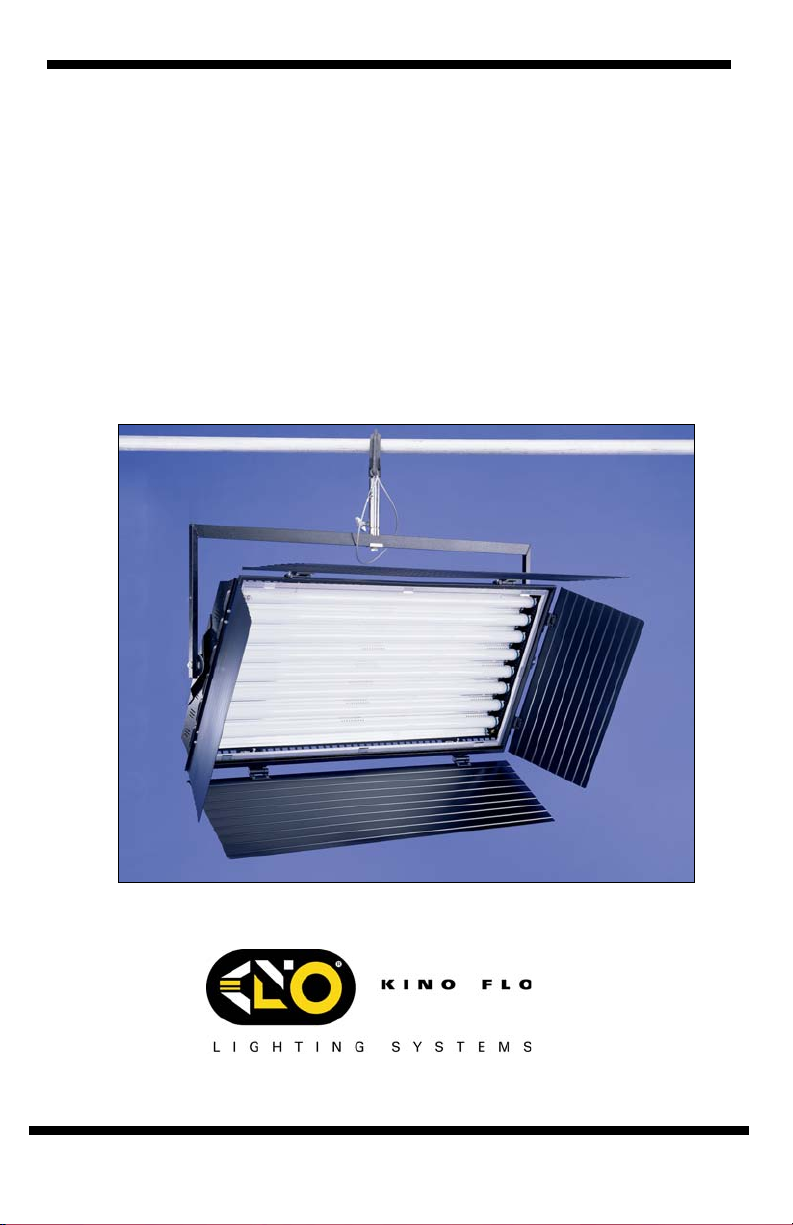
Image 82
• 8 x 4ft lamps
• Manual on/off switching control
• Switches 2 lamps at a time
Image 42
• 4 x 4ft lamps
• Manual on/off switching control
• Switches 2 lamps at a time
Image 22
• 4 x 2ft lamps
• Manual on/off switching control
• Switches 2 lamps at a time
Each System Includes:
1 Image Fixture
1 Silver Louver
1 Gel Frame
2
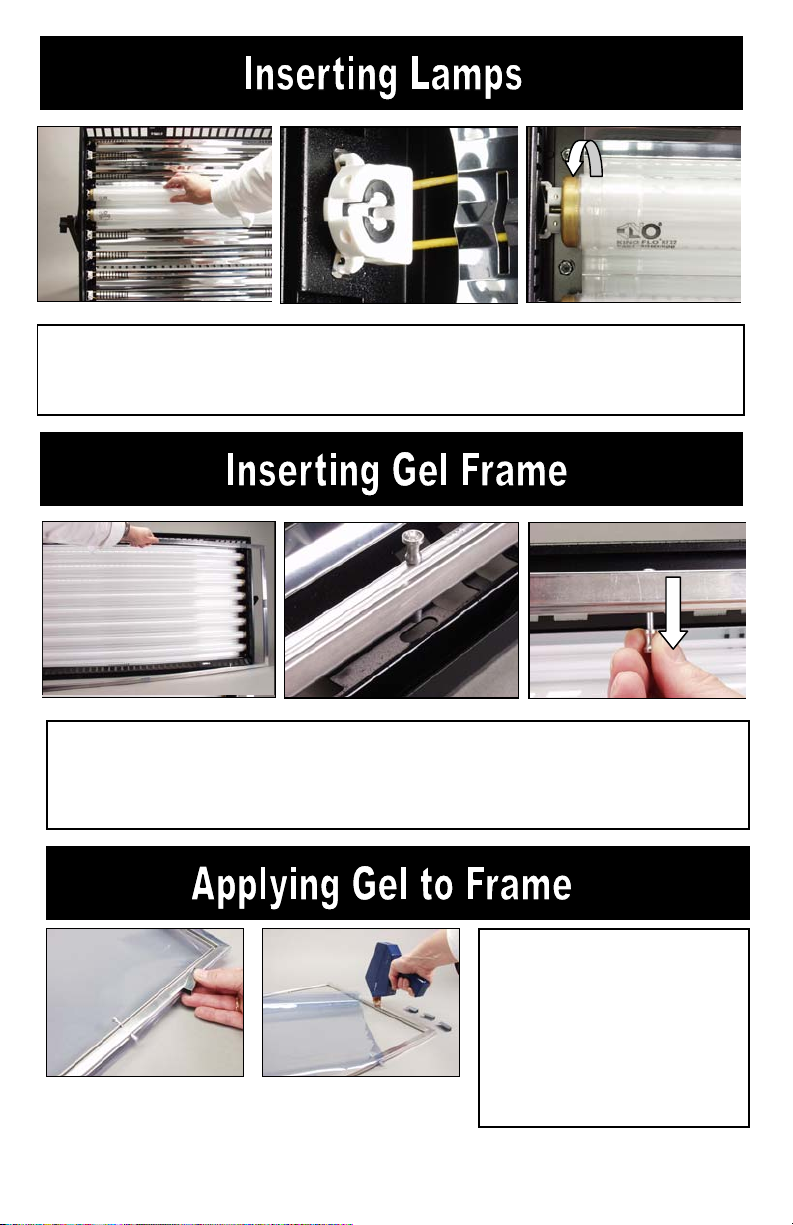
Insert lamps into both lamp connectors. Twist ¼ turn to make
electrical contact.
The gel frame is secured to the fixture by 4 spring-loaded pins. Align the
pins of the gel frame with the oval receptacle holes on the edge of the
fixture. Pull back the pins and release into the receptacles to properly
secure the gel frame.
(A) (B)
A) The Gel Frame comes with
Gel Clips. Cut the gel to size and
use the Clips to fasten the gel to
the Frame.
B) Another method is to apply
transfer tape directly to the gel
frame. The clips are not
necessary when taping the gel.
3
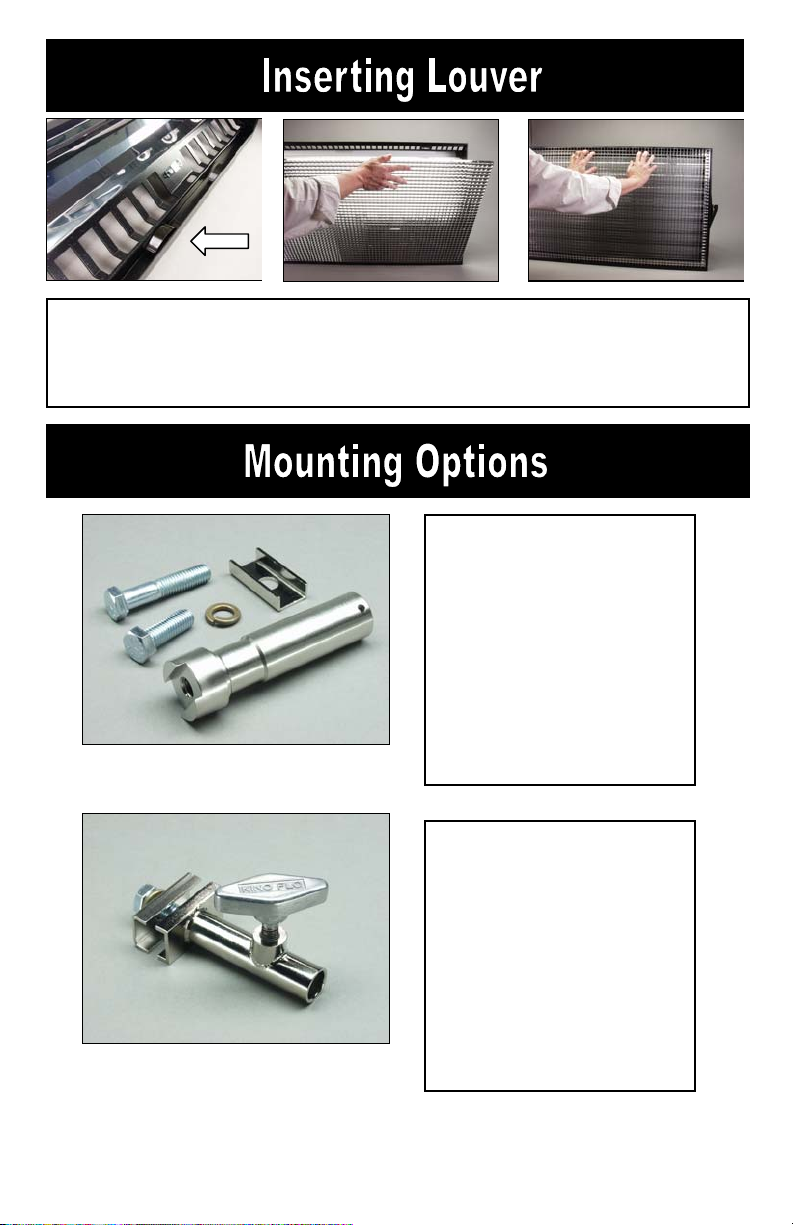
Place the long edge of the Louver into the lower channel containing a set of
leaf springs. Press down on the Louver and slip the upper edge of the
louver into the upper channel of the fixture. To remove reverse the
procedure.
Junior Pin Assembly
The Image 82 requires a
Junior Pin assembly or
any other clamping device
that uses a ½ inch bolt.
The Image 82 uses the
longer bolt. The Image 42
and 22 require the shorter
bolt.
Baby Receiver Assembly
The Baby Receiver is for
use only on the Image 42
and Image 22.
Do Not use the Baby
Receiver on the Image 82.
This receptacle is not
strong enough to safely
hold the greater weight of
the Image 82.
4
 Loading...