

Kino Flo 87DMX, 47 DMX User Manual
Operation Manual
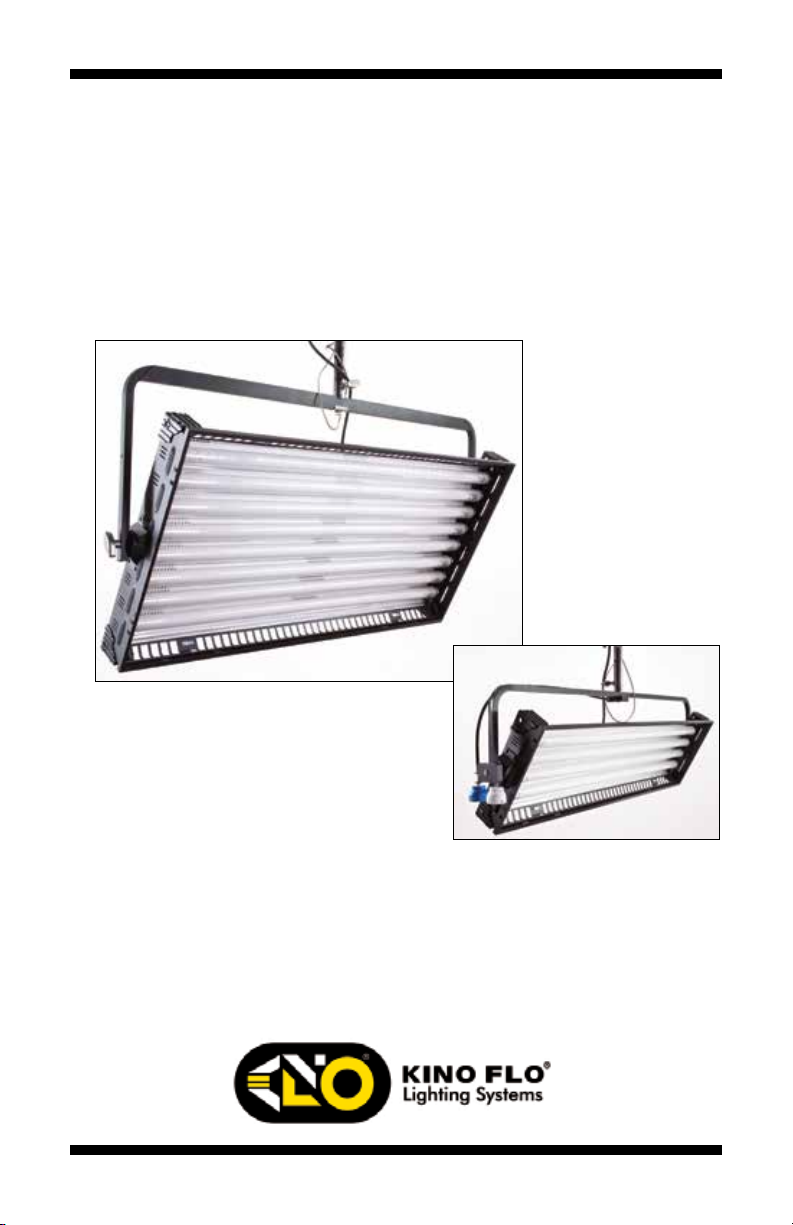
Image 87 & 47 DMX
Image 87 Yoke Mount
Image 47 Pole-Op
Part No. 3100066 Rev A 06-12-2013
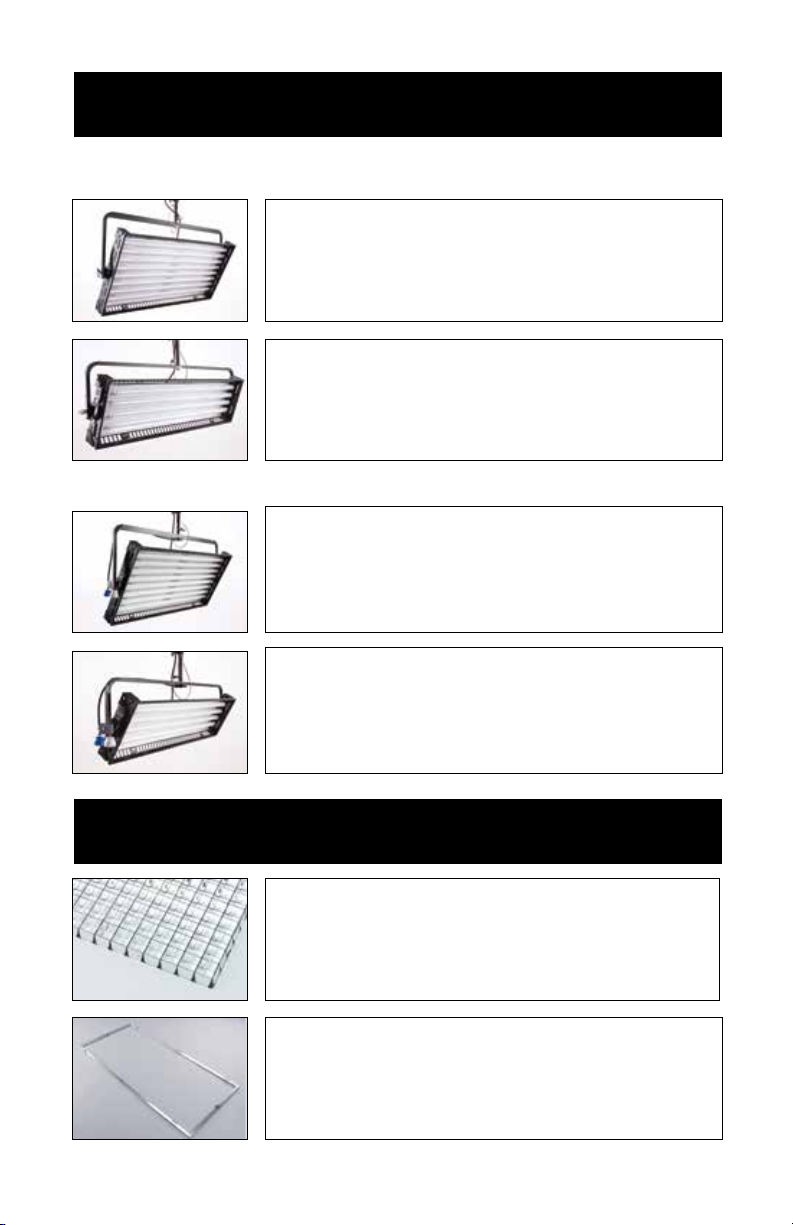
Image Yoke Mount
Image Pole-Op
Image 87 & 47 Fixtures
IMG-87X-120
Image 87 DMX Yoke Mount, 120VAC
IMG-87X-230
Image 87 DMX Yoke Mount, 230VAC
IMG-47X-120
Image 47 DMX Yoke Mount, 120VAC
IMG-47X-230
Image 47 DMX Yoke Mount, 230VAC
IMG-87P-120
Image 87 DMX Pole-Op, 120VAC
IMG-87P-230
Image 87 DMX Pole-Op, 230VAC
IMG-47P-120
Image 47 DMX Pole-Op, 120VAC
IMG-47P-230
Image 47 DMX Pole-Op, 230VAC
Included w/ all Image Models
LVR-I80-S
Image 87 Silver Louver (Included)
LVR-I40-S
Image 47 Silver Louver (Included)
GFR-I80
Image 87 Gel Frame (Included)
GFR-I40
Image 47 Gel Frame (Included)
2
Image 87 DMX Kit
True Match Lamps
®
488-K29-S 4ft Kino KF29
488-K32-S 4ft Kino KF32
488-K55-S 4ft Kino KF55
488-K10-S 4ft Kino 800ma 420 Blue
488-K5-S 4ft Kino 800ma 525 Green
Note: Kino Flo recommends Safety-Coated 420nm Blue for
Bluescreen and 525nm Green for Greenscreen.
Image Yoke Mount Kits
KIT-I87-X1/120
Image 87 DMX Kit, 120VAC
KIT-I87-X1/230
Image 87 DMX Kit, 230VAC
Kit Contents: Dimensions:
1 Image 87 DMX 57.5 x 8 x 35.5”
1 Jr. Pin (146 x 20.5 x 90cm)
1 Ship Case Weight:
62 lb (28kg)
Image 87 DMX Kit
(2-Unit)
KIT-I87-X2/120
Image 87 DMX Kit, 120VAC (2-Unit)
KIT-I87-X2/230
Image 87 DMX Kit, 230VAC (2-Unit)
Kit Contents: Dimensions:
2 Image 87 DMX 57.5 x 17 x 40”
2 Jr. Pin (146 x 43 x 102cm)
1 Ship Case Weight:
163 lb (74kg)
3

KIT-I87-X4/120
Image 87 DMX Kit, 120VAC (4-Unit)
KIT-I87-X4/230
Image 87 DMX Kit, 230VAC (4-Unit)
Image 87 DMX Kit
(4-Unit)
Image 47 DMX Kit
Kit Contents: Dimensions:
4 Image 87 DMX 35.5 x 33.5 x 64”
4 Jr. Pin (90 x 85 x 163cm)
1 Ship Case Weight:
365 lb (166kg)
KIT-I47-X1/120
Image 47 DMX Kit, 120VAC
KIT-I47-X1/230
Image 47 DMX Kit, 230VAC
Kit Contents: Dimensions:
1 Image 47 DMX 57.5 x 9 x 25.5”
1 Jr. Pin (146 x 23 x 65cm)
1 Ship Case Weight:
47 lb (21.5kg)
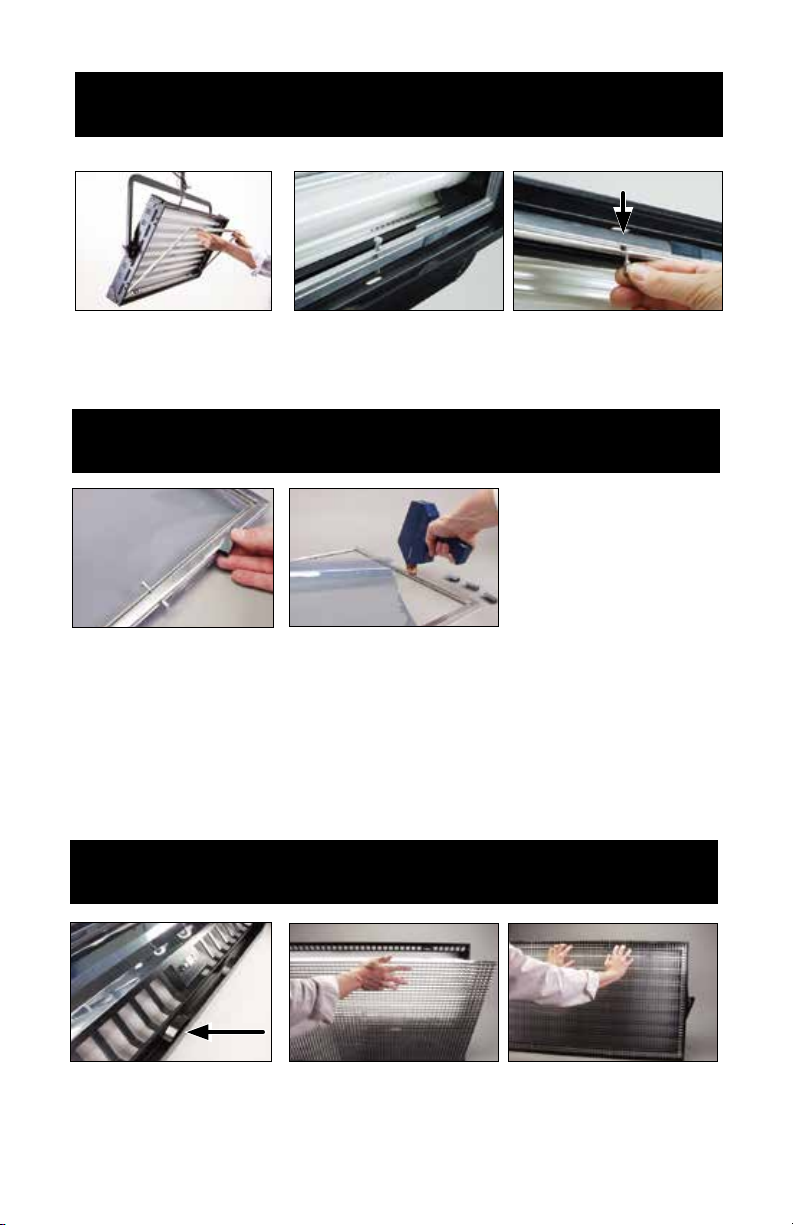
Inserting Lamps
Image 87 is shown throughout this operation manual for illustration purposes only.
Insert lamps into both lamp holders. Twist ¼ turn to make electrical contact.
4
Inserting Gel Frame
The gel frame is secured to the xture by 4 spring-loaded pins. Align the pins of the
gel frame with the oval receptacle holes on the edge of the xture. Pull back the pins and
release into the receptacles to properly secure the gel frame.
Applying Gel to Frame
A) The Gel Frame comes with gel clips. Cut the gel to size and use the clips to
fasten the gel to the frame.
Note: It is recommended to attach one clip on all four sides and two clips near all
four corners of the Gel Frame.
B) Another method is to apply transfer tape directly to the gel frame. The clips are not
necessary when taping the gel.
Inserting Louver
Place the long edge of the Louver into the lower channel containing a set of leaf springs.
Press down on the Louver and slip the upper edge of the louver into the upper channel of
the xture. To remove, reverse the procedure.
5
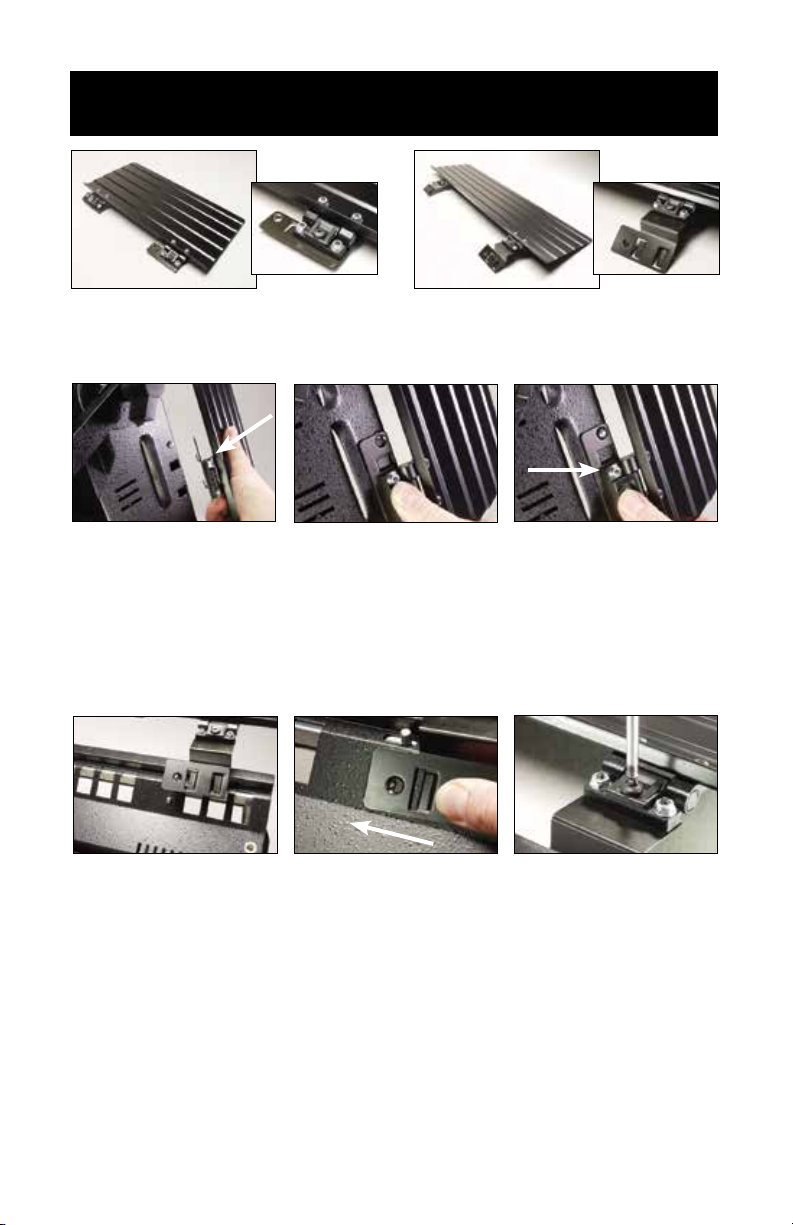
Mounting Barndoors
Side Door (x2)
Top/ Bottom Door (x2)
Side Doors
1) Align the hinge bracket tabs with the two square receptacles on the side of the xture.
2) Press the tabs of both brackets into the square receptacles.
3) Slide the two brackets up until the silver lock pin snaps into place.
4) To release the barndoor, press the lock pin down and slide the bracket in reverse.
Top and Bottom Doors
1) Align the two hinge bracket tabs with the two square vents closest to the silver lock pins.
2) Press the brackets down into the vent and slide them over to engage the lock pins with
the hole in the bracket.
3) To remove the barndoor, press down on the two lock pins and slide the brackets back.
4) Adjust the hinge tension with a Phillips head screwdriver.
6
 Loading...