

KingShield LEDFLPIR10E, LEDFLPIR18E, LEDFLPIR27E Installation Instructions Manual
I
nstallation Instructions
for Lacerta Range - IP44 PIR LED Floodlights
Part Nos: LEDFLPIR10E, LEDFLPIR18E & LEDFLPIR27E
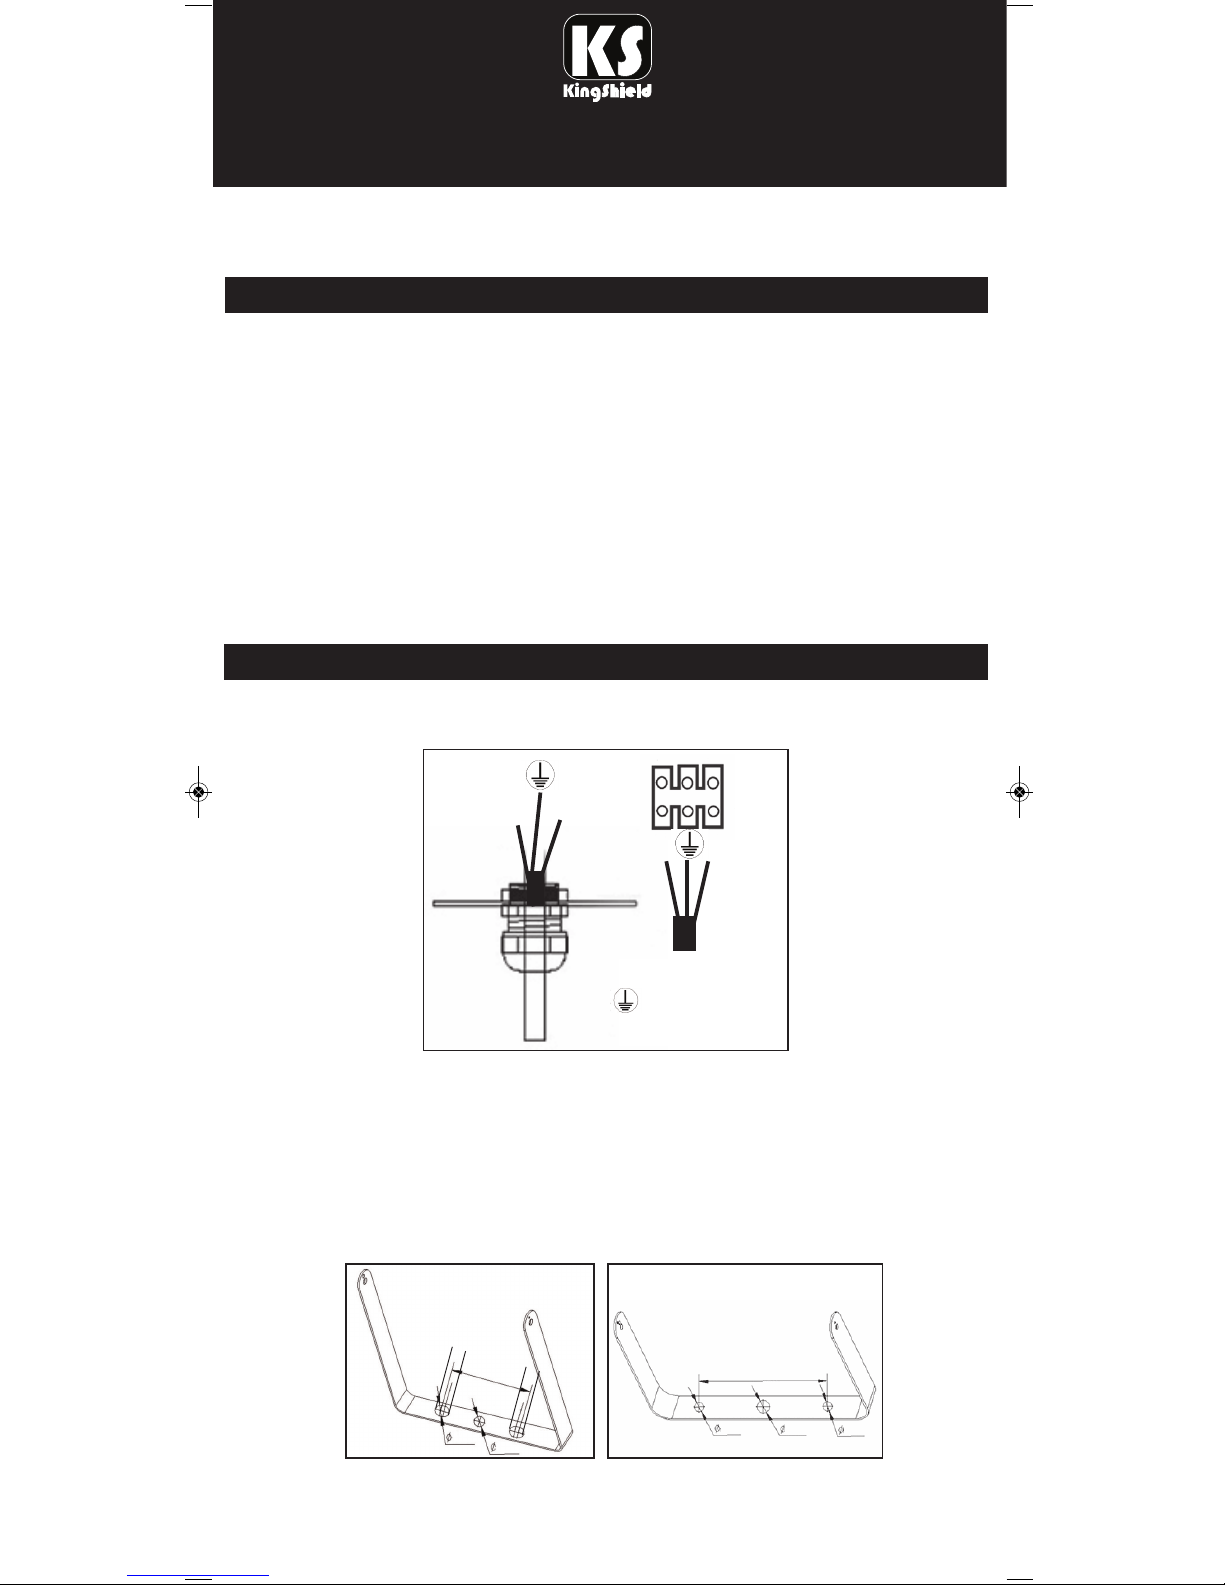
3. Secure the waterproof ring and nut tightly.
4. To set the floodlight direction, loosen the screws on the sides of the mounting bracket
(underneath the housing) and adjust the floodlight angle, then re-tighten all screws
securely.
Note: Leave a minimum of 200mm above the fitting.
L
N
L
N
5. Mark the hole positions for the fixing bracket onto the wall. Drill and plug the wall at
the marked positions,. Screw the fixing bracket to the wall with suitable screws (not
supplied).
IMPORTANT
This product should be installed by a competent person and in accordance with the
c
urrent IET Wiring Regulations. If in doubt, consult a qualified electrician.
GENERAL INFORMATION
IMPORTANT
• Never look directly into the LED light source.
• Do not use near flammable materials
• Do not use near paddling pools, fountains, ponds or similar water sources
• Do not place in water or other liquids
• Never operate with wet hands
• Never cover the fitting
• Never operate when the casing is open, or when the wiring casing is missing or
damaged, or when the protective screen is defective
• Never spray this unit and never attempt t0 clean it with a steam pressure
cleaner as this can damage the insulation seals
• Never attempt to repair this unit yourself, there are no user serviceable parts
1. Loosen the 5 cover screws.
INSTALLATION
2. Connect the wires to the connector block as shown, and re-install the five screws.
L - Brown
- Yellow/Green
N - Blue
18W - LEDFL18E / 27W LEDFL28E
6
mm
6
mm
8
mm
80mm
10W - LEDFL10E
6
mm
6
mm
45
mm
8
mm
8mm
Please keep these instructions for future reference.
Issue no: 704019
WEST ROAD . HARLOW
ESSEX . CM20 2BG . UK
sales@greenbrook.co.uk
www.greenb ro o k . c o.uk
CLEANING
Before cleaning the LED floodlight, allow the unit to cool down sufficiently. Clean with a
slightly moist, clean, lint-free cloth and a mild detergent if required. Do not use cleaners
that contain abrasives or solvents.
Power Rating: 230V AC 50Hz
IP Rating: IP44
Power Factor: 0.9
Colour Temperature: 6,500K
Led Power (LEDFLPIR10E)
Consumption: 10W, 80 lm/W
Led Power (LEDFLPIR18E)
Consumption: 18W, 83 lm/W
Led Power (LEDFLPIR27E)
Consumption: 27W, 81.5 lm/W
LEDFLPIR10E Glass Dims: 126 x 96 x 4mm
LEDFLPIR18E/27E Glass Dims: 165 x 135 x 4mm
LEDFLPIR10E Dims: 130 x 200 x 115mm
LEDFLPIR18E/27E Dims: 170 x 227 x 120mm
LEDFLPIR10E Weight : 560g
LEDFLPIR18E/27E Weight : 1012g
TECHNICAL INFORMATION
GUARANTEE
Your KingShield PIR LED Floodlight is
guaranteed for 3 years from the date of purchase.
This does not affect your statutory rights.
P
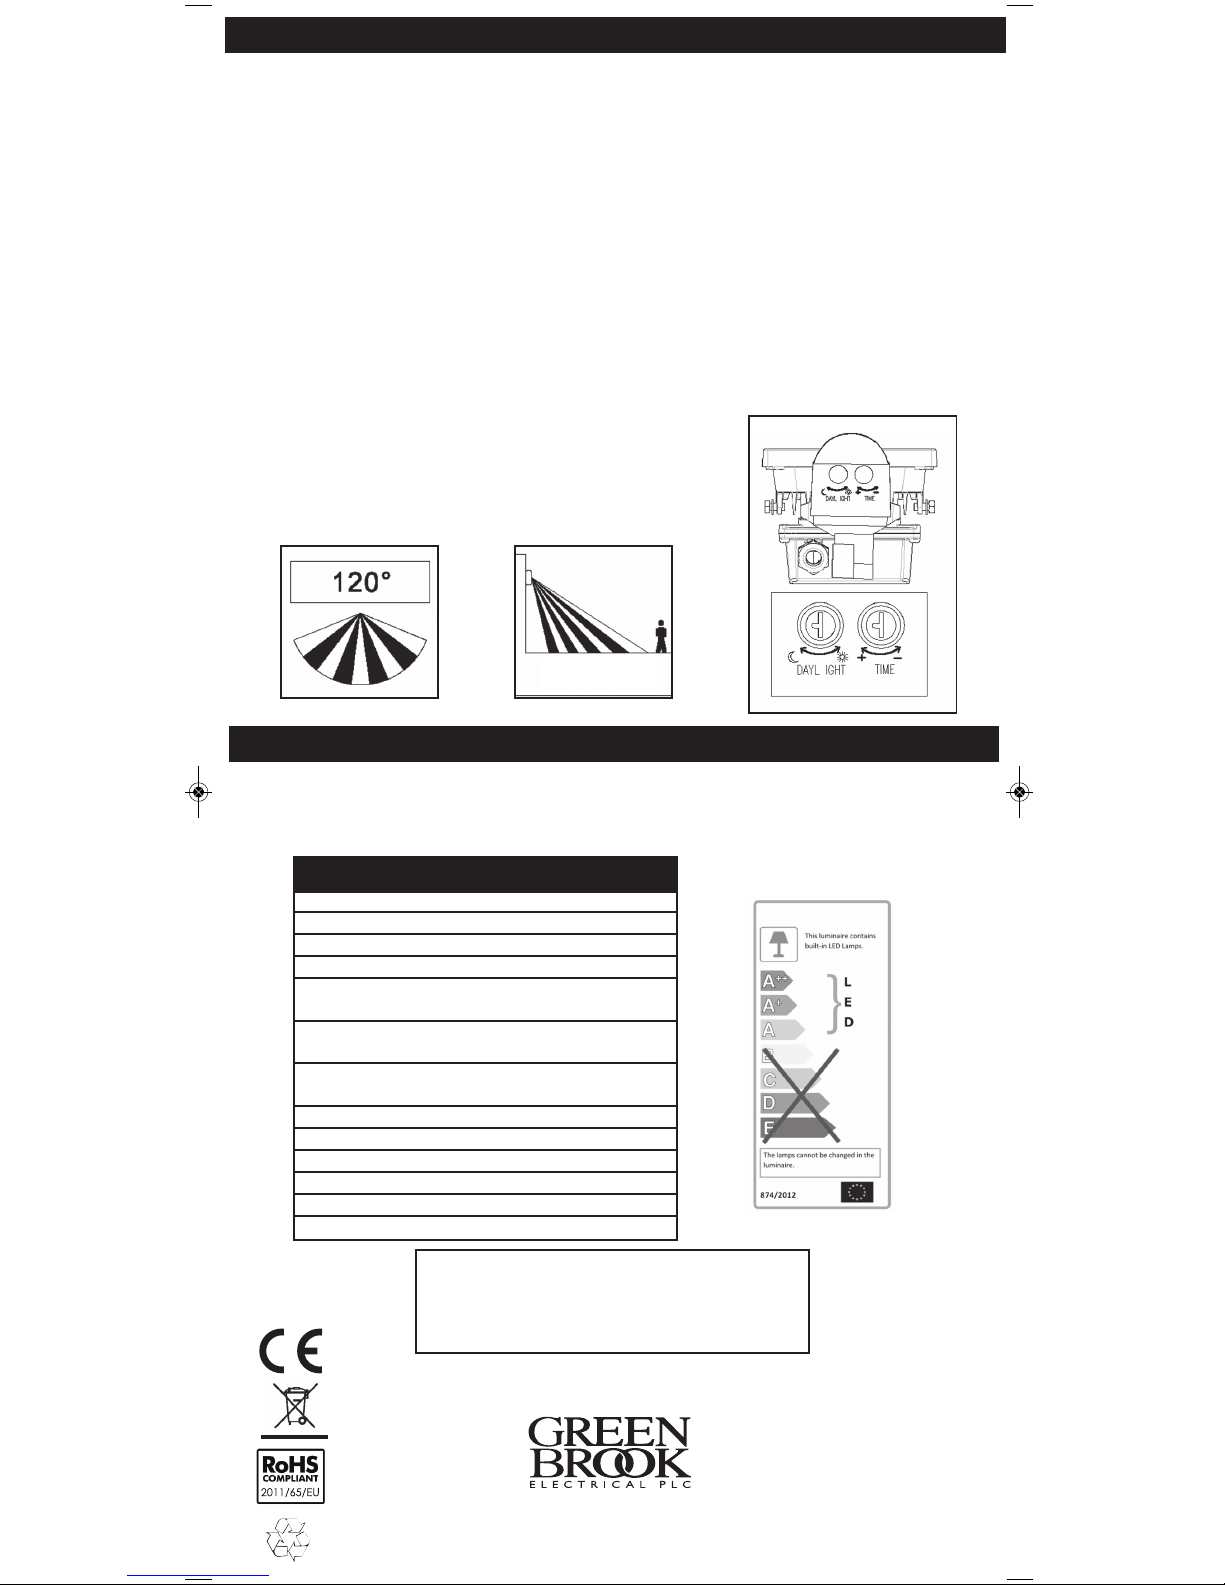
IR SENSOR
PIR DETECTOR SPECIFICATIONS:
Voltage: 100V-250V AC 50Hz
Detection Angle: Approx 120
o
Detection Distance: Max. 8 meters
Duration Time: 8 seconds - 12 minutes (adjustable)
Lux Control level: From daylight to night (adjustable)
A
DJUSTING THE LUX CONTROL LEVEL
The Lux control module has a built-in sensing device photocell that detects
daylight and darkness.
( ☀ ) position denotes that the lamp will be turned on by the PIR during day and night.
( ☽ ) position denotes that the lamp will be turned on by PIR only at night.
You can set to operate the unit at the desired level by adjusting the LUX knob.
ADJUSTING THE DURATION TIME
The duration time is the length of time that the PIR Detector switches the load ‘on’ after activation.
The duration time can be adjusted from approx. 8 seconds - 12 minutes. Rotating the TIME knob
from (+) to (-) will reduce the duration time.
WALK TEST:
To check operation perform a walk test. Set daylight control to ☀
and the time to (-). Walk past the PIR sensor and light should then
turn on, after approx 15 seconds the light will turn off.
1 - 8 Metre
 Loading...