

Kingpin KP100, KP200 Installation And Operation Manual
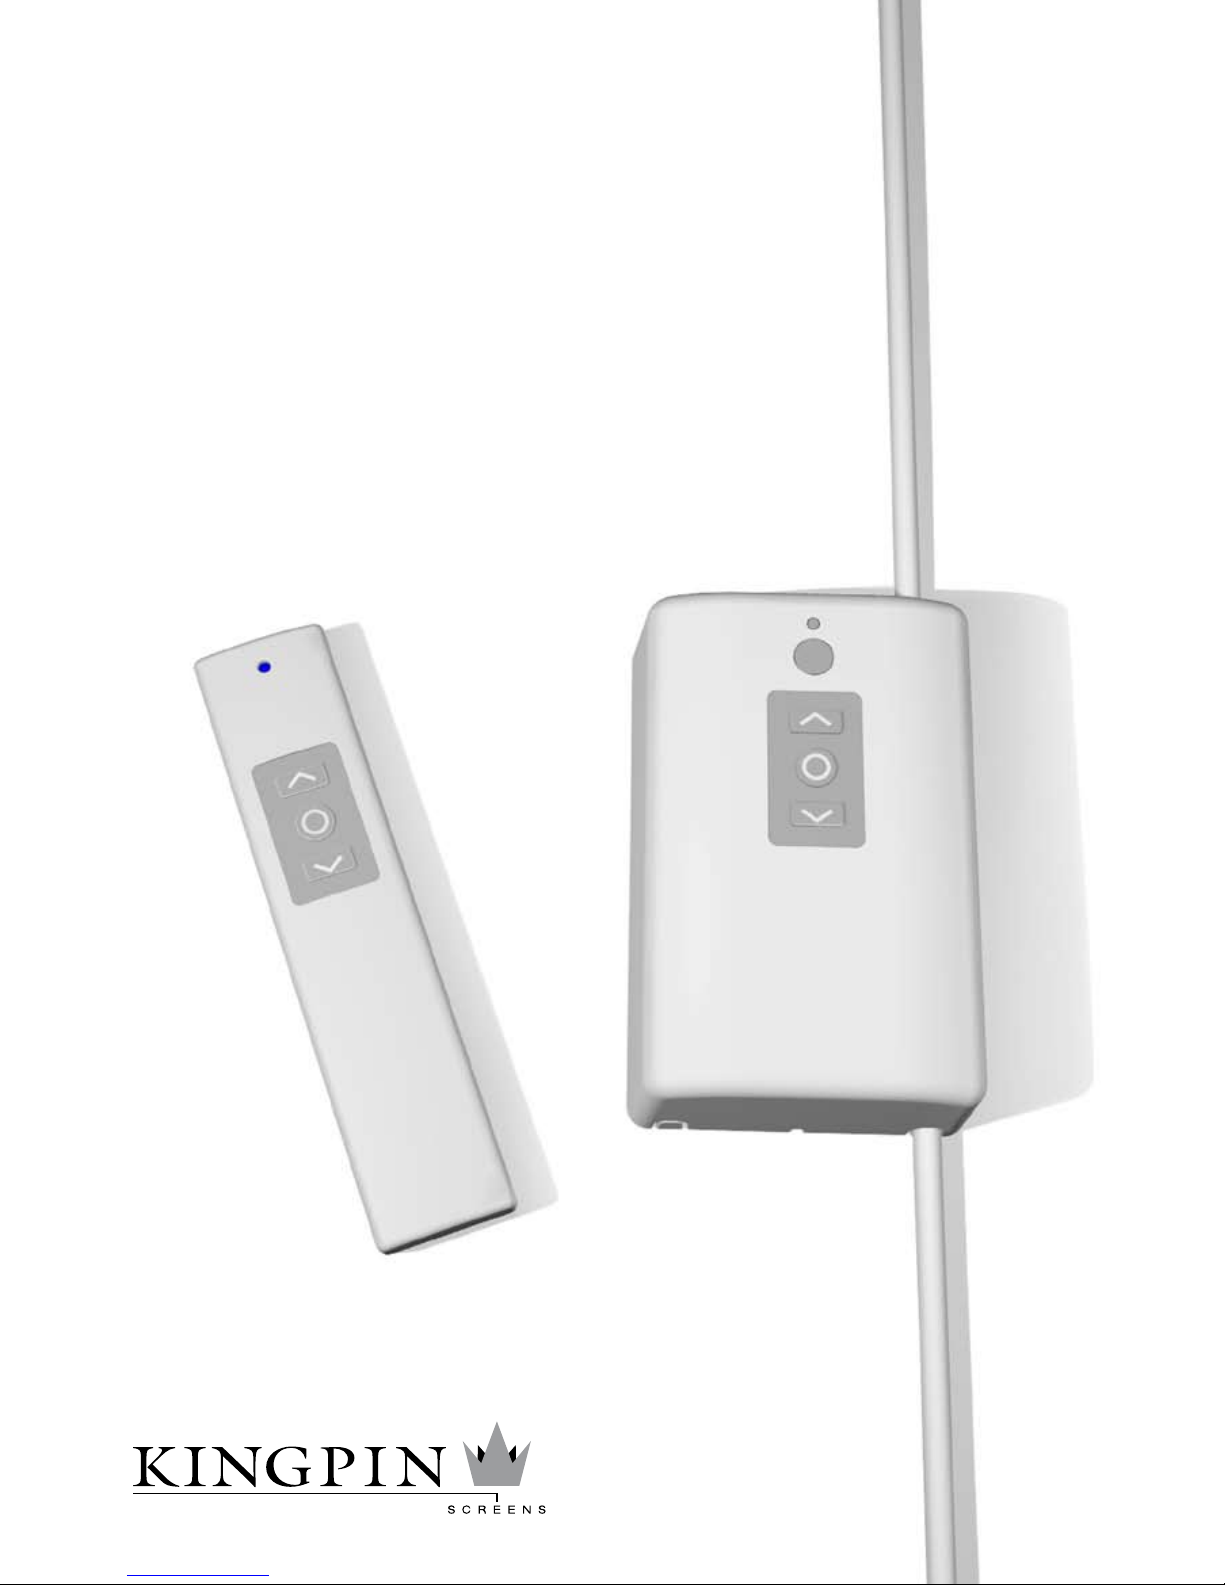
Wireless transmitter (KP100) &
Motor control receiver (KP200)
Installation and operation guide
General
- The installation of the system must be done by an authorized
person.
- The motor control receiver unit (KP200) must be safety xed to
the wall or the ceiling.
- Make sure that no liquid is exposed to the remote control
(KP100) or the motor control receiver (KP200).
- The KP200 unit must be connected to protective earth (PE).
KP100, Wireless transmitter (remote control)
KP100 is an transmitter (single channel) and its handset is compatible with the motor control receiver KP200. The transmitter
transmits through radio waves (RF).
Specications for KP100
• The used frequency is 433,92 Mhz
• Power supply: 12 volts battery
• Battery Alkaline, type 23A
• Working temperature: +5 to +40 degree Celsius
Battery life
The transmitter is working with battery, the normal lifetime of
the battery is over 1 year when used 3-4 times every day.
KP200, Motor control receiver (control box)
KP200 is the control box for connected motor, with this control
box you can operate e.g. a projection screen.
Specication KP200
• Power supply: 100-240 v, 50/60 Hz
• Working temperature: +5 to +40 degree Celsius
• Rated load: <400 W Power
• Emission frequency: 433,92 Mhz
• Fuse 6,3 A
Program settings
The delivered transmitter and receiver are programmed to
match each other.
Fuse
If the control box is not working, unplug the control box from
AC-power and then check the fuse on the circuit board. Open
the two covers (8 pcs of screws) on the backside of the control
box until you see the circuit board. The
fuse is in the plastic box marked “Fuse”.
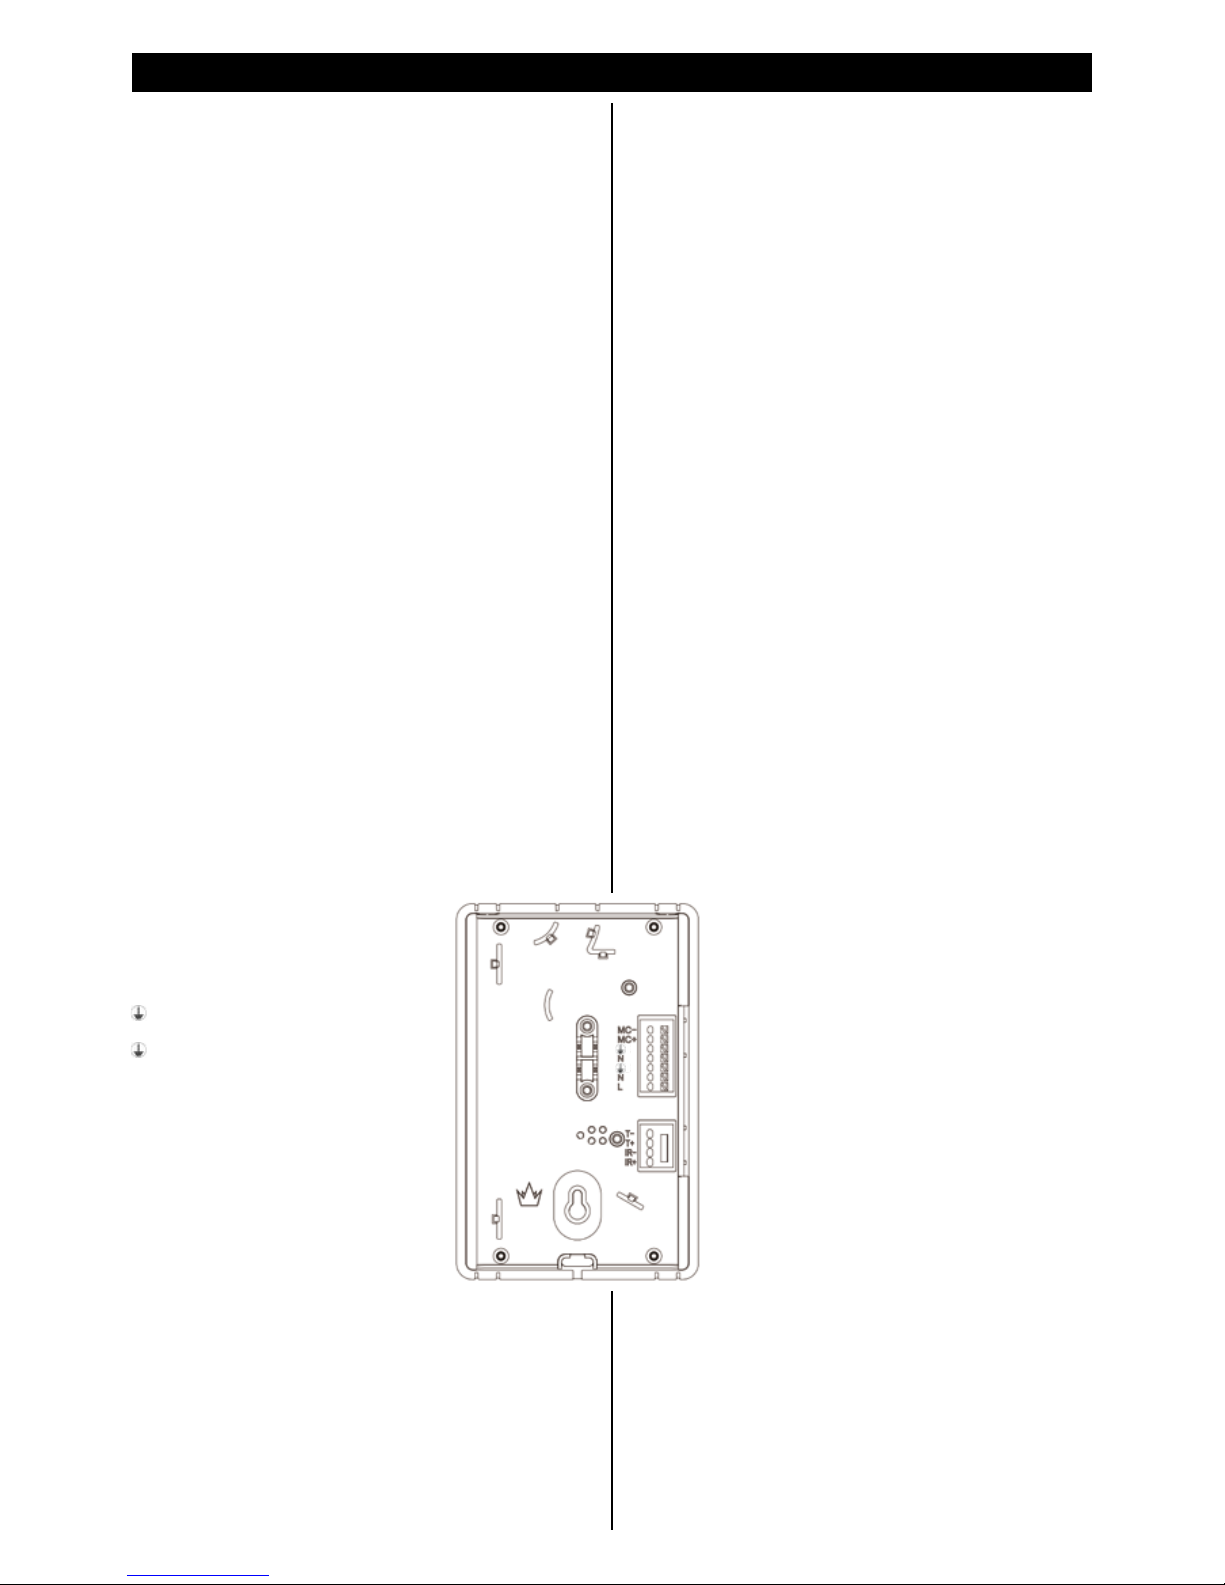
Connections
AC power and connection to the motor:
M-: Motor counter-clockwise
M+: Motor clockwise
: Motor protection earth
N: Motor Neutral
: AC_IN power protection earth
N: AC_IN power Neutral
L: AC_IN power Line
12V TRIGGER connector (2 pins)
TR-: 12V trigger input’s ground;
TR+: 12V trigger input’s signal;
Line IR connection (2 pins)
IR-: Line IR input’s ground
IR+: Line IR input’s signal
How to connect and
program the control box
In this section you will learn how to set the
control box into the programming mode
and to pair equipment to the control box.
1. Pairing with RF-remote control
2. Pairing with IR-remote control
3. Erase all previous programming (reset to default codes)
4. Connecting with Line IR Control module
5. Connecting 12 volts trigger
Go into programming mode:
1. Press and hold down the STOP button of the receiver unit for
more than 5 seconds, when the LED starts to blink, release
the STOP button, then you are in the programming mode.
2. You can now pair the control box with RF/IR equipment or
erase the programming (subject 1-3):
1. Pairing with RF-remote control
The remote control is paired with the control box, if the programming is erased or if the units not are paired you need to
do as follows:
1. Enter programming mode
2. Open the battery cover on the remote control and press
the black button once. The pairing code will now be sent
to the receiver unit.
3. When the pairing is done the LED will lit continuously.
4. You can now use the controller devices
If no pairing is done in 30 seconds the receiver will leave programming mode automatically.
2. Pairing with IR-remote control
You can use the control box with some of the IR-remote controls on the market. If using the default codes* you don´t need
to do any pairing to the control box, but your own IR-remote
control will need some programming. To pair the control box
you do as follows:
1. Enter programming mode
2. Press the key on the IR-unit you want to use as UP, when
accepted the LED of the receiver will close once and then
keep blinking.
3. Press the key on the IR-unit you want to use as STOP, when
accepted the LED of the receiver will close once and then
keep blinking.
4. Press the key on the IR-unit you want to use as DOWN, when
accepted the LED of the receiver will lit continuously.
5. You can now use the controller devices**
If sending RF-signals at the same time as the IR programming
is under progress the receiver will leave the programming
mode.
3. Erase all previous programing (reset to default codes)
With this function you can erase the programming of all pro-
grammed IR-codes, except the default codes. The control box
can only be controlled with the default IR-codes and the buttons on the control box, the other equipment has to be reprogrammed.
1. Go into programming mode
2. Press UP-button (on the control box) for at
least 5 sec, the LED becomes black, then release
the UP-botton.
3. The LED lights and all the programming is
now reset.
Other ways of connecting (no programing):
4. Connecting with Line IR Control module
When using the control box with a control system
like Crestron you can use the default codes*. Do
as follows:
1. Connect the IR input´s ground to the recei-
vers units connection (see g. A) “IR-“
2. Connect the IR input´s signal to the recei-
vers units connection (see g. A) “IR+“
3. You can now use the controller devices**
If sending RF-signals at the same time as the IR programming is done the receiver will leave the programming mode.
5. Connecting with the 12 v trigger
If the projector has a 12 volts trigger, you can connect it to the control box and the screen will go
down when the projector is turned on and go up
when the projector is turned off.
1. Connect the 12 v trigger input´s ground to the receivers
units connection (see g. A) “TR-“
2. Connect the 12 v trigger input´s signal to the receivers units
connection (see g. A) “TR+“
When connecting the trigger cords, make sure that the projector and the control box is powered off.
Installation and operations guide for Wireless emitter KP100 and Motor control receiver KP200
 Loading...