

King Living Reo Assembly Instructions Manual

4x
2x
2x
1. Tilt the Reo over so it’s resting on its rear or
front. Reo’s legs are contained inside the two
zipped pockets located underneath at each end.
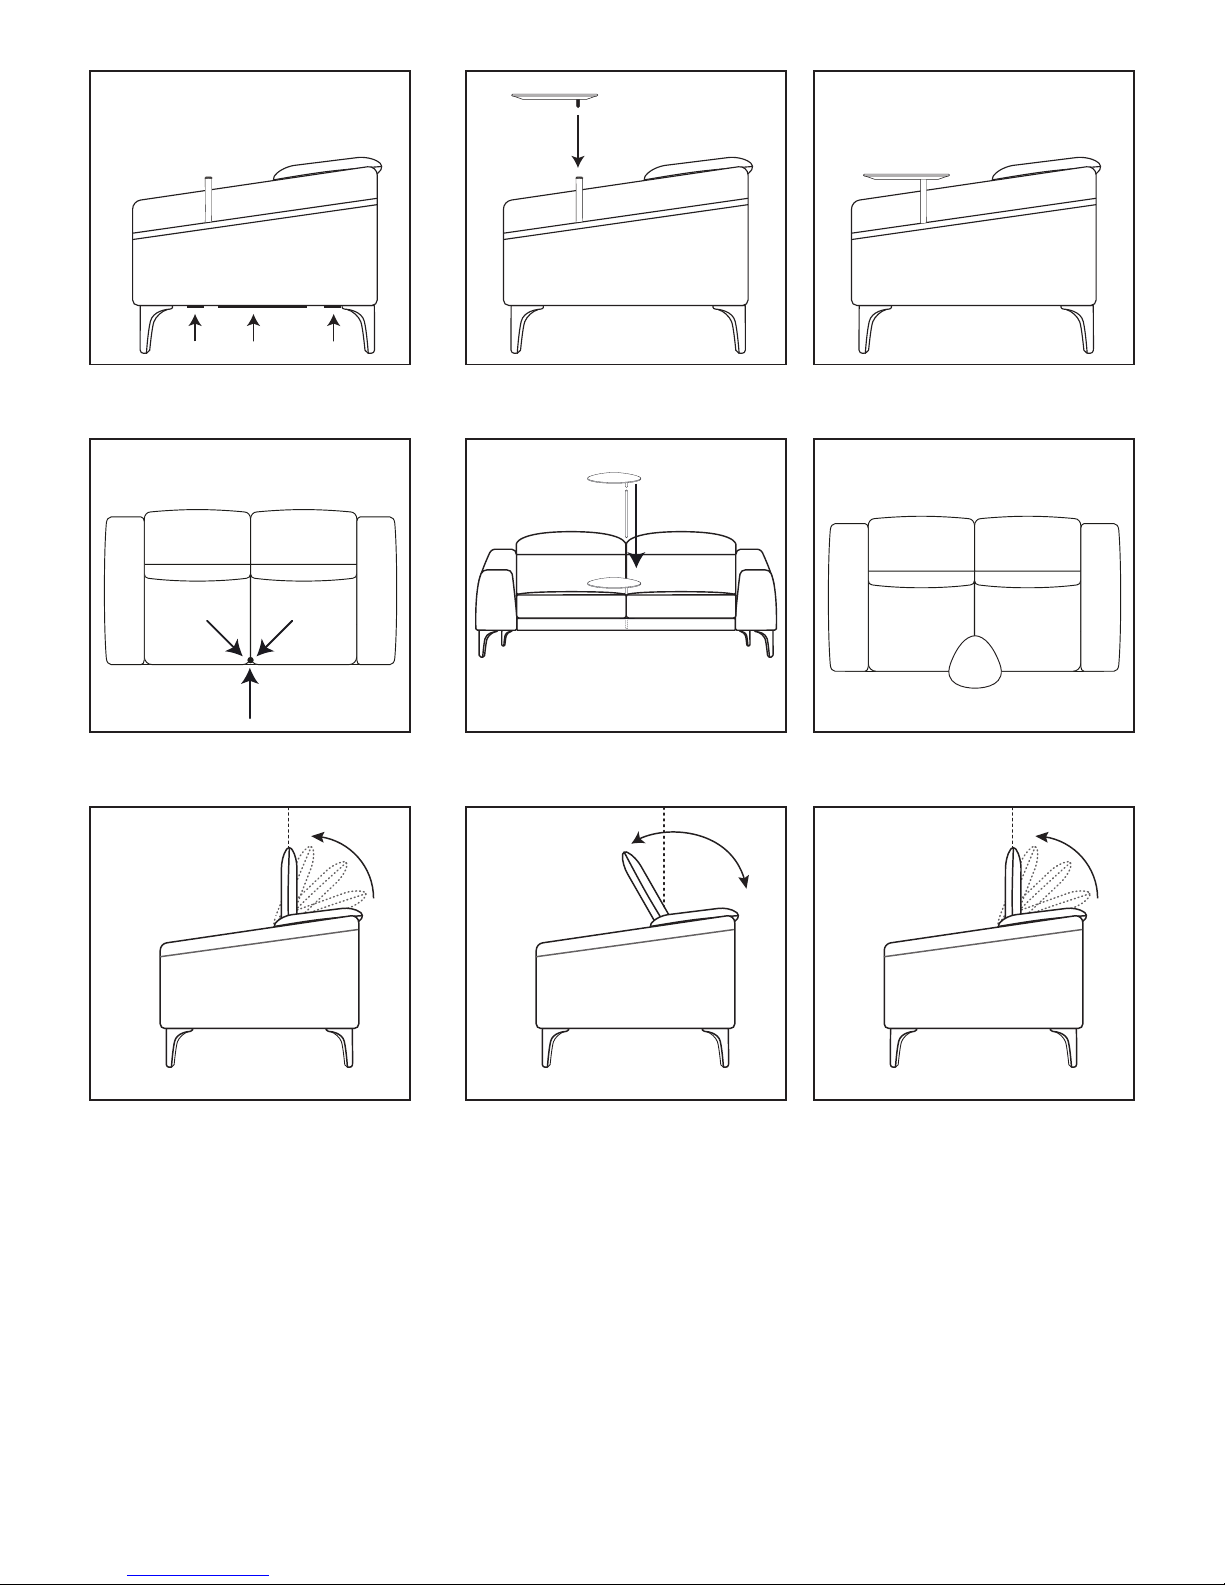
2. Remove the legs from the pockets and insert
them by pushing the leg pins all the way into the
spigot holes located in the corners.
3. Carefully tilt the Reo back to the upright
position. Reo assembly complete.
4. Smart Pocket Accessories (Optional):
A. SMART Pocket™ Table Bracket.
B. King Cable Guide.
5. Insert the end of the Cable into the King
Cable Guide as shown.
6. Open the Velcro strips underneath the arms
then insert the guide and cable into the vertical
pocket channel and slide downward.
7. Slide guide and cable all the way down and
out through the bottom opening of the pocket
channel.
7. Pull any loose cable down (carefully from the
bottom) so the cable is concealed within the
pocket channel.
8. Slide the guide and excess cable through the
horizontally channel towards the back of the
Reo and all the way through. Remove cable
guide.
A B
Reo
Assembly Instructions
Two people are required for safe assembly.
Opening Boxes
DO NOT use a knife to open the King Living boxes - you may damage your furniture.
Peel o the tape, then lift & separate the cardboard aps to open.
Assemble your furniture by following the steps below.
DT2016305 V2
10. SMART Pocket™ Table Assembly. Line up
the table connector to the bracket to join
together.
11. Ensure table is securely pushed into the
bracket. SMART Poctket™ Table assembly
complete.
12. Platform Table Assembly: spigot holes are
located on the platform between the seat
cushions.
14. Reo Platform Table assembly complete.
15. The headrest has 15 settings. With headrest
in the start position (down) you can lift the headrest up to your desired level. The headrest will
click as it enters each new level.
16. To reset headrest to the start position, push
headrest past the furthest upright position and
then return headrest to the start position (down).
17. With headrest back in the start position
(down) you can then lift the headrest up to your
desired level.
9. Close the Velcro strips to secure & conceal
the cable neatly. Bracket assembly complete.
Cable is ready to be connected.
13. Insert the steel pin into the spigot hole. Then
connect the table to the steel pin making sure it
is securely pushed in.
KING LIVING
CUSTOMER CARE:
AUSTRALIA:
T 1300 135 464
E service@kingliving.com.au
W kingliving.com.au
NEW ZEALAND:
T 0800 546 422
E service@kingliving.co.nz
W kingliving.co.nz
SINGAPORE:
T +65 6805 4198
E kingcare@kingliving.com.sg
W kingliving.com.sg
MALAYSIA:
T +603 7732 0272
E service@kingliving.my
W kingliving.my
 Loading...