

OWNER’S MANUAL
3125 | 3425 gfx offshore


TABLE OF CONTENTS
SECTION 1 – WELCOME ABOARD . . . . . . . . . . . . . . . . . . . . . . . . . . . . . . . . . . 1
SECTION 2 – SAFETY INFORMATION . . . . . . . . . . . . . . . . . . . . . . . . . . . . . . . . .3
PREPARATION . . . . . . . . . . . . . . . . . . . . . . . . . . . . . . . . . . . . . . . . . . . . . . . . . . . . . 3
SAFE BOATING . . . . . . . . . . . . . . . . . . . . . . . . . . . . . . . . . . . . . . . . . . . . . . . . . . . . .3
IMPORTANT LABELS AND WARNINGS . . . . . . . . . . . . . . . . . . . . . . . . . . . . . . . .4
GENERAL INFORMATION . . . . . . . . . . . . . . . . . . . . . . . . . . . . . . . . . . . . . . . . . . . . . . . 4
WARNING LABELS . . . . . . . . . . . . . . . . . . . . . . . . . . . . . . . . . . . . . . . . . . . . . . . . . . . 4
CAPACITY / CONFORMITY LABEL INFORMATION . . . . . . . . . . . . . . . . . . . . . . . . . . . . . . . . . . 4
EXHAUST EMISSIONS HAZARD. . . . . . . . . . . . . . . . . . . . . . . . . . . . . . . . . . . . . . . . . . . . 6
SECTION 3 – OPERATOR AND PASSENGER SAFETY . . . . . . . . . . . . . . . . . . . . . . . .7
BOAT OPERATORS. . . . . . . . . . . . . . . . . . . . . . . . . . . . . . . . . . . . . . . . . . . . . . . . . . . 7
SAFE BOATING PRACTICES. . . . . . . . . . . . . . . . . . . . . . . . . . . . . . . . . . . . . . . . . . . . . .8
SECTION 4 – BOAT CHARACTERISTICS AND OPERATION . . . . . . . . . . . . . . . . . . . . .9
GETTING TO KNOW YOUR BOAT . . . . . . . . . . . . . . . . . . . . . . . . . . . . . . . . . . . . . . . . . . . 9
SAFE OPERATION, CARE AND ATTENTION . . . . . . . . . . . . . . . . . . . . . . . . . . . . . . . . . . . . 10
OPERATING TIPS. . . . . . . . . . . . . . . . . . . . . . . . . . . . . . . . . . . . . . . . . . . . . . . . . . . 10
POST OPERATION CHECKLIST . . . . . . . . . . . . . . . . . . . . . . . . . . . . . . . . . . . . . . . . . . . .11
TRAILERING YOUR BOAT . . . . . . . . . . . . . . . . . . . . . . . . . . . . . . . . . . . . . . . . . . . . . . 12
TRAILER CHECKLIST. . . . . . . . . . . . . . . . . . . . . . . . . . . . . . . . . . . . . . . . . . . . . . . . . 12
SECTION 5 – MAINTENANCE AND CARE. . . . . . . . . . . . . . . . . . . . . . . . . . . . . . 13
EXTERIOR MAINTENANCE . . . . . . . . . . . . . . . . . . . . . . . . . . . . . . . . . . . . . . . . . . . . . 13
COMMON TYPES OF CORROSION . . . . . . . . . . . . . . . . . . . . . . . . . . . . . . . . . . . . . . . . . 14
NEW COMPONENT INSTALLATION INSTRUCTIONS. . . . . . . . . . . . . . . . . . . . . . . . . . . . . . . . 16
INTERIOR MAINTENANCE . . . . . . . . . . . . . . . . . . . . . . . . . . . . . . . . . . . . . . . . . . . . . . .17
MAINTENANCE AND ADJUSTMENTS . . . . . . . . . . . . . . . . . . . . . . . . . . . . . . . . . . . . . . . . 18
STORAGE AND WINTERIZING. . . . . . . . . . . . . . . . . . . . . . . . . . . . . . . . . . . . . . . . . . . . 19
RE-COMMISSIONING BOAT AFTER STORAGE. . . . . . . . . . . . . . . . . . . . . . . . . . . . . . . . . . . 20
3125
|
3425 OWNERS MANUAL KINGFISHER BOATS III

SECTION 6 – System and Options. . . . . . . . . . . . . . . . . . . . . . . . . . . . . . . . . . 21
THRU HULL LOCATION . . . . . . . . . . . . . . . . . . . . . . . . . . . . . . . . . . . . . . . . . . . . . . . 21
SYSTEMS . . . . . . . . . . . . . . . . . . . . . . . . . . . . . . . . . . . . . . . . . . . . . . . . . . . . . . . 22
FUEL SYSTEM . . . . . . . . . . . . . . . . . . . . . . . . . . . . . . . . . . . . . . . . . . . . . . . . . . . . 22
ELETRICAL SYSTEM . . . . . . . . . . . . . . . . . . . . . . . . . . . . . . . . . . . . . . . . . . . . . . . . . 24
BOAT DIAGRAM . . . . . . . . . . . . . . . . . . . . . . . . . . . . . . . . . . . . . . . . . . . . . . . . . . . 24
ANCHOR ROPE AND CHAIN REQUIREMENTS . . . . . . . . . . . . . . . . . . . . . . . . . . . . . . . . . . . .27
OPTIONS AND FEATURES. . . . . . . . . . . . . . . . . . . . . . . . . . . . . . . . . . . . . . . . . . . . . . 29
BATTERIES . . . . . . . . . . . . . . . . . . . . . . . . . . . . . . . . . . . . . . . . . . . . . . . . . . . . . . 31
TRIM TAB OPERATION . . . . . . . . . . . . . . . . . . . . . . . . . . . . . . . . . . . . . . . . . . . . . . . . 32
BOW THRUSTER . . . . . . . . . . . . . . . . . . . . . . . . . . . . . . . . . . . . . . . . . . . . . . . . . . . 32
WATER AND PLUMBING . . . . . . . . . . . . . . . . . . . . . . . . . . . . . . . . . . . . . . . . . . . . . . . 33
FRESH WATER SYSTEMS . . . . . . . . . . . . . . . . . . . . . . . . . . . . . . . . . . . . . . . . . . . . . . 34
SECTION 8 – TROUBLESHOOTING . . . . . . . . . . . . . . . . . . . . . . . . . . . . . . . . . 40
SECTION 9 – NAUTICAL TERMS. . . . . . . . . . . . . . . . . . . . . . . . . . . . . . . . . . . 43
SECTION 10 – MAINTENANCE LOG . . . . . . . . . . . . . . . . . . . . . . . . . . . . . . . . . 44
Iv KINGFISHER BOATS 3125 | 3425 OWNERS MANUAL

SECTION 1 – WELCOME ABOARD
Please read this manual completely before operating your
boat for the rst time. It is a valuable reference and should
help you answer most questions about caring for your boat,
how to operate it and your responsibilities as the boat’s
operator.
Take the time to complete and submit the Warranty
Registration. Failure to submit the registration or neglect
or improper care of your boat may void the warranty. The
best way to protect your new KingFisher is to carry out
regular maintenance and inspect your boat regularly as
recommended in this guide.
This manual refers to other manuals that come with your
boat’s equipment and accessories. It is essential you read
all manuals and become familiar with the care, maintenance
and safe operation of all the equipment aboard your boat.
KingFisher wants you to maximize your boating experience
and to be safe every time. If you are missing manuals, see
your KingFisher dealer for a replacement.
In Section 1 of this manual, you will nd a place to record
information such as your engine and boat serial number,
and your dealership contact information. Keep this
information with your boat for easy reference.
If you have any questions about your boat, consult your
KingFisher dealer. If you have any questions about boating
regulations, contact the local United States Coast Guard,
Transport Canada Ofce of Boating Safety or Canadian
Coast Guard, Fisheries and Oceans Ofce.
Before you go boating it is wise to read your boat Owner’s
Manual and go through the pre-trip safety checklist found
in Section 2. Ensuring that your boat is in perfect working
order before beginning a voyage will allow you to get the
most enjoyment out of your boat.
Important Identication Number Records
Record your serial numbers of your hull and motor(s).
The Hull Identication Number or H.I.N. is located on
the starboard side of the transom. Consult the engine
manufacturer’s owners manual for engine serial number
location.
HULL IDENTIFICATION NUMBER:
QBSY _____________________________________
MOTOR 1 SERIAL NUMBER:
___________________________________________
MOTOR 2 SERIAL NUMBER:
___________________________________________
KICKER SERIAL NUMBER:
____________________________________________
Note: It is also recommended to record the serial numbers
of other signicant items if your boat is so equipped.
____________________________________________
____________________________________________
____________________________________________
____________________________________________
3125
|
3425 OWNERS MANUAL KINGFISHER BOATS 1

2 KINGFISHER BOATS 3125 | 3425 OWNERS MANUAL

SECTION 2 – Safety INFORMATION
PREPARATION
Before starting your voyage, ensure that you are
familiar with applicable boating regulations for
the region. These can be obtained from Transport
Canada Ofce of Boating Safety or your local
United States Coast Guard ofce.
Below is a safety checklist that should be performed every
time you head out on the water.
❏ Ensure your boat insurance and vessel
license are complete and up to date
❏ Check your on-board safety equipment, including but
not limited to:
• Paddles
• Class 5BC Fire extinguisher
in good working condition
• Bailing container
• Watertight ashlight
• Type A, B, or C ares on board and that they are
not expired. (Vessels less than 6m must carry 3,
and vessels over 6m must carry 6)
• Buoyant heaving line at least 15m in length
❏ Check the horn
❏ Ensure you have a container to collect any garbage
❏ Check the weather report
❏ Always have someone along who can operate
the boat if you become incapacitated
❏ Make sure you and your guests are wearing
approved personal oatation devices
❏ Instruct your guests on safety procedures and
equipment on board
❏ Leave an itinerary of your trip or “Float Plan” with
someone on shore and have them contact local
Search and Rescue if you don’t return at the
appointed time
SAFE BOATING
It is strongly recommended to read either “The Safe
Boating Guide” (Fisheries and Oceans Canada, Coast
Guard), or “A Boater’s Guide to the Federal Requirements
for Recreational Boats” (US Coast Guard) prior to
operating your boat. Similar publications may be available
through other state or provincial bodies. Check with
your local governing body to see if an operator license
is required in your jurisdiction. Marine safety and boat
handling courses such as those offered through Power
Squadrons are also highly recommended.
❏ Check all lights
❏ Check your radio, cell phone and or signalling device
❏ Check your bilge pump
❏ Ensure every passenger has an approved, properly
tting personal oatation device
❏ Check all seats and ensure they are rmly attached
❏ Check battery and electrical system for damage or
corrosion and spare fuses
❏ Check the steering for smooth operation through the
full range of travel
❏ Ensure that all loose items are safely and securely
stowed
❏ Check for any damage to the boat
❏ Check that the hull drain plugs are in place
❏ Check engine uid levels
❏ Check your capacity rating and ensure your boat is not
overloaded or overpowered
❏ Check bilge for water, fuel and oil.
3125
|
3425 OWNERS MANUAL KINGFISHER BOATS 3

IMPORTANT LABELS AND WARNINGS
For your safety, please do not remove any decals.
GENERAL INFORMATION
Your boat is supplied with a number of identication and warning labels. These labels are intended
to inform and protect the boat operator and passengers. Any lost or damaged labels should be
immediately replaced. Failure to comply with the warnings can result in severe injury or death.
Should you need replacement warning labels, conformity/capacity labels, or instruction labels,
contact your dealership.
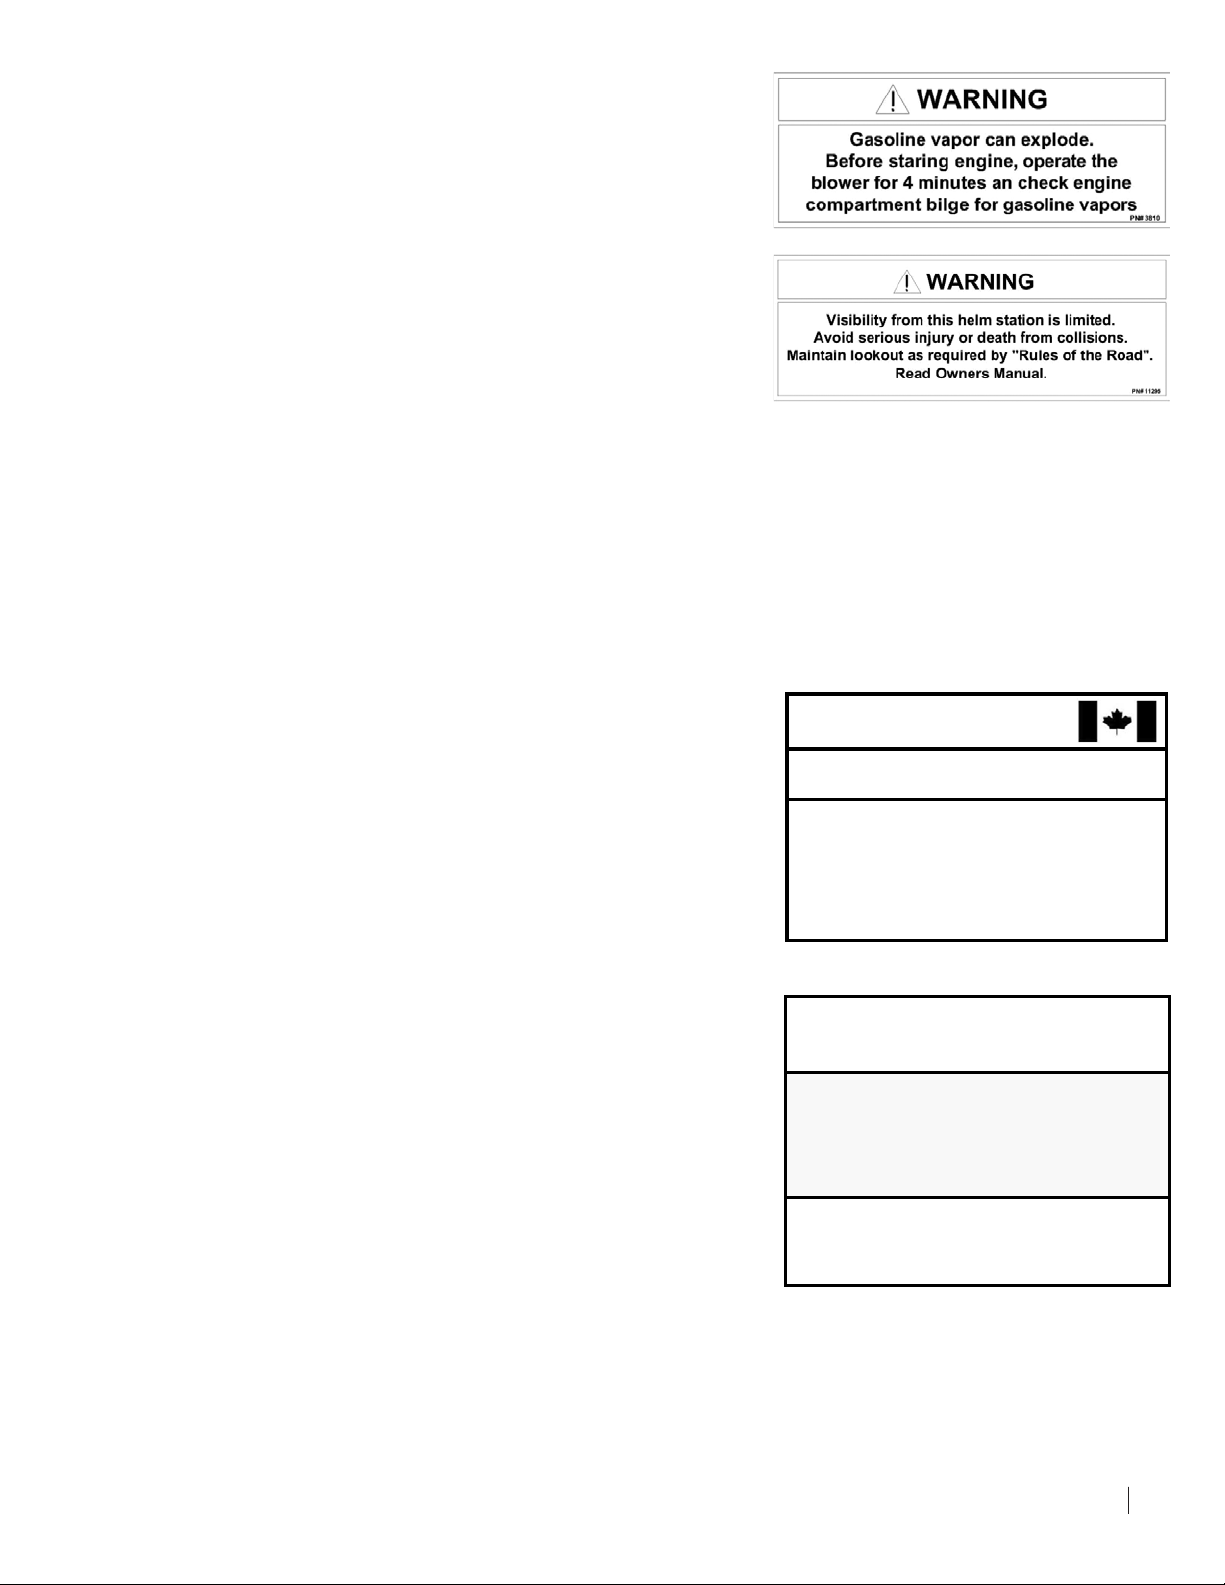
WARNING LABELS
Be sure to familiarize yourself with the following warning labels:
NOTE: Your boat only includes the warning label if applicable.
Decal 1
Located on the starboard side rear deck
tray and relates to the shore power system
Fuel system inspection decal
is located inside the bilge doors
Boarding ladder warning label
is located on the rear swim platform
Decal 2
Auxiliary and main engine operation warning
decal is located above the auxiliary steering station
Decal 3
Winterization warning decal is attached to the sink
faucet and should be removed after the system is ushed
Decal 4
Decal 5
Auxiliary station visibility
warning label is located above
the rear helm station
4 KINGFISHER BOATS 3125 | 3425 OWNERS MANUAL
Decal 6
3125 / 3425
WESTWINN GROUP ENTERPRISES INC
P/N
THIS BOAT COMPLIES WITH U.S. COAST GUARD
SAFETY STANDARDS IN EFFECT ON
THE DATE OF CERTIFICATION
MANUFACTURER:
MODEL / MODELE:
CONFORMITY LABEL
WESTWINN GROUP ENTERPRISES INC (QBS)
VERNON B.C. CANADA
3125 / 3425
3125 / 3425
THE MANUFACTURER DECLARES THAT THIS VESSEL COMPLIES WITH THE
IMPORTED.
THIS BOAT COMPLIES WITH U.S. COAST GUARD
SAFETY STANDARDS IN EFFECT ON
THE DATE OF CERTIFICATION
Water pickup shutoff label is located by the thru-hull
petcock in the headstall, beside the toilet
Decal 7
The watertight closure decal is located near all doors or hatches,
which should be kept closed while underway
CAPACITY / CONFORMITY LABEL INFORMATION
Every vessel is supplied with a label indicating it conforms to related federal requirements as of the date of manufacture.
Vessels over 6 m (19’ 8”) in length are required to display a USSG or Transport Canada Conformity Label (Decal 8 or 9).
If your Conformity label is missing, please contact your KingFisher dealer with your Hull Identication Number (HIN) for a
replacement.
Decal 8
The Transport Canada Conformity label
is located on the baitwell at the stern
Decal 9
The US Coast Guard Conformity label
is located on the baitwell at the stern
CANADIAN COMPLIANCE NOTICE
AVIS DE CONFORMITE CANADIEN
PLEASURE CRAFT CONSTRUCTION REQUIREMENTS OF THE SMALL VESSEL
REGULATIONS, AS THEY READ ON THE DAY ON W HICH THE CONSTRUCTION OF
THE VESSEL WAS STARTED OR ON THE DAY ON WHICH IT THE VESSEL WAS
LE FABRICANT ATTESTE QUE CE BÂTIMENT EST CONFORME AUX EXIGENCES DE
CONSTRUCTION DES EMBARCATIONS DE PLAISANCE DU RÈ GLEMENT SUR LES
PETITS BÂTIMENTS, EN VIGUEUR À LA DATE DU DÉBUT DE SA CONSTRUCTION
OU À LA DATE DE SON IMPORTATION.
P/N
CONFORMITY LABEL
VERNON, BC, CANADA
3125
|
3425 OWNERS MANUAL KINGFISHER BOATS 5
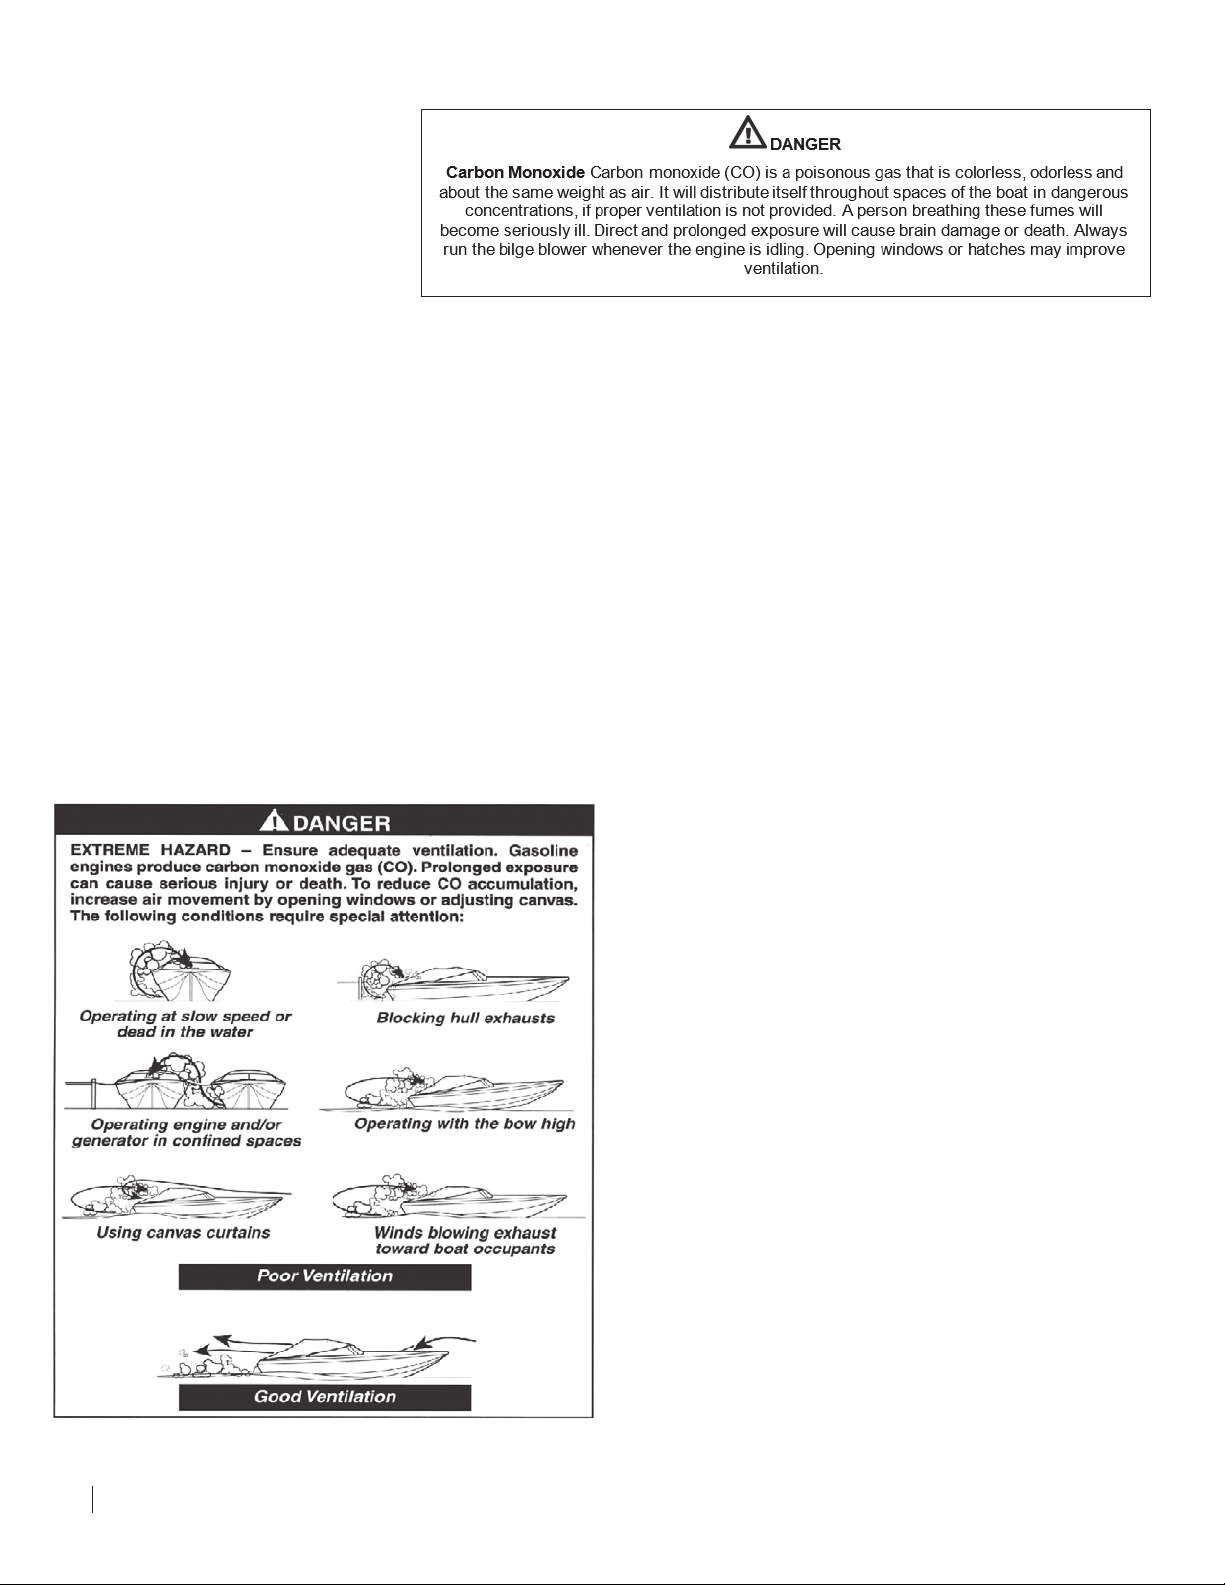
EXHAUST EMISSIONS HAZARD
Decal 10
The Carbon Monoxide (CO) warning
decal is located on the rear bait well
Enclosed cabins or cockpits may accumulate Carbon
Monoxide (CO). This can be a result of fumes from your
own engine or from neighboring boats. To prevent CO
Poisoning ensure continuous movement of fresh air and do
not run the boat fully enclosed. You may wish to install one
or more carbon monoxide detectors in the boat’s enclosed
cabin or cockpit.
CO diffuses in the air much more rapidly than easily
detectable gases; you cannot rely on smell to recognize
its presence. CO will be produced anytime materials
containing carbon are burned. Common sources of CO are
internal combustion engines and open ame devices such
as cooking ranges, space heaters, and charcoal grills.
Ventilation Graphic
Symptoms of CO poisoning include,
but are not limited to, the following:
1. Watering and itchy eyes
2. Flushed appearance
3. Inattentiveness and the inability to think clearly
4. Ringing in the ears
5. Tightness in the chest
6. Headache and/or throbbing temples
7. Drowsiness and fatigue
8. Incoherence
9. Nausea and/or vomiting
10. Dizziness
11. Collapse
12. Convulsions
6 KINGFISHER BOATS 3125 | 3425 OWNERS MANUAL
IMPORTANT: If someone is suffering from CO poisoning
move the person to fresh air, administer oxygen, if available,
and contact medical help. If the victim is not breathing,
perform approved CPR procedures until medical help
arrives and takes over.

SECTION 3 – OPERATOR AND PASSENGER SAFETY
BOAT OPERATORS
The safe use and operation of this boat requires proper
operating techniques, common sense, good judgment,
and expertise. Operators must know the basics of marine
navigation and boat handling. It is vital that operators are
capable of safely navigating their vessel while upholding
respect for others on the waterway.
It is the operators responsibility to operate the boat safely
in accordance with the law, common sense and good
judgment. Check with your local governing body to see
if an operator license is required in your jurisdiction. The
boat operator bears responsibility for the safety of the
boat’s passengers and others that may be in the immediate
vicinity affected by the operation of the boat.
As the boat operator, one of your legal responsibilities is to
come to the aid of other boaters or persons in the water that
are in danger, provided it does not put you or your vessel
in danger. Consult the manuals that come with your life
saving equipment. When approaching persons in the water
approach as slowly as possible. When in the vicinity of
persons in the water, turn off your engine and use paddles
to maneuver. Your boat is not designed to tow other boats.
In an emergency, use your bow or transom eyes for towing
purposes. Your deck cleats are not designed for towing
and can fracture suddenly or pull out of the deck. Towing
another vessel at speeds above 5 mph will put an unusually
heavy load on your motor, possibly resulting in mechanical
damage not covered under engine warranty.
The operator also has a responsibility to operate and
maintain the boat and its equipment in accordance with
the manufacturer’s instructions. Failure to do so may
result in damage to the boat or its equipment or void the
warranty. Your KingFisher requires standard cleaning and
maintenance to ensure many years of enjoyment. See
Section 5 for detailed maintenance requirements and
instructions.
The operator is responsible for the safety of all passengers.
All passengers must be wearing an approved personal
oatation device suitable for their weight. All passengers
should be familiar with the location and use of all emergency
equipment on board.
Everyone who operates the boat must read this manual
to gain a better understanding of KingFisher Boats
components, best handling practices and to understand
their responsibilities.
3125
|
3425 OWNERS MANUAL KINGFISHER BOATS 7
SAFE BOATING PRACTICES
Marine safety is of the utmost importance to keep yourself, your passengers and other boaters safe.
The below tips are common sense and must be followed. Negligence can result in severe injury or death.
• Approved personal oatation devices of the correct
size must be worn at all times by persons aboard the
boat while it is in the water.
• Turn off the engines while any passengers are
entering or leaving the water, or anyone is swimming
in the vicinity of the boat.
• Always operate your boat at a safe speed for weather
conditions. Slow down during periods of restricted
visibility, choppy water and high winds.
• Do not operate the boat if any object is obstructing the
line of sight forward of the steering station.
• Gasoline vapors are explosive. Be careful when
fueling to avoid spillage in the boat or water.
Extinguish all smoking material and open ame while
refueling or while within 15m of a refueling site. Avoid
static electricity discharges and do not operate a cell
phone while fueling.
• Never consume alcohol and/or recreational drugs
during or prior to operating any vessel.
• Never attempt to modify your vessel’s hull or structure
without explicit instructions from the manufacturer or
your dealership. Doing so may result in catastrophic
structural failure that could cause severe injury or
death. Modifying your hull will void the warranty.
• Your boat will always turn more aggressively the
faster that you are going. Always be aware of your
surroundings and give yourself lots of room to
maneuver safely.
• In the event of engine failure, check all electrical,
mechanical and plumbing connections to the engine.
Ensure that there is sufcient fuel in the tank, and that
there has been no fuel or oil leakage. Attempt to restart the engine in accordance with the manufacturer’s
instructions. If the motor will not start wait for it to cool
down and try again. If the motor will not start after
several attempts, summon assistance.
• Check for water or gasoline in the bilge. If there is
gasoline in the bilge, evacuate everyone from the
immediate area and contact your local re department.
Never use the bilge pump to pump out even a tiny
amount of gasoline or oil from the bilge.
• Never sit on seat backs, gunnels or arm rest, and
never stand on seats.
WARNING:
• DELIBERATE MISUSE OF YOUR BOAT AND EQUIPMENT CAN VOID YOUR WARRANTIES
AND POTENTIALLY RESULT IN SERIOUS INJURY OR DEATH
• FAILURE TO COMPLY WITH NAVIGATIONAL REGULATIONS AND RESTRICTIONS
COULD RESULT IN FINES, SEVERE INJURY OR DEATH
• In the event of re, use your re extinguisher in
accordance with its instructions. All other persons
should abandon the boat immediately in the event of
re if it is safe to do so. In the event of loss of steering,
throttle or shift control system failure, turn off the
engine and summon assistance. Use the paddles to
make your way back to shore.
8 KINGFISHER BOATS 3125 | 3425 OWNERS MANUAL

SECTION 4 – BOAT CHARACTERISTICS AND OPERATION
GETTING TO KNOW YOUR BOAT
Read the owners manual for all of your installed components
completely. Locate your circuit breakers, switches and
the location of in-line fuses for the bilge pumps and other
accessories. Use the various component owner’s manuals
provided with your boat to learn where your check points
are located, and what acceptable levels and conditions
are at each point. Get to know where your shut-offs are for
power, seawater, and fuel.
Once you are familiar with the components of your boat, it’s
time to head to the water. Take it easy for the rst little while
until you know how your boat responds to the throttle, turning
and encountering waves. The transition zone between
plaining and displacement speeds can be abrupt at times.
Also, a boat’s sensitivity to steering, wave impact and even
wind at high speed can be unpredictable, because there
is very little of the boat in contact with the water’s surface
to provide stability and control. Practice docking your boat
carefully a few times to get the feel of your boat.
Fuel and Oil
Consult your engine manufacturer’s owner’s manual for the
proper type of fuel to use and any appropriate additives.
Understand the difference between 2-stroke and 4-stroke
and know what engines your boat is equipped with. Your
4-stroke engine may either have a wet-sump oil system
which means that it has an oil lled crank case, or a dry-
sump oil system which means it has an oil tank. If equipped,
your 2-stroke will have an oil tank on board under the deck
with a deck ll, or directly on the engine itself. Never ignore
low oil warnings and always ensure you have sufcient
oil on board. In either case always check your oil before
starting the motor. Consult your engine owner’s manual for
the location of your dipstick, the procedure for checking the
oil level, and the correct type of oil to use.
Avoid lling your boat’s fuel tank to its full capacity and never
park your boat with a completely full fuel tank. Fuel expands
when the surrounding air temperature increases. This can
cause your fuel system to overow. Spilled fuel creates a re
and explosion hazard, can cause severe irritation to skin and
can damage the paint on your boat. Paint damage due to
spilled fuel is not covered by your warranty.
Steering and Controls
Your boat is equipped with hydraulic or powered hydraulic
steering. The uid level must be checked frequently to
ensure that the hydraulic system is intact and that there
is sufcient uid in the lines for your steering system
to function correctly. It is very important to use the
manufacturer’s recommended steering oil type. The oil
type can be found in the applicable steering manufactures
owner’s manual. The steering should only be adjusted by
a qualied technician.
Consult your engine and control owner’s manuals for
instructions on operating your boats throttle and shift
controls. Marine engines can only be started with the
controls in the “Neutral” position. Always shift your controls
to “Neutral” before starting the motor. If you are able to start
your engine with the shifter in gear have your Kingsher
dealer service the boat immediately to correct the problem.
Your vessel will also be equipped with a safety lanyard. The
lanyard consists of a clip attached to your boat’s engine
controls and a snap-hook that attaches to the operator’s
clothing. If the operator is ejected from the boat or collapses,
the lanyard pulls the clip from the controls and shuts off the
engine. Before starting the engine ensure that this lanyard
is in place and the clip ts snugly into its receptacle. For
other engine starting instructions consult your owner’s
manuals.
Instruments and Gauges
Your boat will likely be equipped with an engine
manufactures multi-function display. These gauges are
capable of providing the operator with a comprehensive list
of engine data and operating information such as: voltage,
trim status, boat speed, steering angle, fuel level, oil, water,
engine RPM and engine diagnostic alerts. Always be aware
of your gauge reading. Low RPM’s can mean a fouled prop.
For full break down of capabilities related to your gauge,
see the manufacturer’s owner’s manual. Stay current with
corresponding software updates for your display. Contact
your Kingsher Dealer for more information.
Engine Trim
You can change the angle of the propeller shaft by adjusting
the trim switch. Start from idle with the outboard tucked in/
down all the way. While accelerating and planing, start to
trim the outboard out/up. By trimming the outboard out/up,
you will raise the bow of the boat. By doing this, it reduces
drag and bow steering and increases speed and fuel
economy. Find where your boat has optimal performance.
Over trimming will reduce performance and could potentially
damage your engine by cavitation.
3125
|
3425 OWNERS MANUAL KINGFISHER BOATS 9

SAFE OPERATION, CARE AND ATTENTION
Operating your boat with due care and attention requires
the operator be aware of the surrounding environment at
all times.
• Sudden stop or change of direction can cause
loss of control of the boat resulting in injury or death.
• Operate the boat defensively at all speeds and
keep a safe distance from people, objects and other
watercraft.
• Following directly behind other boats or operating the
boat in an erratic manner can lead to collision, injury
and death.
• Operators should reduce speed and exercise extreme
caution when operating the boat in shallow areas or
where there might be submerged objects.
• Be aware of the weather conditions at all times. If
wind and waves begin to rise or visibility begins to
deteriorate, return to the dock or boat ramp.
• Placing heavy objects over to one side of the boat or
very far forward in your boat can result in poor boat
performance, or in an extreme situation result in loss
of control or capsizing of the boat. Always distribute
any cargo evenly around the center of the passenger
carrying area of your boat.
OPERATING TIPS
Launching
When you arrive at the boat ramp remove the rear tie-
downs from your boat and perform all pre-operation checks.
Ensure the drain plug is in place. When safe to do so, back
your trailer slowly down the ramp until the underside of the
boat is touching the water. Stop your vehicle and set the
parking brake. Disconnect the trailer safety chain from your
boat and let out a few feet of winch line. Ensure you do not
let out enough winch line to become tangled on your vehicle
or the trailer. Back your trailer down the ramp until the boat
is ready to oat free. Set your parking brake. Disconnect
your winch line from the boat and attach a long mooring
line to the bow. Guide your boat off of the trailer and secure
it to the shore using the mooring line or have someone on
shore hold the line. Park your trailer and vehicle. Board
your boat. Ensure that there is enough water under your
boat before lowering the motor.
Loading
Tilt your outboard motor into the traveling position. Moor
your boat on shore or have someone on shore hold the
mooring line. Carefully back your trailer down the ramp
when safe to do so until the trailer bunks are just underwater.
Set your parking brake. Guide your boat onto the trailer as
squarely between the trailer fenders as possible. Attach the
trailer winch line to the bow eye of the boat, detach the
mooring line and winch the boat the remainder of the way
onto the trailer. Attach the safety chain to the bow eye of
the boat. Remove your boat from the water and perform
all post operation checks prior to leaving the parking lot.
Attach the tie downs to the transom, stow all loose items
securely and store the boats fabric top in the down position.
Perform all trailer checks.
10 KINGFISHER BOATS 3125 | 3425 OWNERS MANUAL
Starting your Engine
Consult your engine and control owner’s manuals for proper
engine starting, break-in, and shut-down procedures.
Boarding the Boat
Never attempt to board a boat while the engine is running,
whether from the water or from the shore or dock. When
boarding from a dock or the shore, ensure that the boat is
secured so that it cannot move away from you while you
are boarding. Use a step if necessary to board comfortably.
When boarding from the water, use the transom platform
and ladder if so equipped.
Stopping
We recommend that operators avoid stopping the boat
abruptly because the boats wake can catch up with the
boat and lift the rear of the boat suddenly. Slow the boat
down gradually prior to stopping, and never use reverse
gear as a brake.

Docking
Always enter marinas and dock areas at low speed ~ 5mph
(8km/h) or as posted. Approach the dock head-on, turning
the steering wheel sharply as you come closer to the dock,
bringing the side of the boat you wish to dock on around
to face the dock. Put the boat into reverse gear and turn
the wheel or tiller in the opposite direction to pull the stern
towards the dock, and then put the boat in “Neutral”. The
boat should drift sideways, gently towards the dock. Practice
this often, carefully and at low speeds. Take advantage of
any assistance you may be offered when docking.
POST OPERATION CHECKLIST
❏ After you are nished enjoying your boat for the day
return to the dock or boat ramp and turn your motor off
❏ Check propeller or impellor for nicks
and tangled debris
❏ Check the bilge for gasoline and water
❏ Remove garbage from the boat
Leaving a Dock
When leaving a dock, check for trafc and start the engine
in neutral. Then have a passenger or someone on shore
untie the boat and push the boat away from the dock. Once
the boat is clear of the dock by approximately 1m (3 ft) and
is clear of any obstructions or other boats, put the boat in
gear and proceed with caution at the slowest throttle setting
until the boat is into open water.
Beaching
When beaching the boat, it is critical that the motor
be turned off and the motor or leg tilted up so that the
propeller does not strike sand or rocks on the beach. When
approaching the shore for beaching, slow the boat down so
that a sudden stop will not cause jarring to the passengers
or damage to the boat. As you approach the beach and the
water becomes shallower turn the motor off, tilt the drive up
fully, and drift onto the beach. Once on the beach secure
the boat to a xed object on shore.
Take care in tidal waters that the boat is not beached long
enough for the tide to come in and carry your boat away, or
for the tide to go out and leave your boat stranded.
When you’re ready to leave the beach, have your
passengers board the boat, untie your boat from shore, and
push it into the water. Do not lower the outboard until there
is sufcient water to avoid engine damage. Hull damage as
a result of beaching is not covered under warranty.
❏ Tilt the outboard and trolling motor to the secure
traveling position
❏ Secure all loose items prior to trailering
❏ Wash the boat down with fresh water and pull the
hull’s drain plugs to remove any water from the boat,
securely replacing them afterwards
❏ Consult your engine owner’s manual for special
instructions on purging water from your boat’s exhaust
system and ushing your boat’s cooling system
❏ Perform any post operation maintenance specied in
your engine owner’s manual
Night Operation and Anchoring
Your boat is equipped with navigation lights which must
be turned on from dusk till dawn. The anchor or “all-round”
light must be displayed while at anchor during the night
in any area that experiences marine trafc. Never operate
your boat after dusk if the navigation and anchor lights are
not functioning properly.
Auxiliary Engine Operation
When operating the vessel under the main engine power,
always have the auxiliary motor tilted out of the water.
Engine damage may occur if the auxiliary engine is in the
water while in planning speeds.
3125
|
3425 OWNERS MANUAL KINGFISHER BOATS 11

TRAILERING YOUR BOAT
Please defer to your state or provincial regulations for
towing and licensing requirements.
Gross Vehicle Weight Rating (GVWR)
Take careful consideration of the GVWR. Locate the decal
with the GVWR information. It is usually found on the frame
near the tongue of the trailer. The boat, engine(s), fuel,
water and your boats accessories and gear should never
exceed this rating.
TRAILER CHECKLIST
Before towing your boat complete the below checklist:
❏ Refer to local and regional laws to ensure that
your trailer complies with regulations
❏ Read the trailer manufacturer’s owner’s manual
❏ Check the trailer hitch on your vehicle and make
sure that it is the correct size and load rating
for the trailer you are towing
Trailer Setup
Setting up the correct trailer t for your boat and vehicle is
very important. An improper trailer setup can do cosmetic
as well as visible and unseen structural damage to your
boat. KingFisher strongly recommends having a technician
from an authorized Kingsher dealership ensure your trailer
is properly set up. Damage due to trailering is not covered
under warranty.
Before trailering your boat, become familiar with how your
vehicle handles while towing a trailer. Practice making
turns and get to know the turning clearance that you will
require while towing. Practice backing up with your trailer
and get to know how quickly your trailer will respond to
small movements of your steering wheel. An empty parking
lot is an excellent place to practice.
Handling of the boat on and off the trailer as well as towing a
trailer should never be attempted on a trial and error basis. If
you are a novice boater or have not been boating in a while,
please ask your dealer to show you the proper handling of
the boat on and off the trailer. Use special care for boats
equipped with bow pulpits and anchor systems.
❏ Check for correct function of the trailer braking system
❏ Secure the bow of the boat to the trailer with
the winch line and safety chain
❏ Tie down straps should be attached from the
eyehooks in the transom to the rear of the trailer
❏ Attach the trailer’s break-away chains to your vehicle.
Properly secured chains cross over each other
❏ Secure the trailer tongue over the hitch on your
vehicle using the release handle and locking pin on
the trailer
❏ Tongue jack is in the full upright position
❏ Trailer electrical harness is plugged in and brake
lights, turning indicators, side markers and
parking lights are functional
❏ The boat should be level and sit squarely on the trailer
❏ When trailered correctly, the aft end of the bottom
of the hull should line up as close as possible with
the end of the trailer bunks
❏ Check the trailer for any loose fasteners,
corrosion or damage
CAUTION
Improper trailering may cause irreparable
damage to your boat. If you are unsure
about how to properly secure your boat, please
contact your authorized Kingsher dealer.
12 KINGFISHER BOATS 3125 | 3425 OWNERS MANUAL
❏ Check the tires for proper ination and wear
❏ Check your trailer wheel hubs periodically during
your trip to ensure that they are not overheating
For trailer maintenance parts and warranty information,
please refer to the trailer manufacturer’s owner’s manual.

SECTION 5 – MAINTENANCE AND CARE
EXTERIOR MAINTENANCE
KIngFisher uses marine grade products and takes extra
caution during installation to ensure the longevity of
your boat. However, after each voyage there is a need
to thoroughly clean your vessel to minimize electrolytic
action (galvanic corrosion). In addition to instructions
found elsewhere in this manual and in literature specic to
certain components, the following information is provided
for general maintenance and repair. Because conditions
vary widely in different areas and the frequency and type
of use can differ greatly between owners, intervals for
maintenance are not listed here.
Sacricial Anodes
Sacricial anodes are a highly active alloy material used to
prevent less active alloys from corroding. Your Kingsher
hull is tted with four 2.5lbs aluminium sacricial bar anodes
bolted to the stern of the boat. The boat’s motor(s) will also
be tted with several sacricial anodes. Careful inspection
and replacement of worn anodes are essential to keep
the hull in the best condition possible. Good practice is to
change the anodes if they deteriorate by 40-50%. Failure
to replace a worn anode will result in hull damage and will
void your warranty. See your authorized Kingsher dealer
for sacricial anode replacement information.
Cleaning
Wash your boat with soap and fresh water the way you
would wash a car. Power washing at more than 1000psi
may cause paint to delaminate. Pull the hull drains if
practical and allow the boat to dry thoroughly. Clean all
surfaces and apply a coat of automotive or marine grade
wax protectant two to three times annually to protect your
painted nish from the elements, and to seal the metal
where any paint scratches may have occurred. Rinse with
fresh water after every salt water use. Always spot test new
cleaners and waxes before using. Marine growth, barnacles
and other debris deposits should be removed from the hull
prior to storage. Never use a metal brush of any kind on
the exterior surface of your boat. Do not use abrasive or
non-biodegradable solvents. Do not discharge chemicals
overboard. Regular periodic maintenance will maintain the
overall appearance of your boat.
Oxidization and Corrosion
The high electrically conductive nature of salt water
intensies corrosive action on aluminum. The hostility of
the marine environment affects most materials - metals,
wood, plastic, breglass, etc.
KingFisher hulls are manufactured with marine grade
aluminum alloys such as 5086 - H32 and 5052 - H32. Marine
grade aluminum alloys produce a natural protective lm -
either a whitish or darker surface layer - when exposed to
oxygen or water. Although extremely thin, (approx. 5 to 10
millionths of a millimeter), this oxide lm forms a corrosive-
resistant barrier. Experience shows that large and small
vessels constructed of these alloys can stay in constant
saltwater service for decades as long as proper care is
taken.
Avoid dissimilar metals coming in contact with aluminum
surfaces (e.g. all ferrous metals including steel, brass, or
copper ttings). If there is a need to attach ttings made
of a dissimilar metal make sure that a non-wicking gasket
or sealant is placed between the tting and the boat hull.
If the hull is drilled for any reason, a sealant such as a
marine grade silicone should be used as a barrier between
the hull and components. See the corrosion manual for
more information.
Warranty does not apply to:
Corrosion or damage resulting from fuel overlling, the
use or storage of harmful solvents or cleaners, electrolysis
caused by reversed polarity connections or inadequate
galvanic isolation, improper use of anti-fouling paint, or
dissimilar metals and saltwater exposure. Salt water
corrosion damage resulting from absence of zinc anodes,
cathodic protection devices, improper or unattended
storage or moorage.
Paint Touch Ups
For small scratches that need repainting, clean the area to
be painted of wax, grease and dirt. Apply the touch up paint.
When the paint is dry, (at least 24 hours) polish the area
with an automotive cutting wax compound.
For larger scratches that need repainting, please see your
authorized Kingsher dealer or an automotive body shop.
3125
|
3425 OWNERS MANUAL KINGFISHER BOATS 13

COMMON TYPES OF CORROSION
Galvanic Corrosion
Common type of corrosion caused by dissimilar metals. This can occur for a
variety of reasons including dissimilar ttings and fasteners in direct contact
with bare aluminum; or even loose items like sinkers and old hooks that nd
their way into the bilge or an inconspicuous area. These dissimilar metals cause
galvanic corrosion when immersed together or while in contact with saltwater,
brackish or even contaminated freshwater.
Crevice Corrosion
Lack of oxygen can be another reason why aluminum corrodes. Standing
saltwater, brackish, and even contaminated freshwater sitting in the hull of your
boat over a long period of time can cause tiny areas where the oxide layer
slowly gets deteriorated. Not having that natural hard protective coating of oxide
will cause the aluminum to become pitted over time and could potentially evolve
into microscopic pinholes through the hull.
Electrolysis Corrosion
When an electrical component in either the AC or DC system is incorrectly
installed or has an electrical fault which leads to ground. This fault doesn’t
necessarily need to be on your vessel to cause an issue. It could be located on
a neighboring vessel or a boat on the other side of the marina connected to the
same AC grounding bus on the marina supplied shore power connection. These
faults will turn your boat and every other boat in the marina into a battery, with
the saltwater as the conducting electrolyte.
Poultice Corrosion
Accumulation of debris can create a highly corrosive condition. Combined with
aluminum, this debris creates an acidic solution called aluminum hydroxide that
can corrode through the parent metal. These areas tend to seriously aggravate
aluminum when there is wet-dry cycling.
14 KINGFISHER BOATS 3125 | 3425 OWNERS MANUAL

Identifying and Managing Corrosion
After every voyage you must pay special attention to
the overall cleanliness of your vessel. No different than
storing your gear and hanging items to dry, there is a
need to clean off the saltwater that has come into contact
with your vessel during your outing. A thorough freshwater
wash down is an effective way to reduce the risk of
corrosion, which could require extra maintenance in the
future. Places like under your cutting board, aft helm,
and nylon downrigger mounts are examples of points
of contact that aren’t meant to be watertight and should
always be well rinsed with fresh clean water after every
use. For best results, an initial quick heavy mist well help
loosen the dried salt crystals. Follow this up with a heavy
rinse working from the top down, putting extra spray into
areas with tight contact points that have little chance of
drying up quickly on their own.
Bilge compartments must also be kept as clean as
possible by ushing with fresh water every time you return
to dock. Make sure all internal drain-ways are free from
scum build-up and loose debris. If you notice a white
powder forming in crevasses it’s a sign this area has
been overlooked in previous cleaning attempts. Clean this
powder with a stainless tooth brush so the aluminum can
once again form a new oxide layer. This type of corrosion
will require immediate attention to stop further growth and
should not be delayed.
Chipped paint from stones while trailering, or a scratch
from a loose deck board, will also have a negative effect
when in contact with saltwater. Exposed aluminum in your
paint nish will allow moisture in between the paint and
hull. This will cause paint to blister and peel. It is important
to seal any exposed areas to prevent corrosion forming
and spreading.
Sacricial Anodes and Galvanic Protection
Depending on which model and options you have selected
your boat may be equipped with sacricial anodes and a
galvanic protection device.
A galvanic isolator is present on all models equipped
with a minimum 30A shore power system and is installed
just after the vessel’s shore power connection. Signals
can pass through this galvanically isolated circuit, but
stray currents such as differences in ground potential or
currents induced by AC and DC power are blocked.
Sacricial anodes on your vessel are part of your cathodic
protection system. The anode is made from a metal alloy
with a more “active” voltage than the surrounding metal
it is protecting. The difference in potential between these
two metals means that the sacricial anode material
corrodes in preference to the surrounding area it is
protecting.
Anodes do require maintenance to keep them at their
peak effectiveness. Repeated cleanings throughout the
season with a wire brush may be required to remove any
buildup that may form.
The anodes on your vessel should be inspected and
cleaned every two months. You should change your
anodes after it has corroded to half its original size or
when you’ve accumulated twelve months of immersion in
saltwater. When anodes are cleaned or replaced, it must
also be veried that they have good continuity with the
hull. This is an easy step by using a multi-meter set to the
ohms scale.
Blistering and peeling paint around fasteners and
ttings or chalky white powder is a sign that galvanic
corrosion may be taking place. These are areas not
properly rinsed from previous trips or areas where
movement of a loosened fastener has allowed water to
enter and make contact between the stainless fastener
and bare aluminum. This component must be removed
and the corrosion must be eliminated by light sanding
at a minimum. The affected area will then need to be
recoated with matching paint. The component should
then be reinstalled using the “New Component Installation
Instruction” sheet.
3125
New Sacricial Anode Anode Needing Replacement
|
3425 OWNERS MANUAL KINGFISHER BOATS 15

NEW COMPONENT INSTALLATION INSTRUCTION
If a xture or addition to your boat becomes loose, it increases the risk of exposure.
Check your xtures regularly. To safely and effectively install or replace components, follow the below instructions.
1. Place component
and hole the
markings with a pen
2. Ensure there are
no obstructions
on the back side
of your mounting
location before
drilling.
3. Drill and deburr
holes. Clean up
all metal chips
and shavings so
that none will get
trapped in your
newly installed
component
5. Center the
component over
pre-drilled holes
6. Heavily coat all
fasteners that will
be used to hold the
component in place.
7. There should be
no visible gaps in
the sealant when
the component is
tightened down.
4. Apply a generous
amount of sealant
such as Sikaux
291, Loctite UR 3370
or 3M 5200
16 KINGFISHER BOATS 3125 | 3425 OWNERS MANUAL
8. A soapy water
solution can be
used to clean up the
remaining excess
sealant.

INTERIOR MAINTENANCE
Cabinets and Countertops
Laminate countertops are offered on all Kingsher
models. To keep the sapelli wood cabinets and laminate
countertops in optimum condition, clean the cabinet as with
a lint-free cloth slightly dampened with water and soap. Dry
immediately with a lint-free cloth. Avoid using abrasive pads
or powdered cleansers as these products may scratch and
penetrate the surface, allowing moisture to enter and cause
deterioration of the nish. Keep the surface dry by wiping
up spills and water marks as they occur.
Vinyl Floor Coverings
Remove ordinary dirt and smudges with a mild soap and
water solution and a clean soft cloth or towel. Dry with a
soft lint-free cloth or towel. Do not use abrasive powder,
steel wool, or industrial strength or solvent cleaners. The
use of upholstery “conditioners” or “protectants” is not
recommended and should be avoided on all vinyl coated
fabrics. For tough stains, Formula 409 All-Purpose Spray
Cleaner or Fantastik Spray Cleaner is recommended by
the vinyl manufacturer.
Kingleather Upholstery
The vinyl seats can be routinely washed with a soapy water
solution. For tough stains, use Spray Nine. Protect the seat
coverings with a 303 protectant.
3125
|
3425 OWNERS MANUAL KINGFISHER BOATS 17

MAINTENANCE AND ADJUSTMENTS
Periodic Inspection Checklist
❏ Check entire fuel system for leaks
❏ Check all engine mount fasteners for tightness
❏ Check all deck fasteners for tightness
❏ Inspect hull and motor mounts for cracks and
other signs of fatigue such as deep scufng
❏ Check drain plug
❏ Check bilge for oil, water and gasoline
❏ Check steering lines for wear and ease of function
❏ Check oil level in engine and power steering pump
❏ Test battery and check for damage or corrosio.
❏ Test all switches, lights, horn, and accessories
❏ Check for burnt out lights
Inspecting the Steering
Your boat will come with an owner’s manual for the type
of steering system that your boat is equipped with. Refer
to this manual for information on proper maintenance.
Never operate your boat with a damaged or improperly
functioning steering system. Conrm that the hydraulic
reservoir is full, and check all hoses and connections are
leak-free and that the uid isn’t contaminated.
Inspecting the Circuit-Breakers and Fuses
Your boat is equipped mainly with resettable circuit
breakers. These will pop out if overloaded and can be
pushed back in with a ngertip to reset them. There is an
in-line grey 50A circuit breaker coming off the main battery
lead to your distribution panel. Inspect the fuses and the
electrical system of your boat monthly. You can also nd
a panel of fuses under the main helm. Shut off the main
electrical switch by your battery (or disconnect the battery)
and inspect the accessories. Trace the circuits and inspect
them for chang and for broken or damaged wires, plugs,
switches or connectors. Never bypass a fuse or circuit
breaker. If you are unable to nd the cause of the blown
circuit, have your boat serviced by your Kingsher dealer.
❏ Check seat fasteners and swivels
for tightness and wear
❏ Inspect zinc hull anode and replace if required
❏ Conrm proper operation of galvanic isolator.
See page 30 of this manual
Inspecting the Fuel System
The fuel system can be accessed through removable
panels in the transom and in the deck. Remove the
panels and check the ll tting, the tank ttings and
the vent lines at the ller cap and at the tank for signs
of leakage. Also check the hoses and primer bulb
(if equipped) for signs of wear, chang and other
deterioration. Replace any damaged fuel hoses
immediately. Check the fuel lters. Change the lters
once a season or after every 100hrs of operation.
Servicing Under the Deck
Access to the bilge and fuel tank is gained by removing
all the sidewalk screws and lifting the rear deck off.
Transducer Mounting Plates
Transducer brackets are a standard design feature. They
are intended to reduce the need to drill holes directly into
the hull below the water line. The plates are located at
the base of the transom, where the hull meets the rear of
the boat. Simply attach your transducer(s) directly to this
plate on the transom. Do not drill holes for routing cables
below the water line. Extreme caution must be used when
installing this type of transducer to avoid leakage and
potential injury or death.
WARNING:
GASOLINE VAPORS CAN EXPLODE IF IGNITED, CAUSING SERIOUS INJURY OR DEATH.
INSPECT FUEL SYSTEM FOR LEAKS REGULARLY.
18 KINGFISHER BOATS 3125 | 3425 OWNERS MANUAL

STORAGE AND WINTERIZING
KingFisher recommends your boat be winterized by an
authorized dealer. Your boat should be stored in a covered,
well ventilated area to prevent fungus, mold and mildew. It
is best to store it with a breathable cover over it to prevent
corrosion and staining promoted by leaves, tree sap and
other debris, and to prevent rainwater from accumulating
inside the boat.
Engine
Refer to engine manufacturer’s owner’s manual for
information and instructions on preparing your engine(s) for
winter storage.
Drain Plug
Always remove the drain plug from the boat when storing it
for long periods of time. This will ensure that any water that
has collected in the bilge will drain. When storing the boat
the bow should be slightly higher than the stern, this will
help excess bilge water to drain fully. Inspect the drain plug
when re installing it and replace it if necessary.
Fresh Water System
Drain fresh water and grey water holding tanks. Once tanks
have been drained, add RV anti-freeze and ensure that it
is circulate throughout complete water system. Ensure that
all fresh water has been ushed from all faucets and pumps
and that antifreeze is present in all of the water lines.
Fuel System
Top off the fuel tank with fresh fuel to approximately 7/8
full, adding a fuel conditioner and stabilizer. Consult
your Kingsher dealer for fuel conditioner and stabilizer
purchase information). A 7/8 full fuel tank is less likely to
develop condensation, reducing the risk of contaminating
the fuel. This will also prevent the fuel from expanding and
running out of the fuel vent hose. Running treated fuel
through the engine during the engine winterization process
will also help protect the fuel system.
NOTE: The use of fuel conditioner and stabilizer eliminates
the need to drain the fuel system. Consult your dealer if you
prefer to drain the fuel system.
Always store your boat in a well ventilated area. Unlike a
car, your boat is not equipped with a vapour-tight fuel tank.
Batteries
The battery(s) should be removed for winter storage.
Batteries can suffer permanent damage as a result of
excessive or prolonged periods of discharge. Use terminal
paste to prevent corrosion on the battery terminals and
clamps.
1. Turn off the battery switch(es) and remove the
battery(s).
Ensure that hot water system is drained, ushed and
winterized with R.V. anti-freeze.
Trailer
We recommend your trailer be winterized by an authorized
Kingsher dealer or by a qualied technician. The trailer
frame should be washed and internally ushed if used in
salt water. Wheel bearings and breaking system can be
permanently damaged if not properly winterized and free
of all water.
2. Inspect each battery for cracks or leakage and ensure
the battery terminals are free from corrosion and dirt.
Clean the battery’s casing and terminals with a mixture
of baking soda and water (one tbsp of baking soda to
one-cup water). Apply dielectric grease or petroleum
jelly to the battery terminals and to all exposed
connectors.
3. If the battery is to be stored for a long period of
time, store the battery in a cool, dark place. Check
the specic gravity of the battery uid at least once
a month and recharge if the battery gets too low.
Specic Gravity: 1.28 at 68 degrees F. Sparks,
cigarettes and open ame can lead to a hydrogen
explosion. Your battery should be kept fully charged at
all times.
3125
WARNING:
BATTERIES CAN PRODUCE EXPLOSIVE
HYDROGEN GAS. BATTERY EXPLOSION CAN
LEAD TO BURNS, INJURY AND DEATH ALWAYS
SERVICE BATTERIES IN A WELL VENTILATED AREA
KEEP AWAY FROM SPARK AND OPEN FLAME
|
3425 OWNERS MANUAL KINGFISHER BOATS 19

RE-COMMISSIONING BOAT AFTER STORAGE
Engine
Refer to the engine operator’s manual for detailed
information on re-starting after winter storage.
Batteries Checklist
❏ Terminal posts – clean with wire brush or steel wool
❏ Cable clamps – attach positive (+) cable rst, then
negative (-) cable
❏ Wiring – inspect for deterioration and service or
replace as required
Steering System
Have steering system checked by and an authorized
Kingsher dealer.
Fuel System
Inspect for fuel in the bilge, loose connections, worn
hoses, and leaks.
Miscellaneous Items Checklist:
❏ Through hull ttings – Check to ensure water passage
is unobstructed and hoses and ttings are serviceable
❏ Navigation lights – Check for proper operation
❏ Bilge pumps – Check all pumps and oat
switches for correct operation
❏ Wiring – Check for loose connections
❏ Switches – Check for proper operation
of all equipment and components
❏ Bilge blowers – Check for proper operation;
turn blowers on and place hand over hull blower
vent to make sure air is exiting from vent
❏ Anchor lines and gear – Inspect and
replace if necessary
❏ Hull drain plugs – Installed
❏ Bilge – Clean thoroughly
❏ Engine uids – Check for proper levels as
described in the manufacturer’s owner’s manual
Trailer:
Refer to the trailer manufacturer’s owner’s manual
for re-commissioning of the trailer after storage.
20 KINGFISHER BOATS 3125 | 3425 OWNERS MANUAL

SECTION 6 – SYSTEM AND OPTIONS
THRU HULL LOCATION
1. Baitwell drain
2. Fish box macerator discharge
3. Main bilge pump discharge
4. Secondary bilge pump discharge
5. Livewell drain
6. Fresh water deckll
7. Cabin bilge pump discharge
8. Sink drain
9. Grey water tank vent
10. Grey water pump out
11. Fuel ll
12. Starboard side sh box macerator
13. Grey water overboard discharge
Note: Thru hull location may vary due to individual options selected.
3125
|
3425 OWNERS MANUAL KINGFISHER BOATS 21

IMPORTANT
Check with the Coast Guard and local authorities prior to
discharging grey water overboard.
SYSTEMS
Before operating your boat, become familiar with all
controls. Consult your authorized KingFisher dealer about
any controls or functions that you do not understand.
Bilge Drain
The bilge drain is located at the lowest part of the bilge at
the stern of the boat. When draining the bilge or storing the
boat for longer periods of time, the drain plug should be
removed. When replacing the drain plug it is advised that a
small amount of marine sealant be applied to the threads
before the plug is installed.
Steering System
The steering system requires checking each time that the
boat is taken out on the water.
• Check to ensure that the steering system operates
correctly and smoothly prior to each trip out on the
water.
Fuel Sending Unit
The fuel sending unit is a mechanical device that is
located in the fuel tank. It sends a signal to the fuel gauge
monitoring the amount of fuel that is present in the tank.
NOTE: The fuel sending unit will only give an accurate
reading when the boat’s fuel tank is level. Do not depend on
the fuel gauge as your only means of determining fuel levels.
• Poor or erratic steering may be a sign that the oil level
is low, or that uid or air is leaking out of or into the
system. Leaks can occur in the steering hoses, the
cylinder, or at connection points. Do not attempt to
operate your boat if you suspect a steering system
problem.
• Consult an authorized KingFisher dealer if the steering
system is not functioning correctly. Only a qualied
technician should adjust steering systems. Ensure that
the steering system is lubricated at the beginning of
the boating season and properly winterized at the end
of the season.
FUEL SYSTEM
When lling the gas tank care should be taken not to
spill fuel onto the paint of your boat. Any fuel that may
be spilled on the paint should be immediately wiped off.
Keep tanks approximately 7/8” full during boating season
to avoid condensation and fuel expansion. You may wish
to have a fuel separator installed to prevent water from
entering the engine(s).
If the fuel tank needs to be cleaned or water is found in
the fuel system, refer the boat to an authorized Kingsher
dealer
For recommended fuel please refer to your Engine
Manufacturer’s owner’s handbook.
Fuel Leak Check
Before operating the boat, check the fuel system for leaks.
Open the bilge doors and visually check all fuel hoses, vent
hoses, ttings, and the tank for leaks. If no leaks are found,
carry on with your pre-operation inspection.
If a leak is found or strong gasoline odor is detected,
DO NOT START THE ENGINE. Consult an authorized
Kingsher dealer.
Kicker Motor Fuel Quick Disconnect
A quick disconnect option is offered for the kicker fuel supply
line. The quick disconnect is located on the starboard side
of the transom.
The quick disconnect allows the fuel supply line to the
kicker to be easily detached from the transom bulkhead. To
do this, grasp the tting located at the transom end of the
kicker fuel supply hose and pull back rmly on the ttings
collar.
22 KINGFISHER BOATS 3125 | 3425 OWNERS MANUAL
The safety fuel shut off valve is clearly labeled and located
behind the rear bilge doors around where the fuel lters reside.
When the kicker is not in use, always turn off the fuel supply
shut off valve and tilt the engine up and out of the water.

Re-fueling the Boat
• Do not smoke when refueling.
Keep away from all other ignition sources.
Engine Oil and Fluid Levels
Engine oil and fuel levels specic to your engine model
can be found in the engine manufacturers owner’s manual.
• Stop engine and turn off ignition.
• Refuel in a well-ventilated area. If the boat is in the
water, be sure it is securely moored prior to refueling.
Avoid overlling the tank as fuel expansion may result
in a fuel spill. Gasoline spilled directly on the hull paint
of your boat may result in paint damage that will not
be covered by warranty.
• All passengers must be out of the boat during
refueling.
• Open the gas cap and begin refueling.
Refer to hull plan for location of gas cap.
• When tank is lled to the appropriate level,
replace the gas cap.
For engine oil and other engine uid levels, consult the
engine manufacturer’s owner’s manual.
For easy reference please mark down the engine
manufacturer’s recommended oil specications here:
Main Engine(s) Crankcase Oil: _____________________
Main Engine(s) Gearcase Oil: ______________________
Main Engine(s) Power Trim Oil: ____________________
Kicker Motor Crankcase Oil: _______________________
Kicker Motor Gearcase Oil: ________________________
Kicker Motor Power Trim Oil: _______________________
CAUTION
IF GASOLINE SPILLS ONTO YOUR SKIN, IMMEDIATELY WASH WITH SOAP AND WATER. CHANGE
CLOTHING IF SATURATED WITH GASOLINE. IF GASOLINE GETS INTO YOUR EYES OR FUMES
ARE INHALED, SEEK MEDICAL ATTENTION. IF GASOLINE IS SWALLOWED, CONTACT A POISON
CONTROL CENTER AND SEEK IMMEDIATE MEDICAL ATTENTION.
3125
|
3425 OWNERS MANUAL KINGFISHER BOATS 23

ELECTRICAL SYSTEM
KingFisher Wiring Harness
Weather proof female plug
KingFisher’s standard main wiring harness has been spliced and tted with female weather proof plugs for each option offered.
If a boat has not been factory installed with a specic KingFisher option, the wiring harness may still have been spliced
and plugged to provide a connecter to accommodate the installation of that option after the boat has left the factory.
3425 Diagram
The following diagrams shows general wiring harness routings and plug locations for standard and optional features:
1. Fuse panel and ground block
2. AC panel (option)
3. DC fridge switch
4. Galvanic isolator (in wall)
5. Carbon monoxide (CO) detector
6. Faucet
7. Fridge
8. Toilet macerator switch
9. Washdown switch & shbox switch
10. Fishbox macerator switch (28/30 only),
livewell switch (option)
11. Remote battery controller
24 KINGFISHER BOATS 3125 | 3425 OWNERS MANUAL
12. Remote battery switches
13. Main fuse and bilge fuse(s)
14. Bilge pumps
15. Head stall light
16. Deck lights
17. Shower sump (under deck) (option)
18. Invertor Controller (option)
19. Power invertor (under deck) (option)
20. Cook top (option)
21. Fishbox macerator pumps

Fuse Panel
A fuse panel label is located underneath the dash console.
This label shows the location of the fuses for each option.
Dash Panel
A. Anchor/Nav light
B. Forward bilge
C. Aft bilge
D. Forward heat fan
E. Aft heat fan
F. Interior lights
G. Aft deck lights
H. Starboard and center wiper
I. Port wiper
J. Horn
NOTE: The dash layout may change depending on the
boat model or options chosen.
Example of a fuse panel layout
When a fuse is suspected to be blown, the following
procedure should be followed:
❏ Turn off the component or appliance
❏ Turn the battery switch to the off position
❏ Locate and remove the blown fuse
❏ Replace the blown fuse
❏ Turn on the battery switch to the desired location
❏ Turn on the component or appliance
IMPORTANT: If a fuse burns out continually, consult your
authorized KingFisher dealer.
NOTE: As part of the pre-trip safety check list, it is a good
idea to make sure that there is a selection of spare fuses
on board that can be used in case of emergency.
Breakers
The breakers are located next to each of the dashboard
switches and the 12v accessory plug in. When the breaker
is tripped, the button will pop out. Simply press the
breaker button back in to re-set. If the same breaker pops
continually, consult an authorized Kingsher dealer.
Navigation Lights & Horn
The correct function of the navigation lights and horn are
critical to safe operation of the boat.
Cabin lights
The cabin lights are controlled by the cabin light switch.
Deck lights
The deck light illuminates the cockpit area of the boat and
is operated by the deck light switch.
Wipers
The wipers are controlled by operating their corresponding
dash mounted switches.
3125
|
3425 OWNERS MANUAL KINGFISHER BOATS 25

Troubleshooting
If the navigation, anchor lights or horn are not
operating correctly:
❏ Conrm that the battery system is fully charged and
functioning and that all wires leading to the batteries
are secured rmly to the battery posts
❏ Check that the main 30 amp fuse and the fuse under
the dash have not blown
❏ Check that the bulbs in the lights are not blown
❏ Once the above has been checked, if the lights
or horn are not functioning correctly consult an
authorized KingFisher dealer
Note: If the boat is going to be operated at night or in poor
visibility, the navigation light and the anchor light must be
turned on. If the boat is being anchored at night or in poor
visibility, the anchor light must be turned on. Check the local
State or Provincial guidelines or with the U.S. or Canadian
Coast Guard for this and further safety regulations.
Accessory Wire Harness (Optional)
An optional wiring upgrade is available on all
KingFisher models.
❏ Check that the 30 amp inline fuse has not blown
❏ Check that the component fuse has not blown,
and that the component is not faulty
❏ Once that all the above has been checked, if the
component is still not operating, consult an authorized
Kingsher dealer
If a component or appliance trips the breaker:
❏ Turn off the appliance or component
❏ Move the breaker switch back into the on position
❏ Turn on the component or appliance
Note: If an appliance or component trips its breaker
continually, do not use the appliance or component and
refer to an authorized KingFisher dealer.
This consists of a direct power feed from the battery
switch to a fuse block and bus bar located underneath
the dash.
The positive feed is fused with a 30 amp inline fuse located
close to the battery switch, behind the bilge doors.
If components that are wired into the upgrade wiring
system fail to operate:
❏ Conrm that the battery switch is turned on.
❏ Conrm that the battery system is fully charged and
functioning and that all wires leading to the batteries
are secured rmly to the battery posts.
26 KINGFISHER BOATS 3125 | 3425 OWNERS MANUAL

ANCHOR ROPE AND CHAIN REQUIREMENTS
Anchoring:
(a) Anchoring (manually controlled freefall):
1. Release any anchor locks.
2. When safe, insert the Lewmar wrench in to the capstan drive cap. Rotate clockwise to grip the gypsy and
anticlockwise to free the gypsy controlling the rate of descent of the anchor. Lock the clutch by turning the drive cap
clockwise and engage the anchor locks.
3. To return the windlass back to powered operation lock the clutch by rotating the capstan drive cap clockwise until
tight and remove the wrench handle.
4. Engage the circuit breaker/isolator and press the up button.
5. NOTE: If the clutch nut is not tight the internal clutch mechanism will rotate freely and not engage the drive
to the capstan.
a. Anchoring (powered UP/DOWN):
To release anchor:
1. Check clutch nut is tight. If the clutch nut is not tight the internal clutch will rotate freely and not engage
the drive to the capstan.
2. Release any anchor locks.
3. Engage the circuit breaker/isolator. Press DOWN button.
To retrieve anchor:
1. Press the UP button continuously to retrieve the anchor.
Note: If the clutch nut is not tight the internal clutch will rotate freely and not engage the drive to the capstan.
3125
|
3425 OWNERS MANUAL KINGFISHER BOATS 27

TruePower Combi 2000 Pure Sine Wave Series
Your new ProMariner TruePower Combi unit is current limiting with built in “smart”
features to monitor vital functions and preclude damage to the charger and the
installed system. The unit incorporates alarms, indicators and an auto shutdown feature for peace of mind and trouble free operation. This section contains
descriptions of the LED indications and functions of controls. Turning the unit OFF
and ON again will restart the unit after a fault, however, if the fault is still present,
the unit will again shut down.
Inverter – The TruePower Combi serves as a Pure Sine wave or a Quasi
(modied) Sine wave inverter, converting DC power to clean, reliable AC power.
Charger – The TruePower Combi also serves as a high efciency automatic
battery charger suitable for all commonly available battery types.
Transfer Switch – The TruePower Combi includes an internal, automatic 30 amp AC Transfer switch that senses the
presence of AC shore/station power. Upon connection to a shore power/shore station source, the Combi will switch
from INVERTER mode (providing AC power via DC battery source) to CHARGE mode, automatically. This switch, in
compliance with ABYC E-11, disconnects the neutral AC lead from the AC ground when in shore/station power mode.
28 KINGFISHER BOATS 3125 | 3425 OWNERS MANUAL

OPTIONS AND FEATURES
Airtronic D2 Heater (Optional)
The Airtronic D2 is a compact diesel burning 7,500 BTU/
hr air heater. These heaters provide hot air to the interior
of the boat for passenger comfort and window defrosting.
Various control options are available to operate the heater.
It cycles through four heat outputs modes, (boost, high,
med, low) in order to maintain a desirable temperature. In
the event that the heat output required is less then what
the “low” power mode is distributing the heater switches to
“stand-by” mode.
Espar Hydronic Heater (Optional)
The Espar Hydronic heater not only provides hot water but
also cabin heat by ducting hot air via fan heaters into the
cabin, cuddy and dashboard vents. The Espar Hydronic
heater works by circulating heated water in a closed
loop through a heat exchanger in the hot water tank and
then in turn through two different radiator blower units
located below the rear counter top and underneath the
dash footrest. The blowers for these units are operated by
switches on the dash.
Hot Water Tank
The hot water tank works in conjunction with the Espar D5
hydronic heater and the shore power. When the boat is
plugged into shore power, the hot water tank runs off 120
AC voltage with the main breaker switched on and the
hot water tank breaker switched on. When the boat is not
plugged into shore power, the water gets heated by the
coolant being circulated by the D5 Espar heater.
Shore Power System
The shore power breaker panel is located to the starboard
side of the helm seat.The shore power option enables the
boat user to run the boats electrical components without
the use of the internal battery system.
These lights are located adjacent to the panel’s breakers.
If reverse polarity is indicated immediately disconnect the
shore power cord, and consult an authorized KingFisher
dealer.
A green light on the shore power breaker panel will be
illuminated when the system is operational. Each breaker
in the breaker panel is clearly labelled with its intended
use.
The shore power system is installed with two 110v power
receptacles. The rst is located next to the breaker panel
with the second located below the rear port side counter
top. These receptacles are GFI protected and have a
breaker button built into the front of the receptacle. If the
GFI breaker trips, the button will pop out. Depress the
button to re-set the breaker. There is also a test button
located on the face of the GFI plug in, simply depress the
test button until the built in breaker button pops out. This
test should be carried out frequently to ensure that the
circuit breaker is working correctly. Be sure to reset the
breaker button before using the plug in.
To hook up to shore power:
❏ Ensure that the AC main 30 amp switch on the shore
power panel is turned off.
❏ Plug the shore power cord into the boat’s shore power
socket. The boat’s plug in socket is located below the
starboard side gunnel in the top side tray.
❏ Plug the shore power cord into the dock power supply.
❏ Turn on the shore panel AC main 30 amp switch.
❏ Check the shore power panel for reverse polarity
warning lights.
3125
Inverter/Battery Charger
The Pro Mariner True Power 2000 is a combination
inverter/battery charger, converting DC power to clean,
reliable AC power to allow systems on board to function
by DC battery power or by AC shore power. This inverter
also has an integrated battery charging system that
automatically starts charging all batteries on board when
plugged into shore power.
When plugged in to shore power, the presence of AC
current begins the charging cycle, as well as indicates
to the whole system that the inverter is NO LONGER
providing inverter power and is providing AC power as a
pass-through.
|
3425 OWNERS MANUAL KINGFISHER BOATS 29

STATION
OPERATION
All models with invertors QC Galvanic isolator and hull bond testing
Galvanic Isolator
Every boat that receives a shore power package also receives a galvanic isolator. The isolator works by interrupting
galvanic circuits created with other boats and the dock when the boat shore power is plugged in and operational.
The galvanic isolator’s operational indication lights are visible behind the helm seat through an access hole in the
carpeted shore power panel mounting board.
For operational instructions please refer to the manufacturer’s owner’s manual.
AC/DC Fridge
An AC/DC fridge option is provided with the Dockside
package. Both AC and DC power can be connected
to the fridge at the same time. The unit will always run
on AC when AC power is available. Should the AC be
disconnected there is a one minute time delay before the
unit continues to run on DC. If AC power is reintroduced
the unit immediately switches back to AC.
Two Burner Alcohol Stove
The ORIGO stove has a non-pressurized alcohol burner.
The alcohol is absorbed into a non-ammable material
in the canister. Remove the cutting board. Pull the stove
top latch forward and lift the stovetop up. Caution should
be taken while fueling the canister. Be sure the ame is
completely extinguished. Remove each canister from the
stove to fuel one at a time. It should be cool enough to
be tangible with bare hands. Do not over ll the canister.
Start up: Turn the power on and set the thermostat
between 3 and 4. You can make further adjustments after
the box has cooled down. Allow the refrigerator to come
down to temperature before putting product in. Setting
the thermostat to a higher setting i.e. 7, will not decrease
the time required for the unit to cool down to its normal
operating temperature. AC/DC units cool at the same rate
Max capacity is 1 quart. Check the fuel level by tilting the
canister vertically. Hold this position for 5-10 seconds.
Once the fuel is visible in the non-ammable material at
the bottom of the opening, the canister is full. The stove
will operate if the canister is not lled to the max capacity.
Be sure to clean up any spilt fuel. Close the stove top
before lighting.
on DC as on AC.
Lighting the burner: A hand held butane bbq lighter is
recommended. Slide the control to the maximum opening.
Stick the lighter in towards the canister and ignite.
Extinguishing the ame: Slide the control to the “Off”
position. Wait a few moments. Conrm the ame is
extinguished by opening it back to wide open. Repeat if
ame is still burning. Wait until the stovetop is completely
cooled off before replacing the cutting board.
30 KINGFISHER BOATS 3125 | 3425 OWNERS MANUAL

Wallas 85DU Diesel Stove
Fueling: The diesel tank for this device is shared with
the diesel D5 Espar heater. It is located mid ship, behind
the cabin bulkhead on the port side. It is encased in an
aluminum compartment with a hinged door.
Start up: To get the stove turned on, continuously press
(3) for approximately 2 seconds, at which point, the power
control indicator (4) illuminates, letting you know the stove
is ready for use. The stove switches normal mode once
the switch is released after holding for 2 seconds. At this
point, the yellow heating indicator (7) illuminates. The red
combustion indicator (1) will illuminate when the burner
ame has be ignited and the ame is stabilized (About 5
minutes). The whole start up process takes approx. 11
minutes.
BATTERIES
The 3125/3425 will be equipped with two starting batteries
and two house batteries. Certain engine manufactures
recommend different types of batteries over others. Refer
to the engine manufacturer recommendations for proper
battery type and size. There will be one 24 series starting
battery for each engine, located on the starboard side
inside the bilge access area. The house batteries are
located on the port side and will be 27 series, lead acid.
Battery Control Center
The battery control center main cluster is located in the
bilge compartment. This system has a dedicated key
switch, located on the Starboard side in the face of the
cabinet. This key switch controls the starting and house
battery switches. It allows the the operator to conveniently
operate all battery isolation with a simple turn of a key.
Once the engines have been started and the cranking
batteries have reached the peak charge of 13.7/24.4 volts
the system will automatically switch to charging the house
batteries. This ensures all batteries are being charged
adequately.
Battery management key switch. Located on dinette face.
Normal use: The heating level is adjusted by turning the
knob (2). Avoid turning the knob rapidly as this may cause
the unit to get sooty.
Heating/thermostat mode: Requires the blower lid
assembly. When the lid is folded over the ceramic top,
the heating mode can be activated by turning the control
knob (2) to min-max-min-max while the yellow heating
indicator (7) is illuminated. To conrm the heating mode
has been activated, the yellow thermostat indicator (5) will
be illuminated. Once passed the ignition phase, the temp
is controlled by turning the knob. When the thermostat
indicator is illuminated brightly, the desired temp has not
been reached. When it dims, the desired temp has been
achieved.
Returning to manual mode: Repeat the min-max-minmax procedure and the thermostat indicator will go out
and the unit will return it to manual use mode.
Shut down: By pressing the heating switch (3) for approx.
2 seconds at which point the yellow heating indicator light
(7) will go out immediately. The red combustion indicator
(1) will continue to blink for 5 minutes while the unit is
cooling down. It cannot be restarted until it is cooled down
and the red indicator stops ashing.
Battery Maintenance
❏ Keep battery cables tightly connected and corrosion free.
❏ Ensure batteries are securely mounted at all times.
If the boat is not used for a month or more:
❏ Remove the batteries
❏ Clean the battery’s casing and terminals with a mixture
of baking soda and water (one tbsp of baking soda to
one cup water)
❏ Apply dielectric grease or petroleum jelly to battery
terminals
Note: If the battery is to be stored for a prolonged period
of time, store the battery in a cool, dark place. Check the
specic gravity of the battery uid at least once a month
and recharge the battery if required.
Battery Chargers
The optional charger is located behind the rear starboard
side inspection panel and is set up to charge
all batteries when the shore power is plugged in.
Please refer to the manufacturer’s owner’s manual for
operating and safety instruction.
3125
|
3425 OWNERS MANUAL KINGFISHER BOATS 31

TRIM TAB OPERATION
The trim tab switch is located to the starboard
side of the main steering wheel.
Please refer to the manufacturer’s owners
manual for operating and safety instruction.
BOW THRUSTER
An optional bow thruster is available on the 3125/3425
Offshore. The bow thruster is operated by way of a dash
mounted joy stick.
The bow thruster motor and tube are located beneath
the cuddy platform. The main 250-amp fuse for the bow
thrusters is located at the stern of the boat beside the
battery switch.
Bow Thruster Prop
Joy stick
For bow thruster operational instructions please refer to
the manufacturer’s owner’s manual.
32 KINGFISHER BOATS 3125 | 3425 OWNERS MANUAL

WATER AND PLUMBING
Bilge Pumps
There are 2 bilge pumps located in the stern portion of
the bilge directly behind the fuel tank. The rst of these
two bilge pumps is located at the lowest point of the bilge,
below the battery trays. The second pump is installed
approximately 3” up the side of one of the main stringers
behind the fuel tank. This bilge pump is installed as a
backup emergency pump. If the pump located in the bilge
becomes clogged or malfunctions, the second back up
pump will kick in if the bilge water level rises and trips its
oat switch.
Note: The bilge pump will only reduce the water level to
3/4” from the bottom of the hull. Some water will always
be left in the bottom of the hull. Do not run the bilge pump
dry for prolonged periods of time. Never depend upon an
automatic system as the only guarantee to keep water
out of your boat, periodical manual checking of the bilge
water level must be done. Bilge pumps should always
be checked for correct operation each time the boat is
operated.
Note: The second bilge pump location is designed to
minimize the possibility of the pump becoming clogged
with foreign objects and debris that may accumulate in the
bilge of the boat.
There is a third bilge pump located inside the cabin door,
under the vinyl oor board, just in front of the hot water
tank. This pump clears bilge water from inside the cabin. It
is important not to forget to clean out all bilge pumps and
check for correct operation as part of your pre-trip safety
check.
Bilge Pump Operation
The main bilge pump(s) is controlled by means of a
switch located on the dash and secondly, by an integral
oat switch that will be tripped by rising water levels. The
battery switch will need to be in the Battery 1, Battery 2 or
the “All” position for switched power at the dash to trip the
pump. The oat switch power to all bilge pumps is hooked
up directly to the battery bypassing the battery switch.
To test the operation of the pumps:
• Turn the small knob located on the back of the bilge
pump, this lifts up on the oat paddle and trips the
pump
Float switch
test knob
• Once the oat switch is tripped, the pump will turn on.
Once correct operation is conrmed, release the knob
• Turn on the battery switch to Battery 1, Battery 2 or to
the All position
Cabin Bilge Pump
• Switch on the bilge pump switch at the dash and check
that the pump has tripped, once correct operation is
conrmed turn off the switch
3125
|
3425 OWNERS MANUAL KINGFISHER BOATS 33

Back Up Bilge Pump
The back up bilge pumps is located approximately 3” up
onto the port side stringer at the rear of the bilge. This
bilge pump is an emergency back up pump and is wired
directly to the battery only. This pump is tripped by an
internal oat switch only.
To test this pump:
• Turn the small knob located on the back of the bilge
pump, this lifts up on the oat paddle and trips the
pump
• Once the switch is tripped, the pump will turn on.
Once correct operation is conrmed, release the knob
Important: If the backup pump fails to work, clean out
the pump as described below. Check the main 10 amp
fuse that is located on the bilge pumps positive lead to the
battery and check that the battery system is fully charged
and operational. After conrming the above, if the pump is
still not working, DO NOT OPERATE THE BOAT, consult
a KingFisher dealer.
Cleaning a Bilge Pump
Important: Before each time that the boat is operated, the
bilge pumps should be cleaned out thoroughly, tested and
checked for any signs of wear or damage.
1. Remove the top section of the bilge pump by pressing
in the two tabs located at the sides of the pump body.
2. Lift up on the pump body to expose the pick up and
strainer basket.
Ball Valve Operation
Every option that requires water to be drawn from the
outside of the boat is tted with a stainless steel ball
valve. The valve is attached to the water pick up thru-hull
and is opened by turning the handle 90 degrees.
Important: When not in use, any water pick up ball valve
should be in the shut or off position.
Shut Position Open Position
3. Clean all debris out of the strainer basket
and the pick up
4. Replace the bilge pump if the pump is showing any
signs of wear or damage.
5. Re-assemble the bilge pump and test as described in
the bilge pump operation
34 KINGFISHER BOATS 3125 | 3425 OWNERS MANUAL

FRESH WATER SYSTEMS
There are two fresh water systems that may be offered
1. Cold fresh water system
2. Hot and cold fresh water system
Important: KingFisher Boats are delivered winterized. All
water system components are treated with RV anti-freeze.
These components MUST be ushed out with fresh water
thoroughly before use.
Hot / Cold Water System with Heater / Defroster
and Shower
The hot water system is heated by an Espar Hydronic
diesel heater, which is located in an aluminum
compartment on the port side behind the cabin bulkhead.
The main power switch and thermostat are located on the
other side of the bulkhead, inside the cabin.
Cold Fresh Water System
The cold fresh water system consists of a 40 USG fresh
water holding tank. The system is supplied via an on-
board pressurized water pump.
To operate the system:
❏ Fill the fresh water holding tank with fresh water. The
holding tank is location below the oor just inside the
aft cabin door.
❏ The deck ll cap is indicated in blue and is located on
the starboard side gunnel, mid ship.
❏ Ensure that the battery switch is in the correct battery
position. (See battery switch)
❏ The pressure pump switch is located on the dinette
switch plate.
A
C
D
E
B
G
A. Coolant reservoir
B. Diesel tank
C. D5 Hydronic heater
D. Coolant overow tank
E. Rad Cap access
F. Rap Cap
G. Thermostat/ Main power switch
3125
|
3425 OWNERS MANUAL KINGFISHER BOATS 35

Periodic Heater Maintenance & Troubleshooting
In the event of a failure there are several items which
should be checked before major troubleshooting is done:
• Remove rad cap and conrm coolant level is lled to
the top of the reservoir. If coolant is low, add a 50/50
mix of automotive coolant
• Check coolant hoses and fuel lines for leaks
• Check electrical harnesses and connections
for corrosion
• Run the heater for a minimum of 15 mins once
a month, even when the boat is not in use
• Maintain the batteries and electrical connections in
good condition. When the system senses insufcient
power supply, the heater will not start
• Low and high voltage cut-outs will shut the
heater down automatically
• Check circuit breakers and fuses
• Make sure there are no obstructions at the
combustion intake and exhaust
Hot Water Tank
The hot water tank is located under the oor, just inside
the cabin. The fresh water in the hot water tank can be
heater either by the Espar Hydronic system or by AC
shore power. The hot water tank is hard wired into the
shore power system and will automatically run off of
the shore power source once that the power supply is
connected.
Refer to the hot water tank manufacturer’s manual for
operating and safety instructions.
• Make sure there is adequate fuel in the tank
CAUTION
Care should be taken not to overll the diesel fuel tank as
fuel may expand and overow out of the tank or ttings.
Only ll the fuel tank to 7/8 of the tank’s capacity.
To avoid potentially dangerous onboard fuel spills, always
remove the diesel tank out of the cabin area before lling
it with fuel.
If diesel fuel spills onto your skin, immediately wash with
soap and water. Change clothing if saturated with diesel
fuel. If diesel fuel gets into your eyes or diesel fumes are
inhaled, seek medical attention. If diesel fuel is swallowed,
seek medical attention.
36 KINGFISHER BOATS 3125 | 3425 OWNERS MANUAL

Shower System
The showerhead is incorporated in the sink faucet and
locks into the supplied bracket on the overhead shelf.
The water pick-up and ball valve for the toilet is clearly
labelled and located behind the fuel tank, below the bilge
doors.
To clean out the shower sump:
1. Expose the sump by removing the
fridge and pulling up the access hatch
2. Remove the Philips screws in the four corners of
the sump box lid and carefully remove the lid
3. Remove the sump inlet lter screen
4. Clean the screen of debris and foreign objects
5. Replace the screen
6.
Test the pump function by lifting up on the oat switch
Note: Do not activate the pump dry for longer than a
second or two as this may damage the pump rendering it
inoperable.
When operating the shower system the water pressure
pump switch must be turned on. The water pressure
switch is located in the top draw front of the cabinet
adjacent to the head stall.
Note: Always ensure that there is sufcient water in
the fresh water tank to allow water to be drawn by the
pressure pump prior to operating the shower system.
Running the system dry may cause severe damage and
render the system inoperable.
The shower drains directly into a sump pump which is
located on the starboard side, below the oor under the
fridge. The sump contains a small pump which is tripped
by the way of a oat switch.
When the pump is tripped, the waste water is directed
overboard by way of a through hull.
Important: To maintain sump operation it is necessary
to clean out the lter screen in the sump box regularly.
If the pump fails to activate:
• Conrm there is sufcient water in the water tank
• Conrm the battery switch is turned on
• Conrm the battery system is fully charged and
functioning and that all wires leading to the batteries
are secured rmly to the battery posts
• Check the main 30 amp fuse and the fuse under the
dash have not blown
• Once the above has been checked, if the shower
pump is still not working, consult a KingFisher dealer
Shower sump box Remove lter screen
3125
Tripping the oat switch
|
3425 OWNERS MANUAL KINGFISHER BOATS 37

Head (toilet)
The water supply for the head is drawn via a ball valve
tting directly from the outside water.
To operate the head
Before use, make sure that there is enough water in the
toilet bowl to prevent the toilet paper becoming compacted
at the bottom of the bowl. To do this:
❏ Open the water pick up ball valve which is clearly
labelled and located in the bilge of the boat, behind
the fuel tank
❏ Ensure that the ush control lever is set to open
❏ Pump the toilet handle with long smooth strokes
until adequate water has own into the toilet bowl
❏ During use, pump as necessary to keep contents
of the bowl low enough for comfort
❏ Pump as much water in the bowl as necessary
to ush the contents into the holding tank
❏ Once the toilet bowl is clear, close the ball valve and
turn the ush control lever to the closed position
“Y” Valve Operation and Holding Tank Contents
Disposal
Grey Water Holding Tank
Head waste will ush directly into the black water holding
tank. The tank is located on the starboard side, under the
cabin oor. The black water holding tanks are black in
color.
From the holding tank there are two choices,
1. Firstly, the holding tank can be pumped out through
the Waste Pump Out. See Hull Layout for pump out
deck location. To do this simply turn the “Y” valve to
the “Pump Out” location and ensure that the toilet
lever is in the open or up position.
2. The tank can also be sucked out from a dock side waste
station. Position the “Y” valve to the dockside position;
attach the pump out hose attachment to the outside tting
and operate the pump out station as directed.
Note: It is only necessary to turn on the macerator pump
when pumping the contents of the waste tank overboard.
Y Valve Location
The “Y” valve is located in the head stall on the sink galley
lower to the oor.
Important: Be sure to check with local authorities or
Coast Guard regarding state or provincial overboard
waste discharge regulations.
Important: Take care not to allow any foreign object or
materials to enter the waste system
38 KINGFISHER BOATS 3125 | 3425 OWNERS MANUAL

CAUTION:
Plastic parts may crack and the enamel coating
on the seat and lid may blister if they come into
contact with aggressive chemical agents such
as Acetone or Bleach. Do not use abrasive pads
on any part of the toilet and do not use cream
cleaners on any part of the toilet except for the
toilet bowl.
Fish Box Pumps:
The sh lockers are located on port and starboard in the
deck oor.
Each sh locker is tted with a diaphragm evacuation
pump. These pumps are operated by switches located on
the rear helm.
• When a sh locker needs to be drained, simply turn on
the battery switch and then operate the pump switch
until the locker has drained fully.
• Once the locker has drained, turn off the pump switch.
Fish Box Troubleshooting
The waste from the sh lockers is evacuated out of
through hulls located at the rear of the boat. If the pump(s)
do not work correctly,
❏ Conrm the battery system is fully charged and
functioning and all wires leading to the batteries are
secured rmly to the battery posts
❏ Conrm the battery switch is turned on
❏ Check that the main 30 amp fuse and the
fuse under the dash have not blown
Cleaning the Toilet
❏ To clean the bowl, use any liquid or cream ceramic
cleaner.
❏ To clean the rest of the toilet, including the seat and
lid, use a non-abrasive liquid cleaner. Polish with a dry
cloth only.
❏ To disinfect the toilet, use a liquid disinfectant diluted in
accordance with the manufacturer’s instructions. You
may apply it to all parts of the toilet using a sponge or
soft brush as necessary.
CAUTION:
Do not use thick liquid toilet cleansers or undiluted
bleach. They may damage the valves, gaskets,
seals and the enamel coating of the seat and lid.
❏ Once the above has been checked, if the pump
is still not working, consult a KingFisher dealer
Livewell and Wash down
Livewell or bait tank is located at the aft deck. The switch
to turn on the aerator is located on the rear helm.
3125
|
3425 OWNERS MANUAL KINGFISHER BOATS 39

SECTION 8 - TROUBLESHOOTING
The following trouble shooting information is a basic general guideline to possible issues. Always consult your authorized
KingFisher dealer if issues persist. Check engine operator’s manual for detailed engine troubleshooting information
Symptom Probable Cause Corrective Action
Electrical system dead Battery switch turned off/
Main fuse blown
Wipers or Bilge Pump
or Light won’t work
Fuel gauge not functioning No fuel in tank
Tachometer
not functioning
Boat performance is
poor or boat vibrates
Abnormal amount of water
Blown circuit breaker / fuse
Pump plugged or hose
disconnected
Loose or disconnected wire Faulty
gauge
Loose wire Faulty
sensor Faulty gauge
Propeller or outboard leg is fouled
Incorrect propeller
Boat is overloaded or poor load
distribution
Motor is not trimmed
properly
Engine damage or problem Hull
damage
Boat has a leak
Turn main switch on / replace main fuse/ inspect
electrical system for overload / short circuit
Inspect component and circuit
Unplug pump or connect hose.
Have boat serviced
Fill fuel tank
Check sending unit wires
Have the sending unit or gauge serviced
Check sending unit wires
Have the sensor or gauge serviced
Turn off engine and inspect prop and motor leg.
Change prop
Check and adjust boat loading.
Check for water in bilge
Adjust trim angle
Consult your engine manual.
Inspect hull bottom for damage
Bail water out
in boat
Engine quits/won’t start Engine problems
Engine coughs / sputters Inadequate Fuel Supply
Rough Ride Excessive speed
Alarm buzzer sounding Engine problems – low oil or
Boat persistently smells of
gasoline
Hull drain plug missing
Dead battery
Dirty spark plugs
Engine trimmed incorrectly Poor
load distribution
overheating
Fuel spilled into bilge/fuel
system leak
Turn bilge pump on. Plug leak
Insert hull drain plug/ call for help
Consult engine owner’s manual. Replace battery/
have boat serviced. Use paddles/call for help
Conrm fuel in tank, clear obstructed or pinched
lines, clean fuel lters/strainers, check fuel lter/
sediment bowl for water in fuel
Replace spark plugs
Reduce speed adjust trim
Adjust loading
Turn motor off immediately. Consult engine
owner’s manual. Have boat serviced
Check bilge for gasoline/evacuate boat/
inspect fuel system for leaks
40 KINGFISHER BOATS 3125 | 3425 OWNERS MANUAL

Symptom Probable Cause Corrective Action
Engine runs hot Low oil or coolant
Broken / stretched belt
Plugged water inlet
Damaged water pump
or thermostat
Engine stops suddenly Ignition or battery
problems Safety lanyard
pulled
Erratic Steering Trim set incorrectly
Steering system loose or
low on uid
Electrical issue Loose wire
Faulty sensor
Check oil level/coolant level
(after engine cool down)
Replace broken/stretched cooling system belt
Clear raw water intake. Replace raw water
pump Replace thermostat
Replace water pump impeller
Check ignition wiring and fuse. Check battery
connections. Check safety shut off lanyard
Check engine manufacturer’s operations manual
for more detailed information
Adjust motor/drive trim
Tighten steering wheel
Bleed hydraulic lines. Check oil level
Check the circuit breakers on the control panel
Check the main fuse
Burnt fuse
Popped breaker
Corroded wires/connections
Dead battery
Check wire lead connections
Check for clean battery terminals
Check battery for sufcient charge
Consult an authorised KingFisher dealer if the problem persists.
3125
|
3425 OWNERS MANUAL KINGFISHER BOATS 41

42 KINGFISHER BOATS 3125 | 3425 OWNERS MANUAL

SECTION 9 – NAUTICAL TERMS
Abeam Object 90 degrees to centerline on either side of the boat
Abaft A point on a boat that is aft of another
Aft Toward the rear or stern of the boat
Beam The width of a boat.
Bow The fore part of a boat
Bulkhead Vertical partition in a boat
Chine Meeting juncture of side and bottom of boat.
Chock Deck tting, used as guide for mooring or anchor Lines.
Also, a wedge to stop wheels from rolling
Cleat Deck tting with arms or horns on which lines may be made fast
Cockpit An open space from which a boat is operated
Deck Upper structure that covers the hull between gunnels
Draft Depth of water required to oat boat and its propulsion system
Fathom Six feet
Fenders Rope or plastic pieces hung over the side to protect the hull from chang
Freeboard Height of exposed hull from water line to deck
Ground Tackle General term referring to anchors, anchor lines, etc
Gunnel/Gunwale Meeting juncture of hull and deck; or the highest edge of the hull side
Hatch A deck opening providing access to the space below
Head Toilet or toilet room
Helm The tiller, wheel and other steering gear
Keel The lowest external portion of the hull
Knot Nautical mile per hour; one nautical mile is 1851.96m (6,076 ft.); a
land mile is 1609.34m (5,280 ft.)
Lee The direction toward which the wind blows
Port To the left side of the boat facing forward
Porthole A hinged window in the boat’s cabin or hull
Scupper An opening in a deck or cockpit permitting water to drain overboard
Stanchion A xed, upright post used for support (of rails or lifelines)
Starboard To the right side of the boat facing forward
Stern The after portion of the boat
Stern Drive Inboard / outboard propulsion unit
Transom The transverse part of the stern
Windward The direction from which the wind is blowing
3125
|
3425 OWNERS MANUAL KINGFISHER BOATS 43

SECTION 10 – MAINTENANCE LOG
Kingsher Model: ________________________________________________________________
Serial # (HIN): ________________________________________________________________
Make of Motor:__________________________________________________________________
Trailer:_________________________________________________________________________
Date Maintenance Description Engine Hours
44 KINGFISHER BOATS 3125 | 3425 OWNERS MANUAL

Operating, servicing and maintaining
Prop 65 Boat Owner’s
Manual Image
a recreational marine vessel can expose
you to chemicals including engine exhaust,
carbon monoxide, phthalates, and lead,
which are known to the State of California
to cause cancer and birth defects or other
reproductive harm. To minimize exposure,
avoid breathing exhaust, service your vessel
in a well-ventilated area and wear gloves or
wash your hands frequently when servicing
this vessel. For more information go to
www.P65warnings.ca.gov/marine.

KingFisher Boats
Center of Excellence
8160 Highland Road
Vernon, BC V1B 3W6
TF: 1-888-545-9171
www.kingfisherboats.com
 Loading...