

King Champion MA-80 User Manual

PORTABLE INTERNET RADIO
IR-80
User Manual
Please read this user manual carefully before using the receiver

Functional Modes and Features
The product is a small, lightweight and stylish design battery operated Internet Radio. This product incorporate an
Internet radio and Music streaming features to be use with a Lan orWi-Fi network. Other features include a Music
Player and a FM radio. Powered by an external battery and optional DC Power Adaptor, the
product provides
hours of network audio streaming from Internet radio stations and music steaming from your own networked PC
connected to your Lan or Wi-Fi access point.
A brief description of the features is listed below:
Internet Radio gets you connected to various radio stations around the world
through the Lan or Wi-Fi .
Media Stream play music streams from your Windows media player version11
application in your PC or Notebook running Windows XP or Vista OS over the Lan or
Wi-Fi
connection.
FM, connects to the local FM Radio Stations
Setting, used for performing all the settings in your product
1
12 3
4
56
7
11
12
8
9
10
13
14

Product Button Definition
7 Power Power On/Off
10 Volume NAVI
3 MENU Press this button to bring you back to top main menu
14 DC input +9V DC Input
9
NAVI knob/
Enter
II
Turn to scroll through the menu listing in down or up directions / play previous or
next song / go down or up in pop up menu list and use to as Enter key to select an
item. / To select an item
8 Dot Matrix 2X16 dot matrix LCM display
4 FM Press this button to enter the “FM” mode directly
5 PC Press this button to enter the “Media stream” mode directly
6 Internet Press this button to enter the “Internet Radio” mode directly
11
Battery
Compartment
To hold 6 X AA-size battery dry cell or rechargeable NiMH/NiCd (External battery
charger required)
12 Telescopic Antenna
2
3.5 Earphone Jack, For connecting the Earphones. Insert the Jack pin until it clicks it
the place.
13 Earphone Jack
2 BACK Press to go up one list screen level or to return to previous menu
Preset Station Buttons. Press and hold to save a station to that preset number, and
press particular Preset button to call back the saved station.
1 P1 – P5
Turn to increase or decrease volume level this button to bring you back to top main
menu
Getting Started
Package contents
Your product package includes:
Product
Adaptor
User Manual
Powering ON your product
To Power on your product, press and hold the Power key, you will see the “ ” screen.
To Power off your product, press and hold Power key, you will see the “ ” screen.
After the startup is complete, you will see the Main Menu screen that shows you the Internet Radio, Media Stream,
FM Radio and Setting modes as option in a list. Use the Navigation Knob to scroll through the list as you like and
press the Navigation Knob to confirm the selection.
At any time in any of this mode, if you press the Menu button it will bring you back to the Main Menu.
Setting up the Wi-Fi
Your product can be easily connected to the Wi-Fi networks. When a Wi-Fi connection is required (for instance, to
play Internet Radio or Media stream) the product will automatically look for a network and try to connect to it.
When you are connecting the product for the first time, you will have to setup the network by select the Network
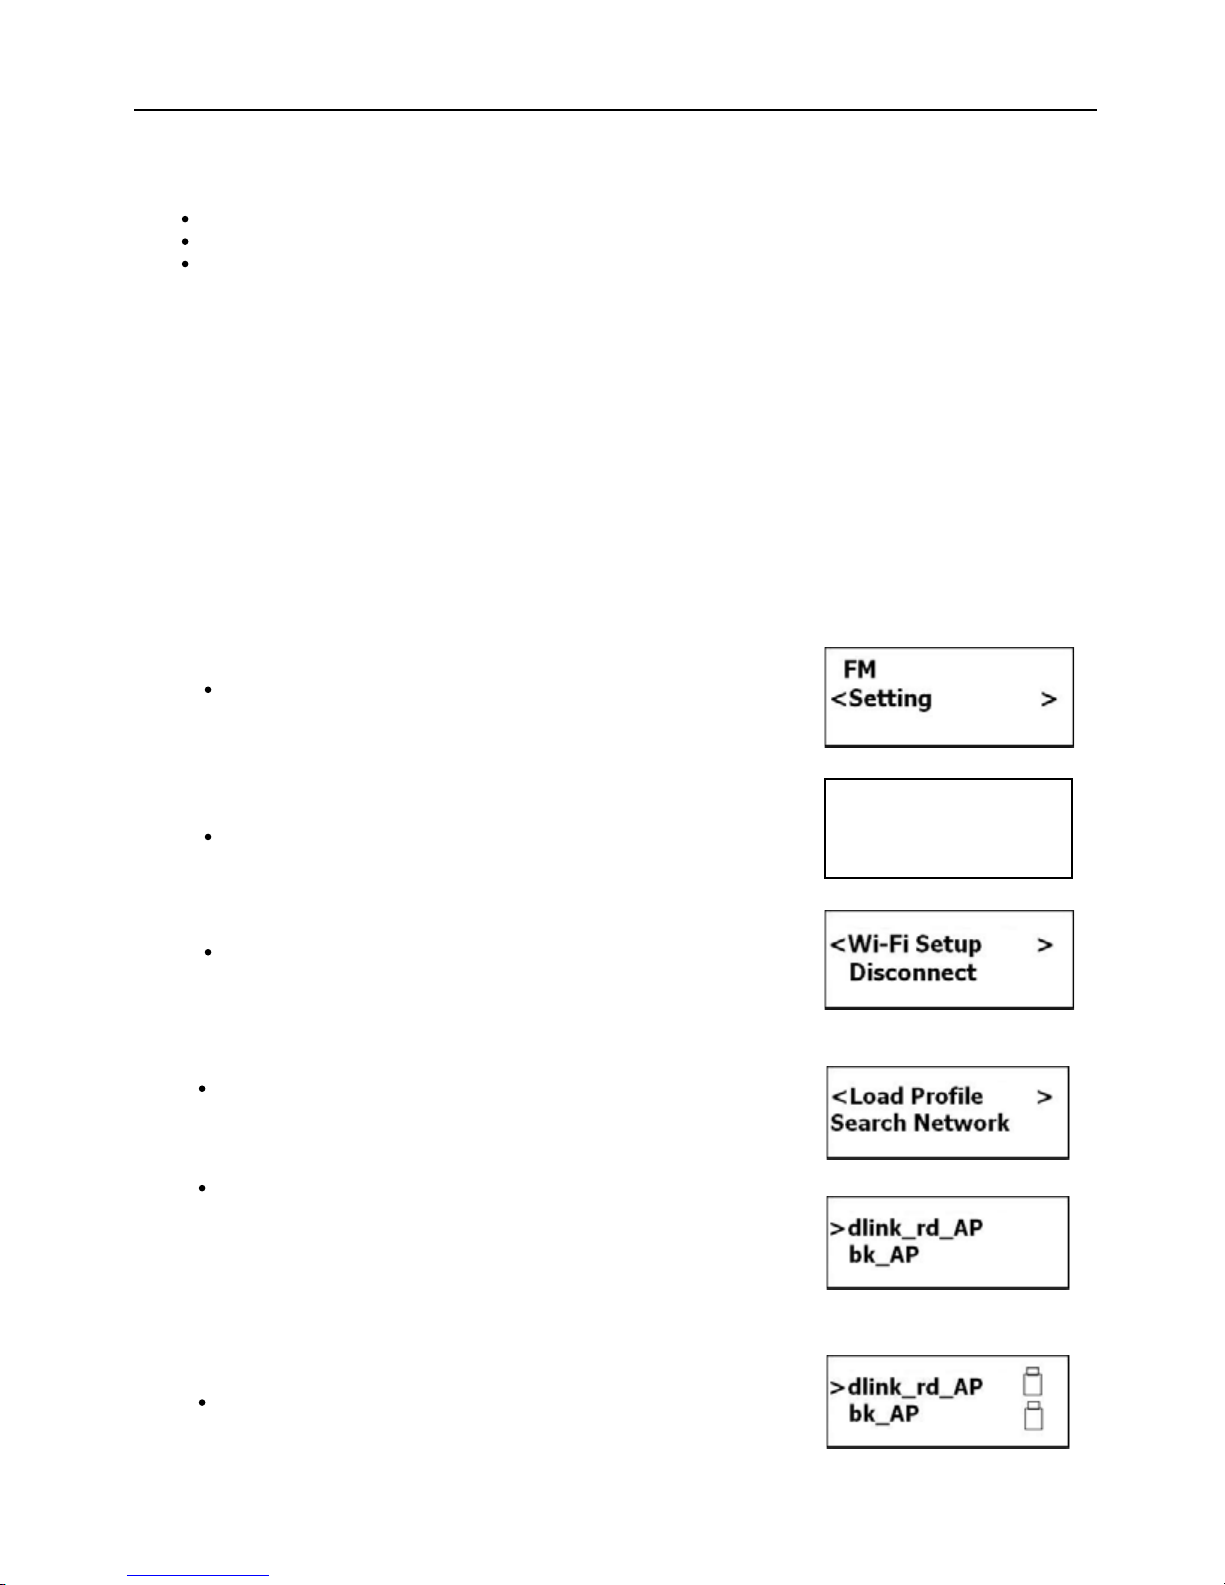
Configure option from the Setting mode in the Main Menu. To do this pleases following the steps listed below:
From the main menu select the Setting option by using the NAVI
Knob to navigate and select it.
Next select the Network Configure option from the list using the
NAVI Knob.
Select Wi-Fi Setup from the menu list by using the NAVI Knob to
navigate and select it.
Of course, if you directly enter into the “Internet radio” menu, the unit can pop up the wizard also as below
For the case of using the Wi-Fi network you will see this screen that
list two options for you, the Load profile and Search network option
respectively.
The Load profile option let you load back a profile that you have
saved in the previous section, please use the NAVI Knob to navigate
and select it. If the saved profile has the correct information that
match to the current AP you are going to connect to, product will try
to connect to it and put a tick beside the AP name once the product
successfully connected to the AP.
To search for a new wireless Access Point before using the Wi-Fi
connectivity, please select the Search network from the above screen.
Then you will see a screen showing “Searching” while the product
trying to search and show you all the available Access Points that the
product able to find. The product will then show all the Wi-Fi
networks SSID in the range as shown in the screen for example.
3
King Champion
Internet Radio
Internet Radio
Power off
< Use Wi-Fi >
Use Lan
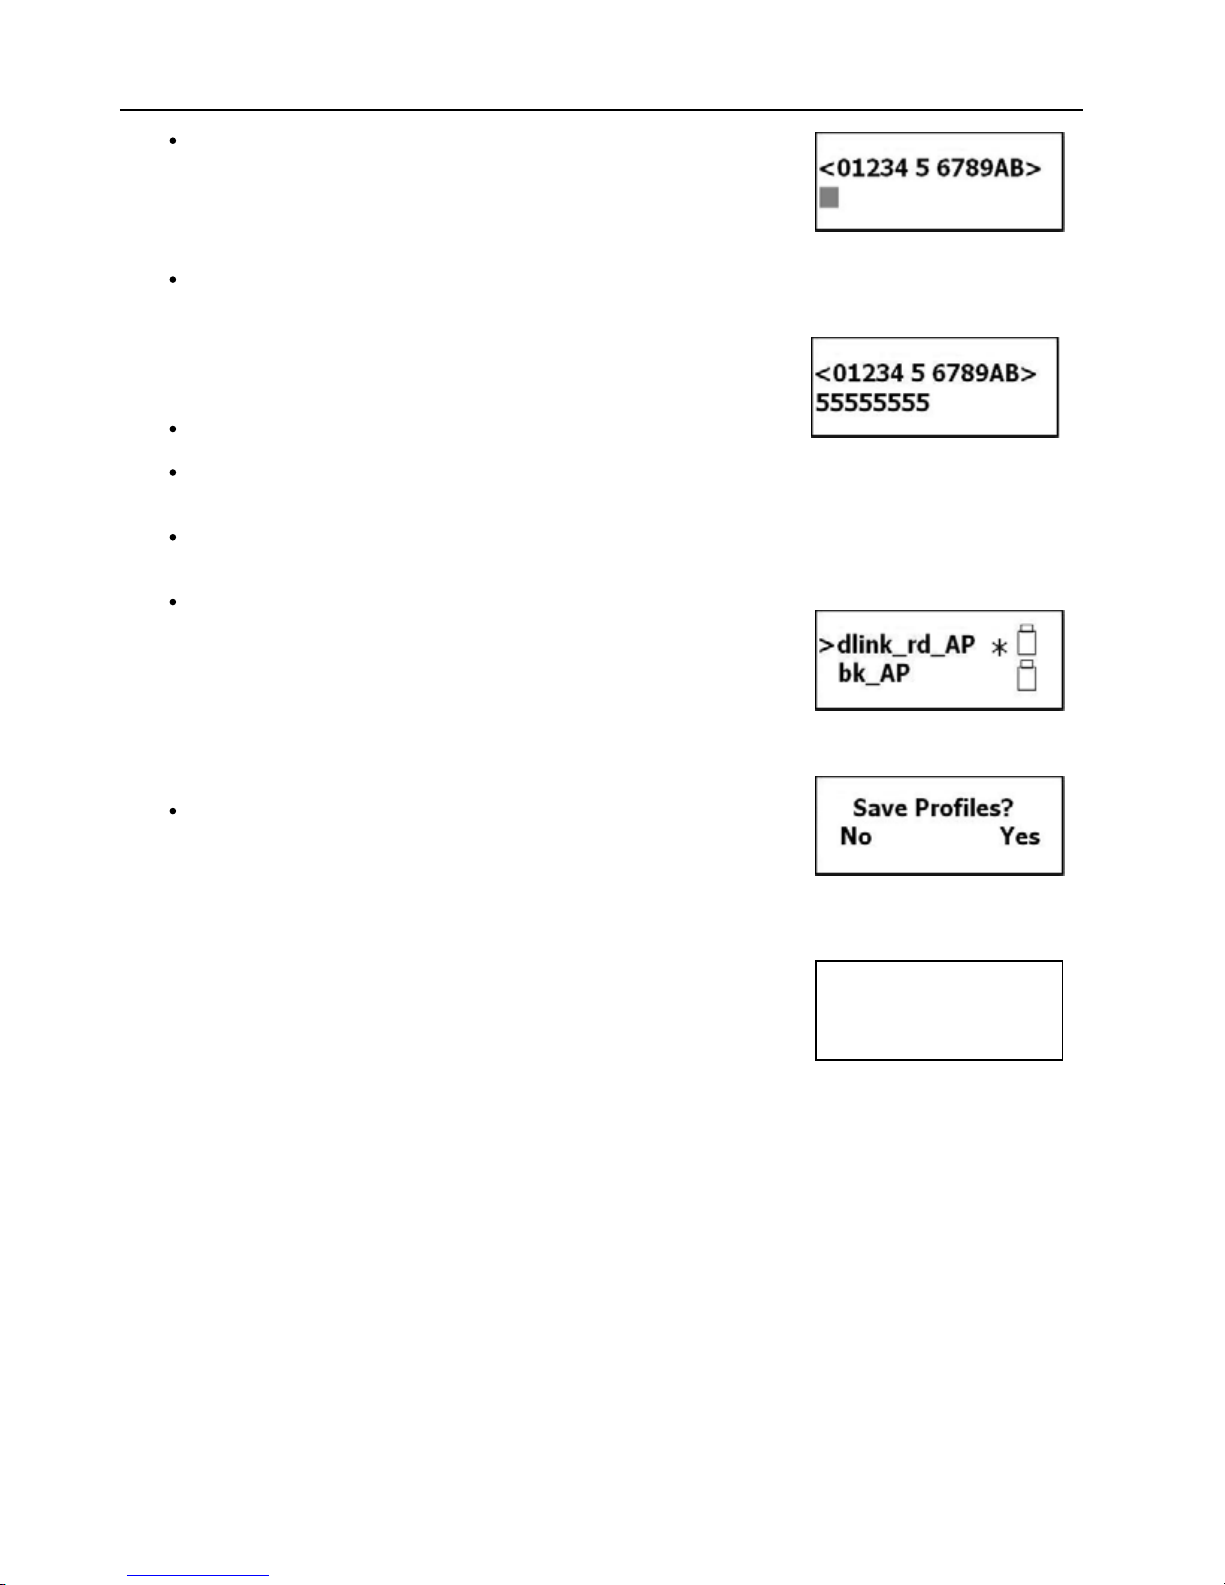
Once you have gets the list of Wi-Fi networks AP SSID use the NAVI
Knob to navigate and select the AP SSID that you wish to use. Once
the network AP is selected the product will prompts you for the Default
Network key which is the WEP/WPA default secure key of the Wi-Fi
Access point.
Use NAVI to key in the network key. Turning the NAVI knob left and
right will change the numbers, characters and symbols that you wish to
have to show in the center of upper line of the screen, in this example,
the number ‘5’ is the current active number, to select it press the NAVI
knob once. Turning the NAVI knob to the left (counter clock wise) or
right will shift the ‘character’ to the center of the screen for selection
and pressing the NAVI Knob will select it.
Use the Back button to delete the selected character.
Once the Network Key has been completed key in, next press-andholds the NAVI Knob to confirm the Network key.
Now the product should try to access the Access point that you have
selected.
Once the product managed to connect to the AP it will now put a star
next to the network AP SSID name that you have selected. Press the
NAVI Knob and save the profile. So that the future connection to this
Wi-Fi AP you don’t have to go through the Wi-Fi AP selection process
again, if you are using the same Wi-Fi AP for Internet Radio or Media
Streaming
Once you select to save the profile, it will prompt where to save as
shown. Use the NAVI Knob to select Yes or No.
Now your Wi-Fi AP connection is setup.
Setting up the LAN
Select LAN Setup from the menu list by using NAVI Knob to Select it.
If you directly enter into use lan,the unit will connect to network automatical with
DHCP server.
Use Wi-Fi
< Use LAN >
4
 Loading...