

Kinetik BPM1KTL User Manual
Fully Automatic Blood Pressure Monitor
By Paul Aylett at 2:09 pm, Jun 05, 2012
User Manual
BPM1KTL Series

Content
Introduction 2
Parts 3
Setting up your Blood Pressure Monitor
Loading Battery 4
Connecting the Cuff 4
Clock and Date Adjustment 5
4-6
Backlight Indicator and Classification of 6
Blood Pressure
Irregular Heart Beat 7
Using your Blood Pressure Monitor 8-16
Your first test 8
Putting on the Cuff 9
Washing Instruction 9
Start 10
Measuring Process 12
Memory 13
Displaying Stored Results 13
Deleting Measurements from the Memory 14
What the results mean 15
Re-measuring 16
Shut Down 16
Additional Information on Blood 17
Pressure
Specification 18
Abnormality & Troubleshooting
19-20
Maintenance 21
Blood Pressure Record Table 22
Explanation of symbols on unit 23

Introduction
Thank you for buying and using the Kinetik Medical Fully Automatic Blood Pressure Monitor.
This monitor is an easy to use and accurate way to measure your blood pressure.
Before you start, it is important to read this instruction manual.
Blood pressure testing is easy. To get the most out of this product, please read this user guide
carefully.
We hope you will be satisfied with your Fully Automatic Blood Pressure Monitor. If you have any
questions, please contact your local pharmacist or healthcare professional.
2

Parts
Cuff
Clock
Systolic
Diastolic
Rubber tubule
low battery
deflate to measure (deflate air in cuff)
irregular heartbeat
Rubber tubule plug
fully automatic
BLOOD PRESSURE MONITOR
LCD
IHB
start
memory /
select
Start
Memory /
Select
Setting up your Blood Pressure Monitor
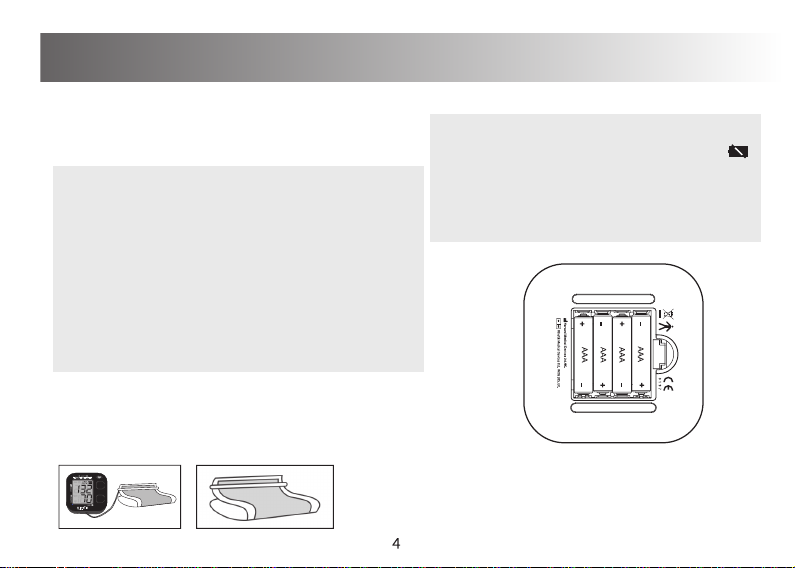
Loading Batteries
a. Open the battery cover on the base of the monitor.
b. Insert four “AAA” batteries, observing correct polarity.
c. Close the battery door.
Non-rechargeable batteries are not to be recharged.
•
Exhausted batteries are to be removed from the monitor.
•
The supply terminals are not to be short circuited.
•
Do not mix old and new batteries or different types of
•
batteries. Do not use rechargeable batteries. Only batteries
of the same or equivalent type as recommended are to be
used. Batteries must be handled with care under adult
supervision. If batteries leak and come into contact with
skin or eyes, wash immediately with copious amounts
of water.
Connecting the Cuff
a. Insert the plug end of the rubber tubule firmly into
the cuff socket located on the front of the monitor
to ensure there is no air leakage.
BLOOD PRESSURE MONITOR
fully automatic
IHB
start
memory /
select
b. The cuff should be ready to use. Ensure that the end is passed
through the metal loop and the hook and loop fastening is facing
outwards. NOTE: Cuff supplied.
Replacing Batteries
When the LCD screen displays ‘low battery’
•
new batteries must be inserted immediately
to ensure accurate results.
Please dispose of batteries according to battery
•
manufacturer’s instructions.
BPM1KTL
Setting up your Blood Pressure Monitor
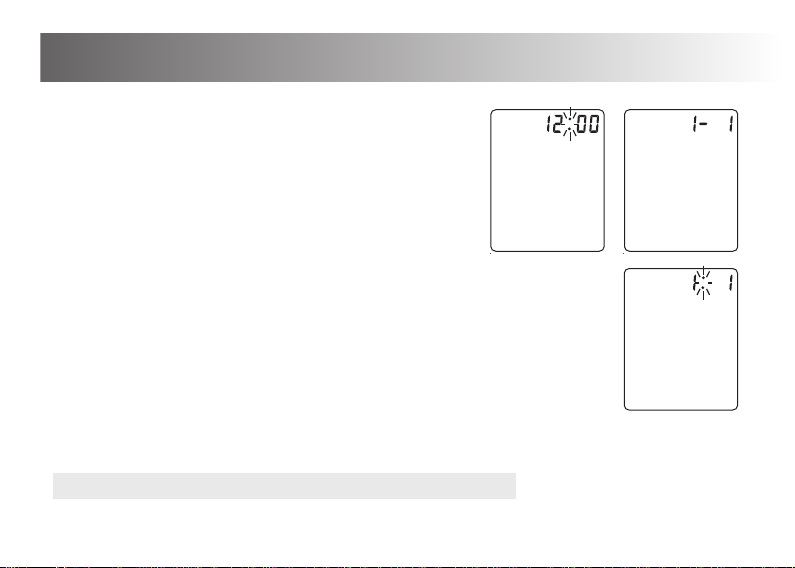
Clock and Date Adjustment
a. Once you install the battery or turn off the monitor, it will enter
standby mode, and LCD will alternate between time and date.
b. While the monitor is in standby, press and hold both the ‘start’ and ‘memory’ buttons
simultaneously until the green backlight comes on and the month digit starts to blink.
Press the ‘memory’ button repeatedly (or press and hold for rapid advance) to select
the correct month. Once done, press the ‘start’ button to confirm. The month is now
set and you can begin to select the correct day, again using the ‘memory’ button to
select and the ‘start’ button to confirm. Repeat the procedure for setting the hour and
minutes. When finished, the monitor will return to standby mode.
c. The monitor will turn off automatically after 1 minute of no operation, with the time
and date unchanged.
d. Once you change the batteries, you should readjust the time and date.
Note: when you adjust the clock and date, the backlight always is green.
5

Backlight Indicator and Classification of Blood Pressure
The backlight will change according to your measured result. The table below shows the different blood
pressure classifications as defined by the British Hypertension Society and the corresponding backlight
colour. Please note that factors such as smoking, obesity & diabetes will affect your blood pressure. Always
consult your physician or healthcare professional before starting a diet or exercise regime.
Classification of Blood
Pressure Levels
Low * 90 or 60 Flashing green/amber
Optimal 91–119 and 61 - 79 Green
Normal 120–129 and 80 -84 Green
High-normal 130–139 or 85 - 89 Amber
Grade 1 Hypertension 140–159 or 90 - 99 Flashing Amber
Grade 2 Hypertension 160–179 or 100–109 Red
Grade 3 Hypertension 180 or 110 Flashing red
* Low blood pressure, or hypotension, occurs when blood pressure during and after each heartbeat is much lower than
usual. This means the heart, brain, and other parts of the body do not get enough blood. Symptoms may include blurry
vision, confusion, dizziness, fainting, light-headedness, sleepiness & weakness. However, blood pressure that is borderline
low for one person may be normal for another. Consequently, hypotension in a healthy person that does not cause any
problems usually doesn't require treatment. If in doubt, seek advice from your physician or healthcare professional.
Systolic BP
(mmHg)
Note: The backlight indicator and the colours used are designed to indicate the various classifications of
blood pressure only. The use of the colours Amber or Red should not be interpreted as a medical emergency.
Diastolic BP
(mmHg)
6
Backlight Colour

Irregular Heart Beat
This monitor can detect possible irregular heart beat (cardiac arrhythmia) disorders during measurement
and if detected indicates the detection with the flashing icon . Arrhythmia is a condition where the
heart rhythm is abnormal as a result of defects in the bioelectrical system that controls the beating of the
heart. The symptoms (premature or omitted heart beats, slow or excessively fast heart rate) may be
caused by heart disease, age, physical predisposition, excessive use of stimulants, stress or lack of sleep.
Arrhythmia can only be ascertained through examination by your doctor.
Repeat the measurement if the flashing icon is displayed. Please note that you should rest for 5 minutes
between measurements and not talk or move during the measurement. If the icon appears often, please
contact your doctor. Any self-diagnosis and treatment based on the test results may be dangerous. It is
vital to follow your doctor‘s instructions.
Note: This monitor is designed to detect Premature Ventricular Contractions, also known as a
Premature Ventricular Complex (or complexes), Ventricular Premature Contractions (or complex or
complexes), Ventricular Premature Beats, or Extrasystoles. It is not designed to detect Atrial
Fibrillation or Atrial Premature Beats.
7
 Loading...