

Page 1
KINESIS® MAXIM™
Adjustable Ergonomic Keyboard and Optional 10-key
USER’S MANUAL
Page 2

Page 3

USER’S MANUAL
KINESIS
® MAXIM™
Adjustable Ergonomic Keyboard and Optional Numeric Keypad
VERSIONS COVERED:
PS/2 compatible keyboard, part number KB200PC
PS/2 compatible numeric keypad, part number AC200PCKP
November, 2002 Edition
© 1997-2002 Kinesis Corporation. All rights reserved. Printed in the U.S.A. on recycled
paper. Please recycle!
Kinesis is a registered trademark of Kinesis Corporation. Maxim is a trademark of Kinesis
Corporation. Windows is a trademark of Microsoft Corporation.
Information in this document is subject to change without notice. No part of this document
may be reproduced or transmitted in any form or by any means, electronic or mechanical, for
any purpose, without the express written permission of Kinesis Corporation.
Page 4

FEDERAL COMMUNICATIONS COMMISSION
RADIO FREQUENCY INTERFERENCE STATEMENT
Note
This equipment has been tested and found to comply with the limits for a Class
B digital device, pursuant to Part 15 of the FCC Rules. These limits are designed
to provide reasonable protection against harmful interference when the
equipment is operated in a residential installation. This equipment generates,
uses and can radiate radio frequency energy and, if not installed and used in
accordance with the instructions, may cause harmful interference to radio
communications. However, there is no guarantee that interference will not occur
in a particular installation. If this equipment does cause harmful interference to
radio or television reception, which can be determined by turning the equipment
off and on, the user is encouraged to try to correct the interference by one or
more of the following measures:
# Reorient or relocate the receiving antenna
# Increase the separation between the equipment and receiver
# Connect the equipment into an outlet on a circuit different from that to which
the receiver is connected
# Consult the dealer or an experienced radio/TV technician for help
Warning
To assure continued FCC compliance, the user must use only shielded
interfacing cables when connecting to computer or peripheral. Also, any
unauthorized changes or modifications to this equipment would void the user’s
authority to operate.
INDUSTRY CANADA COMPLIANCE STATEMENT
This Class B digital apparatus meets all requirements of the Canadian Interfacecausing Equipment Regulations.
Cet Appareil numerique de la classe B respecte toutes les exiginces du
Reglement sur le material broilleur du Canada.
Page 5

TABLE OF CONTENTS
Health and Safety Warning ................................................... 6
Read-Me-First........................................................................ 7
Introduction ........................................................................... 9
Connecting the Keyboard to Your Computer ....................... 11
Customizing Your Keyboard ................................................ 13
Numeric Keypad ............................... .................................. 17
Caring for Your Keyboard .................................................... 19
Technical Support, Accessories, and Repairs ........................ 21
Ergonomic Guidelines ........................................................... 23
Warranty ............................................................................... 26
Product Specifications ............................................................ 27
5
Page 6

HEALTH AND SAFETY WARNING
Continuous use of any keyboard may cause aches and pains or more serious
cumulative trauma disorders such as tendinitis and carpal tunnel syndrome.
# Observe sensible guidelines when using any keyboard to help minimize
the possibility of injury.
# Follow established guidelines for computer and workstation setup. See
Appendix, “Ergonomic Guidelines for Computer Workstations.”
# Maintain a proper keying posture and use a light touch to press the keys.
# Exercise good judgment in placing reasonable limits on your keyboarding
time every day.
# Ensure that you take reasonable rest breaks from keyboarding during the
course of the day.
# At the first sign of stress-related injury from keyboard use (aching,
numbness, or tingling of arms, wrists, or hands), consult your health care
professional.
Kinesis Corporation bases its product designs on research, proven features, and
user evaluations. However, because of the complex set of factors believed to
contribute to computer-related injuries, the company can make no warranty
that its products will prevent or cure any physical ailment.
Your risk of injury may be affected by workstation and chair design, posture,
time worked without breaks, type of work, activities outside of the workplace,
and individual physiology.
6
Page 7

READ ME FIRST
Important information for those who don’t normally read
manuals — and for those who do!
Congratulations on buying a quality product which will significantly improve your
computer comfort and productivity. Please read the entire manual before installing
or using your new keyboard. However, if you can’t do that right now, at least read
this page to learn some important things!
Registration
By registering online (http://www.kinesis-ergo.com/registration.htm) or by sending
in the enclosed registration card, you validate your warranty and create a
communications link with Kinesis for learning about future products and upgrades.
Health and Safety Warning
We have provided important information on the previous page and in the Appendix.
Please read it.
Connecting your keyboard
This keyboard is PC compatible. Turn off your computer before connecting the
keyboard. See “Connecting the Keyboard to Your Computer” for more information
on compatibility.
Connecting the optional 10-key
Turn off your computer. Plug the keyboard and 10-key together with the short cable,
then plug the long keyboard cable into the 10-key’s “PC” port. Finally, reconnect
the main cable to your computer’s PS/2 keyboard port
Ergonomic Setup
You can use your adjustable keyboard just as it comes out the box, but you are
missing out on the most important features! It is easy to customize for optimal
comfort, but the chapter on “Customizing Your Keyboard” will make it a lot easier.
Palm supports
Most people like supporting the weight of their arms and shoulders on the built in
palm supports. Be sure to stabilize the palm supports after each adjustment to the
keyboard. Also, please use the self-adhesive pads provided. If you decide you don’t
want palm supports, see “Customizing Your Keyboard” for instructions on
removing them.
7
Page 8

8
Page 9
INTRODUCTION
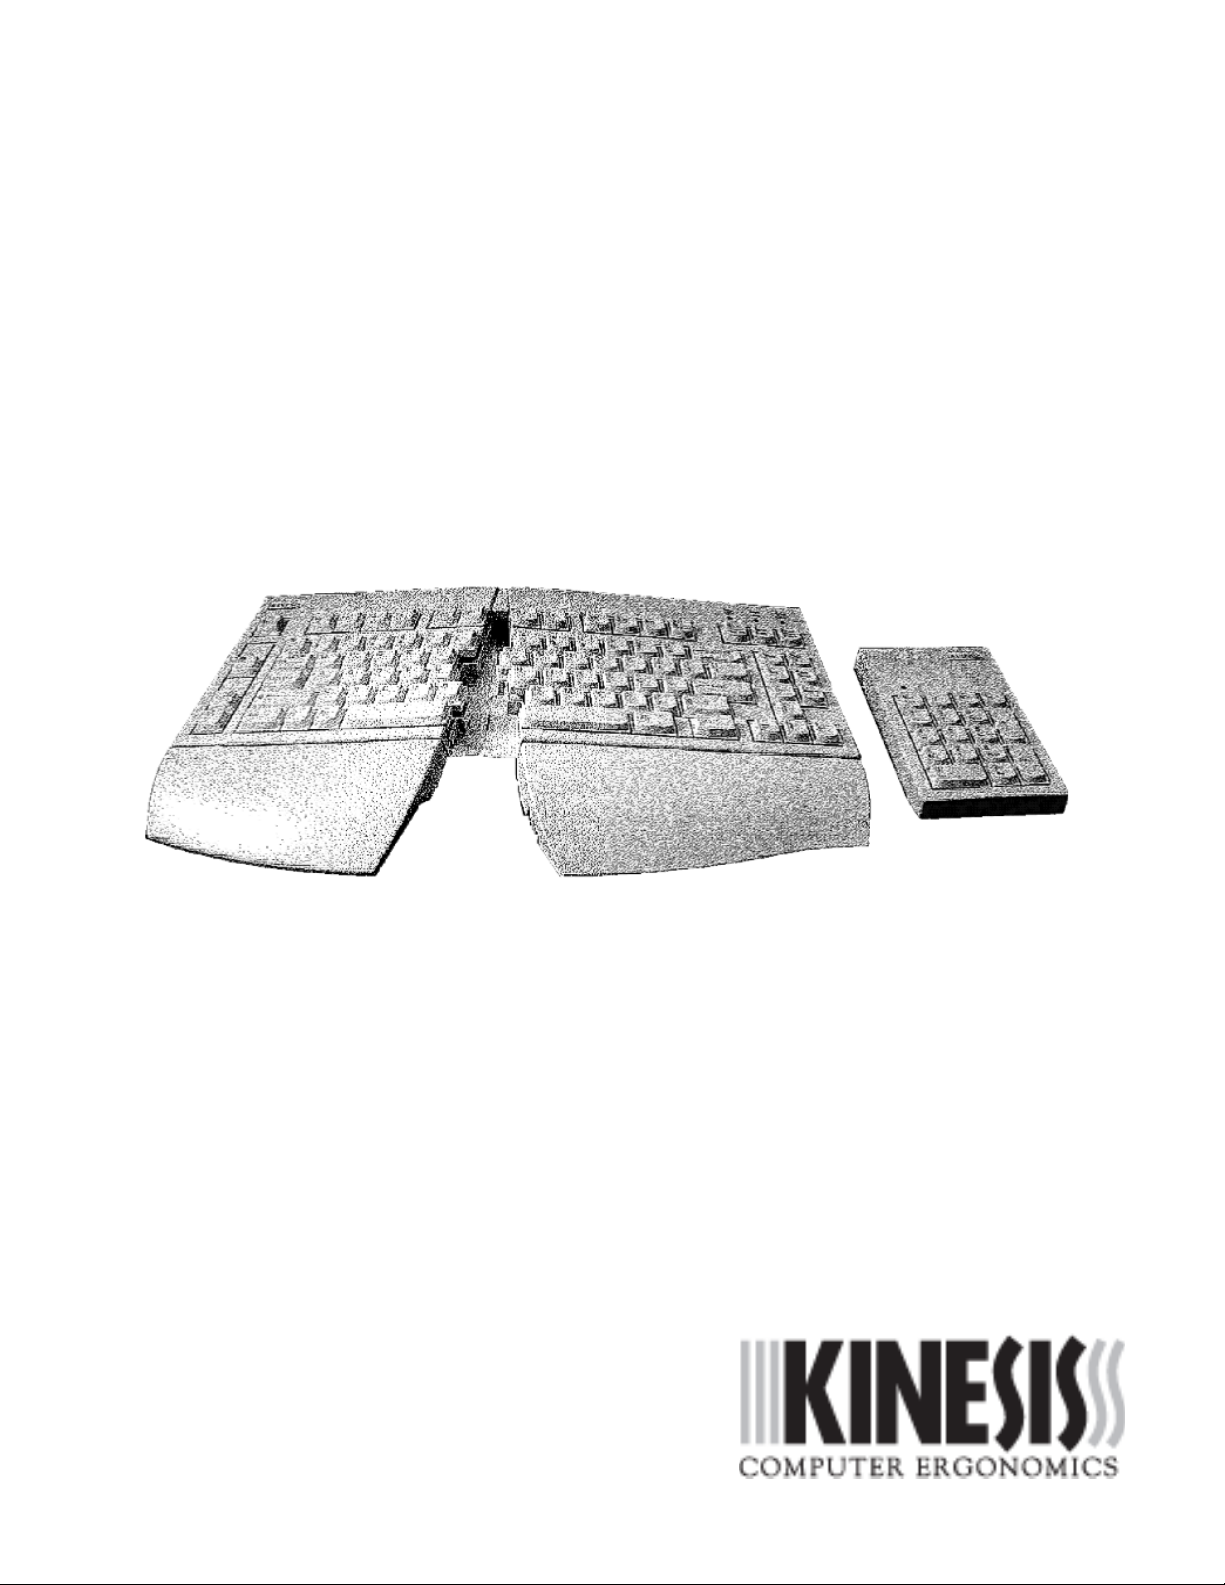
The Kinesis® Maxim™ adjustable ergonomic keyboard sets a new standard in
workstation ergonomics. Extensive ergonomic studies have resulted in an adjustable
keyboard design which can be optimized by the user for his or her individual
requirements and preferences.
Ergonomic features
The Maxim™ ergonomic keyboard can be individually adjusted to conform to the
natural positions of your arms and hands. Ergonomic features include:
# Padded, removable palm supports
# Adjustable keyboard front-to-back slope
# Adjustable hand/arm positioning (front opening angle)
# Adjustable lateral slope to relax forearm muscles
# Embedded numeric keypad (10-key)
# Optional separate 10-key which can be positioned on either side of the
keyboard or used alone
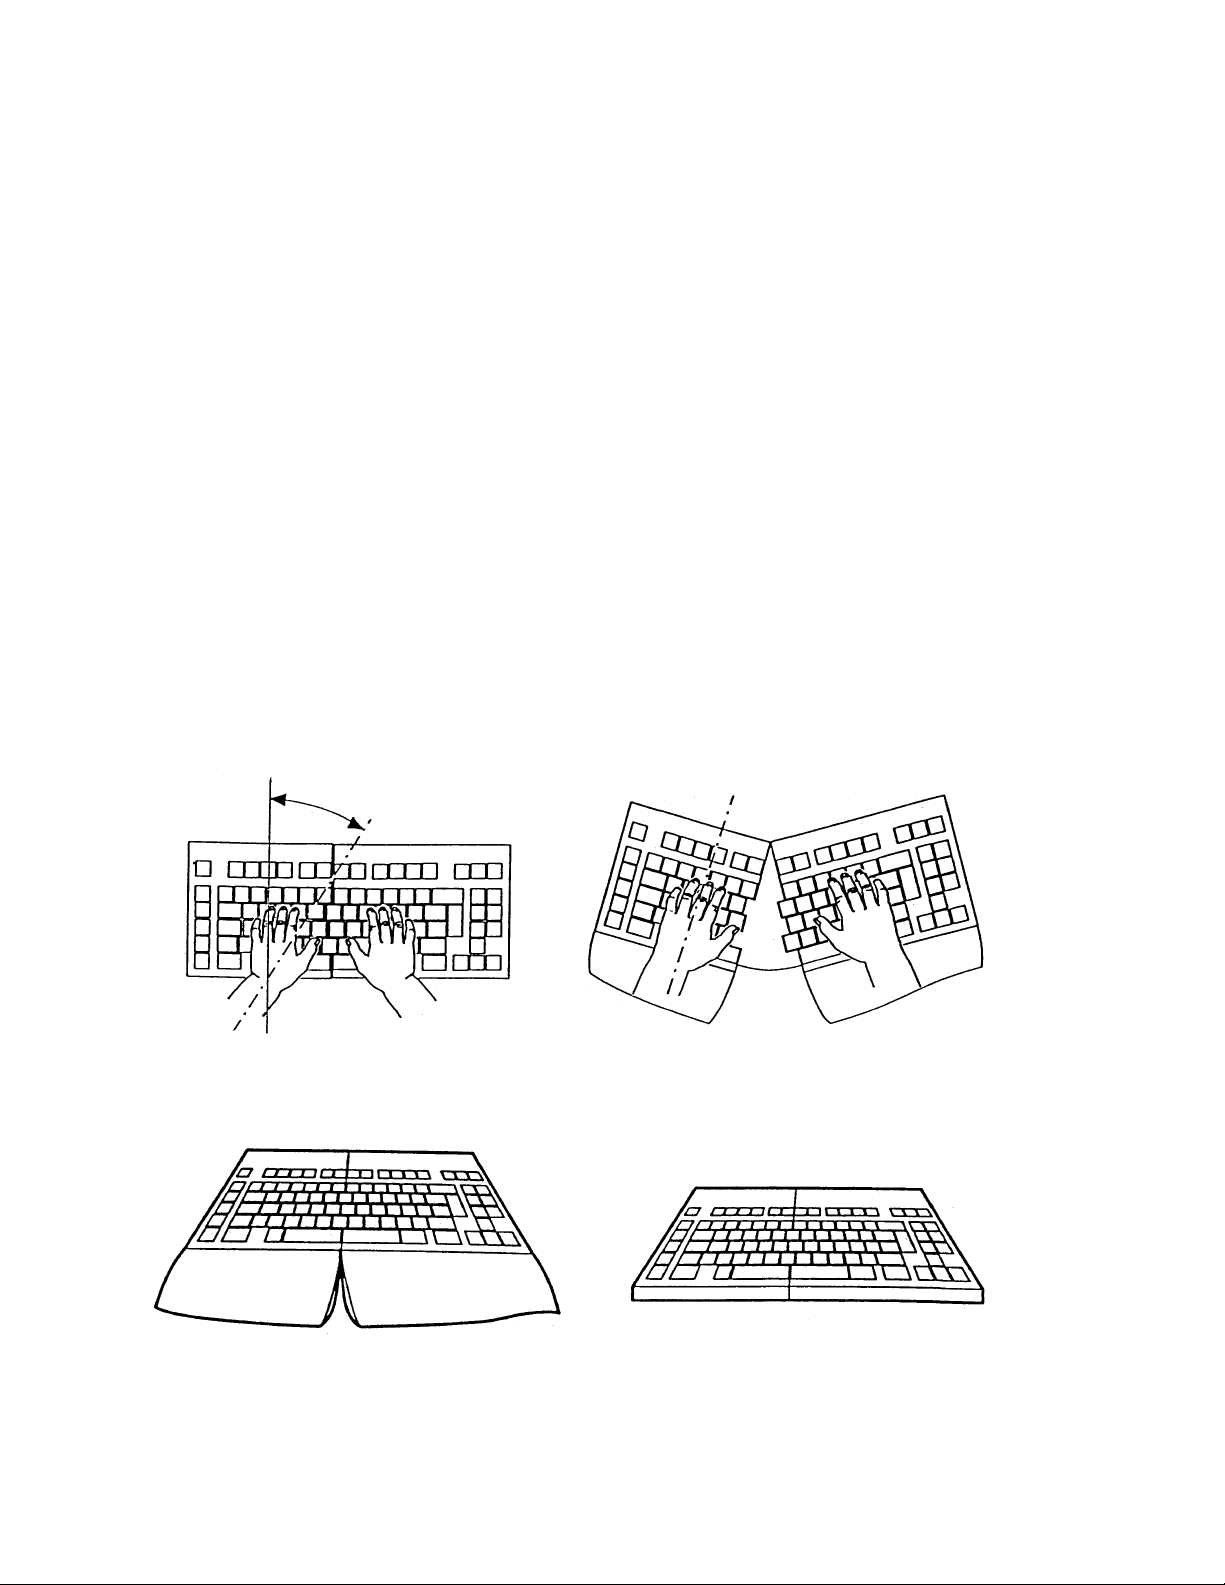
A splittable keyboard straightens wrists, relieving stress to the hands, arms, and
shoulders
The Maxim adjustable keyboard with palm supports installed (left) and palm supports
removed (right)
9
Page 10

Layout of keyboard and optional separate numeric keypad
The Maxim adjustable ergonomic keyboard has a layout very similar to that of a
traditional keyboard or a full size notebook computer. This provides virtually instant
adaptation for new or occasional users. The few differences (discussed below)
reduce the width of the keyboard and thus improve the positioning of the mouse for
right-handed users compared to a traditional keyboard.
Navigation/Editing key array changes
On a traditional keyboard, the navigation/editing keys form a two inch wide group of
key pairs comprising the arrow keys plus Insert/delete, Home/End, and Pageup/
Pagedown. Because this group of keys is located between the alpha keys and the
numeric keypad, it contributes to the significant width of the traditional keyboard
which is responsible for the awkward mouse position right handed users experience.
The Maxim keyboard modifies this group of keys to reduce the keyboard width but
maintains the traditional arrangement of the arrow keys and the grouping of
functional pairs for the other navigation/editing keys.
Embedded numeric keypad
The single biggest factor responsible for the narrow width of the Maxim keyboard is
the use of an embedded numeric keypad like that used on most notebook computers.
For occasional keypad use, numeric keypad actions are accessible by holding the left
side “Fn” key while typing numeric keypad actions on the right side.
For intensive numeric data entry, most users will want to purchase the optional
separate numeric keypad (see drawing below), which can be moved out of the way
when using the mouse.
Windows keys
Special keys on the left side of your keyboard are provided for Windows operating
systems. See your Windows documentation for their usage.
Page 11

CONNECTING THE KEYBOARD TO YOUR COMPUTER
Before you start, turn off your PC and read these instructions completely before
attempting to connect your new keyboard. A drawing of the keyboard and optional
numeric keypad showing the key layout and cable connections is provided below.
Compatibility
The Maxim is intended for computers designed to accept PC-compatible (PS/2, also
known as “enhanced” or “101-105 style”) keyboards.
Temperature
If the keyboard is brought into the installation site from a cold environment,
condensation may form. Before operating the keyboard, wait until it is absolutely dry
and has reached approximately the same temperature as the installation site. During
installation and before operating the keyboard, observe the information on
environmental conditions in the section entitled “Product Specifications".
Cables
The keyboard comes with a five foot keyboard cable with a PS/2 connector. If you
require a longer keyboard cable, you may use a
commercially-available PS/2 keyboard
extension cable or contact Kinesis Sales to
purchase an available longer cable.
Cable installation
Take care to lay cables in such a way that they
cannot be tripped over or damaged.
(1) Plug the main cable into the connector on
the back of the keyboard.
(2) Connect the keyboard cable to the PS/2
keyboard port on your PC, then turn on your
computer.
Plug main keyboard cable into back of
keyboard. To remove cable, first set front
opening angle to 20-30 degrees.
Note for easy disconnecting of keyboard cable:
Spread apart the left and right sections of the keyboard to exposure the phone-style
connector before trying to disconnect the keyboard cable.
11
Page 12

Connecting separate numeric keypad
If you plan to use the separate numeric keypad, see the section “Numeric Keypad
and Windows Keys” for instructions.
12
Page 13

CUSTOMIZING YOUR KEYBOARD
You will find it very easy to change from a traditional, flat keyboard to the new
adjustable ergonomic keyboard. The traditional keyboard layout has been retained,
allowing you to adjust the keyboard little by little to meet your needs.
Adjustment options
The various adjustment options for the Kinesis Maxim adjustable ergonomic
keyboard allow you to achieve a relaxing and neutral hand position and thus reduce
stress and increase comfort. Adjustments include:
# Adjustable keyboard front-to-back slope
# Adjustable hand/arm positioning (front opening angle)
# Adjustable lateral slope
# Removable palm supports
Adjusting the keyboard front-to-back slope
As with conventional keyboards, the slope can be changed from 6E to 12E by
elevating the two keyboard feet at the back of the keyboard. For most users, 6E is
preferable (rear feet left down).
Adjusting the front opening angle to optimize hand/arm positioning
When hands and arms are optimally positioned, the wrists are not bent. To achieve
this position, you can adjust the front opening angle in five stages from 0 to 30
degrees. Grasp the keyboard from the front and pull the left and right halves apart
until you have the desired angle. After adjusting the opening angle, stabilize the palm
supports (see new page):
Adjust the front opening angle of your keyboard
13
Page 14

Adjusting the lateral slope
You may adjust the lateral keyboard slope to your preferred position. In order to
prevent unnecessary muscle tension in the forearms, Kinesis recommends that you
raise the center of the keyboard to form an angle of either 8
o
or 14o. The higher angle
will provide the most relief from forearm muscle tension, but may not be compatible
with some keyboard drawers.
# Two recessed grips
are located on the back
of the keyboard. Grasp
these grips with both
hands and pull up (1) on
the center of the
keyboard so that
it bends at the center
hinge.
# Raise the appropriate
Rear view. Lift center of keyboard (1) and elevate one support flat (2)
support flap (2) in the
center of the keyboard. Use the smaller flap for an 8E lateral slope or the larger flap
for 14E.
Note: Do not attempt to raise both flaps at once, or damage may occur.
# Stabilize the palm supports if you have not removed them (see below).
Using, adjusting, or removing padded palm supports
The palm supports are provided for resting your hands when you pause from typing,
since it is generally recommended that you do not rest your hands on palm supports
while actually typing. They can be easily removed if you prefer. However, their
presence can largely prevent the undesirable practice of “wrist extension” while
typing, where the hands are bent upward at the wrist. If you choose to use the palm
supports, you should apply the self-adhesive palm pads provided.
Stabilizing the palm supports
To provide a stable base, the palm supports should be adjusted using the rotary
control wheels once you have selected the Lateral Slope position.
Turn the rotary adjusting wheel at the inside edge of each support until the the
support does not rock or wobble during use. Each time you change the keyboard
setting, you must re-stabilize the palm supports (see figure, opposite page).
14
Page 15

Step-by-step adjustment of palm supports:
# First, adjust the lateral slope (refer to “Adjusting the lateral slope” above).
# Then, turn each of the two adjusting wheels all the way towards “–”. If the
adhesive pads cover the “-“ symbol, see the drawing below.
# One at a time, turn the two control wheels back towards “+” symbol until each
palm support is stable.
To lower palm support, turn towards “-”. To raise,
turn towards “+”.
Removing the palm supports
You may remove the palm supports if you prefer. Before you do so, the keyboard
should be disconnected from your computer and the keyboard sections must be
pushed together and lowered to a flat position.
# Disconnect the cable from its connector in the back of the keyboard (separate the
left and right modules at the front briefly to expose the release tab on the main cable
connector). Once the main cable is disconnected from the keyboard, tip the keyboard
up so it is resting on its back edge.
# Underneath the keyboard, where each palm support attaches to the main keyboard
body, you will see a ½ inch long plastic flange and adjacent narrow tab. These
flanges lock the palm supports to the keyboard (see drawing below).
# While pinching together the locking flange and nearby tab, slide the palm support
towards the outside of the keyboard. If it doesn’t slide easily, allow it to sag forward
slightly while sliding.
15
Page 16

Warranty note concerning the removal of palm supports: Damage caused by
incorrect or careless removal of palm supports is not covered by the warranty.
Removing palm supports. Underside of keyboard is
shown with arrow indicating one of two locking flanges
which are pressed when removing the palm supports.
Attaching the palm supports
The two halves of the keyboard must be pushed together before you attach the palm
supports. Then reinstall the palm supports, one at a time:
# First, insert palm support from below into the slots provided in the keyboard.
# Then slide the palm support towards the middle of the keyboard until it latches
Attaching the palm supports
16
Page 17

NUMERIC KEYPAD
The Maxim adjustable keyboard does not have a dedicated numeric keypad in order
to optimize use of both the keyboard and mouse from an ergonomic point of view.
Instead, an embedded numeric keypad (blue legends) is provided, which is activated
by holding down the blue “Fn” key on the left front side of the keyboard (see
drawing below).
Operating the embedded numeric keypad (see drawing)
To obtain numeric output from the embedded keypad, “Numlock” must be on. Most
computers can be set to boot with Numlock on, but you may also change this state by
pressing the blue “Fn”key at the same time as the “F12/Numlock” key. When
“Numlock” is activated, pressing the “Fn” key plus a blue-legended keypad key
types the desired number from the numeric keypad.
Connecting a separate numeric keypad (see drawing)
If you prefer to have a separate numeric keypad, two different Kinesis products are
available for this purpose: (1) the standard Maxim keypad which attaches to the
keyboard with the provided telephone-style cable, and (2) the color-matched Savant
programmable keypad with Relegendable keycaps and on-board memory adequate to
store many hundreds of keystrokes.
Maxim keyboard and optional Maxim keypad showing layout and cable connections.
17
Page 18

18
Page 19

CARING FOR YOUR KEYBOARD
Cleaning the keyboard
Switch off all connected devices and unplug the PC power plug from its receptacle.
Do not use scouring powder or solvents to clean the keyboard. Make sure that no
liquid penetrates the interior of the switches.
It is normally sufficient to clean the surface of the keyboard housing with a dry cloth.
If it is particularly dirty, use a cloth that has been moistened in water with mild
detergent and thoroughly wrung out, or clean the keyboard using a cloth dampened
with a small amount of rubbing alcohol (70% isopropanol).
Foreign objects and spills
Make sure that no foreign objects (e.g. paper clips, staples, etc.) or liquids find their
way inside the keyboard to avoid the risk of short circuit. If metal objects or a spill
does get inside the keyboard, immediately unplug it or turn off your computer.
For clear liquid spills, it may be adequate to blot, then shake out as much liquid as
possible. Then allow the keyboard to dry thoroughly (at least 24 hours in most
climates) before testing.
If your keyboard does not work properly, and for spills of sticky liquids or
conductive objects trapped inside, contact Kinesis Technical Support (next chapter)
for advice.
Keycap removal
If you need to remove one or more keycaps for cleaning, a Keycap Removal Tool is
available from Kinesis for a modest price. It can be difficult to re-install the widest
keycaps (Space bar, Shift, Enter, Backspace) because they include an alignment
wire. There we recommend that you contact Technical Support (see the next chapter)
before removing one of these wide keys.
19
Page 20

20
Page 21

TECHNICAL SUPPORT, ACCESSORIES, & REPAIRS
What to do first
If you have questions about installing or operating your Kinesis keyboard, first
review the relevant sections of this User’s Manual. You may also find useful
information and answers to frequently asked questions on Kinesis’ web site at
www.kinesis-ergo.com.
Contacting Kinesis Technical Support
Contact Kinesis technical support only after you have read the entire user’s manual
and still have problems or unanswered questions. You may contact Kinesis
Technical Support by E-mail (tech@kinesis-ergo.com), fax (425-402-8181), or
phone (425-402-8100). Kinesis toll-free sales number is not available for technical
support calls. Technical support hours for voice phone are 8:00am to 4:30pm Pacific
time.
When you contact Kinesis, be prepared to document your purchase date, as well as
your keyboard model and serial numbers. Also know the brand and model of your
computer and your computer’s operating system.
Purchasing Kinesis Accessories
You should have received information about available accessories in the box with
your Kinesis keyboard. If you do not have this information, or if you just have
questions, please contact your local dealer or Kinesis Sales at 800-454-6374, or visit
our web site at http://www.kinesis-ergo.com.
Authorized Repair
If your keyboard needs factory repair, you must first obtain an authorization number
(RMA) from Technical Support at Kinesis. The keyboard may be repaired by
authorized, qualified personnel only. Unauthorized opening of the keyboard and
inexpert repairs may invalidate your warranty.
Getting an RMA number prior to keyboard repair
For any repair, whether or not it is covered by your warranty, you must contact
Kinesis to explain the problem, provide certain information, and get an RMA
number to write on your package. Packages sent to Kinesis without first obtaining an
RMA number may be refused and any repair work cannot commence without
information and instructions from the owner.
21
Page 22

Packaging and Shipping
If you need to ship the keyboard, transport it only in its original packaging, or in
other packaging that protects it against impact and scratches. It is advisable to insure
your package since Kinesis is not responsible for items until they are received safely
at the Kinesis repair center.
Be sure to note your RMA number on the outside of the package and include a note
listing the problem and your return shipping address. Kinesis normally cannot ship to
APO or post office boxes.
Warranty repairs are normally returned to the customer via UPS ground at no charge.
However, you may request upgraded return shipping at the time the RMA is issued
and just pay the difference between the ground rate and the more expensive rate.
22
Page 23

APPENDIX A: ERGONOMIC GUIDELINES
Adapting tools and environments to reflect human capabilities — the science of ergonomics
— is crucial to enhancing comfort and reducing injury. Ergonomics also makes an important
contribution by educating people in the safe, healthy use of technology products.
As a result, ergonomic issues involve many aspects of the work environment. No single
product can be expected to provide a solution for all of the varied ergonomic concerns in the
workplace.
Your experiences with a Kinesis keyboard will be affected by a number of non-keyboard
factors, including your stress level, the chair you sit in, and the desk and other work surfaces
in your office. In fact, hand and arm injuries can result from elements of your workstation
other than your keyboard.
To enhance the comfort of your work environment, Kinesis has joined with Herman Miller,
Inc. to provide guidance for creating an ergonomically appropriate workspace.
The following ergonomic guidelines are reprinted with the permission of Herman Miller,
Inc. These guidelines include references to ANSI (American National Standards Institute)
standards. They do not constitute research conducted by Kinesis.
Introduction by Herman Miller, Inc.
The position and location of the furniture and equipment in your office are related to the size
and shape of your body. For example, when you adjust the height of your chair so that your
feet rest flat on the floor, you may find that your work surface is too high. To work
comfortably, you must make a series of adjustments to the components around you.
Start by adjusting your chair. Go on to adjust your work surfaces and finally your computer
equipment. Remember, if you experience discomfort while working, consult a health care
professional.
Adjusting your chair
Adjusting the Seat Height of your Chair
Seat height means the distance from the floor to the top of your chair’s seat when you are
sitting in your chair. First, sit in your chair in a comfortable, upright position. Adjust your
seat height up or down so that your feet rest comfortably flat on the floor and your thighs are
approximately parallel to the floor. If your feet dangle slightly and the backs of your thighs
press hard on the front of the seat, the chair is probably too high. If your knees are elevated
and your thighs don’t touch the front of the seat, the chair is probably too low.
If you like to lean back when working, try it now. If your heels are lifted off the floor,
consider lowering your chair. If your heels rise as you push off with your feet to lean back,
consider loosening your chair’s tilt tension.
If you like to sit forward, try it now. If you must tuck your feet in or stick them out in front
of you, consider raising your chair. If you feel the chair seat gives too much, consider
tightening your chair’s tilt tension. When you have adjusted your chair, take a look at the
23
Page 24

standard ranges recommended by ANSI. Compare the position of your chair with the ANSI
ranges.
ANSI-Recommended Seating
1. Seat height should range from 16” to 20.5”. This refers to how high the chair seat should
be with a person’s weight pressing on the cushions.
2. Seat depth for chairs with rectangular cushions or chairs made of hard materials should
range from 15” to 17”. Seat depth refers to the distance from the front edge to the back
edge of the seat cushion. Seat depth can be greater if the front edge of the seat is soft or
curved.
3. Seat width should be at least 18.2” measured across the middle of the seat. Seat width
refers to the side-to-side distance across the seat cushion.
4. Distance between armrests should be at least 18.2” measured between the inner edges of
the armrests.
5. The backrest should be at least 12” wide in the lower back area. Now go on to adjusting
your work surface.
Adjusting your work surface
The proper height of the work surface is related to the clearance you have beneath it to
accommodate your legs while in a seated position.
1. Pull up to the work surface while seated. With your feet flat on the floor, adjust the height
of your work surface so that your knees do not bump the edge of the work surface, pencil
drawer, or keyboard support tray (when the tray is in its working position). The tops of
your thighs should not touch the underside of the work surface.
2. When pulled up to the work surface, your feet or knees should not bump against the back
of the work surface or wall supporting the work surface.
3. Swivel to grasp something within easy reach on your work surface. You need enough
clearance beneath your work surface to move freely. Your knees should not bump against
storage drawers or support brackets.
4. While sitting in an upright position, your forearms should rest comfortably on the work
surface.
If the height of the work surface causes your shoulders to be raised up or hunched, consider
lowering your work surface. If you must slump or hunch over your work surface, consider
raising it so that you can work in a comfortable, upright position. Check the height of your
work surface against the standards recommended by ANSI.
According to ANSI
1. Knee space should measure at least 20” from side to side under the work surface; 24” of
knee space is preferred.
2. The underside of the work surface or keyboard tray should be higher than your knees. If
24
Page 25

you work at a desk with a work surface that cannot be raised or lowered, the clearance
under the work surface should be at least 26.2”.
There should be at least 12.2” of front-to-back clearance at knee height, measured from
underneath the front edge of the work surface back toward the wall supporting the work
surface. Taller people will need more clearance. Now adjust your Kinesis keyboard and
computer monitor.
Adjusting your Keyboard
Adjust the angle and height of your keyboard so that the front of the keyboard is
approximately at the same height as your elbows. Your forearms should be parallel to the
floor. Be Careful of the Following:
1. Are you striking the keys on your keyboard too hard? Try to remember to soften your
touch.
2. Are your shoulders raised or hunched? Relax and lower them. If the armrests of your
chair are forcing your shoulders up, consider asking to have the armrests removed. If
your work surface is forcing your shoulders up, consider asking to have it lowered.
3. Do you keep your hands poised above the keyboard? Relax them; don’t allow yourself to
keep your hands frozen in one position. Remember mini-breaks.
4. Are you leaning against a sharply angled edge? Move back to relieve pressure on your
forearms.
5. Are you leaning over to reach things in your workstation that could be placed closer? Do
you often reach behind your body or above shoulder height to retrieve something that
could be moved forward or down? Try to find an arrangement that keeps materials you
frequently use within convenient reach (about 20” away for a heavy object).
Finally, listen to your body. If you think you may be more comfortable adopting a different
posture or way of working, experiment! And if you are experiencing persistent discomfort or
unusual sensations, see a health care professional for advice.
Reprinted in part with the permission of Herman Miller, Inc., Zeeland, MI USA. Herman Miller, Inc. does not necessarily recommend the use
of the Kinesis keyboard. Design concept; LANDMARK bv DESIGN & CONSULT, THE NETHERLANDS
© 1992 HERMAN MILLER, INC., Zeeland, MI USA
25
Page 26

KINESIS KEYBOARD LIMITED WARRANTY
Kinesis Corporation (“Kinesis”) warrants to the original retail purchaser that this Kinesis
keyboard (“Product”) is free from defects in materials and workmanship and will perform
substantially in accordance with the Product documentation for two years from the date of
purchase. This Warranty does not apply to software or diskettes enclosed with the product,
which are covered by a Kinesis License Agreement. If Product fails due to accident, abuse,
or inappropriate use, or normal wear, Kinesis shall have no responsibility under this Limited
Warranty.
Purchaser’s Exclusive Remedies
During the first TWO (2) years after the date of original purchase, the exclusive remedy for a
defect in this Kinesis Product shall be, at Kinesis Corporation’s option, either repair or
replacement of the Product. If you suspect the Product is not working properly or if you have
questions about the performance of the Product, contact Kinesis technical support. If you
wish to return the Product to Kinesis for any reason, you must obtain from Kinesis an RMA
number and instructions for returning the Product. You are responsible for the cost of
shipping the Product to Kinesis. Within the United States and Canada, Kinesis will ship
products repaired or replaced under warranty to you by ground at no charge. Repair parts
and replacement Product will be either reconditioned or new.
Disclaimer of Other Warranties
The warranty and remedies set forth above are exclusive and in lieu of all others, whether
oral or written, express or implied. Kinesis specifically disclaims any and all implied
warranties, including, without limitation, warranties of merchantability and fitness for a
particular purpose. No Kinesis dealer, agent, or employee is authorized to make any
modification, extension, or addition to this warranty. Kinesis does not warrant that the
Product will meet your requirements, or that operation of the Product will be uninterrupted
or error-free, or that all errors will be corrected.
Limitation of liability
Kinesis is not responsible for special, incidental, or consequential damages resulting from
any breach of warranty, or under other legal theory, including but not limited to lost profits,
downtime, goodwill, damage to or replacement of equipment and/or property nor any costs
of recovering, reprogramming, or reproducing any program or data stored in or used with
Kinesis products.
Some states or countries do not allow the exclusion or limitation of incidental or
consequential damages or exclusions of implied warranties, so the above limitations or
exclusions may not apply to you. This warranty gives you specific legal rights, and you may
also have other rights, which vary from state to state and country to country.
26
Page 27

PRODUCT SPECIFICATIONS
Compatibility: PS/2 compatible
PS/2 cable termination
Standards met:
Product safety: Tested and complies with European
standards (EN60950 / VDE O8O5)
"Safety-tested" marks ZH1/618, IS0 9241-4 /
EN29241-4, IS0 9995, D1N 2137
Electromagnetic: Interference and interference immunity: CE symbol
Tested to EC Guideline 89/336/EWG
(EN 55022/B, EN 50082-1)
FCC Class B
Electrical
Electrical load: Keyboard Power consumption: <50mA at 5V
Key Switches
Type: Conductive rubber on mylar
Max force: 1.80 oz.
Legends: 2-color (black and blue), laser etched
Environmental
Temperatures: Ambient temperatures for use: 5EC to 40EC
Physical
Dimensions: Dimensions at minimum adjustment angle
Without palm supports With palm supports
Height = 1 inch 1 inch
Width = 15.1 inches 15.1 inches
Depth = 6.5 inches 10.3 inches
Ship wt: 3.75 lbs
Keyboard wt: 2.75 lbs, keyboard alone, with palm supports
Adjustment range:
o
Front opening angle: 0
Front-to-back slope: 6
to 30o (continuous)
o
and 12
o
Lateral slope: 0o, 8o and 14
o
Page 28

 Loading...