

Page 1
Quick Start Guide
Freestyle VIP3 Pro Accessory Kit (AC920)
Compatible with Freestyle Pro & Edge Keyboards
Introduction
The VIP3 Pro is designed to enable
adjustable tenting of your Freestyle
Pro keyboard. The VIP3 Pro can be
adjusted to provide tenting angles of
o
5
, 10o, or 15o, and each side of the
keyboard can be set independently to
suit your preferences. The tenting
angle is easy to adjust without
detaching the VIP3 Pro from the
keyboard.
What is Tenting?
“Tenting” is the elevation of the center portion of a split keyboard. By raising your thumbs, your forearm
muscles become relaxed, resulting in significantly improved comfort and blood flow. The palm supports
included in the kit further improve relaxation of forearm, neck and shoulder muscles.
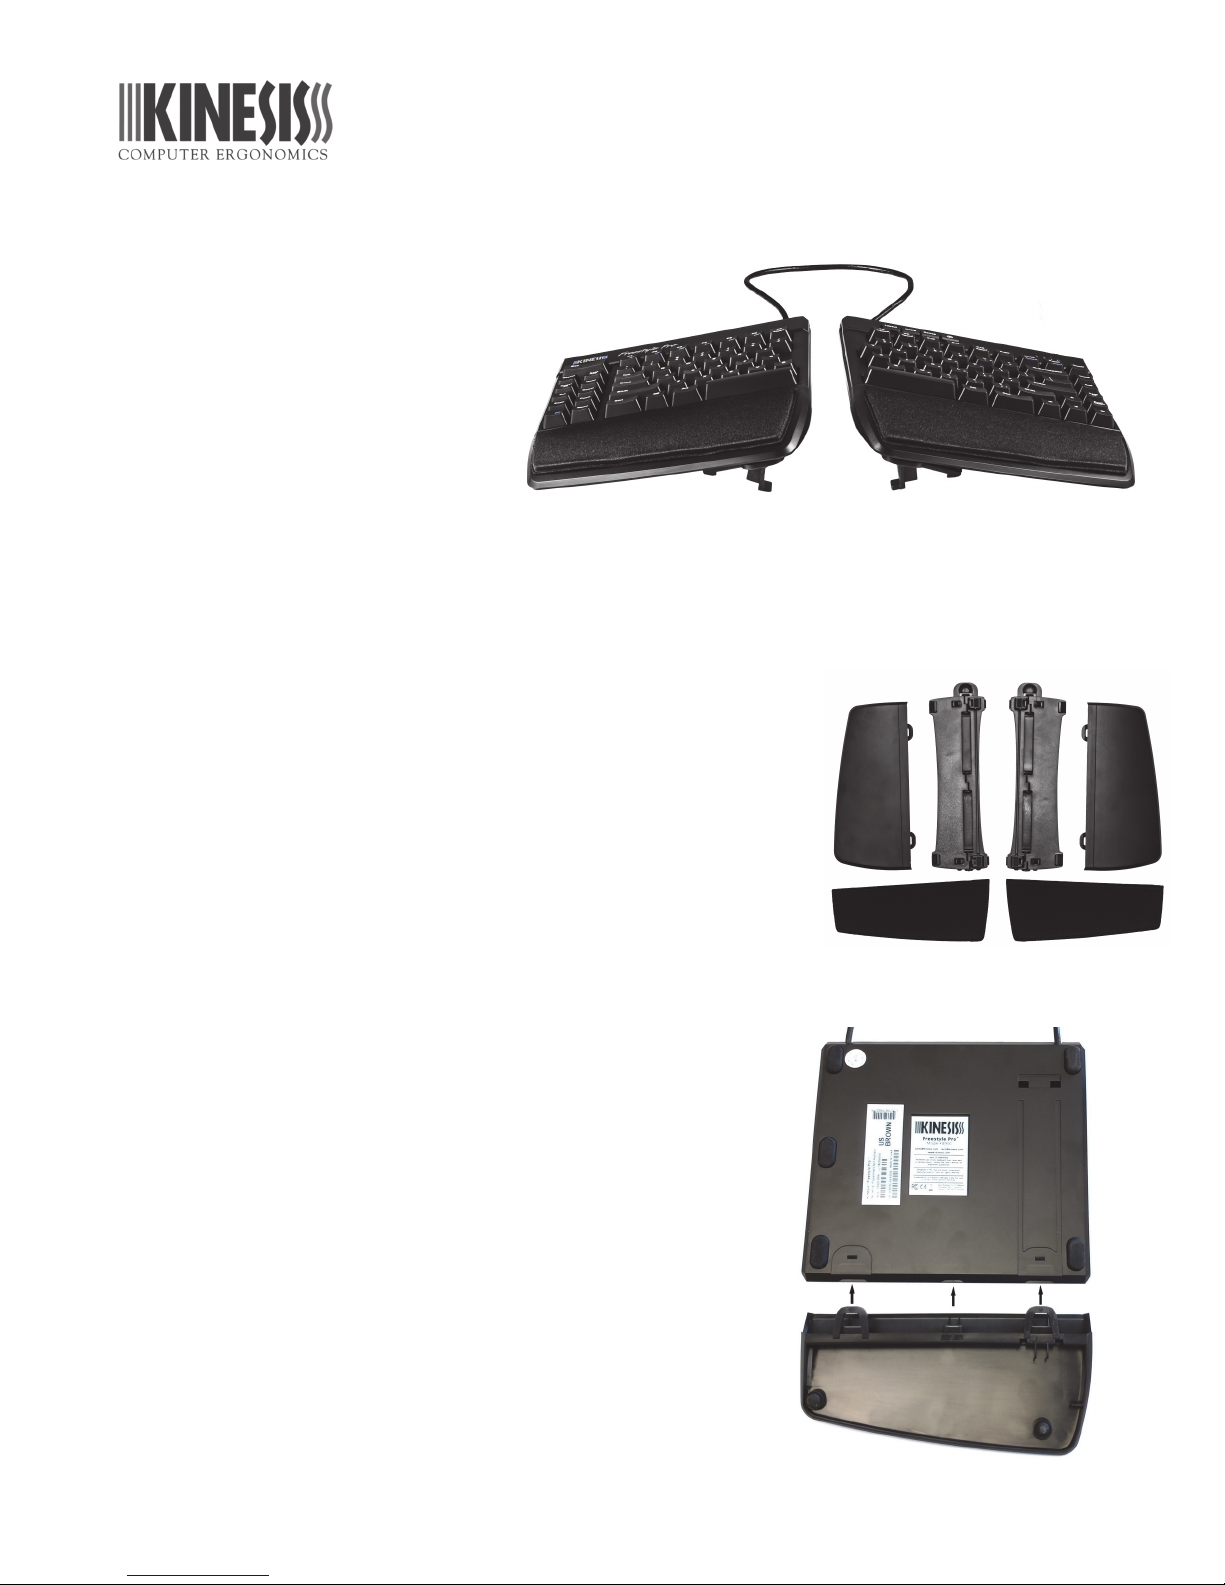
VIP3 Pro Contents
Each VIP3 Pro kit contains a pair of left and right palm supports,
replaceable self-adhesive palm pads, and and left and right “v-lifters”
which mount to the underside of the keyboard once the palm supports
are installed. Each v-lifter can produce three reproducible tenting angles
without any additional accessories.
NOTE: The v-lifters and palm supports are not interchangeable. For stable
operation, the left v-lifter and left palm support must be installed on the left key
module and vice versa.
Installing VIP3 Pro
1. Disconnect keyboard: Unplug the keyboard or shut down your
computer to avoid accidentally pressing any keys.
2. Install Palm Supports: The palm supports must be installed prior
to installing the v-lifters. Identify the left and right palm support by
using the legend engraved on the underside of the palm support.
Match the correct palm support to the appropriate key module, then
place both key modules and palm supports upside down on a flat
surface.
Slide each palm support towards its key module to engage the three
mounting tabs in their prospective slots (arrows).
If the palm supports don’t slide on smoothly and allow the two locking
loops to engage, confirm you are using the correct (right or left) palm
support.
VIP3 Pro kit installed on Freestyle Pro keyboard, 10 degree tenting shown.
VIP3 Pro kit contents
Installing palm supports
Mounting Tabs
Page 2
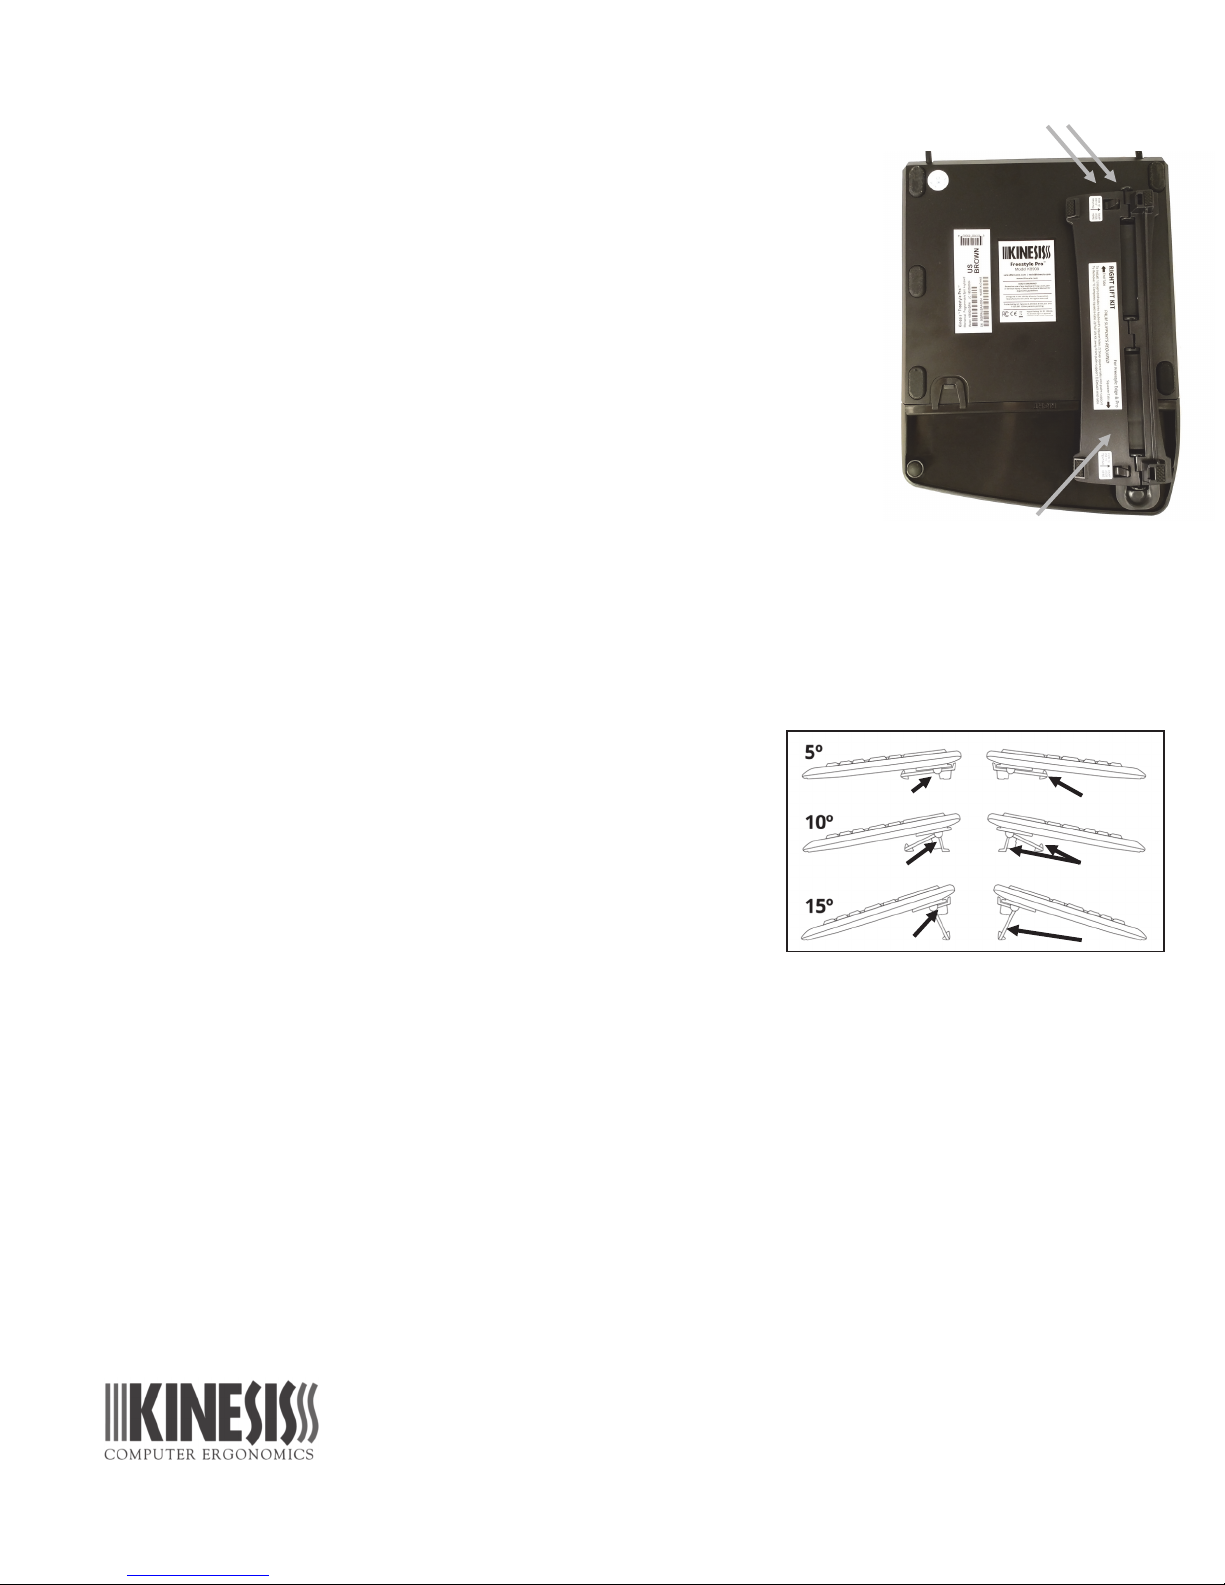
3. Install v-lifters: Identify the left and right v-lifters based on their labels. With
the keyboard still upside down, insert the two end-tabs into the square holes on
the underside of the appropriate key module at a 90
the end tabs at a 90
o
angle, the v-lifter may not align properly. Once the end
o
angle. If you don’t insert
1. Insert end-tabs into square
holes in backside of key
module
tabs are in place, lower the other end of the v-lifter until the two “squeeze-tabs”
snap into the palm support. The v-lifter should lock securely into place. When
both v-lifters are installed, gently flip the keyboard back into the upright position
and reposition the modules for typing.
Removing VIP3 Pro Kit
1. Unplug the keyboard or shut down your computer.
2. Position the key module upside down and press the “squeeze-tabs”
together slightly.
3. Lift straight up on the squeeze-tab end of the v-lifter until the two end-tabs
can be disengaged.
NOTE: Do not attempt to remove the palm supports while the v-lifters are
attached. This could damage the palm supports and/or the v-lifters.
Adjusting VIP3 Pro
The VIP3 Pro can be quickly adjusted to provide 5
o
which provide 5
to achieve 10
o
5
tenting: The VIP3 Pro ships with the legs unsnapped. To convert
back to 5
o
after changing to 10o or 15o, pull the short and long
tenting when unsnapped (i.e., flat). The legs may be snapped together to form a rigid “V”
o
& 15o tenting.
support legs apart to release the snaps. The legs will fold flat from
o
, 10o, or 15o tenting. Each v-lifter has two hinged legs
Legs unsnapped
2. Then lower this end until
squeeze-tabs (underneath)
lock into the palm support
Flat
the weight of the keyboard.
o
10
and 15o tenting: To enable the higher tent settings, simply
2 Legs Legs snapped
squeeze the two legs of one v-lifter together to engage the snaps. To
change between the 10
and flip the snapped v-lifter to one of the two positions shown below.
o
and 15o angles, lift each key module slightly
Legs snapped
1 Leg
Tips & Troubleshooting
For best results, start at 5o tenting and as your body adapts, experiment with 10o and 15o tenting to find the
setting that works best for you.
If the VIP3 Pro feels unstable you may have installed the v-lifters on the incorrect key modules, or the legs
may not be fully snapped into place.
Health Caution
If you experience pain, weakness, or tingling while using a keyboard, consult a qualified health professional.
Support
For additional support please email technical support: tech@kinesis.com.
Kinesis Corporation
22030 20
Bothell, WA 98021 USA
th
Avenue SE, Suite 102
www.kinesis.com sales@kinesis.com
Version May 8, 2018
 Loading...