

1 Drawer
Vehicle Storage System
Part No 51550
51550 Manual_Layout 1 19/12/2014 4:57 pm Page 1

Installation:
Includes:
Mounting Kit:
4 x bolts
4 x washers
4 x locking nuts
Stacking Kit:
6 x bolts
6 x washers
6 x spring washers
1
Remove top section by undoing the
10 retaining screws and set aside
taking care not to loose the fasteners.
This allows access to the internal base
of the drawer system so it can be bolted
to the vehicle
2
51550 Manual_Layout 1 19/12/2014 4:57 pm Page 2
Installation:
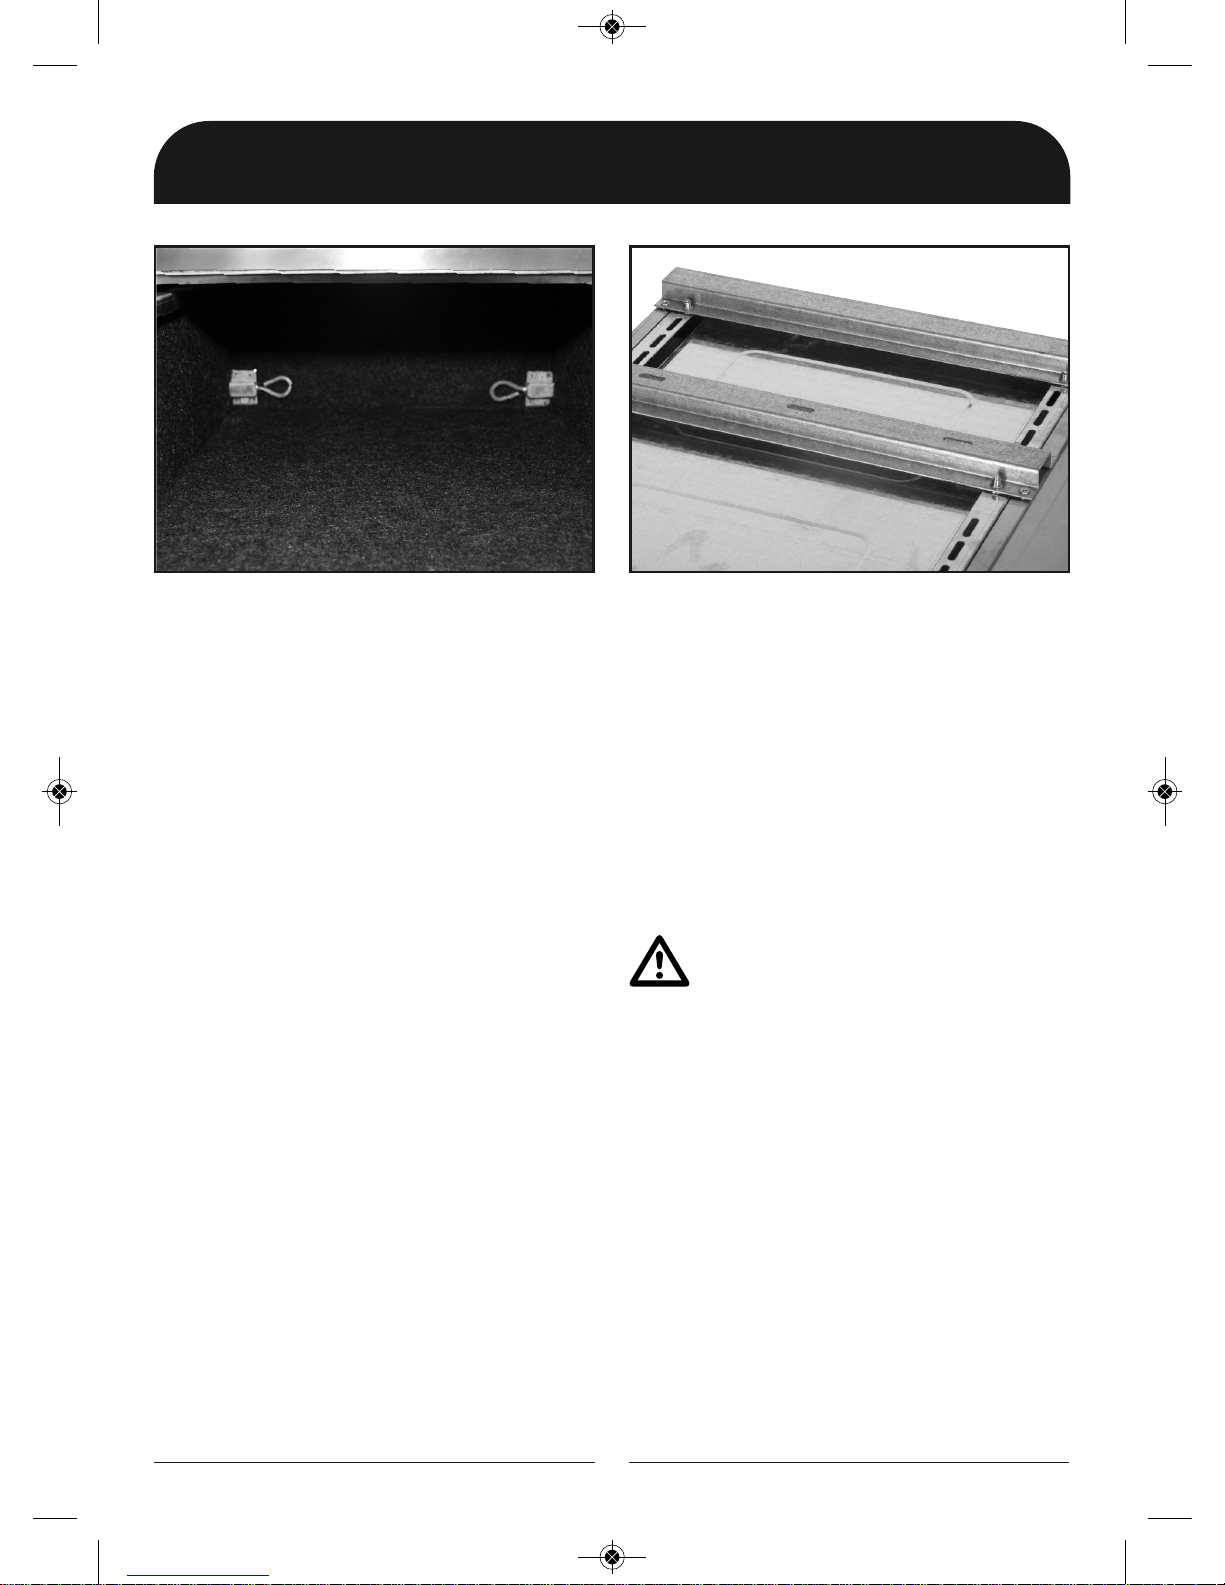
2
Remove the 2 drawers by
unlatching the 2 retaining latches
located at the rear interior of the drawer
3
Due to the heavy weight of this
product please ensure that you
have at least 1 person assist you in
lifting this product into the interior of the
vehicle. Also ensure that the drawer top
is removed to minimise weight while
installing into the vehicle
4
Check the base of the vehicle
that the drawer system is to be
installed in and identify suitable
mounting points within the vehicle.
Either use existing vehicle mounting
points or new drill new mount points
using the bottom fixing ribs as a guide
for drilling the holes or locating to
existing mounting points.
WARNING: Care must be taken when
drilling new holes into your vehicle.
Ensure that you avoid fuel and brake lines,
electrical wires and other components that
may damage your vehicle
NOTE: The mounting points on the ribs are
elongated and the ribs are adjustable to assist
in locating suitable mounting points
NOTE: Automotive carpet may need to be
removed using a sharp knife to gain easier
access to the vehicle mounting points or for
drilling holes
NOTE: Use a minimum of 4 mounting bolts
provided to ensure maximum mounting
strength and weight capacity are achieved.
3
51550 Manual_Layout 1 19/12/2014 4:57 pm Page 3

Installation:
6
Once the mounting bolts are
secure,re attach the top section
and trim ensuring all fasteners are
tightened.
5
Use the existing removed vehicle
bolts to secure the frame base
via mounting slots provided OR the
mounting bolts provided to secure to the
vehicle. Ensure the bolts as securely
tightened and use a suitable thread glue
to ensure they do not loosen.
7
Refit drawer ensuring that rear
locating stops automatically engage.
NOTE: A firm push is required to move the
drawers past the automatic drawer stops.
8
To stack a second drawer system on
top of another fitted unit remove the
drawer and line up the base mounting
slots with lower unit mounting holes on
the lower unit. Install the stacking bolts
and ensure they are tight.
4
51550 Manual_Layout 1 19/12/2014 4:57 pm Page 4

Care and Maintenance:
ENSURE:
• Ensure all extremities are clear
of moving parts especially when
opening and closing the drawers
• Distribute weight evenly when
loading the drawer system in
both the drawer and top section
• Ensure all items stored on top of
the drawer system are secured
using the anchor points and
suitable tie downs
• For optimum safety install a
quality cargo barrier
• Ensure the product is regularly
maintained and cleaned to
optimise the products life span
• Ensure drawer is locked at
all times to protect contents
AVOID:
• Do not overload the drawer
(keep below 100kgs)
• Do not use chemicals, solvents,
when cleaning the carpet. Use
warm soapy water and vacuum
regularly
• Do put place sharp objects on
the carpeted areas as this my
damage the surface
• Metal surfaces inside vehicles
will become extremely hot.
Avoid touching metal surfaces
until they cool down
5
WARNING: Product is designed for interior use only
51550 Manual_Layout 1 19/12/2014 4:57 pm Page 5

Care and Maintenance:
Maintenance:
• Remove the drawer using the
internal rear latches and inspect
and clean all roller bearings
using a clean cloth or rag
• Replace seized, rough, loose
roller bearings
• Clean drawer runners and lubricate
using a good quality light grease
(small amount only)
• Clean carpet by regularly
vacuuming . Use a damp cloth
and warm soapy water to clean
dirt and marks
• Use a quality stainless steel
cleaner on body sides
• Use a quality metal polish on
metal trim (remove prior to
cleaning to avoid marking the
carpet)
• Use Graphite powder or silicone
spray for lock barrels
• Use light grease on lock latch
and light oil on lock handle
6
• Regularly check and tighten all
all fasteners including mounting
points
51550 Manual_Layout 1 19/12/2014 4:57 pm Page 6

Spare Parts:
7
1
5
Part No Description
10 51000-11 Screw kit x 24
11 51000-12 Stainless side panels 2pce (right & left)
12 51000-16 Ply wood Top (RHS)
13 51000-17 Drawer front
14 51000-18 Rear drawer latch x 1 (with screws)
15 51000-21 Drawer (RHS)
16 51000-23 Rubber stopper
17 51550-1 Stacking Bolts Kit
Part No Description
1 51000-1 Lock & Key
2 51000-2 Pull handle latch 1 pce (stainless steel)
3 51000-3 Roller bearing 1 pce
4 51000-5 Spare carpet (1X1M)
5 51000-6 Retractable tip down point x1 (with fasteners)
6 51000-7 Corner Trims (front)
7 51000-8 Corner Trim (side)
8 51000-9 Mounting bolt kit
9 51000-10 Hex key kit x 8
2
3
13
15
6
11
7
8
10
9
12
4
16
14
17
51550 Manual_Layout 1 19/12/2014 4:57 pm Page 7

Dimensions:
8
Weight: 36.5Kg
51550 Manual_Layout 1 19/12/2014 4:57 pm Page 8
 Loading...