

Pull Out Pantry
INSTALLATION INSTRUCTION
INSTALLATION INSTRUCTIONS

Front Edge
P 1
( Bottom Panel)
( Top Panel)
Front Edge
Pull Out Pantry
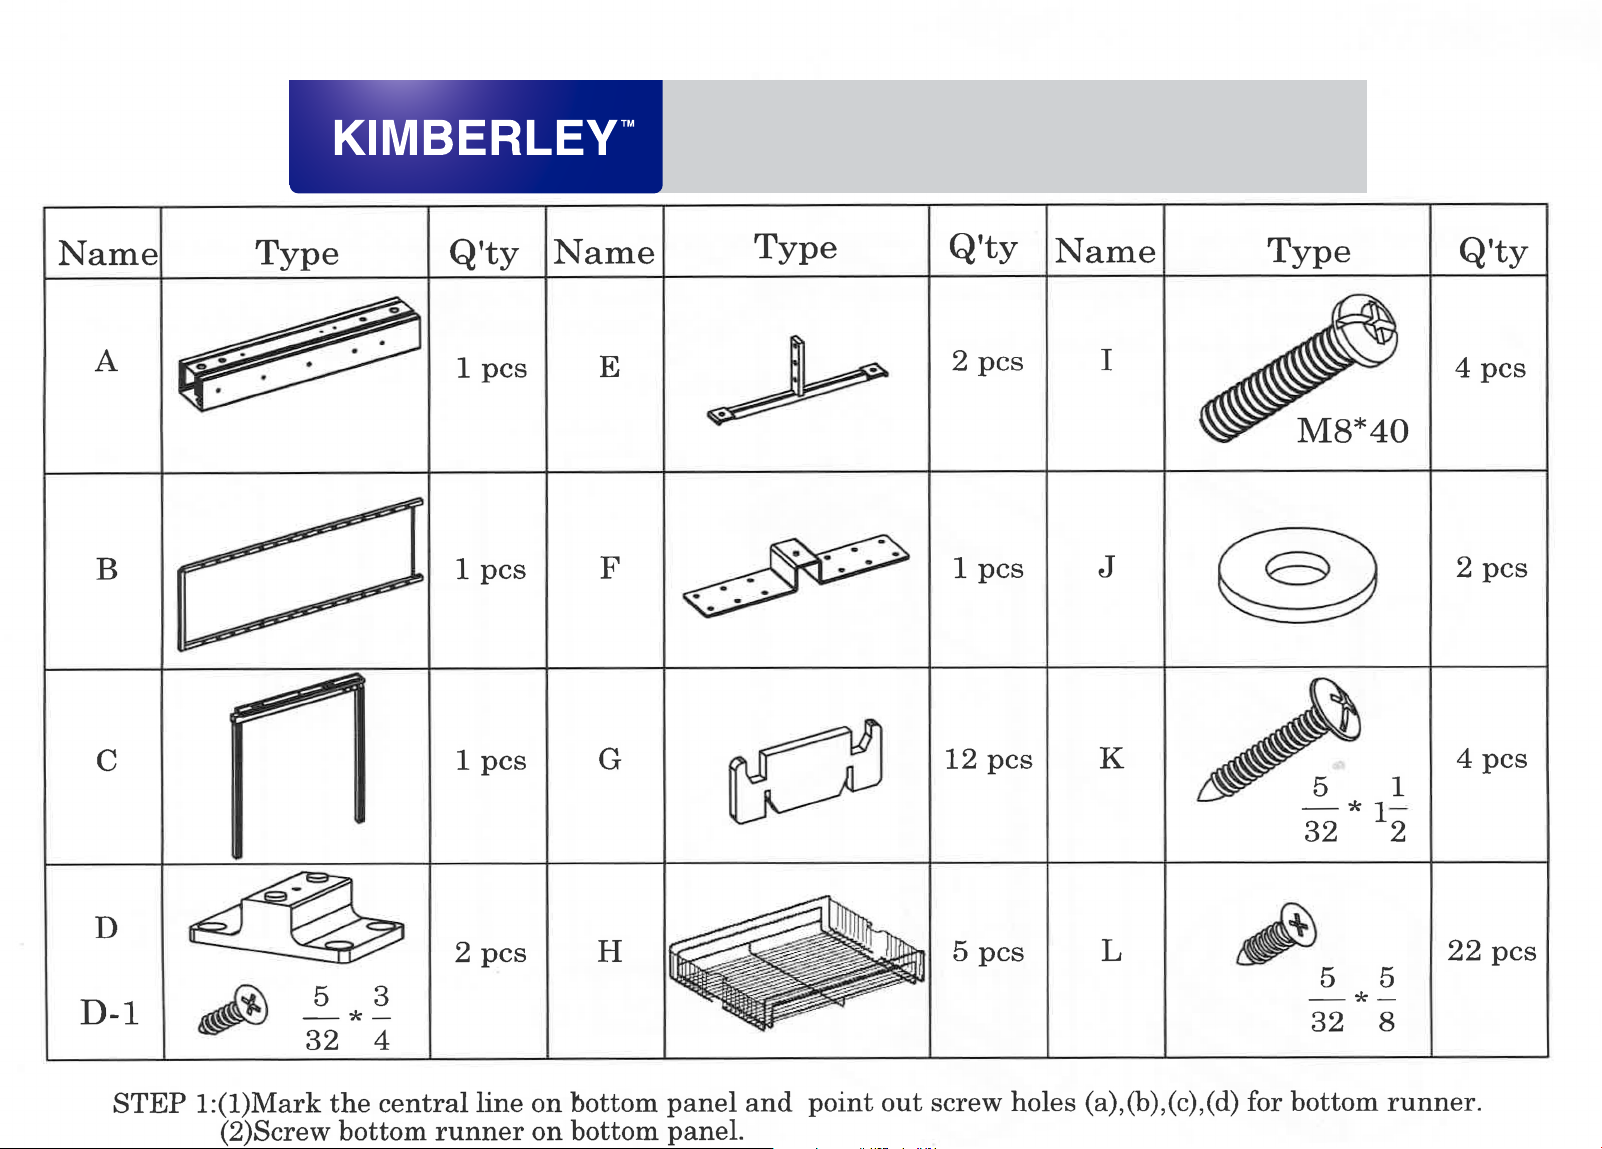
Name
A
B
C
D
D-1
Type
3.5 *
INSTALLATION INSTRUCTION
INSTALLATION INSTRUCTIONS
Q'ty
1 pcs
1 pcs
1 pcs
Name
E
F
G
H
3
4
Type
Q'ty
2 pcs
1 pcs
12 pcs
5 pcs2 pcs
Name
I
J
K
L
Type
M8*40
5
32
5
32
* 1
*
Q'ty
4 pcs
2 pcs
4 pcs
1
2
22 pcs
5
8
STEP 1:(1)Mark the central line on bottom panel and point out screw holes (a),(b),(c),(d) for bottom runner.
(2)Screw bottom runner on bottom panel.
.
(d)
Central Line
L
(c)
L
400
5
14 14
STEP 2: (1)Mark the central line on top panel and point out screw position.
(2)Disconnect inner member of slide.
(3)Screw attached plastic parts on the top slide of frame and put inner
member back to slide.
(a)(b)
.
Central Line
45
32
(b)
(a)
1
(d)
(c)
28 28
227
32
110
push
D
D
2
D-1
3
D-1
3

P 2
Pull Out Pantry
INSTALLATION INSTRUCTION
INSTALLATION INSTRUCTION
INSTALLATION INSTRUCTIONS
STEP 3:(1)Keep the frame in closing position,and connect
(2)pull up top frame to match the screw holes on
(3)Fix the top frame and bottom frame.
frame with bottom runner by two screws.
top panel.
L
2
Y
.
I
J
1
STEP 4:(1)Mark the central line on door panel and point
(2)Screw T-Bar on door panel.
(3)Connect upright tube with T-Bar and door panel.
( Door Panel)
out screw holes (a),(b),(c),(d)for T-Bar.
.
Central Line
(a)
(b)
3
S2
(c)
P
S1
112.5 112.5
Y
(d)
Y
E
(b)
(a)
(c)
L
(d)
E
L
P : The thickness of carcase panel.
S1=P+84mm
S2=P+84mm+Y
Y= The distance from top screw hole center to
bottom screw hole center of frame.
STEP 5: (1)Connect the door panel with frame by T-Bar.
(2)To adjust the screws on T-Bar to set up the door panel on right lateral position.
(3)To adjust the screws on bottom frame to set up the door panel on right vertical position.
2
1
.
.
K
.
To adiust the door on lateral level.
3
.
I
F
K
.
To adiust the door on vertical level.
G
 Loading...