

Kimball Cetra, Footprint Assembly Instructions Manual
Cetra®\
Footprint
®
Assembly Instructions
TRAXX
®
Mounted
Worksurface
Installation
Proper product installation, in accordance with these instructions, is the responsibility of the installing agent.
If you have any questions concerning these instructions, please call Kimball Customer Care Teams.
SYSTEMS
Recommended Tools
• Screw Gun with
Torque Option
• #2 Phillips Head Bit
•Tape Measure
Telephone 800.482.1818
Fax 812.482.8300
www.furniture.kimball.com
Form #AISYFP004B-01
#1202060
Printed in U.S.A
© 2001 Kimball International, Inc.
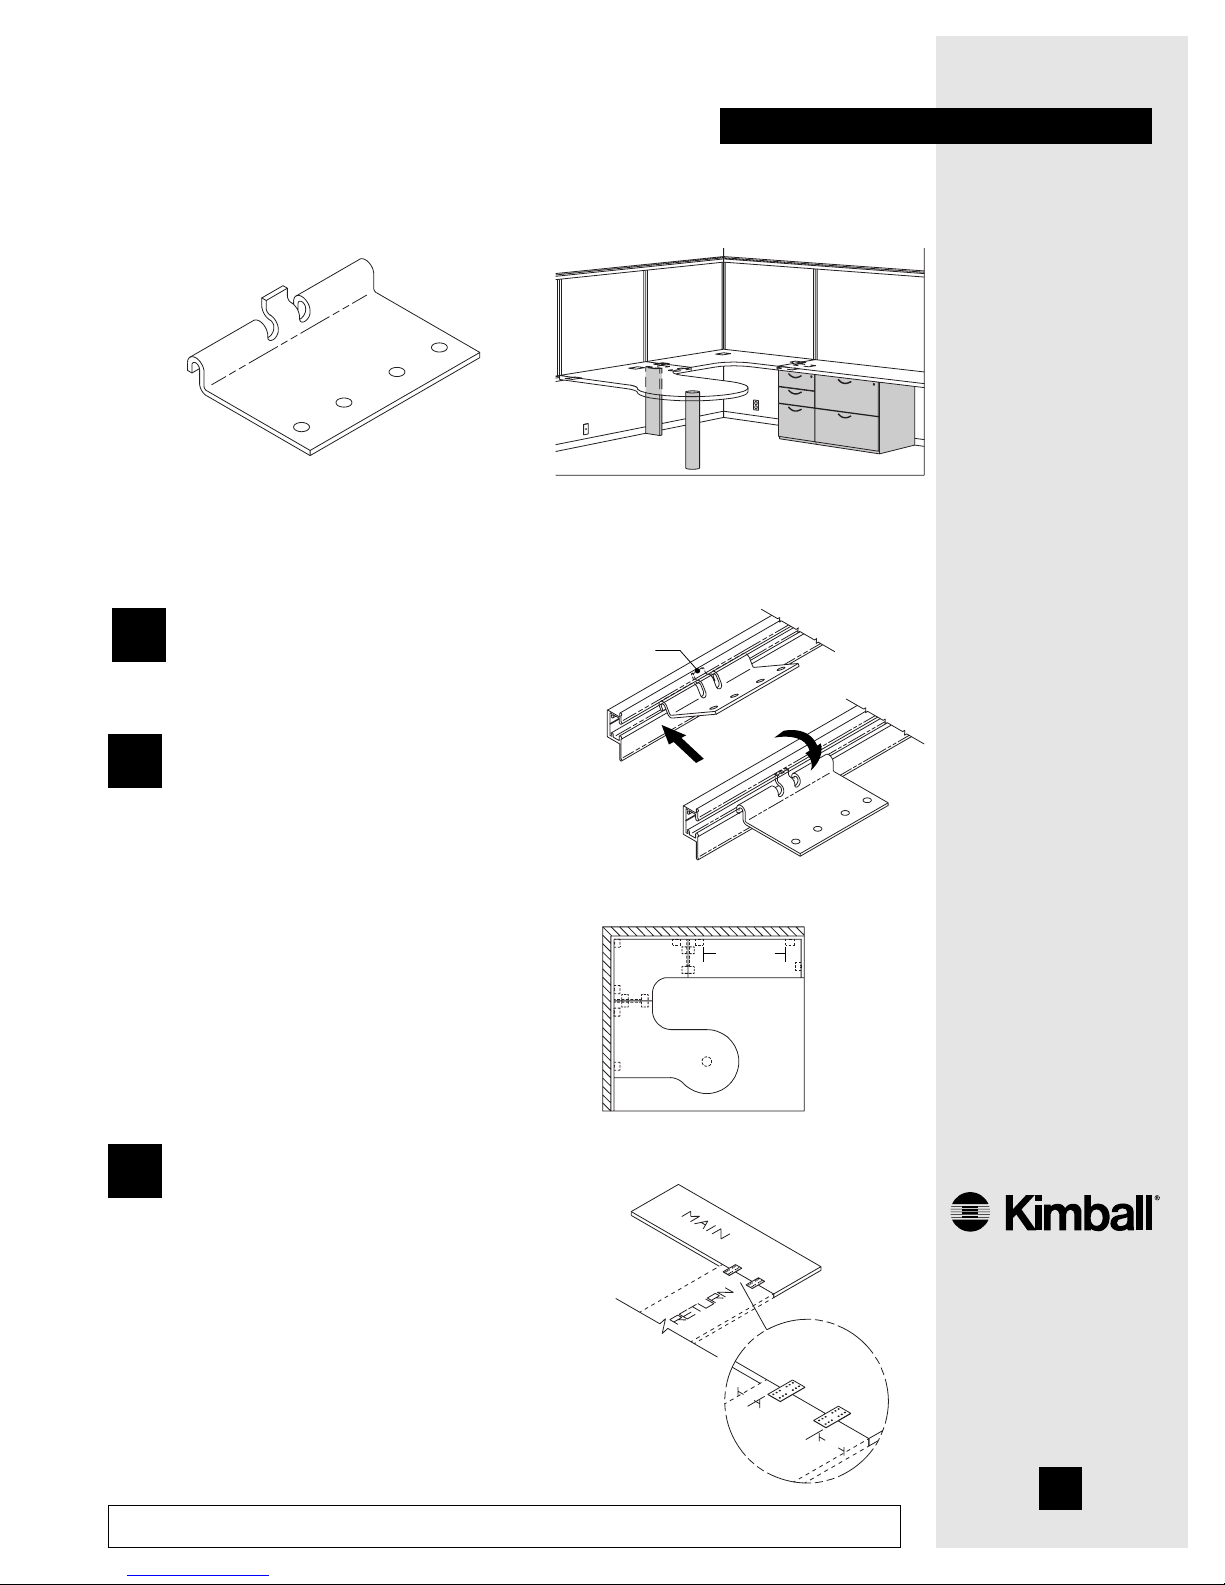
Worksurfaces can be Traxx mounted with worksurface brackets (Figure A) and supported
with pedestals, end panels, and support bases (Figure B).
1
3
2
Push the top of the bracket downward
allowing bracket to hang off of the
Traxx (Figure D).
Figure A
Place worksurface on clean, solid
surface, back side facing up. Install the
flat brackets on the main worksurface,
approximately 2" from front edge and
approximately 6" from back edge of the
adjoining worksurface using the screws
(ASC100) provided (Figure F). Ensure
that the flat bracket attachment does
not interfere with other brackets or
components. Two flat brackets are
required to join surfaces end to end or
at a right angle.
Insert hook on the top of the bracket
into the Traxx at a 45 degree angle
(Figure C).
1
Figure B
Note: The maximum distance between
brackets should be no greater than 48"
(Figure E). The maximum span of an
unsupported worksurface should not
exceed 60" for 1 3/16" worksurfaces and
72" for 1 9/16" worksurfaces. Support is
required within 6" of surfaces butted
end-to-end. This may be a pedestal or
12" deep support panel.
Figure E
Figure F
Worksurface Brackets
Pedestals, End Panels and Support Bases
Figure D
Figure C
Hook
48" or less
2"
6"
Traxx
Mounted
Worksurface
Installation
Proper product installation, in accordance with these instructions, is the responsibility of the installing agent.
If you have any questions concerning these instructions, please call Kimball Customer Care Teams.
SYSTEMS
6
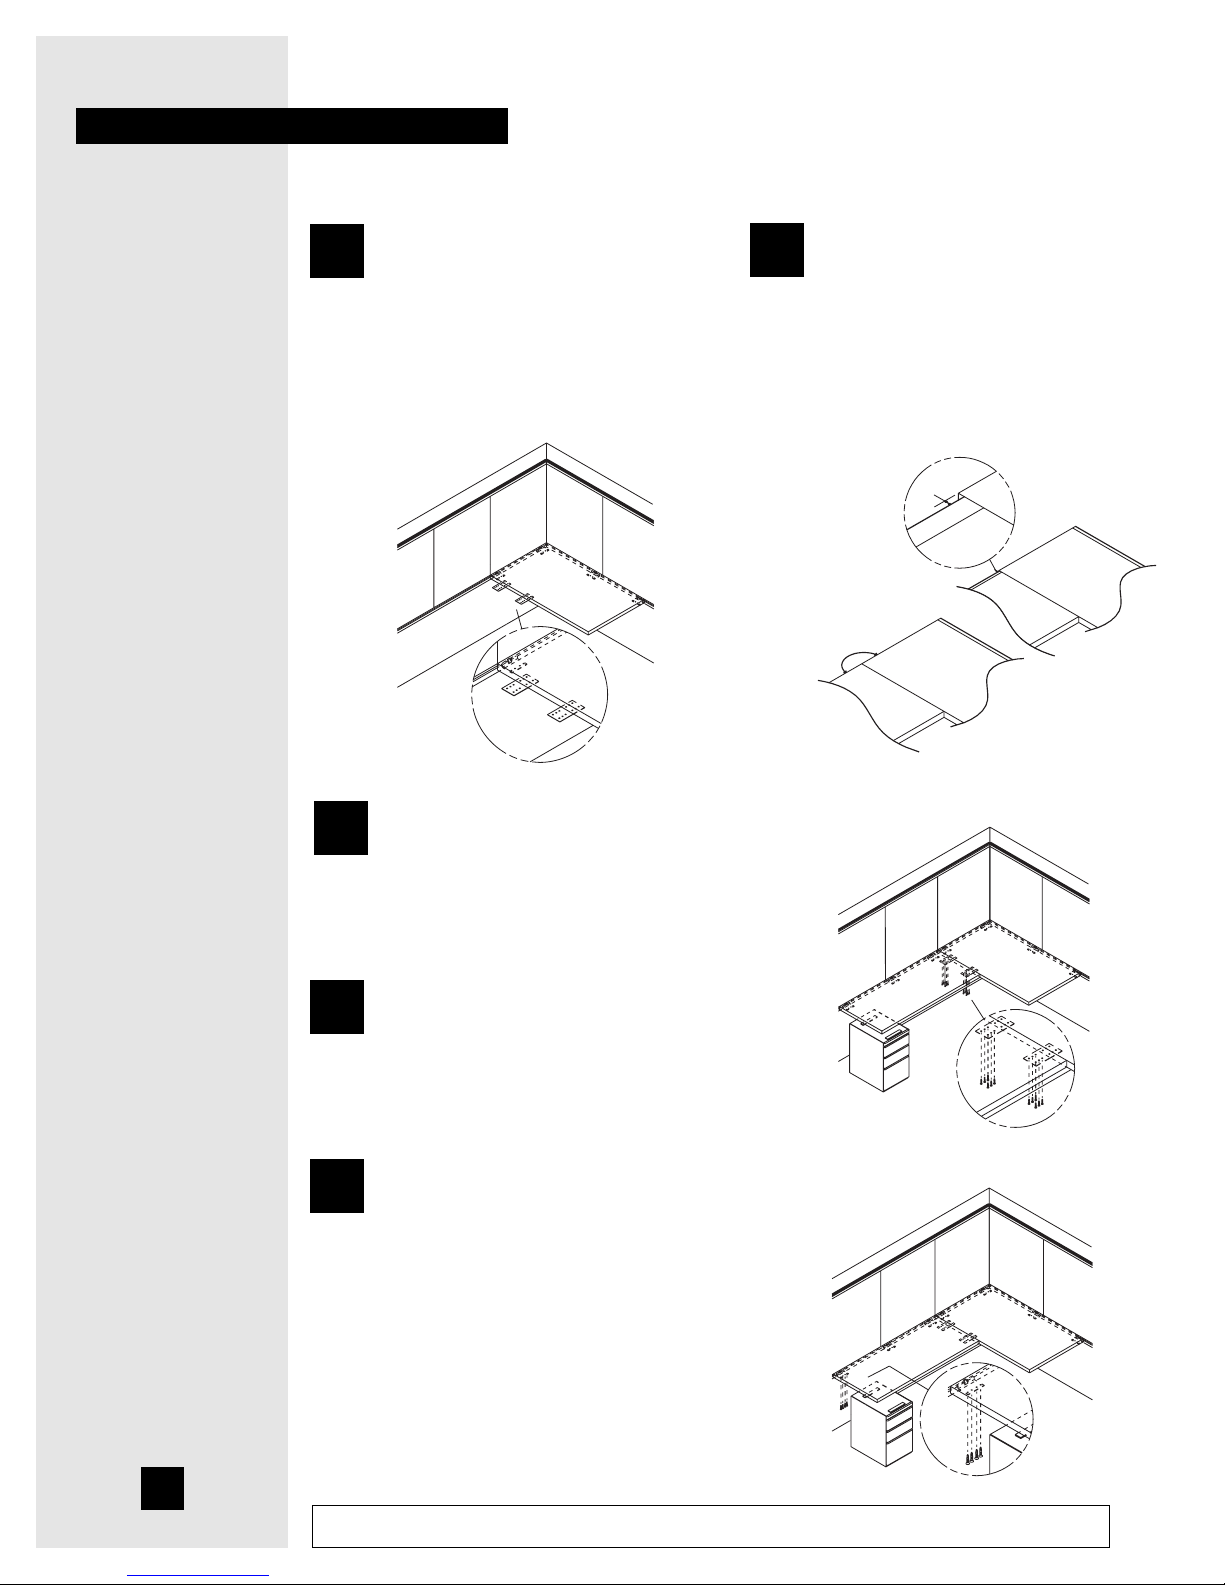
Attach extension or filler worksurface to
the flat brackets with screws (ASC100)
provided (Figure J). Twelve screws are
required per bracket.
Cetra\
Footprint
Assembly Instructions
2
5
Lay extension or filler worksurface onto
brackets.
4
Lay the worksurface on the brackets
(Figure G).
Figure G
Note: When attaching two surfaces at a
right angle, there will be a 1/8" gap
between the wire manager and Traxx
(Figure H). If there is no wire manager,
the surfaces should align (Figure I).
Tip: Use an undersurface component as
additional support until the worksurface
bracket is secured to the surface.
Figure J
Figure K
7
Beginning at one end of the worksurface
layout, apply pressure to the front of the
ganged worksurfaces while controlling
the gaps between the Traxx and back of
worksurface.
8
Attach the worksurfaces to the worksurface
brackets using the screws (ASC100)
provided (Figure K). A minimum of three
screws are required per bracket.
Figure I
Figure H
1/8"
 Loading...