

KILLABEE 8204, 8212, 8247, 9015 Instruction Manual

INSTRUCTION MANUAL
Model:8204

Congratulations, you are now the owner of a brand new KILLABEE chair!
Before enjoy the comfort chair, you have to put it together.This Assembly
Guide will take you through the basic assembly process. To make sure
your assembly goes smoothly, please follow the assembly instructions,
and
especially the important safety information.
For more detailed and visual instructions, we have an Assembly Video that
will help you to understand the assembly process much better.
Also, while it is possible to assemble the chair on your own,
having a
second person to help you makes it even easier.
Before you begin, please check if there are any missing parts from the
package. Should there be any issues, please don't hesitate to drop us an
email and we'll help you out ASAP.
If you run into any diculty during the assembly, remember to check out the
Assembly Video to see if you've missed anything. If you're unable to resolve
your problems, drop us an email as well and our support team will assist
you.
Scan it to see Installation Video
On YouTube: https://youtu.be/S5lJP4oDsWI
E-mail: service@killabee.net Web: www.killabee-gaming.com
2
ASSEMBLY GUIDE
E-mail: service@killabee.net Web: www.killabee-gaming.com
3
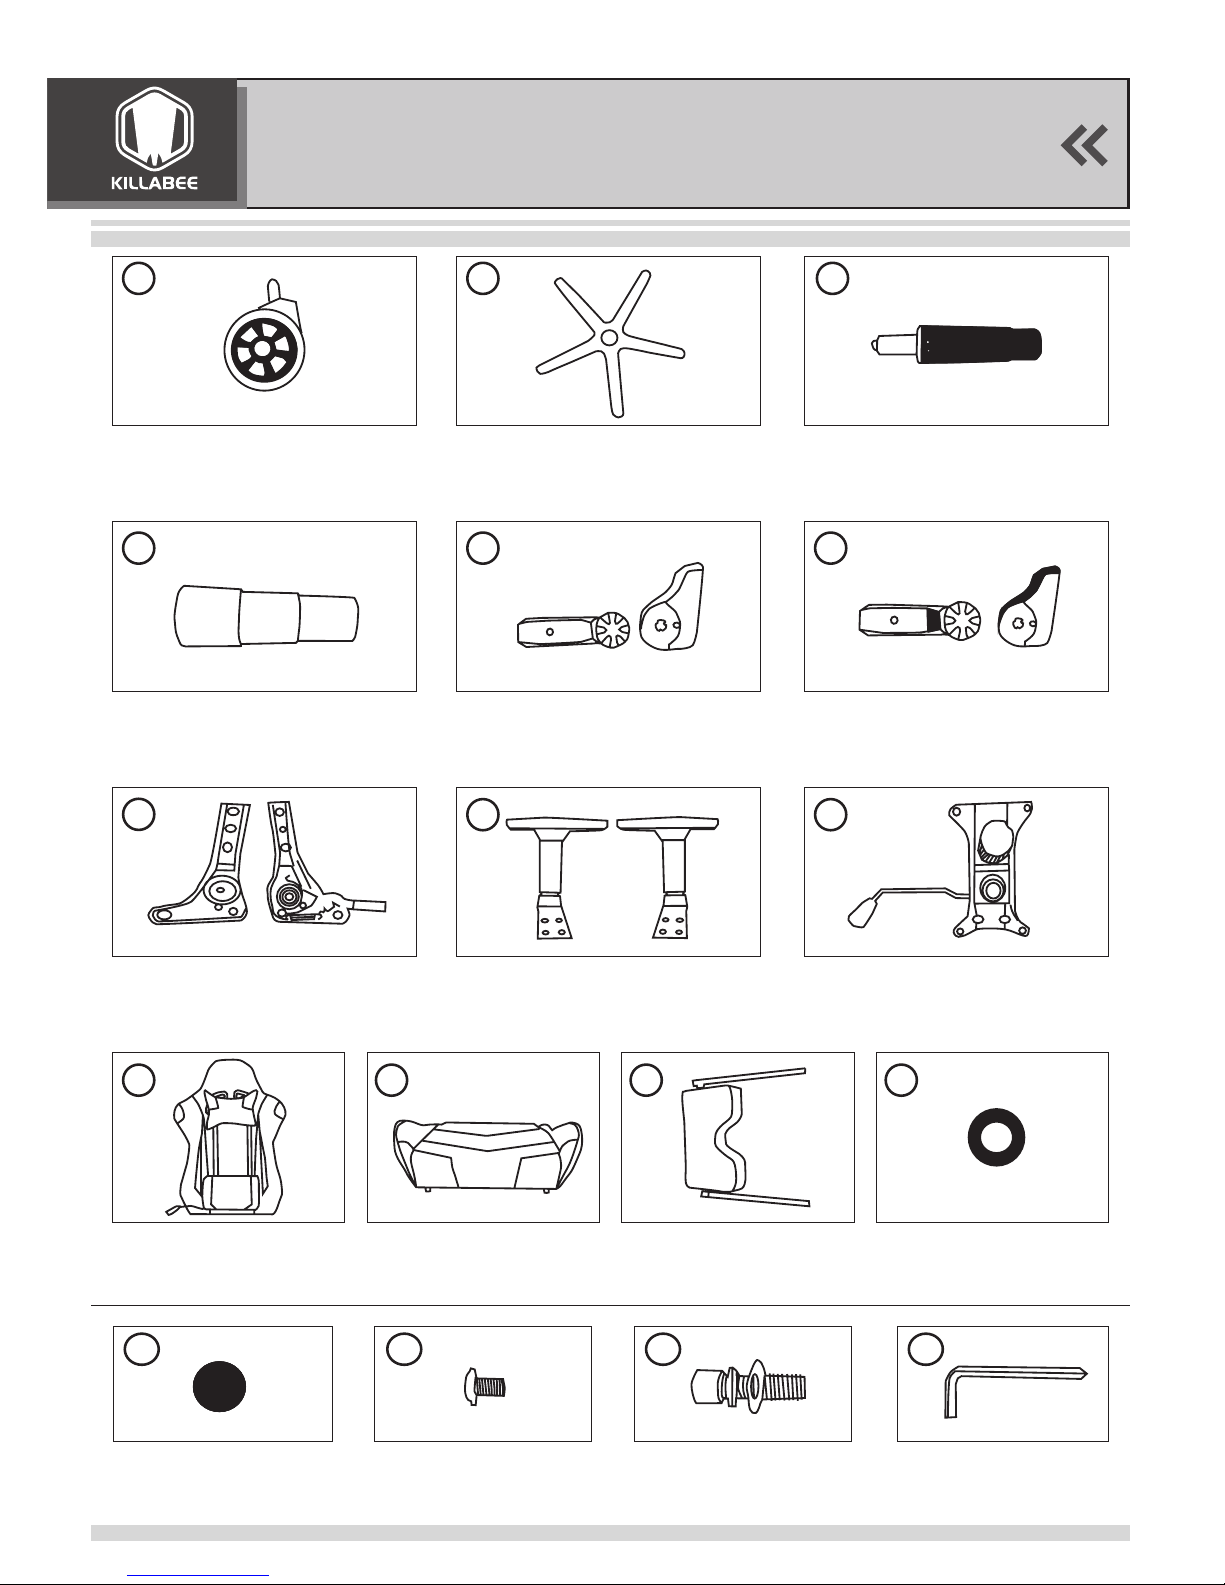
PACKAGE LIST
Quantity: 5
Quantity: 1
Quantity: 2
Left
Right
Quantity: 1 Quantity: 1 Quantity: 1 Quantity: 2
Quantity: 2 Quantity: 1
Quantity: 4 Quantity: 4 Quantity: 20 Quantity: 1
Quantity: 1
Quantity: 1
Quantity: 1
Quantity: 1
Casters
Lift Cover
Angle Adjusters
Back Cushion Seat Cushion Footrest Rubber Rings
Armrests Seat Plate
Plastic Caps Bolts M5*8mm Bolts M8*25mm Wrench
Star Base
Left Plastic Cover Set
Gas Lift
Right Plastic Cover Set
A
D
G
J K L M
H I
1 2 3 4
B
E
C
F

E-mail: service@killabee.net Web: www.killabee-gaming.com
4
ASSEMBLY INSTRUCTIONS
STEP 1 :
Turn the Star Base upside down, then press the Casters into
the holes at the end of each base leg.
STEP 2 :
Turn the Star Base upright and insert the Lift into the center
hole of the Star Base, the Lift Cover should be placed over the Lift.
A
CD
B
H H
3
3
E-mail: service@killabee.net Web: www.killabee-gaming.com
5
ASSEMBLY INSTRUCTIONS
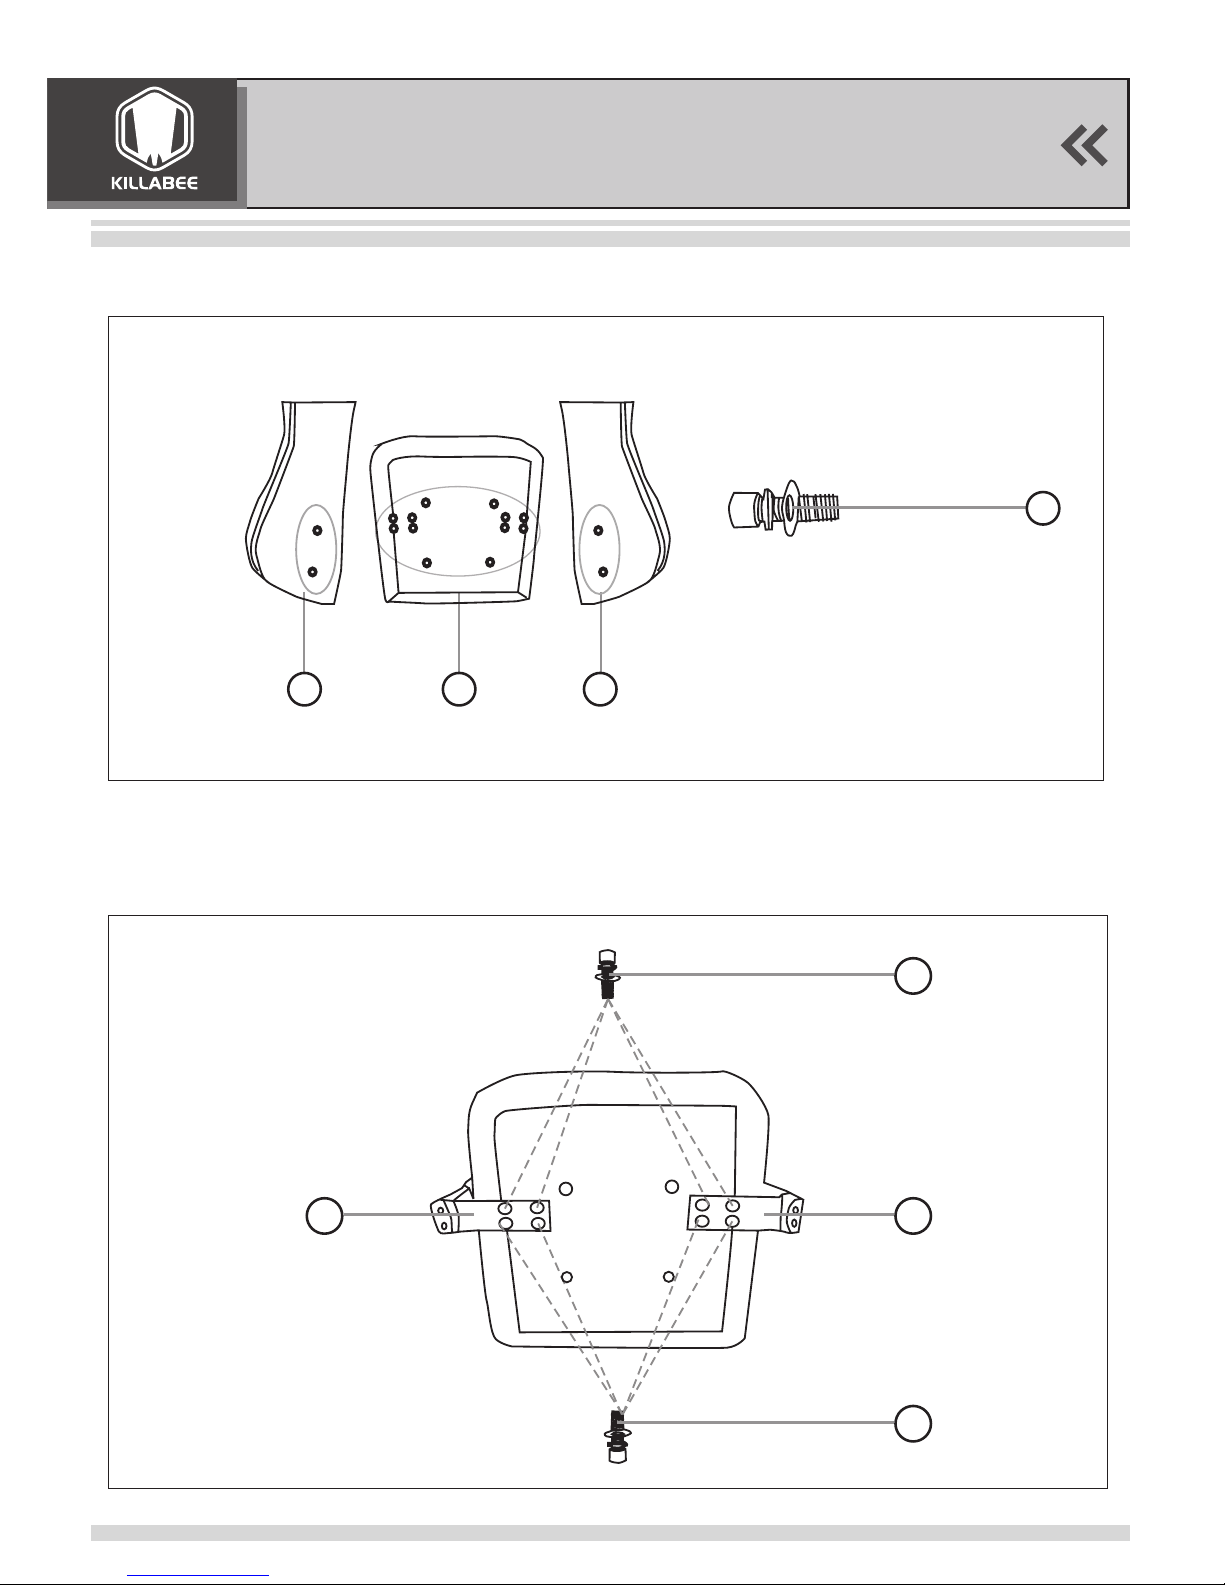
STEP 3 :
Remove All M8x25mm Bolts from the seat and back.
STEP 4 :
Attach the arms to the seat cushion with eight M8X25mm
bolts, using the Wrench.
3
JKJ
M8*25mm
STEP 5 :
Align the seat plate to the bottom of the seat cushion, make
sure that the front of the seat plate is facing the front of the seat cushion.
Attach the seat plate to the seat cushion using four M8X25mm bolts,
tighten all the bolts with the wrench.
I
3
STEP 6 :
Insert the footrest to the pre-drilled holes underneath the seat
cushion, then put the rubber rings at the end of pole.
M
L
E-mail: service@killabee.net Web: www.killabee-gaming.com
6
front
ASSEMBLY INSTRUCTIONS

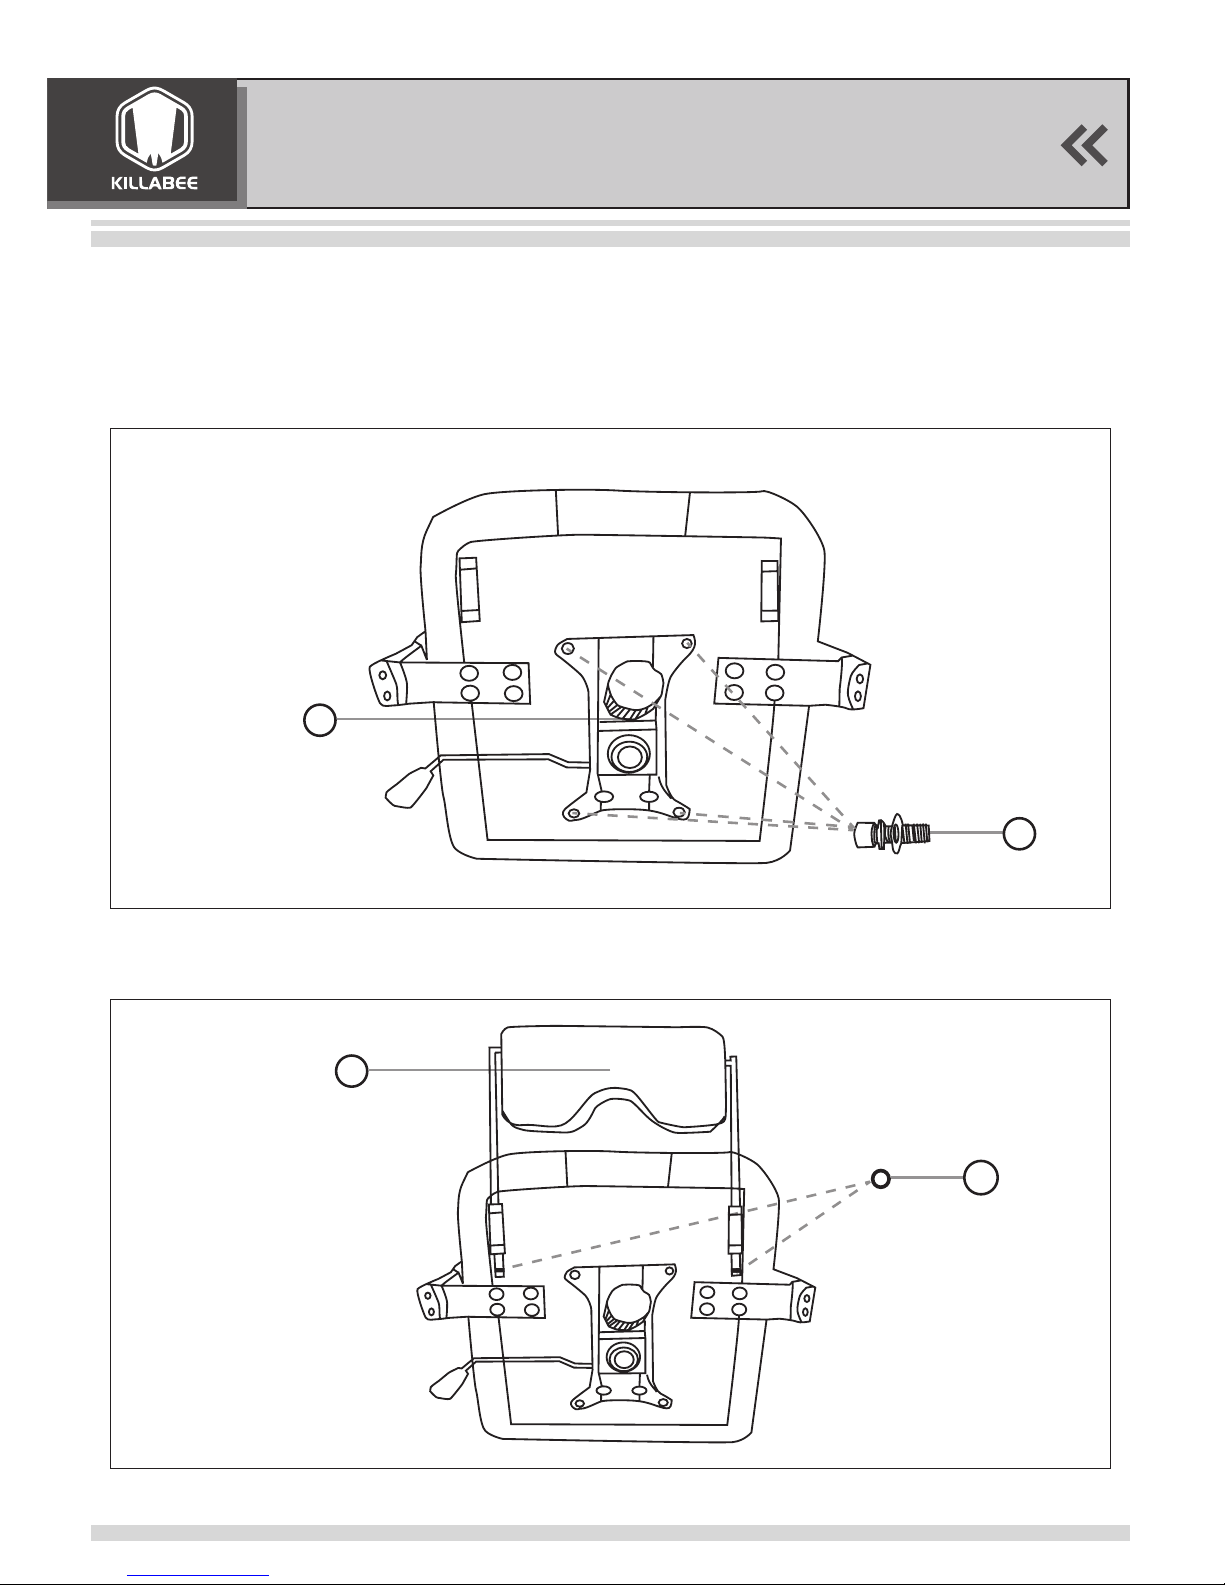
STEP 7:
Turn the seat cushion upright and align the center hole of the
seat plate over the lift, then push the seat cushion down onto the lift
rmly until the connection is secure.
STEP 8:
Using Adjusters to attach Seat Cushion and Back Cushion,
align the adjusters over the pre-drilled holes underneath the seat cushion
and back cushion with M8x25mm Bolts, tighten all the bolts with the
wrench.
G
KK
3
4
Note: Do not tighten the bolts fully at this step.
RightLeft
E-mail: service@killabee.net Web: www.killabee-gaming.com
7
ASSEMBLY INSTRUCTIONS

E
F
2
4
3
4
KK
J
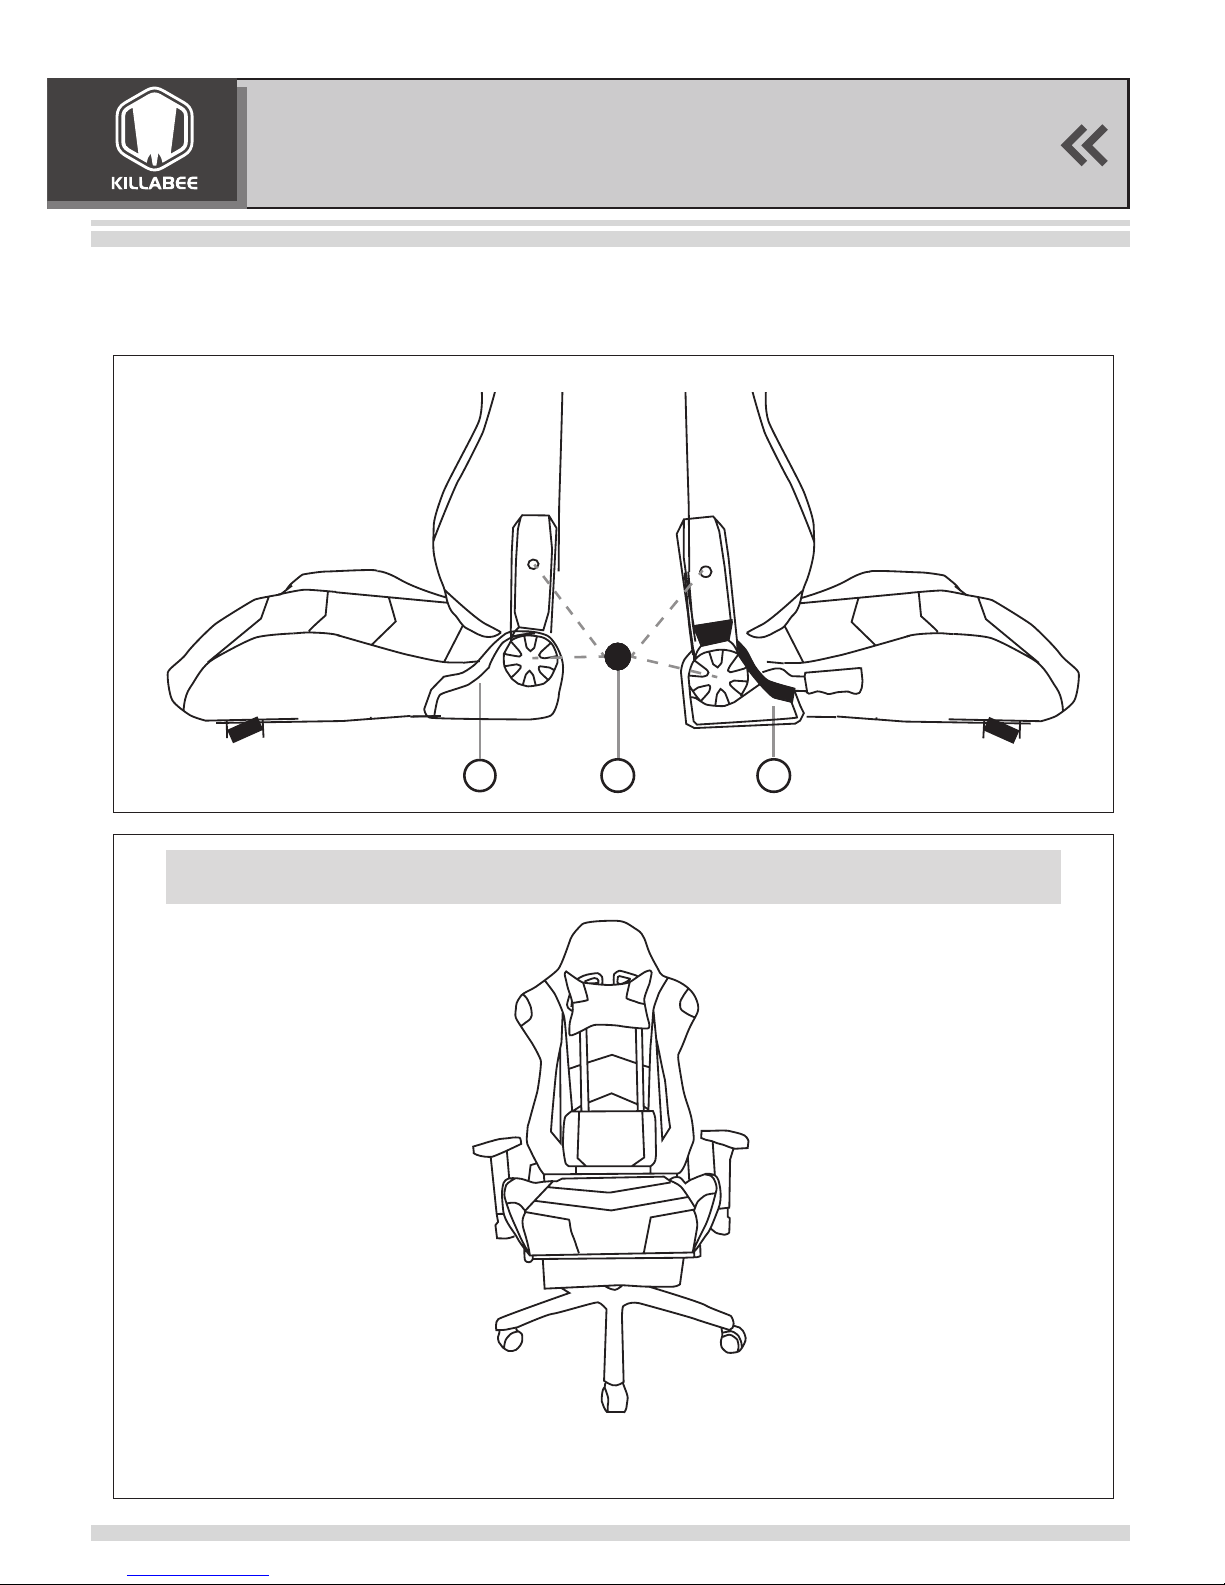
STEP 10: Adjust the balance, then fully tighten all the bolts on
each side of adjusters.
STEP 11:
Attach the Plastic Cover on right and left side with four
M5X8mm bolts, using the wrench.
STEP 9 :
Attach Seat Cushion and Back Cushion, align the adjusters
over the pre-drilled holes underneath the back cushion with M8x25mm
Bolts, tighten all the bolts with the wrench.
Note: Do not tighten the bolts fully at this step.
E-mail: service@killabee.net Web: www.killabee-gaming.com
8
ASSEMBLY INSTRUCTIONS
E
F
Congratulations!You’ve assembled your Killabee chair.
STEP 12:
Press the plastic caps into the adjuster holes to cover the
bolts.
If you have any problems during installation or other issues, please contact us
service@killabee.net, we will reply your email in 24 hours.
1
E-mail: service@killabee.net Web: www.killabee-gaming.com
9
ASSEMBLY INSTRUCTIONS
 Loading...