

KII AUDIO THREE Owner's Manual
Kii THREE
owner´s manual
bedienungsanleitung


face the music

5
YEAR/JAHRE
WARRANTY/
GARANTIE
Warranty Information:
Kii Audio provides a full FIVE (5) YEAR WARRANTY on the Kii THREE.
Beginning of the warranty period is the date of purchase.
Garantie Informationen:
Kii Audio gewährt Ihnen (5) JAHRE GARANTIE auf die Kii THREE.
Beginn der Garantiezeit ist das Kaufdatum.
4
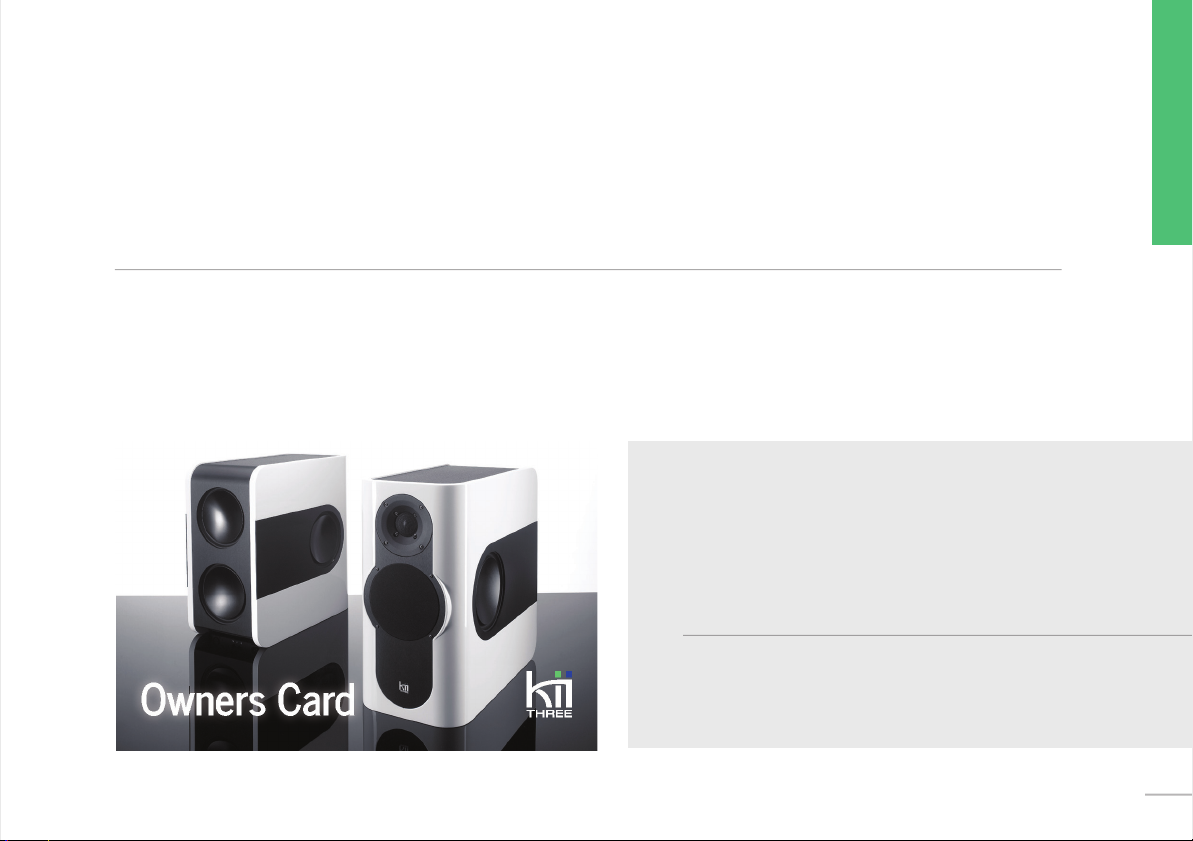
Kii audio - Owners card
Thank you for purchasing the most advanced loudspeaker to date.
Please register your serial numbers on the webpage below in order to receive full warranty
and information by email about upgrades and product news for your Kii THREE.
Vielen Dank dass Sie sich für den Kauf des fortschrittlichsten Lautsprechers der Welt entschieden haben.
Bitte registrieren Sie die Seriennummern Ihrer Lautsprecher auf der unten genannten Website, um die volle
Garantieleistung sowie alle Informationen über Upgrades und Produktneuheiten für Ihre Kii THREE per Email zu erhalten.
Register
kiiaudio.com/registration
owner@kiiaudio.com
your direct email, exclusive to owners.
English
5


3
Kii THREE
OWNER´S MANUAL - ENGLISH from page 8
BEDIENUNGSANLEITUNG - DEUTSCH ab Seite 22
English
7

Table of Contents
1
Owners Card / Warranty Information
2
Table of Contents
3
Unpacking your Kii THREE
4
The Connector Panel explained
5
Boundary Switch explained
6
Contour Switch explained
7
Setup examples / pictograms
8
Tech Specs
9
Safety Warning
8
page 4 - 5
page 8
page 9
page 10 - 11
page 12 - 13
page 14 - 15
page 16 - 18
page 19
page 20 - 21
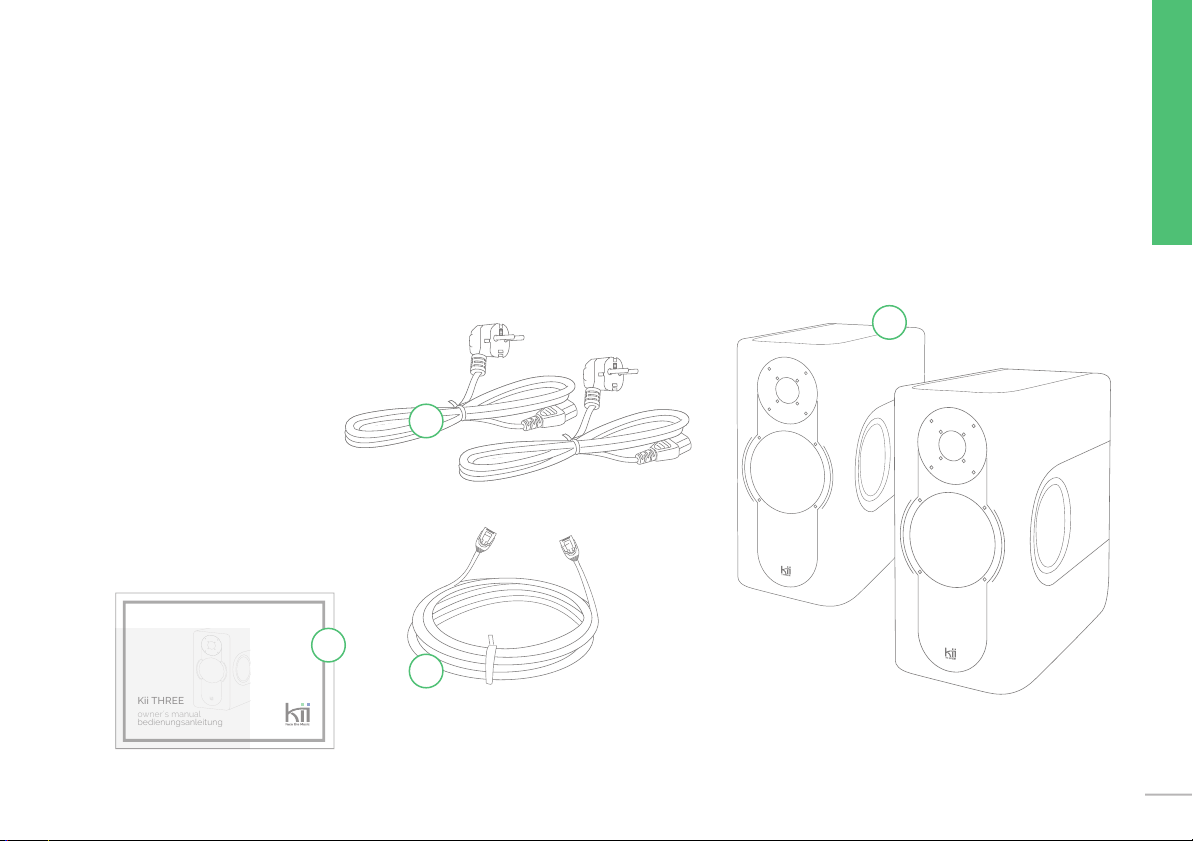
Unpacking your Kii THREE
what is in the box?
Each pair of Kii THREE speakers is delivered in
two boxes which contain:
1 | 2x Kii THREE Speaker
2 | 2x Power Cable
3 | 1x Cat5 Cable (5m)
4 | 1x Owner´s Manual
Kii THREE
owner´s manual
bedienungsanleitung
4
2
3
English
1
9
Installation + Connector Panel
Input Select In Kiilink Thru 230V~ 120V~200W
a
b
S/N
c
R Dig L
Analog
P/R
Boundary Contour
free
corner
wall
B
F
C
300
f
a
b
Ff F
c
s
b
a
f
s
10k
3k
c
s
c
b
a
B
f
s
C
c
b
a
f
RISK OF ELECTRIC SHOCK
DO NOT OPEN
Kii Audio “THREE”
CAUTION
e
f
d
Boundary
Power - The Kii THREE has no power switch. Simply plug the power cable into the IEC socket f.
If no audio signal is present at the input for more than 15 minutes,
the speaker will automatically go into standby mode.
As soon as the input detects any audio signal (analog or digital) it will automatically power on.
This can take up to seven seconds.
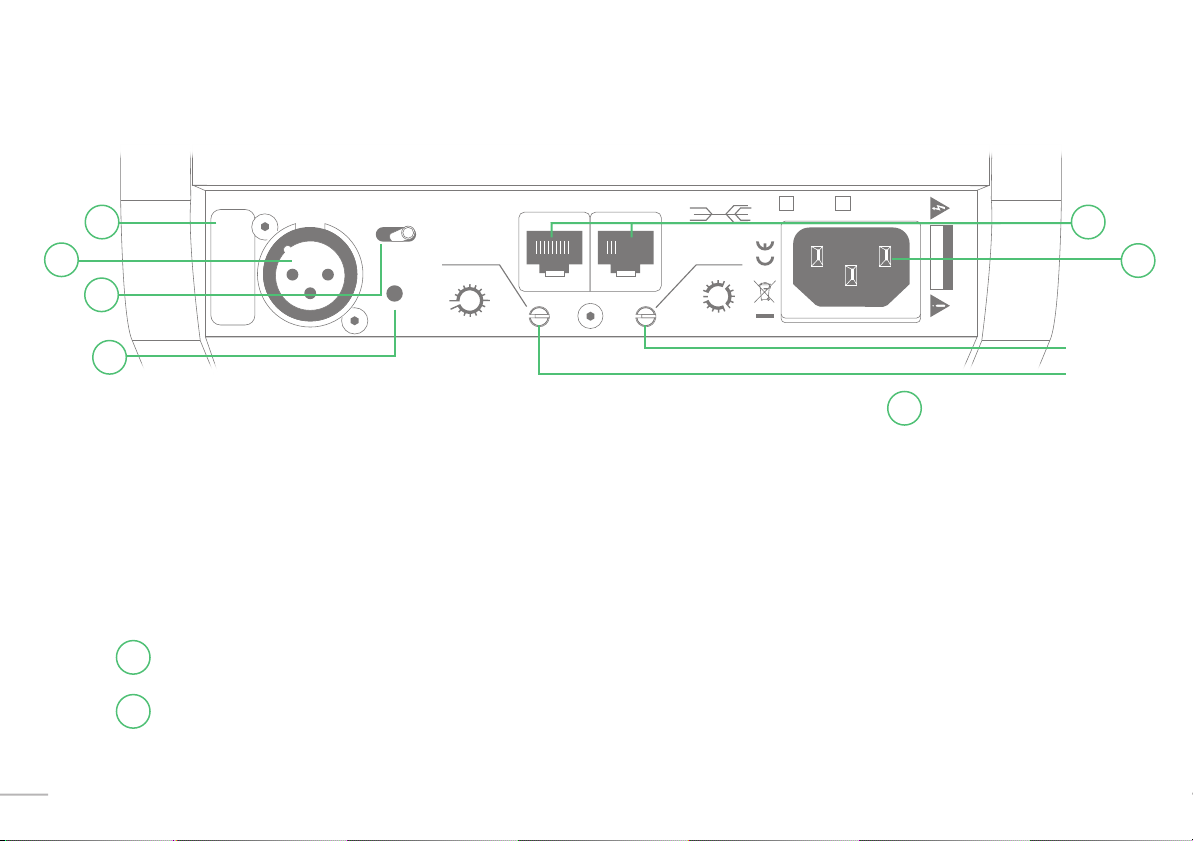
Here is an overview of the connector panel from left to right:
SERIAL NUMBER - This is the individual Serial No. for each speaker.
a
XLR INPUT - This is the single XLR Input connector which can be set to process analog or digital audio
b
signals, depending on how the Select switch (c) is set.
10

SELECT SWITCH - this three position mini switch selects whether the XLR Input functions as an analog
c
input for this individual speaker, or if either the right or left channel of the AES signal will be played by
this speaker.
P/R button - (RESET)
d
Press and hold the button for 5 seconds, this resets the speaker.
(The front LEDs will indicate this by blinking briey in violet color)
P/R button - (LATENCY MODE)
A short press of the button will switch the Kii THREE into low latency mode.
This allows to achieve lip-sync of the audio to picture, when used alongside a TV or beamer.
Pressing the button again switches the speaker back into normal mode.
For the best listening experience (without picture), make sure the speaker is set to normal mode.
(The front LEDs will indicate this by ONE red LED lighting up - low latency mode,
or TWO red LEDs lighting up - normal mode)
Kiilink - Input and Thru (or Output) - When a digital input (AES) is used, both channels of the
e
stereo signal will be sent together via a single digital cable from your source.
You simply choose the speaker that is located closest to your digital source and connect the AES cable
to its input, this is now the „master speaker“ while we call the other one the „slave speaker“. The slave
speaker gets its signal directly from the master speaker.
English
Both speakers are connected with the supplied CAT5 cable. Simply plug it into the right CAT5 port
(labeled „Thru“) of your master speaker and into the left CAT5 port (labeled „In“) of your slave speaker.
11
 Loading...