

Kids UP Kids ROCK Size 3, KIDS ROCK 3 User Manual
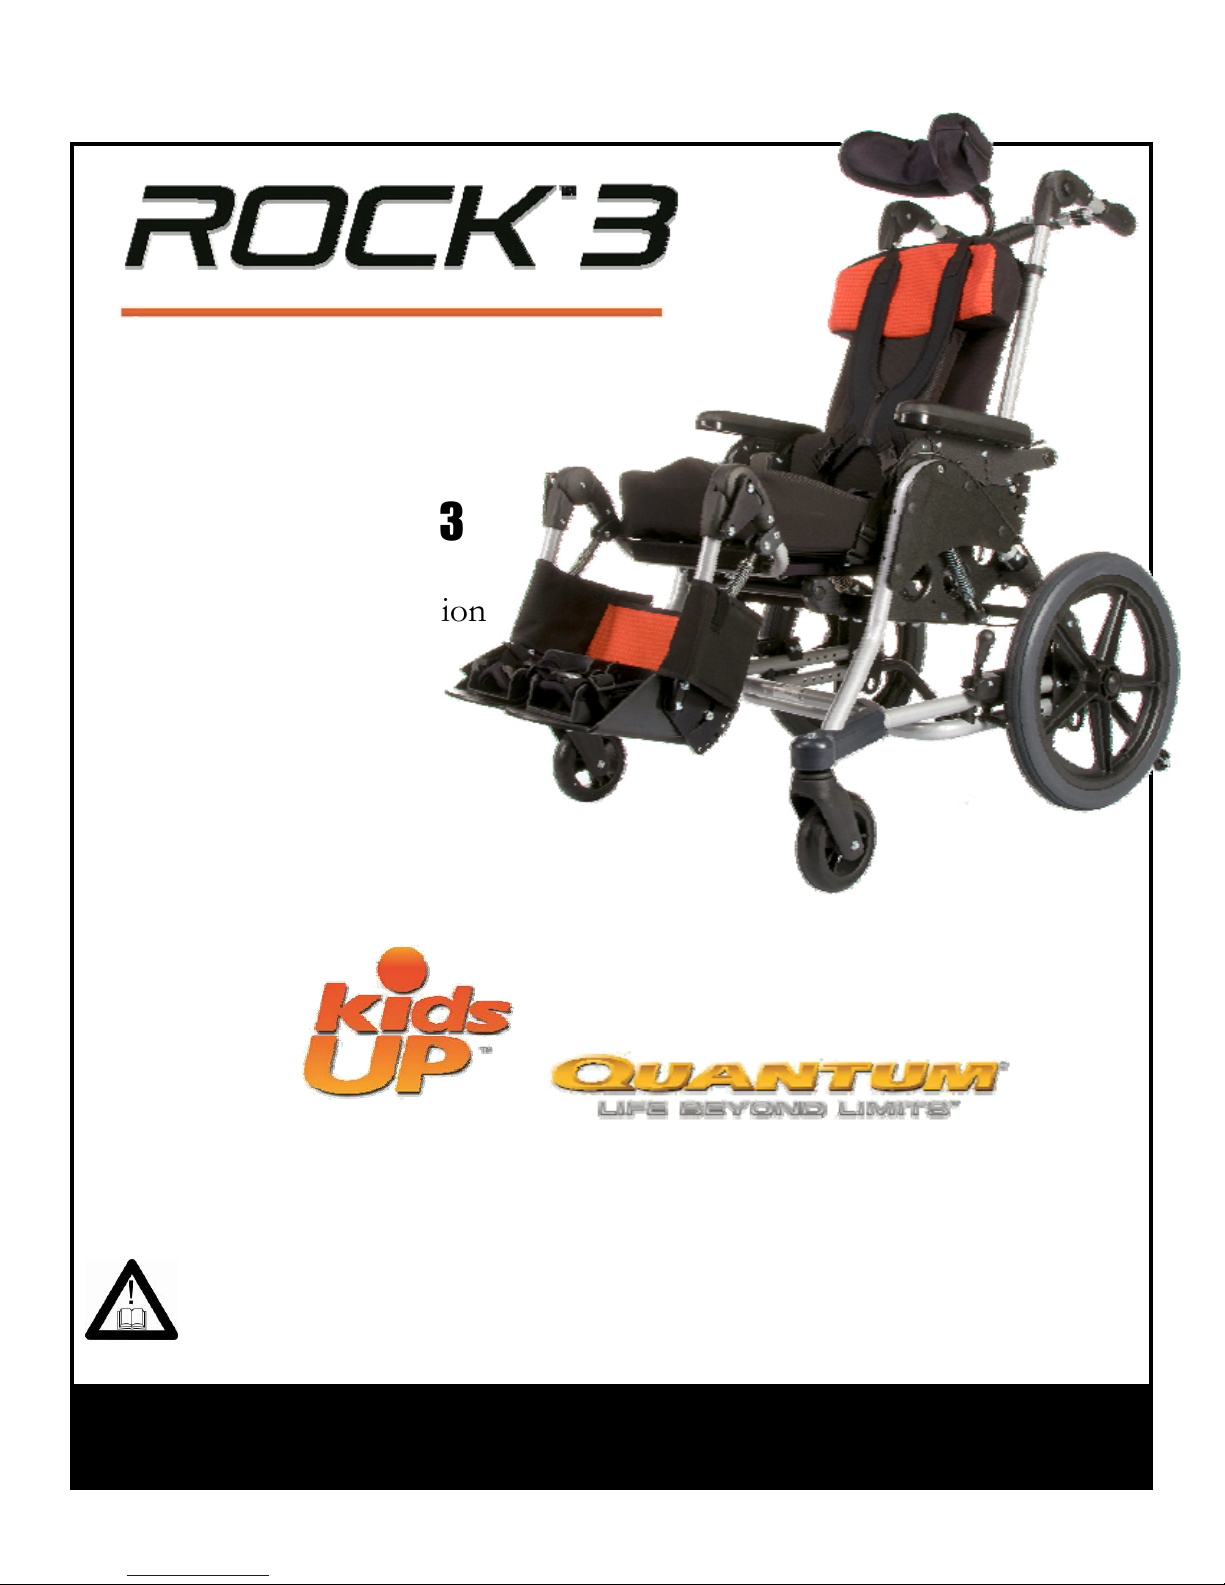
□ Kids ROCK
TM
Size 3
□ With Transit Option
□ Without Transit Option
□ REACTION
™
Dynamic Seating System
by
Serial #:____________________
Date of
Delivery:___________________
DEALER: THIS MANUAL MUST BE GIVEN TO THE USER OF THIS
DEPENDENT MOBILITY BASE.
USER: READ THIS MANUAL BEFORE USING THIS DEPENDENT
MOBILITY BASE AND SAVE FOR FUTURE REFERENCE.
Product delivered may vary from the one described and pictured in this manual.
Ver. 11-0603DM
USER MANUAL

You have made a great choice for your child by choosing a Kids ROCK Chair. We believe
that every child should be able to move to the best of their ability because “Movement is
life!” We welcome questions and comments about our products and services. Please feel
free to contact us using the information below:
Manufacturer & U.S. Distributor
Quantum Montana
312 B Andrea Drive
Belgrade, MT 59714
European Distributor
Partnering Together to Mobilize Kids.
HOGGI, GmbH
Taunusstraße 17
56235 Ransbach-Baumbach
Germany
Tel.: 02623 92499-0
Fax: 02623 92499-99
Website: www.hoggi.de
by
Toll Free: 877-454-3787
www.quantumrehab.com
Your Authorized Dealer is:
2
“Movement is life!”

TABLE OF CONTENTS
I. CHAIR MODELS & PARTS .......................................................................................... 4
II. UNPACKING YOUR NEW KIDS ROCK CHAIR ...................................................... 6
III. READ BEFORE USING .............................................................................................. 8
IV. GENERAL WARNINGS ............................................................................................. 9
V. SET-UP & ADJUSTMENT ......................................................................................... 12
VI. OPERATING INSTRUCTIONS ................................................................................ 18
VII. MAINTENANCE ...................................................................................................... 25
VIII. MAINTENANCE RECORD ................................................................................... 26
“Movement is life!”
3
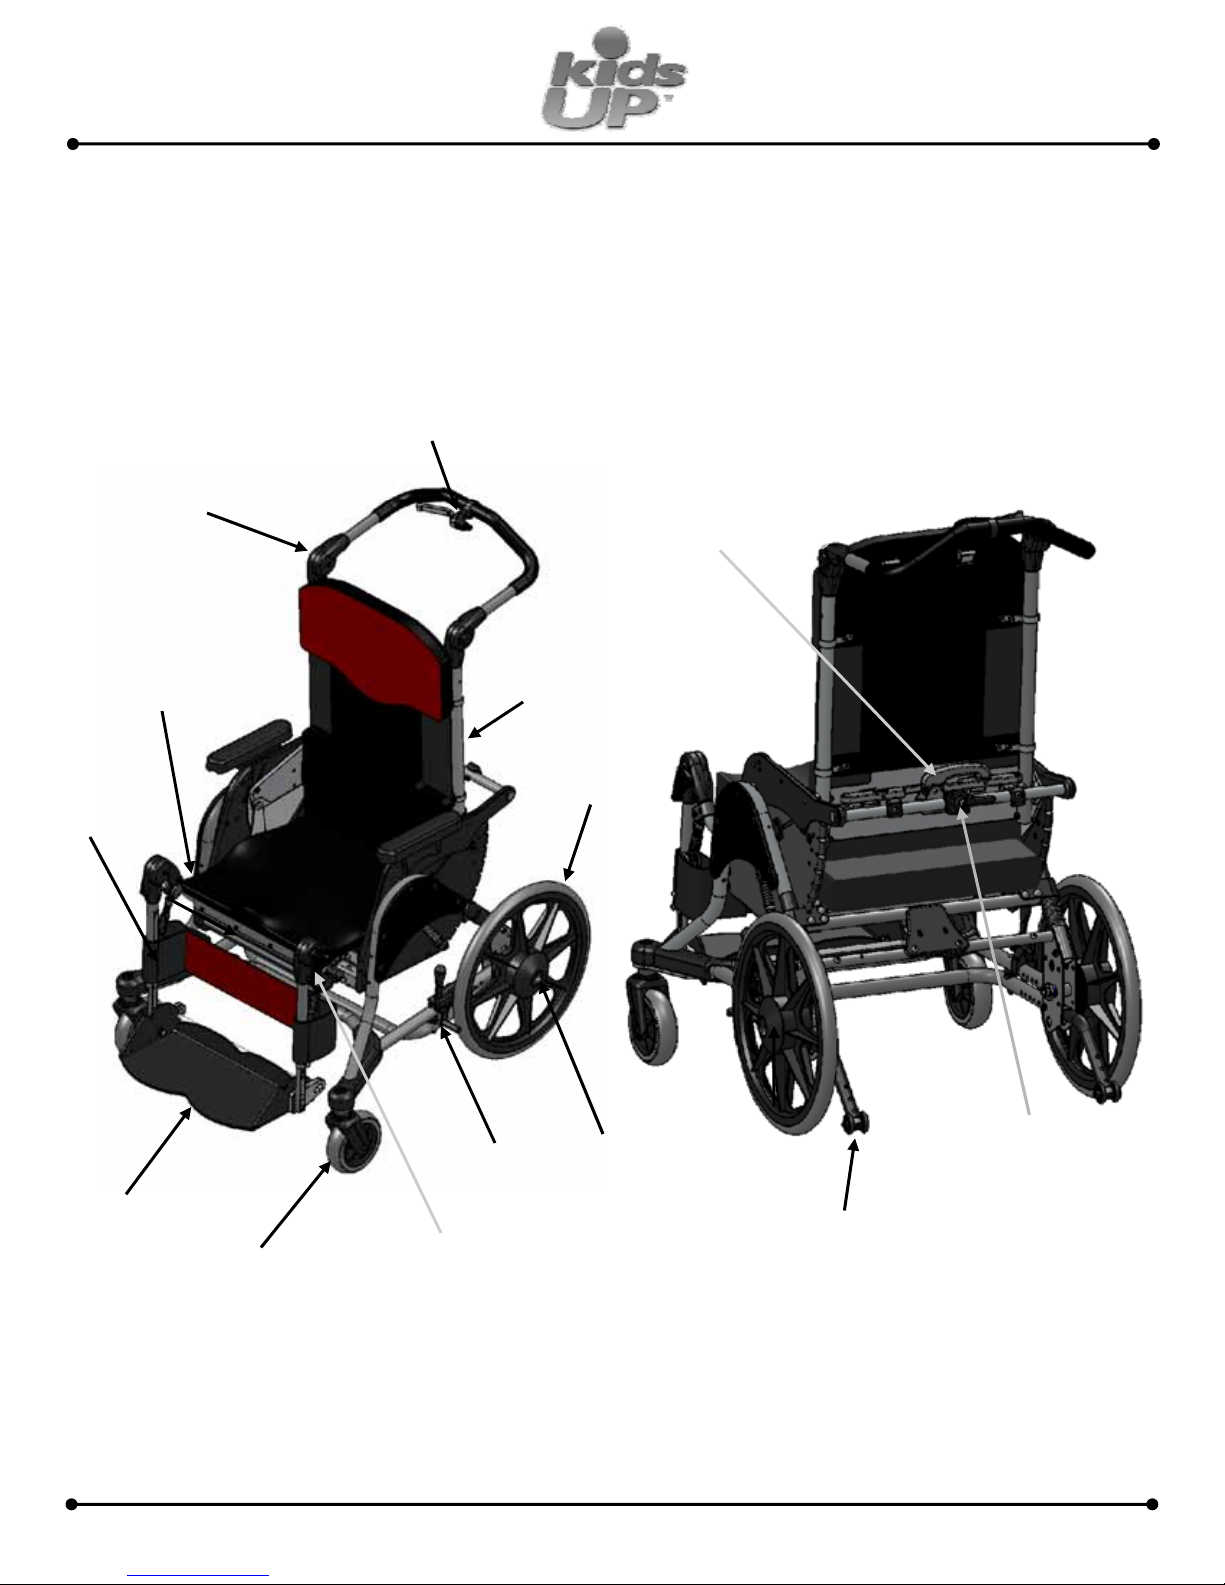
I. CHAIR MODELS & PARTS
Please refer to the front of this manual to determine which configuration was delivered to you.
Throughout this manual, you will notice the chair configuration option in brackets like [Adjustable Seat Pan],
indicating information that applies only to a specific option.
The chair’s parts are labeled below for your reference. Many of the optional components are shown.
Push Handle
Angle Adjustment
Tilt Adjustment Lever
Fold & Hip Angle
Adjustment Lever
Adjustable Seat Pan
Calf
Protector
Foot Plate
Caster Tire
Wheel Lock
Ratchet Lock
Back Cane
Rear
Wheel
Quick
Release
Button
ACTIVE Lock
Handle
Anti-tip
Product delivered may vary from the one described and pictured in this manual.
4
“Movement is life!”
ROCK SIZE 3 SPECIFICATIONS
Maximum Weight* 215 lbs 97 kg
Seat Depth Range 14-20 inches 35-50 cm
Seat to Shoulder Range 18-26 inches 46-66 cm
Leg Drop Range 14-20 inches 35-50 cm
Maximum Hip Width 17 inches 43 cm
* Maximum weight rating equals occupant weight plus any items carried and weight of accessories/positioning
components installed on chair.
“Movement is life!”
5
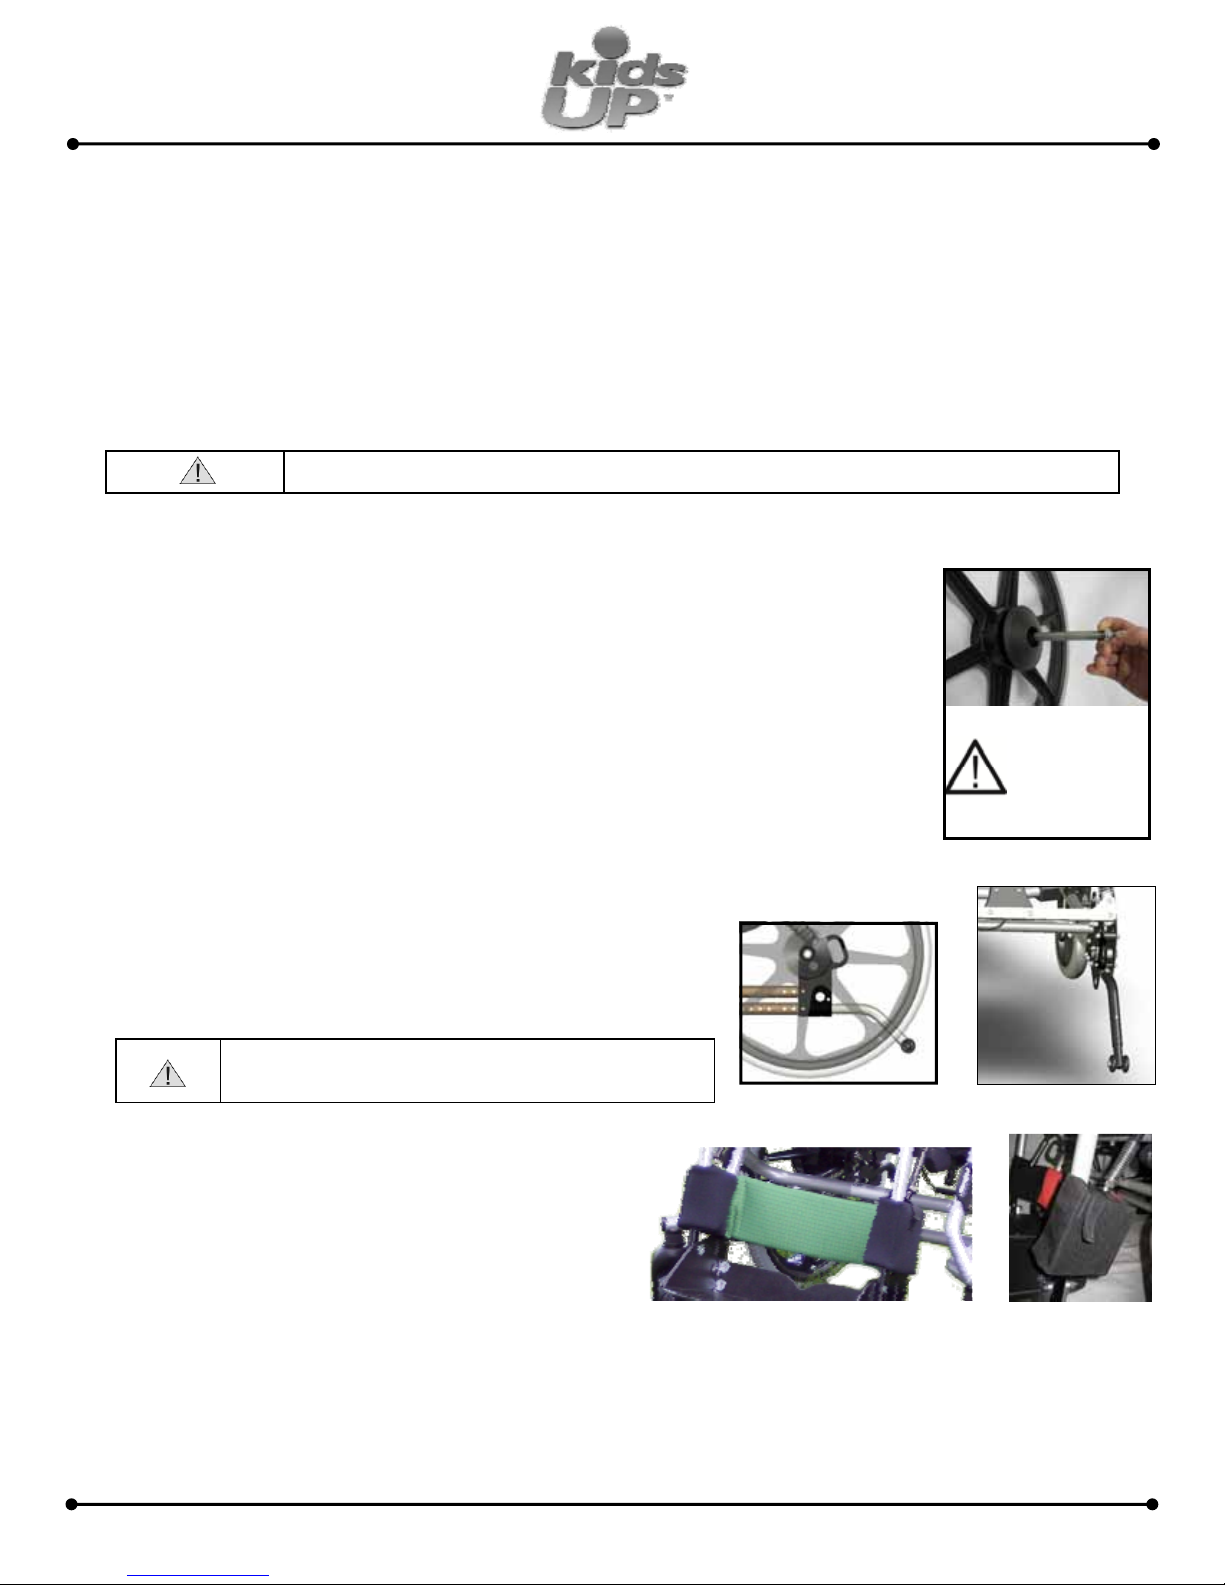
II. UNPACKING YOUR NEW KIDS ROCK CHAIR
THE ORIGINAL PACKAGE CONTAINS THE FOLLOWING COMPONENTS:
Kids ROCK Chair
2 Rear Wheels
Anti-tips
Additional options and accessories as ordered
PREPARING THE CHAIR FOR USE:
1. Remove the chair & components from the box.
Keep Box Upright
Verify that package is in good shape and that no damage has occurred during shipping.
Remove the Kids ROCK Chair and accessories from the packaging material.
Check to make sure that your order is complete.
2. Install the rear wheels (Fig. A).
A. Make sure the wheel lock lever is released.
B. Put the axle through the wheel hub.
C. Hold the axle and wheel. Align the axle with the axle sleeve on the chair.
D. Press the button on the axle and slide the axle into the axle sleeve.
E. Make sure that the axle is fully engaged by verifying that the button on the top of the
axle pops out.
F. If included, install the hub cap by locating and rotating to lock into place.
3. Fold the seat back up into position—see section VI part B for
detailed instructions.
4. Install the rear anti-tips (Fig. B and C)—see section V part E for
detailed instructions.
5. Install the Calf Protector as shown in Figures D and
E.
6. Install the active handle according to the instructions
on the following page, then verify the functionality of
the active mechanism.
7. Make additional adjustments to the chair as
necessary. Refer to the appropriate section of this
manual for instructions.
WARNING: Always use anti-tips. See section V
part E for detailed instructions.
WARNING: Contact your health care professional before using this unit with a child.
Figure B
Figure D: Calf Protector Installation Figure E
WARNING!
Verify that pin
is fully
engaged
(button up)
Figure A
Figure C
6
Please see the next page of this manual.
“Movement is life!”
Unpacking your chair continued…
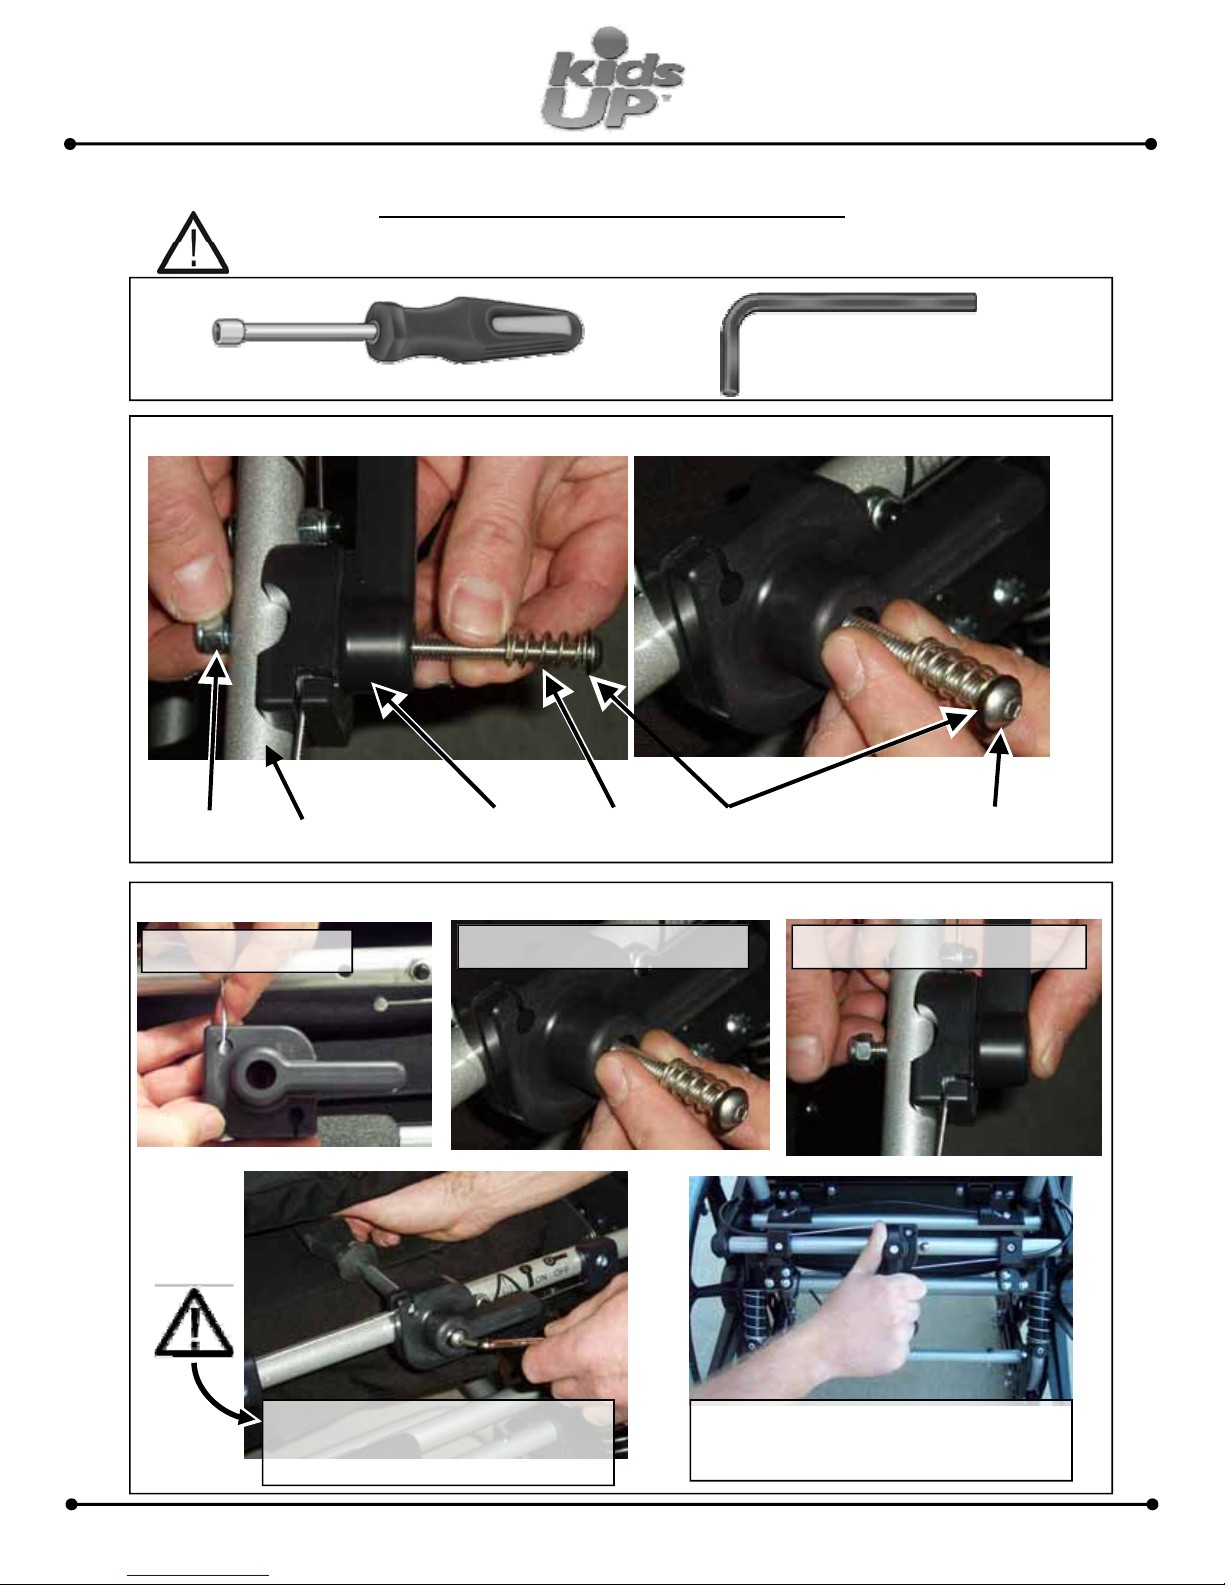
Active Handle Installation Instructions
The active handle is removed for shipping to prevent damage to the chair. It must be installed to
enable full functionality of the chair.
Tools:
5/32 inch Allen Wrench
7/16 inch Nut Driver
Hardware:
Nyloc Nut Active Handle Spring
Active Bar
(Back bar on chair)
Instructions:
1. Attach Cables
2. Insert Bolt Assembly
Nylon Washer
3. Finger Tighten Nut
Bolt
4. Tool Tighten 3 Rotations
after finger tight
5. Verify that handle locks into
active position.
“Movement is life!”
7

III. READ BEFORE USING
A. READ MANUAL CAREFULLY & OFTEN
Read manual completely before use!
Familiarize yourself with handling and functions of the product before use and practice them. You must
read and fully understand the contents of this manual. Any caregiver that is going to operate this chair
should also read the manual in full.
You are responsible for the safety of your child. The safety of your child could be affected if you do not
follow the instructions in this manual. Nevertheless, not all possible circumstances and unpredictable situations can be covered by this manual. Reason, care, and circumspection are not features of the product, they
are required of persons who use the product. If instructions are not clear and further explanation is necessary, please contact your Kids Up dealer. If you do not follow all instructions and warnings, damage to the
chair or serious injury may occur.
B. DEFINITION OF SYMBOLS
WARNING!
The word “WARNING” and/or the symbol shown to the left indicate practices that are
unsafe or dangerous and could result in serious injury or death to the occupant of this
chair or others.
WARNING! READ INSTRUCTION MANUAL!
Additional symbols are defined throughout this manual along with operating instructions.
C. CHOOSE THE RIGHT CHAIR & SAFETY OPTIONS
There are several options available to meet the needs of children. Make sure that your (and your health care
provider’s) choice of chair and other options takes into account your child’s comfort, positioning, physical
limitations, and hazards that may be encountered during daily use. Operating the pushchair outside of the
recommendations provided by the manufacturer can lead to a dangerous situation. The pushchair is not
suitable for jogging, running, skating or similar activities. Swiveling front wheels tend to wobble at higher
speed and can cause a sudden stop and tip over of the pushchair. Use the pushchair only at regular walking
speed. Under no circumstance should you let go of the handlebar while pushing. Do not ever push the chair
away.
8
“Movement is life!”
IV. GENERAL WARNINGS
WARNING: The operator/caregiver must read and understand this manual prior to
operating this equipment. If you are unable to understand any part of the manual,
contact your dealer for assistance.
WARNING: The initial set up of this pushchair must be performed by a qualified
technician.
WARNING: Procedures other than those described in this manual must be performed
by a qualified technician.
WARNING: MAXIMUM WEIGHT LIMIT
The weight carried by the Kids ROCK chair must NEVER exceed the total weight
limit of 215 pounds. (Maximum occupant size plus any items carried.) When using the
chair in transit, all items including positioning tray must be removed from the chair
and secured separately.
WARNING: REDUCING THE RISK OF AN ACCIDENT
ALWAYS get properly trained and get comfortable operating the chair.
ALWAYS watch for obstacles and avoid them as often as possible.
ALWAYS use anti-tips.
Make sure that the chair operates properly. Repair any problems before use.
ALWAYS verify that the quick release axles are locked so that the back wheels do
not come off.
ALWAYS secure your child into the chair during use.
WARNING: CHANGES & ADJUSTMENTS
Adjustments made to the chair will change the balance and function of the chair
and may increase risk of tip over — consult your supplier before making adjustments.
Warranty will be voided if modifications that change the structure of the chair are
made without authorization.
WARNING: Avoid getting the chair wet as it may cause rust or corrosion. Dry the
chair thoroughly if it is exposed to moisture.
WARNING: EXTREME TEMPERATURES
Do not leave the chair or child in the sun or near other heat sources since the surfaces
on the chair may reach temperatures capable of burning the child. Do not leave the
chair or child outside in cold temperatures because contact with a chair in temperatures below freezing could result in injury. Damage to the chair may also result from
exposure to extreme hot or cold temperatures.
“Movement is life!”
9
 Loading...