

Kiddicare BABY WEAVERS Use And Care Manual
WARNING
This highchair has been designed to meet the standard of BS EN 14988:2006 + A1:2012.
Do not leave the child unattended when using this highchair.
Do not use this highchair until your child is able to sit up unaided.
Do not place too close to a source of heat such as electric bar fires, gas fires etc.
Do not use the highchair unless all components are correctly fitted and adjusted.
Ensure that the child is always restrained by the crotch, waist and shoulder straps provided.
Do not position in close proximity to trailing flexes, electric irons, ornaments or other obstacles.
The highchair must always be used on a stable level surface.
Do not use the highchair if any part is broken, torn or missing.
When not in use, store safely away and do not allow to be used as a toy or climbing frame.
YOUR CHILDREN’S SAFETY
IS YOUR RESPONSIBILITY
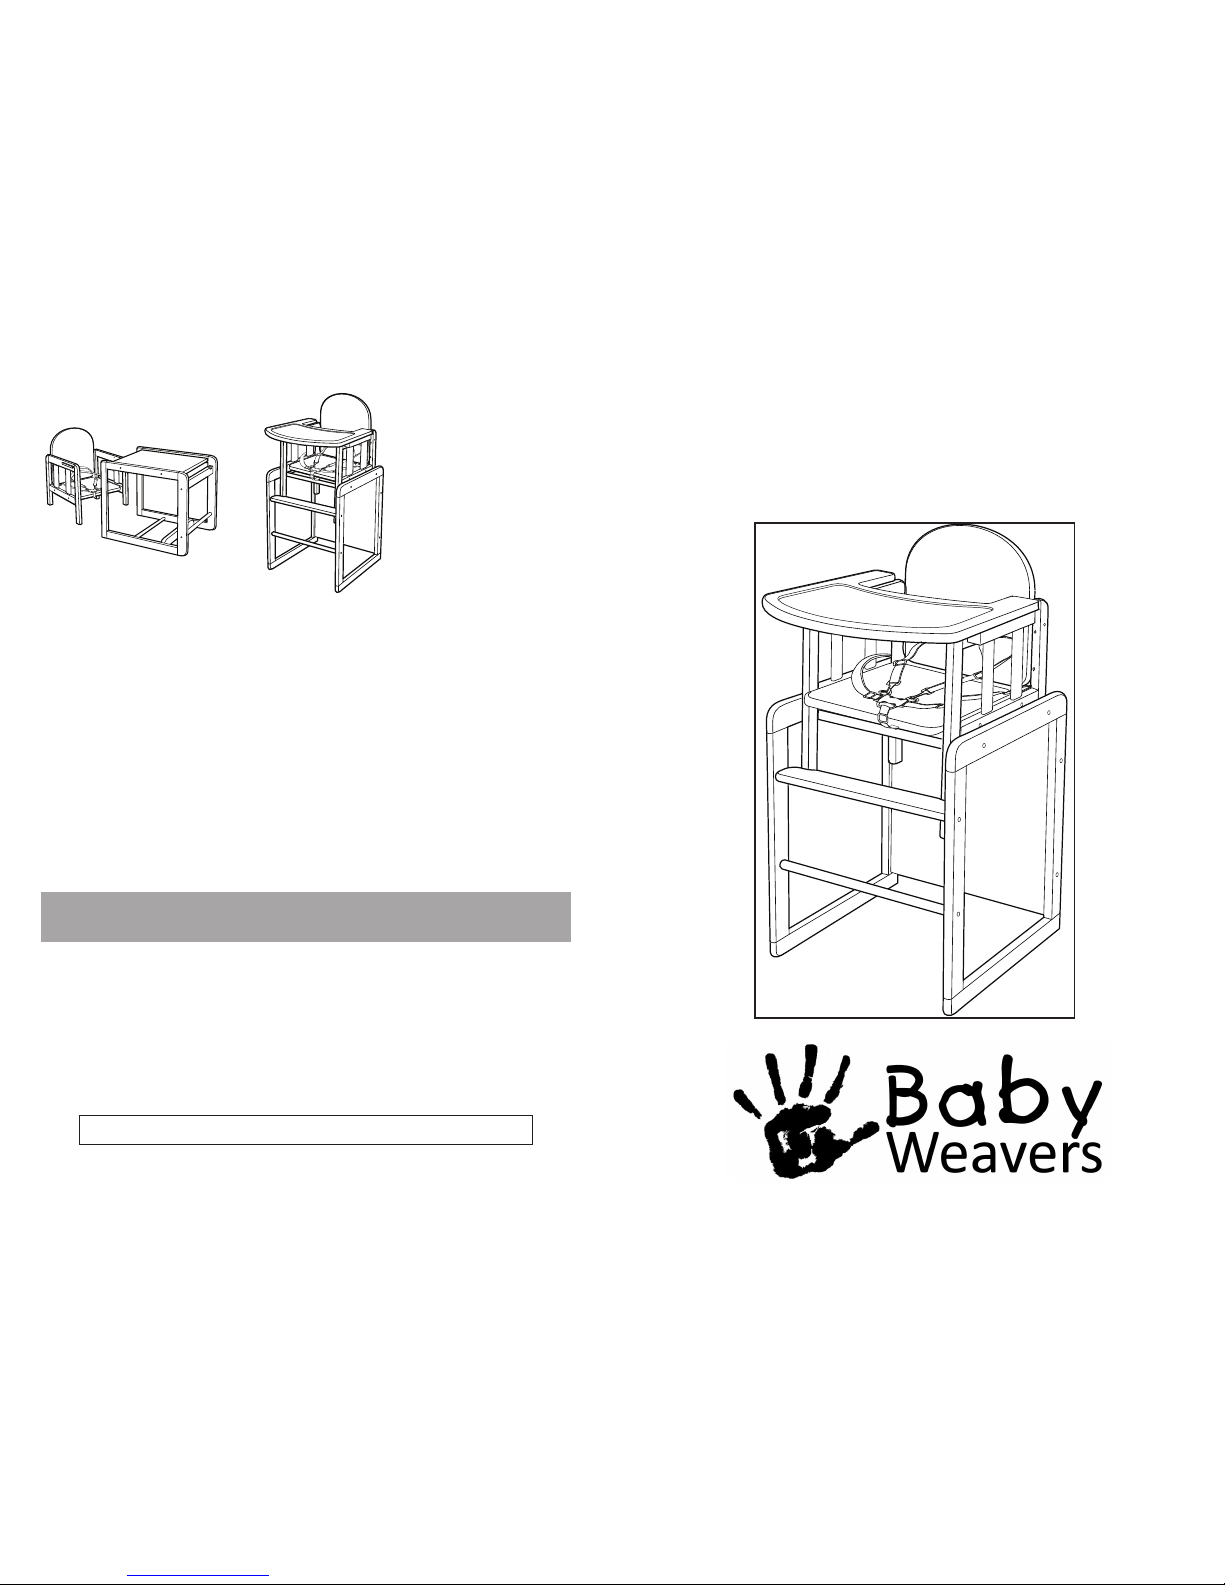
Combination
Highchair
kiddicare.com
Club Way, Cygnet Park, Hampton, Peterborough, Cambs, PE7 8JA
www.kiddicare.info
Regularly check for tightness of screws and that there is no wear or damage to the frame
or harness. To clean, use a damp cloth with a little warm soapy water but do not immerse
in water. Avoid strong detergents, abrasive or ammonia based cleaners. A light application of good furniture polish may be applied to the frame.
SAFETY NOTES:
a) When using the chair as a Highchair, the child must always wear the waist, shoulder
and crotch straps provided. Ensure that the two ends of the waist strap are fastened
into the buckle on top of the crotch strap and the shoulder straps are attached to the
two halves of the waist straps. Adjust for security. Ensure that the straps run directly
from the attachment points on the chair to your child’s body and are not passed
around any part of the highchair or any cushions or inserts you are using.
b) When using the tray ensure it is locked in position.
c) When used as a highchair ensure that the front legs of the top chair assembly fit into
the slots in the footrest.
d) Regularly check for freedom of movement of the locking devices. A light appplication
of a good furniture polish to the tray locks and runners may ease operation.
Customer Care Hotline For this Product 01692 408802
Your Combination highchair
can be used as a table and
seat or as a highchair.
To convert to highchair
mode, tip the table onto its
end with the table top to the
rear. Slide the legs of the
chair into the slots in the two
leg supports. Push down
fully to secure.
LF 87 r6

Table assembly;
Fit wooden dowels into the larger holes
in each end of the Front and Rear leg
supports and then fit the supports
to the side frame using two screws,
referring to the illustration for correct
positioning.
Attach the two round crossbars and
the table top using 6 screws, but do
not tighten fully at this stage.
Repeat with the other side frame, again
leaving the screws loose to allow slight
movement.
Fit the chair to the table as shown
overleaf. Tighten all screws on the
table.
IMPORTANT : PLEASE READ THESE
INSTRUCTIONS CAREFULLY
AND RETAIN FOR FUTURE
REFERENCE
1 PARTS LIST
2 ASSEMBLY INSTRUCTIONS
A - Table top x 1
B - Table frame x 2
C - Rear leg support x 1
D - Front leg support x 1
E - Round crossbar x 2
F - Chair frame x 2
G - Seat back x 1
H - Seat base & harness x 1
I - Tray x 1
J - Hexagon key x 1
K - Wooden dowel x 6
L - Screws x 18
A
K
C
D
I
B
G
J
H
E
F
To assemble the seat, take the chair
frame and push a wooden dowel into
each of the two holes which only go
part way through the wood (one on
each side of the frame).
Fit the seat onto one side of the chair
frame and secure with 3 screws.
Repeat with the other side.
NOTE: Before securing the chair
frames to the seat, ensure that the
straps are not twisted.
Ensure all screws are fully tightened
before continuing.
To fit the tray, grasp it on both sides
and squeeze the two triggers with your
fingers. From the front of the seat, slide
the tray onto the two plastic runners on
the arms of the seat. Release the
triggers and move forward or back until
the tray locks into place. To adjust or
remove the tray, squeeze the triggers
and move forwards or backwards as
desired.
Always ensure that the locks are
properly engaged when using the tray.
L
 Loading...