

KID CAR Cocoon, Comfoft Operating Instructions Manual

kid car Cocoon & Comfoft operating instructions
EN
Introduction
Congratulations on the purchase of your
KID CAR. You purchased a product that
is the result of many years of experience,
the use of modern techniques, highquality materials, the highest safety
standards and excellent design.
Please take your time to familiarise
yourself with the KID CAR. It is no big
deal to assemble the KID CAR, but it may
take some time to get the hang of using
the KID CAR in tandem with a bicycle, as
a buggy and as a jogging cart.
Please read and follow these directions
carefully for the safety of your child(ren).
These directions contain recommendations and instructions that must be
carefully read and accepted before using
the KID CAR as a bicycle trailer, buggy
or jogging cart.
Keep the proof of purchase with your
name, address and the date of purchase
at a safe place, as it will be required
when making a claim under warranty.
We trust that you will enjoy the use of
your KID CAR.
Always check before taking the KID
CAR out for a ride
• Has the drawbar been correctly
placed, is the locking pin in place and
is the spring clip secured?
• Do the wheels fi t properly in the axle
holes, have the locking pins been
placed and the spring clips secured?
• Has the coupling been placed in the
interlocking device and has the seat
belt been fi tted?
• Have the buttons to secure the rear
(rolling)cage been set in the locking
position?
• Are your children wearing the fi ve-
point seat belts?
• Are the brakes of your bicycle in good
working order?
• Has the running wheel been tucked
away in the holder?
• Has the parking brake been
released?
After taking your new KID CAR from
the box, check that you have received a
complete set:
The base pack
1.1 Plastic fl oor with aluminium frame,
roller cages and fabric span
1.2 Two nylon wheels with pre-mounted
axle shafts
1.3 Pushbar
1.4 Drawbar with rapid-action coupling
De KID CAR is nog uit te breiden met:
• Babyschaal standaard
• Babyschaal deluxe
• Zonnescherm
• Outdoorwiel
• Extra kogeltrekhaak
• Afstelbare vering
• Parkeerhoes
2.1 Ball draw hook
2.2 Safety fl ag
2.3 2-in-1 front cover
2.4 Two hub caps
2.5 Stroller wheel
2.6 Rear light
1. Assembling the base pack
First take the base frame with fl oor, the
wheels and the parts box simultaneously
from the box.
Put the base frame with fl oor on the
ground. Protect the fl oor and frame parts
against damage. You may wish to cover
the ground surface with a rug or a sheet
of plastic fi rst.
Put the parts box and the wheels aside.
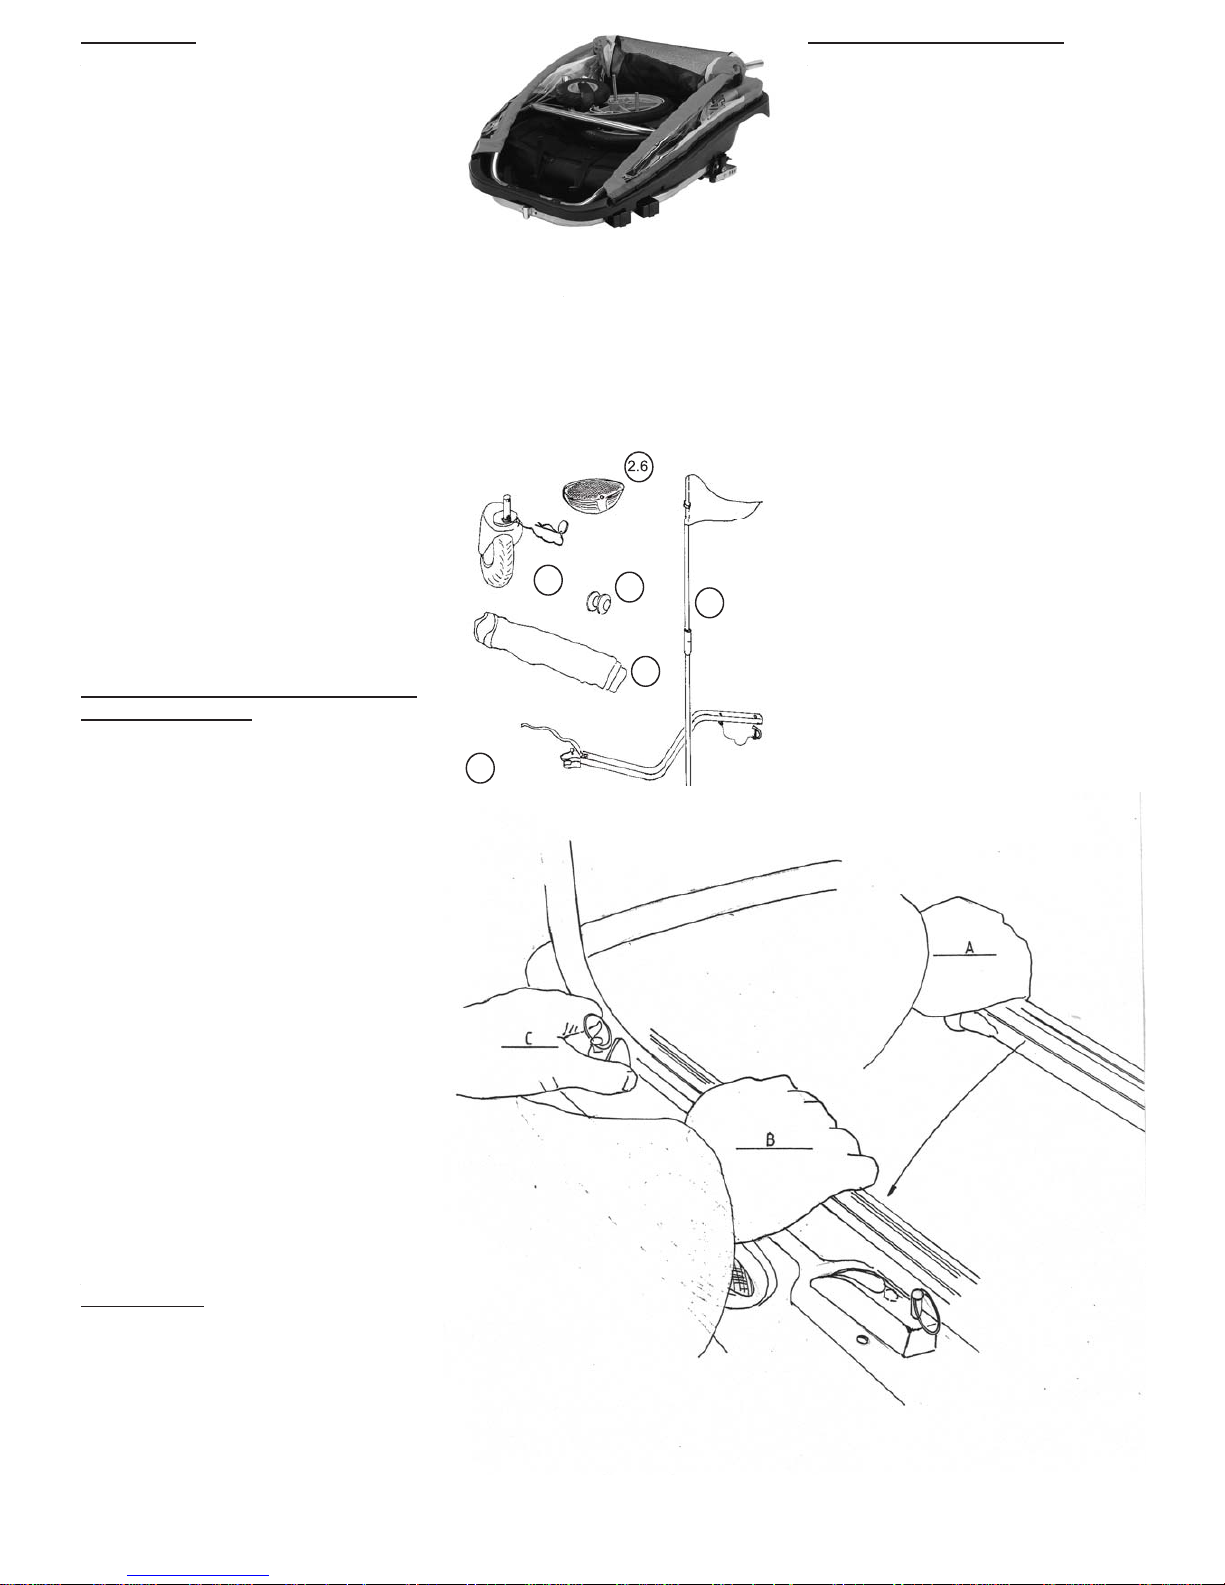
Sit behind the base frame with the fl oor,
and hold the horizontal tube of the rear
brace in one hand.
Move the horizontal tube to the back
(A).
Pull the horizontal tube in the recess at
the top of the fl oor (B).
Turn the two buttons in the locking
position (C) once the horizontal tube
of the rear brace is in the recess. The
button pins will lock automatically.
2
2.2
2.1
2.3
2.4
2.5
 Loading...