

Kia 2007 Magentis, 2008 Magentis Owner's Manual

kia, the company
Congratulations! Your selection of a Kia was a wise investment. It
will give you years of driving pleasure. Now that you are the owner of
a Kia vehicle, you’ll probably be asked a lot of questions about your
vehicle and the company like “What is a Kia?”, “Who is Kia?”, “What
does ‘Kia’ mean?”.
Here are some answers. First, Kia is the oldest car company in Korea.
It is a company that has thousands of employees focused on building
high-quality vehicles at affordable prices.
The first syllable, Ki, in the word “Kia” means “to arise from to the
world” or “to come up out of to the world.” The second syllable, a,
means “Asia.” So, the word Kia, means “to arise from” or “to come
up out of Asia to the world.”
Drive safely and enjoy your Kia!

The information and specifications provided in this manual
were accurate at the time of printing. Kia reserves the right to
discontinue or change specifications or design at any time
without notice and without incurring any obligation. If you
have questions, always check with your Kia Dealer.
We assure you of our continuing interest in your motoring
pleasure and satisfaction in your Kia vehicle.
© 2007 Kia Motors Crop.
All rights reserved. Reproduction by any means, electronic or
mechanical, including photocopying, recording, or by any
information storage and retrieval system or translation in
whole or part is not permitted without written authorization
from Kia Motors Corporation.
Printed in Korea

ii
1
2
3
4
5
6
7
8
9
Introduction
Your vehicle at a glance
Knowing your vehicle
Driving your vehicle
Driving tips
In case of an emergency
Maintenance
Specifications
Index

1
How to use this manual / 1-2
Vehicle break-in process / 1-2
Introduction

You’ll find various WARNING’s,
CAUTION’s, and NOTICE’s in this manual. These were prepared to enhance your
personal safety. You should carefully read
and follow ALL procedures and recommendations provided in these
WARNING’s, CAUTION’s and NOTICE’s.
✽✽
NOTICE
A NOTICE indicates a situation in
which damage to your vehicle could
result if the notice is ignored.
No special break-in period is needed. By
following a few simple precautions for the
first 1,000 km (600 miles) you may add to
the performance, economy and life of
your vehicle.
• Do not race the engine.
• Do not maintain a single speed for long
periods of time, either fast or slow.
Varying engine speed is needed to
properly break-in the engine.
• Avoid hard stops, except in emergencies, to allow the brakes to seat properly.
• Avoid full-throttle starts.
WARNING
A WARNING indicates a situation in
which serious bodily injury or death
could result if the warning is ignored.
CAUTION
A CAUTION indicates a situation in
which personal injury, perhaps
severe, could result if the caution is
ignored.
VEHICLE BREAK-IN PROCESS

2
Interior overview / 2-2
Instrument panel overview / 2-3
Engine compartment / 2-4
Your vehicle at a glance
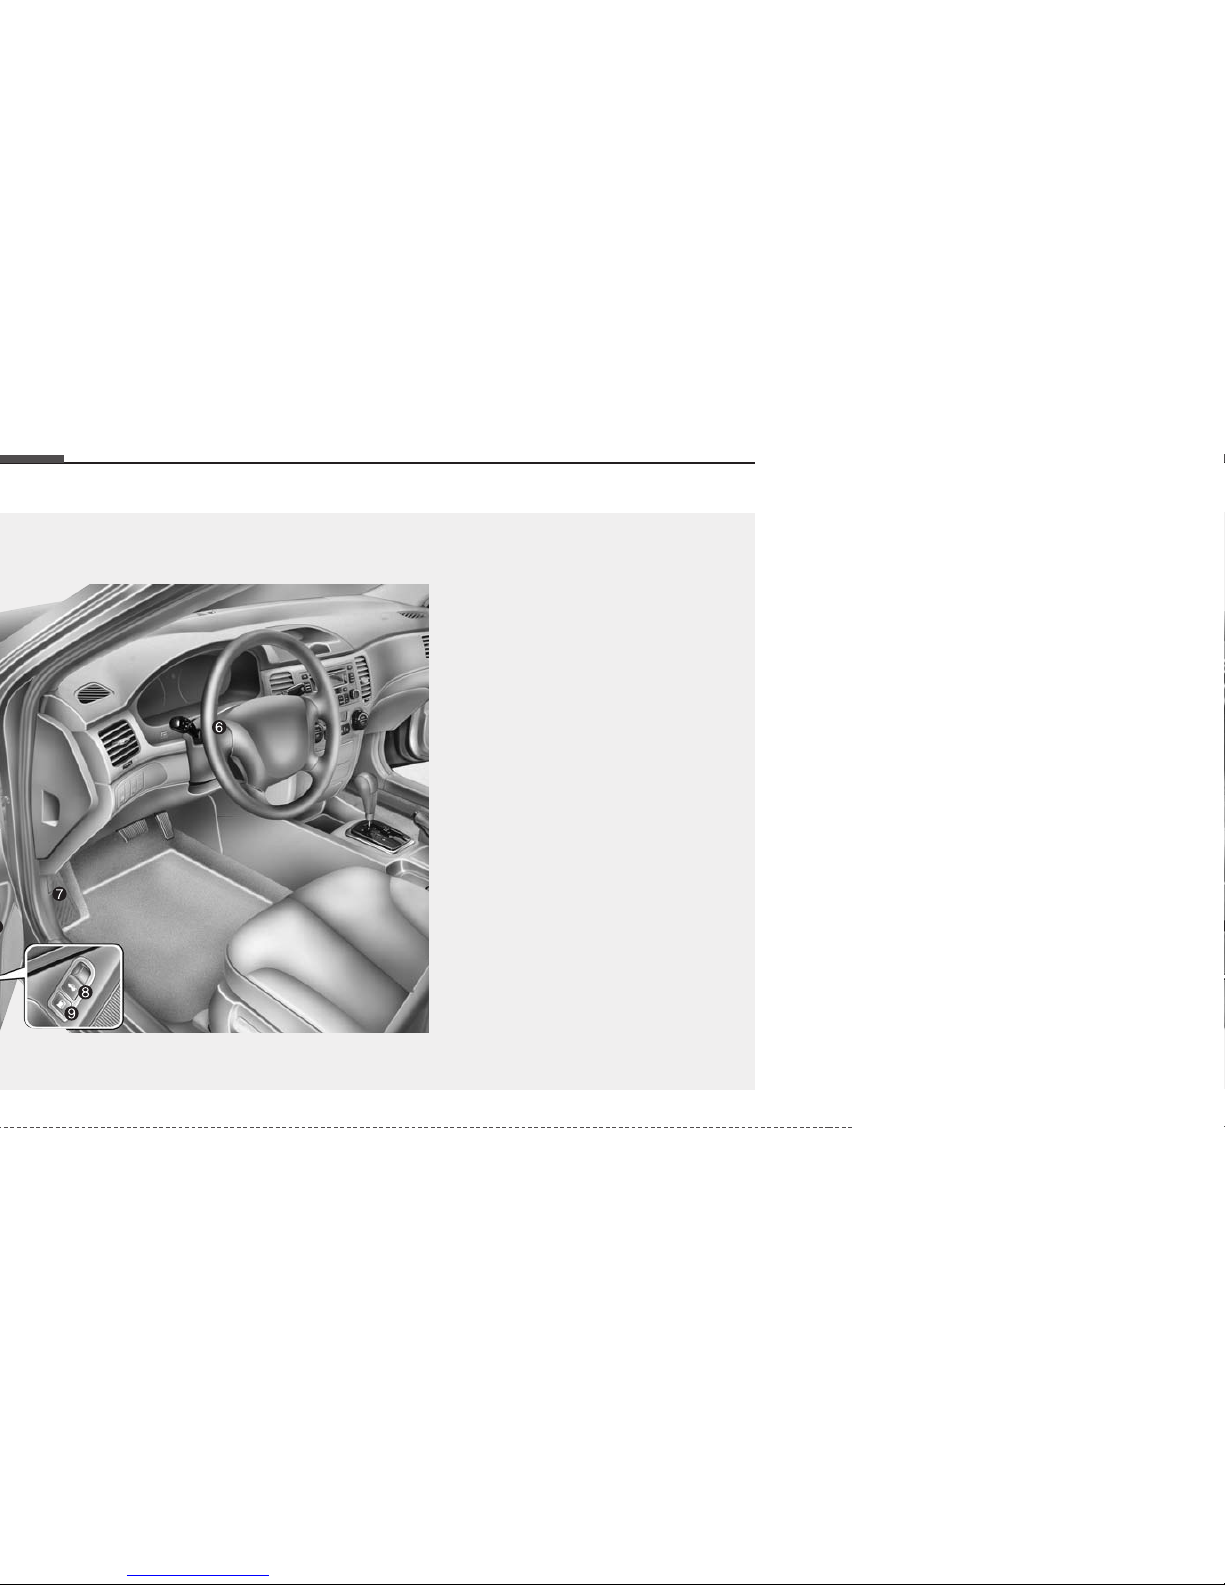
1. Door lock/unlock button.....................3-11
2. Outside rearview mirror control
switch*...............................................3-76
3. Power window switches* ...................3-14
4. Master power door lock control* .......3-12
5. Master power window control lock*...3-17
6. Steering wheel ..................................4-16
7. Hood release lever ...........................3-71
8. Trunk release lever* ..........................3-70
9. Fuel filler lid release button...............3-72
* : if equipped
OMG025001
23
Your vehicle at a glance
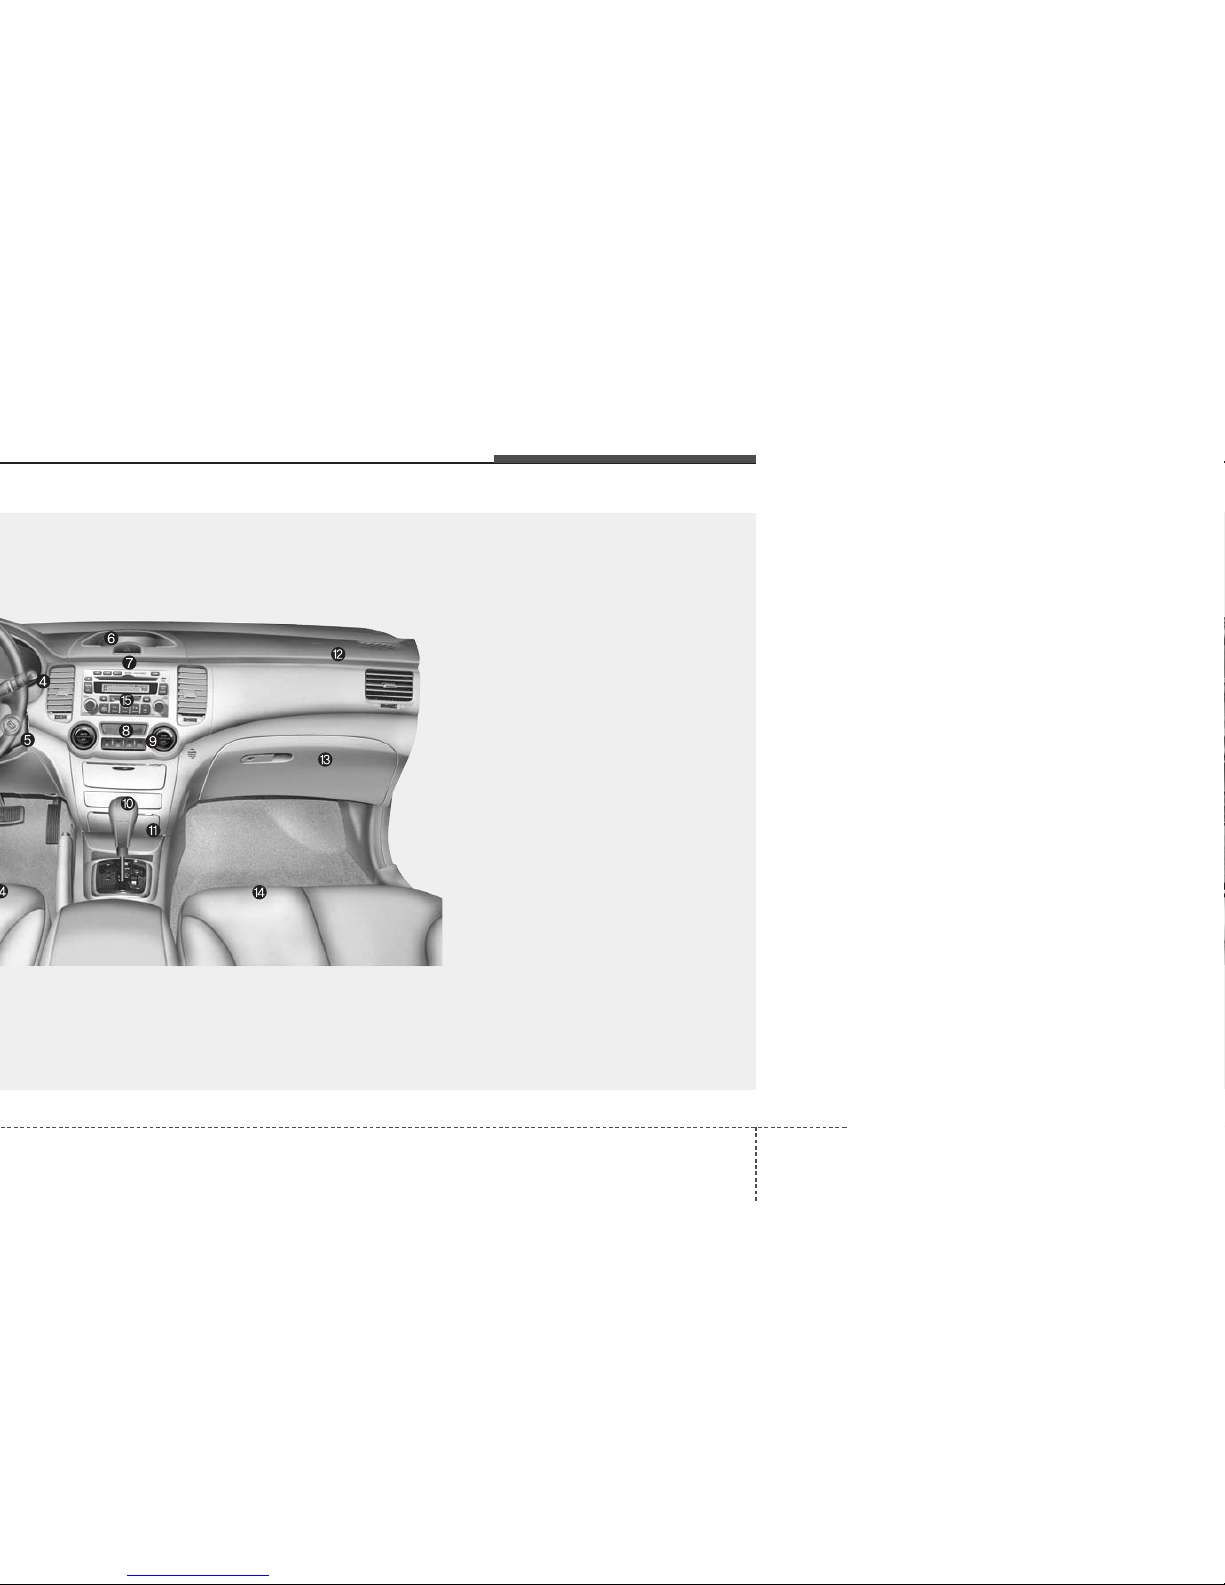
1. Driver’s air bag ..................................3-51
2. Light control / Turn signals ................4-40
3. Instrument cluster .............................4-24
4. Wiper/Washer....................................4-43
5. Ignition switch....................................4- 2
6. Digital clock.......................................3-89
7. Hazard...............................................4-47
8. Rear window defroster......................4-46
9. Climate control system.............4-48/4-55
10. Shift lever ....................................4-4/4-6
11. Cigar lighter.....................................3-86
12. Passenger’s air bag ........................3-52
13. Glove box ........................................3-85
14. Seat.................................................3-18
15. Audio controls*................................3-94
* : if equipped
OMG025002
OMG077002
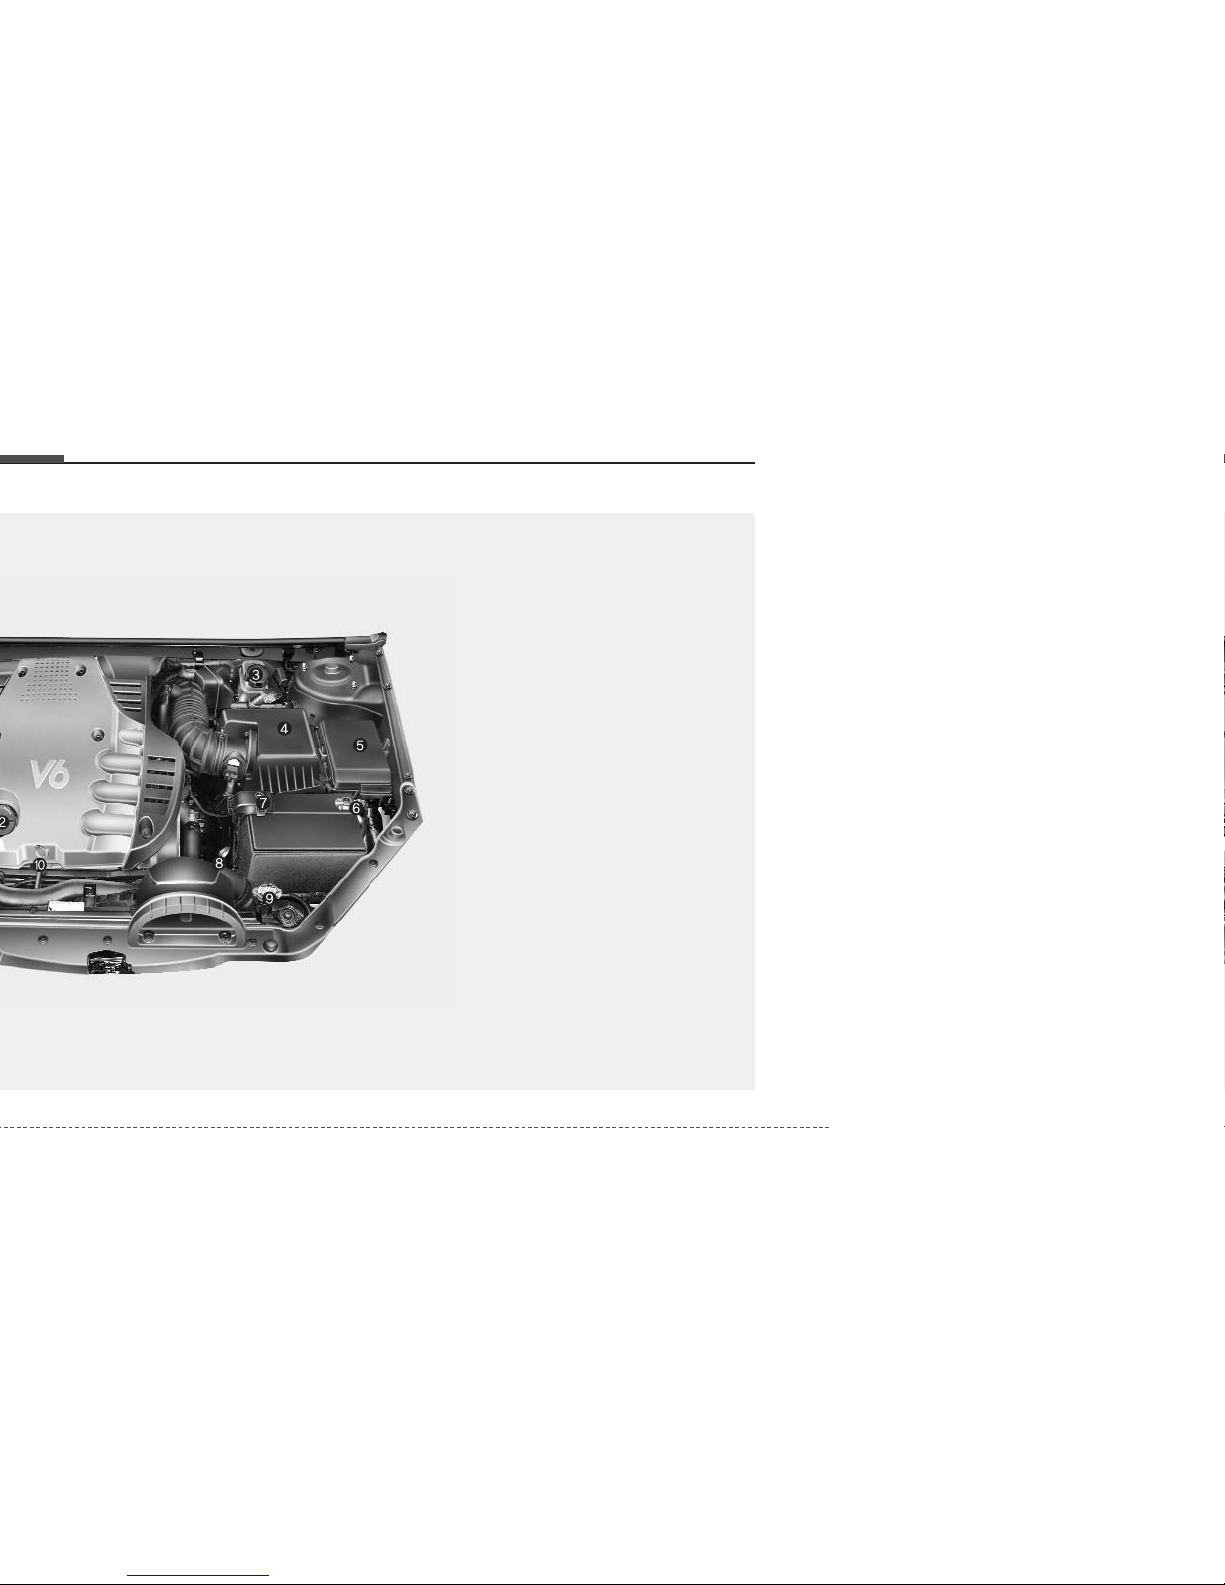
1. Engine coolant reservoir...................7-12
2. Engine oil filler cap............................7-11
3. Brake fluid reservoir..........................7-14
4. Air cleaner.........................................7-18
5. Fuse box ...........................................6- 8
6. Negative battery terminal ...........6-4/7-21
7. Positive battery terminal .............6-4/7-21
8. Auto transaxle oil dipstick* ................7-16
9. Radiator cap......................................7-13
10. Engine oil dipstick...........................7-11
11. Power steering fluid reservoir .........7-15
12. Windshield washer fluid reservoir...7-17
* : if equipped

3
Keys / 3-2
Remote keyless entry / 3-4
Theft-alarm system / 3-6
Immobilizer system / 3-8
Door locks / 3-10
Window / 3-14
Seat / 3-18
Safety belts / 3-28
Air bags-supplemental restraint system / 3-48
Trunk / 3-69
Hood / 3-71
Fuel filler lid / 3-72
Mirrors / 3-75
Homelink® wireless control system / 3-79
Interior lights / 3-83
Storage compartment / 3-84
Interior features / 3-86
Sunroof / 3-90
Luggage net / 3-92
Antenna / 3-93
Audio remote control / 3-94
Audio system / 3-95
Knowing your vehicle
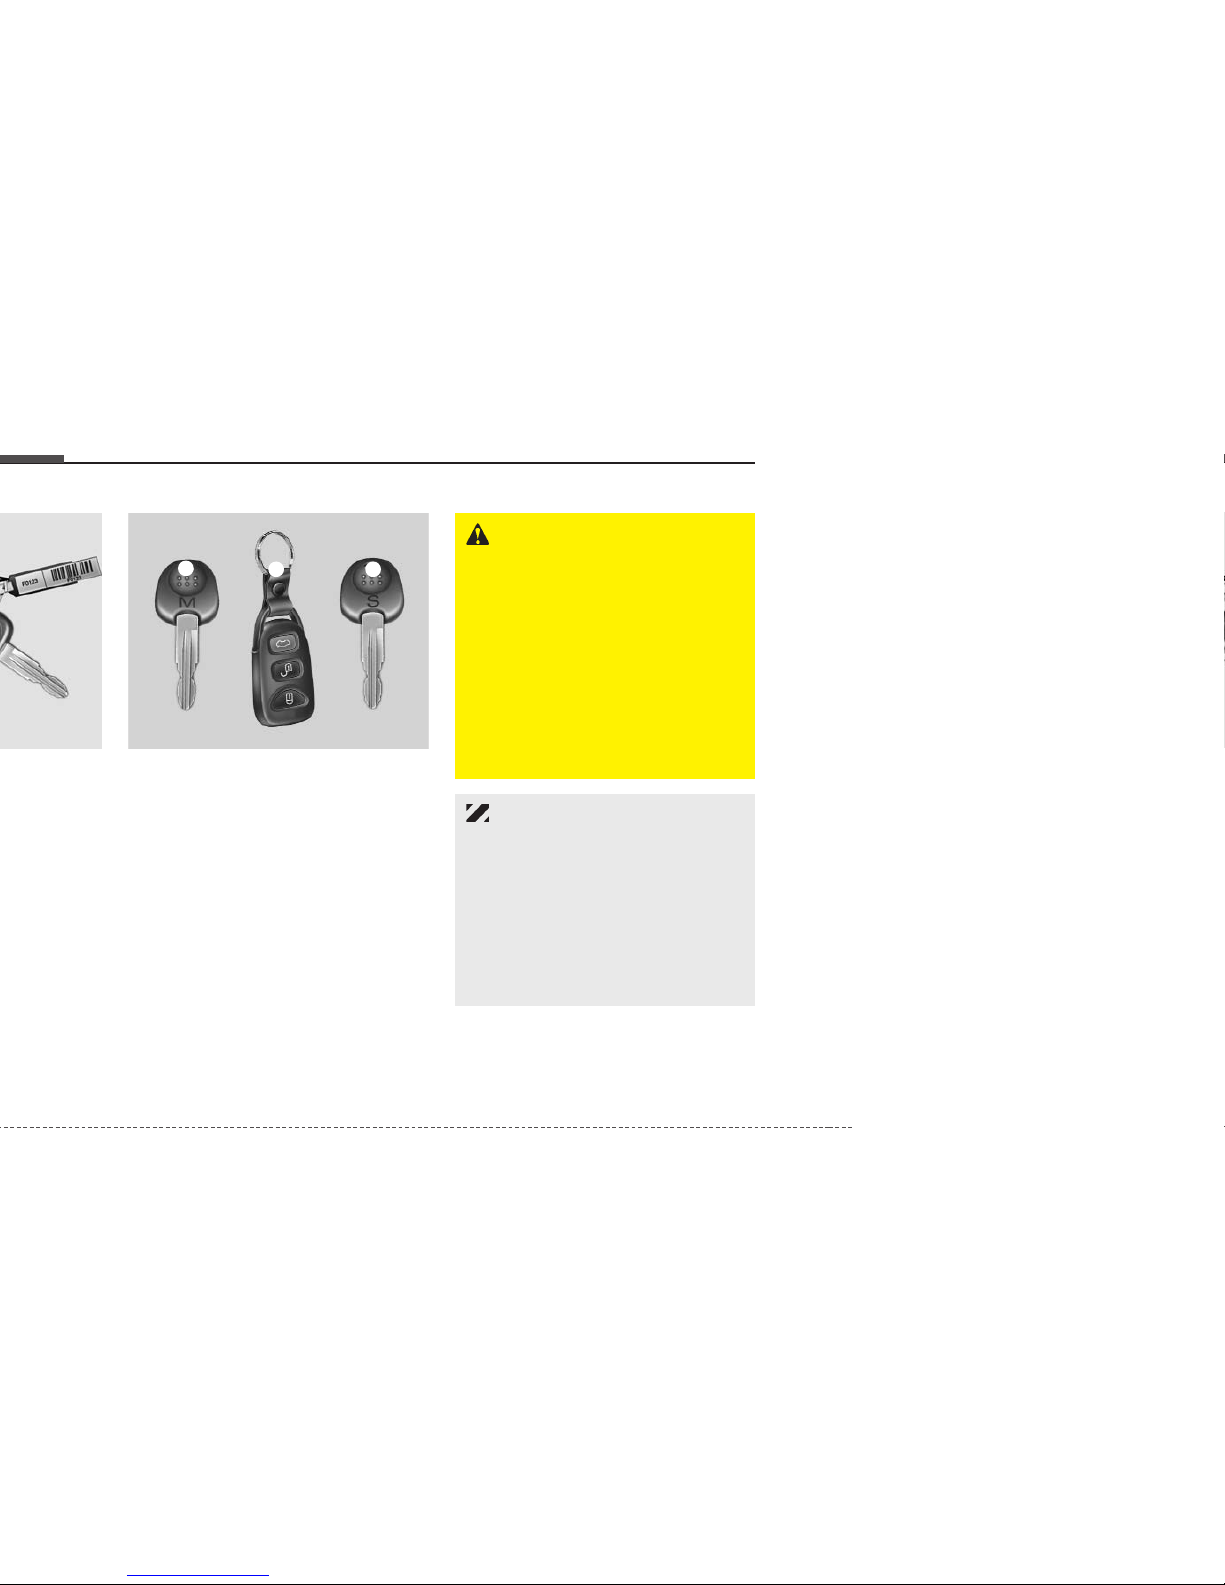
Key operations
(1) Master key
Used to start the engine, lock and
unlock the doors, lock and unlock the
glove box (if equipped), and open the
trunk.
(2) Transmitter (if equipped)
Used to lock and unlock the doors
and trunk.
(3) Sub key (if equipped)
Used only to start the engine and lock
and unlock the door.
WARNING - Ignition key
Leaving children unattended in a
vehicle with the ignition key is dangerous even if the key is not in the
ignition. Children copy adults and
they could place the key in the ignition. The ignition key would enable
children to operate power windows
or other controls, or even make the
vehicle move, which could result in
serious bodily injury or even death.
Never leave the keys in your vehicle
with unsupervised children.
CAUTION
Use only Kia original parts for the
ignition key in your vehicle. If an
aftermarket key is used, the ignition
switch may not return to ON after
START. If this happens, the starter
will continue to operate causing
damage to the starter motor and
possible fire due to excessive current in the wiring.
OMG035108 OMG037109
1
2 3
33
Knowing your vehicle
With master and sub key
(if equipped)
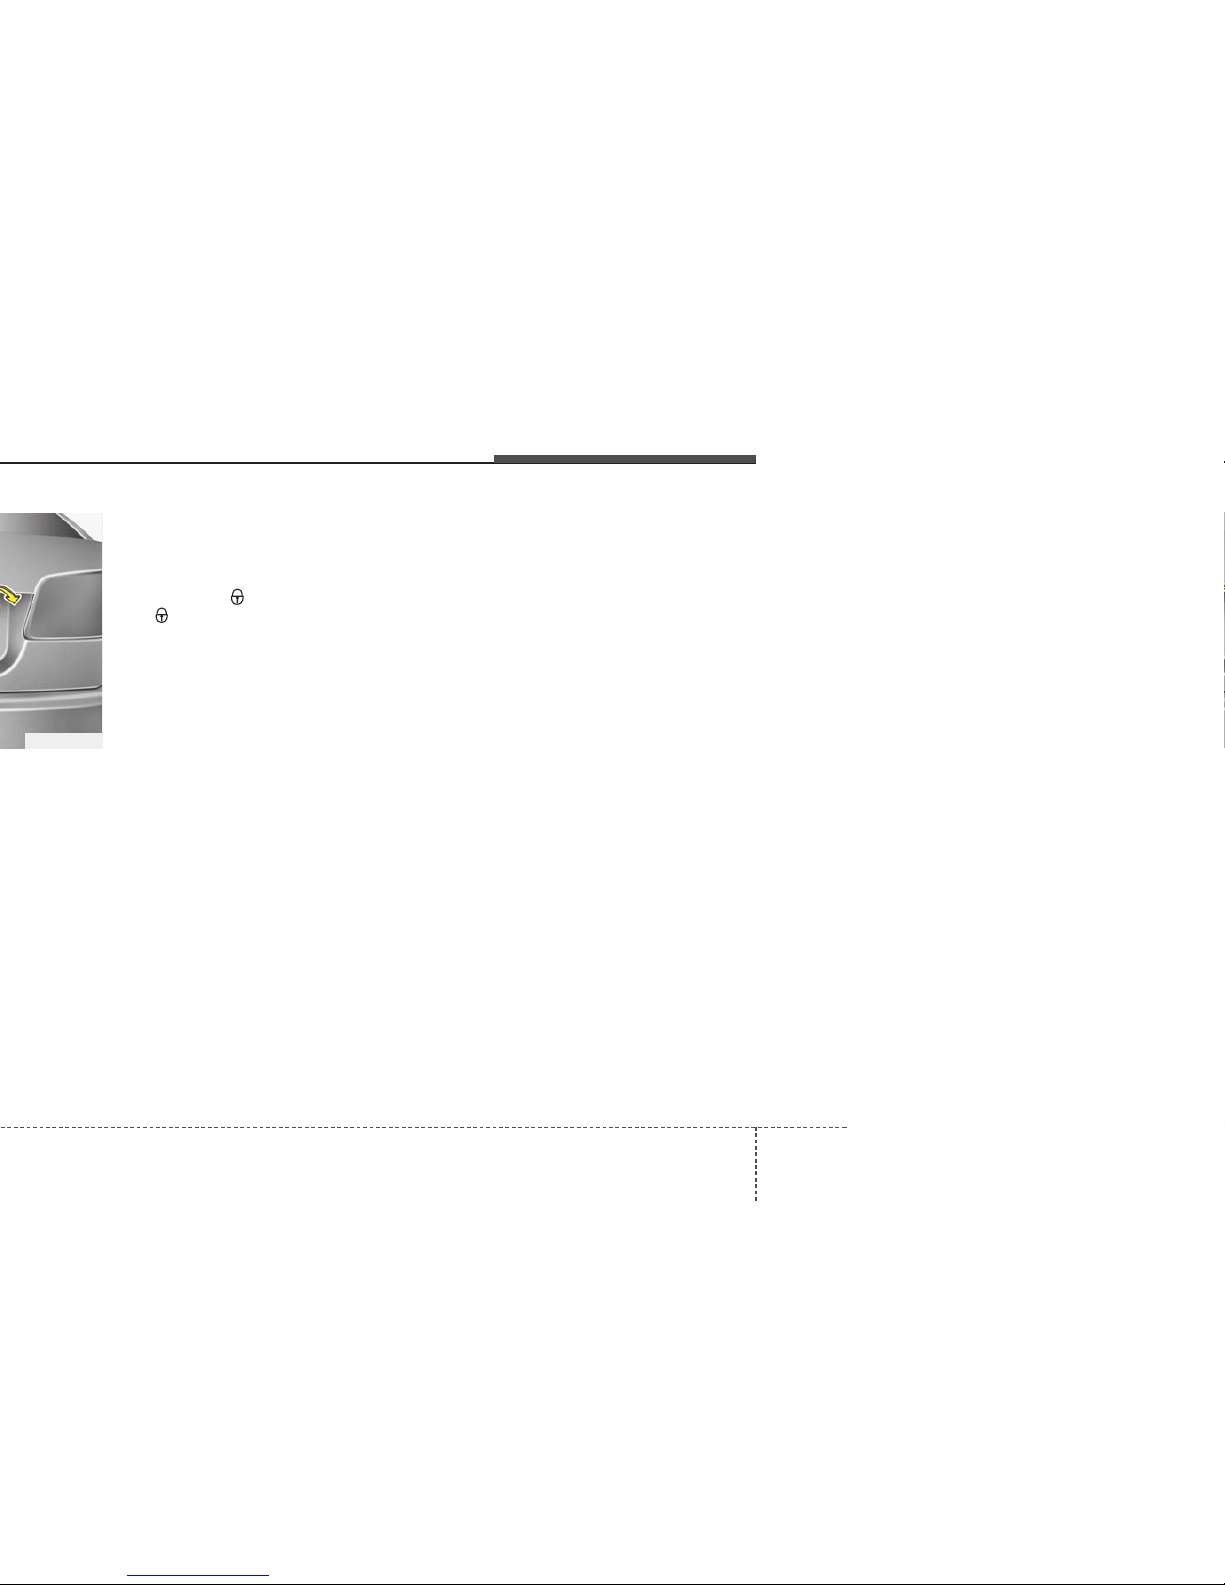
1. Open the trunk with the master key.
2. Set the trunk lid lock knob in the trunk
to LOCK ( ) position. In the LOCK
( ) position, the trunk can not be
unlocked with either the trunk release
lever inside the car or trunk open button of the transmitter.
3. Close the glove box, and lock the glove
box using the master key.
4. Leave the attendant with the sub key.
The trunk and glove box are secured
because the sub key only allows
engine start and door lock and unlock.
OMG035003
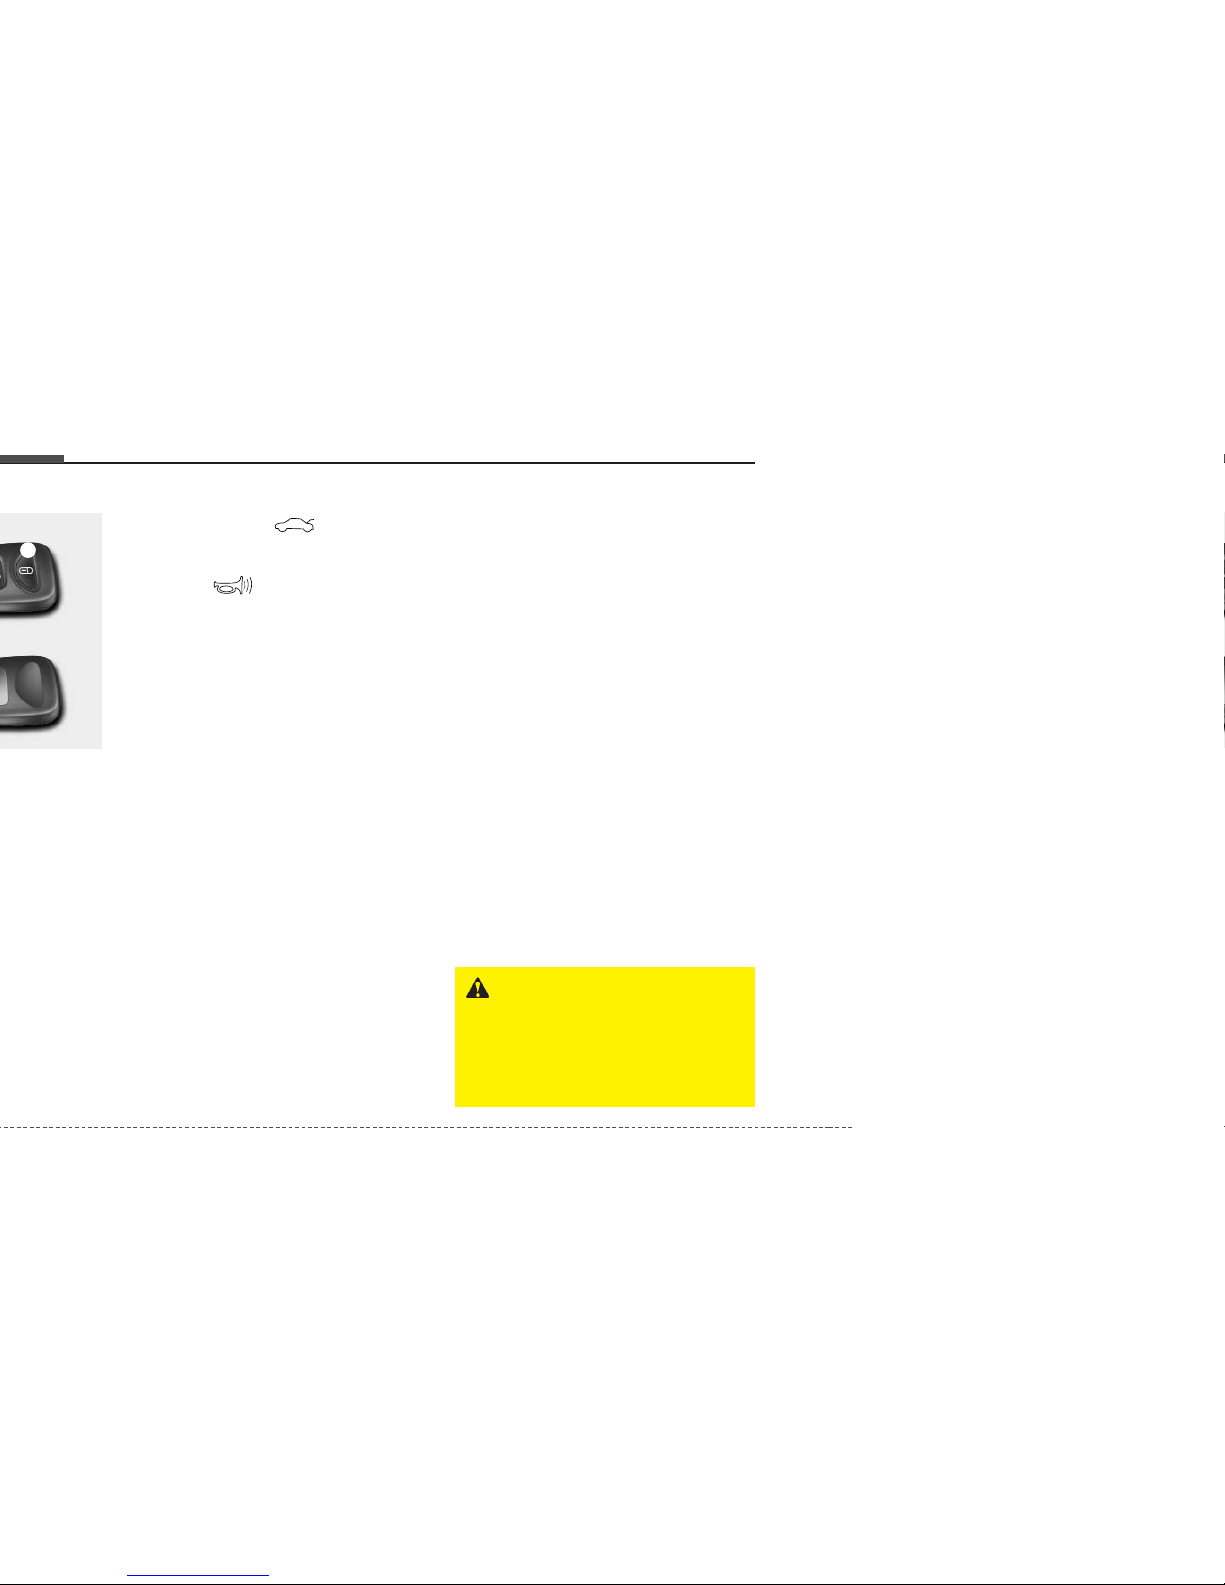
(3) Trunk lid open ( , if equipped)
The trunk lid opens if this button is
pressed (more than 1 second).
(4) Alarm ( )
The horn sounds and hazard warning
lights will flash for about 30 seconds if
this button is pressed (more than 0.5
second). To stop the horn and lights,
press any button on the transmitter.
✽✽
NOTICE
The transmitter will not work if any of
following occur:
• The ignition key is in ignition switch.
• You exceed the operating distance
limit (about 10 m [30 feet]).
• The battery in the transmitter is
weak.
• Other vehicles or objects may be
blocking the signal.
• The weather is extremely cold.
• The transmitter is close to a radio
transmitter such as a radio station or
an airport which can interfere with
normal operation of the transmitter.
When the transmitter does not work
correctly, open and close the door with
the ignition key. If you have a problem
with the transmitter, contact an authorized Kia Dealer.
✽✽
NOTICE
Keep the transmitter away from water
or any liquid. If the keyless entry system
is inoperative due to exposure to water
or liquids, it will not be covered by your
manufacturer vehicle warranty.
Operational distance may vary depending upon the area the transmitter is used
in. For example, if the vehicle is parked
near police stations, government and
public offices, broadcasting stations, military installations, airports, or transmitting towers, etc., these may interfere with
the signal.
This device complies with Industry
Canada Standard RSS-210. Operation
is subject to the following two conditions:
1. This device may not cause interference, and
2. This device must accept any interference, including interference that may
cause undesired operation of the
device.
OMG037004
12
WARNING
Changes or modifications not
expressly approved by the party
responsible for compliance could
void the user's authority to operate
the equipment.
35
Knowing your vehicle
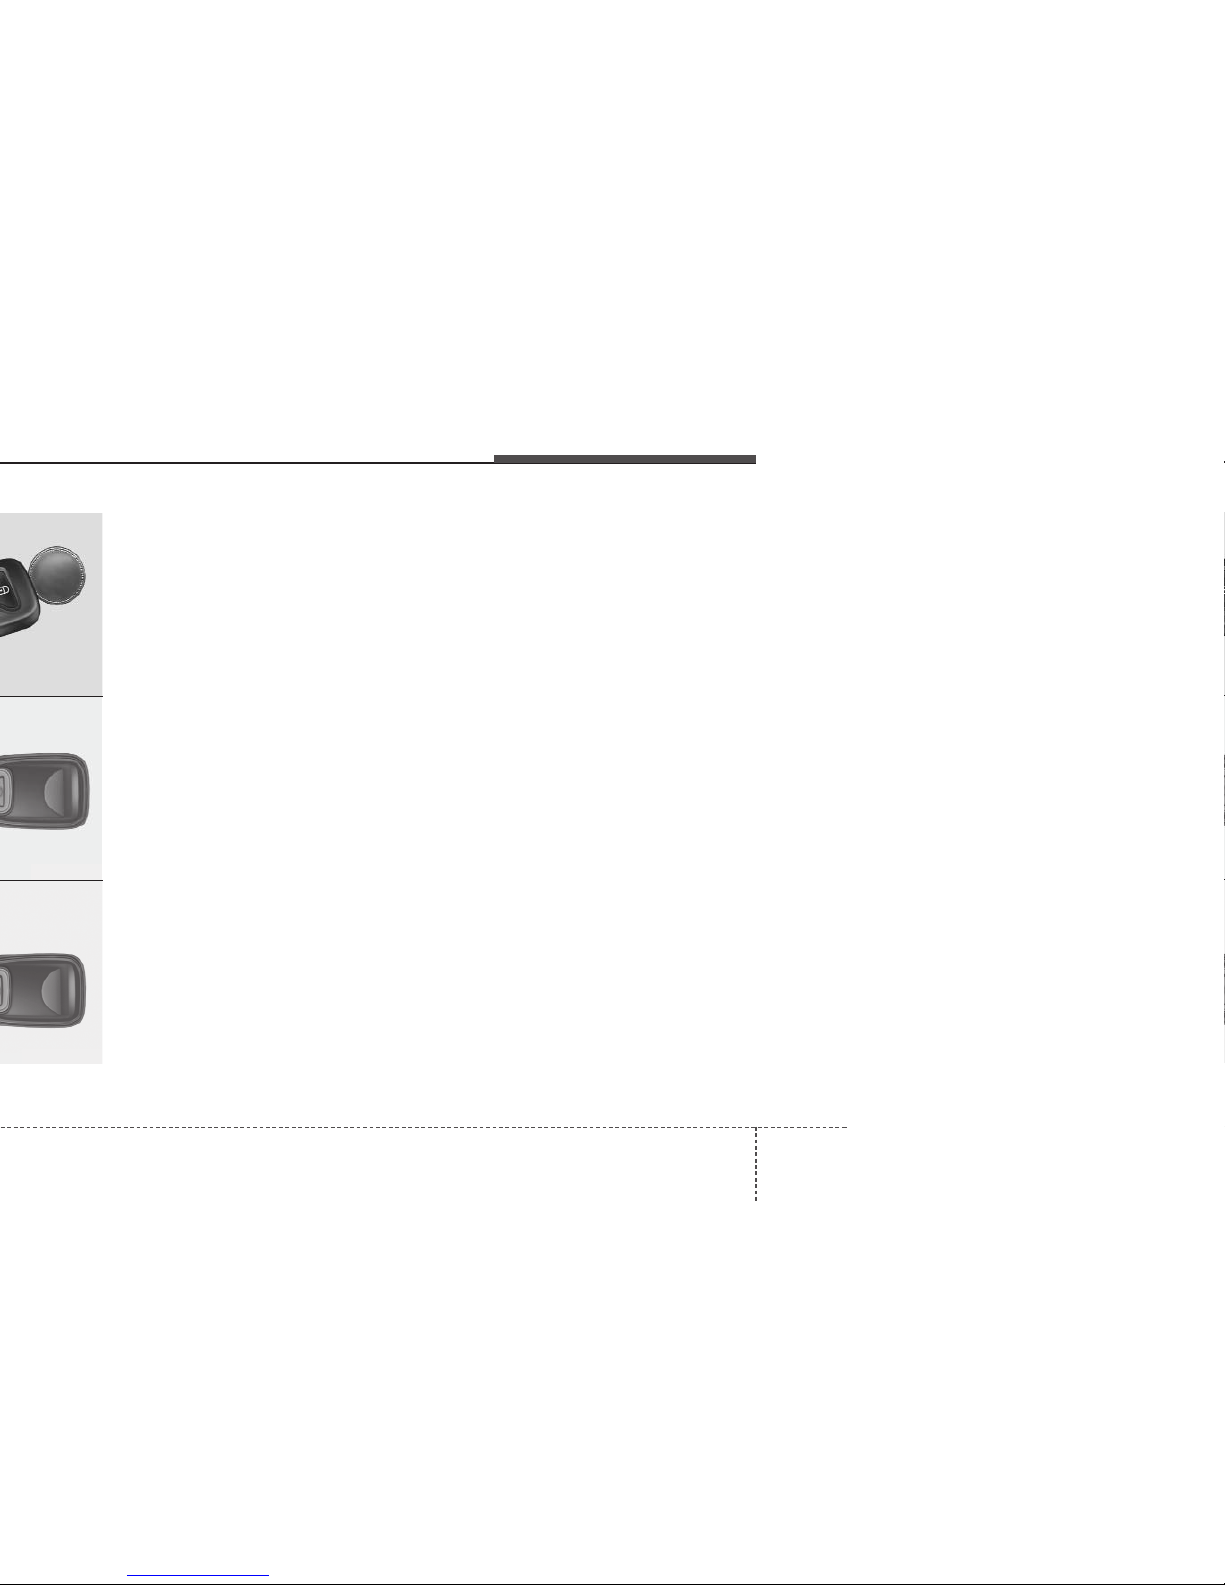
Battery replacement
Transmitter uses a 3 volt lithium battery
which will normally last for several years.
When replacement is necessary, use the
following procedure.
1. Insert a slim tool into the slot and gently pry open the transmitter center
cover.
2. Replace the battery with new one.
When replacing the battery, make sure
the battery positive “+” symbol faces
up as indicated in the illustration.
3. Install the battery in the reverse order
of removal.
✽✽
NOTICE
The keyless entry system transmitter is
designed to give you years of troublefree use, however it can malfunction if
exposed to moisture or static electricity.
If you are unsure how to use your transmitter or replace the battery, contact an
authorized Kia dealer.
For replacement transmitters, see an
Authorized Kia Dealer for reprogramming.
✽✽
NOTICE
• Using the wrong battery can cause the
transmitter to malfunction. Be sure to
use the correct battery.
• To avoid damaging the transmitter,
don't drop it, get it wet, or expose it to
heat or sunlight.
7B070E01NF
HNF2005
HNF2006

Armed stage
When the ignition switch is in the “LOCK”
position, and key is not in the ignition, the
system will be armed and the hazard
lights will flash once when the following
conditions are met:
• The hood, trunk and doors are all
closed and locked with the transmitter
or ignition key.
• If a door or the trunk is not opened
within approximately 30 seconds after
unlocking with the transmitter, all doors
will be locked again and theft alarm
system armed.
If the “Lock” button pressed for more than
two times within 3 seconds, the horn will
sounds from the second time pressed.
Do not arm the system until all passengers have left the vehicle. If the
system is armed while a passenger(s)
remains in the vehicle, the alarm may
be activated when the remaining passenger(s) leaves the vehicle.
Theft alarm stage
The alarm will activate (horn will sound
and lights flash) when:
• Any door is opened without using the
transmitter or key.
• The trunk lid is opened without using
the key.
• The engine hood is opened.
The alarm will sound ON for 27 seconds,
then OFF for 10 seconds. This ON/OFF
cycle will be repeated three times. During
this time, the engine will not start.
The engine will not start while the
theft-alarm system is armed or activated.You must disarm the theft-alarm
system to start the engine.
Theft alarm
stage

37
Knowing your vehicle
Disarmed stage
If the following conditions are met, the
alarm system will be deactivated and the
hazard flasher light will flash twice.
• When the doors are unlocked with the
transmitter or ignition key.
After depressing unlock button, you
must open the doors within 30 seconds
or all doors will automatically lock
again and the theft-alarm system will
be armed.
• When the ignition switch is in the “ON”
position.
The alarm will be deactivated when:
• The lock ( ), unlock ( ) button on
the transmitter is pressed.
• The doors are unlocked with the ignition key.
• The ignition switch is in the “ON” position for 30 seconds or more.
✽✽
NOTICE
Avoid trying to start the engine while
the alarm is activated. The vehicle starting motor is disabled during the theftalarm stage.

To activate the immobilizer system:
Turn the ignition key to the OFF position.
The immobilizer system activates automatically. Without a valid ignition key for
your vehicle, the engine will not start.
✽✽
NOTICE
When starting the engine, do not use the
key with other immobilizerkeys around.
Otherwise the engine may not start or
may stop soon after it starts. Keep keys
separate to avoid immobilizer malfunctions.
Limp home (override) procedure
When you turn the ignition key to the ON
position, if the IMMO indicator goes off
after blinking 5 times, your transponder
equipped in the ignition key is out of order.
You cannot start the engine without the
lime home procedure. To start the engine,
you have to input your password by using
the ignition switch.
The following procedure is how to input
your password of “2345” as an example.
1. Turn the ignition key to the ON position.
The IMMO indicator ( ) will blink 5
times and go off indicating the beginning of the limp home procedure.
2. Turn the ignition key to the ACC posi-
tion.
CAUTION
Do not put metal accessories near
the key or ignition switch.
The engine may not start for the
metal accessories may interrupt the
transponder signal from normally
transmitting.
WARNING
In order to prevent theft of your
vehicle, do not leave spare keys
anywhere in your vehicle. Your
Immobilizer password is a customer unique password and should
be kept confidential. Do not leave
this number anywhere in your vehicle.

39
Knowing your vehicle
✽✽
NOTICE
The transponder in your ignition key is
an important part of the immobilizer
system. It is designed to give years of
troublefree service, however you should
avoid exposure to moisture, static electricity and rough handling.
Immobilizer system malfunction could
occur.
✽✽
NOTICE
Do not change, alter oradjust the immobilizer system because it could cause the
immobilizer system to malfunction and
should only be serviced by an authorized Kia dealer.
Malfunctions caused by improper alterations, adjustments or modifications to
the immobilizer system are not covered
by your vehicle manufacturer warranty.
This device complies with Industry
Canada Standard RSS-210. Operation
is subject to the following two conditions:
1. This device may not cause interfer-
ence, and
2. This device must accept any interfer-
ence, including interference that may
cause undesired operation of the
device.
WARNING
Changes or modifications not
expressly approved by the party
responsible for compliance could
void the user's authority to operate
the equipment.

• Doors can also be locked and
unlocked with the transmitter (if
equipped).
• Once the doors are unlocked, they may
be opened by pulling the door handle.
• When closing the door, push the door
firmly by hand. Make sure that doors
are closed securely.
To lock a door without the key, push the
inside central door lock switch (1)to the
“LOCK” position and close the door (2).
OMG035005
OMG035006A
311
Knowing your vehicle
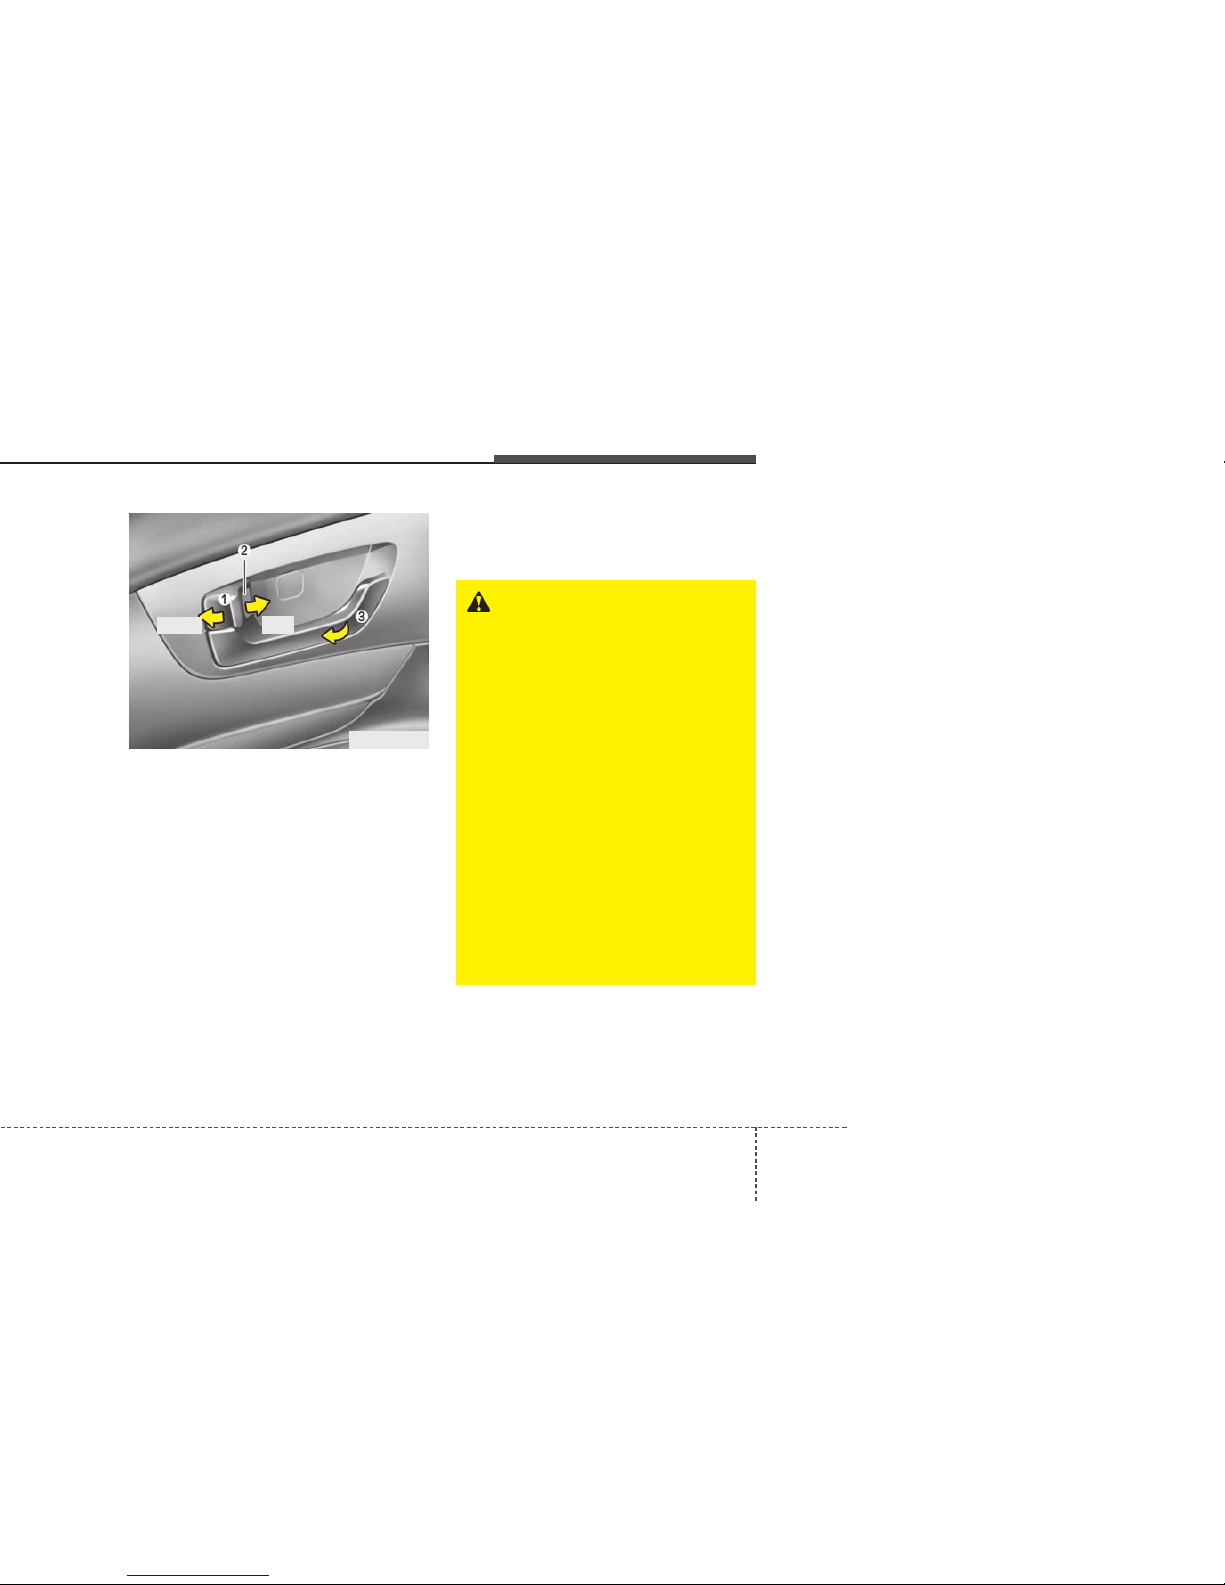
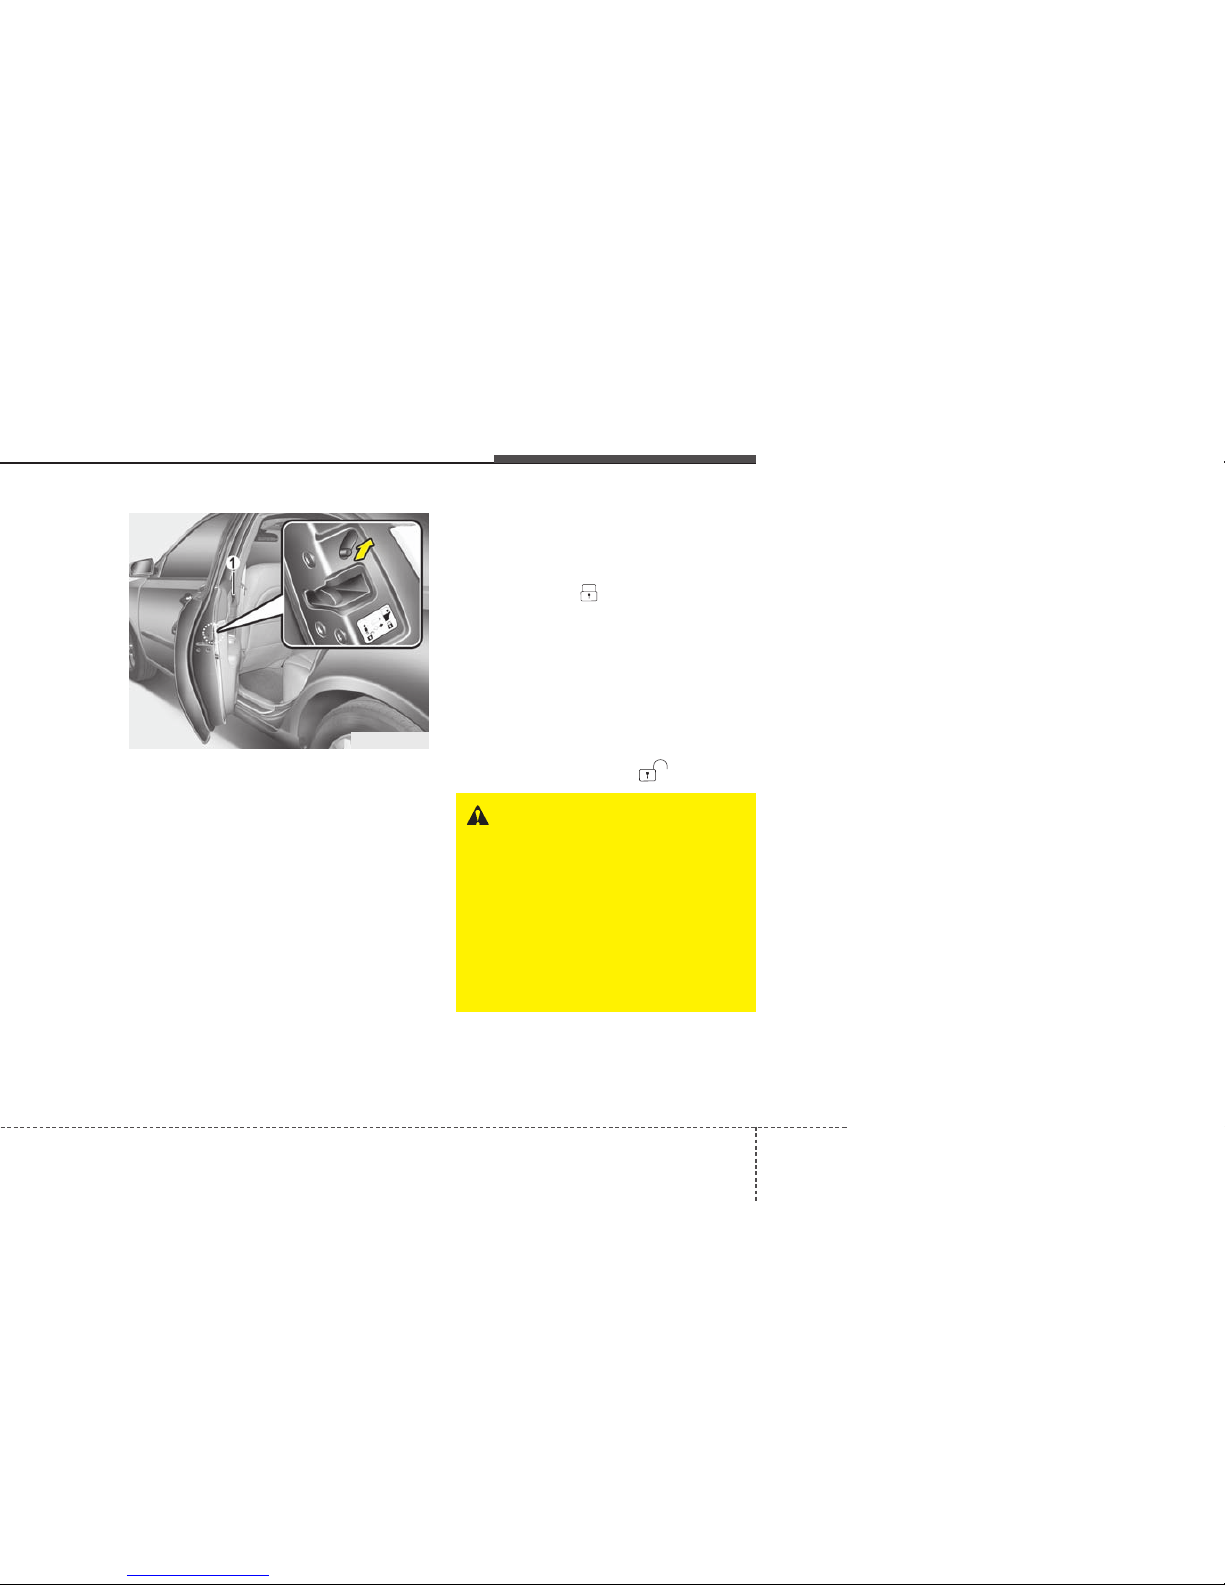
Operating door locks from inside
the vehicle
With the door lock button
• To unlock a door, push the door lock
button forward to the “Unlock” position
(red mark on button visible).
• To lock a door, push the door lock button (1) forward to the “Lock” position. If
the door is locked properly, the red
mark (2) on the door lock button will
not be visible.
• To open a door, pull the door handle
(3) outward.
• If the inner door handle of front door is
pulled when the door lock button is in
lock position, the button is unlocked
and door opens. (if equipped)
• Front doors cannot be locked if the
ignition key is in the ignition switch and
door is open.
WARNING - Door lock mal-
function
If a power door lock ever fails to
function while you are in the vehicle, try one or more of the following
techniques to exit:
• Operate the door unlock feature
repeatedly (both electronic and
manual) while simultaneously
pulling on the door handle.
• Operate the other door locks and
handles, front and rear.
• Lower a front window and use the
key to unlock the door from outside.
• Lower the rear seats (if
equipped), move to the cargo
area and open the trunk using the
emergency release handle (if
equipped).
OMG035007
Lock
Unlock
• However, if the key is in the ignition
switch and any front door is open, the
doors will not lock when the front portion of central door lock switch is
pressed.
CAUTION - Doors
• The doors should always be fully
closed and locked while the vehicle is in motion to prevent accidental opening of the door.
Locked doors will also discourage potential intruders when the
vehicle stops or slows.
• Be careful when opening doors
and watch for vehicles, motorcycles, bicycles or pedestrians
approaching the vehicle in the
path of the door. Opening a door
when something is approaching
can cause damage or injury.
WARNING - Unlocked vehi-
cles
Leaving your vehicle unlocked can
invite theft or possible harm to you
or others from someone hiding in
your vehicle while you are gone.
Always remove the ignition key,
engage the parking brake, close all
windows and lock all doors when
leaving your vehicle unattended.
WARNING - Unattended
children
An enclosed vehicle can become
extremely hot, causing death or
severe injury to unattended children or animals who cannot escape
the vehicle. Furthermore, children
might operate features of the vehicle that could injure them, or they
could encounter other harm, possibly from someone gaining entry to
the vehicle. Never leave children or
animals unattended in your vehicle.
OMG035008
OMG035009
313
Knowing your vehicle
Rear door child safety lock
The child safety lock is provided to help
prevent children from accidentally opening the rear doors from inside the vehicle.
The rear door safety locks should be
used whenever children are in the vehicle.
1. Open the rear door.
2. Push the child safety lock located on
the rear edge of the door to the “Lock”
position. When the child safety lock is
in the “Lock ( )” position, rear door
will not open when the inner door handle is pulled inside the vehicle.
3. Close the rear door.
4. To open the rear door, pull the outside
door handle.
Even though the doors may be unlocked,
the rear door will not open by pulling the
inner door handle (1) until rear door child
safety lock is unlocked ( ).
WARNING - Rear door
locks
If children accidentally open the
rear doors while the vehicle is in
motion, they could fall out and be
severely injured or killed.To prevent
children from opening the rear
doors from the inside, the rear door
safety locks should be used whenever children are in the vehicle.
OMG035010
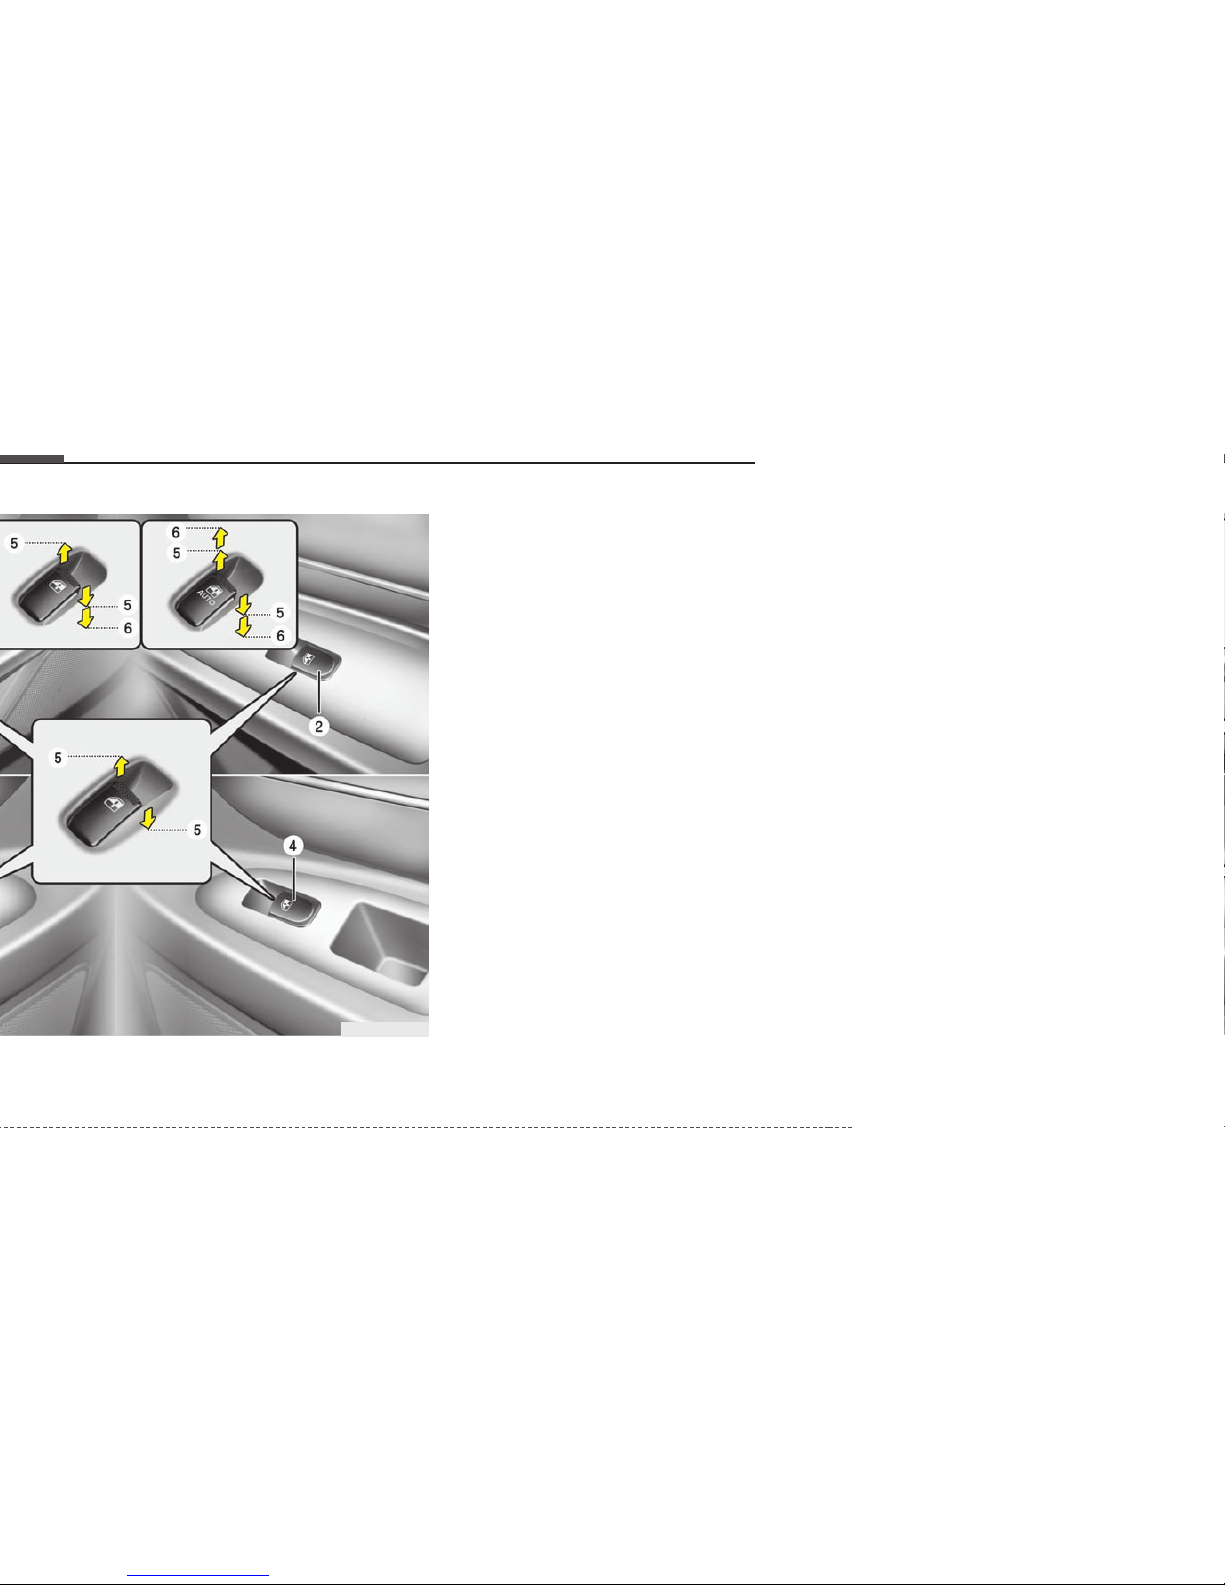
Power windows (if equipped)
(1) Driver’s door power window switch
(2) Front passenger’s door power win-
dow switch
(3) Rear door (left) power window switch
(4) Rear door (right) power window
switch
(5) Window opening and closing
(6) Automatic power window*
(Driver’s window)
(7) Power window lock switch*
• Power window timer*
The power windows can be operated
for approximately 30 seconds after the
ignition key is removed or turned to the
ACC or LOCK position. If the front door
is open, the window will not operate
unless the ignition key is in the ON
position.
* : if equipped
OMG035011
• Type A
• Type B

315
Knowing your vehicle
Window opening and closing
The driver’s door has a master power
window switch that controls all the windows in the vehicle. To open or close a
window, press down (5) or pull up (5) the
front portion of the corresponding switch.
Automatic power window
(driver’s window, if equipped)
Type A - Automatic power window down
Depressing the power window switch
momentarily to the second detent position (6) completely lowers the driver’s
window even when the switch is
released. To stop the window at the
desired position while the window is in
operation, pull up the switch momentarily
to the opposite direction of the window
movement.
OMG035012 OMG035013
Automatic window reversal (When window is closed by the automatic power
window)
If the upward movement of the window is
blocked by an object or part of the body,
the window will detect the resistance and
will stop upward movement. The window
will then lower approximately 20~30 cm
(8~12 inches) to allow the object to be
cleared.
OMG035014 OMG035110
WARNING
• The automatic window reversal
feature (window lowers 20~30 cm
(8~12 inches) cm when a resistance is detected) will only operate when the automatic power
window operation feature is used.
Automatic window reversal will
not operate if the window is
raised using the first detent position (5) on the power window
switch or the window is raised
using the second detent position
(6) on the switch within 2 seconds after the window is lowered
by the automatic window reversal
feature. Always double check to
make sure all faces, arms, hands
and other obstructions are safely
out of the way of before operating
the power window.
• If an object less than 4 mm
(0.15 inch) in diameter is caught
between the window glass and
the upper window channel, the
automatic reversal may not detect
the resistance and will not operate. Therefore, always check for
any obstructions before raising
any window.
317
Knowing your vehicle
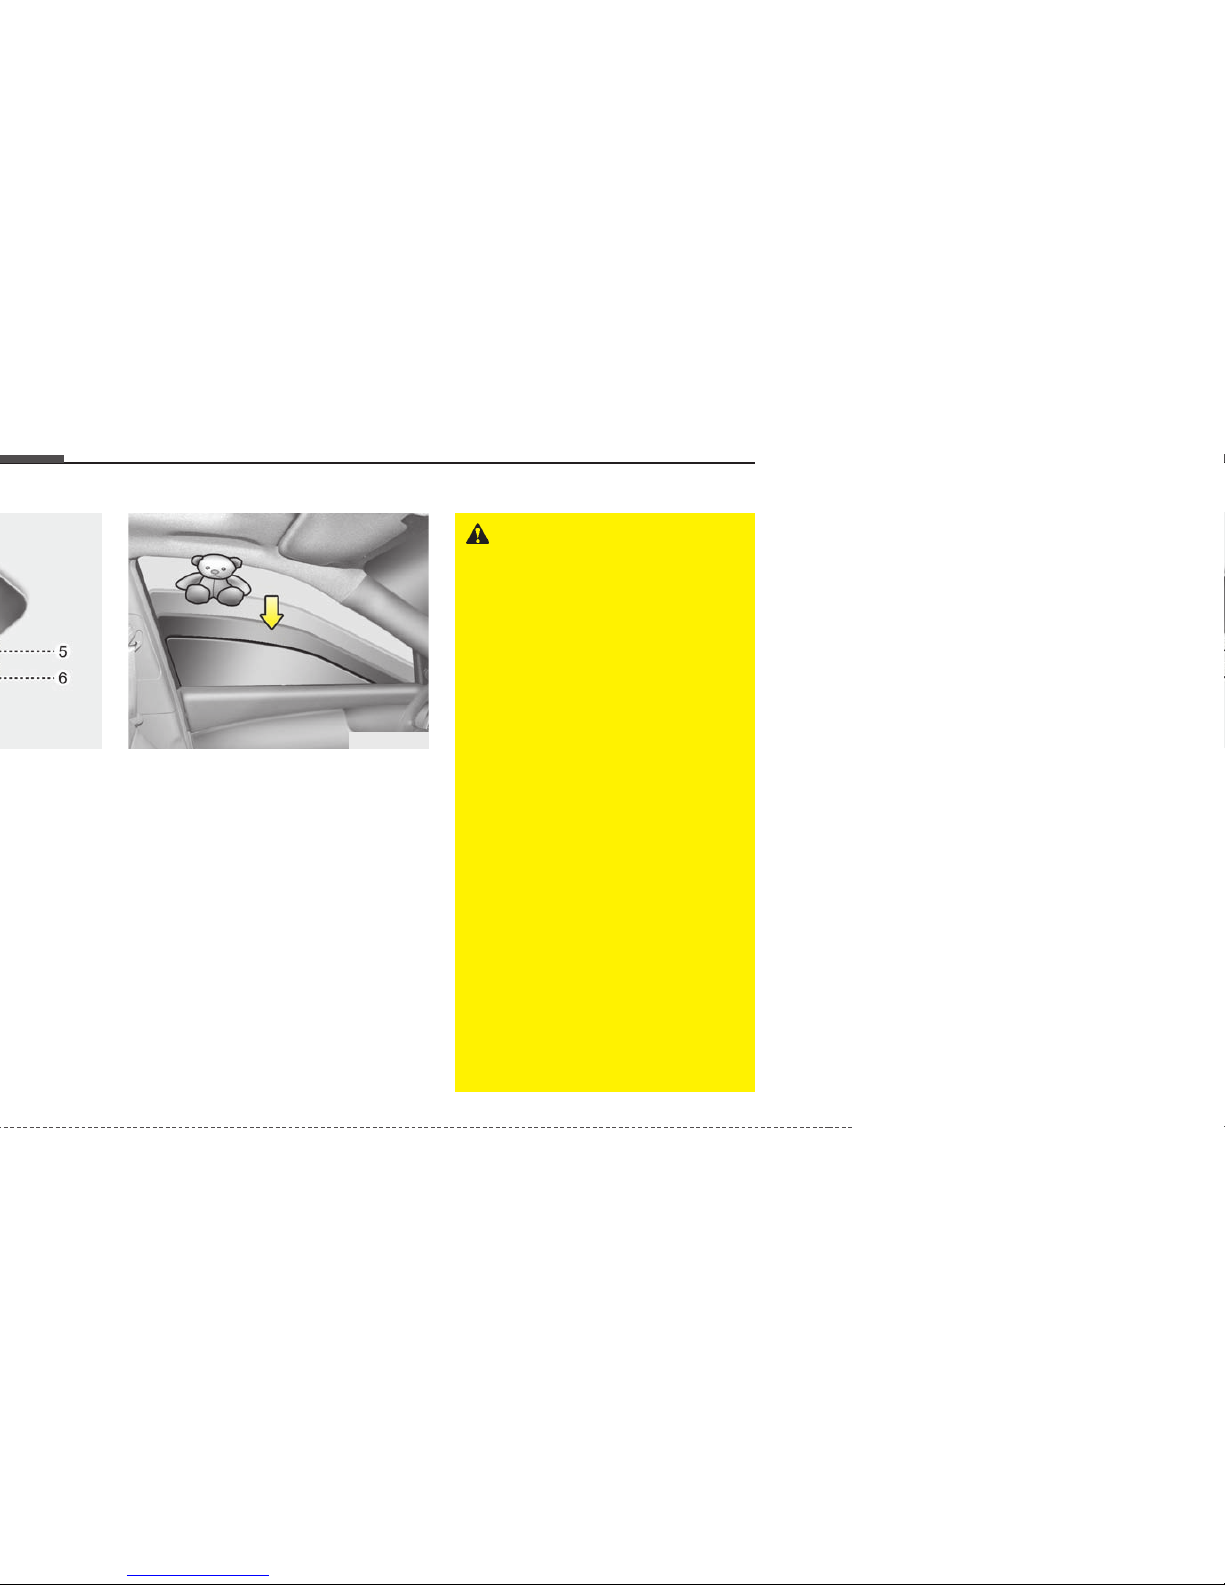
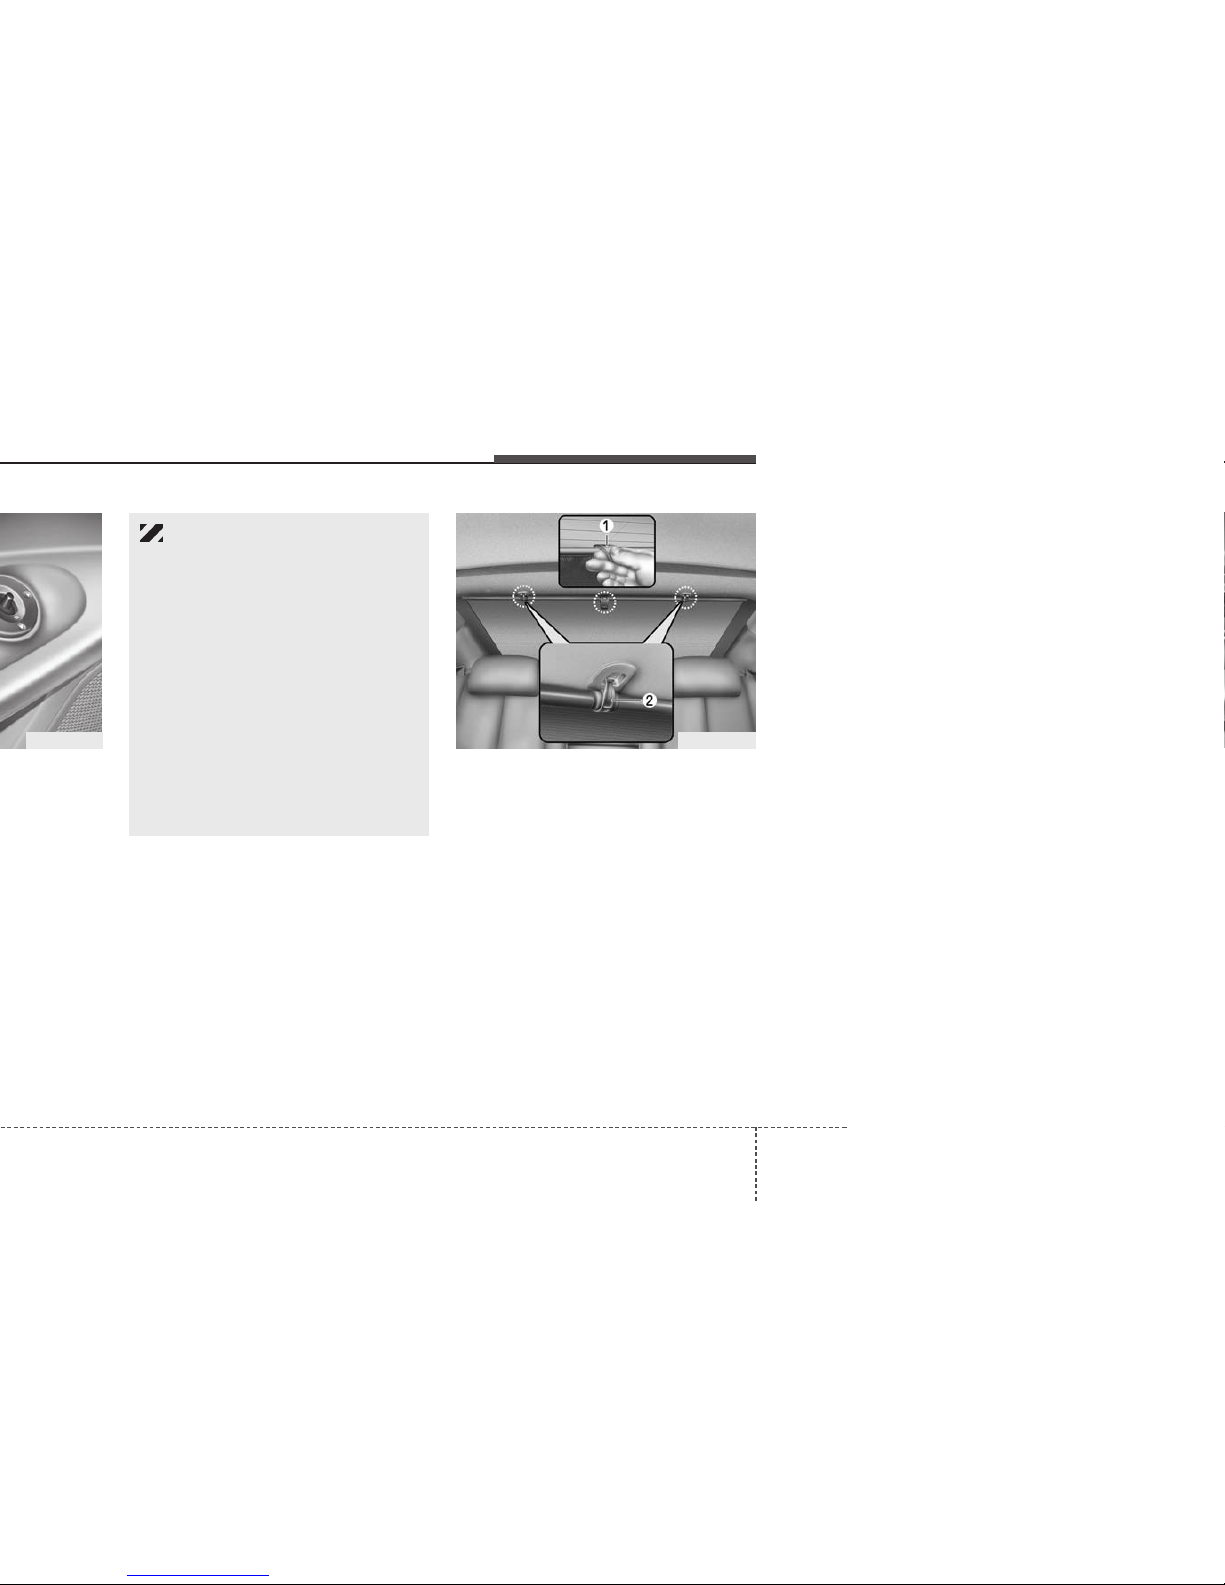
Curtain (if equipped)
Use the rear curtain installed in the rear
package shelf to shield the rear seat from
direct sunlight through the rear window.
Grasp the tab on the end (1) of the curtain and carefully pull it up to hook (2).
CAUTION - Windows
• Always double-check to make
sure all arms, hands, heads and
other obstructions are safely out
of the way before closing a window. Serious injury could occur.
• Do not allow children to play with
the power windows. Keep the driver’s door power window lock
switch in the LOCK position
(depressed). Serious injury can
result from unintentional window
operation by a child.
• Never extend face or arms outside through the window opening
while driving.
OMG035015 OMG035016
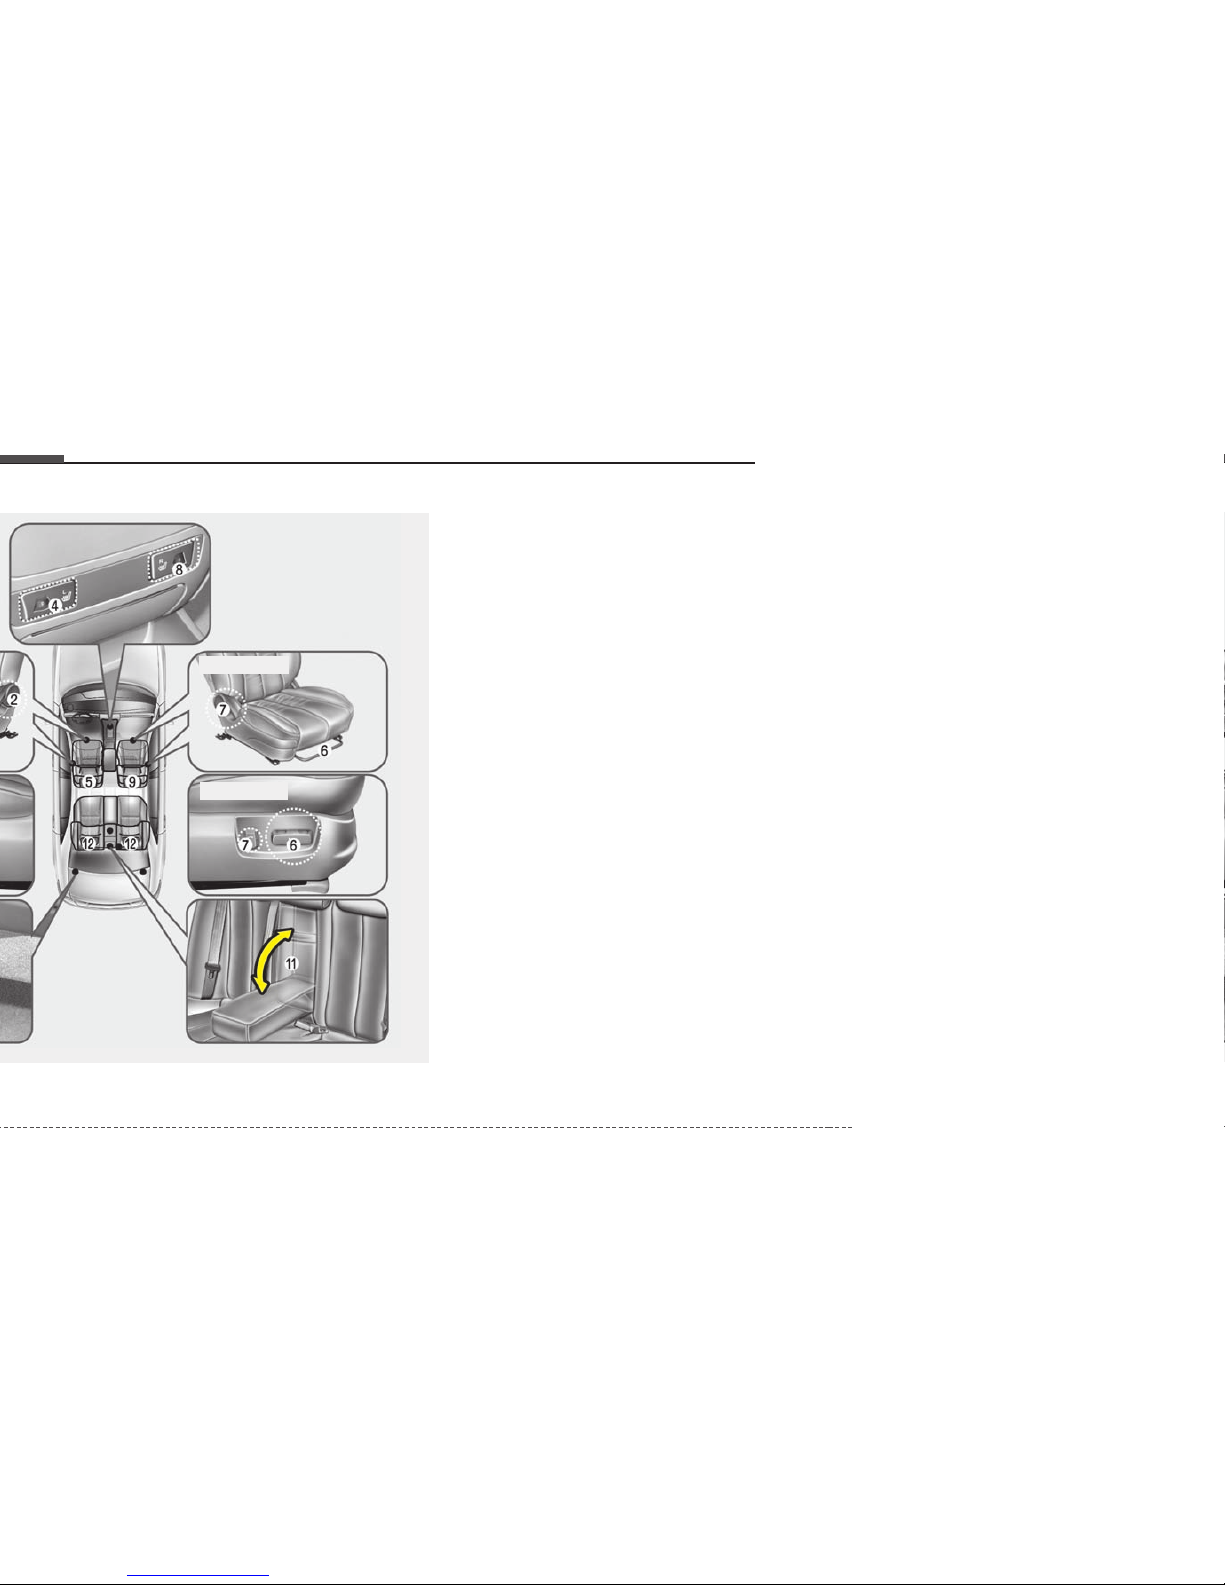
Driver’s seat
(1) Forward / backward
(2) Seatback recliner
(3) Seat cushion, height*
(4) Seat warmer*
(5) Headrest
Front passenger seat
(6) Forward / backward
(7) Seatback recliner
(8) Seat warmer*
(9) Headrest
Rear seat
(10) Split folding rear seat*
(11) Armrest*
(12) Headrest
* ; if equipped
OMG035017
Manual Type
Electric type
319
Knowing your vehicle
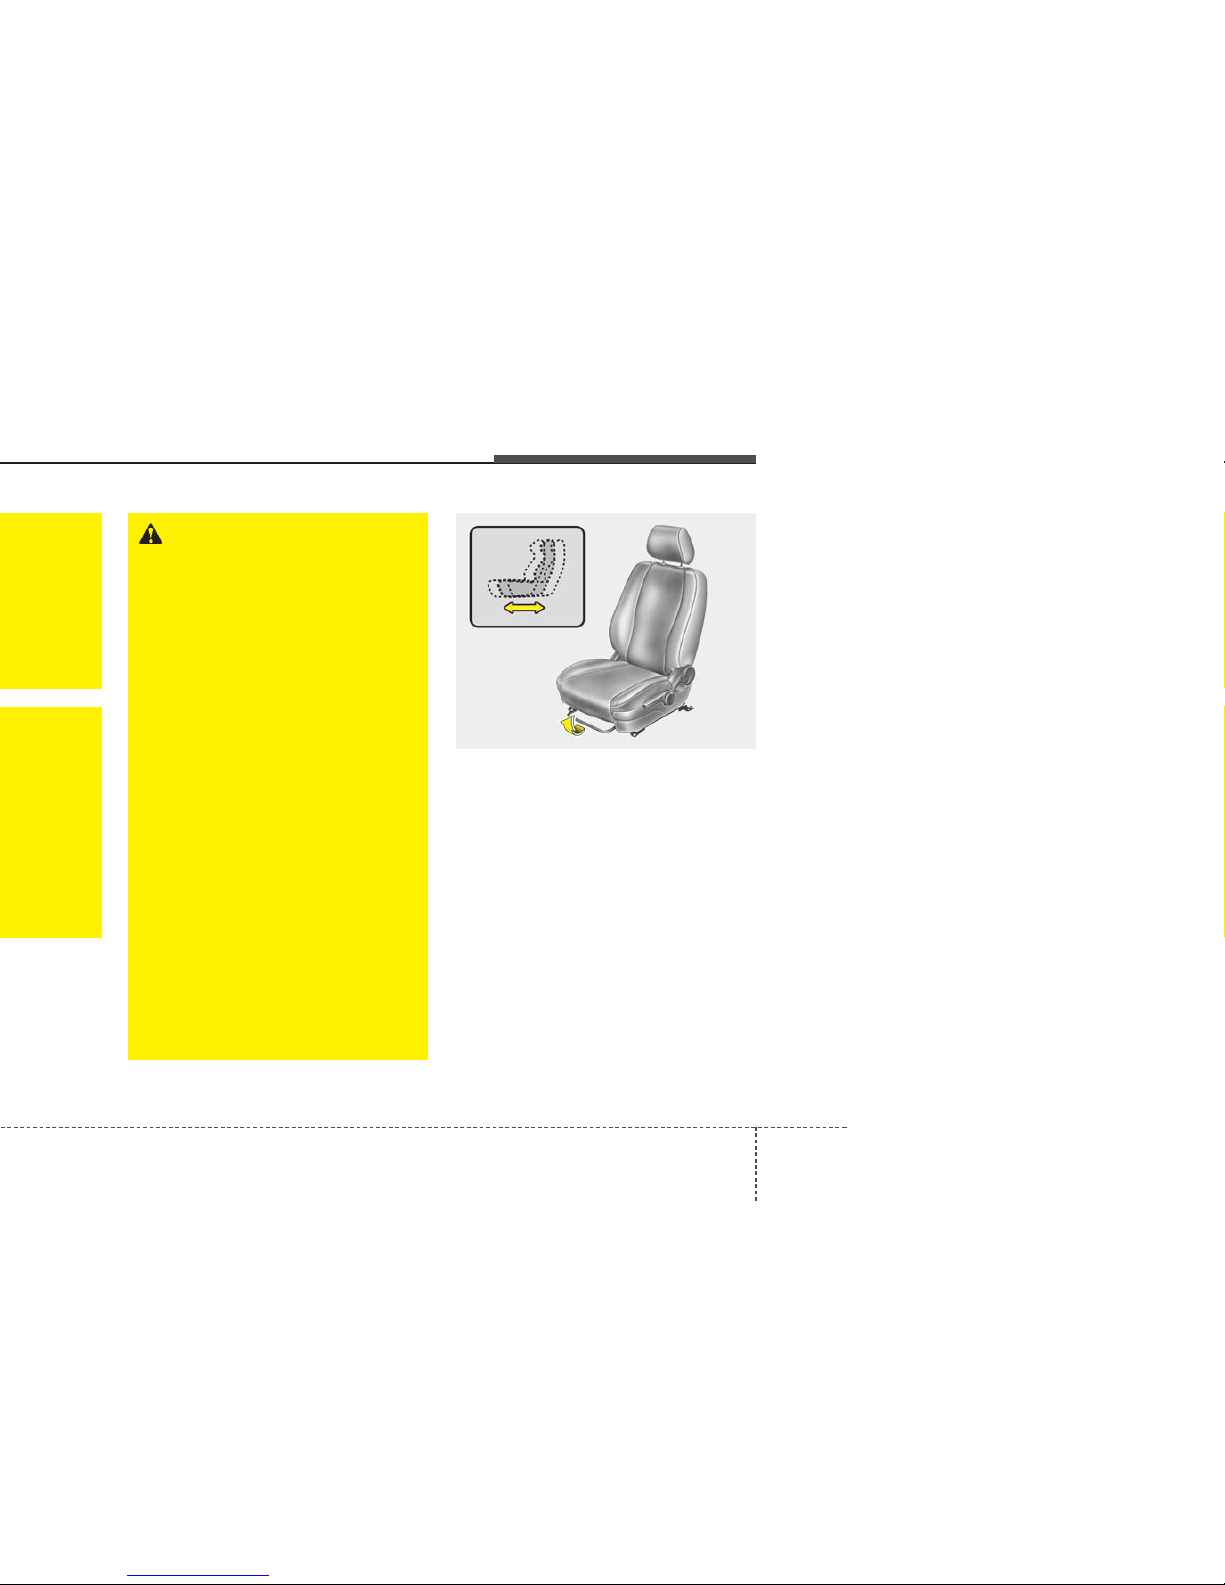
Front seat adjustment
(Manual type)
Adjusting the seat forward and backward
To move the seat forward or backward:
1. Pull the seat slide adjustment lever
under the front edge of the seat cushion up and hold it.
2. Slide the seat to the desired position.
3. Release the lever and make sure the
seat is locked in place.
Adjust the seat before driving, and make
sure the seat is locked securely by trying
to move forward and backward without
using the control knob. If the seat moves,
it is not locked properly.
WARNING - Driver’s seat
• Never attempt to adjust seat while
the vehicle is moving. This could
result in loss of control, and an
accident causing death, serious
injury, or property damage.
• Do not allow anything to interfere
with the normal position of the
seatback. Storing items against a
seatback or in any other way
interfering with proper locking of
a seatback could result in serious
or fatal injury in a sudden stop or
collision.
• Always drive and ride with your
seatback upright lap portion of
the safety belt is snug and low
across the hips. This puts your
safety belts in the best position to
protect you in case of an accident.
• In order to avoid unnecessary air
bag injuries including the possibility of severe injury or death,
always sit as far back as possible
from the steering wheel so that
your chest is at least 250 mm (10
inches) from the steering wheel.
OMG035018
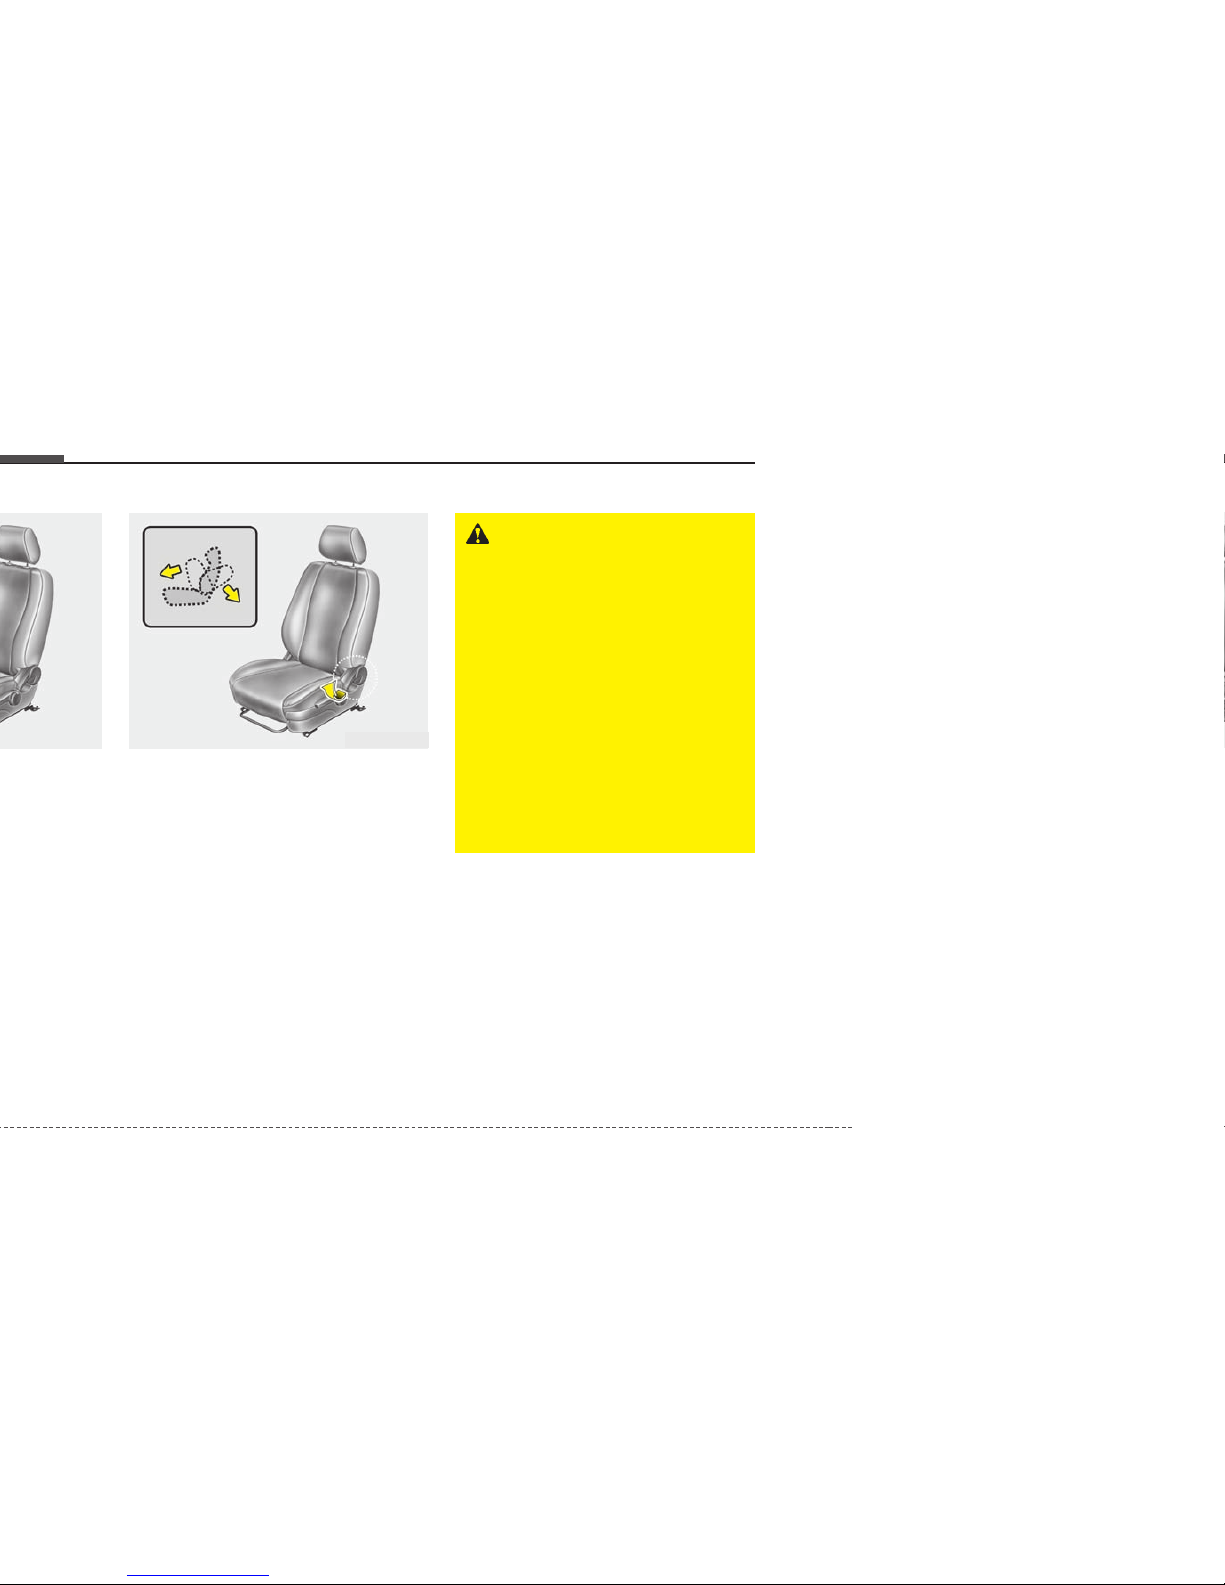
Adjusting the seatback recliner
To recline the seatback:
1. Lean forward slightly and lift up on the
seatback recline lever located on the
outside of the seat, at the rear.
2. Carefully lean back on the seat and
adjust the seatback to the desired
position.
3. Release the lever and make sure the
seatback is locked in place. (The lever
MUST return to its original position for
the seatback to lock.)
WARNING - Driver respon-
sibility for front seat passenger
Driving or riding in a vehicle with a
front seatback reclined could lead
to serious or fatal injury in an accident. If a front seat is reclined during an accident, the occupant’s hips
may slide under the lap portion of
the safety belt applying great force
to the unprotected abdomen or
neck. Serious or fatal internal
injuries could result. The driver
must advise the front passenger to
keep the seatbacks in comfortably
upright position whenever the vehicle is in motion.
OMG035019
OMG035020
321
Knowing your vehicle
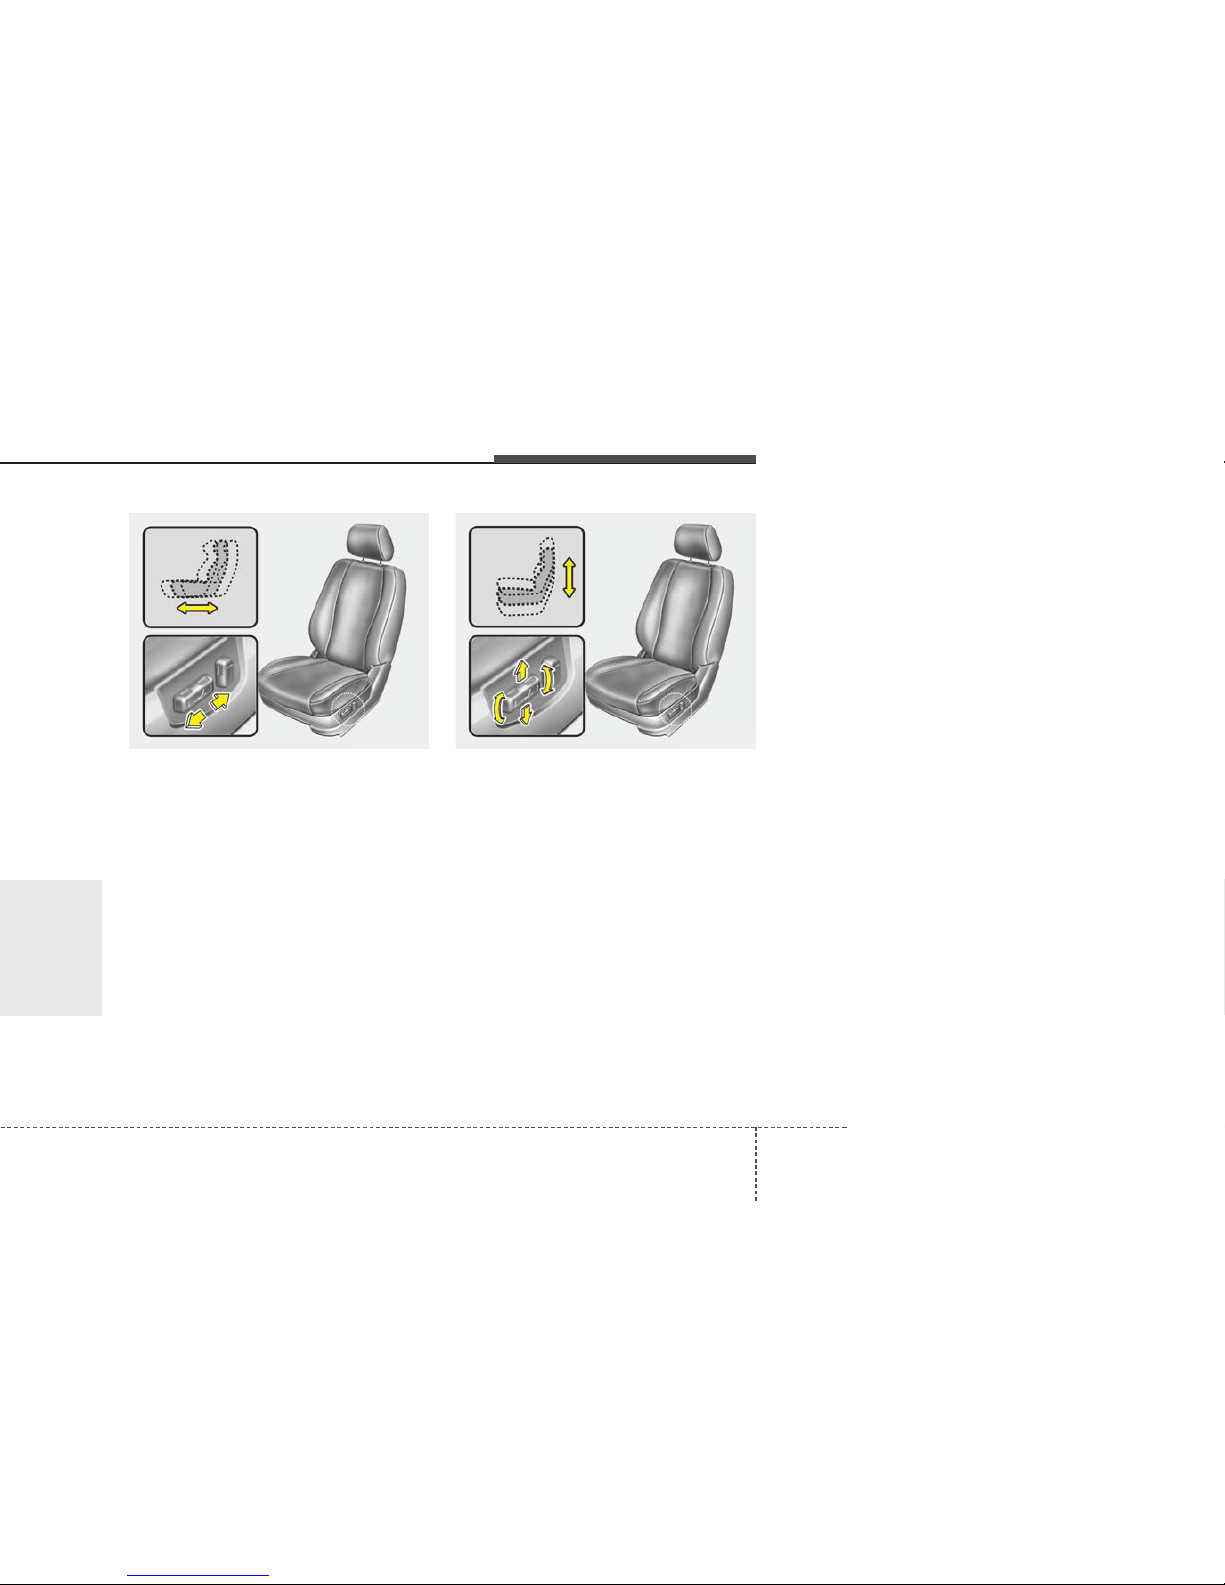
Adjusting the seat forward and backward
Push the control button forward or backward to move the seat to the desired
position. Release the knob and the seat
will lock in the selected position.
Adjust the seat before driving, and make
sure the seat is locked securely by trying
to move forward and backward without
using the control knob. If the seat moves,
it is not locked properly.
Adjusting height of the driver’s seat
cushion (if equipped)
Move the front portion of the control knob
up to raise or down to lower the front part
of the seat cushion.
Move the rear portion of the control knob
up to raise or down to lower the rear part
of the seat cushion.
To raise or lower the seat cushion, pull up
or push down on the center of the corresponding switch. Release the knob once
the seat reaches to the desired position.
OMG035022 OMG035100
 Loading...