

KI WireWorks PWCT, WireWorks PW90, WireWorks PWCTW, WireWorks PWCTW90 Installation Manual

Countertop Installation Manual
WireWorks™ Countertops

Table of Contents
Model PWCT . . . . . . . . . . . . . . . . . . . . . . . . . . . . . . . . . .2
Straight Countertop
Model PW90 . . . . . . . . . . . . . . . . . . . . . . . . . .4
90˚ Countertop
Model PWCTW . . . . . . . . . . . . . . . . . . . . . . . .6
Straight Wheelchair Height Countertop
Model PWCTW90 . . . . . . . . . . . . . . . . . . . . . .8
90˚ Wheelchair Height Countertop
1
Model PWCT Straight Countertop
2
Single piece rectangular surface. To be used with
36” or 42” high panels. Countertop extends no
more than 4" over the top of the panel to comply
with ADA guideline 4.4.1. Brackets, which are
mounted on inside of station, include steel locking
clips to prevent dislodgement. Countertop accepts
task light on receptionist side.
Note: If countertop is installed adjacent to an in-
line height change full post, a notch must
be specified on the left, right or both sides
of the work surface. Figure 2.
Width: 24", 30", 36", 42", 48", 54", 60", 66", 72",
78", 84"
Depth: 16"
Note: WireWorks Countertops can be installed
on top of any height panel. Countertops
add 3" to the stated height of the panel; i.e.
a 30" high panel supports a countertop
such that the top of the countertop is 33"
above the floor (assuming that the glides
are turned out 1/2”).
Note: Brackets are positioned on the receptionist
side of the panel. The aisle side of the
panel remains clear of brackets (except for
wheelchair height countertops).
1. Ensure that countertop is the same width as the
panel(s) to which it will be attached.
2. Ensure that the panel top cap and related trim
is installed prior to attaching the countertop.
Top cap cannot be installed after countertop is
installed.
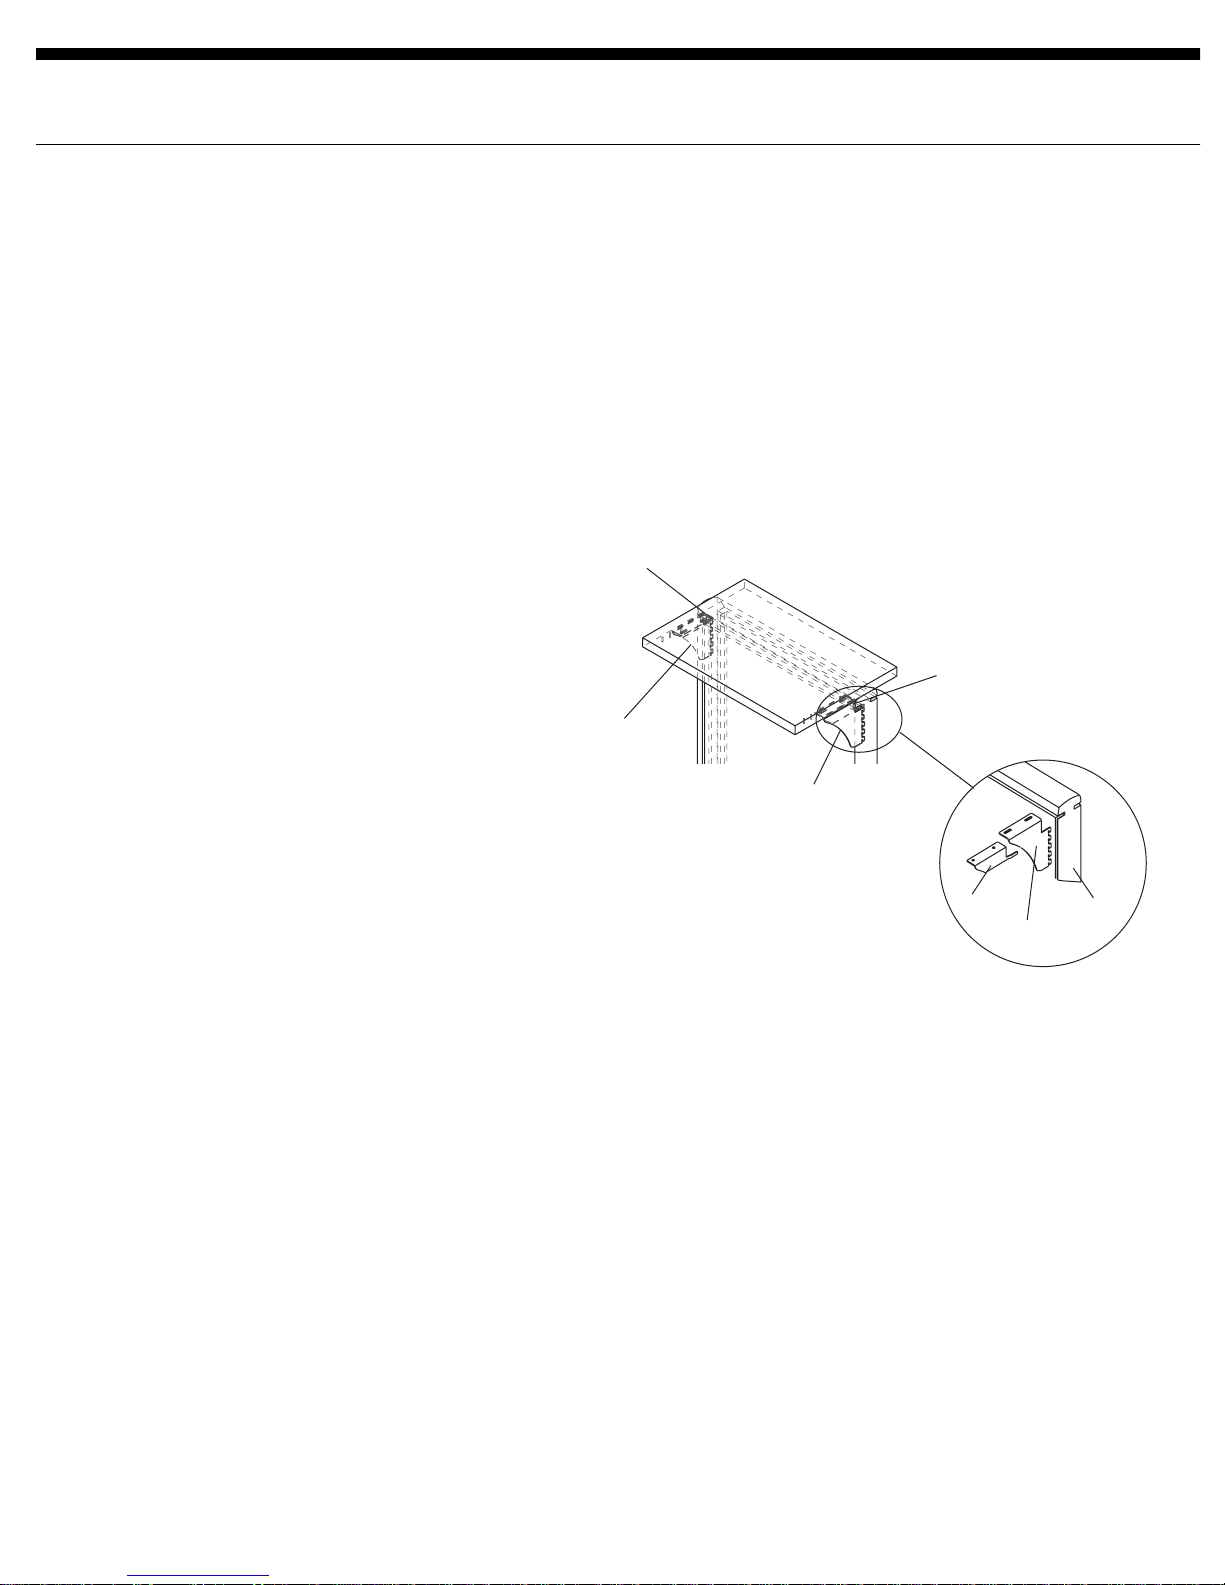
3. Position the brackets such that the top of the
bracket is slightly (1/8") above the panel top
cap. Note: Brackets are handed and "L" and "R"
are stamped into the top flange of the brackets.
Figure 1.
Countertop support lock (L)
Countertop support
bracket (L)
Countertop support bracket (R)
Countertop support
lock (R)
Figure 1
Panel
Lock
Bracket
Aisle
Receptionist
Model PWCT Straight Countertop
3
4. Brackets are engaged into the panel by
inserting teeth of bracket into slots of vertical
post and then pushing down to seat. Check for
proper engagement by pulling firmly straight
out.
Note: Countertops over 60" use three brackets.
5. Locate predrilled holes on underside of
countertop.
6. Place countertop over brackets (installed on
panel). Position countertop such that greatest
amount of overhang is on receptionist side of
panel. Figure 1.
7. Install one screw in the left and right brackets
in holes closest to receptionist.
8. Insert locking bracket so that the long finger of
the bracket engages into slot of vertical post of
panel and that the hole in the top flange of
locking bracket aligns with the hole in the
countertop bracket (closest to the panel).
Figure 1.
9. Drive in screw through flanges of both brackets
and into pilot hole of countertop.
10. Tighten all four screws.
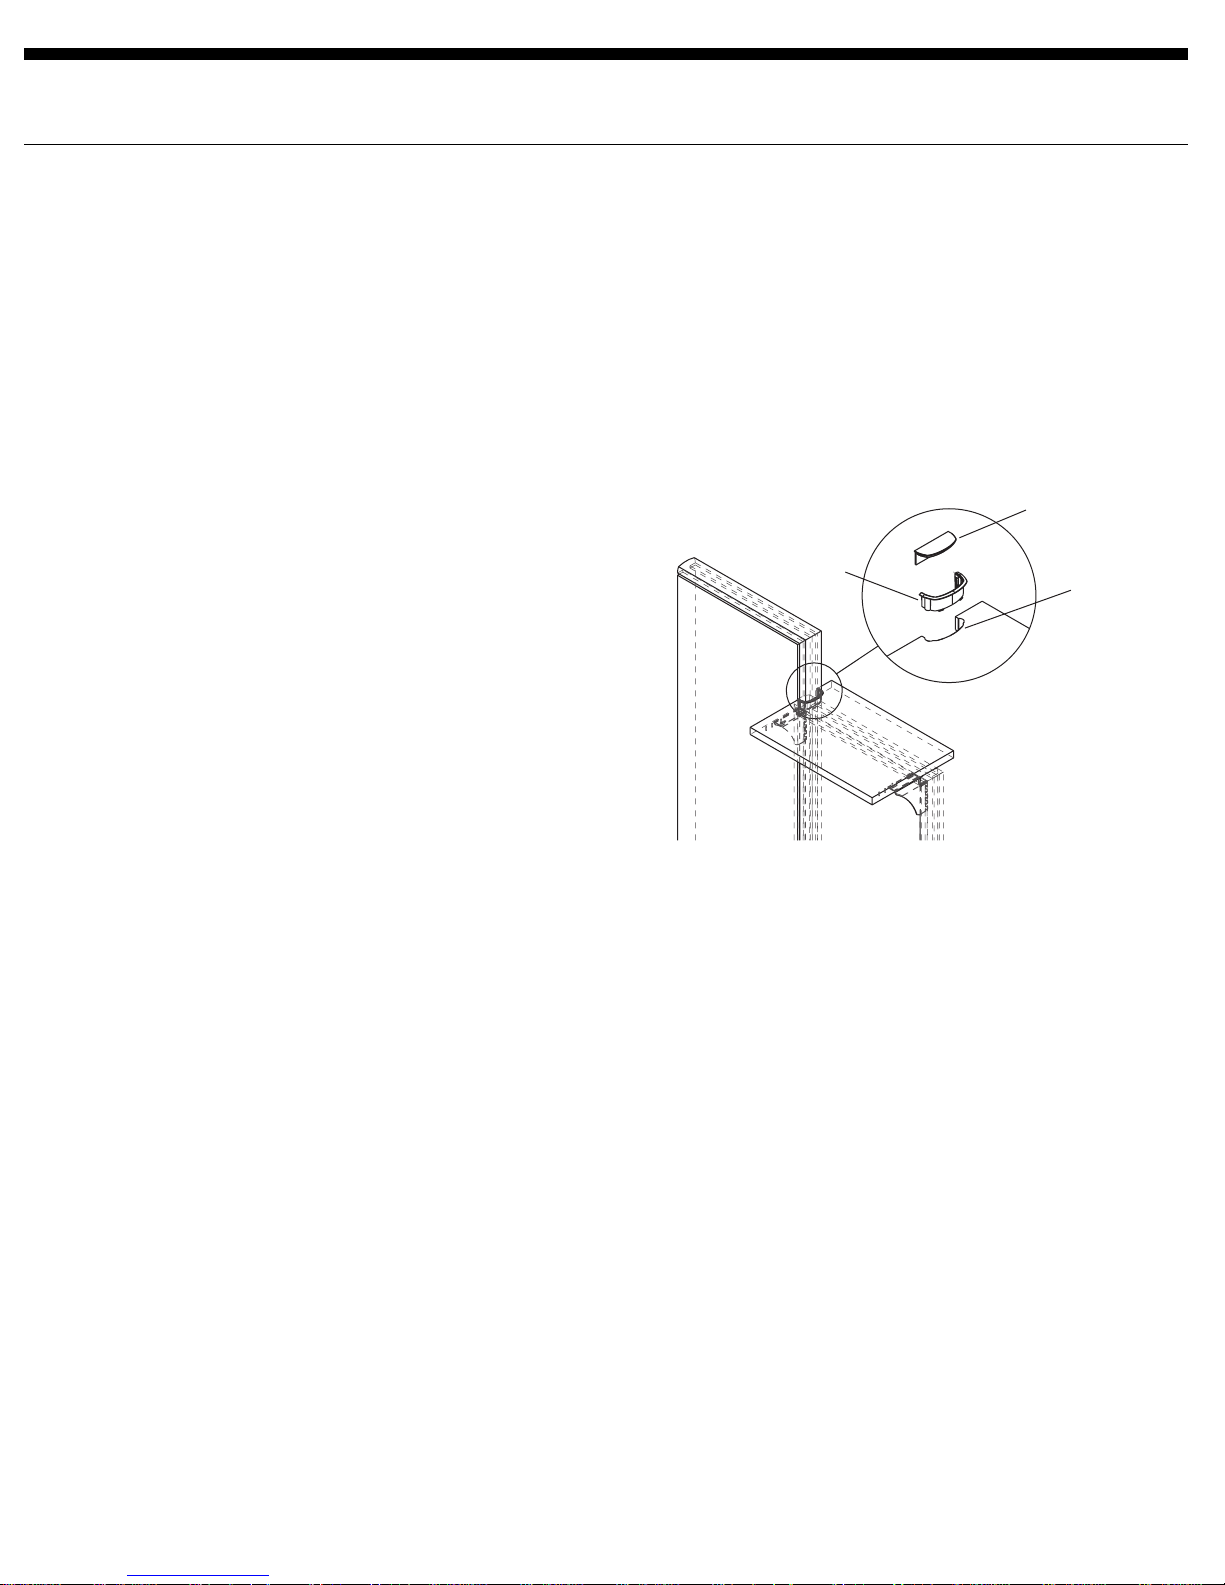
Countertop used with change of height trim
When the countertop is located next to a taller
panel(s) the countertop must be ordered with one
or two notches to accommodate the end of run trim
of the taller panel(s). Figure 2.
Note: To finish the cutout in the countertop, use
the C-shaped grommet. A filler is provided
to cap the grommet if the countertop is
reconfigured to a location without a taller
adjacent panel.
C-shaped
grommet
Filler
Notch
Figure 2
Aisle
Receptionist
 Loading...