

KI InTandem Disassembly Instructions Manual
Disassembly Instructions
InTandem Table
Material Type:
A . Steel B. Plastic C. Wood / Particle Board
C
All fasteners not explicitly tagged
are Material Type A: Steel
Procedure:
C
A
C
B
A
A
B
A
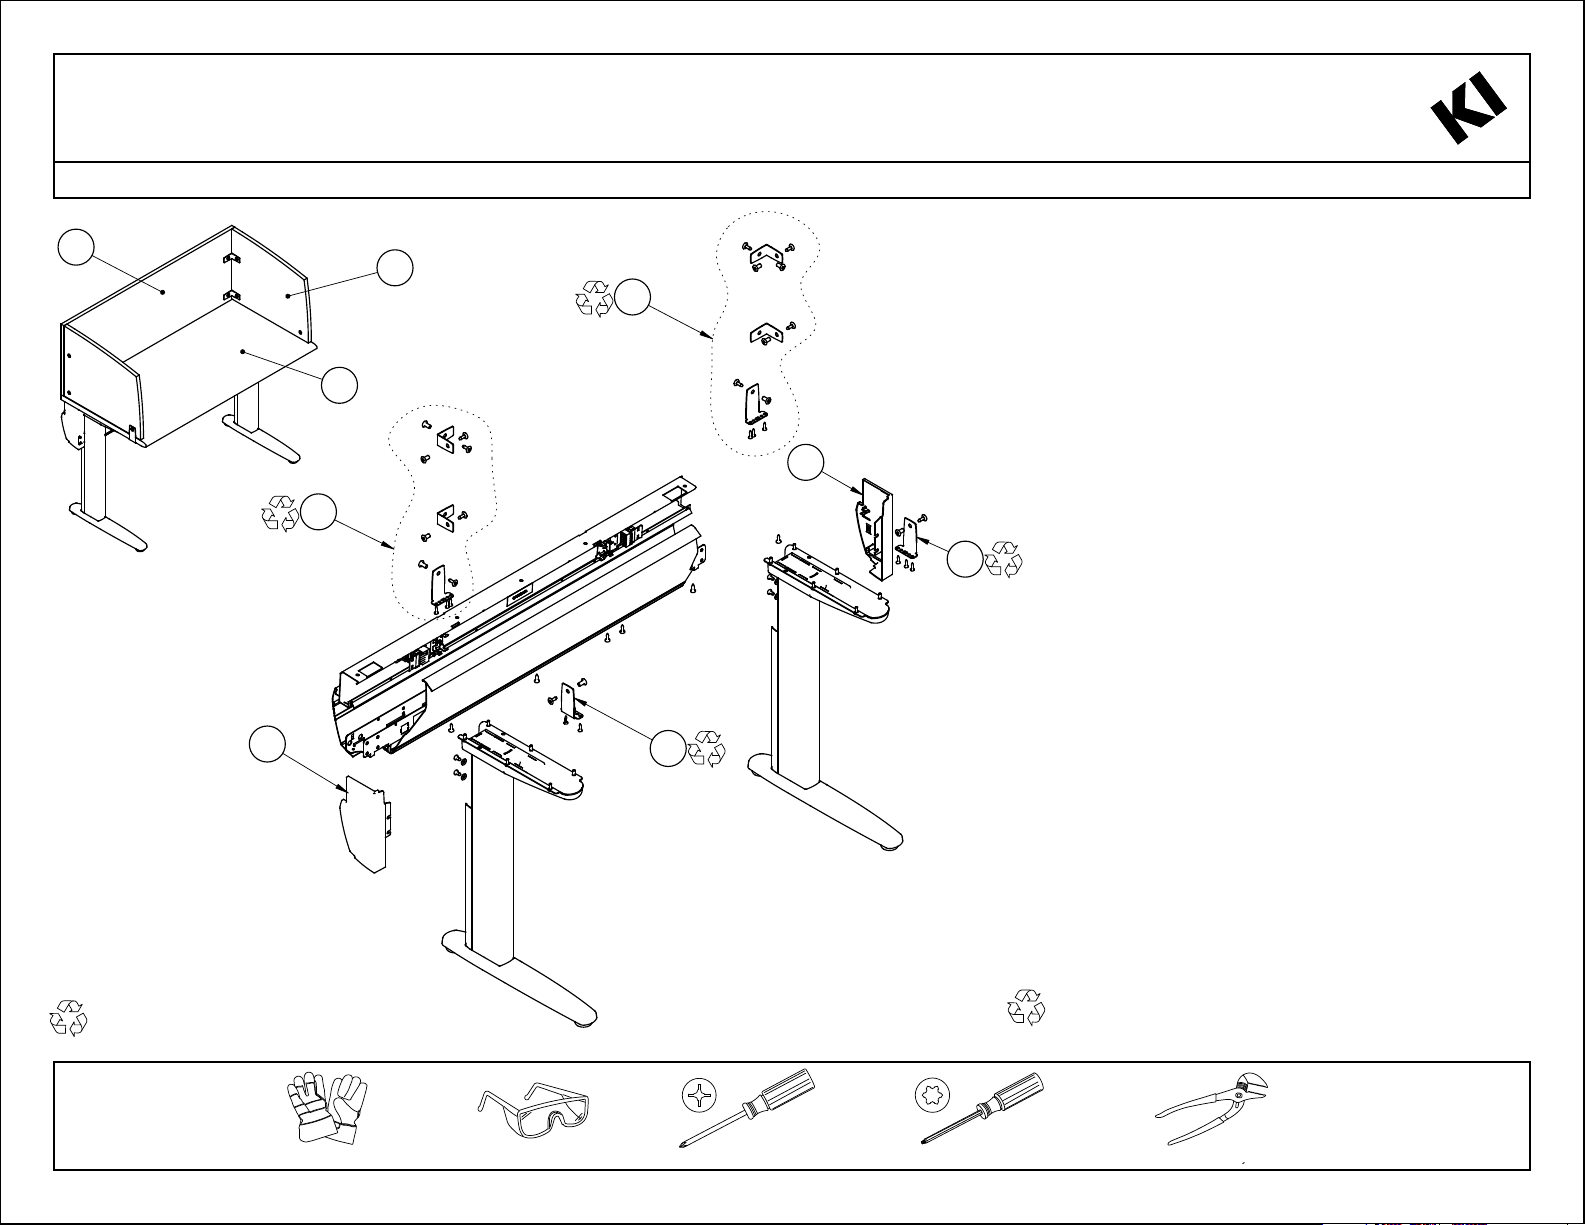
1. Remove the screws and nuts holding the dividers to the table
and to each other and remove the brackets and dividers.
2. Remove the screws holding each divider mounting bracket to
the table top and remove the brackets.
3. Remove the screws holding the beam end caps to the leg
and remove the caps.
4. Pull open the access door cover. Remove the screws holding
the lower beam to the legs and remove the lower beam access
door and beam cover. Remove the screws holding the upper
beam to the underside of the table and remove the upper beam.
5. Remove the screws holding the table top to the legs and re move the top.
(continued next page)
General Notes:
1. Disassembly time: 20-30 minutes
2. This procedure assumes basic familiarity with hand tools and
furniture terminology: no specialized training is required
3. All materials removed and disassembled shall be sorted and
segregated with like materials and disposed of or recycled
according to recycling availability or waste acceptance
4. For items to be recycled, refer to KI's End of Life Recycling
Matrix and KI's End of Life Recovery Options Matrix, available
at www.ki.com
Required
Tools
Gloves
KI · 1330 Bellevue Street · P.O. Box 8100 · Green Bay, WI 54308-8100 · 1-800-424-2432 · www.ki.com
Safety Glasses
Philips Screwdriver
Torx Screwdriver
Channel Lock Pliers
Page 1 of 2Rev. 0 P0033-0056
Disassembly Instructions
InTandem Table
Material Type:
A
A .Steel B. Aluminum C. Plastic D. Electrical Component
C
A
A
A
D
C
Procedure (continued):
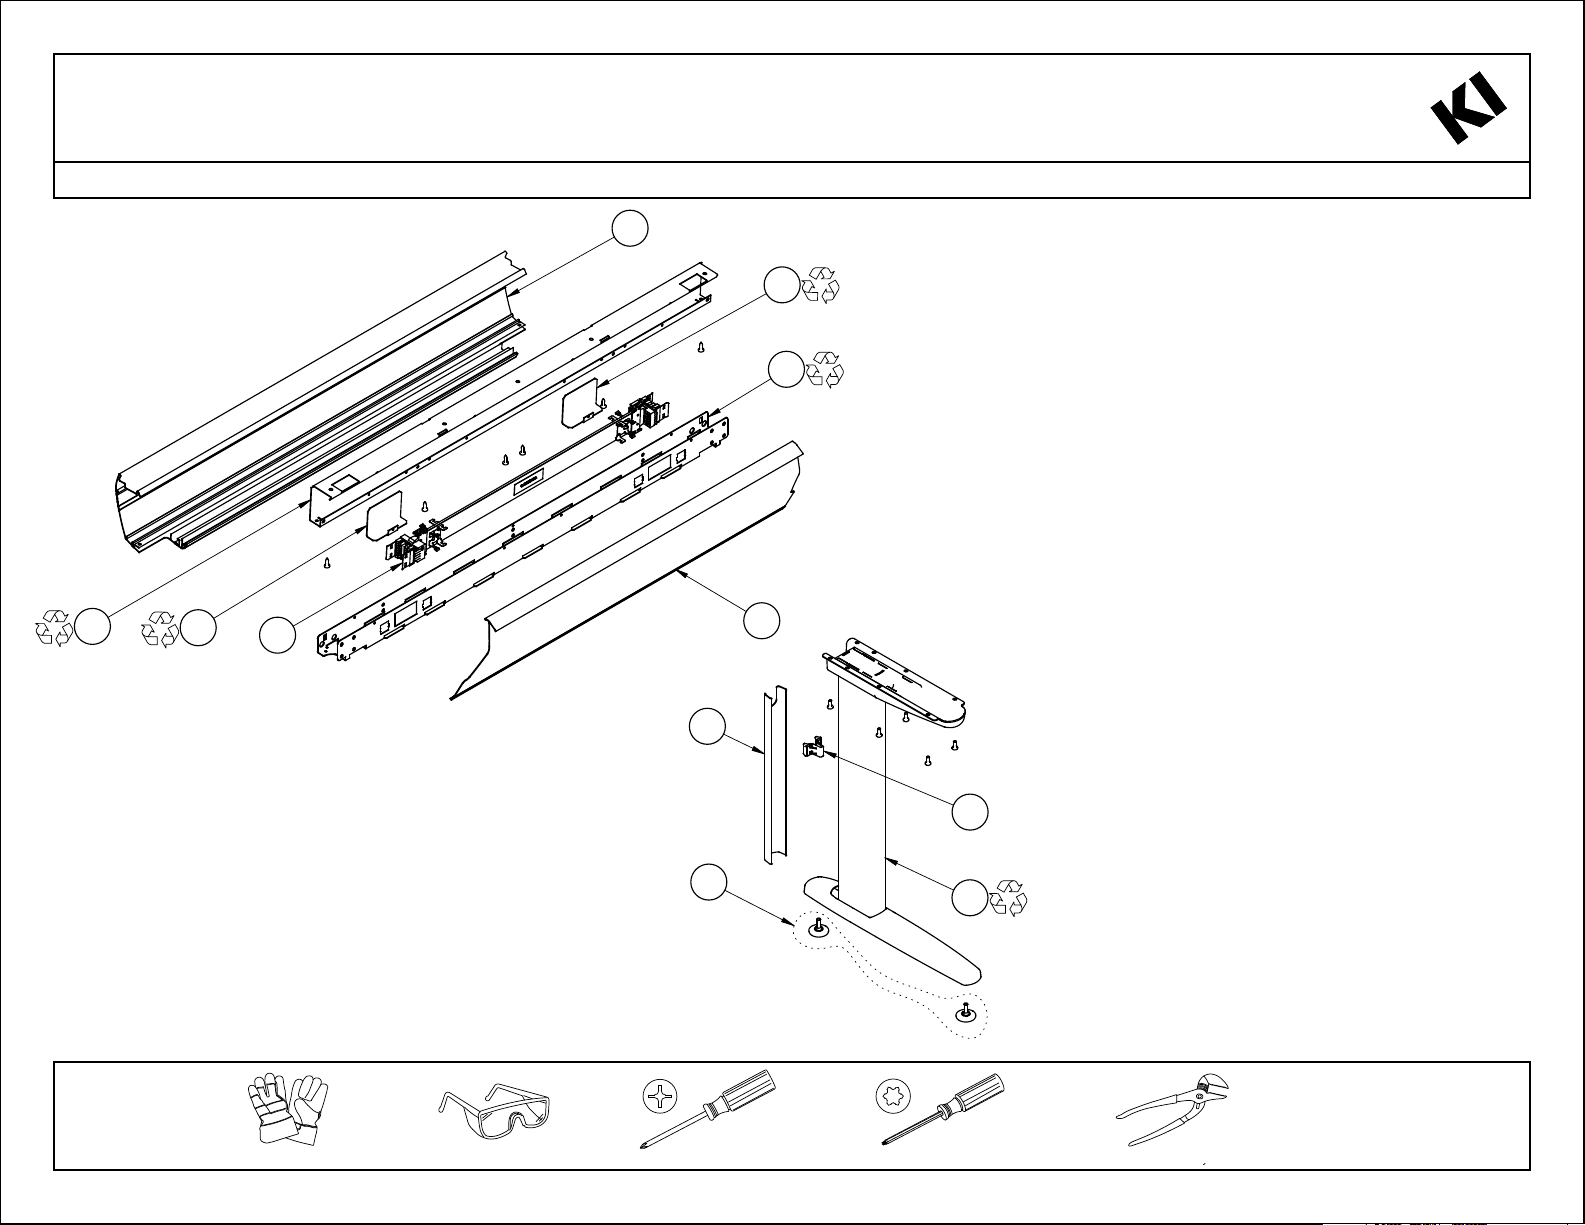
6. Remove the screws holding the electrical harness and cover
plates to the beam and remove the harness and plates.
7. Pull out the trim channel on the back of each leg and remove
the channel retaining clip.
8. Remove the glides from the bottom of each leg.
9. Remove the glides and pry out the glide housings inserted
into each leg tube.
B
Required
Tools
Gloves
KI · 1330 Bellevue Street · P.O. Box 8100 · Green Bay, WI 54308-8100 · 1-800-424-2432 · www.ki.com
Safety Glasses
C
Philips Screwdriver
C
A
Torx Screwdriver
Channel Lock Pliers
Page 2 of 2Rev. 0 P0033-0056
 Loading...