

KI Balance Assembly Instructions Manual
Assembly Instructions
Balance® Overhead Cabinet
December 2015
Balance® Overhead Cabinet
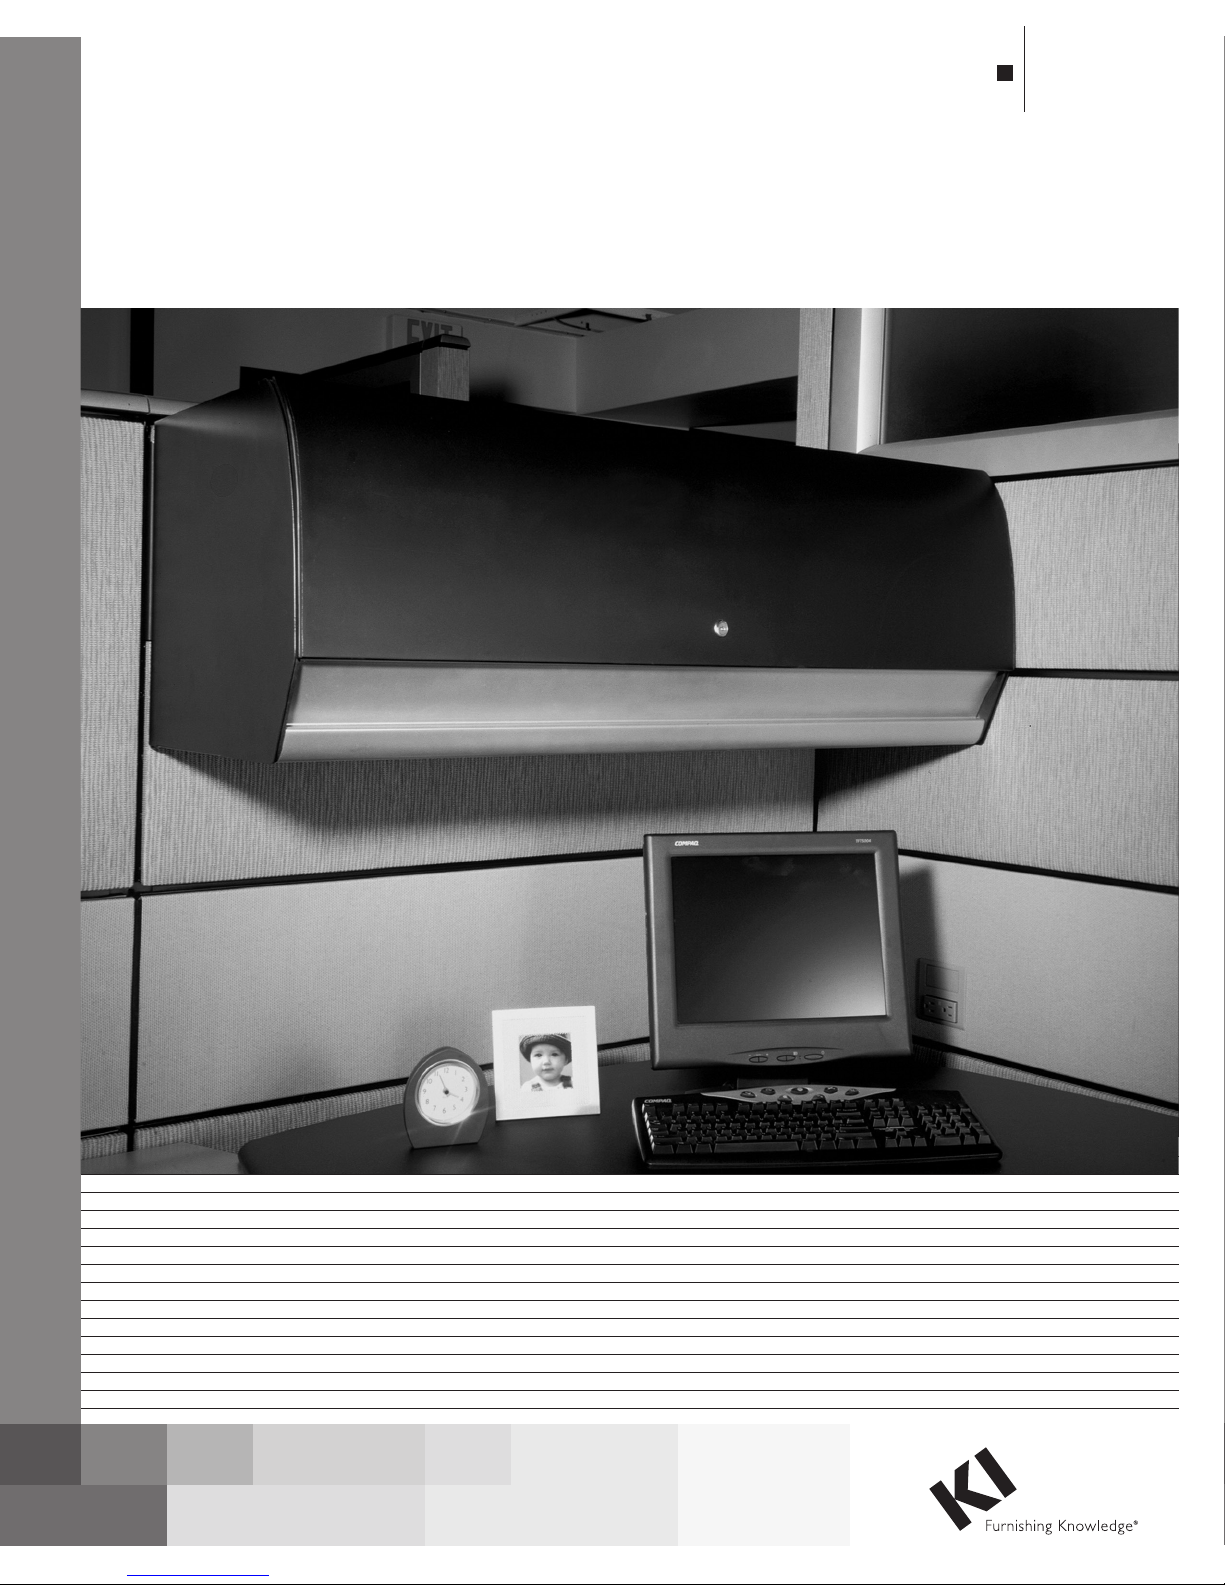
Figure 1
On-Module
overhead
Assembly Instructions
Assemble units as described herein only. To do otherwise
may result in instability. All screws, nuts and bolts must be
tightened securely and must be checked periodically after
assembly. Failure to assemble properly, or to secure parts
may result in assembly failure and personal injury.
Mounting Bracket Attachment
Note: Mounting brackets for
different panel systems are attached
to the overhead in the same manner.
Depending on the panel system and
attachment type, a set of brackets
may consist of one left-hand and one
right-hand bracket or two
non-handed brackets.
1. Carefully set assembled overhead
on either end, on a soft surface to
prevent damage. Handed brackets
should be assembled so the toothed
flange of the mounting bracket
is flush with the overhead side.
Non-handed brackets should be
assembled so either end of bracket is
flush with the overhead side.
2. Engage the offset tab of the mounting
bracket into the slot along the back
of the overhead. Align the mounting
bracket hole with the hole in the
bottom of the overhead and fasten
with one 5/16-18 x 1/2” machine screw.
Repeat at the other end of overhead
(Figure 1).
3. Hang the overhead unit onto
the panel using the appropriate
mounting instructions for the system.
mounting
bracket
mounting
bracket
hole
offset tab
51
/ -18 x /
16 2
machine screw
"
overhead
cabinet
slot
side
Note: An alternative installation
method may be used for overhead
units on all panel systems. Hang
the brackets onto the panel system
prior to attaching the brackets
to the overhead unit. Refer to
instructions of panel-mounted units
for information on attaching brackets
to panels. Hook the offset tab of the
bracket into the slot on the back of
the overhead, allowing the overhead
to fully engage the bracket. Align the
hole in mounting bracket to the hole
in the overhead bottom and fasten
with one 5/16-18 x 1/2” machine screw.
Repeat on other end of overhead unit.
2
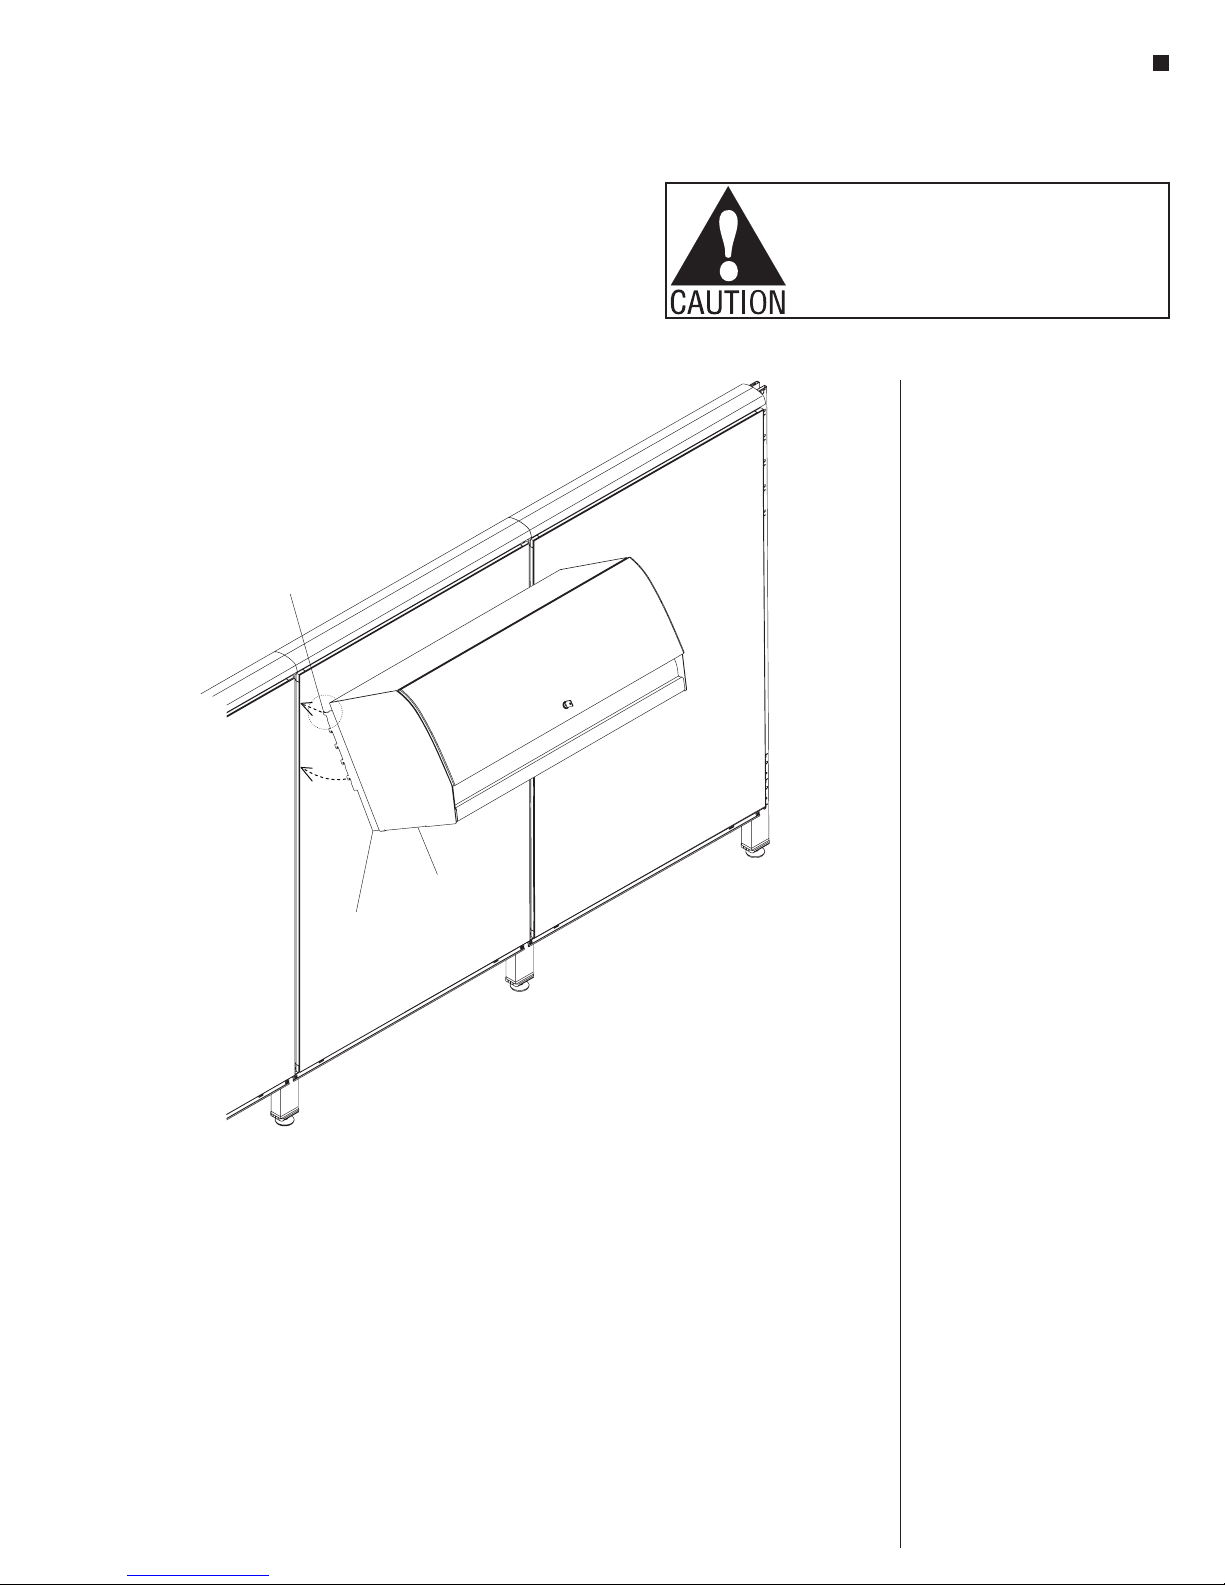
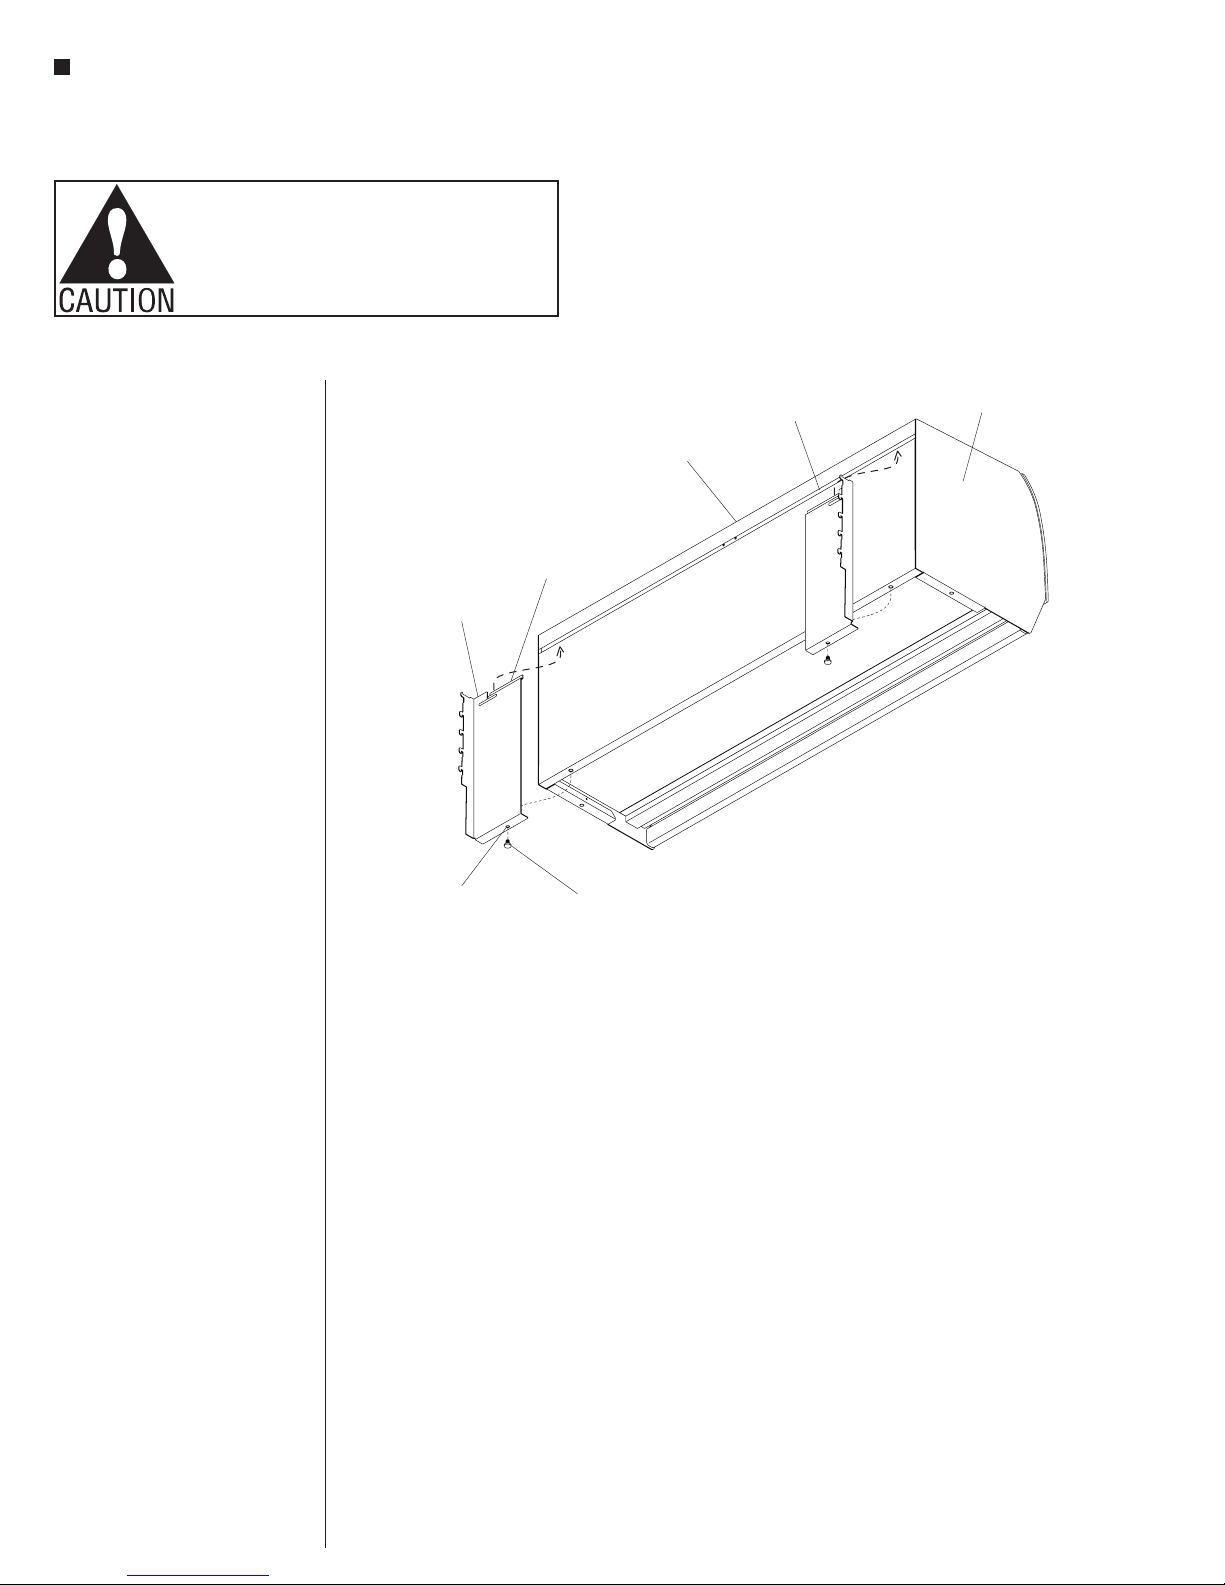
Figure 2
upturned
tooth
Balance® Overhead Cabinet
Assembly Instructions
Assemble units as described herein only. To do otherwise
may result in instability. All screws, nuts and bolts must be
tightened securely and must be checked periodically after
assembly. Failure to assemble properly, or to secure parts
may result in assembly failure and personal injury.
On-Module Mounted
Overhead Units
1. The On-module mounting brackets
have integral teeth that engage the
vertical furniture hanging slots in the
panel frame. Locate the on-module
overhead unit at the height that is
desired on the panel. Engage the
upturned tooth of the top hook
(circled) into the panel frame by
holding the cabinetbottom out about
30°, then rotate the unit to engage
all the remaining teeth. When all
teeth are engaged, press down on the
cabinet to lock in place (Figure 2).
On-Module
mounting
bracket
Caution: To remove the overhead
unit from the panel, push the bottom
of the cabinet straight up about 1/4”
and rotate the bottom out toward
you to about 30°. Pull the overhead
straight out and down. Do not force
the side panel, damage to the top
tooth may result.
on-module
overhead
3
Balance® Overhead Cabinet
Figure 3
Assembly Instructions
Assemble units as described herein only. To do otherwise
may result in instability. All screws, nuts and bolts must be
tightened securely and must be checked periodically after
assembly. Failure to assemble properly, or to secure parts
may result in assembly failure and personal injury.
WireWorks® Off-Module Mounted
Overhead Units
1. WireWorks off-module overhead
units can only be hung with the top
aligned to a 12” high tile. To make
hanging the unit easier, remove the
top cap or tile directly above the top
of the overhead.
2. Disengage the overhead locks on the
mounting brackets by lifting the tabs
closest to the back of the overhead
and pulling it toward the cabinet.
With the overhead locks pulled out
toward the front of the cabinet, hang
the top and bottom of the mounting
brackets into the tracks of the panel’s
horizontal rail.
overhead
lock
mounting
bracket
12 tile"
Caution: Make sure the cabinet is
hanging on the horizontal track and
not on the tile.
3. After the unit is hung in the track,
move it to the desired position by
gently lifting up while sliding it.
Secure the cabinet on the tracks by
pushing the overhead locks toward
the track (Figure 3).
off-module
cabinet
4
 Loading...