

KI Altus Mesh Back Task Chairs, Altus Fabric Back Task Chairs Repair & Replacement Instructions
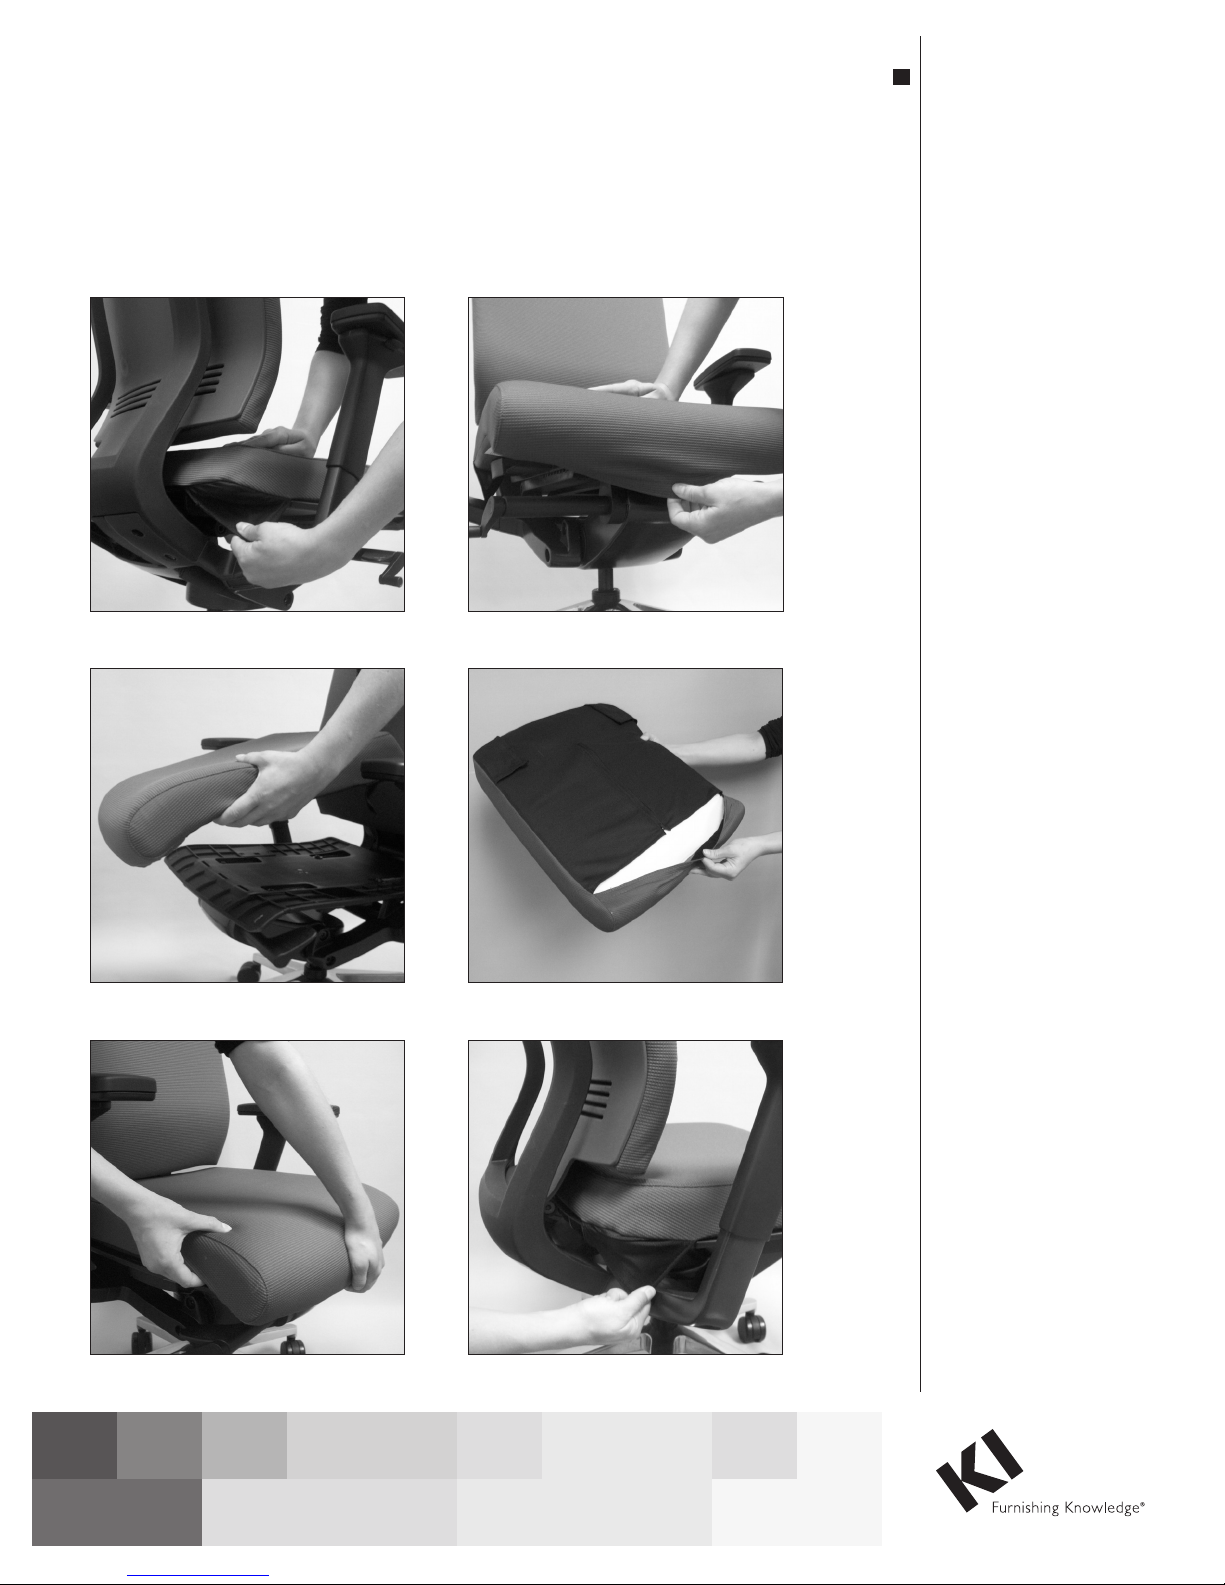
Figure 1
Repair & Replacement Instructions
Altus Fabric & Mesh Back Task Chairs
Seat & Back Slip Cover Replacement
August 2010
Figure 2
Seat Slip Cover Replacement
1. With the chair in the upright
position, locate the rear corners of
the seat slip cover at the underside
back of the seat framework. Pull
down and back on the seat corners,
releasing the velcro securing the
corners to the seat framework, then
lift the back of the slip cover up
from the seat (Figure 1).
2. Next, release the front of the seat
slip cover from the chair underside
by pulling away the velcro that
secures it along the entire front of
the chair (Figure 2).
3. Remove the seat slip cover and
cushion assembly from the
framework and set aside (Figure 3).
Note: If the Altus Fabric Chair
“back slip cover” is to be replaced
as well, it is easier to perform if
the seat cover is removed first.
Consider following step 1 on page
2 before continuing below with
step 4.
Figure 3
Figure 4
4. Take the replacement seat slip
cover cushion assembly in hand,
and locate the long strip of velcro
attached to the front underside, at
the inside of the cover against the
cushion (Figure 4).
5. Open the velcro away from the
cushion and slip the front of the
cushion onto the front of the Altus
seat framework allowing the velcro
of the new seat slip cover to be
oriented near the velcro along the
front edge of the seat framework
(Figure 5).
6. Starting at one front corner of the
chair, begin securing the velcro of
the seat cover to the velcro under
the front of the chair, moving from
one side of the front to the other,
taking care to attach it straight.
7. Gently pull the rear fabric triangles
of the seat slip cove over the
back to the underside of the seat
framework and attach to the velcro
(Figure 6).
Figure 5
1330 Bellevue Street · P.O. box 8100 · Green Bay, WI 54308-8100 · Tel 1-800-424-2432 · www.ki.com
Figure 6
© 2010 KI All Rights Reserved · Litho in USA · Code KI-62215/HT/PDF/0810
8. Check the seat slip cover for correct
alignment and/or wrinkles. Remove
and reposition the velcro as needed
to achieve a nice fit.
Altus Fabric & Mesh Back Task Chairs - Seat & Back Slip Cover Replacement
Repair & Replacement Instructions
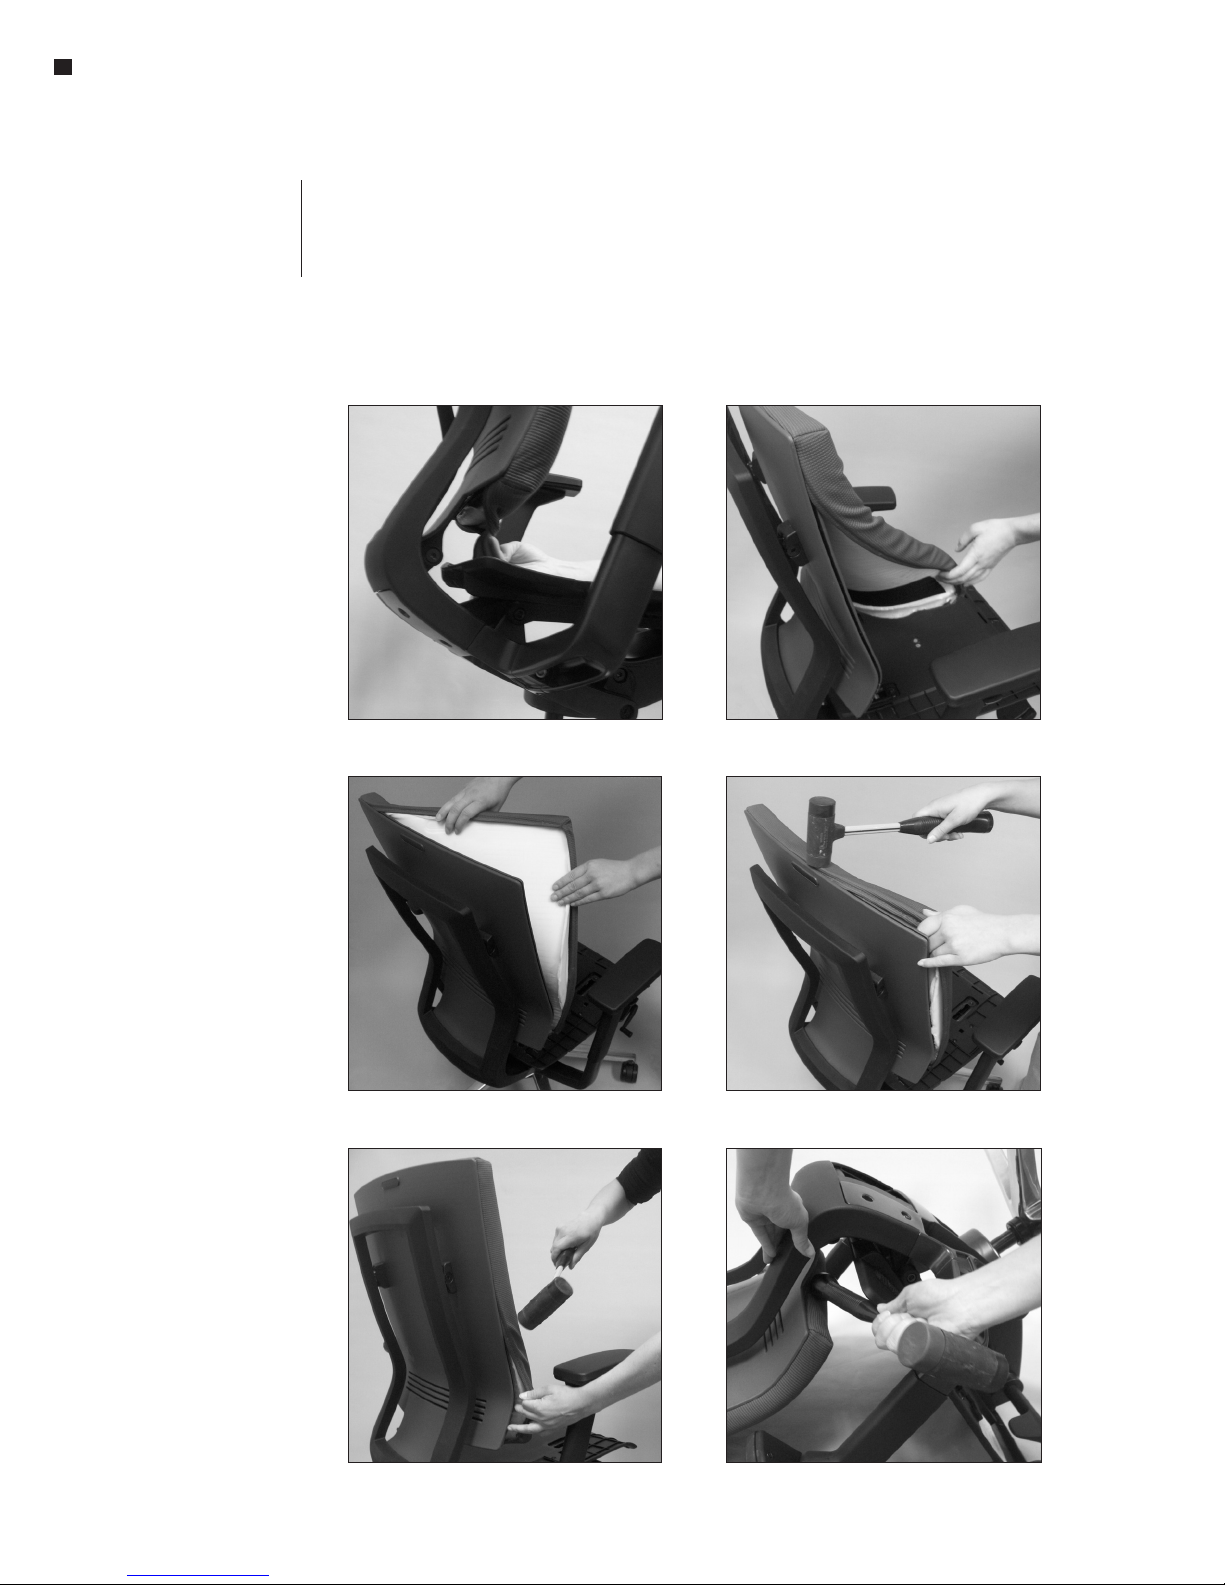
Back Slip Cover Replacement
Note: It is easier to replace
the back slip cover if the seat
slip cover has been temporarily
removed. See instructions on
page 1.
1. Begin removal of the old back
slip cover at the lower rear of
the chair back as illustrated.
Grasp and gently pull the fabric
out of the lower groove first.
Continue pulling fabric from
the groove, working around the
chair back until the entire back
slip cover can be removed.
Set the back slip cover aside
(Figures 1, 2 & & 3).
2. Begin installing the new back
slip cover at one top corner.
Align the corner of the fabric
with the upper corner of the
back structure and press the
fabric edge into the groove in
the back, taking care to not
press the foam into the groove
(Figure 4).
6. Carefully turn the chair to the
upright position. If needed,
remove, replace and adjust
fabric in the groove to achieve a
nice fit.
Figure 1
Figure 2
3. Continue working along the top,
pressing fabric into the groove.
Use a rubber mallet to tap the
fabric edge into the groove
along the top of the chair back.
When fabric is all tapped into
the top groove in the seat back,
check that the fabric corners
align with the chair back
corners. Stretch and adjust if
necessary (Figure 4).
4. Next, work down one side of
the chair back, pressing and
tapping fabric into the groove. It
is recommended to use a thumb
to guide the fabric and to use
fingers to help keep the foam
out of the groove. At the bottom,
assure that the fabric corner
meets the chair back corner and
adjust as necessary. Repeat the
process at the other side of the
chair (Figure 5).
5. Carefully tip the Altus Chair
forward onto a clean floor
surface to expose the lower rear
of the chair back. As with the
top and sides, tuck and tap the
fabric into the bottom chair back
groove. At the center bottom
of the chair back, the handle of
the mallet may be used to press
the fabric into the groove of the
chair (Figure 6).
Figure 3
Figure 5
Figure 4
Figure 6
2
 Loading...