

Keystone Hardscapes Stonegate Country Manor Fireplace With Curved Walls And Columns Installation Instructions Manual
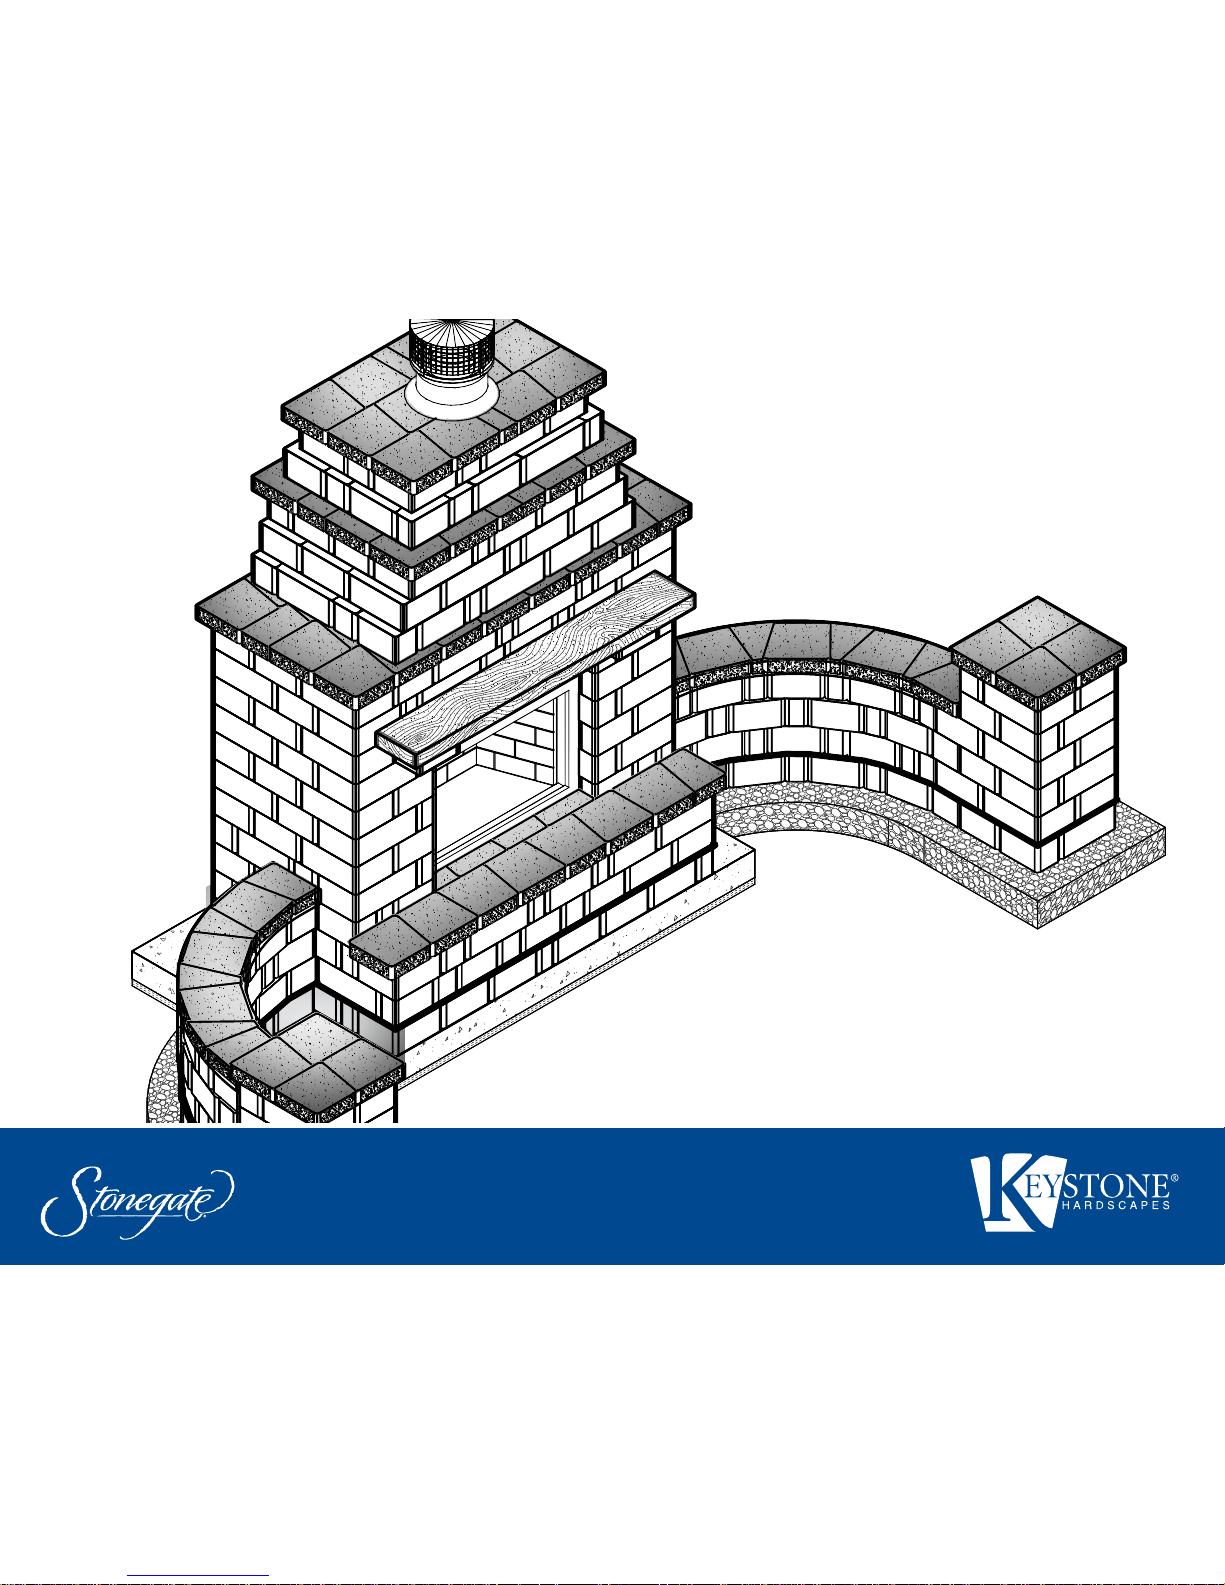
WOOD BURNING OUTDOOR FIREPLACE
W/CURVED WALLS & COLUMNS
Installation Instructions using Stonegate® 3-pc System
2 Keystone Step-by-Step Kits
FIREPLACE WITH CURVED WALLS & COLUMNS
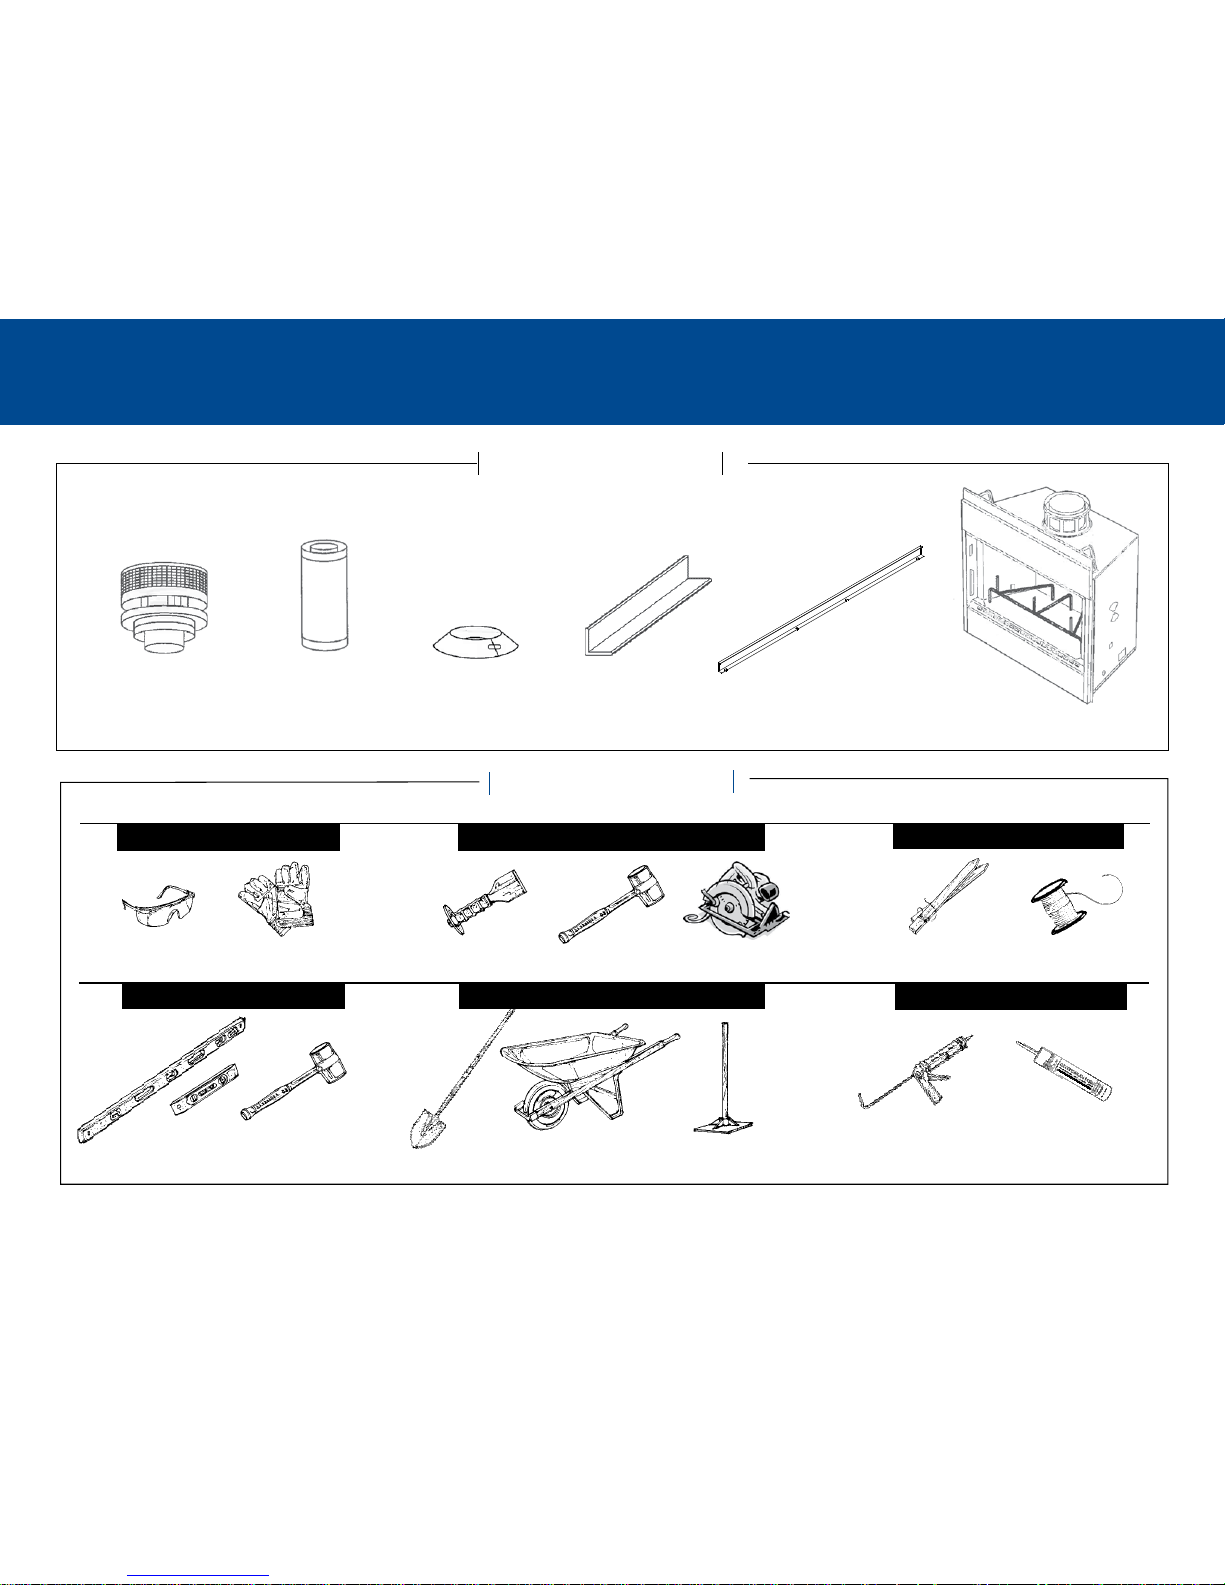
Gloves
Exterior Grade
Construction Adhesive
Level(s)
Safety Glasses
Layout Stakes
Hand Compactor
Concrete Saw
BASIC TOOLS
Shovel
Wheel Barrow
safety
alterations layout
finishing
leveling general
Mallet
Line
Caulking Gun
MalletStone Chisel
KIT CONTAINS
12" and 48"
Chimney Sections
Storm CollarContemporary
Termination Round
Fireplace Insert
with Grate
Steel Lintel Fireplace
Trim Piece
Keystone Step-by-Step Kits 3
www.keystonehardscapes.com
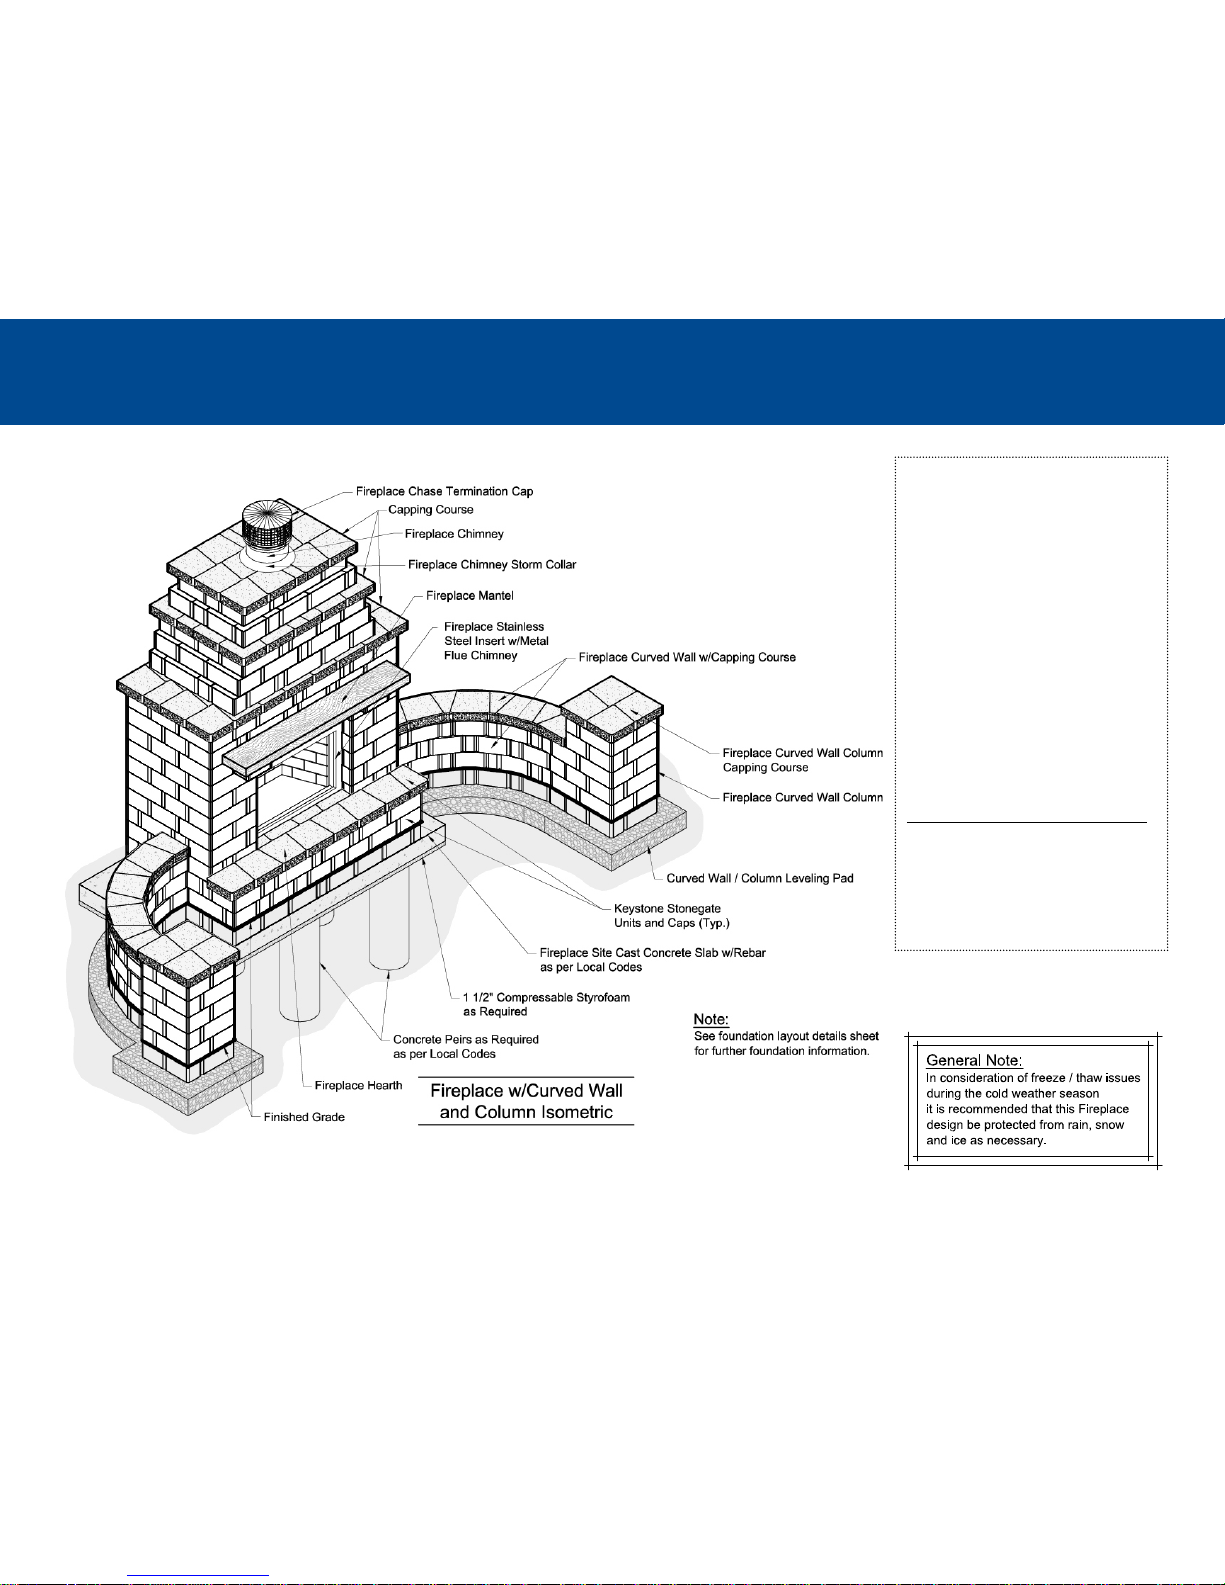
FIREPLACE WITH CURVED WALLS & COLUMNS
You will need:
139 - 16"/14"w Large units
141 - 12"/10"w Medium units
175 - 6"/4"w Small units
105 - 12"/10"w Stonegate caps
600 - Interlocking Pins (approx.)
(use where alignment allows)
25 - Tubes Exterior Grade Concrete
Adhesive (approx.) Apply two ¼"
strips of concrete adhesive on
each course.
• Mantel Piece
• Fireplace Insert (contact Keystone for
specs & retail options)
• Steel lintel - (1) 54"L angle
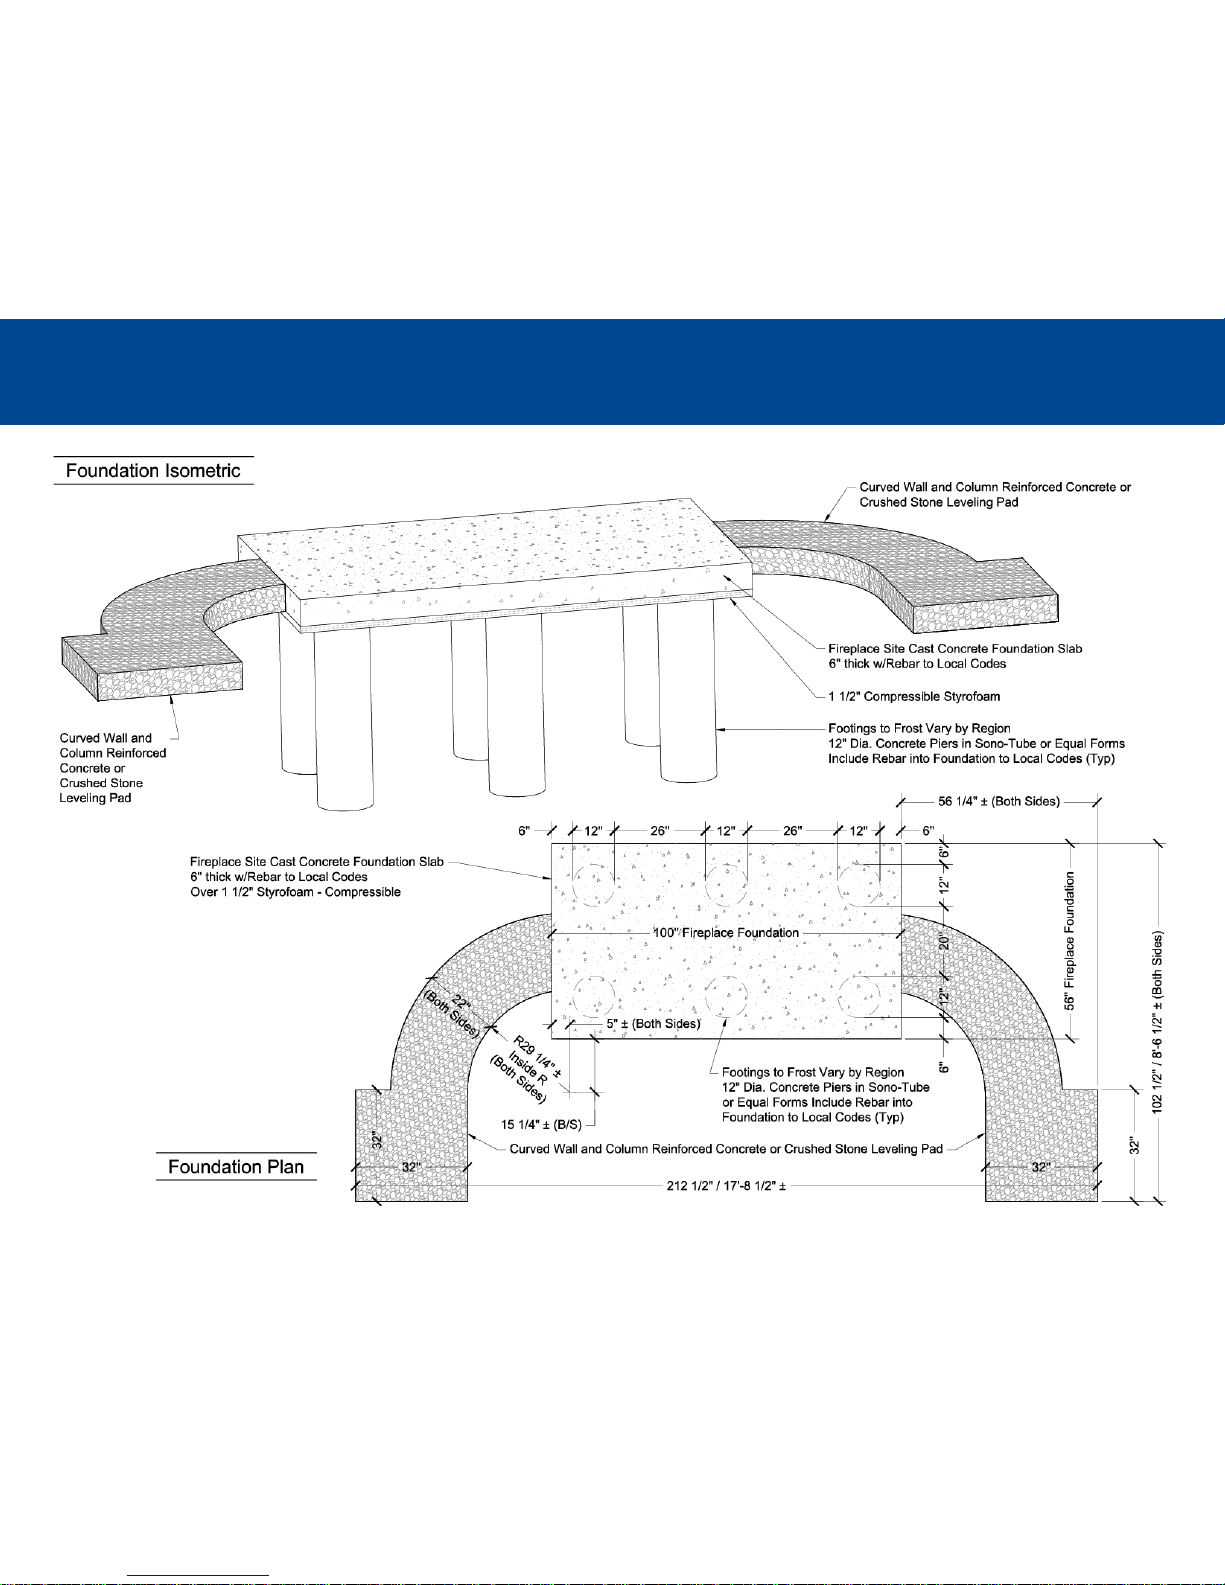
• Concrete slab material - 19.5 cf
• Curved Wall/Column pad material -
15.9 cf
Notes:
• All Keystone Stonegate units are 6”h x 10”d.
• Keystone recommends the use of its interlocking
pins when alignment allows. Use pins in
conjunction with concrete adhesive to maximize
stability of your structure.
4 Keystone Step-by-Step Kits
FIREPLACE WITH CURVED WALLS & COLUMNS
4 Keystone Step-by-Step Kits
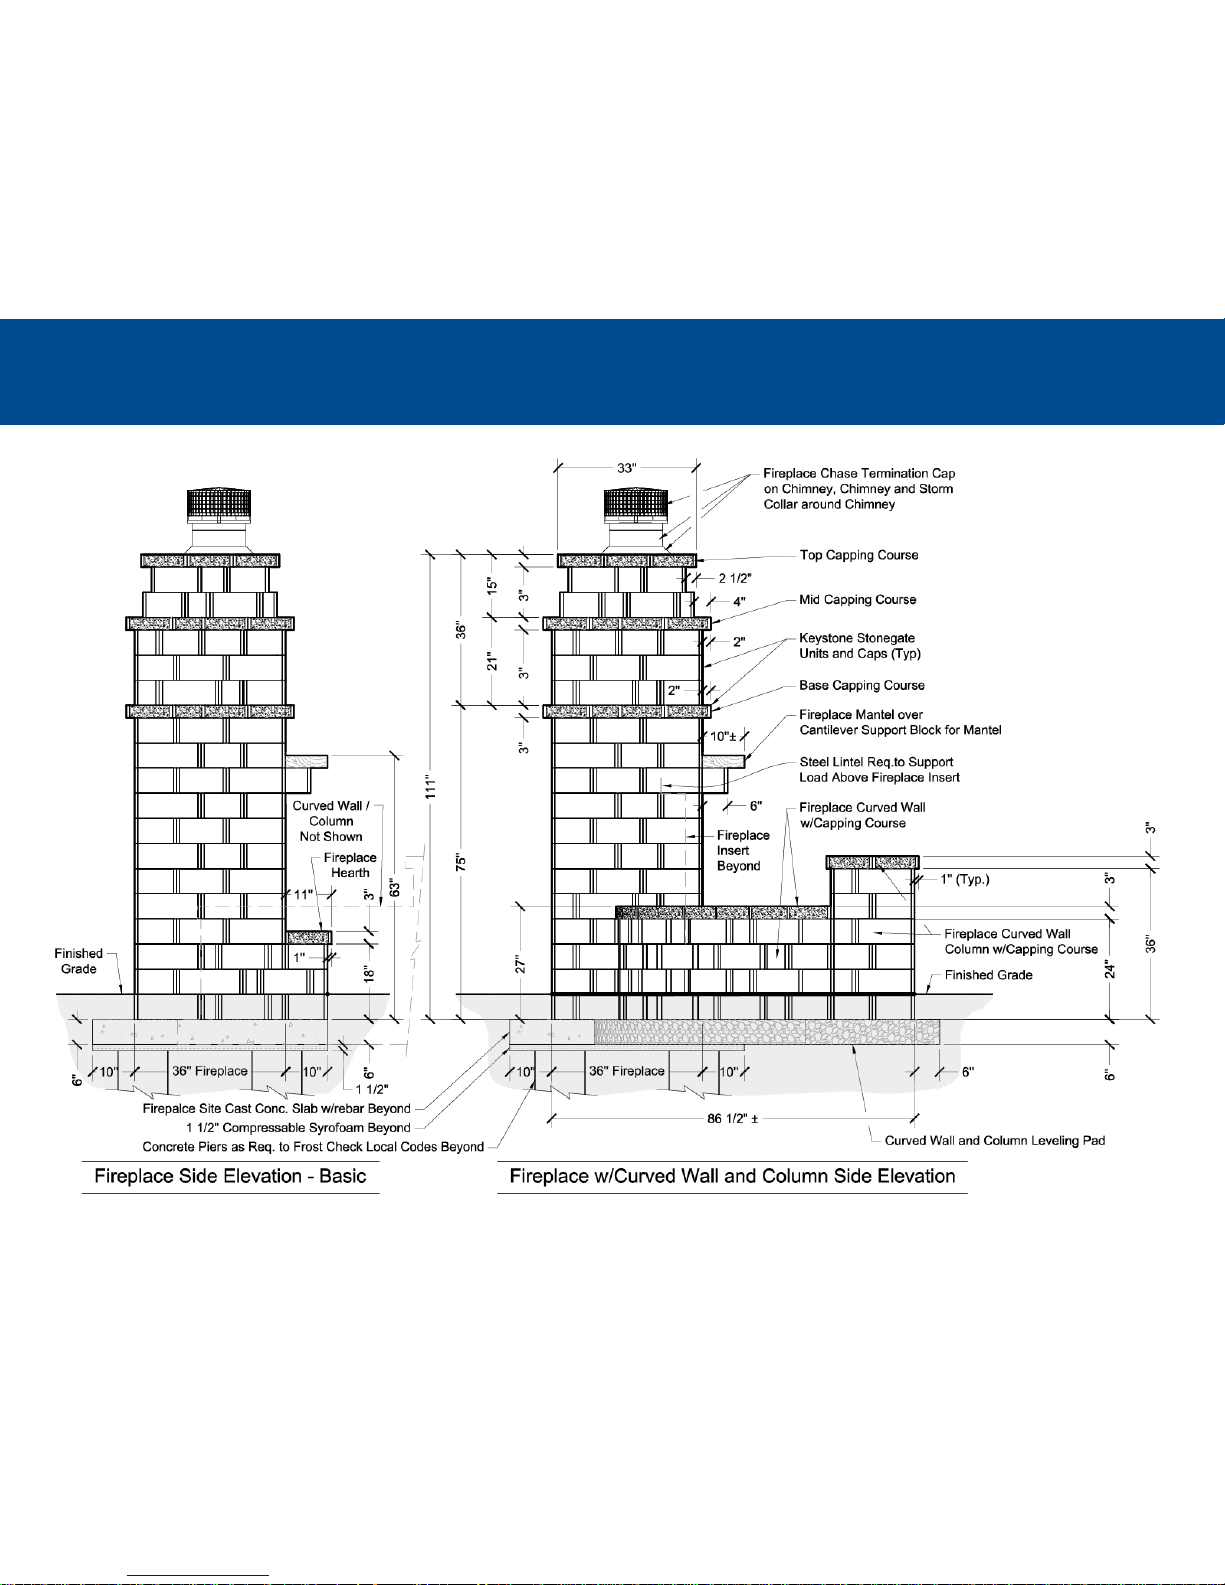
Fireplace insert: See local codes for fireplace/chimney clearances and chimney extension above roof as required. Please refer to the installation manual that is included with the
fireplace insert for proper installation instructions.
Keystone Step-by-Step Kits 5
www.keystonehardscapes.com
FIREPLACE WITH CURVED WALLS & COLUMNS
Keystone Step-by-Step Kits 5
COURSE BY COURSE INSTRUCTIONS
6 Keystone Step-by-Step Kits
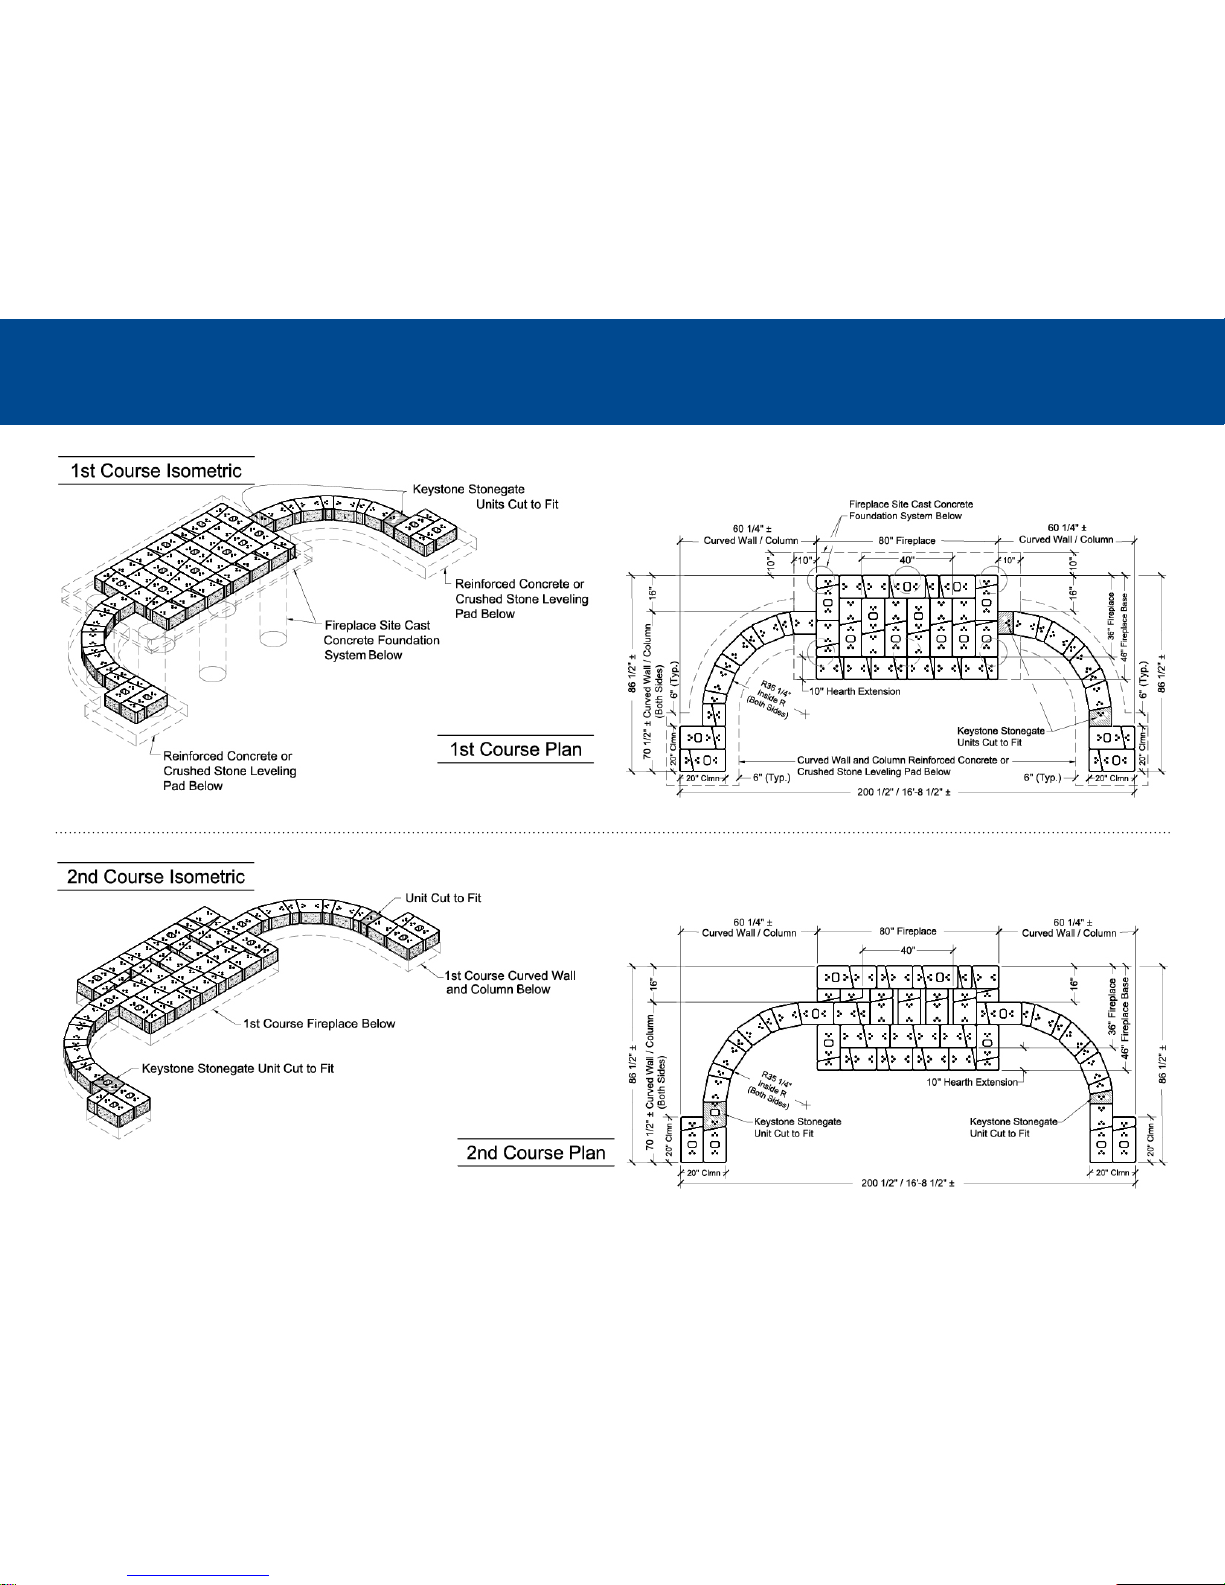
COURSE BY COURSE INSTRUCTIONS
Keystone Step-by-Step Kits 7
www.keystonehardscapes.com
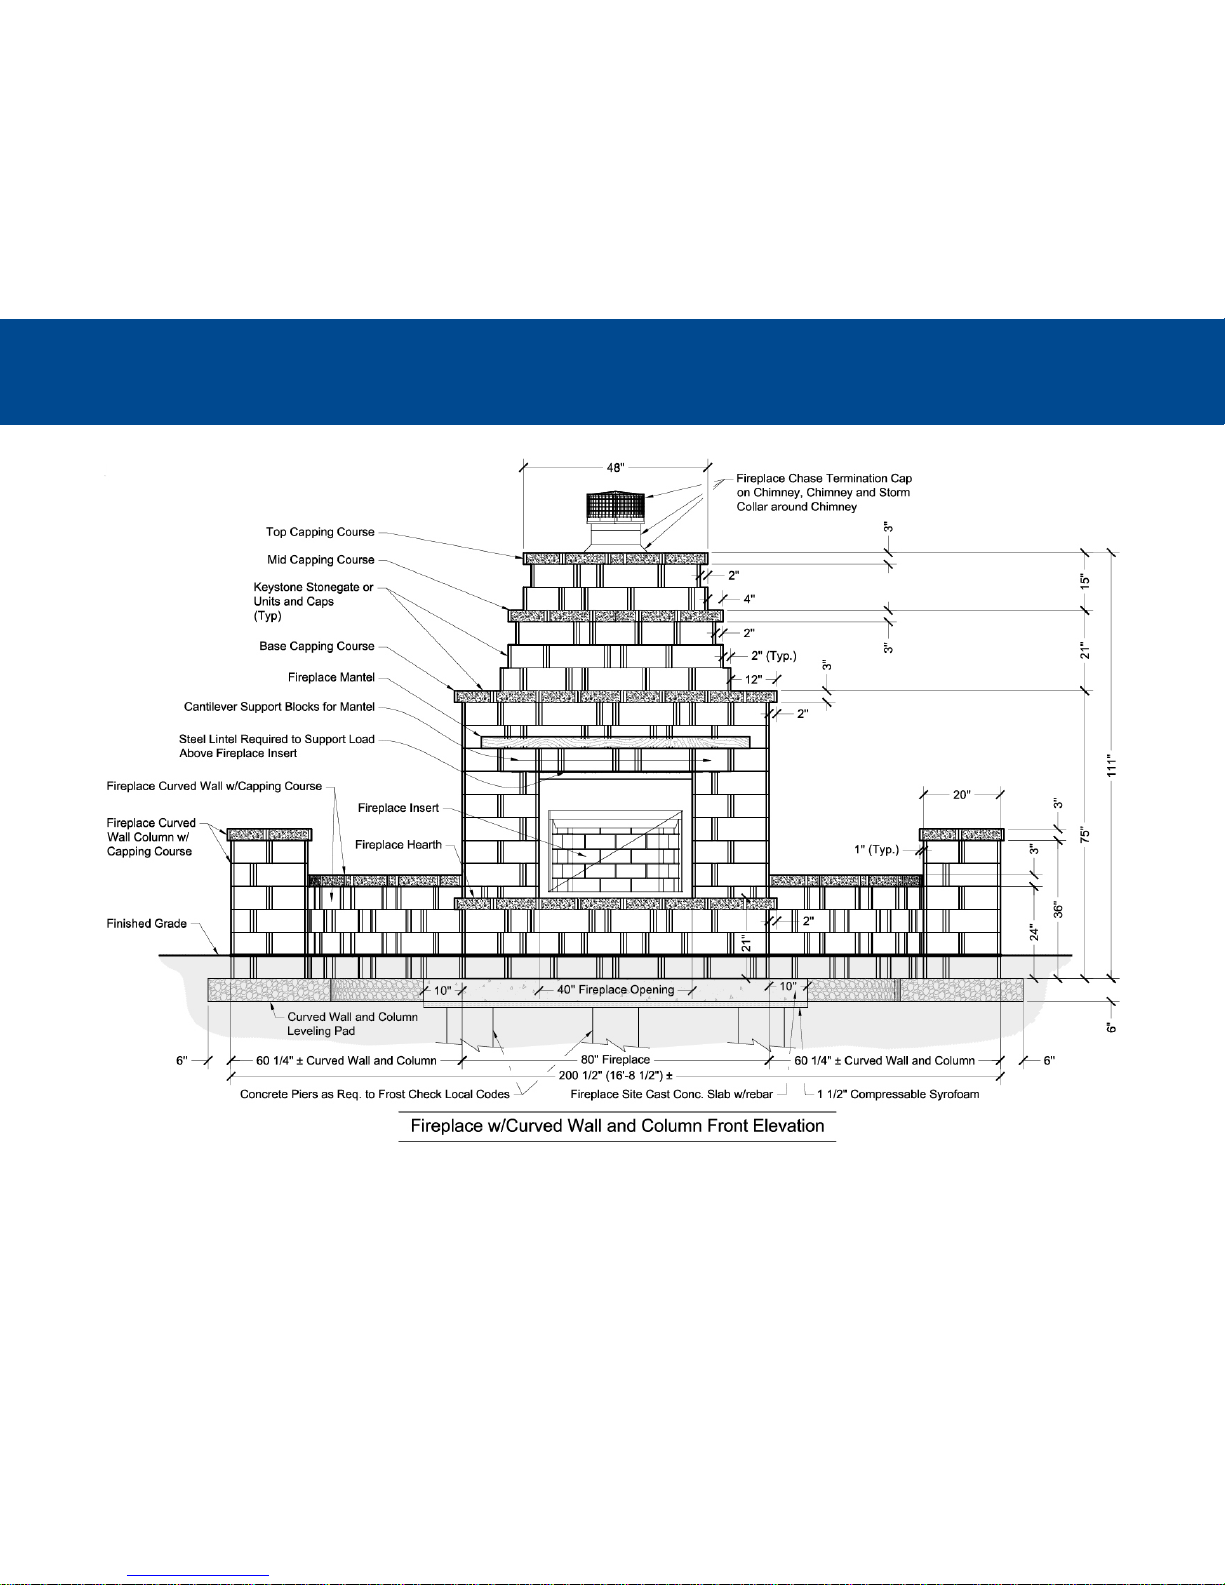
Note: Due to block outside face texture variances when building the fireplace courses, the outside
dimensions of the courses may get wider than desired. If required, cut an interior perimeter unit to
get the required outside dimension.
Block Cutting Note:
Using a concrete saw or wheel grinder tool w/masonry disk, cut block units as needed.
Block units to be cut due to obstruction are labeled with solid hatching.
Block units to be cut to fit are labeled with angular hatching.
 Loading...