

Page 1

Keysight U1731C/
U1732C/U1733C
Handheld LCR Meter
Quick Start
Guide
Page 2
CAUTION
WARNING
ENGLISH
Contacting Keysight
www.keysight.com/find/assist
(worldwide contact information for
repair and service)
Safety and EMC Information
This meter is safety-certified in
compliance with the following
safety and EMC requirements:
– IEC61010-1:2001/
EN61010-1:2001
(Second Edition)
– IEC 61326-1:2005/
EN 61326-1:2006
– Canada: ICES/NMB-001:
Issue 4, June 2006
– Australia/New Zealand:
AS/NZS CISPR11:2004
Safety Notices
A WARNING notice denotes a
hazard. It calls attention to an
operating procedure, practice, or
the like that, if not correctly
performed or adhered to, could
result in personal injury or
death. Do not proceed beyond a
WARNING notice until the
indicated conditions are fully
understood and met.
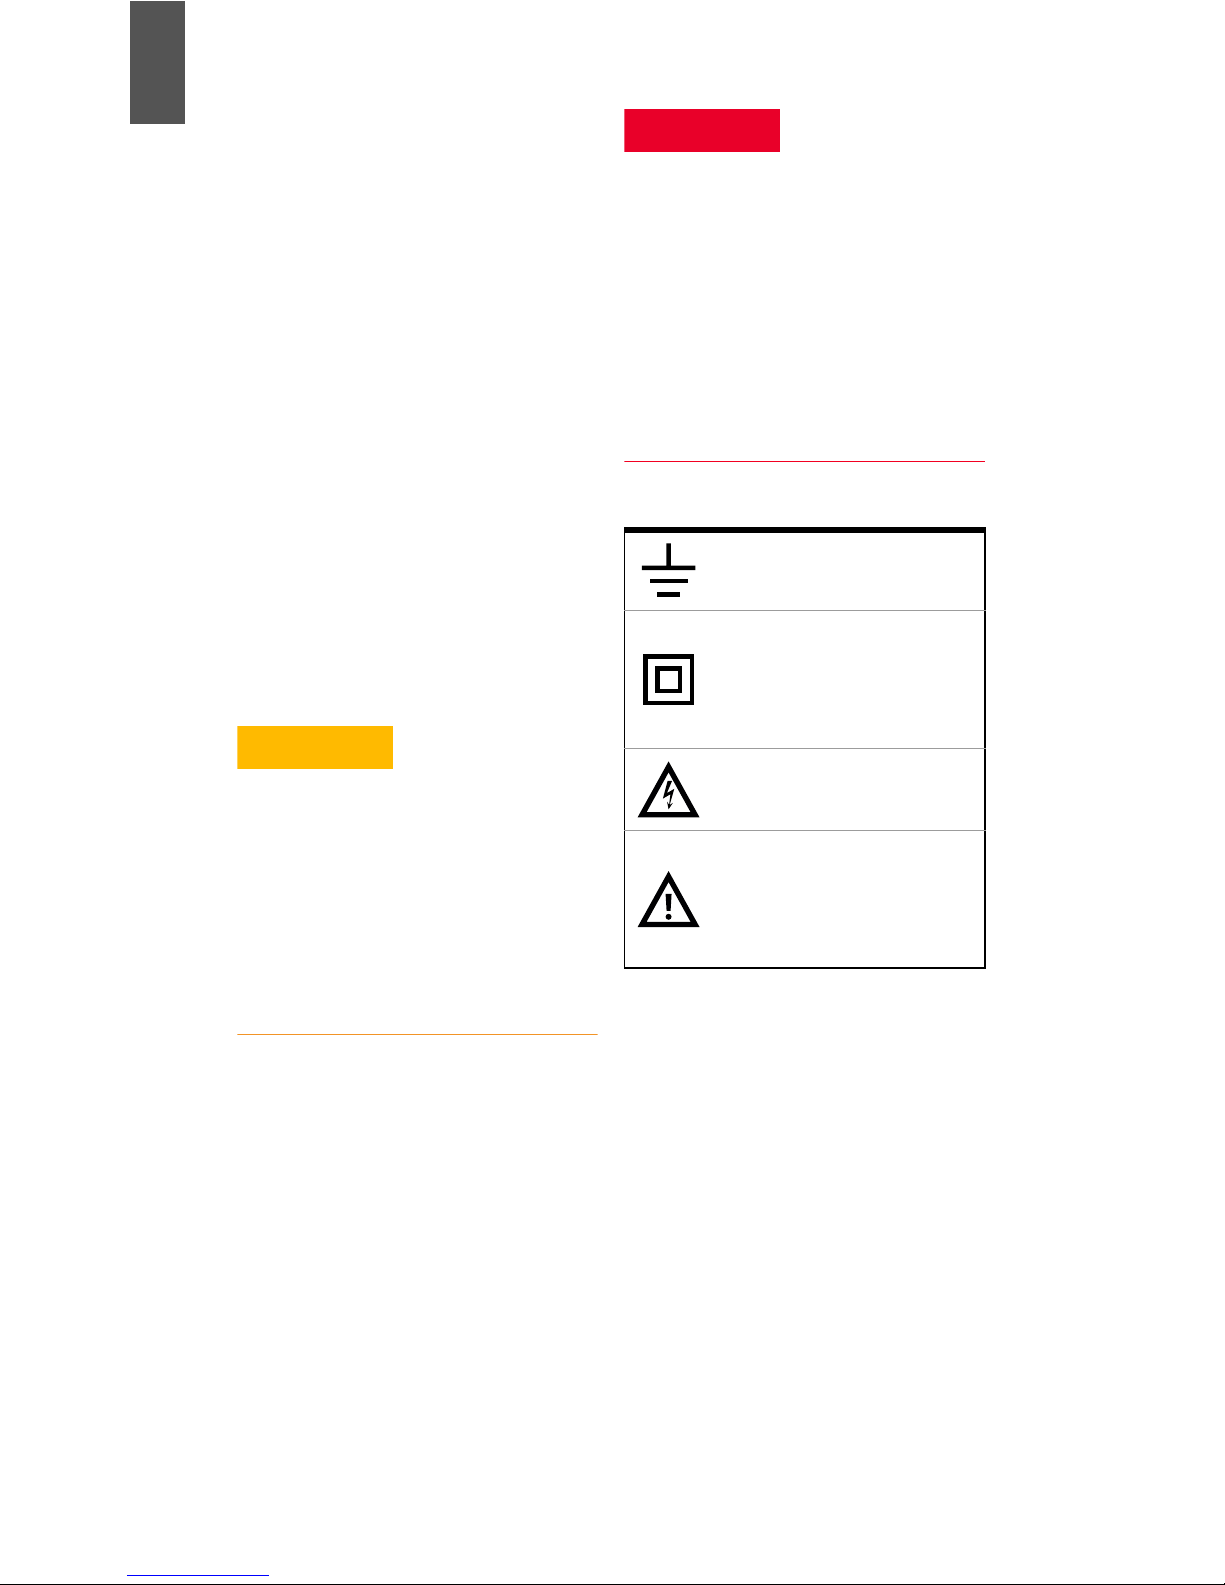
Safety symbols
Earth (ground) terminal
Equipment protected
throughout by double
insulation or reinforced
insulation
A CAUTION notice denotes a
hazard. It calls attention to an
operating procedure, practice, or
the like that, if not correctly
performed or adhered to, could
result in damage to the product or
loss of important data. Do not
proceed beyond a CAUTION notice
until the indicated conditions are
fully understood and met.
Caution, risk of electric
shock
Caution, risk of danger
(refer to this manual for
specific Warning or Caution
information)
For further safety information details, refer to the
Keysight U1731C/U1732C/U1733C Handheld LCR Meter User’s Guide.
2 Keysight U1731C/U1732C/U1733C Quick Start Guide
Page 3

Verify that you received the following items in the
NOTE
shipment of your LCR meter:
ENGLISH
✔ One pair of alligator clip test leads
✔ One 9 V alkaline battery
✔ Printed copy of the U1731C/U1732C/U1733C
Quick Start Guide
✔ Printed copy of the Certificate of Calibration
If any item is missing or damaged, keep the
shipping materials and contact the nearest
Keysight Sales Office.
The descriptions and instructions in this guide apply
to the U1731C, U1732C, and U1733C handheld LCR
meters.
The model U1733C appears in all illustrations.
All related documents and software are available for
download at www.keysight.com/find/hhTechLib.
Keysight U1731C/U1732C/U1733C Quick Start Guide 3
Page 4

ENGLISH
Install the Batteries
Your LCR meter is powered by a single 9 V
alkaline battery (included with the shipment).
1 Turn the LCR meter OFF
and remove the test
leads from the terminals.
2 Lift the tilt stand and
loosen the screw with a
suitable Phillips
screwdriver.
3 Remove the battery cover and observe the
polarity markings.
4 Insert the battery and replace the battery
cover and screw.
4 Keysight U1731C/U1732C/U1733C Quick Start Guide
Page 5

Turn On the LCR Meter
Power-on button
WARNING
NOTE
To power ON your LCR meter, press the power-on
button once.
To avoid damage to the device, do not exceed the
input limit. Do not apply voltage to the input
terminals. Discharge the capacitor before testing.
ENGLISH
Your LCR meter is capable of remote data logging.
To use this feature, you will need an IR-USB cable
(U5481A, purchased separately) and the Keysight
GUI Data Logger Software (downloadable from
www.keysight.com/find/hhTechLib).
Keysight U1731C/U1732C/U1733C Quick Start Guide 5
Page 6

ENGLISH
Display screen
Keypad
Input terminals/
IR communication
Battery cover
Tilt stand
External power
(Lift the tilt stand
adapter input jack
(+12 VDC)
port
socket
for access)
NOTE
The LCR Meter at a Glance
The external AC to DC power adapter input jack
requires an input voltage of +12 VDC.
6 Keysight U1731C/U1732C/U1733C Quick Start Guide
Page 7

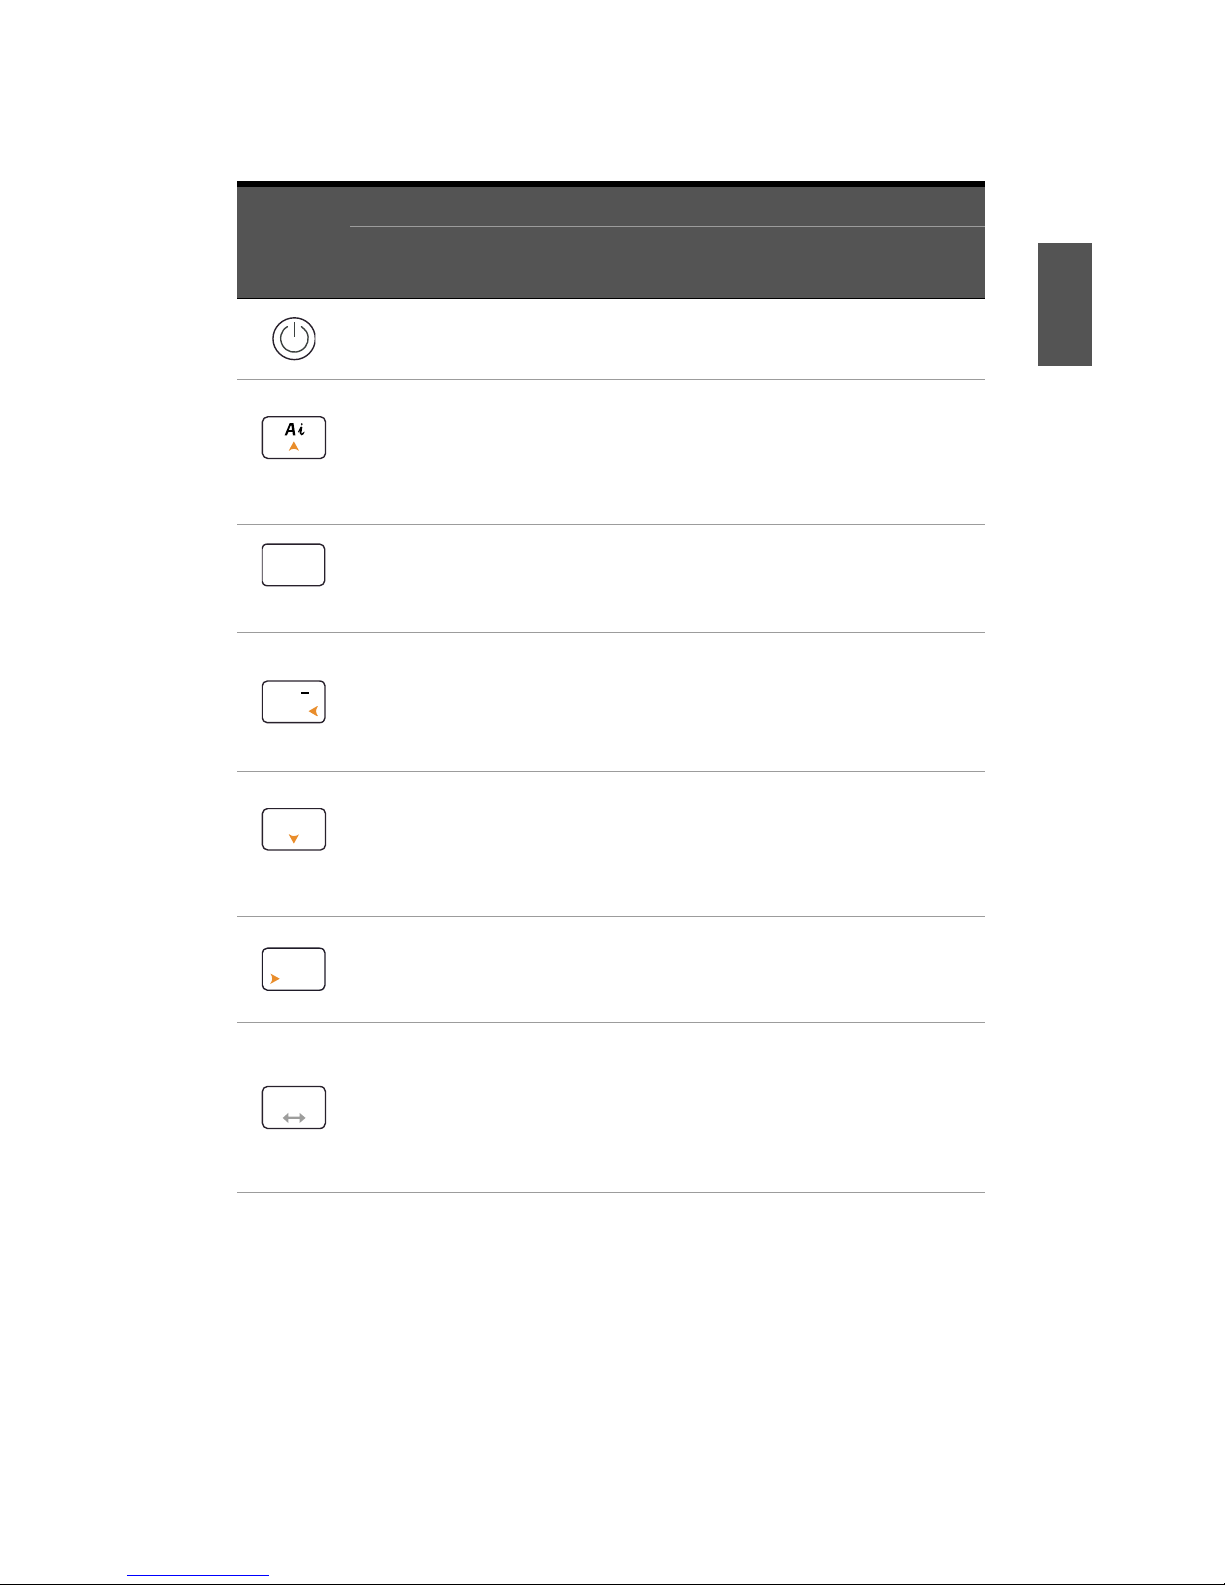
Understanding the Keypad
ESR
Rec
Hold
Save
Limit
DQO
DCR
Freq.
Auto
Range
P S
ZLCR
Tol%
Cal
Null
Key response when pressed for:
Legend
Less than 1 second More than 1 second
Turns the LCR meter on or off -
ENGLISH
Starts or stops the auto
identification mode
Holds or releases the present
reading on the display
Switches between dissipation
factor (D), quality factor (Q),
and phase angle (θ)
measurement
Selects a test frequency
Disables autoranging and sets
a manual range
Switches between impedance
(Z), inductance (L), capacitance
(C), and resistance (R)
measurement
Enables or disables the ESR
(equivalent series resistance)
[a]
mode
Starts or stops the static
recording mode
Enables or disables the limit
comparison mode
Enables or disables the DCR
(direct current resistance) mode
Enables autoranging
Toggles between parallel and
series circuit mode
[b]
Enables the tolerance mode
Sets the null/relative mode
[a] Autoranging only. ESR mode exits to capacitance (C) measurement by default.
[b] Applicable for U1733C model only. DCR mode exits to inductance (L)
measurement by default.
[c] Applicable for U1732C and U1733C models only.
Keysight U1731C/U1732C/U1733C Quick Start Guide 7
Turns the backlight display on or
[c]
off
or disables the tolerance
mode (if tolerance is enabled)
Enters the open/short calibration
mode for selected range and test
frequency
Page 8

ENGLISH
NOTE
Performing LCR Measurements
Auto Identification (Ai)
Press the button to automatically identify and
select an appropriate primary measurement
function (L, C, or R), secondary measurement
function (D, Q, or
θ), and measurement mode
(parallel or series) for the device-under-test.
The LCR meter powers up in the Ai mode by default.
is shown on the left of the display screen when
the Ai mode is enabled.
– flashes when the LCR meter is identifying
a measurement function and mode.
– Press again while is shown to exit the
Ai mode.
LCR measurement steps
8 Keysight U1731C/U1732C/U1733C Quick Start Guide
Page 9

Secondary (D/Q/θ) measurements
Inductor
2
Capacitor
2
Resistor
2
Inductance (L) measurements
ENGLISH
Capacitance (C) measurements
Resistance (R) measurements
Keysight U1731C/U1732C/U1733C Quick Start Guide 9
Page 10

ENGLISH
THIS PAGE HAS BEEN INTENTIONALLY LEFT BLANK.
10 Keysight U1731C/U1732C/U1733C Quick Start Guide
Page 11

Keysight U1731C/
U1732C/U1733C
Mesureur LCR portable
Guide de mise
en route
Page 12

Contacter Keysight
ATTENTION
www.keysight.com/find/assist
(contacts pour la réparation et la
FRANÇAIS
maintenance au niveau mondial)
Informations de sécurité et
de CEM
Ce mesureur est certifié pour la
sécurité conformément aux
exigences CEM et de sécurité
suivantes :
– CEI61010-1:2001/
– CEI 61326-1:2005/
EN61010-1:2001
(deuxième édition)
EN 61326-1:2006
AVERTISSEMENT
La mention AVERTISSEMENT
signale un danger pour la
sécurité de l’opérateur. Si la
manœuvre ou la procédure
correspondante n’est pas
exécutée correctement, il peut
y avoir un risque grave, voire
mortel pour les personnes. En
présence d’une mention
AVERTISSEMENT, il convient de
s’interrompre tant que les
conditions indiquées n’ont pas
été parfaitement comprises et
satisfaites.
– Canada : ICES/NMB-001 :
édition 4 juin 2006
– Australie/Nouvelle Zélande :
AS/NZS CISPR11:2004
Avertissements de sécurité
La mention ATTENTION signale un
danger pour le matériel. Si la
manœuvre ou la procédure
correspondante n’est pas exécutée
correctement, il peut y avoir un
risque d’endommagement de
l’appareil ou de perte de données
importantes. En présence de la
mention ATTENTION, il convient de
s’interrompre tant que les
conditions indiquées n’ont pas été
parfaitement comprises et
respectées.
Symboles de sécurité
Borne de prise de terre
Équipement protégé par
une double isolation ou une
isolation renforcée
Attention, danger
d’électrocution
Attention, risque de danger
(reportez-vous au manuel
de l’instrument pour
obtenir des informations
détaillées sur les
avertissements et les mises
en garde)
Pour plus d’informations sur la sécurité, consultez le
U1731C/U1732C/U1733C Mesureur LCR portable Guide de
12 Keysight U1731C/U1732C/U1733C Guide de mise en route
l’utilisateur d’Keysight.
Page 13

Assurez-vous d’avoir reçu les articles suivants
REMARQUE
avec la livraison de votre mesureur LCR :
✔ Une paire de conducteurs à pinces crocodiles
✔ Une pile alcaline 9 V
✔ Un exemplaire imprimé du U1731C/U1732C/
FRANÇAIS
U1733C Guide de mise en route
✔ Un exemplaire imprimé du certificat
d’étalonnage
Au cas où un article serait manquant ou
endommagé, conservez le matériel livré et
contactez le bureau de vente Keysight le plus
proche.
Les descriptions et instructions contenues dans ce
guide s’appliquent aux U1731C, U1732C, U1733C
et Mesureur LCR portable.
Le modèle U1733C apparaît dans chaque illustration.
Tous les documents et logiciels associés peuvent
être téléchargés depuis le site www.keysight.com/
find/hhTechLib.
Keysight U1731C/U1732C/U1733C Guide de mise en route 13
Page 14

Installation des batteries
Votre mesureur LCR est alimenté par une seule
FRANÇAIS
pile alcaline 9 V (livrée avec le produit).
1 Arrêtez le mesureur LCR
et retirez les câbles de
test des bornes.
2 Soulevez le socle
inclinable et desserrez la
vis à l’aide d’un tournevis
cruciforme approprié.
3 Retirez le capot du compartiment de batterie
et repérez les marques de polarité.
4 Insérez la pile et remettez en place le capot du
compartiment de batterie et la vis.
14 Keysight U1731C/U1732C/U1733C Guide de mise en route
Page 15

Mettez le mesureur LCR en marche
Bouton de mise
en marche
AVERTISSEMENT
REMARQUE
Pour mettre en marche votre mesureur LCR,
appuyez une fois sur le bouton de mise en marche.
Ne dépassez pas les limites d’entrée : vous risqueriez
d’endommager l’appareil. N'appliquez pas de tension
aux bornes d'entrée. Déchargez le condensateur avant
les tests.
Le mesureur LCR vous permet de journaliser des
données à distance. L'utilisation de cette
fonctionnalité nécessite un câble IR-USB (U5481A,
vendu séparément) et le logiciel de journalisation
Keysight GUI Data Logger Software (téléchargeable
depuis le site www.keysight.com/find/hhTechLib).
FRANÇAIS
Keysight U1731C/U1732C/U1733C Guide de mise en route 15
Page 16

Le mesureur LCR en bref
(+12 Vcc)
Écran
Clavier
Port de communication
infrarouge (IR)
Socle inclinable
Couvercle de
compartiment de pile
(soulevez le socle
inclinable pour
y accéder)
Prise d'entrée de
l'adaptateur
d'alimentation externe
Bornes d'entrée/fiche
REMARQUE
FRANÇAIS
La prise d'entrée pour adaptateur CA - CC nécessite
une tension d'entrée de +12 Vcc.
16 Keysight U1731C/U1732C/U1733C Guide de mise en route
Page 17

Présentation du pavé numérique
ESR
Rec
Hold
Save
Limit
DQO
DCR
Freq.
Auto
Range
P S
ZLCR
Tol%
Cal
Null
Légende
Réponse de la touche lorsqu’elle est enfoncée pendant :
Moins d’une seconde Plus d’une seconde
Met en marche ou arrête le
mesureur LCR
Lance ou arrête le mode
d'identification automatique
Maintient ou permet d'effacer la
valeur à l'écran
-
Active ou désactive le mode ESR
(résistance-série équivalente)
Lance ou arrête le mode
d'enregistrement statique
Permet d'alterner entre la
mesure du facteur de dissipation
(D), du facteur de qualité (Q) et
Active ou désactive le mode de
comparaison de limite
de l'angle de phase angle (θ)
Permet de sélectionner une
fréquence de test
Active ou désactive le mode DCR
(résistance en courant continu)
FRANÇAIS
[a]
[b]
Désactive la classification
automatique et définit une
classe manuelle
Active la classification
automatique
Permet d'alterner entre la
mesure d'impédance (Z),
d'inductance (L), de capacité (C)
Permet d'alterner entre le mode
de circuit parallèle et série
et de résistance (R)
Active ou désactive le
[c]
ou
Active le mode de tolérance
rétro-éclairage de l'écran
désactive le mode de tolérance
(si la tolérance est activée)
Entre en mode d'étalonnage
Définit le mode null/relatif
ouvert/court pour la classe et la
fréquence de test sélectionnées
[a] Classification automatique uniquement. Par défaut, vous accédez à la mesure de
capacité (C) en quittant le mode ESR.
[b] Applicable au modèle U1733C uniquement. Par défaut, vous accédez à la mesure
de l'inductance (L) en quittant le mode DCR.
[c] Applicable aux modèles U1732C et U1733C uniquement.
Keysight U1731C/U1732C/U1733C Guide de mise en route 17
Page 18

Exécution de mesures LCR
REMARQUE
Identification automatique (Ai)
FRANÇAIS
Appuyez sur le bouton pour réaliser une
identifier et sélectionner automatiquement une
fonction de mesure principale (L, C ou R) ou
secondaire (D, Q ou
θ) appropriée et un mode de
mesure (parallèle ou série) pour l'appareil testé.
Le mesureur LCR démarre par défaut en mode Ai.
apparaît sur la gauche de l'écran lorsque le
mode Ai est activé.
– clignote lorsque le mesureur LCR est en
cours d'identification d'une fonction ou d'un
mode de mesure.
– Appuyez de nouveau sur pendant que
apparaît pour quitter le mode Ai.
18 Keysight U1731C/U1732C/U1733C Guide de mise en route
Page 19

Étapes de mesure LCR
FRANÇAIS
Mesures secondaires (D/Q/θ)
Keysight U1731C/U1732C/U1733C Guide de mise en route 19
Page 20

FRANÇAIS
Inductor
2
Capacitor
2
Resistor
2
Mesures d'inductance (L)
Mesures de capacité (C)
Mesures de résistance (R)
20 Keysight U1731C/U1732C/U1733C Guide de mise en route
Page 21

Keysight U1731C/
U1732C/U1733C
Handheld-LCR-Messgerät
Schnellstarthandbuch
Page 22

Kontakt zu Keysight
VORSICHT
WARNUNG
www.keysight.com/find/assist
(weltweite Kontaktinformationen
für Reparatur und Service)
Sicherheits- und
EMV-Informationen
DEUTSCH
Dieses Messgerät ist
sicherheitszertifiziert nach
folgenden Sicherheits- und
EMC-Anforderungen:
– IEC61010-1:2001/
– (Zweite Ausgabe)
– IEC 61326-1:2005/EN
– Kanada: ICES/
– Australien/Neuseeland: AS/NZS
Sicherheitshinweise
Ein Hinweis mit der Überschrift
VORSICHT weist auf eine Gefahr
hin. Er macht auf einen
Betriebsablauf oder ein Verfahren
aufmerksam, der bzw. das bei
unsachgemäßer Durchführung zur
Beschädigung des Produkts oder
zum Verlust wichtiger Daten
führen kann. Setzen Sie den
Vorgang nach dem Hinweis
VORSICHT nicht fort, wenn Sie die
darin aufgeführten Hinweise nicht
vollständig verstanden haben und
einhalten können.
EN61010-1:2001
61326-1:2006
NMB-001:Ausgabe 4, Juni 2006
CISPR11:2004
Eine WARNUNG weist auf eine
Gefahr hin. Sie macht auf einen
Betriebsablauf oder ein
Verfahren aufmerksam, der bzw.
das bei unsachgemäßer
Durchführung zu Verletzungen
oder zum Tod führen kann.
Setzen Sie den Vorgang nach
einem Hinweis mit der
Überschrift WARNUNG nicht
fort, wenn Sie die darin
aufgeführten Hinweise nicht
vollständig verstanden haben
und einhalten können.
Sicherheitssymbole
Anschluss an Schutzerde
(Masse)
Ausrüstung ständig durch
Doppelisolierung oder
verstärkte Isolierung
geschützt
Vorsicht, Stromschlagrisiko
Vorsicht, Stromschlagrisiko
(spezifische Warn- und
Vorsichtshinweise finden
Sie im Handbuch)
Weitere Sicherheitsinformationen finden Sie im
Keysight U1731C/U1732C/U1733C Handheld-LCR-Messgerät
22 Keysight U1731C/U1732C/U1733C Schnellstarthandbuch
Benutzerhandbuch.
Page 23

Überprüfen Sie, ob folgende Teile in der
HINWEIS
LCR-Messgerät-Lieferung enthalten sind:
✔ Zwei Messleitungen mit Abgreifklemmen
✔ Eine 9-V-Alkalibatterie
✔ Gedruckte Ausgabe des U1731C/U1732C/
U1733C Schnellstarthandbuchs
✔ Gedruckte Ausgabe des Zertifikats für die
Kalibrierung
DEUTSCH
Sollte ein Teil fehlen oder beschädigt sein,
bewahren Sie das Versandmaterial auf und
kontaktieren Sie die nächstgelegene Keysight
Geschäftsstelle.
Die Beschreibungen und Anweisungen in diesem
Handbuch gelten für U1731C, U1732C und U1733C
Handheld-LCR-Messgerät.
In allen Abbildungen wird das Modell U1733C
dargestellt.
Alle zugehörigen Dokumente und die Software
können unter www.keysight.com/find/hhTechLib
heruntergeladen werden.
Keysight U1731C/U1732C/U1733C Schnellstarthandbuch 23
Page 24

Einlegen der Batterien
Das LCR-Messgerät wird über eine einzelne
9-V-Alkalibatterie betrieben (im Lieferumfang
enthalten).
1 Schalten Sie das
DEUTSCH
Messgerät AUS und
entfernen Sie die
Messleitungen von den
Anschlüssen.
2 Heben Sie den
Neigungsständer an und
lösen Sie die Schraube mit einem
Kreuzschlitzschraubendreher.
3 Entfernen Sie die Batterieabdeckung und
beachten Sie die Polaritätskennzeichnungen.
4 Legen Sie die Batterie ein und bringen Sie die
Batterieabdeckung und Schraube wieder an.
24 Keysight U1731C/U1732C/U1733C Schnellstarthandbuch
Page 25

Einschalten des LCR-Messgeräts
Einschalttaste
WARNUNG
HINWEIS
Drücken Sie die Einschalttaste einmal, um das
LCR-Messgerät einzuschalten.
Um eine Beschädigung des Geräts zu vermeiden,
überschreiten Sie nicht die Eingangsbeschränkung.
Wenden Sie an den Eingangsanschlüssen keine
Spannung an. Entladen Sie den Kondensator vor der
Testdurchführung.
DEUTSCH
Das LCR-Messgerät verfügt über eine
Remote-Funktion zur Datenprotokollierung. Um
diese Funktion zu nutzen, benötigen Sie ein
IR-USB-Kabel (U5481A, separat erhältlich) und die
Keysight GUI Data Logger Software (als Download
verfügbar unter www.keysight.com/find/hhTechLib).
Keysight U1731C/U1732C/U1733C Schnellstarthandbuch 25
Page 26

Das LCR-Messgerät – Übersicht
(+12 V Gleichstrom)
Bildschirmanzeige
Tastenfeld
IR-Kommunikationsan
schluss
Neigungsständer
Batteriefachabdeckung
(Neigungsständer für
Zugriff anheben)
Eingang für das
externe Netzteil
Eingangsanschlüsse/
-buchsen
HINWEIS
DEUTSCH
Für den Eingang für das externe Netzteil benötigen
Sie eine Eingangsspannung von +12 V Gleichstrom.
26 Keysight U1731C/U1732C/U1733C Schnellstarthandbuch
Page 27
Die Tastatur
ESR
Rec
Hold
Save
Limit
DQO
DCR
Freq.
Auto
Range
P S
ZLCR
Reaktion, wenn Taste
Legende
weniger als 1 Sekunde
gedrückt wird
Schaltet das LCR-Messgerät ein
bzw. aus
Startet oder beendet den Modus
für die automatische
Identifizierung
Hält den aktuellen Messwert auf
der Anzeige oder gibt ihn frei
Wechseln zwischen
Ableitungsfaktormessung (D),
Qualitätsfaktormessung (Q) und
Phasenwinkelmessung (θ)
Auswählen der Testfrequenz
mehr als 1 Sekunde
gedrückt wird
-
Aktiviert oder deaktiviert den
ESR-Modus (Equivalent Series
Resistance – äquivalenter
Serienwiderstand)
[a]
Startet oder beendet den
statischen
Aufzeichnungsmodus
Aktiviert oder deaktiviert den
Grenzwertvergleichsmodus
Aktiviert oder deaktiviert den
DCR-Modus (Direct Current
Resistance –
Gleichstromwiderstand)
[b]
DEUTSCH
Deaktiviert die automatische
Bereichsauswahl und legt eine
manuelle Bereichsauswahl fest
Wechseln zwischen
Impedanzmessung (Z),
Induktivitätsmessung (L),
Kapazitätsmessung (C) und
Widerstandsmessung (R)
Keysight U1731C/U1732C/U1733C Schnellstarthandbuch 27
Aktiviert die automatische
Bereichswahl
Umschalten zwischen Parallelund Reihenschaltungsmodus
Page 28

Reaktion, wenn Taste
Tol%
Cal
Null
Legende
DEUTSCH
[a] Nur automatische Bereichswahl. Über den ESR-Modus wird standardmäßig auf
[b] Nur für das Modell U1733C verfügbar. Über den DCR-Modus wird
[c] Nur für die Modelle U1732C und U1733C verfügbar.
weniger als 1 Sekunde
gedrückt wird
mehr als 1 Sekunde
gedrückt wird
Schaltet die
Anzeigenhintergrundbeleuchtu
Aktiviert den Toleranzmodus
ng ein bzw. aus
deaktiviert den Toleranzmodus
(falls dieser aktiviert ist)
Gibt den Open/
Stellt den Nullmodus/relativen
Modus ein
Short-Kalibrierungsmodus für
den ausgewählten Bereich und
die ausgewählte Testfrequenz an
die Kapazitätsmessung (C) umgeschaltet.
standardmäßig auf die Induktivitätsmessung umgeschaltet.
[c]
oder
28 Keysight U1731C/U1732C/U1733C Schnellstarthandbuch
Page 29

Ausführen von LCR-Messungen
HINWEIS
Automatische Identifizierung (Ai)
Drücken Sie die Taste , damit die
entsprechende Primärmessfunktion (L, C oder R),
die Sekundärmessfunktion (D, Q oder
θ) und der
Messmodus (Parallel- oder Reihenschaltung) für
das zu testende Gerät automatisch erkannt und
ausgewählt werden.
Das LCR-Messgerät wird standardmäßig im
Ai-Modus gestartet. wird auf der linken Seite
der Anzeige angezeigt, wenn der Ai-Modus
aktiviert ist.
– blinkt, wenn das LCR-Messgerät eine
Messfunktion bzw. einen Messmodus ermittelt.
– Drücken Sie erneut, während angezeigt
wird, um den Ai-Modus zu verlassen.
DEUTSCH
Keysight U1731C/U1732C/U1733C Schnellstarthandbuch 29
Page 30

DEUTSCH
Schritte für die LCR-Messung
Sekundärmessungen (D/Q/θ)
30 Keysight U1731C/U1732C/U1733C Schnellstarthandbuch
Page 31

Induktivitätsmessungen (L)
Inductor
2
Capacitor
2
Resistor
2
Kapazitätsmessungen (C)
Widerstandsmessungen (R)
DEUTSCH
Keysight U1731C/U1732C/U1733C Schnellstarthandbuch 31
Page 32

DEUTSCH
DIESE SEITE WURDE ABSICHTLICH LEER GELASSEN.
32 Keysight U1731C/U1732C/U1733C Schnellstarthandbuch
Page 33

Keysight U1731C/
U1732C/U1733C
Misuratore LCR palmare
Guida rapida
Page 34

Contatti Keysight
ATTENZIONE
AVVERTENZA
ITALIANO
www.keysight.com/find/assist
(informazioni di contatto in tutto il
mondo per riparazione e
assistenza)
Informazioni di sicurezza
e CEM
Questo misuratore è conforme alle
normative di sicurezza e EMC:
– IEC61010-1:2001/
EN61010-1:2001
(seconda edizione)
– IEC61326-1:2005/
EN61326-1:2006
– Canada: ICES/NMB-001:
quarta edizione, giugno 2006
– Australia/Nuova Zelanda:
AS/NZS CISPR11:2004
Informazioni sulla sicurezza
La dicitura AVVERTENZA indica
la presenza di condizioni di
rischio. L'avviso richiama
l'attenzione su una procedura
operativa, una prassi o
comunque un'azione che, se non
eseguita correttamente o
attenendosi scrupolosamente
alle indicazioni, potrebbe
causare lesioni personali anche
mortali. In presenza della
dicitura AVVERTENZA
interrompere l'attività finché le
condizioni indicate non siano
state perfettamente comprese e
soddisfatte.
Simboli di sicurezza
Messa a terra
La dicitura ATTENZIONE indica la
presenza di condizioni di rischio.
L'avviso richiama l'attenzione su
una procedura operativa, una
prassi o comunque un'azione che,
se non eseguita correttamente o
attenendosi scrupolosamente alle
indicazioni, potrebbe comportare
danni al prodotto o la perdita di
dati importanti.In presenza della
dicitura ATTENZIONE interrompere
l'attività finché le condizioni
indicate non siano state
perfettamente comprese e
soddisfatte.
Apparecchiatura protetta
tramite doppio isolamento
o isolamento rinforzato
Attenzione, rischio di
scossa elettrica
Attenzione, rischio di
pericolo (consultare il
manuale dello strumento
per maggiori informazioni
su AVVERTENZA e
ATTENZIONE)
Per maggiori informazioni sulla sicurezza, consultare la
U1731C/U1732C/U1733C Misuratore LCR palmare User’s Guide Keysight.
34 Keysight U1731C/U1732C/U1733C Guida rapida
Page 35

Controllate che insieme al misuratore LCR
NOTA
abbiate ricevuto i seguenti componenti:
✔ Puntali con pinze a coccodrillo
✔ Batteria alcalina da 9 V
✔ Copia stampata della U1731C/U1732C/
U1733C Guida rapida
✔ Copia stampata del Certificato di Calibrazione
Se uno dei componenti risulta mancante o
danneggiato, conservate il materiale ricevuto e
contattate l'Keysight ufficio vendita di zona.
ITALIANO
Le descrizioni e le istruzioni in questa guida
riguardano i modelli U1731C, U1732C e U1733C
Misuratore LCR palmare.
Il modello U1733C appare in tutte le illustrazioni.
All'indirizzo www.keysight.com/find/hhTechLib
sono disponibili tutti i documenti inerenti e i
software.
Keysight U1731C/U1732C/U1733C Guida rapida 35
Page 36

Installare le batterie
Il misuratore LCR è alimentato da una batteria
alcalina da 9 V (fornita tra i componenti).
1 Spegnere il misuratore
LCR e rimuovere i puntali
di test dai terminali.
2 Sollevare il supporto
inclinato e svitare
ITALIANO
utilizzando un apposito
cacciavite Philipps.
Rimuovere il coperchio della batteria
3
e osservare i segni della polarità
.
4 Inserire la batteria, riposizionare il coperchio
e avvitare.
36 Keysight U1731C/U1732C/U1733C Guida rapida
Page 37

Accendere il misuratore LCR
Pulsante di
accensione
AVVERTENZA
NOTA
Per accendere il misuratore LCR, premere una
volta il pulsante di accensione.
Per evitare di danneggiare il dispositivo, non superare
il limite di ingresso. Non applicare tensione ai
terminali di ingresso. Scaricare il condensatore prima
di eseguire il test.
ITALIANO
Il misuratore LCR è in grado di registrare i dati in
remoto. Per utilizzare questa funzione, è necessario
un cavo IR-USB (U5481A, acquistato
separatamente) e il software Keysight GUI Data
Logger (scaricabile dal sito www.keysight.com/
find/hhTechLib).
Keysight U1731C/U1732C/U1733C Guida rapida 37
Page 38

ITALIANO
(+12 V CC)
Schermata di
visualizzazione
Tastierino
Porta di
comunicazione IR
Supporto inclinato
Coperchio batteria
(Sollevare il supporto
inclinato per accedere)
Jack d'ingresso per
adattatore di
corrente esterno
Terminali/presa di
ingresso
NOTA
Panoramica del misuratore LCR
Il jack d'ingresso dell'adattatore di corrente da CA a
CC richiede una tensione di ingresso di +12 V CC.
38 Keysight U1731C/U1732C/U1733C Guida rapida
Page 39

Panoramica sul tastierino
ESR
Rec
Hold
Save
Limit
DQO
DCR
Freq.
Auto
Range
P S
ZLCR
Tol%
Cal
Null
Legenda
Azione del tasto una volta premuto:
Meno di 1 secondo Oltre 1 secondo
Accende o spegne il
misuratore LCR
Avvia o interrompe la modalità
di identificazione automatica
Mantiene o elimina l'attuale
lettura sul display
Consente di selezionare la
misurazione del fattore di
dissipazione (D), fattore di
qualità (Q) e angolo di fase (θ)
Consente di selezionare una
frequenza di test
-
Abilita o disabilita la modalità
ESR (resistenza equivalente
in serie)
[a]
Avvia o interrompe la modalità di
registrazione statica
Abilita o disabilita la modalità di
confronto dei limiti
Abilita o disabilita la modalità
DCR (resistenza alla corrente
continua)
[b]
ITALIANO
Disabilita l'Auto range e imposta
la modalità manuale
Abilita l'Auto range
Consente di selezionare la
misurazione dell'impendenza
(Z), dell'induttanza (L), della
capacitanza (C) e della
Consente di selezionare la
modalità parallela e seriale
resistenza (R)
Accende o spegne la
[c]
Abilità la modalità di tolleranza
retroilluminazione del display
disabilita la modalità di tolleranza
(se la tolleranza è attivata)
Imposta la modalità di
Imposta la modalità Null/Relative
calibrazione aperta/breve per
l'intervallo selezionato e la
frequenza di test
[a] Solo Auto range. La modalità ESR è la modalità predefinita per la misurazione
della capacitanza (C).
o
[b] Applicabile solo sul modello U1733C. La modalità DCR è la modalità predefinita
per la misurazione dell'induttanza.
[c] Applicabile solo sul modello U1732C e U1733C.
Keysight U1731C/U1732C/U1733C Guida rapida 39
Page 40

Misurazioni LCR
NOTA
Identificazione automatica (Ai)
Premere il pulsante per identificare
automaticamente e selezionare la funzione di
misurazione principale (L, C o R), la funzione di
ITALIANO
misurazione secondaria (D, Q o
θ) e la modalità di
misurazione (parallela o seriale) per il disposito
sottoposto a test.
Il misuratore LCR si accende automaticamente in
modalità Ai. compare a sinistra del display se la
modalità Ai è abilitata.
– lampeggia quando il misuratore LCR è in
fase di identificazione di una funzione e
modalità di misurazione.
– Premere di nuovo una volta visualizzato
per uscire dalla modalità Ai.
40 Keysight U1731C/U1732C/U1733C Guida rapida
Page 41

Fasi di misurazione LCR
ITALIANO
Misurazioni secondarie (D/Q/θ)
Keysight U1731C/U1732C/U1733C Guida rapida 41
Page 42

ITALIANO
Inductor
2
Capacitor
2
Resistor
2
Misurazioni dell'induttanza (L)
Misurazioni della capacitanza (C)
Misurazioni della resistenza (R)
42 Keysight U1731C/U1732C/U1733C Guida rapida
Page 43

Keysight U1731C/
U1732C/U1733C
Multímetro portátil LCR
Guía de
inicio rápido
Page 44

Contacto con Keysight
PRECAUCIÓN
ADVERTENCIA
ESPAÑOL
www.keysight.com/find/assist
(información de contacto en todo el
mundo para reparación y servicio)
Seguridad e información
sobre compatibilidad
electromagnética
Este multímetro está certificado en
forma segura en conformidad con
los siguientes requisitos de
seguridad y EMC:
– IEC61010-1:2001/
EN61010-1:2001
(segunda edición)
– IEC61326-1:2005/
EN61326-1:2006
– Canadá: ICES/NMB-001:
Edición 4, junio de 2006
– Australia/Nueva Zelanda:
AS/NZS CISPR11:2004
Notificaciones de seguridad
Un aviso de ADVERTENCIA
indica peligro. Informa sobre un
procedimiento o práctica
operativa que, si no se realiza o
cumple en forma correcta,
podría causar lesiones o muerte.
En caso de encontrar un aviso de
ADVERTENCIA, interrumpa el
procedimiento hasta que se
hayan comprendido y cumplido
las condiciones indicadas.
Símbolos de seguridad
Terminal de conexión
(a tierra)
Equipo protegido
completamente con doble
aislamiento o aislamiento
reforzado
Precaución, riesgo de
electrochoque
Un aviso de PRECAUCIÓN indica
peligro. Informa sobre un
procedimiento o práctica operativa
que, si no se realiza o se cumple en
forma correcta, puede resultar en
daños al producto o pérdida de
información importante. En caso
de encontrar un aviso de
PRECAUCIÓN no prosiga hasta que
se hayan comprendido y cumplido
totalmente las condiciones
indicadas.
Precaución, peligro
(consulte este manual para
obtener información
específica respecto de
cualquier Advertencia o
Precaución)
Para obtener información sobre seguridad más detallada, consulte el
Manual del usuario de U1731C/U1732C/U1733C Multímetro portátil
LCR Keysight.
44 Keysight U1731C/U1732C/U1733C Guía de inicio rápido
Page 45

Verifique si recibió los siguientes elementos
NOTA
incluidos con su multímetro LCR:
✔ Un par de cables de prueba con pinzas de
conexión
✔ Una batería alcalina de 9 V
✔ Copia impresa de la Guía de inicio rápido de
U1731C/U1732C/U1733C
✔ Copia impresa del Certificado de calibración
Si falta algo o hay algo dañado, guarde los
elementos que recibió y comuníquese con la
oficina de ventas de Keysight más cercana.
Las descripciones e instrucciones de esta guía se
aplican a los U1731C, U1732C y U1733C
Multímetro portátil LCRs.
ESPAÑOL
El modelo U1733C aparece en todas las ilustraciones.
Todos los documentos y software relacionados
están disponibles para descarga en
www.keysight.com/find/hhTechLib.
Keysight U1731C/U1732C/U1733C Guía de inicio rápido 45
Page 46

ESPAÑOL
Instalación de las pilas
Su multímetro LCR se alimenta con una sola pila
alcalina de 9 V (incluida con el envío).
1 Apague el multímetro
LCR y retire los cables de
prueba de los terminales.
2 Levante la base de
inclinación y afloje el
tornillo con un
destornillador Phillips.
3 Quite la cubierta de las pilas y observe las
marcas de polaridad.
4 Inserte la pila y vuelva a colocar la cubierta
y el tornillo.
46 Keysight U1731C/U1732C/U1733C Guía de inicio rápido
Page 47

Encienda el multímetro LCR
Botón de
encendido
ADVERTENCIA
NOTA
Para encender su multímetro LCR, presione el
botón de encendido una vez.
Para evitar daños al dispositivo, no exceda el límite
de entrada. No aplique tensión a los terminales de
entrada. Descargue el capacitor antes de realizar
la prueba.
ESPAÑOL
Su multímetro LCR tiene capacidad de registro de
datos remoto. Para usar esta función, necesita un
cable IR-USB (U5481A, adquirido por separado) y el
Software Keysight GUI Data Logger (que puede
descargarse en www.keysight.com/find/hhTechLib).
Keysight U1731C/U1732C/U1733C Guía de inicio rápido 47
Page 48

ESPAÑOL
(+12 VCC)
Pantalla de
visualización
Teclado
Puerto de
comunicación IR
Base de inclinación
Cubierta de la batería
(Levante el soporte de
inclinación para poder
acceder)
Conector de entrada
adaptador de
corriente externo
Terminales de
entrada/zócalo
NOTA
El multímetro LCR de un vistazo
El conector de entrada adaptador de corriente
externo CA a CC requiere un voltaje de entrada de
+12 VCC.
48 Keysight U1731C/U1732C/U1733C Guía de inicio rápido
Page 49

El teclado
ESR
Rec
Hold
Save
Limit
DQO
DCR
Freq.
Auto
Range
P S
ZLCR
Tol%
Cal
Null
Leyenda
Respuesta de la tecla al presionarla para:
Menos de 1 segundo Más de 1 segundo
Enciende o apaga el
multímetro LCR
Inicia o detiene el modo de
identificación automática
Mantiene o libera la lectura
actual en la pantalla
Cambia entre la medición del
factor de disipación (D), factor de
calidad (Q), y ángulo de fase (θ)
Selecciona una frecuencia de
prueba
Desactiva el rango automático
y establece un rango manual
-
Activa o desactiva el modo ESR
(resistencia de serie equivalente)
Inicia o detiene el modo de
grabación estática
Activa o desactiva el modo de
comparación límite
Activa o desactiva el modo DCR
(resistencia de corriente directa)
Activa el rango automático
[a]
ESPAÑOL
[b]
Cambia entre la medición de
impedancia (Z), inductancia (L),
capacitancia (C), y resistencia (R)
Alterna entre el modo de circuito
en serie y paralelo
Activa o desactiva la luz de fondo
[c]
o desactiva el
Activa el modo de tolerancia
de la pantalla
modo de tolerancia (si la
tolerancia está habilitada)
Ingresa al modo de calibración
Establece el modo nulo/relativo
abierta/corto para el rango
y frecuencia de la prueba
seleccionados
[a] Rango automático solamente. El ESR modo sale a la medición de capacitancia
(C) de manera predeterminada.
[b] Aplicable para el modelo U1733C solamente. El modo DCR sale a la medición de
inductancia (L) de manera predeterminada.
[c] Aplicable para los modelos U1732C y U1733C solamente.
Keysight U1731C/U1732C/U1733C Guía de inicio rápido 49
Page 50

Cómo realizar mediciones LCR
NOTA
Identificación Automática (Ai)
Pulse el botón para identificar
automáticamente y seleccionar una función
principal de medición adecuada (L, C o R),
ESPAÑOL
función de medición secundaria (D, Q, o
θ), y el
modo de medición (paralelo o serie) para el
dispositivo bajo prueba.
El multímetro LCR se enciende en el modo Ai de
manera predeterminada. se muestra a la
izquierda de la pantalla cuando el modo Ai está
habilitado.
– parpadea cuando el multímetro LCR está
identificando una función y un modo de medición.
– Pulse de nuevo, mientras se muestra
para salir del modo Ai.
50 Keysight U1731C/U1732C/U1733C Guía de inicio rápido
Page 51

Pasos de la medición LCR
ESPAÑOL
Mediciones secundarias (D/Q/θ)
Keysight U1731C/U1732C/U1733C Guía de inicio rápido 51
Page 52

ESPAÑOL
Inductor
2
Capacitor
2
Resistor
2
Mediciones de inductancia (L)
Mediciones de capacitancia (C)
Mediciones de resistencia (R)
52 Keysight U1731C/U1732C/U1733C Guía de inicio rápido
Page 53

Keysight U1731C/
U1732C/U1733C 掌上
型 LCR 量測儀
快速入門
指南
Page 54

聯絡 Keysight
ᘜา
⨸ب
安全符號
www.keysight.com/find/assist
(
針對維護與服務的全球聯絡人資訊
安全和 EMC 資訊
此量測儀在安規上符合下列安全和
EMC 要求:
– IEC61010-1:2001/
– IEC 61326-1:2005/EN
– 加拿大:ICES/NMB-001:
– 澳洲 / 紐⻄蘭:
安全聲明
繁體中文
EN61010-1:2001 ( 第二版 )
61326-1:2006
第 4 期,2006 年 6 月
AS/NZS CISPR11:2004
)
接地端子
設備受到 「雙重絕緣」
或 「強化絕緣」的完整
保護
注意,有電擊的風險
注意,有發生危險的風
險 ( 請參閱儀器手冊,以
獲得特定的 「警告」或
「注意」資訊 )
「注意」通知代表發生危險狀況。它
提醒您注意,如果沒有正確執行或
遵守操作程序、作法或相關說明,
可能會導致產品毀損或重要資料遺
失。除非已經完全了解和滿足所指
定的條件,否則請不要在出現 「注
意」通知的狀態下繼續進行。
「警告」通知代表發生危險狀況。
它提醒您注意,如果沒有正確執行
或遵守操作程序、作法或相關說
明,可能會導致人員受傷或死亡。
除非已經完全了解或進行到所指
定的狀況,否則請不要在出現「警
告」通知的狀態下繼續進行。
如需進⼀步瞭解安全⽅⾯的詳細資訊,請參閱
《
Keysight U1731C/U1732C/U1733C
54 Keysight U1731C/U1732C/U1733C 快速入門指南
掌上型
LCR
量測儀 使用者指南》
。
Page 55

請檢查在出貨給您的 LCR 量測儀中是否包含下列
え⥘
品項:
✔ ⼀對鱷⿂夾式測試棒
✔ ⼀個 9 V 鹼性電池
✔ U1731C/U1732C/U1733C 快速入門指南的
紙本
✔ 校正證書的紙本
如果有任何品項遺失或損毀,請保留包裝材料,並
聯絡最近的 Keysight 經銷處。
本指南的敘述與說明適用於 U1731C、U1732C、
U1733C 和掌上型 LCR 量測儀。
所有圖示均為 U1733C 機型。
您可以從 www.keysight.com/find/hhTechLib 下載
所有相關文件與軟體。
繁體中文
Keysight U1731C/U1732C/U1733C 快速入門指南 55
Page 56

安裝電池
繁體中文
您的 LCR 量測儀是由 9 V 鹼性電池 ( 隨附 ) 提供
電源。
1 關閉 LCR 量測儀並從端
子取下測試棒。
2 拉起傾斜底座,使用尺寸
正確的 Phillips 螺絲起子
鬆開螺絲。
3 取下電池外蓋,仔細觀察
極性標誌。
4 放入電池,蓋上電池外蓋,將螺絲旋緊。
56 Keysight U1731C/U1732C/U1733C 快速入門指南
Page 57

開啟 LCR 量測儀
電源按鈕
⨸ب
え⥘
若要打開 LCR 量測儀電源,按⼀次電源按鈕即可。
為避免損壞此裝置,請勿超過輸入限制。請勿對輸入端
子施加電壓。進行測試前先將電容器放電。
LCR 量測儀可以遠端記錄資料。若要使用此項功能,
您需要有⼀條 IR-USB 纜線 (U5481A,需另外購買 )
以及 「Keysight GUI 資料記錄器軟體」
( 可從 www.keysight.com/find/hhTechLib 下載 )。
繁體中文
Keysight U1731C/U1732C/U1733C 快速入門指南 57
Page 58

LCR 量測儀⼀覽
(+12 VDC)
顯示器畫面
鍵台
IR 通訊埠
傾斜底座
電池外蓋
( 拉起傾斜底座查看
內部 )
外部電源配接器
輸入插孔
輸入端子 / 插槽
え⥘
繁體中文
外部的 AC 至 DC 電源配接器輸入插孔需要 +12 VDC
的輸入電壓。
58 Keysight U1731C/U1732C/U1733C 快速入門指南
Page 59

認識鍵盤
ESR
Rec
Hold
Save
Limit
DQO
DCR
Freq.
Auto
Range
P S
ZLCR
Tol%
Cal
Null
圖例
按住按鍵的時間不同時所執行的功能:
小於 1 秒 超過 1 秒
開啟或關閉 LCR 量測儀
啟動或停止自動辨識模式
按住或釋放顯示器上的目
前讀數
在損耗因數 (D)、品 質 因 數 (Q)
和相角 (θ) 測量之間切換
選取測試頻率
停用自動調整範圍並設定
為手動調整範圍
在阻抗 (Z)、感 應係 數 (L)、電
容 (C) 和電阻 (R) 之間切換
-
啟用或停用 ESR ( 等效串聯電
阻 ) 模式
[a]
啟動或停止靜態記錄模式
啟用或停用極限比較模式
啟用或停用 DCR ( 直流電阻 )
[b]
模式
啟用自動調整範圍
切換並聯和串聯電路模式
繁體中文
啟用公差模式
設定空值 / 相對模式
[a] 僅自動調整範圍。預設 ESR 模式會退出至電容 (C) 測量。
[b] 僅適用於 U1733C 機型。DCR 模式預設會退出至感應係數 (L) 量測
[c] 僅適用於 U1732C 和 U1733C 機型。
Keysight U1731C/U1732C/U1733C 快速入門指南 59
開啟或關閉背光顯示
[c]
,或 停
用公差模式 ( 如果啟用公差
的話 )
針對所選取的範圍和測試頻
率,進 入 open/short 校正模式
Page 60

執行 LCR 測量
え⥘
自動辨識 (Ai)
按 按鈕以自動辨識並選取適當的主要測量功
繁體中文
能 (L、C 或 R)、次要測量功能 (D、Q 或
θ),以及
被測裝置 (DUT) 的測量模式 ( 並聯或串聯 )。
預設 LCR 量測儀啟動時會在 Ai 模式。啟用 Ai 模 式
時, 會顯示 顯示器畫⾯左側。
– 當 LCR 量測儀正在辨識測量功能和模式會閃爍。
– 再按 ⼀次 ( 顯示時 ) 以離開 Ai 模式。
LCR 測量步驟
60 Keysight U1731C/U1732C/U1733C 快速入門指南
Page 61

次要 (D/Q/θ) 測量
Inductor
2
Capacitor
2
Resistor
2
測量感應係數 (L)
測量電容 (C)
測量電阻 (R)
繁體中文
Keysight U1731C/U1732C/U1733C 快速入門指南 61
Page 62

繁體中文
本頁預留空白。
62 Keysight U1731C/U1732C/U1733C 快速入門指南
Page 63

Keysight U1251B 和
U1252B 手持式数字
万用表
快速入门
指南
Page 64

联系 Keysight
ቅᗹ
䆜
安全标志
www.keysight.com/find/assist
( 针对维修和服务的全球联系信息 )
安全和 EMC 信息
此仪表经过安全认证,符合以下安
全和 EMC 要求:
– IEC61010-1:2001/
EN61010-1:2001 (第二版)
– IEC 61326-1:2005/
EN 61326-1:2006
– 加拿大:ICES/NMB-001:
2006 年 6 月第 4 期
– 澳大利亚 / 新西兰:
AS/NZS CISPR11:2004
安全声明
接地端
设备采用双重绝缘或加强
绝缘技术进行全面保护
小心,电击风险
小心,有危险 (请参阅
本仪器手册了解具体的
“ 警告 ” 或 “ 小心 ” 信息)
小心标志表示有危险。它要求在执
行操作步骤时必须加以注意,如果
不正确地执行或不遵守操作步骤,
简体中文
则可能导致产品损坏或重要数据
丢失。在没有完全理解指定的条件
且不满足这些条件的情况下,请勿
继续执行小心标志所指示的任何
操作。
“ 警告 ” 标志表示有危险。它要求
在执行操作步骤时必须加以注
意,如果不正确地执行操作或不
遵守操作步骤,则可能导致人身
伤亡。在没有完全理解指定的条
件且不满足这些条件的情况下,
请勿继续执行 “ 警告 ”标志所指示
的任何操作。
有关进一步的安全详细信息,请参阅
Keysight U1251B
64 Keysight U1251B 和 U1252B 快速入门指南
和
U1252B
手持式数字万用表用户指南
。
Page 65

请确认已收到随 LCR 仪表一起提供的下列物品:
⌞ᝅ
✔ 一对钳夹测试引线
✔ 一节 9 V 碱性电池
✔ U1731C/U1732C/U1733C 快速入门指南的印
刷副本
✔ 校准证明的印刷副本
如果任何物品缺少或损坏,请保留包装材料,并
与离您最近的 Keysight 销售办事处联系。
本指南中的描述和说明适用于 U1731C、U1732C 和
U1733C 手持式 LCR 仪表。
型号 U1733C 会出现在所有插图中。
所有相关文档和软件可从以下地址下载:
www.keysight.com/find/hhTechLib。
简体中文
Keysight U1251B 和 U1252B 快速入门指南 65
Page 66

安装电池
LCR 仪表由一节 9 V 碱性电池 (此仪表附随的电
池)供电。
1 关闭 LCR 仪表,然后从
端子卸下测试引线。
2 抬起倾斜座,用合适的十
字螺丝刀将螺丝拧下。
3 取下电池盖,观察电极
标记。
4 插入电池,重新装上电池盖和螺丝。
简体中文
66 Keysight U1251B 和 U1252B 快速入门指南
Page 67

打开 LCR 仪表
电源按钮
䆜
⌞ᝅ
要打开 LCR 仪表,请按一下电源按钮。
为避免损坏本设备,请勿超出输入限值。不要向输入端
子施加电压。测试前进行电容器放电。
使用 LCR 仪表可以进行远程数据记录。要使用此功
能,您需要一根 IR-USB 电缆 (U5481A,单独购
买),以及 Keysight GUI Data Logger 软件 (可从
www.keysight.com/find/hhTechLib 下载)。
简体中文
Keysight U1251B 和 U1252B 快速入门指南 67
Page 68

LCR 仪表简介
(+12 VDC)
显示屏
键盘
IR 通信端口
倾斜座
电池盖
(抬起倾斜座即可接触
到它)
外部电源适配器输入孔
输入端子 / 套接口
⌞ᝅ
简体中文
外部 AC-DC 电源适配器输入插孔要求输入电压为
+12 VDC。
68 Keysight U1251B 和 U1252B 快速入门指南
Page 69

了解键盘
ESR
Rec
Hold
Save
Limit
DQO
DCR
Freq.
Auto
Range
P S
ZLCR
Tol%
Cal
Null
图例
根据按键时间的不同,键的响应也不同:
不到 1 秒 超过 1 秒
打开或关闭 LCR 仪表
-
启用或禁用 ESR (等效串行
启动或停止自动识别模式
保留或释放显示屏上的当前
读数
电阻)模式
启动或停止静态记录模式
[a]
在耗散因子 (D)、质 量 因 子 (Q)
和相位角 (θ) 测量之间切换
启用或禁用限值比较模式
启用或禁用 DCR (直流电阻)
选择测试频率
模式
[b]
禁用自动量程并设置手动量程 启用自动量程
在阻抗 (Z)、电 感 (L)、电 容 (C)
和电阻 (R) 测量之间切换
在并行和串行电路模式之间
切换
简体中文
启用容差模式
设置空 / 相对模式
[a] 仅自动量程。默认情况下, ESR 模式会退出到电容 (C) 测量模式。
[b] 仅适用于 U1733C 型号。默认情况下, DCR 模式会退出到电感 (L) 测量
模式。
[c] 仅适用于 U1732C 和 U1733C 型号。
Keysight U1251B 和 U1252B 快速入门指南 69
打开或关闭背光灯显示屏
[c]
,
或禁用容差模式 (如果启用
了容差)
对于选定量程和测试频率,
进入开路 / 短路校准模式
Page 70

执行 LCR 测量
⌞ᝅ
自动识别 (Ai)
按 按钮可以针对被测设备自动识别并选择适
当的主要测量函数 (L、 C 或 R)、辅助测量函数
简体中文
(D、 Q 或
θ)和测量模式 (并行或串行)。
默认情况下, LCR 仪表会在 Ai 模式下打开。在启用
Ai 模式后, 会显示在显示屏左侧。
– 会在 LCR 仪表识别测量函数和模式时闪烁。
– 在显示 时再次按 可退出 Ai 模式。
LCR 测量步骤
70 Keysight U1251B 和 U1252B 快速入门指南
Page 71

辅助 (D/Q/θ) 测量
Inductor
2
Capacitor
2
Resistor
2
电感 (L) 测量
电容 (C) 测量
电阻 (R) 测量
简体中文
Keysight U1251B 和 U1252B 快速入门指南 71
Page 72

简体中文
本页特意留为空白。
72 Keysight U1251B 和 U1252B 快速入门指南
Page 73

Keysight U1731C/
U1732C/U1733C ハン
ドヘルド LCR メータ
クイック・
スタート・
ガイド
Page 74

Keysight への連絡
ὀព
㆙࿌
www.keysight.co.jp/find/assist
( 修理/サービスのためのワール
ドワイドのお問い合わせ先 )
安全および EMC 情報
このメータは、以下の安全要件お
よび EMC 要件に基づいて安全性
が認証されています。
– IEC61010-1:2001/
EN61010-1:2001
(Second Edition)
– IEC 61326-1:2005/
EN 61326-1:2006
– カナダ:ICES/NMB-001:
Issue 4、2006 年 6 月
– オーストラリア/ニュージーラ
ンド:AS/NZS CISPR11:2004
安全に関する注意事項
警告の表示は、危険を表しま
す。ここに示す操作手順や規則
などを正しく実行または遵守し
ないと、怪我または死亡のおそ
れがあります。指定された条件
を完全に理解し、それが満たさ
れていることを確認するまで、
警告の指示より先に進まないで
ください。
安全記号
グランド端子
機器全体を二重絶縁ま
たは強化絶縁で保護
注意、感電の危険あり
日本語
注意の表示は、危険を表します。
ここに示す操作手順や規則などを
正しく実行または遵守しないと、
製品の損傷または重要なデータの
損失を招くおそれがあります。指
定された条件を完全に理解し、そ
れが満たされていることを確認す
るまで、注意の指示より先に進ま
ないでください。
注意、危険あり(具体
的な警告または注意情
報については測定器の
マニュアルを参照)
『
Keysight U1731C/U1732C/U1733C
74 Keysight U1731C/U1732C/U1733C クイック・スタート・ガイド
詳細な安全情報については、
ハンドヘルド
』を参照してください。
Guide
LCR
メータ
User's
Page 75

LCR メータの梱包に以下の付属品が揃っている
ὀグ
ことを確認します。
✔ ワニ口クリップ・テスト・リード 1 対
✔ 9 V アルカリ電池 1 個
✔ U1731C/U1732C/U1733C クイック・スター
ト・ガイドの印刷版
✔ 校正証明書の印刷版
上記のいずれかが欠品しているか損傷している
場合は、梱包材料を保存しておき、最寄りの
Keysight 販売窓口までご連絡ください。
本ガイドの説明と手順は、U1731C、U1732C、
U1733C ハンドヘルド LCR メータに当てはまり
ます。
図にはすべてモデル U1733C が示されています。
関連するすべてのドキュメントとソフトウェアは、
www.keysight.co.jp/find/hhTechLib からダウン
ロードできます。
Keysight U1731C/U1732C/U1733C クイック・スタート・ガイド 75
日本語
Page 76

電池の装着
LCR メータは、9 V アルカリ電池 1 個(出荷時
に付属)で動作します。
1 LCR メータをオフにし、
2 傾斜スタンドを持ち上
3 電池カバーを取り外し、+/-の表示を確
4 電池を挿入し、電池カバーとねじを取り付
端子からテスト・リー
ドを取り外します。
げて、適切なプラスね
じドライバでねじを緩
めます。
認します。
けます。
日本語
76 Keysight U1731C/U1732C/U1733C クイック・スタート・ガイド
Page 77

LCR メータをオンにする
電源オン・
ボタン
㆙࿌
ὀグ
LCR メータをオンにするには、電源オン・ボタ
ンを 1 回押します。
デバイスへの損傷を避けるために、入力リミットを超
えないようにしてください。入力端子に電圧を印加し
ないでください。テスト前にキャパシタを放電してく
ださい。
LCR メータにはリモート・データ・ロギング機能
があります。この機能を使用するには、IR-USB
ケーブル(U5481A、別売)と Keysight GUI Data
Logger ソフトウェア(www.keysight.co.jp/find/
hhTechLib からダウンロード可能)が必要です。
日本語
Keysight U1731C/U1732C/U1733C クイック・スタート・ガイド 77
Page 78

LCR メータの概観
(+ 12 Vdc)
ディスプレイ画面
IR 通信ポート
傾斜スタンド
バッテリ・カバー
(アクセスするには傾
斜スタンドを持ち上げ
ます)
外部電源アダプ
タ入力ジャック
キーパッド
入力端子/ソケット
ὀグ
日本語
外部 AC - DC 電源アダプタ入力ジャックには、
+ 12 Vdc の入力電圧を供給する必要があります。
78 Keysight U1731C/U1732C/U1733C クイック・スタート・ガイド
Page 79

キーパッドの機能
ESR
Rec
Hold
Save
Limit
DQO
DCR
Freq.
Auto
Range
P S
ZLCR
Tol%
Cal
Null
凡例
1 秒未満押した場合 1 秒以上押した場合
キーの機能
LCR メータをオン/オフし
ます
自動識別モードを開始/停
止します
ディスプレイ上の現在の
読み値を保持または解放
します
損失係数(D)、Q 値、位相
角(θ)測定を切り替えます
テスト周波数を選択します
オートレンジをオフにし、
手動レンジを設定します
インピーダンス(Z)、イン
-
ESR(等価直列抵抗)モー
ドをオン/オフします
[a]
静的記録モードを開始/停
止します
リミット比較モードをオン/
オフします
DCR(直流抵抗)モードを
オン/オフします
[b]
オートレンジをオンにし
ます
ダクタンス(L)、キャパシ
タンス(C)、抵抗(R)測
並列/直列回路モードを切
り替えます
定を切り替えます
ディスプレイのバックライ
許容値モードをオンにし
ます
トをオン/オフ
許容値モードをオフにしま
[c]
するか、
す(許容値がオンの場合)
選択されたレンジおよびテ
ヌル/相対モードを設定し
ます
スト周波数に対するオープ
ン/ショート校正モードに
入ります
[a] オートレンジのみ。ESR モードは、終了時にデフォルトでキャパシ
タンス(C)測定モードに移行します。
[b] U1733C モデルのみに当てはまります。DCR モードは、終了時にデ
フォルトでインダクタンス (L) 測定に移行します。
[c] U1732C および U1733C モデルのみに当てはまります。
日本語
Keysight U1731C/U1732C/U1733C クイック・スタート・ガイド 79
Page 80

LCR 測定の実行
ὀグ
自動識別(Ai)
ボタンを押すと、被試験デバイスに対する適
切なプライマリ測定機能(L、C、R)、セカンダ
リ測定機能(D、Q、
θ)、測定モード(並列また
は直列)が自動的に識別され、選択されます。
LCR メータは、電源投入時にはデフォルトで Ai
モードになります。Ai モードがオンのときには、
ディスプレイの左側に が表示されます。
– が点滅している間は、LCR メータが測定機
能とモードを識別しています。
– が表示されているときに をもう一度押
すと、Ai モードを終了します。
LCR 測定の手順
日本語
80 Keysight U1731C/U1732C/U1733C クイック・スタート・ガイド
Page 81

2 次(D/Q/θ)測定
Inductor
2
Capacitor
2
Resistor
2
インダクタンス(L)測定
キャパシタンス(C)測定
抵抗(R)測定
日本語
Keysight U1731C/U1732C/U1733C クイック・スタート・ガイド 81
Page 82

日本語
これは空白のページです。
82 Keysight U1731C/U1732C/U1733C クイック・スタート・ガイド
Page 83

Keysight U1731C/
U1732C/U1733C 핸드
헬드 LCR 미터
빠른 시작
설명서
Page 84

키사이트로 문의
㨰G㢌
GḔ
www.keysight.com/find/assist
( 수리 및 서비스를 위한 월드와이
드 연락처 정보 )
안전 및 EMC 정보
이 장치는 다음 안전 및 EMC 요구
사항에 따라 안전 인증을 받았습
니다 :
– IEC61010-1:2001/
EN61010-1:2001
(2 차 개정 )
– IEC 61326-1:2005/
EN 61326-1:2006
– 캐나다 : ICES/NMB-001:
Issue 4, June 2006
– 호주 / 뉴질랜드 : AS/NZS
CISPR11:2004
안전 고지
경고 고지는 위험 사항을 알려줍
니다 . 올바로 수행하거나 준수
하지 않으면 상해나 사망을 초래
할 수 있는 작동 절차와 실행 방
식 등에 주의를 요합니다 . 발생
한 상황을 완전히 이해하여 해결
하기 전에는 경고 고지 이후 내용
으로 넘어가지 마십시오 .
안전 기호
접지 단자
장비는 이중 절연 또는
강화 절연에 의해 전체
적으로 보호됩니다
주의 , 감전 위험
한국어
주의 고지는 위험 사항을 알려줍니
다 . 올바로 수행하거나 준수하지
않으면 제품이 손상되거나 중요한
데이터가 손실될 수 있는 작동 절차
와 실행 방식 등에 주의를 요합니다 .
발생한 상황을 완전히 이해하여 해
결하기 전에 주의 고지 이후 내용으
로 넘어가지 마십시오 .
안전 정보에 대한 자세한 내용은
주의 , 위험 요소가 있음
( 구체적인 경고 또는 주
의 정보는 장치 매뉴얼
을 참조하십시오 .)
Keysight U1731C/U1732C/U1733C
84 Keysight U1731C/U1732C/U1733C 빠른 시작 설명서
핸드헬드
조하십시오
LCR
.
미터 사용 설명서를 참
Page 85

LCR 미터의 배송품에 다음 물품을 받았는지 확인
㵬GḔ
하십시오 .
✔ 악어입 클립 테스트 리드 한 쌍
✔ 9V 알카라인 배터리 1 개
✔ U1731C/U1732C/U1733C 빠른 시작 설명서
인쇄본
✔ 교정 인증서 인쇄본
빠지거나 파손된 품목이 있으면 배송물을 보관하
고 가까운 Keysight 영업소로 연락하십시오 .
이 설명서의 설명 및 지침은 U1731C,U1732C 및
U1733C 핸드헬드 LCR 미터에 적용됩니다 .
U1733C 모델은 모든 그림에서 나타납니다 .
모든 관련된 문서 및 소프트웨어는 www.keysight.
com/find/hhTechLib 에서 다운로드할 수 있습니다 .
Keysight U1731C/U1732C/U1733C 빠른 시작 설명서 85
한국어
Page 86

배터리 설치
LCR 미터는 배송품에 포함된 9V 알카라인 배터리
하나로 작동됩니다 .
1 LCR 미터를 끄고 단자에
2 틸트 스탠드를 들어 올리
3 배터리 덮개를 분리하고 극성 표시를 확인합
4 배터리를 삽입하고 배터리 덮개와 나사를 다
서 테스트 리드를 분리합
니다 .
고 알맞은 십자 드라이버
로 나사를 풉니다 .
니다 .
시 장착합니다 .
한국어
86 Keysight U1731C/U1732C/U1733C 빠른 시작 설명서
Page 87

LCR 미터를 켭니다
전원 버튼
GḔ
㵬GḔ
LCR 미터 전원을 켜려면 전원 버튼을 한 번 누릅
니다 .
장치 손상을 피하려면 입력 제한을 초과하지 마십시오.
입력 단자에 전압을 공급하지 마십시오 . 검사 전에 캐
패시터를 방전시키십시오 .
이 LCR 미터는 원격 데이터 로깅을 할 수 있습니다 .
이 기능을 사용하려면 IR-USB 케이블 (U5481A, 별
도 구매 ) 과 Keysight GUI Data Logger 소프트웨어
(www.keysight.com/find/hhTechLib 에서 다운로드 )
가 필요합니다 .
한국어
Keysight U1731C/U1732C/U1733C 빠른 시작 설명서 87
Page 88

LCR 미터 살펴보기
(+12VDC)
디스플레이 스크린
키패드
IR 통신 포트
틸트 스탠드
배터리 커버
( 액세스하기 위해 틸
트 스탠드를 들어 올립
니다 .)
외부 전원 어댑터
입력 잭
입력 단자 / 소켓
㵬GḔ
한국어
외부 AC/DC 전원 어댑터 입력 잭은 +12VDC 의 입력
전압이 필요합니다 .
88 Keysight U1731C/U1732C/U1733C 빠른 시작 설명서
Page 89

키패드 개요
ESR
Rec
Hold
Save
Limit
DQO
DCR
Freq.
Auto
Range
P S
ZLCR
Tol%
Cal
Null
범례
누르는 시간에 따른 키 응답
1 초 미만 1 초 이상
LCR 미터를 켜거나 끕니다
자동 확인 모드를 시작하거
나 정지합니다
디스플레이의 현재 판독값
을 고정하거나 고정을 해제
합니다
손실 계수 (D), 양호도 (Q) 및
위상각 (θ) 측정 사이를 전환
합니다
테스트 주파수를 선택합니다
-
ESR( 등가 직렬 저항 ) 모드를
활성화하거나 비활성화합
[a]
니다
고정 기록 모드를 시작하거
나 정지합니다
제한 비교 모드를 활성화하
거나 비활성화합니다
DCR( 직류 저항 ) 모드를 활성
화하거나 비활성화합니다
[b]
자동 범위 조정을 비활성화
자동 범위 조정을 활성화합
하고 수동 범위 조정을 설정
니다
합니다
임피던스 (Z), 인덕턴스 (L),
커패시턴스 (C), 저항 (R) 측
정 사이를 전환합니다
병렬 및 직렬 회로 모드를 전
환합니다
백라이트 디스플레이를 켜
[c]
허용 오차 모드를 활성화합
니다
거나 끕니다
차가 활성화된 경우 , 허용 오
또는 허용 오
차 모드를 비활성화합니다
선택된 범위 및 테스트 주파
Null/Relative 모드를 설정합
니다
[a] 자동 범위 조정만 . ESR 모드는 기본 설정으로 커패시턴스 (C) 측정을
종료합니다 .
[b] U1733C 모델에만 해당됩니다 . DCR 모드는 기본 설정으로 인덕턴스 (L) 측
정을 종료합니다 .
수를 위해 open/short 캘리브
레이션 모드로 들어갑니다
한국어
[c] U1732C 및 U1733C 모델에만 해당됩니다 .
Keysight U1731C/U1732C/U1733C 빠른 시작 설명서 89
Page 90

LCR 측정 수행
㵬GḔ
자동 확인 (Ai)
자동 확인을 하려면 버튼을 누르고 테스트 중
인 장치에 대해 적절한 기본 측정 기능 (L, C 또는
R), 보조 측정 기능 (D, Q 또는
θ) 및 측정 모드 ( 병
렬 또는 직렬 ) 을 선택합니다 .
LCR 미터는 기본 설정으로 Ai 모드로 켜집니다 . Ai
모드가 활성화되어 있으면 가 디스플레이 화면
왼쪽에 나타납니다 .
– 는 LCR 미터가 측정 기능 및 모드를 확인할
때 깜박입니다 .
–Ai 모드를 종료하려면 가 나타날 때 를 다
시 누릅니다 .
LCR 측정 단계
한국어
90 Keysight U1731C/U1732C/U1733C 빠른 시작 설명서
Page 91

보조 (D/Q/θ) 측정
Inductor
2
Capacitor
2
Resistor
2
인덕턴스 (L) 측정
커패시턴스 (C) 측정
저항 (R) 측정
한국어
Keysight U1731C/U1732C/U1733C 빠른 시작 설명서 91
Page 92

한국어
이 페이지는 비어 있습니다 .
92 Keysight U1731C/U1732C/U1733C 빠른 시작 설명서
Page 93

Keysight U1731C/
U1732C/U1733C
Medidor LCR portátil
Guia de
início rápido
Page 94

Entre em contato com
CUIDADO
AVISO
a Keysight
www.keysight.com/find/assist
(informações de contato de reparo
e serviço)
Informações de segurança
e EMC
Este medidor tem a segurança
certificada em conformidade com
estes requisitos de segurança
e EMC:
– IEC 61010-1:2001/
EN61010-1:2001 (2ª edição)
– IEC 61326-1:2005/
EN 61326-1:2006
– Canadá: ICES/NMB-001:
Issue 4, junho de 2006
– Austrália/Nova Zelândia:
AS/NZS CISPR11:2004
O sinal AVISO indica perigo. Ele
chama a atenção para um
procedimento, prática ou algo
semelhante que, se não for
corretamente realizado ou
cumprido, pode resultar em
ferimentos pessoais ou morte.
Não prossiga após um sinal de
AVISO até que as condições
indicadas sejam completamente
compreendidas e atendidas.
Símbolos de segurança
Terminal terra
Equipamento protegido
com isolamento duplo ou
isolamento reforçado
PORTUGUÊS
Avisos de segurança
O sinal CUIDADO indica risco. Ele
chama a atenção para um
procedimento, prática ou algo
semelhante que, se não for
corretamente realizado ou
cumprido, pode avariar o produto
ou causar perda de dados
importantes. Não prossiga após
um sinal de CUIDADO até que as
condições indicadas sejam
completamente compreendidas e
atendidas.
Cuidado, risco de choque
elétrico
Cuidado, potencialmente
perigoso (consulte o
manual do instrumento
para informações
específicas sobre Aviso ou
Cuidado)
Para obter mais detalhes sobre segurança, consulte o
Guia do Usuário U1731C/U1732C/U1733C Med idor LCR portátil Keysight.
94 Keysight U1731C/U1732C/U1733C Guia de início rápido
Page 95

Verifique se você recebeu estes itens junto com o
NOTA
seu medidor LCR:
✔ Um par de fios de teste com fecho jacaré
✔ Uma bateria alcalina de 9 V
✔ Cópia Impressa do U1731C/U1732C/U1733C
Guia de início rápido
✔ Cópia Impressa do Certificado de Calibração
Se algum item não tiver vindo ou estiver com
defeito, guarde a embalagem e contate o
Escritório de Vendas Keysight mais próximo.
As descrições e a instruções neste guia se aplicam
aos U1731C, U1732C e U1733C Medidor LCR
portátils.
O modelo U1733C aparece em todas as ilustrações.
Todos os documentos e softwares relacionados
estão disponíveis para download em
www.keysight.com/find/hhTechLib.
Keysight U1731C/U1732C/U1733C Guia de início rápido 95
PORTUGUÊS
Page 96

Instalar as baterias
O medidor LCR funciona com uma bateria
alcalina de 9 V (inclusa).
1 Desligue o medidor LCR
e remova os fios de teste
dos terminais.
2 Levante o suporte
inclinável e solte os
parafusos com uma
chave Philips adequada.
3 Remova a tampa das baterias e observe as
marcações de polaridade.
4 Insira as baterias e recoloque a tampa e os
parafusos da bateria.
PORTUGUÊS
96 Keysight U1731C/U1732C/U1733C Guia de início rápido
Page 97

Ligar o medidor LCR
Botão
liga-desliga
AVISO
NOTA
Para LIGAR o medidor LCR, pressione o botão
Liga-Desliga uma vez.
Para evitar danos ao equipamento, não exceda os
limites das entradas. Não aplique tensão aos
terminais de entrada. Descarregue o capacitor antes
do teste.
O medidor LCR pode fazer registro remoto de
dados. Para usar esse recurso, você irá precisar de
um cabo IR-USB (U5481A, adquirido
separadamente) e o software Keysight GUI Data
Logger Software (que pode ser baixado de
www.keysight.com/find/hhTechLib).
PORTUGUÊS
Keysight U1731C/U1732C/U1733C Guia de início rápido 97
Page 98

Visão geral do medidor LCR
(+12 VCC)
Tela
Teclado
Porta de
comunicação IR
Suporte inclinável
Tampa d a bateria
(Levante o suporte,
para acesso)
Entrada do adaptador
externo de alimentação
Terminais/soquete de
entrada
NOTA
PORTUGUÊS
A tomada de entrada do adaptador de alimentação
CA para CC exige uma tensão de entrada de +12 VCC.
98 Keysight U1731C/U1732C/U1733C Guia de início rápido
Page 99

Noções básicas sobre o teclado
ESR
Rec
Hold
Save
Limit
DQO
DCR
Freq.
Auto
Range
P S
ZLCR
Tol%
Cal
Null
Resposta da tecla quando pressionada por:
Legenda
Menos de um segundo Mais de um segundo
Liga ou desliga o medidor LCR -
Inicia ou interrompe o modo de
identificação automática
Mantém ou libera a leitura no
visor
Alterna entre as medições de
fator de dissipação (D), fator de
qualidade (Q) e ângulo de fase (θ)
Seleciona uma frequência de teste
Desabilita o intervalo automático
e define um intervalo manual
Alterna ente as medições de
impedância (Z), indutância (L),
capacitância (C) e resistência (R)
Habilita ou desabilita o modo
ESR (resistência de série
equivalente)
[a]
Inicia ou interrompe o modo de
gravação estático
Habilita ou desabilita o modo de
comparação de limites
Habilita ou desabilita o modo
DCR (resistência de corrente
contínua)
[b]
Habilita o intervalo automático.
Alterna entre os modos de
circuito paralelo e em série
Habilita o modo de tolerância
Define o modo null/relative.
[a] Somente intervalo automático O modo ESR sai para medição de capacitância (C),
por padrão.
[b] Aplicável somente para o modelo U1733C O modo DCR saí para a medição de
indutância (L)por padrão.
[c] Aplicável somente para os modelos U1732C e U1733C.
Keysight U1731C/U1732C/U1733C Guia de início rápido 99
Liga ou desliga a iluminação
traseira do visor
[c]
ou desabilita
o modo de tolerância (se a
tolerância estiver habilitada)
Entra no modo de calibração
aberta/curta para o intervalo e
frequência de teste selecionados
PORTUGUÊS
Page 100

Fazer medições LCR
NOTA
Identificação automática (Ai)
Pressione o botão para identificar e
selecionar automaticamente uma função de
medição primária adequada (L, C ou R),
secundária (D, Q ou
θ) e modo de medição
(paralelo ou em série) para o dispositivo em teste.
O medidor LCR se liga no modo Ai, por padrão.
aparece na esquerda da tela, quando o modo Ai for
habilitado.
– pisca quando o medidor LCR estiver
identificando função e modo de medição.
– Pressione novamente, enquanto estiver
sendo mostrado no modo Ai.
Etapas da medição LCR
PORTUGUÊS
100 Keysight U1731C/U1732C/U1733C Guia de início rápido
 Loading...