

Page 1

Keysight Y1225A Rack Mount Kit
Installation
This installation note contains procedures for installing the Y1225A Rack Mount
Kit for the Keysight M9502A 2-slot AXIe Chassis in a standard EIA rack.
Parts List
The parts included with each rack mount adapter option and the support rail are
shown in the following table:
Quantity Description Part Number
1 Rack Flange Kit N5650-00020
4 Rack Flange Screws M4x6 Flat Head N/A
2 Support Rails M9018-00001
8 Channel Nuts (for support rail-to-rack) 0590-0804
4 Support Rail-to-Rack Screws - 10-32 x 0.5 2680-0278
4 Dress Adapter Screws for rack flanges E9900-06001
General Guidelines
In rack mounting the chassis, follow these guidelines:
1 Always begin installing the chassis and heavy instruments at the bottom of
the rack and work up. This maintains a lower center of gravity and reduces the
possibility of the rack tipping.
2 Anti-tipping feet, if available with the rack, should always be extended.
3 The heaviest instrument of chassis should always be mounted at the bottom
of the rack.
4 For maximum cooling and optimum rack thermal efficiency, place the
instrument or chassis with the greatest power consumption towards the top of
the rack. This promotes efficient cooling since heat rises when placed nearer
to the top of the rack, high power instruments will not unnecessarily heat
other instruments. However, in doing this, do not violate the guideline that
the heaviest instruments should be placed at the bottom of the rack.
5 If instruments or modules in the chassis are consuming maximum power, 1U
of rack space is required for ventilation below the chassis.
Page 2
Keysight Y1225A Rack Mount Kit Installation
Procedure
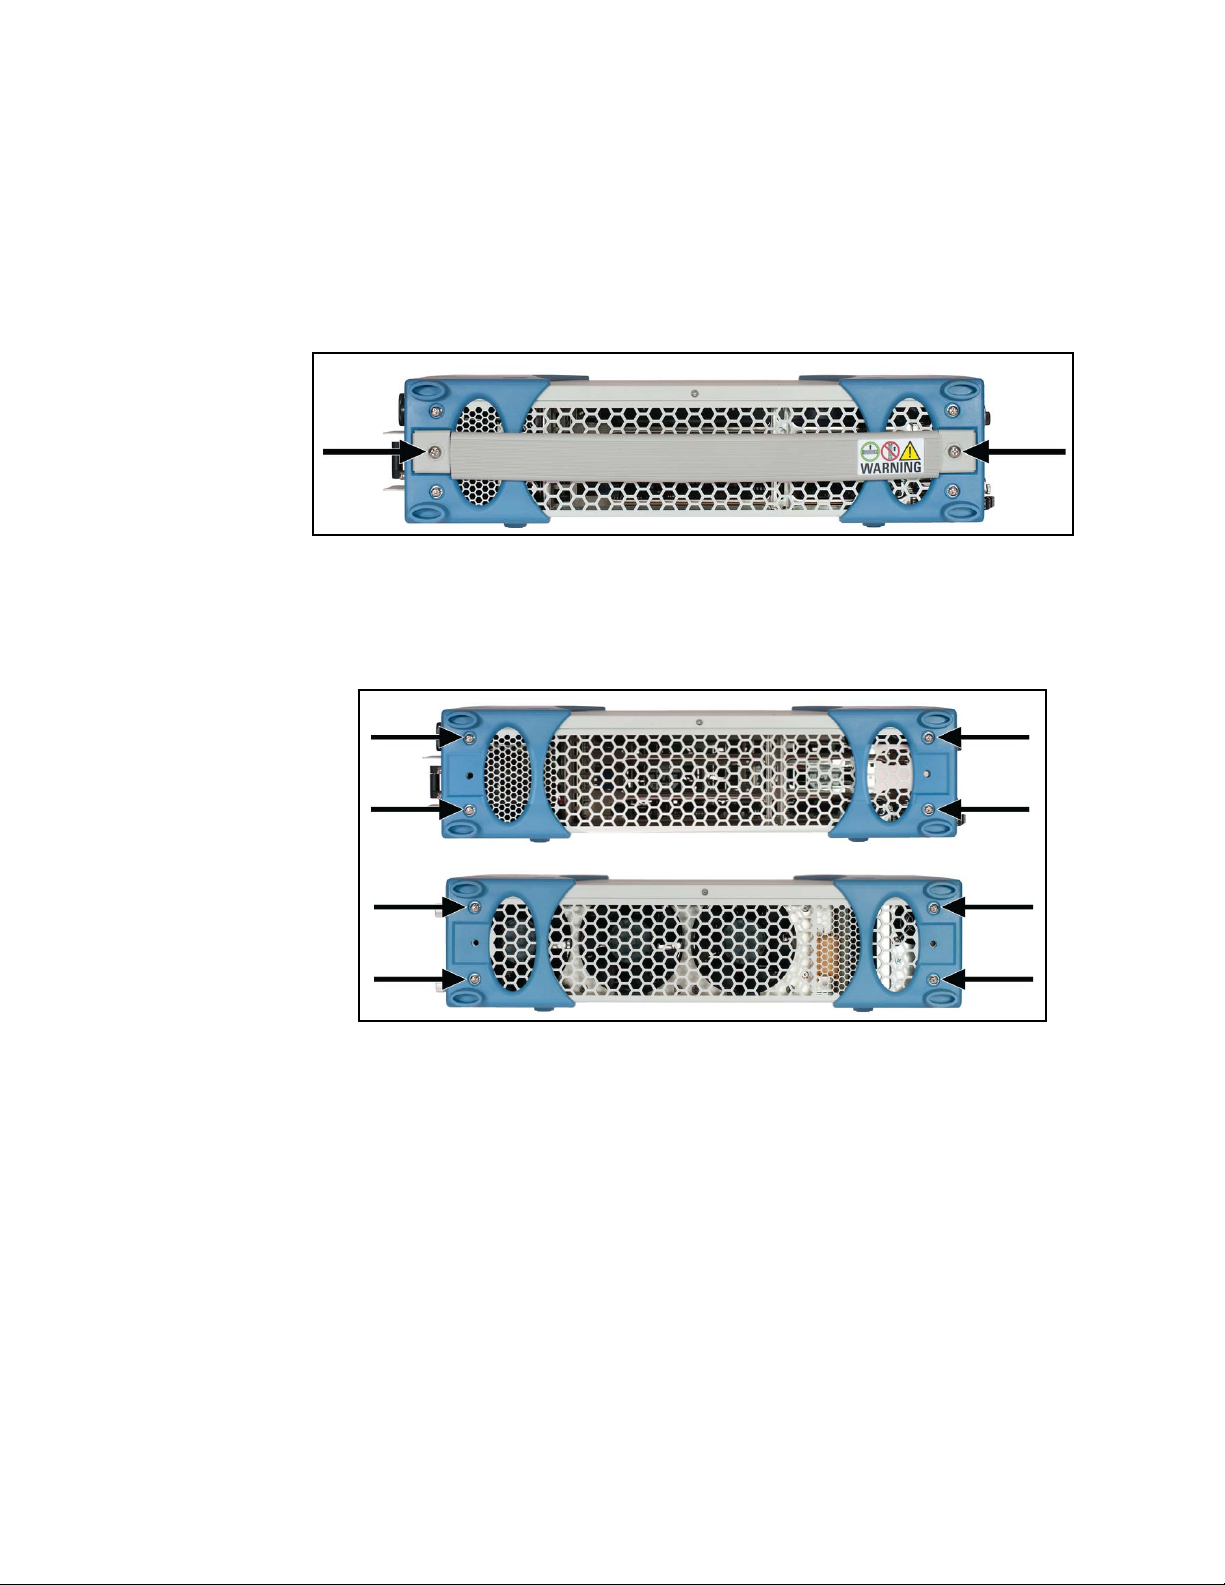
1 The M9502A AXIe chassis has a single carry handle which must be removed
before removing the bumpers. Remove the two #2 Phillips screws securing
the handle.See Figure 1.
Figure 1 . Removing the Carry Handle
2 Remove the four #2 Phillips screws from each side of both bumpers. See
Figure 2.
Figure 2 . Removing the Chassis Bumpers
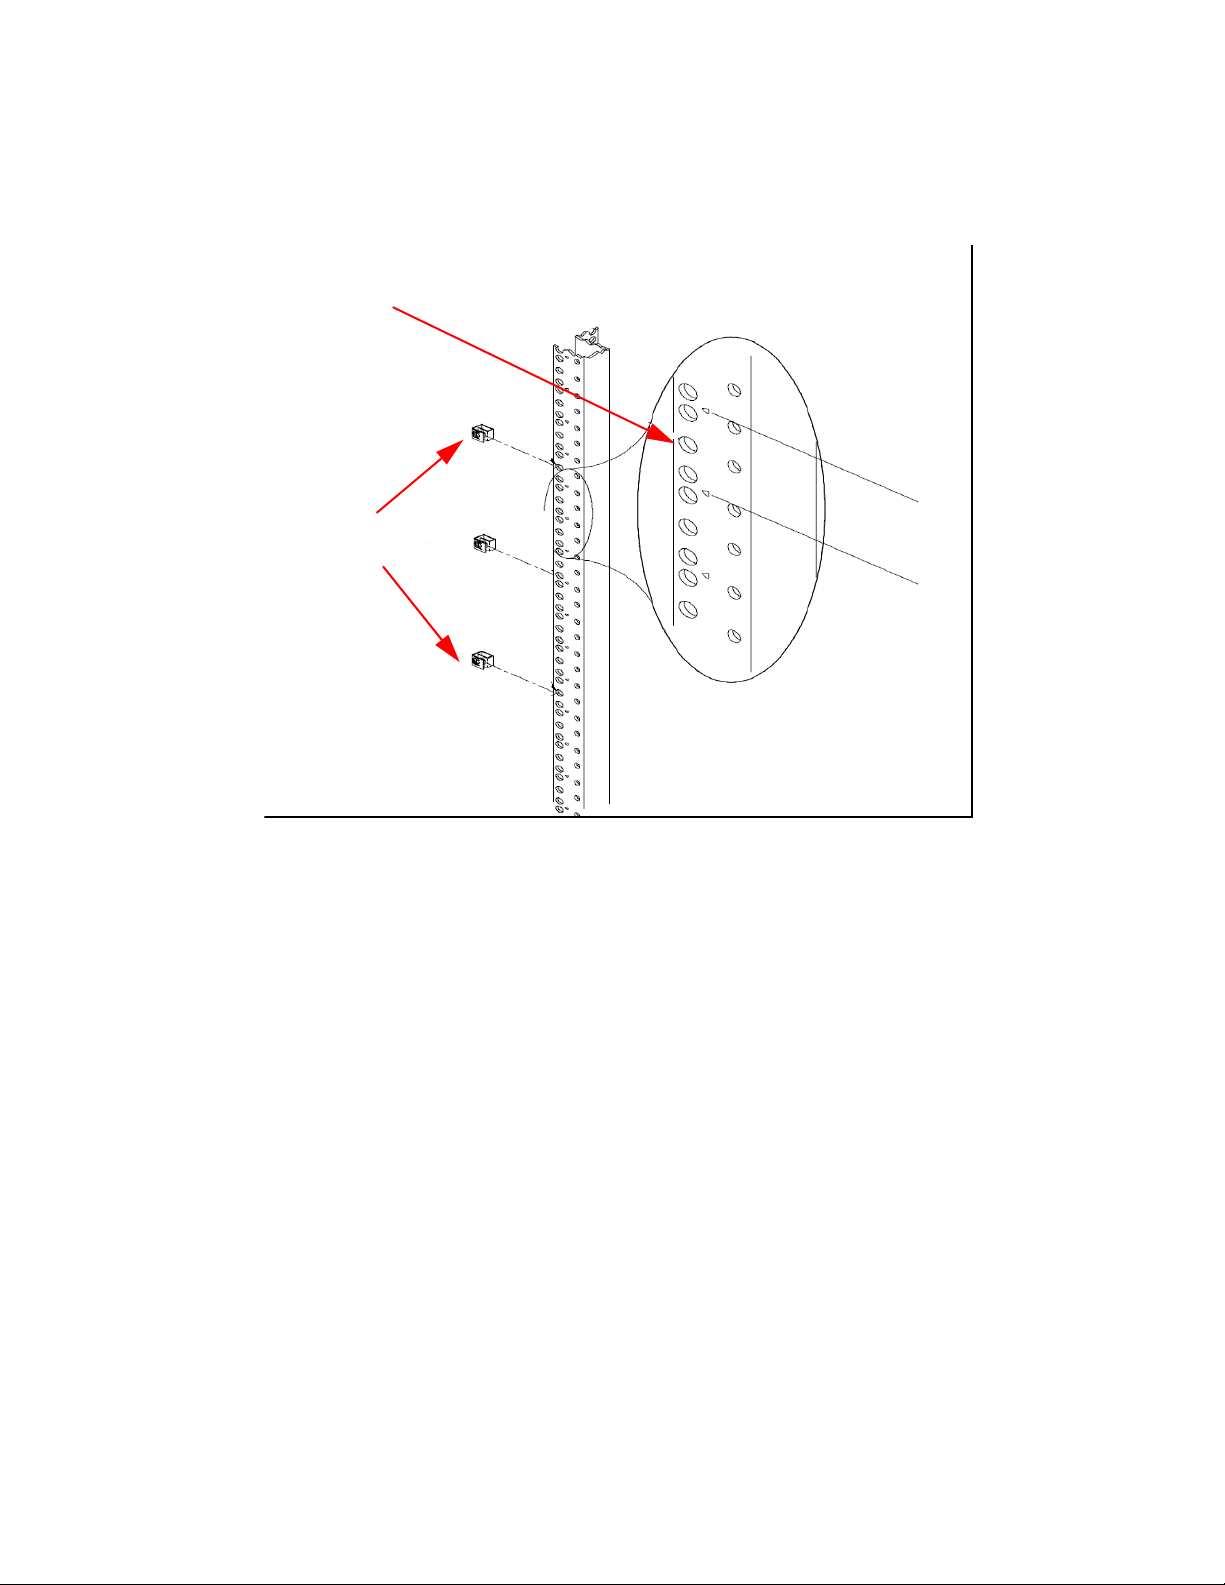
3 Using the rack mount flanges as templates, position the flanges on the rack’s
vertical columns where the chassis is to be mounted. Align the adapter holes
over the “center” holes of the EIA rack units. Slide channel nuts over the rack
holes to be used by the rack mount flanges. See Figure 3.
2 Keysight Y1225A Rack Mount Installation Note
Page 3
One
Rack
Unit
Rack Unit
Center Hole
Channel
Nuts
Keysight Y1225A Rack Mount Kit Installation
Figure 3 . Center Holes of EIA Rack, Attaching Channel Nuts
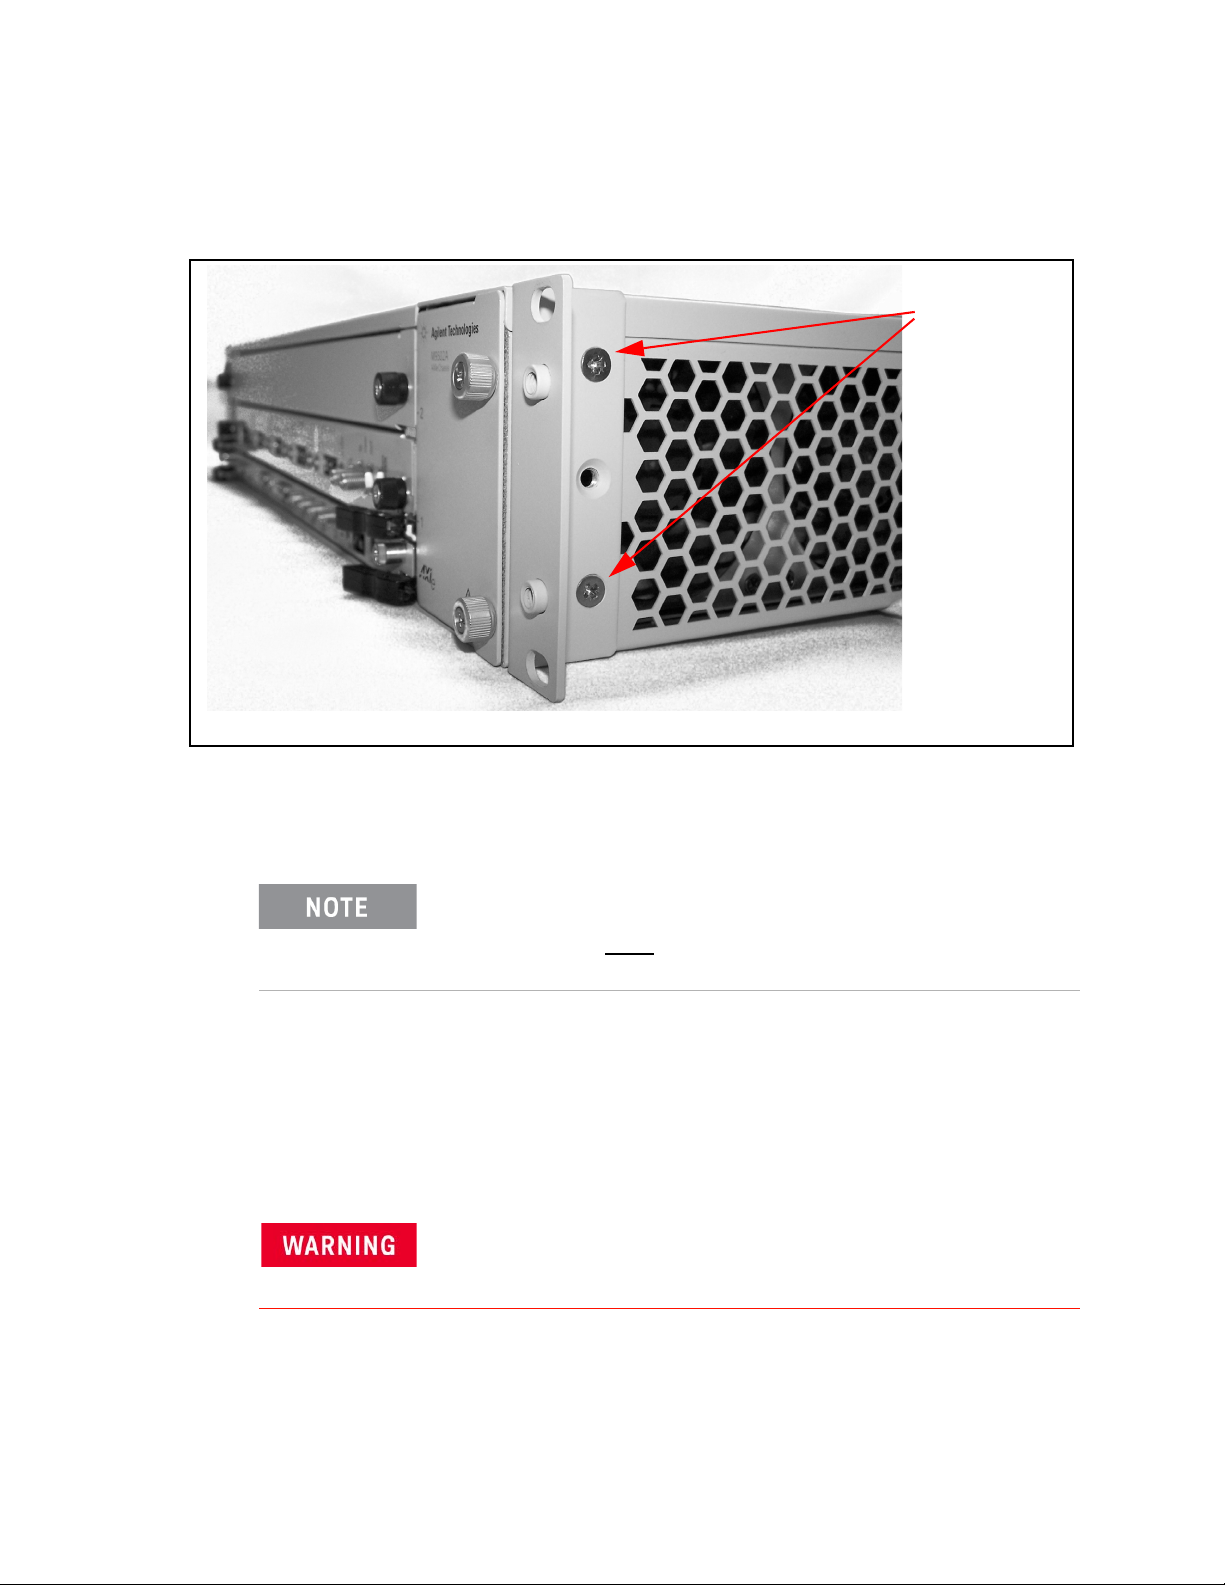
4 Attach the rack mount front handle flanges to the chassis. Refer to Figure 4.
Keysight Y1225A Rack Mount Installation Note 3
Page 4
Two F lathead
Screws
Keysight Y1225A Rack Mount Kit Installation
Figure 4 . Attaching Rack Mount Flanges to M9502A Chassis
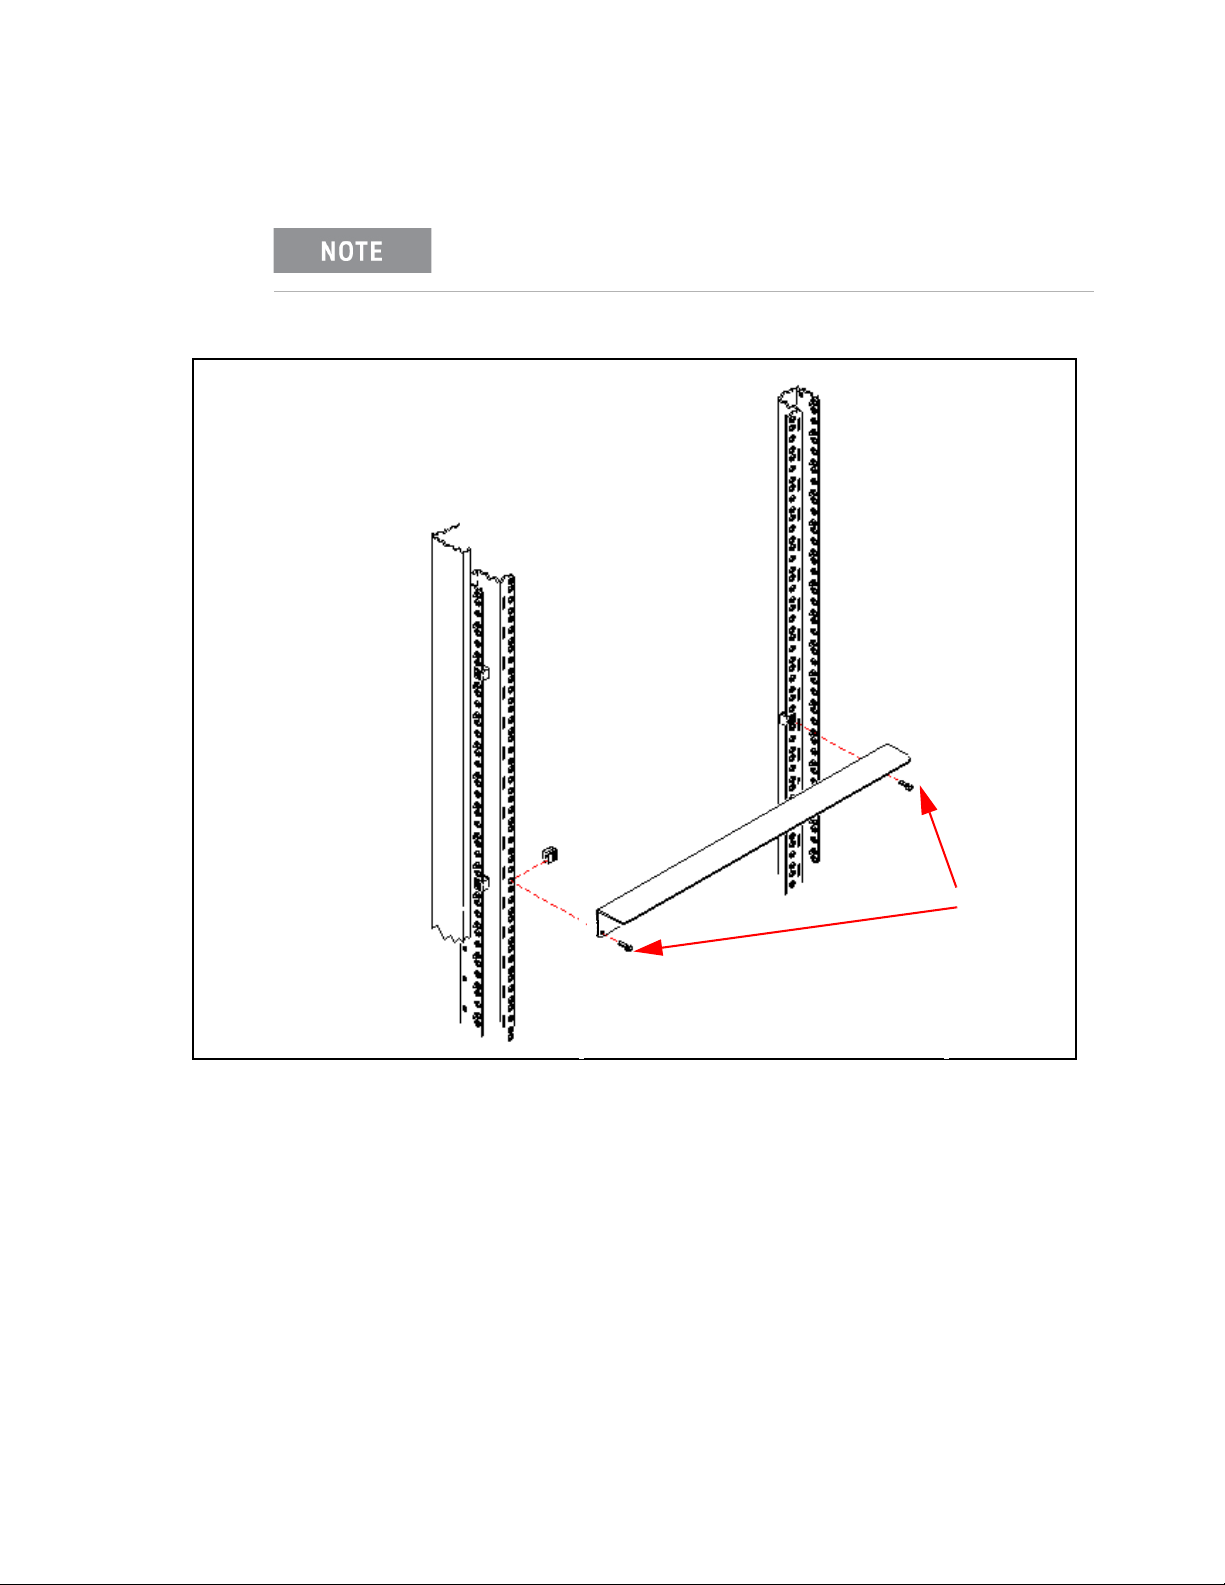
5 Position the rails on the rack’s vertical columns where the chassis is to be
mounted. Align the adapter holes over the “center” holes of the EIA rack units.
INSTALL THE SUPPORT RAILS UPSIDE DOWN IN THE RACK! To
provide adequate air flow to the ventilation holes on the sides of
the chassis, you must
install the rack slides upside down as
shown in Figure 5.
de channel nuts over the rack holes to be used by the support rails.
6 Sli
7 Attach the support rails UPSIDE DOWN to the rack’s inside vertical columns.
Use four channel nuts and the four 10-32 x 0.5 support rail-to-rack pan head
screws as shown in Figure 5.
8 Set the chassis onto the support rails.
To prevent injury during rack mounting, the chassis should
be empty and two people should lift the chassis into the
rack.
9 Slide
the M9502A chassis into the rack until the rack mount front handle
flanges are against the rack’s vertical columns. Secure the chassis to the rack
using the adapter dress screws.
4 Keysight Y1225A Rack Mount Installation Note
Page 5
Keysight Y1225A Rack Mount Kit Installation
10-32 x 0.5 screws
If the rack will be moved excessively or over long distances, you
should use a strap to secure the chassis to the rack slides.
Figure 5 . Attaching the Support Rails to the Rack.
Keysight Y1225A Rack Mount Installation Note 5
Page 6

This information is subject to change
without notice.
© Keysight Technologies 2014
Edition 2 September 2014
*Y1225-90001*
Y1225-90001
 Loading...