

Page 1
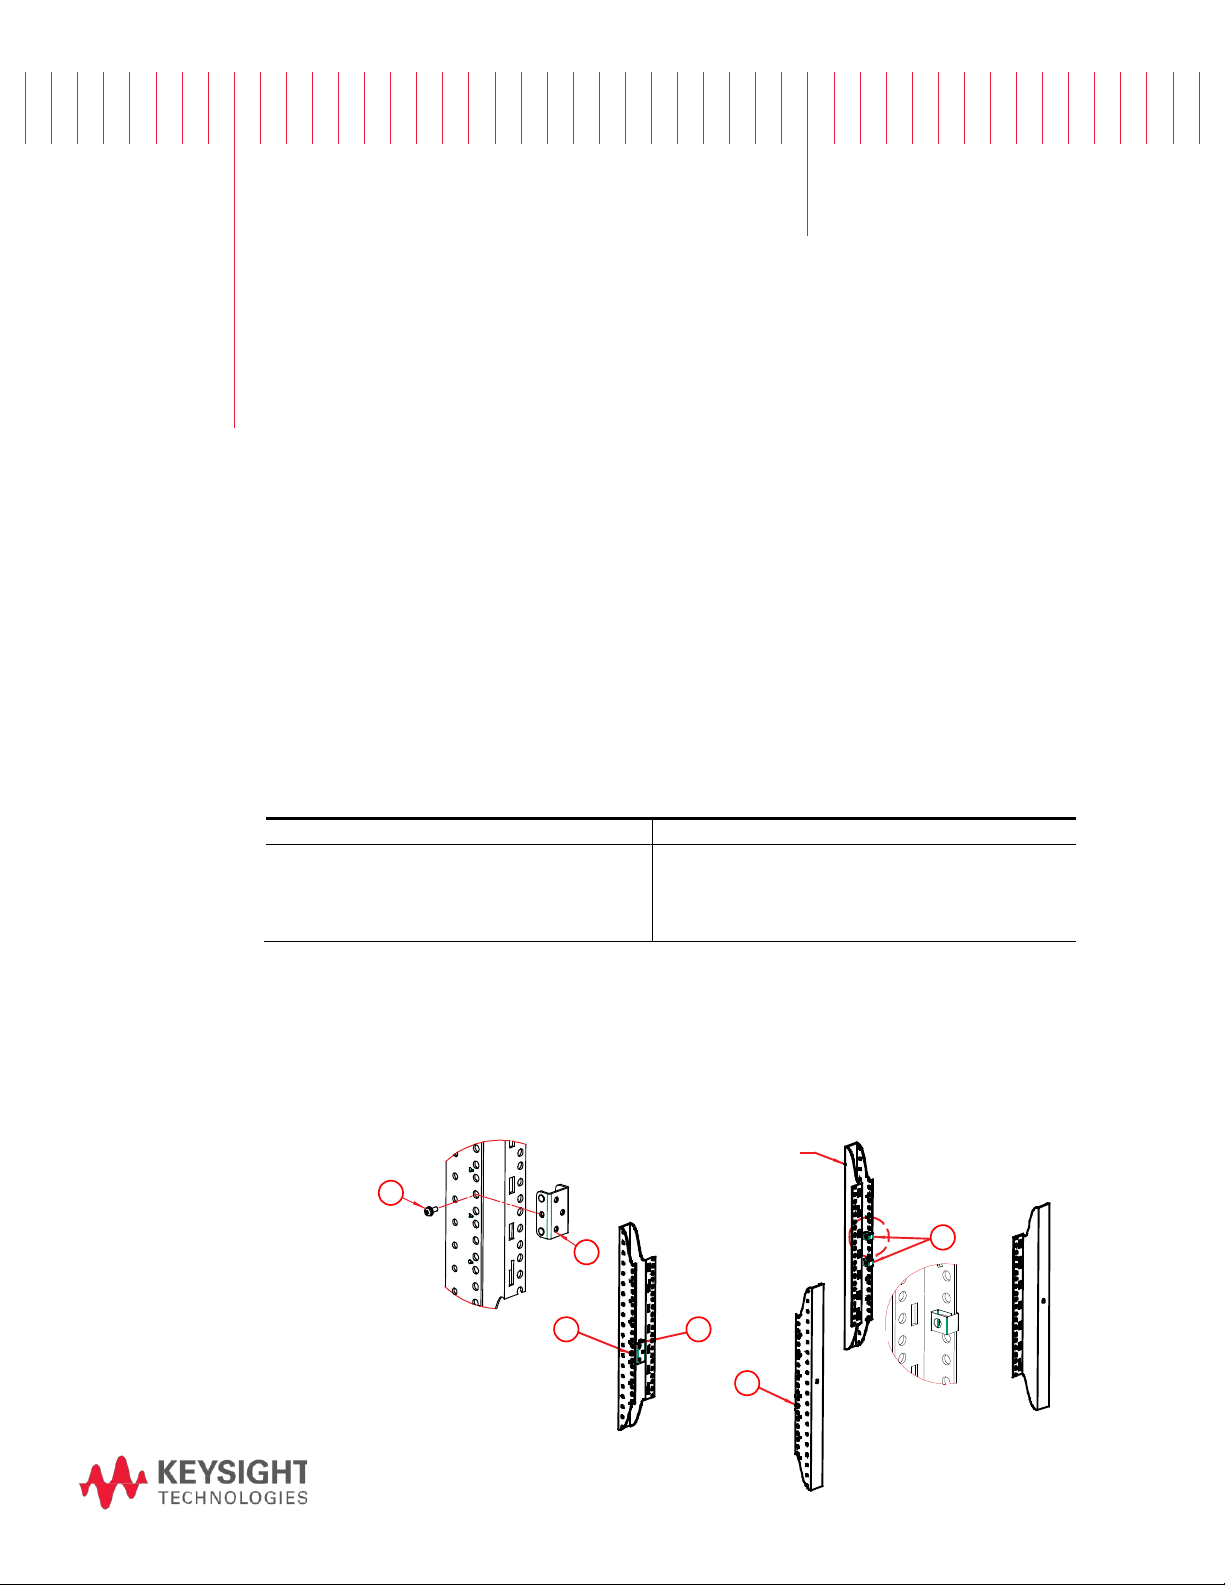
Item
Description
Qty
Part number
Item
Description
Qty
Part number
1
Rear bracket
2
5003-2099
5
Joining strap
2
5003-2098
2
Clip nuts
4
0590-0804
6
Rear support bar
1
5003-2100
3
Right rail
1
5003-2096
7
M4 screws
18
0515-0380
4
Left rail
1
5003-2097
8
Dress screw (10-32)
4
0570-1366
FRONT OF RACK
BACK OF RACK
RACK COLUMNS
BOTH SIDES
BOTH SIDES
7
7
7
1
1
2
Installation Guide
Keysight
Rack Mount Kit
This guide describes how to install the Keysight N8958A Rack Mount Kit. The kit allows the
Keysight N8900 series power supplies to be mounted in a Keysight 19-inch EIA rack cabinet.
Note that non-Keysight cabinets may not have the rack column features required by this kit.
You cannot use standard support rails for rack mounting this series of power supplies. With
standard rails, the rack width is less than the instrument width. This kit replaces the
standard rails.
N8958A
Obtaining Documentation
Download the latest version of the Keysight N8900 Series Operating and Service Guide
from the Web at http://www.keysight.com/find/N8900.
Items Supplied
Rack Installation
Tools required: Torx T20 driver; Phillips driver.
1. Install the two rear brackets on the rear columns of the rack where your unit will be
located. Use two of the M4 screws.
2. Install the four clip nuts on the front columns of the rack.
Page 2
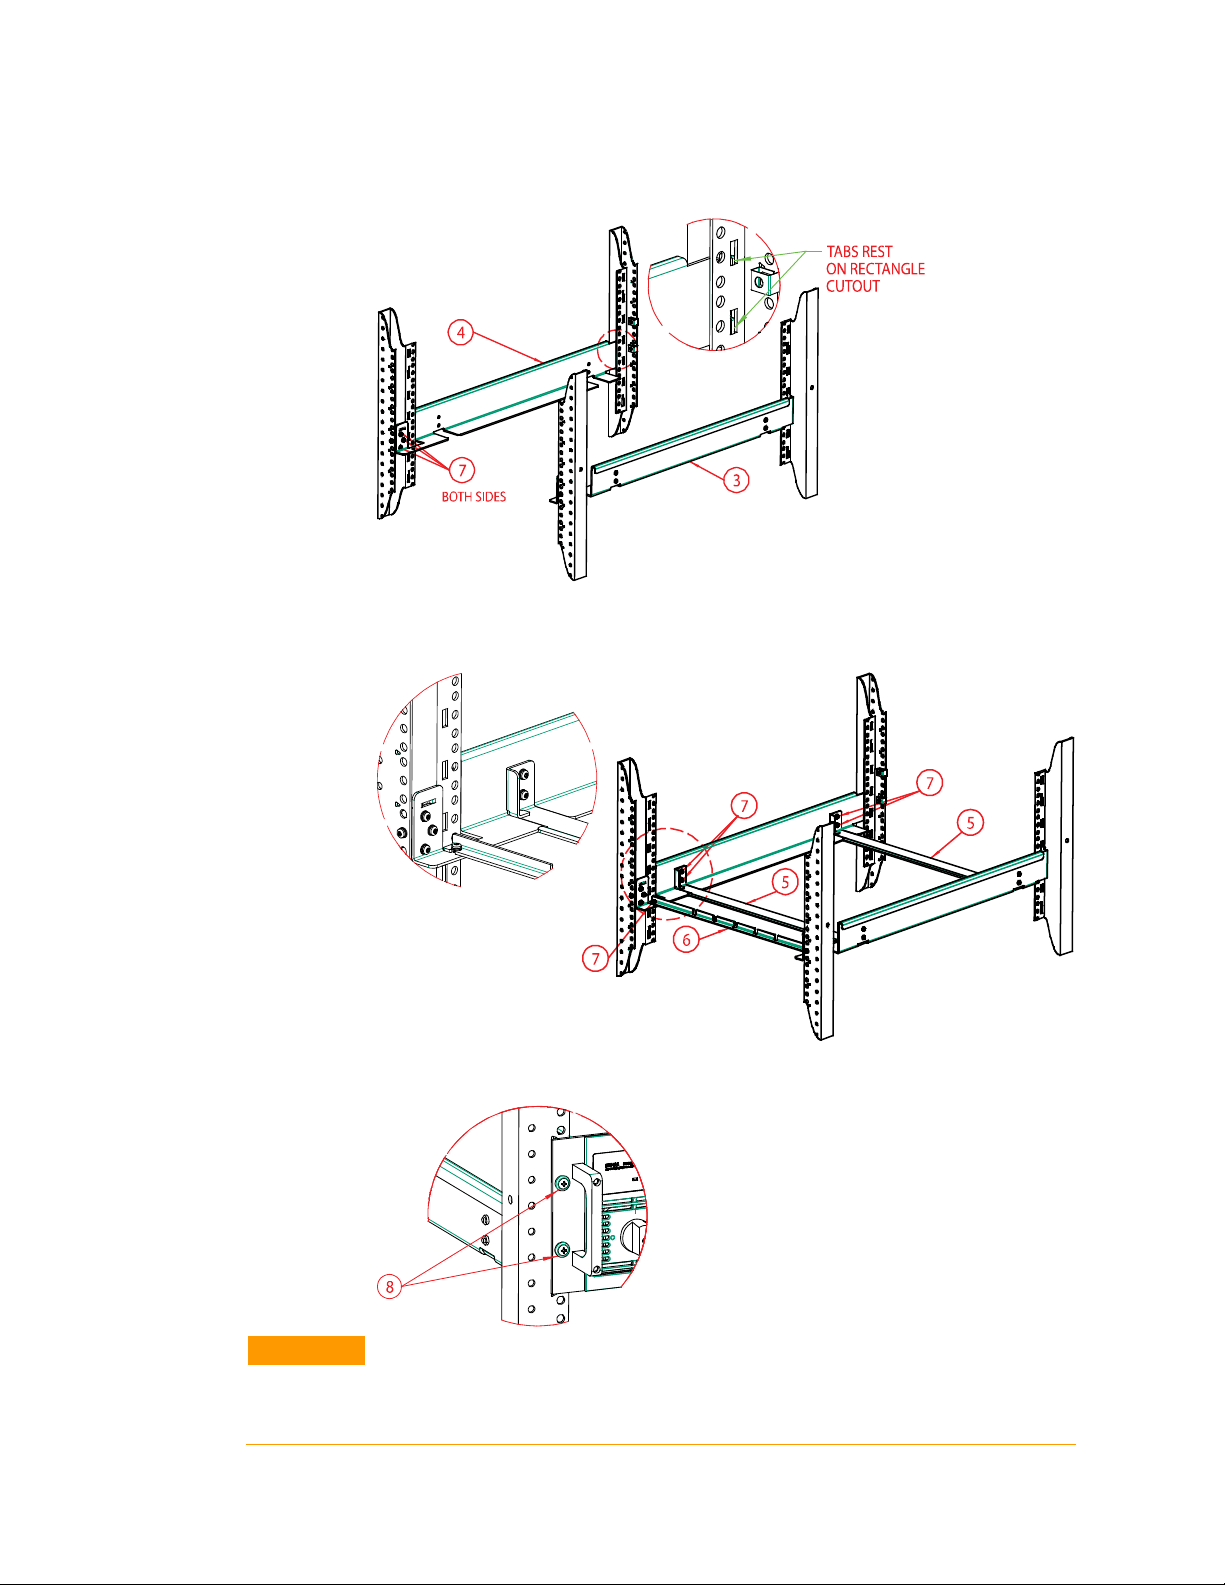
3. Install the right and left rails to the rack columns. Use six of the M4 screws to attach the
CAUTION
Two people are required when handling units. Because of the unit’s weight, do not lift or
move it alone. Moving by hand should be avoided wherever possible. If unavoidable, lift
only the instrument’s chassis; do not lift the unit using the exterior handles, knobs, or
output terminals.
columns to the rear brackets. The front tabs of the rails rest inside the rectangular cutouts
of the front columns.
4. Install the two joining straps to the front and back of the right and left rails. Use eight of
the M4 screws.
5. Install the rear support bar to the right and left rails. Use two of the M4 screws.
6. Slide the instrument into the rack. Attach the front of the instrument to the rack columns
using the four 10-32 dress screws provided.
© Keysight Technologies 2018
Part number 5991-3406
Edition 2,
August 2018
Printed in Malaysia
 Loading...