

Page 1
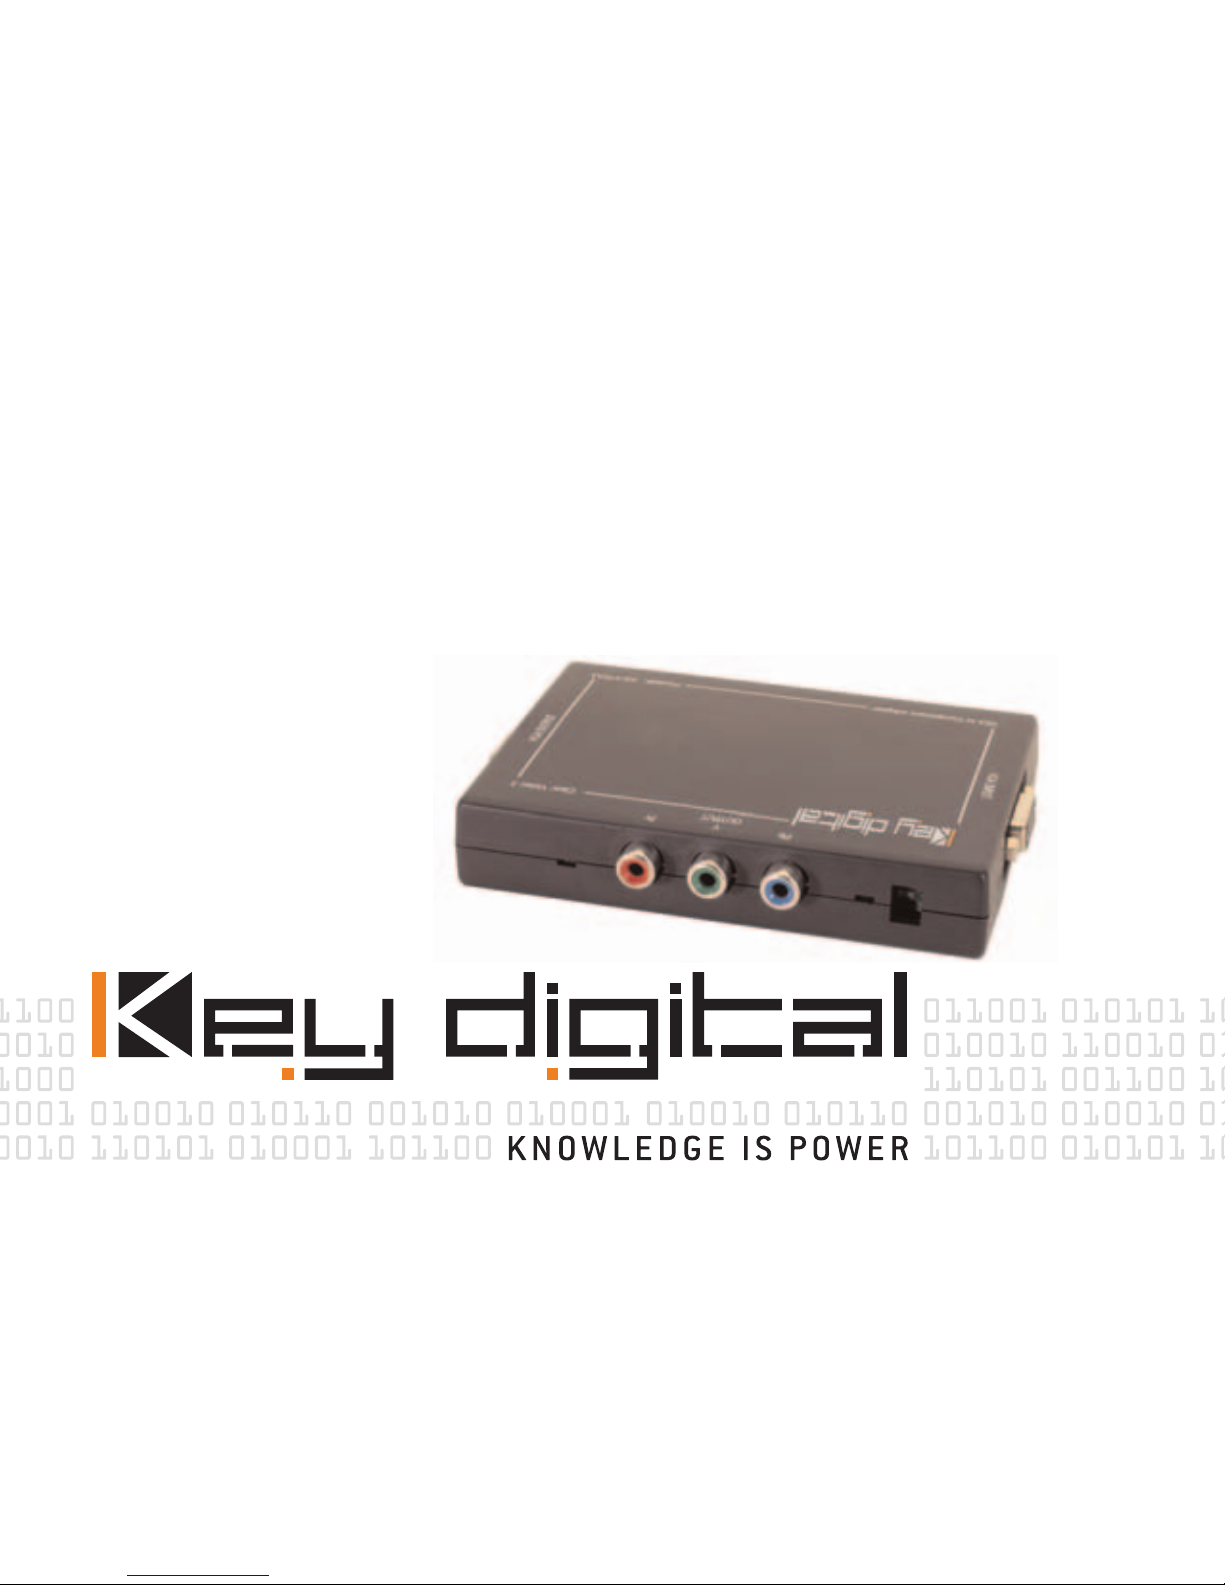
KD-VTCA3
VGA to Component Video Adapter
Page 2

VGA to Component Video Adapter
Model KD-VTCA3
VGA Video (RGBHV) Input to Component Video (YPrPb) Output and active VGA
loop-through Video Adapter, with SCART compatibility. This Video Adapter is NOT
a Video Scaler or Video Processor.
Included in this package:
• OneKD-VTCA3 ClearColor3
• One external power supply
• This User/Installer Manual with included
KD-VTCA3
Model KD-VTCA3
Warranty statement
Page 3
Product Overview
TheKD-VTCA3
ClearColor3 is the world’s smallest adapter on the market to “glue” your VGA
(RGBHV) devices to Component Video (YPrPb) HDTV monitors. ClearColor3 is
the ideal choice to drive your Component Video displays from VGA sources like
your HDTV Set Top Box or personal computer (PC). ClearColor3 works with
HDTV RCA®Set Top Boxes, HD monitors like Panasonic®and Sony®, and all
video formats — 480p, 720p, 1080i/540p, NTSC, PAL, interlaced or
progressive. With ClearColor3, there is also SCART compatibility, and a VGA
loop-through permits you to simultaneously drive a VGA and Component Video
OPERATING INSTRUCTIONS
Page 4

monitor. With your cost-effective KDS ClearColor3 product, you get
crystal-clear processing and you can drive monitors with cable lengths up to
50 feet.
Why do you need a Video Adapter?
The video industry has produced many different products to process, switch,
and distribute your video. In many instances, the video input or output
formats of these products are not compatible. For example, you may have an
application where you would like your VGA-out (RGBHV) HDTV Set Top Box or
personal computer to drive your Component Video (YPrPb) display.
KD-VTCA3
Model KD-VTCA3
Page 5

What do you do? One less-palatable option is to purchase all new equipment
that is totally compatible, which is a significant investment and limits you for
the future to ever consider equipment that does not conform to the standard
you purchased. At Key Digital Systems, we have a better solution for you. We
have designed economical, high-quality video adapters, which “glue” your
components that may have been designed to diverging standards:
•KD-VTCA3
ClearColor3: VGA to Component Video adapter, and more
• KD-CTCA3 ClearVideo3: Component Video (YPrPb) to VGA
adapter, and more
OPERATING INSTRUCTIONS
Page 6

NOTE THAT A VIDEO ADAPTER DOES NOT PERFORM
VIDEO SCALING, PROCESSING, OR SCAN
CONVERSIONS.
Product Features
KD-KD-VTCA3
ClearColor3 offers versatility, convenience, and well thought-out features:
• Smallest VGA (RGBHV) input to Component Video (YPrPb) output Video
Adapter on the market today
KD-VTCA3
Model KD-VTCA3
Page 7
• Convenient loop-through feature:
• VGA input also has loop-through output to simultaneously drive
your VGA and Component Video displays
• Enables display of:
• HDTV RCA®Set Top Boxes and Personal computers PC’s on HD
Component Video monitors like Panasonic®and Sony
®
• Personal Computer output on HD Component Video monitors*
• Compatible with:
• All video formats — 480p, 720p, 1080i/540p, NTSC, PAL,
interlaced or progressive
• Flexible Sync options:
• Composite Sync out on YPrPb
OPERATING INSTRUCTIONS
Page 8

• SCART decoding of composite sync on H input
• Special Sync mode to accommodate a Panasonic®Direct View
HDTV monitor connected to RCA®DTV Set Top Box
*NOTE: When using your ClearColor3 with a VGA personal computer input,
special care should be given to set your PC to the appropriate resolution
that will be recognized by an HDTV Component Video monitor. A freeware
program called PowerStrip helps to do this, and is available from
h
ttp://www.entechtaiwan.com/ps.htm. Various experts have published guides
on how to use PowerStrip in the application of HDTV. One of these guides is
included at the end of this manual.
KD-VTCA3
Model KD-VTCA3
Page 9
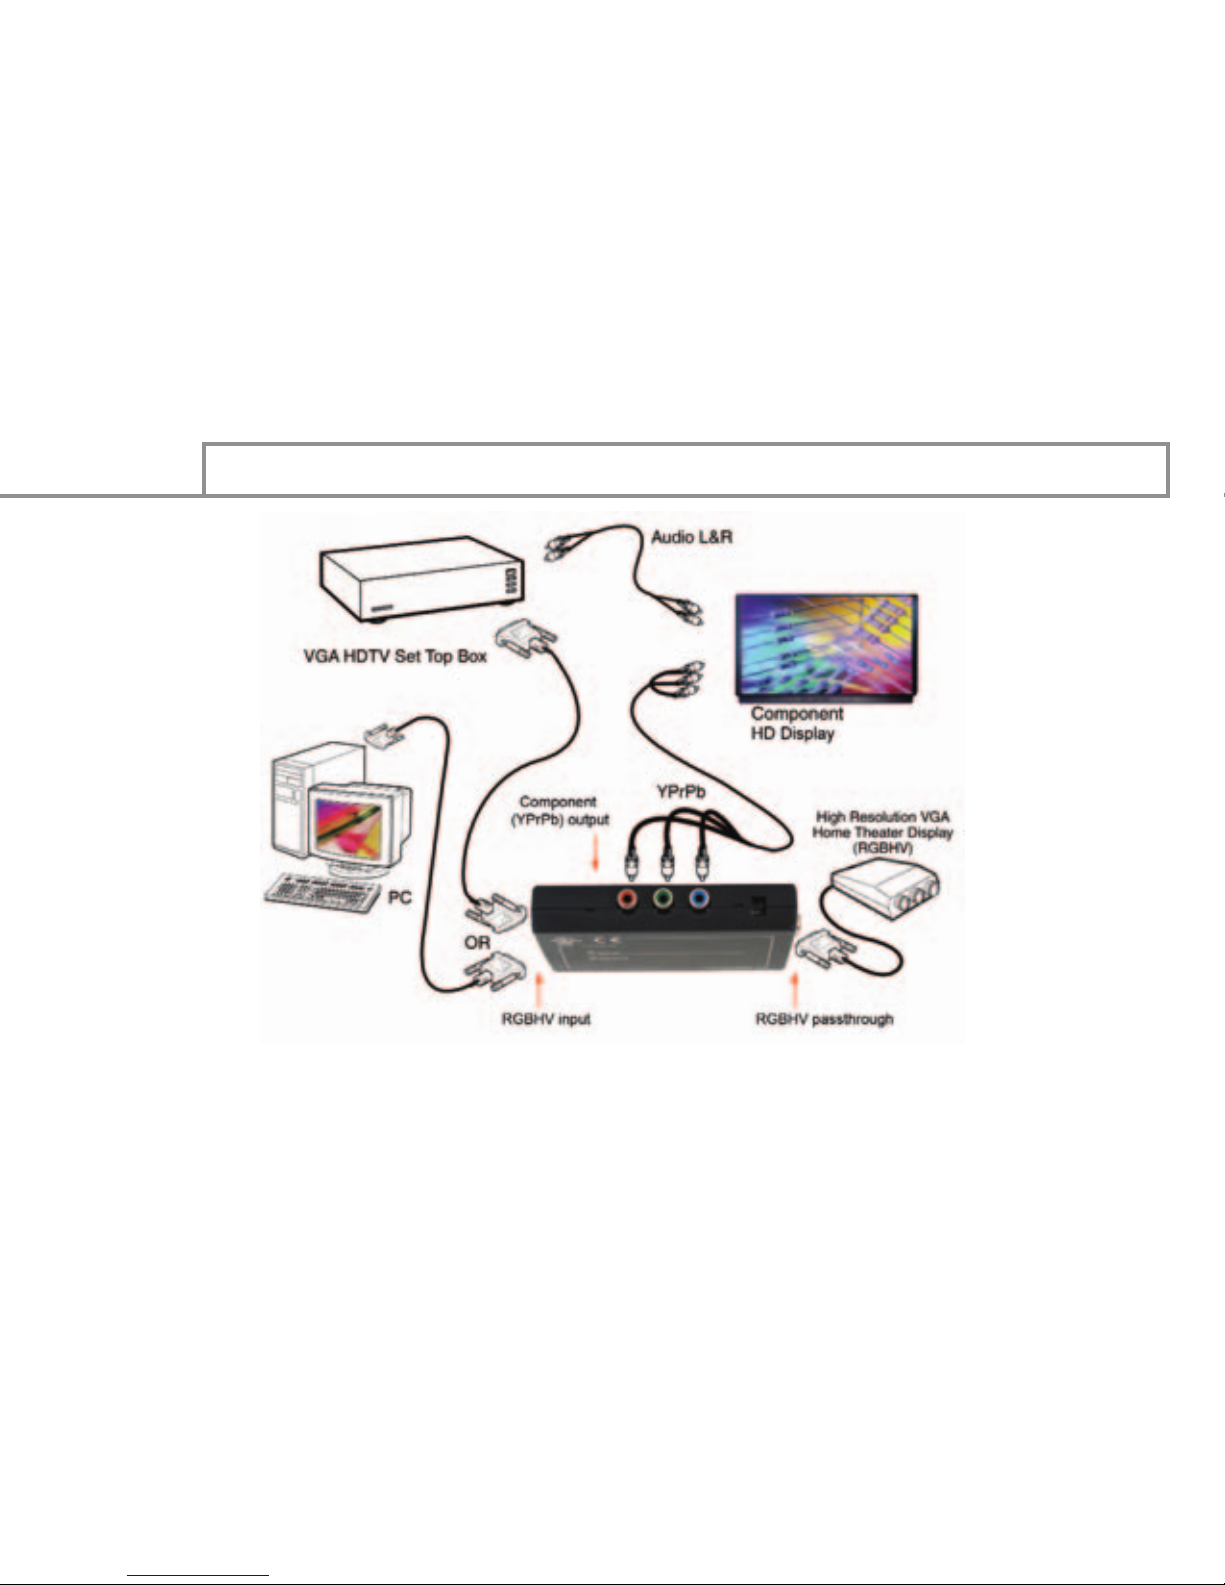
SOME TYPICAL APPLICATION EXAMPLES
VGA to Component Video Adapter
ClearColor3, ModelKD-VTCA3
OPERATING INSTRUCTIONS
Page 10

Safety Instructions – Please be sure to follow these
instructions for safe operation of your unit
1)Read these instructions.
2)Keep these instructions.
3)Heed all warnings.
4)Follow all instructions.
5)Do not use this apparatus near water.
6)Clean only with dry cloth.
7)Do not block any ventilation openings. Install in accordance with the manu
facturer’s instructions.
KD-VTCA3
Model -KD-VTCA3
Page 11
8)Do not install near any heat sources such as radiators, heat registers,
stoves, or other apparatus (including amplifiers) that produce heat.
9)Do not defeat the safety purpose of the polarized or grounding-type plug. A
polarized plug has two blades with one wider than the other. A grounding
type plug has two blades and a third grounding prong. The wide blade or the
third prong are provided for your safety. If the provided plug does not fit
into your outlet, consult an electrician for replacement of the obsolete
outlet.
10)Protect the power cord from being walked on or pinched particularly at
plugs, convenience receptacles, and the point where they exit from the
apparatus.
11)Only use attachments/accessories specified by the manufacturer.
12)Use only with the cart, stand, tripod, bracket, or table specified by the man
ufacturer, or sold with the apparatus. When a cart is used, use caution
UL LISTED - Model KD-VTCA3
Page 12

when moving the cart/apparatus combination to avoid injury from tip-over.
13)Unplug this apparatus during lightning storms or when unused for long
periods of time.
14)Refer all servicing to qualified service personnel. Servicing is required
when the apparatus has been damaged in any way, such as power-supply
cord or plug is damaged, liquid has been spilled or objects have fallen into
the apparatus, the apparatus has been exposed to rain or moisture, does
not operate normally, or has been dropped.
KD-VTCA3
Model KD-VTCA3
Page 13
QUICK SET-UP
Connecting and using yourKD-VTCA3
ClearColor3 is a simple process.
NOTE: Do not attempt to connect power to the unit until you have completed
all Steps 1 – 4.
STEP 1:
Determine your configuration requirements. The primary function of
theKD-VTCA3
QUICK SET-UP
Page 14

ClearColor3 is to convert your VGA (RGBHV) signal to Component Video
(YPrPb). The unit automatically adjusts to the input scan format. There are
added bonuses that let you also simultaneously drive your VGA monitor,
decode SCART input sync, and a Special Sync mode accommodates a
Panasonic®Direct View HDTV monitor connected to RCA®DTV Set Top Box.
For PC VGA inputs, please refer to setting of your PC to the appropriate
resolution for your Composite Video display. See the PowerStrip guide at the
end of this manual.
Please be aware that LCD flat panel monitors do not recognize interlaced
formats such as 1080i.
KD-VTCA3
Model KD-VTCA3
Page 15
STEP 2: Make your Input Connection:
• One VGA Video (RGBHV) input on DB15 connector
STEP 3: Make your Output Connections:
• One Component Video (YPrPb) output on three RCA female jacks which can
drive equal cable lengths up to 50 feet (be sure to terminate this output at the
end of the runs)
• If desired, use the VGA loop-through to simultaneously drive your VGA
monitor
STEP 4: Configure the Sync Select Switches (adjacent to the Component Video
output connectors) to suit your application:
QUICK SET-UP
Page 16

Select input sync with Switch 1 between H and V drive, or SCART on H:
• Switch 1 ON (up): H and V drive VGA input (typical mode, RGBHV)
• Switch 1 OFF (down): SCART composite sync in on H
Select output sync with Switch 2 between H and V drive, or Special Sync mode:
• Switch 2 ON (up): Composite Sync out on YPrPb (typical mode)
• Switch 2 OFF (down): Special Sync out to accommodate a Panasonic®Direct
View HDTV monitor connected to RCA®DTV Set Top Box
STEP 5: Apply power to the unit:
KD-VTCA3
Model KD-VTCA3
Page 17
• Use ONLY the external wall-plug power supply provided with your unit, +6
Volts @ 0.3 Amps, 110-240V AC, 50-60 Hz
• Connect the 1/8” mini-plug external power supply connector to your unit,
and plug the power supply into a power outlet
• The green Power-on LED (adjacent to the external power supply connector)
should be ON
STEP 6: Operation of your unit:
• Your VGA source should now drive your Component Video display and is also
available as a loop-through to a VGA monitor
QUICK SET-UP
Page 18

Technical Specifications
ClearColor3
ModelKD-VTCA3
Video Input:
• One VGA Video (RGBHV) input on DB15 connector
• RGB: 0.7 V p-p, 75 Ohm, terminated at the source
KD-VTCA3
Model KD-VTCA3
Page 19
Video Outputs:
• One Component Video (YPrPb) output on three RCA female jacks
• 1 V p-p @ 75 Ohm terminated
• Composite Sync on YPrPb
• One VGA loop-through output on DB15 connector
• VGA input loops-through to this connector to simultaneously
drive a VGA display
Accepted Scanning Formats:
• Unit adjusts automatically for ANY incoming video scanning format:
• 50 Hz or 60 Hz refresh
• 480p, 576p, 1080i/540p, 720p
• Output scanning format is always the SAME as the input scanning format
Technical Specifications
Page 20

Control and Adjustments:
• LED (adjacent to the external power supply connector):
• Green Power-on LED
• Sync Select Switches (adjacent to the Component Video output connectors):
• Input sync: H and V drive, or SCART:
• Switch 1 ON (up): H and V drive VGA sync in (typical
mode, RGBHV)
• Switch 1 OFF (down): SCART composite sync in on H
• Output sync: H and V drive, or Special Sync mode:
• Switch 2 ON (up): H and V drive VGA out (typical
mode, RGBHV)
• Switch 2 OFF (down): Special Sync out to accommo-
KD-VTCA3
Model KD-VTCA3
Page 21
date a Panasonic®Direct View HDTV monitor
connected to RCA®DTV Set Top Box
• Input Sync polarity:
• Positive or Negative TTL sync accepted for H and V in RGBHV
mode
Processing:
• HDTV colorimetry matrix
• Video bandwidth -3 dB at 110 MHz, linear-phase passband, for crystal-clear
display
• Outputs can drive equal-length cables up to 50 feet
Technical Specifications
Page 22

Mechanical:
• Connectors
• DB15 (frequently used for VGA/computer)
• RCA (for Component Video)
• 1/8” mini-plug external power supply input
• Size: 2” x 4.75” x 0.75”
• Weight: 1 lb.
• Enclosure type: Plastic
• External wall-plug power supply provided, +6 Volts @ 0.3 Amps, 110-240V AC,
50-60 Hz
KD-VTCA3
Model KD-VTCA3
Page 23
HOW TO CONTACT KEY DIGITAL
Repairs and Warranty Service:
Should your HD Leeza require warranty service, please contact Key Digital first
to obtain a Returned Materials Authorization (RMA) number
Please contact us at either:
Toll-free
1-203-778-0295 extension 3#
email [email protected]
HOW TO CONTACT KEY DIGITAL
Page 24

Technical Support:
For technical questions about using our products, please contact us at either:
1-203-778-0295 or Toll-free 1-888-258-2028
email [email protected]
Customer Support:
For customer support questions about using our products, please contact us at
either:
1-203-778-0295
email [email protected]
KD-VTCA3
Model KD-VTCA3
Page 25
WARRANTY
All Key Digital products are built to high manufacturing
standards and should provide years of trouble-free operation.
They are backed by a limited two-year parts and labor warranty.
WARRANTY
Page 26

IMPORTANT NOTICE WHEN USING THIS PRODUCT WITH A
VGA COMPUTER INPUT
When using your ClearColor3 with a VGA personal computer input, special care
should be given to set your PC to the appropriate resolution that will be
recognized by an HDTV Component Video monitor. A freeware program called
PowerStrip helps to do this, and is available from
h
ttp://www.entechtaiwan.com/ps.htm. Various experts have published guides
on how to use PowerStrip in the application of HDTV. One of these guides is
included below:
KD-VTCA3
Model KD-VTCA3
Page 27
REVISED: Custom Resolution Guide for HDTV-HTPC
Here are several progressive scan Custom Timing and Resolution strings for
the ATI Radeon card
, created with PowerStrip 3.28 build 342 and Catalyst 3.1
WinXP ATI drivers, displayed on a Mitsubishi W55819 1080i 16x9 HDTV. All are
1080i/ 540p based timings. Scan rate is exactly 33.75 kHz and refresh rate is
59.94 Hz for all resolutions. Please note I am using a Key Digital VTCA-2
Transcoder to connect to my HDTV, not an ATI HDTV dongle adapter. If used with
the ATI HDTV adapter you will get a virtual desktop almost every time.
Copy the entire PowerStrip timing parameters listed below, one resolution at a
time. Then, in PS 3—display profiles—advanced timings—custom
PowerStrip Specifications
Page 28

resolutions—user defined, click the paste button, which will add the copied
values, and then click “add”. Or, you can enter the generic timing detail values
manually in the custom resolution screen if you wish. PowerStrip will tell you if
the display driver has accepted the new resolution. You may be promted to
reboot first. If so, you will restart at your previous resolution, so you will have
to manually switch to the new resolution. Enter the advanced timings screen
and adjust as needed. Common first time tweaks include positioning and
adjusting for over/underscan.
Remember, to use your new custom T & R,
make sure you set PowerStrip 3 (options—-preferences) to start up with
Windows AND apply settings at start up. Use at y
our own risk.
—————————————————————————————————————
PowerStrip timing parameters: Desktop 4x3
640x480p=640,152,48,176,480,28,1,54,34290,272
KD-VTCA3
Model KD-VTCA3
Page 29
Generic timing details for 640x480:
HFP=152 HSW=48 HBP=176 kHz=34 VFP=28 VSW=1 VBP=54 Hz=60
+hsync +vsync
——————————————————————————
PowerStrip timing parameters: DVD 1
720x480p=720,76,40,100,480,29,1,53,31590,272
Generic timing details for 720x480:
HFP=76 HSW=40 HBP=100 kHz=34 VFP=29 VSW=1 VBP=53 Hz=60
+hsync +vsync
——————————————————————————
PowerStrip timing parameters: Desktop 16x9
PowerStrip Specifications
Page 30

848x480p=848,88,48,120,480,28,1,54,37260,272
Generic timing details for 848x480:
HFP=88 HSW=48 HBP=120 kHz=34 VFP=28 VSW=1 VBP=54 Hz=60
+hsync +vsync
——————————————————————————
PowerStrip timing parameters: Desktop 16x9
856x480p=856,87,48,121,480,28,1,54,37530,272
Generic timing details for 856x480:
HFP=87 HSW=48 HBP=121 kHz=34 VFP=28 VSW=1 VBP=54 Hz=60
+hsync +vsync
——————————————————————————
PowerStrip timing parameters: DVD 1.5
1080x480p=1080,108,48,164,480,29,1,53,47250,272
KD-VTCA3
Model KD-VTCA3
Page 31
Generic timing details for 1080x480:
HFP=108 HSW=48 HBP=164 kHz=34 VFP=29 VSW=1 VBP=53 Hz=60
+hsync +vsync
——————————————————————————
PowerStrip timing parameters: DVD 2
1440x480p=1440,144,80,208,480,29,1,53,63180,272
Generic timing details for 1440x480:
HFP=144 HSW=80 HBP=208 kHz=34 VFP=29 VSW=1 VBP=53 Hz=60
+hsync +vsync
——————————————————————————PowerStrip timing parameters: DVD 2.5
PowerStrip Specifications
Page 32

1800x480p=1800,154,96,246,480,32,1,50,77490,272
Generic timing details for 1800x480:
HFP=154 HSW=96 HBP=246 kHz=34 VFP=32 VSW=1 VBP=50 Hz=60
+hsync +vsync
——————————————————————————PowerStrip timing parameters: DVD 540p
1800x540p=1800,148,96,244,540,7,1,15,77220,272
Generic timing details for 1800x540:
HFP=148 HSW=96 HBP=244 kHz=34 VFP=7 VSW=1 VBP=15 Hz=60
+hsync +vsync
——————————————————————————PowerStrip timing parameters:
960x540p=960,98,48,142,540,7,1,15,42120,272
KD-VTCA3
Model KD-VTCA3
Page 33
Generic timing details for 960x540:
HFP=98 HSW=48 HBP=142 kHz=34 VFP=7 VSW=1 VBP=15 Hz=60
+hsync +vsync
—————————————————————————————————————
TIP: To get an exact scan rate of 33.75Khz, go to the “advanced timings
screen”, type “33.75” in the horizontal scan rate box and press the TAB
button on the keyboard. This will set the scan rate exactly to 33.75KHz and
also adjust the refresh rate accordingly.
—————————————————————————————————————
If you find your desktop has black bars on the sides (underscan), or has a bit
too much overscan (image cropping), simply go back to the advanced timings
PowerStrip Specifications
Page 34

screen and adjust the horizontal front/back porches: To decrease horizontal
overscan, increase the horizontal front/back porches. To increase horizontal
overscan, decrease the horizontal front/back porches. Before making
overscan adjustments, click the “lock scan frequencies” button in the
advanced timings screen. Now you can make realtime adjustments while
keeping the scan rate and refresh rate locked.
You’ll probably find that a
couple of clicks will do the trick.
—————————————————————————————————————
Keep the progressive vertical line total at 563 (interlaced 1125). You won’t
have much range of vertical sizing adjustment, only positioning. To
compensate for vertical underscan, it is best to add pixels to the vertical total
since the range of adjustment is limited. Try to maintain a 16x9 aspect ratio
when you add to the line total. Example: if 848x480p is underscanned, try a
custom resolution of 888x500p, using the same timings. To compensate for
KD-VTCA3
Model KD-VTCA3
Page 35
vertical overscan, adjust using the service menus of your set.
—————————————————————————————————————
t is also important to note that the monitor you specify in Windows must be
capable of resolving the resolutions you present to the display driver in
progressive scan mode. I have used the Sony GDM-W900 monitor drivers
because it has a max resolution of >1920x1200p as listed in PowerStrip 3
monitor profiles. Make sure to “disable plug & play monitors”. Selecting a
high-resolution monitor will also help avoid “virtual desktop”, or a side
scrolling desktop. PowerStrip will allow you to create your own custom monitor
driver. I made a driver for my Mits HDTV based on the Sony specs and is
attached later in this thread.
—————————————————————————————————————
I use 856x480p @ 540p timings (posted above) for best 16x9 desktop results.
The sides are perfect on my set with less than half of the title bar and task bar
PowerStrip Specifications
Page 36

cropped, quite manageable IMO. Your results may differ depending on your
sets’ overscan. Try large icons and a Windows Standard -large- Appearance for
a smooth, easy to read desktop and a neutral grey desktop color for even tube
wear. There are also utilities available to hide the desktop and mouse completely, such as Icon Hider and BZ (mouse) Hider.
—————————————————————————————————————
I cannot stress this point enough: test on your PC monitor first, get a stable
picture with acceptable values, connect to your HDTV, then adjust as needed.
As always, results may vary according to manufacturer.
—————————————————————————————————————
Here are several UPDATED interlaced custom T & R strings for the ATI Radeon
card, created with PowerStrip 3.28 build 342 and Catalyst 2.5 WinXP ATI driv-
KD-VTCA3
Model KD-VTCA3
Page 37
ers, displayed on a Mitsubishi W55819 1080i 16x9 HDTV. Scan rate is
33.75KHz and refresh rate is 30Hz for all resolutions.
***Interlaced overlay support is driver and OS specific***
Use at your own risk.
—————————————————————————————————————
PowerStrip timing parameters:
800x600i=800,279,56,329,600,250,1,274,49410,280
Generic timing details for 800x600:
HFP=279 HSW=56 HBP=329 kHz=34 VFP=250 VSW=1 VBP=274 Hz=30
interlace +hsync +vsync
———————————————————————————PowerStrip timing parameters:
PowerStrip Specifications
Page 38

1024x768i=1024,164,56,220,768,160,1,196,49410,280
Generic timing details for 1024x768:
HFP=164 HSW=56 HBP=220 kHz=34 VFP=160 VSW=1 VBP=196 Hz=30
interlace +hsync +vsync
————————————————————————————
PowerStrip timing parameters:
1152x864i=1152,190,112,218,864,116,1,144,56430,280
Generic timing details for 1152x864:
HFP=190 HSW=112 HBP=218 kHz=34 VFP=116 VSW=1 VBP=144 Hz=30
interlace +hsync +vsync
————————————————————————————
KD-VTCA3
Model KD-VTCA3
Page 39
PowerStrip timing parameters:
1280x720i=1280,125,120,139,720,180,1,224,56160,280
Generic timing details for 1280x720:
HFP=125 HSW=120 HBP=139 kHz=34 VFP=180 VSW=1 VBP=224 Hz=30
interlace +hsync +vsync
————————————————————————————
PowerStrip timing parameters:
1280x768i=1280,124,128,132,768,160,1,196,56160,280
Generic timing details for 1280x768:
HFP=124 HSW=128 HBP=132 kHz=34 VFP=160 VSW=1 VBP=196 Hz=30
interlace +hsync +vsync
PowerStrip Specifications
Page 40

————————————————————————————
PowerStrip timing parameters:
1280x1024i=1280,125,128,131,1024,43,3,55,56160,280
Generic timing details for 1280x1024:
HFP=125 HSW=128 HBP=131 kHz=34 VFP=43 VSW=3 VBP=55 Hz=30
interlace +hsync +vsync
—————————————————————————————
PowerStrip timing parameters:
1440x960i=1440,125,144,139,960,64,1,100,62370,280
Generic timing details for 1440x960:
HFP=125 HSW=144 HBP=139 kHz=34 VFP=64 VSW=1 VBP=100 Hz=30
KD-VTCA3
Model KD-VTCA3
Page 41
interlace +hsync +vsync
————————————————————————————
PowerStrip timing parameters:
1600x900i=1600,154,152,174,900,93,3,129,70200,280
Generic timing details for 1600x900:
HFP=154 HSW=152 HBP=174 kHz=34 VFP=93 VSW=3 VBP=129 Hz=30
interlace +hsync +vsync
————————————————————————————
PowerStrip timing parameters:
1920x1080i=1920,180,144,244,1080,24,2,20,83970,280
Generic timing details for 1920x1080:
PowerStrip Specifications
Page 42

KD-VTCA3
Model KD-VTCA3
HFP=180 HSW=144 HBP=244 kHz=34 VFP=24 VSW=2 VBP=20 Hz=30
interlace +hsync +vsync
—————————————————————————————
OK, by popular request here are some
480p based timings for 4x3 HD sets for
the ATI Radeon card. These basically emulate a 480p progressive scan DVD
player. They were created on a 16x9 Mitsubishi HDTV in 480p mode and in 4x3
horizontal squeeze mode, so you might have to adjust for horizontal overscan
and positioning relative to your own set.
Timings are exactly 31.5KHz scan rate and 60 Hz refresh rate for all
resolutions.
There is some vertical overscan, but it’s not too bad. U
se at your own risk.
———————————————————————————480p timings——-Radeon Catalyst 2.5 drivers
Page 43
PowerStrip Specifications
———————————————————————————PowerStrip timing parameters: Desktop 4x3
640x480p=640,55,96,57,480,11,5,29,26712,272
Generic timing details for 640x480:
HFP=55 HSW=96 HBP=57 kHz=32 VFP=11 VSW=5 VBP=29 Hz=60
+hsync +vsync
———————————————————————————PowerStrip timing parameters: DVD 1
720x480p=720,67,96,85,480,21,5,19,30492,272
Generic timing details for 720x480:
HFP=67 HSW=96 HBP=85 kHz=32 VFP=21 VSW=5 VBP=19 Hz=60
+hsync +vsync
Page 44
————————————————————————————
PowerStrip timing parameters: DVD 2
1440x480p=1440,118,144,218,480,13,5,27,60480,272
Generic timing details for 1440x480:
HFP=118 HSW=144 HBP=218 kHz=32 VFP=13 VSW=5 VBP=27 Hz=60
+hsync +vsync
————————————————————————————
Last edited by Karnis on 02-20-03 at 01:43 AM
 Loading...