

Page 1
OPERATING INSTRUCTIONS
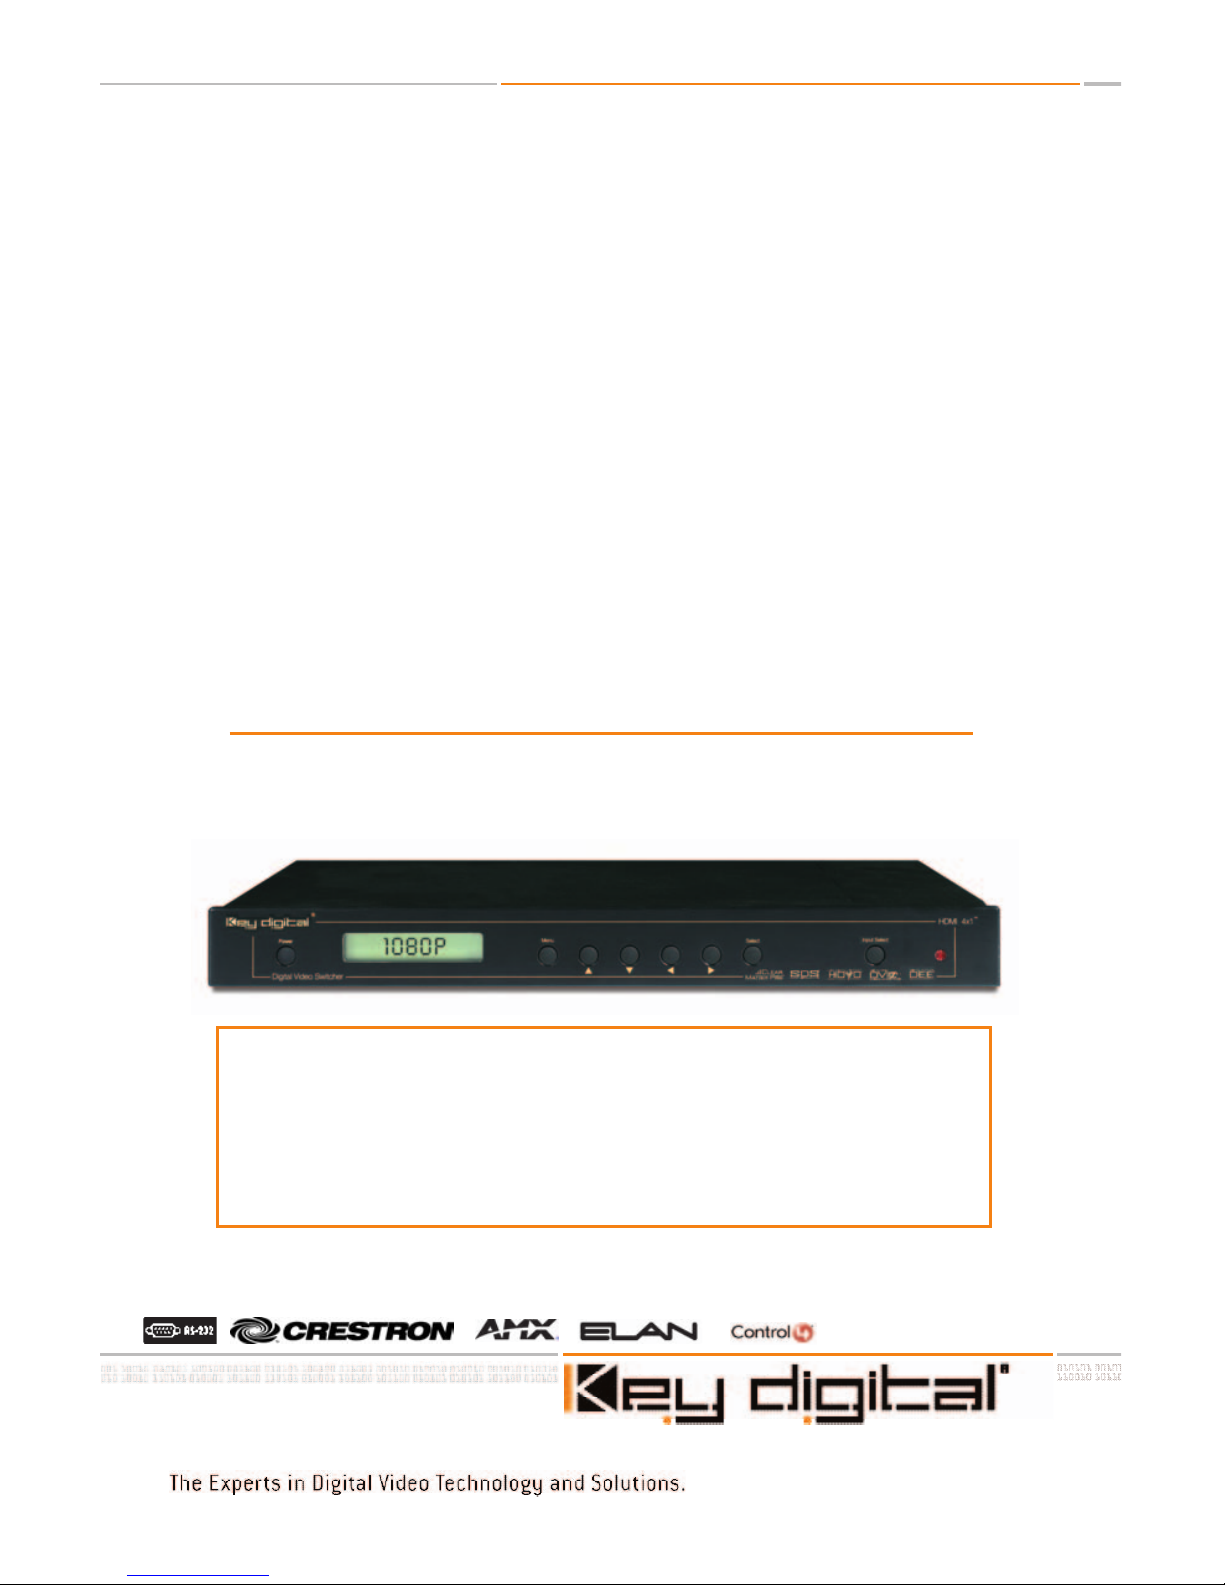
HDMI 4x1
4 Inputs to 1 Output HDMI Switcher
4x1 HDMI Switcher (with HDCP) that switches any of four (4) inputs of HDMI A/V
to one (1) output. Conveniently switches 60 Hz and 50Hz video sources, and
multiple audio formats. The selected input video can be scaled to match the
native resolution of your display, using world-renowned Key Digital
®
Clear Matrix
ProTMtechnology. Easily control all features with the convenient front-panel display and pushbuttons, the IR Remote Control, or RS-232. It’s all-digital, for the
absolute best, crystal-clear, and pristine switching and picture quality!
TM
Page 2

HDMI 4x1TMSwitcher
Safety Instructions – Please be sure to follow these
instructions for safe operation of your unit
1
Read these instructions.
2
Keep these instructions.
3
Heed all warnings.
4
Follow all instructions.
5
Do not use this apparatus near water
6
Clean only with dry cloth.
7
Do not block any ventilation openings. Install in accordance with the manufacturer’s
instructions.
8
Do not install near any heat sources such as radiators, heat registers, stoves, or other
apparatus (including amplifiers) that produce heat.
9
Do not defeat the safety purpose of the polarized or grounding-type plug. A polarized plug has two blades with one wider than the other. A grounding type plug has
two blades and a third grounding prong. The wide blade or the third prong are provided for your safety. If the provided plug does not fit into your outlet, consult an electrician for replacement of the obsolete outlet.
10
Protect the power cord from being walked on or pinched particularly at plugs, con-
venience receptacles, and the point where they exit from the apparatus.
11 Only use attachments/accessories specified by the manufacturer
12
Use only with the cart, stand, tripod, bracket, or table specified by the manufacturer,
or sold with the apparatus. When a cart is used, use caution when moving the
cart/apparatus combination to avoid injury from tip-over.
13
Unplug this apparatus during lightning storms or when unused for long periods of
time.
14
Refer all servicing to qualified service personnel. Servicing is required when the
apparatus has been damaged in any way, such as power-supply cord or plug is
damaged, liquid has been spilled or objects have fallen into the apparatus, the appa-
ratus has been exposed to rain or moisture, does not operate normally, or has been
dropped.
HDMI 4x1TMOperating Instructions
Page 2 of 24
Page 3

Page 3 of 24
HDMI 4x1TMOperating Instructions
TABLE OF CONTENTS
Key Features.............................................................................................4
About the HDMI 4x1
TM
Switcher.................................................................6
Getting Started..........................................................................................8
Basic Operation.......................................................................................11
IR Remote Control..................................................................................12
Firmware Upgrades.................................................................................16
RS-232 Commands.................................................................................18
Technical Specifications..........................................................................20
How to Contact Key Digital
®
....................................................................23
© 2005 Key Digital, Inc. All rights reserved.
Page 4
KEY FEATURES
The HDMI 4x1TMSwitcher is a 4x1 HDMI Switcher that supports HDCP Copy Protection and
switches any of four (4) inputs of HDMI A/V to one (1) output. Concurrently switch all Inputs,
including HDMI, Toslink Optical audio, digital PCM audio, and analog Left & Right stereo
audio. It's all-digital, for crystal-clear and pristine switching and picture quality!
Conveniently switches 60 Hz and 50Hz
video sources, and multiple audio
formats.
The selected input video can be
scaled to match the native resolution of
your display, using world-renowned Key
Digital
®
Clear Matrix ProTMtechnology. All
the video processing features you'd expect
from Key Digital®are also provided. Use the
convenient front-panel display and pushbuttons, the IR Remote Control, or RS-232
to easily contr
ol all features of the product.
HDMI 4x1TMOperating Instructions
Page 4 of 24
Page 5

HDMI Switcher:
• Crystal-clear switching of four (4) HDMI Inputs to One (1) HDMI Output
• HDMI Type A 19-pin connector
• To support DVI-D Video I/O, use HDMI<>DVI adapter cable(s)
• Supports HDCP Copy Protection
•
Switches 60 Hz and 50Hz video sources, and multiple audio formats
• HDMI repeater functionality with hot plug detection
Switches Video and Audio with individual connectors for:
• HDMI Video and Audio
• Toslink Optical Audio
• Digital PCM Audio
• Analog stereo Left & Right Audio
Can also be configured to process and scale any HDMI video input to match
the native resolution of your display:
• Using world-renowned Key Digital®Clear Matrix ProTMtechnology
• A full-function, high-quality Video Processor is included
• Supports all popular source and display formats and resolutions
• Pass-through mode (output = input)
• Accepts and automatically detects 60 Hz and 50 Hz input formats (the output frame rate
will be the same as the input frame rate)
• Built-in Test patterns available through the front-panel controls as well as RS-232
Easy to control and operate:
• Convenient front-panel display and pushbuttons
• Store your custom settings (like brightness, contrast, much more) for each of the four (4)
HDMI Inputs
• Easy-to-operate IR Remote Control, and rear-panel remote input
• RS-232
• Firmware upgradeable
Page 5 of 24
HDMI 4x1TMOperating Instructions
Page 6
HDMI 4x1TMOperating Instructions
Page 6 of 24
About the HDMI 4x1TMSwitcher
Thank you for purchasing the Key Digital®HDMI 4x1TMSwitcher, a high-quality, versatile
HDMI switcher that supports HDCP Copy Protection and switches any of four (4) inputs of
HDMI A/V to one (1) output. As more and more A/V products support the HDMI interface,
you'll find that the HDMI 4x1
TM
Switcher is exactly the solution you've been looking for. Your
HDMI switcher is engineered with the latest state-of-the-art technologies, and conveniently
provides many useful features that are easy to configure and control. The all-digital HDMI
interface and Key Digital
®
switching and processing provide the absolute best, crystal-clear,
and pristine picture quality!
The Solution you've been waiting for, the solution you've been looking for…
The HDMI 4x1
TM
Switcher is ideally suited to interface a wide array of source products with
an HDMI or DVI output, like your DVD player, Satellite Box, HD DVR, Set Top Box, or even
your PC, to any display with an HDMI or DVI input.
Page 7

Page 7 of 24
HDMI 4x1TMOperating Instructions
4 Inputs to 1 Output HDMI Switcher:
Let's start with the basic functions of your Key Digital
®
HDMI 4x1TMSwitcher. First and foremost, you purchased the product as a four (4) input to one (1) output switcher, capable of
supporting the 19-pin HDMI Type A connections with HDCP (Copy Protection).
Your Key Digital®HDMI 4x1TMSwitcher carries whatever signals are present on your HDMI cables. That means that you can switch Video as
well as Audio. HDMI lets source devices (like your DVD player, Satellite /
Set Top Box, or PC) “talk” with your display or “sink” device, and your
HDMI 4x1
TM
Switcher functions as a true HDMI repeater to pass along
this information. Your switching connection is truly seamless!
Versatile video and audio Inputs and Outputs:
Next, let's look at the versatility offered by your HDMI 4x1
TM
Switcher. Flexible Audio I/O
interfaces include HDMI, Toslink Optical audio, digital PCM audio, and analog Left & Right
stereo audio. If you have a DVI device you want to switch, or a display with a DVI input,
simply use HDMI<>DVI adapter cable(s).
A built-in Scaler to perfectly match the native resolution of your display:
All of the above features are what you've come to expect from Key Digital
®
. In fact, you can
stop right here, and you would have the perfect solution for all your HDMI switching requirements. But your HDMI 4x1TMSwitcher offers so much more…
Wouldn't you like to get the most your HDMI interface has to offer? Sure, HDMI is a pristine,
digital A/V interface. But how do you best interface your 480 sources to the native resolution of your display? Or what if the HD output from your Satellite / Set Top Box doesn't
match the native resolution of your display? Or what if you want to connect your PC to a
projector? This is where the beauty of your Key Digital
®
HDMI 4x1TMSwitcher shines
through. With world-renowned Key Digital®Clear Matrix ProTMtechnology built right into your
HDMI 4x1
TM
Switcher, any selected input video can be scaled exactly to match the native
resolution of your display. Most of the popular source and display formats and resolutions
are supported.
A built-in Video Processor:
But the power of your HDMI 4x1
TM
Switcher does not end there. An easy-to-operate, fullfunction, high-quality Video Processor is built into your switcher. For each input, you can
control a broad range of functions, from Brightness and Contrast, to Size, Position, and even
“Zoom” - Aspect Ratio adjustments. Test patterns built-into your HDMI 4x1
TM
Switcher help
you set-up your video system.
So easy to Control:
With so many features and versatility, you may be wondering: Is the HDMI 4x1
TM
Switcher
easy to operate and control? Simply use the convenient front-panel display and pushbuttons, the IR Remote Control, or RS-232 to easily control all features of the product.
Page 8
HDMI 4x1TMOperating Instructions
Page 8 of 24
Getting Started
Follow these instructions to quickly and easily set-up your HDMI 4x1TMSwitcher unit.
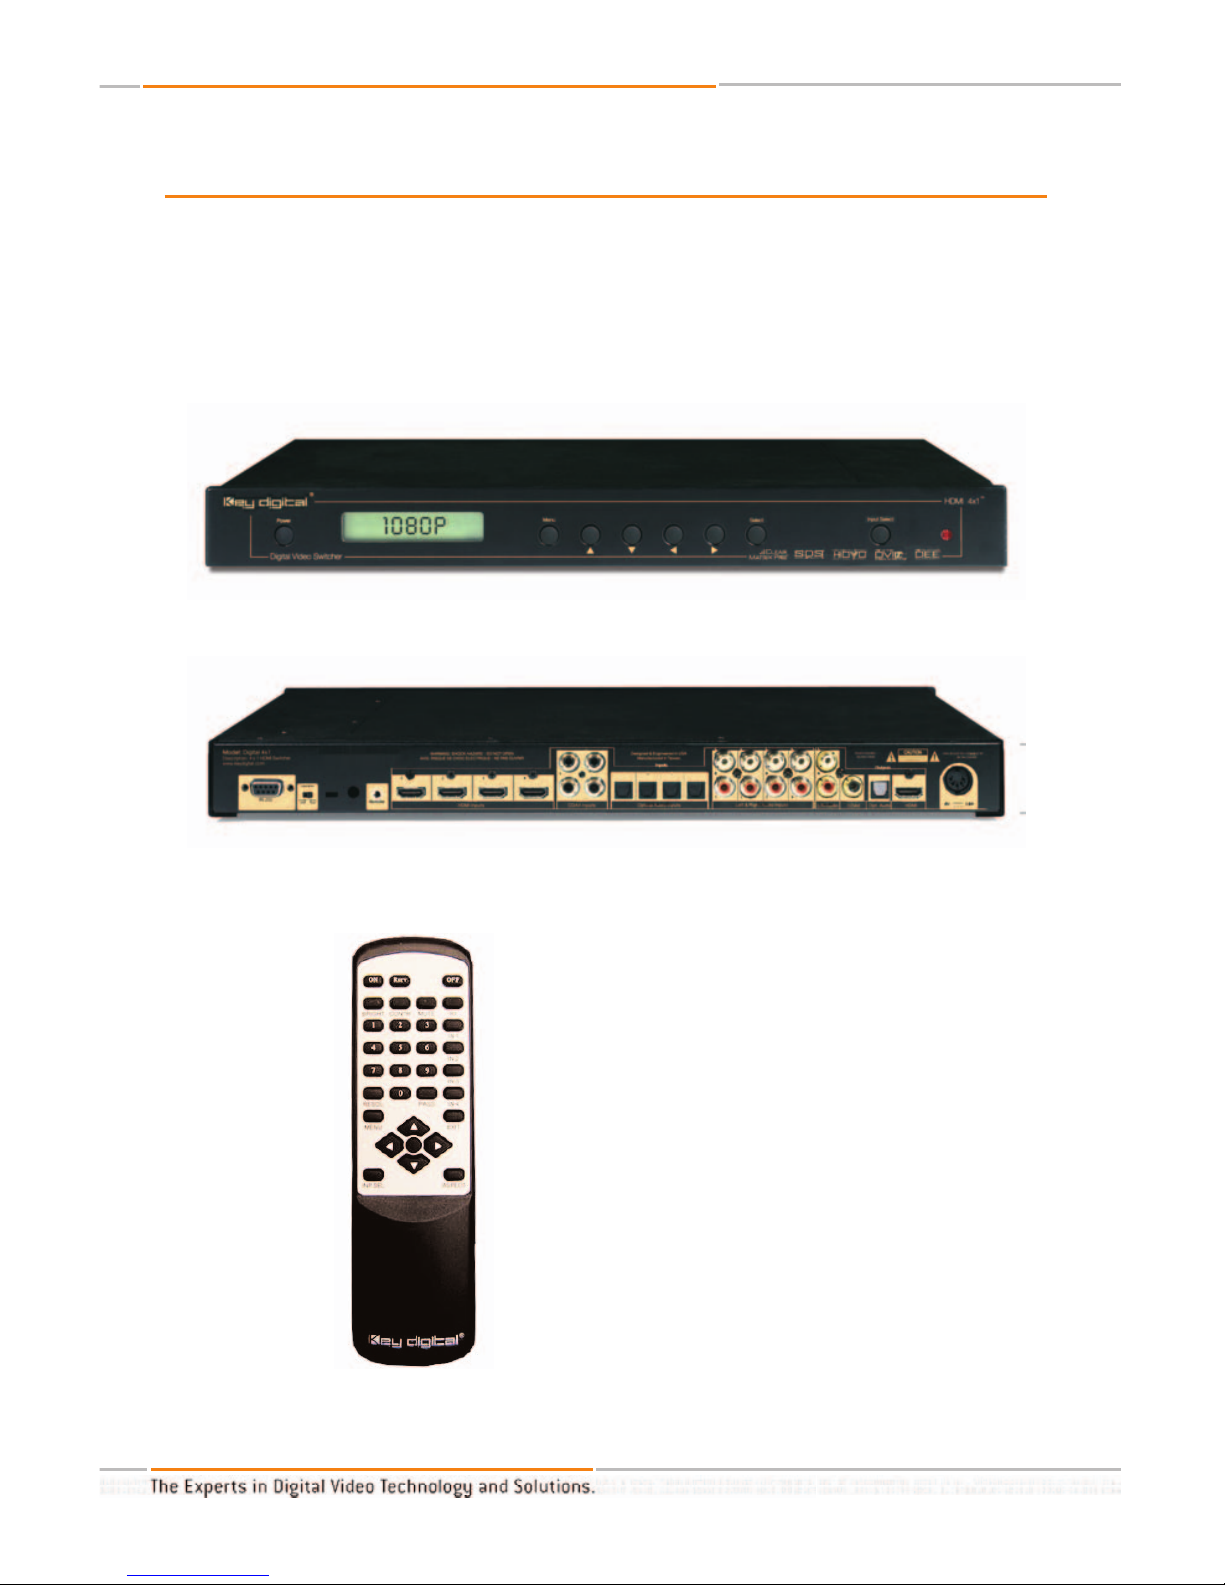
Open the carton and you will find the following contents:
1. One HDMI 4x1TMSwitcher unit
2. External, 6-Volt power supply
3. IR Remote Control with batteries included
4. Operating Instructions Manual
5. Warranty card
Setting up your HDMI 4x1TMSwitcher for operation:
Your HDMI 4x1
TM
Switcher is easy to configure and operate. In this section, you will first
connect all of your A/V input and output devices to your HDMI 4x1TMSwitcher unit. Do not
connect the external 6 Volt DC supply (provided) to the back of the Switcher until all your
Video and Audio connections to the HDMI 4x1
TM
Switcher are complete.
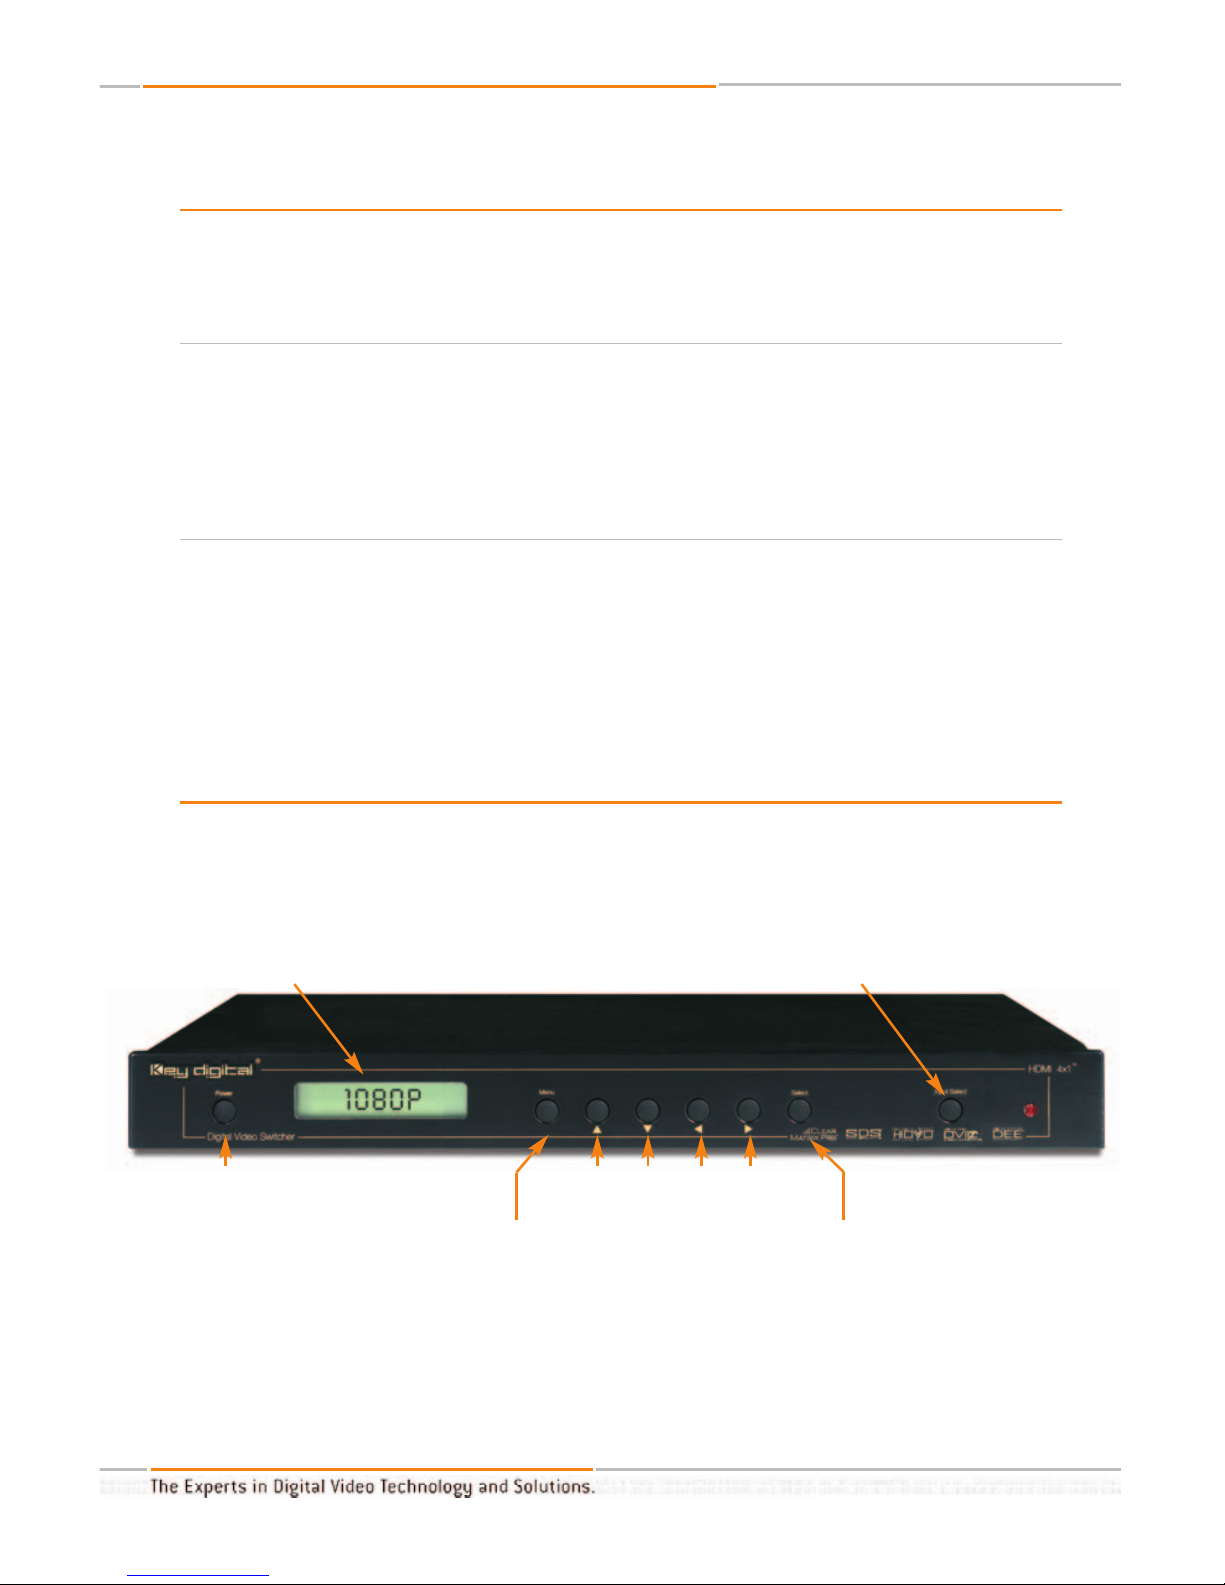
1. Become familiar with the location of the buttons, display, and connectors on your
HDMI 4x1TMSwitcher unit.
LCD Display: provides visual indi-
cation of modes, formats, and
selections
Power On-Off
Toggle
Menu Select pushbutton
invokes your
choices
IR Remote detector
Navigation & Control
Scroll Pushbuttons
Up Down Left Right
Input Select: convenient selection
of which 1-of-4 Inputs to switch to
the Output
Front-panel view of the HDMI 4x1TMSwitcher
Page 9

Page 9 of 24
HDMI 4x1TMOperating Instructions
2. Find a convenient and safe location to place your HDMI 4x1TMSwitcher unit.
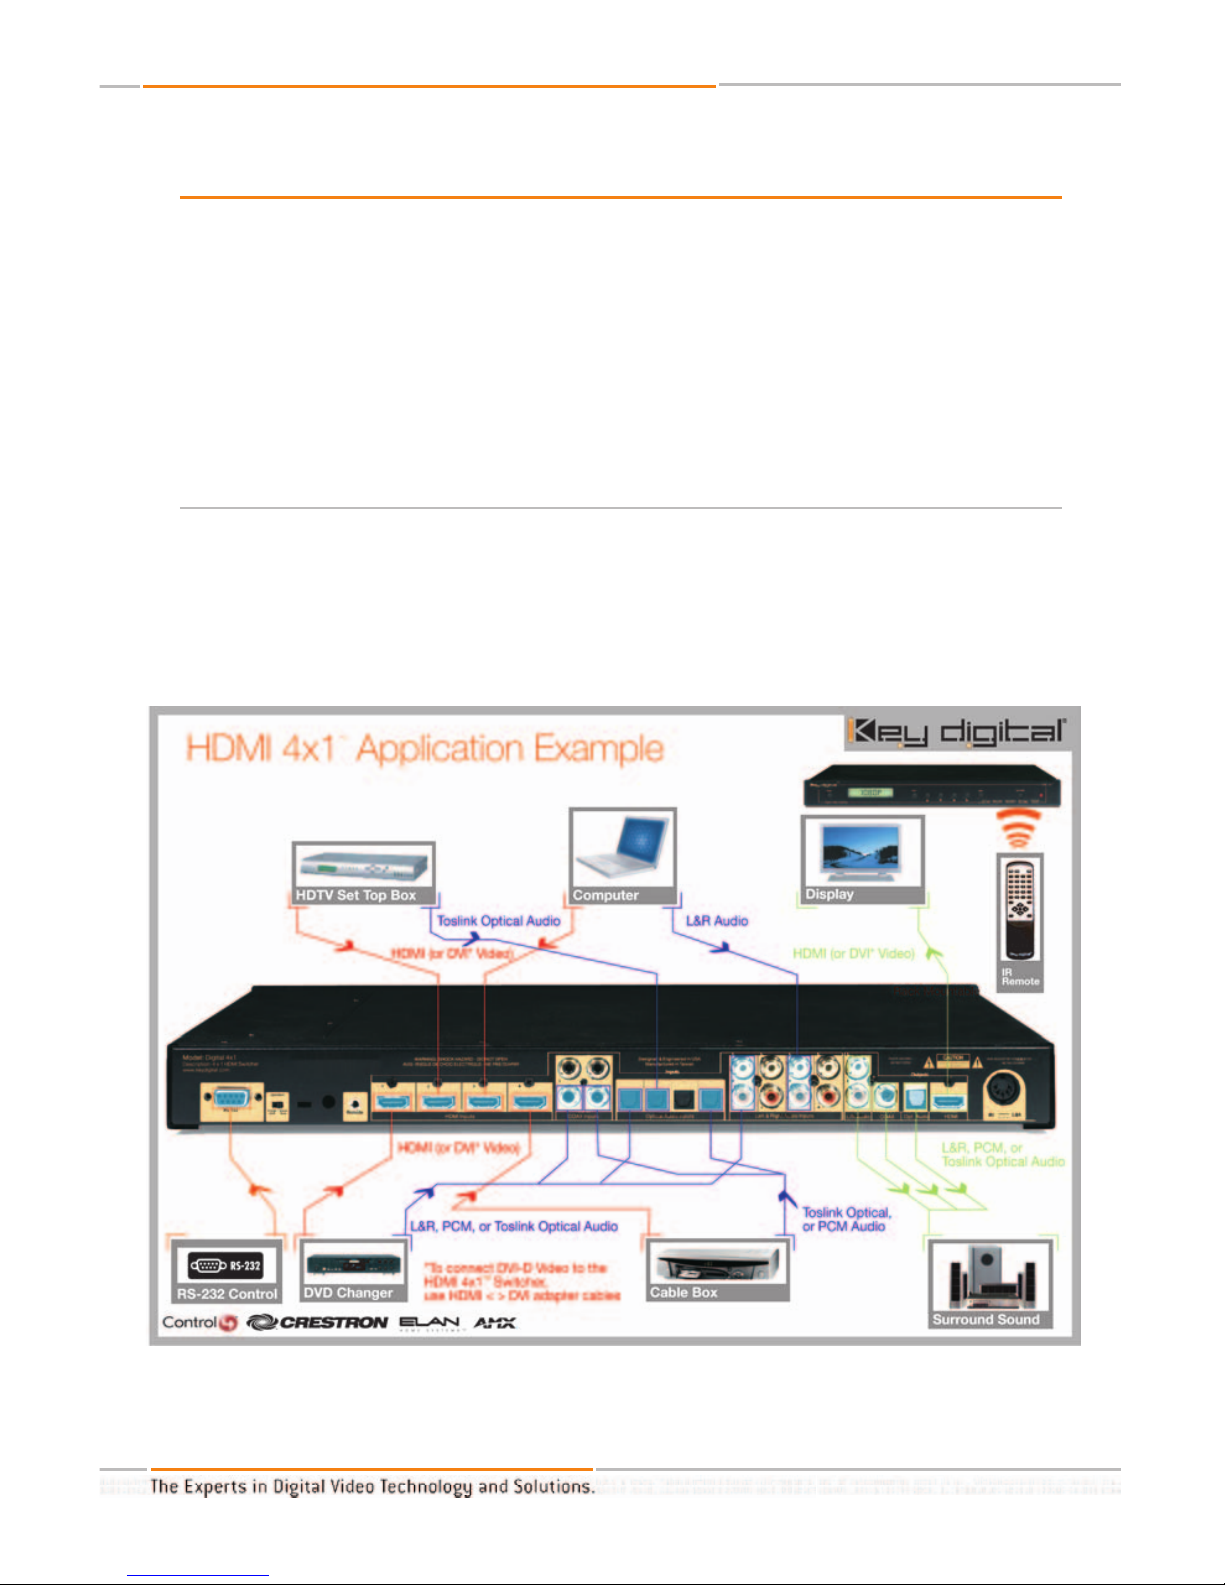
3. Connect your A/V Equipment to your HDMI 4x1TMSwitcher unit.
You may have several source devices with an HDMI output that you would like to conveniently connect and arbitrarily switch into your display device. Your HDMI 4x1TMSwitcher
accepts up to four (4) source devices. You can select (switch) any one (1) of these four (4)
devices to the output of the Switcher and hence to the input of your display.
Video signals are carried digitally over the HDMI link. The HDMI 4x1
TM
Switcher is a true
HDMI repeater, and detects the characteristics of the source and display devices. The HDMI
4x1
TM
Switcher supports HDCP Copy Protection.
You may decide to route your Audio signals over HDMI (along with the Video). Your HDMI
4x1
TM
Switcher also supports Audio switching of digital coaxial PCM audio (1 x RCA connector), Toslink optical audio, and/or analog audio Left & Right stereo pairs (2 x RCA connectors, color-coded Left and Right).
If the equipment you would like to connect to your HDMI 4x1
TM
Switcher has only DVI-D connectors, then you will need to separately purchase HDMI <> DVI-D adapter cables to connect the equipment to your HDMI 4x1
TM
Switcher
. Remember
, while HDMI suppor
ts Video
and Audio over the same connection, DVI-D supports Video only and you will need to separately connect your Audio signals to the HDMI 4x1
TM
Switcher.
At this time, connect your equipment to the inputs and outputs of your HDMI 4x1
TM
Switcher unit.
Analog Stereo Audio pairs
Left (top) & Right (bottom)
Digital Coaxial
PCM Audio
External Power Supply
jack
Wired Remote
Wired Remote HDMI A/V Inputs
Mode
Program - Normal
Rear-panel view of the HDMI 4x1TMSwitcher
1234
1234
Toslink Optical
Audio Inputs
Analog Stereo Audio
L&R Pair Out
Toslink Optical
Audio Out
HDMI A/V
Out
1234
Page 10

HDMI 4x1TMOperating Instructions
Page 10 of 24
4. Be sure that your HDMI 4x1TMSwitcher is set to “Normal” operating mode.
To change operating Modes: Power must NOT be applied to your HDMI 4x1TMSwitcher unit.
The power supply MUST be disconnected (either from the back of your unit or from the wall
outlet) to have a complete power shutdown - reset.
Only select “Program” mode when you need to perform a Firmware Upgrade of your HDMI
4x1TMSwitcher unit, as provided and instructed by Key Digital®. Firmware Upgrade instructions are provided later in this Operating Manual.
If the rear-panel Mode switch is set to “Program” mode and your HDMI 4x1TMSwitcher unit is
powered ON,
or even if the power supply is connected and the unit is turned OFF, the unit is
expecting a firmware upgrade and will not operate properly. If you did not intend to perform
the firmware upgrade, turn your HDMI 4x1
TM
Switcher unit OFF. Then, you must physically
disconnect power to your unit, set the rear-panel Mode slide switch to “Normal” mode,
physically reconnect power to the unit, and then turn the power back ON to your unit for
normal operation of your HDMI 4x1
TM
Switcher.
5. Connect the external power supply to your HDMI 4x1TMSwitcher unit.
Do not connect the external 6 Volt DC supply (provided) to the back of the Switcher until all
your Video and Audio connections to the HDMI 4x1TMSwitcher are complete (as described in
the prior step of this Operating Manual) and you have set the Mode switch to “Normal”
mode.
Once you have made all the A/V connections to your HDMI 4x1
TM
Switcher and the Mode is
set to “Normal”, plug in the external 6 VDC @ 5 Amp Power Supply (provided with your unit)
to the jack on the back of the unit and connect the power cord into an appropriately rated
wall outlet or power strip. You may now turn your HDMI 4x1
TM
Switcher unit ON using the
front-panel pushbutton, the IR Remote Control, or RS-232.
Mode: Program - Normal
Physically disconnect the power to your unit before setting the
rear-panel Mode slide switch to “Normal” mode
Page 11

Page 11 of 24
HDMI 4x1TMOperating Instructions
Basic Operation of the HDMI 4x1TMSwitcher
Now that you have connected your A/V equipment and the power supply to the HDMI 4x1
TM
Switcher, you are ready to operate and control the unit.
Be sure that your HDMI 4x1
TM
Switcher is set to “Normal” operating mode, as instructed in
the prior Step in this Operating Manual:
Whenever power is supplied to your HDMI 4x1
TM
Switcher unit and your unit is “turned OFF,”
the unit is actually in “Standby” mode. To change operating Modes, power must NOT be
applied to your HDMI 4x1TMSwitcher unit. The power supply MUST be disconnected (either
from the back of your unit or from the wall outlet) to have a complete power shutdown reset.
Be sure the rear-panel Mode slide switch is set to “Normal” mode. (Only select
“Program” mode when you need to perform a firmware upgrade of your HDMI 4x1
TM
Switcher unit, as provided and instructed by Key Digital®.)
Controlling your HDMI 4x1
TM
Switcher unit:
Your HDMI 4x1
TM
Switcher is easy to control and operate, and you have several convenient
options for controlling your HDMI 4x1TMSwitcher. All controls are available via:
• Front-panel pushbuttons, with a handy LCD display for instant feedback. The pushbuttons
act to “cycle” through operations, and you can navigate with the Up, Down, Left, and
Right arrows. The LCD will display the current function.
To use the front-panel pushbuttons and LCD:
• The
LEFT and RIGHT arrow pushbuttons allow you to scroll through the different
“menus”
• The
UP and DOWN arrow pushbuttons allow you to scroll through the different
“options” or selections, for the given menu
• The
Select pushbutton allows you to invoke the Menu or Option selection
• The
Input Select pushbutton allows for convenient front-panel selection of which
1-of-4 Inputs to switch to the Output
Page 12

HDMI 4x1TMOperating Instructions
Page 12 of 24
• IR Remote Control (discrete commands are available). Always be sure there is a clear line-
of-site from the hand-held IR Remote Control and the IR detection lends at the front right
panel of your HDMI 4x1
TM
Switcher unit.
• Wired (rear-panel) remote input.
• RS-232 (Crestron, CNMSX-PRO, AMX compatible)
ON
“Hot Buttons” that bring you
directly to the Menu functions
“Resolution” Allows you to select
the desired output resolution
The LEFT and RIGHT arrows
allow you to scroll through the different “Menus”
Cycle through and switch any
Input 1 - 4 to the Output
Input Selects
Allow you to switch any Input
1 – 4 to the Output
The Select pushbutton allows
you to invoke the Menu or
Option selection
“Aspect” Allows you to select
the desired output Aspect
Ratio processing
The UP and DOWN arrows allow
you to scroll through the different
“options” or selections, for the
given menu
OFF
Page 13

Page 13 of 24
HDMI 4x1TMOperating Instructions
1. Basic HDMI Switcher operation.
The most basic operation of your HDMI 4x1TMSwitcher unit is to provide switching of any
one (1) of up to four (4) HDMI A/V inputs (and corresponding analog, PCM, and/or Toslink
optical Audio inputs) to the output. Since your HDMI 4x1
TM
Switcher supports full HDMI
repeater functionality with hot plug detection, it passes the EDID upstream > downstream
from the e.g. display to the selected (switched) source device.
Having followed the procedures in this Operating Manual, the following steps should have
been taken:
a.Find a safe location for your HDMI 4x1
TM
Switcher
b.All of you're A/V devices should be interconnected to your HDMI 4x1
TM
Switcher
c.The rear-panel Mode switch should be set to “Normal” mode
(before the power
supply is connected to your unit)
d.The external 6 VDC @ 5 Amp power supply should be connected to the rear of
your unit and plugged into an appropriate power outlet
Now, turn the power ON to your HDMI 4x1
TM
Switcher unit. Press the Power switch on the
front left of the unit, or use the IR Remote Control:
You can immediately enjoy using your HDMI 4x1
TM
Switcher by selecting any desired input to
be switched to the output, using the “Input Select” switch on the front right of the unit.
Simply depress the “Input Select” switch and cycle through for Input 1, Input 2, Input 3, or
Input 4. Your HDMI 4x1
TM
Switcher will detect all active inputs.
Note that the Inputs 1 through 4 correspond to the HDMI inputs as marked on the rear
panel of the switcher. Also note that the corresponding analog, PCM, and/or Toslink optical
Audio inputs ar
e also switched to their output.
You may also select which input is switched to the output using the IR Remote Control.
Power On-Off
Toggle
Input Select: convenient selection of which
1-of-4 Inputs to switch to the Output
Page 14

HDMI 4x1TMOperating Instructions
Page 14 of 24
2. Understand the full capabilities of your HDMI 4x1TMSwitcher unit.
Your HDMI 4x1TMSwitcher unit is feature-rich, and performs much more than “4 x 1” switching of HDMI signals A/V and corresponding analog, PCM, and/or Toslink optical Audio. Your
HDMI 4x1
TM
Switcher unit has a built-in, high-quality scaler and video processor. Before we
start to operate and control these functions, let's look at the gamut of features provided in
your unit:
Video Processing Functions Provided
• Key Digital®DPETM(digital picture enhancement) and DEETM(digital edge enhancement)
• Sharpness, Brightness, Contrast
• Saturation, Hue
• Horizontal & Vertical Size, Position, Input Offset
• Zoom (Output Aspect Ratio processing), including options to prevent monitor burn-in for
Letterbox or Pillarbox images:
• Full
• Letterbox, Pillarbox
• Horizontal Zoom, Vertical Zoom, Horizontal and Vertical Zoom
You can also scale the selected (switched) HDMI video input to match the native resolution
of your display:
• Using world-renowned Key Digital®Clear Matrix ProTMand SDSTM(Super Digital Scaling)
technologies to deliver world-class scaling
• Supports all popular source and display formats and resolutions
3. Operating the HDMI 4x1TMSwitcher Video Scaler and Video Processor.
The Video Scaler and Video Processor built into your HDMI 4x1TMSwitcher unit is easy to
operate. You can control these functions using the front-panel pushbutton switches or your
IR Remote Control, with instant feedback from the front-panel LCD display.
Use the “Menu” pushbutton, and “Arrow” keys to scroll through the Menu options. For each
input, first select the video format carried by your HDMI signal: either RGB or Component
(YPbPr).
Each of the four (4) Inputs HDMI Inputs has a separate memory, so you can save
your preferred settings per input device. You can then select and store the following prefer
r
ed parameters for:
• Brightness
• Sharpness
•
Contrast
•
H-Size
Page 15

Page 15 of 24
HDMI 4x1TMOperating Instructions
• V-Size
• Saturation
• Hue
• H-Input Offset
• V-Input Offset
• H-Position
• V-Position
• Input format (RGB or YPbPr)
• Zoom / Aspect Ratio
Once you have selected a parameter to adjust for a particular Input (Input 1 through 4),
simply use the Left and Right Arrow buttons to move through the range. For example,
“Brightness” is set to a factory default of “00” but can be adjusted Up to +50 or Down to -50.
When instructed, you can reset the setting to Factory Default using the “Select” pushbutton
on the front panel.
4. Video Resolution Formats Supported.
The world-class video processor and scaler built into your HDMI 4x1TMSwitcher converts the
Input Video format to match the resolution format of your display. Pass-through mode
(output = input). Most popular Input and Output video resolution formats are supported,
including:
Input Formats Supported:
• 720 x 480i @ 60 Hz
• 720 x 480p @ 60 Hz
• 1280 x 720p @ 60 Hz
• 1920 x 1080i @ 60 Hz
Output Formats Supported:
• 640 x 480p @ 60 Hz
• 720 x 480i @ 60 Hz
• 20 x 480p @ 60 Hz
• 920 x 540 p @ 60 Hz
• 1280 x 720p @ 60 Hz
• 1368 x 768p @ 60 Hz
• 1280 x 768p @ 60 Hz
• 1400 x 1050p @ 60 Hz
• 1920 x 1080i @ 60 Hz
•
1920 x 1080p @ 60 Hz
• 576i @ 50 Hz
• 576p @ 50 Hz
• 720p @ 50 Hz
• 1080i @ 50 Hz
• 576i @ 50 Hz
• 576p @ 50 Hz
• 720p @ 50 Hz
• 1080i @ 50 Hz
• Pass-through mode (output = input)
Page 16

HDMI 4x1TMOperating Instructions
Page 16 of 24
5. Zoom - Aspect Ratio adjustments.
Your HDMI 4x1TMSwitcher can perform output Aspect Ratio processing, including options
to prevent monitor burn-in for Letterbox or Pillarbox images:
• Full
• Letterbox, Pillarbox
• Horizontal Zoom, Vertical Zoom, Horizontal and Vertical Zoom
You can also scale the selected (switched) HDMI video input to match the native resolution
of your display:
• Using world-renowned Key Digital®Clear Matrix ProTMand SDSTM(Super Digital Scaling)
technologies to deliver world-class scaling
• Supports all popular source and display formats and resolutions
Firmware Upgrades
From time-to-time, Key Digital®provides the option for you to update the Firmware that operates and controls your HDMI 4x1TMSwitcher, such as to add a new or impr
oved feature.
These updates are optional, and you should only perform upgrades as provided and
instructed by Key Digital
®
. Check our web site at www.keydigital.com for the latest firmware
updates.
Should a Firmware Upgrade be available that you are interested in installing in your unit,
please be sure to carefully and completely follow all of the steps described below.
1.
H Zoom (Horizontal Zoom): This “H Zoom” feature is particularly useful for some
Plasma owners, who may want to stretch the image to fill the screen and avoid the
nasty burn-in. If the input signal is a Pillarbox, Horizontal Zoom extends (distorts)
the image from left to right to fill the screen. For example, when a 4:3 movie is upconverted to HDTV in a studio, it may be simply released in the Pillarbox format,
with black bars to the left and right of the image in a 16:9 window.
2.
V Zoom (Vertical Zoom): This “V Zoom” feature is particularly useful for some
Plasma owners, who may want to stretch the image to fill the screen and avoid the
nasty burn-in. If the input signal is a Letterbox, Vertical Zoom extends (distorts) the
image from top to bottom to fill the screen. For example, it is very common for a
widescreen DVD movie to be presented in Letterbox, because the original movie
may be captured in 2.35:1 Cinemascope or some other Aspect Ratio that creates a
small letterbox in a 16:9 window.
3.
HV Zoom: This mode simultaneously stretches the image uniformly in both the
Horizontal and Vertical directions, using the same ratios as in H Zoom and V Zoom.
This Zoom mode may be preferred over the H- or V-Zoom, both of which geometrically distort the image. Because the image is “Zoomed,” there will be a slight loss
(cropping) of the image at the top and bottom for Pillarbox sources, and at the left
and right for Letterbox sources.
Page 17

Page 17 of 24
HDMI 4x1TMOperating Instructions
In order to perform the Firmware Upgrade, be sure that your HDMI 4x1TMSwitcher is set to
“Program” operating mode:
The power supply MUST be disconnected (either from the back of your unit or from the wall
outlet) to have a complete power shutdown - reset. Next, set the rear-panel Mode slide
switch to “Program” mode. Only select “Program” mode when you need to perform a
firmware upgrade of your HDMI 4x1TMSwitcher unit, as provided and instructed by Key
Digital®.
Mode: Program - Normal
Physically disconnect the power to your unit before setting
the rear-panel Mode slide switch to “Normal” mode
Page 18

HDMI 4x1TMOperating Instructions
Page 18 of 24
HDMI 4x1TMSwitcher
RS-232 Discrete Commands
Provided below is a table of the Discrete RS-232 Commands that allow you to control your
HDMI 4x1
TM
Switcher.
Page 19

Page 19 of 24
HDMI 4x1TMOperating Instructions
Page 20

HDMI 4x1TMOperating Instructions
Page 20 of 24
Technical Specifications
General
• HDMI 4x1
TM
Switcher, Model HDMI 4x1:
• 4-Inputs to 1-Output HDMI Switcher
• Crystal-clear switching of four (4) HDMI Inputs to one (1) HDMI Output
• HDMI Type A 19-pin connector
• To support DVI-D Video I/O, use HDMI<>DVI adapter cable(s)
• Supports HDCP Copy Protection
• HDMI repeater functionality with hot plug detection
• Switches Video and Audio with individual connectors for:
• HDMI Video and Audio
• Toslink Optical Audio
• Digital PCM Audio
• Analog stereo Left & Right Audio
•
Can also be confi
gur
ed to pr
ocess and scale any HDMI video input to match the native
resolution of your display:
• Using world-renowned Key Digital
®
Clear Matrix ProTMtechnology
• A full-function, high-quality Video Processor is included
• Supports all popular source and display formats and resolutions
Page 21

Page 21 of 24
HDMI 4x1TMOperating Instructions
• Easy to control and operate:
• Convenient front-panel display and pushbuttons
• vEasy-to-operate IR Remote Control
• RS-232
Video & Audio Inputs
• There are four (4) Inputs, on the rear of the product, labeled “1” through “4”
• Select “RGB” or Component (YPbPr) for each Input
• For each of the four (4) Inputs, there are the following connectors:
• HDMI A/V: 1 x HDMI Type A 19-pin connector
• Supports HDCP Copy Protection
• To support DVI-D Video, use HDMI<>DVI adapter cable(s)
• Digital Coaxial PCM Audio: 1 x RCA female
• Optical Audio: 1 x Toslink
• Analog stereo Left & Right Audio: RCA female (1 each color-coded Left & Right)
Video & Audio Outputs
• There is one (1) Output, on the rear of the product, with the following connectors:
• HDMI A/V: 1 x HDMI Type A 19-pin connector
- • Supports HDCP Copy Protection
- • To support DVI-D Video, use HDMI<>DVI adapter cable(s)
• Digital Coaxial PCM Audio: 1 x RCA female
• Optical Audio: 1 x Toslink
• Analog stereo Left & Right Audio: RCA female (1 each color-coded Left & Right)
Video Input Formats Supported
• Supports the following popular Input Formats:
• 720 x 480i @ 60 Hz
• 720 x 480p @ 60 Hz
• 1280 x 720p @ 60 Hz
• 1920 x 1080i @ 60 Hz
• Accepts and automatically detects 60 Hz and 50 Hz input formats
Video Output Formats Supported
• Supports the following popular Output Formats:
• 640 x 480p @ 60 Hz
• 720 x 480i @ 60 Hz
• 720 x 480p @ 60 Hz
• 1920 x 540 p @ 60 Hz
• 1280 x 720p @ 60 Hz
• 1368 x 768p @ 60 Hz
• 1280 x 768p @ 60 Hz
• 1400 x 1050p @ 60 Hz
• 1920 x 1080i @ 60 Hz
• 1920 x 1080p @ 60 Hz
• The output frame rate will be the same as the input frame rate, and supports 60 Hz and
50 Hz input for
mats
• 576i @ 50 Hz
• 576p @ 50 Hz
• 720p @ 50 Hz
• 1080i @ 50 Hz
• Pass-through mode (output = input)
• 576i @ 50 Hz
• 576p @ 50 Hz
• 720p @ 50 Hz
• 1080i @ 50 Hz
Page 22

Video Processing Functions
• Sharpness, Brightness, Contrast
• Saturation, Hue
• H & V Size, Position, Input Offset
• Zoom (Output Aspect Ratio processing), including options to prevent monitor burn-in for
Letterbox or Pillarbox images:
• Full
• Letterbox, Pillarbox
• Horizontal Zoom, Vertical Zoom, Horizontal and Vertical Zoom
• Built-in Test patterns help you set-up your video system (all patterns available through the
front-panel LCD and pushbuttons, as well as RS-232):
• White pattern
• Cross pattern
• Cross hatch
• Color bars
• Gray scale
• White window
• Horizontal ramp
• Wide horizontal ramp
• Wide vertical ramp
Status and Control
• Store your custom settings for each of the four (4) HDMI Inputs
• Convenient front-panel display and pushbuttons
• Easy-to-operate IR Remote Control
• Discrete IR commands available
• Rear-panel remote input
• RS-232:
• Crestron, AMX, CNMSX-PRO compatible
• Firmware upgradeable, with rear-panel switch to go into “Program Mode”
Connectors
• Each Input and the Output is compromised of the following connectors:
• RHDMI: 1 x HDMI Type A 19-pin connector
• RDigital Coaxial PCM Audio: 1 x RCA female
• ROptical Audio: 1 x Toslink
• RAnalog stereo Left & Right Audio: RCA female (1 each color-coded Left & Right)
• RS-232C: D-sub 9-pin
Mechanical
• No fan noise
• Rack mountable: 1U
•
Pr
oduct Size: 17 x 11 x 1.5 inches (excluding ears)
• Product Weight: 8 lbs. (excluding external power supply)
• Enclosure type: Metal
• Input power: External power supply included (6 Volt DC @ 5 Amps, 110-240 VAC, 50-60 Hz)
HDMI 4x1TMOperating Instructions
Page 22 of 24
Page 23

HOW TO CONTACT KEY DIGITAL
®
Repairs and Warranty Service:
n
Should your HDMI 4x1
TM
require warranty service, please contact Key Digital®to obtain a
Returned Materials Authorization (RMA) number
n
Please contact us at either:
n
1-914-667-9700
n
email tech@keydigital.com
Technical Support:
n
For technical questions about using our products, please contact us at either:
n
1-914-667-9700 or Toll-free 1-888-258-2028
n
email tech@keydigital.com
Customer Support
n
For customer support questions about using our products, please contact us at either:
n
1-914-667-9700
n
email customersupport@keydigital.com
W
ARRANTY
All Key Digital®products are built to high manufacturing standards and should provide years of
tr
ouble-free operation. They are backed by a limited two-year parts and labor warranty.
Page 23 of 24
HDMI 4x1TMOperating Instructions
Page 24

Web :: www.keydigital.com
Phone
:: 914-667-9700 Fax :: 914-668-8666
Key Digital®, led by digital video pioneer Mike Tsinberg,
develops and manufactures high quality, cutting-edge
technology solutions for virtually all applications where
high quality video imaging is important. Our products are
used by professional broadcasters, corporations, cus-
tom installers, home theater retailers, and consumers.
HDMI 4x1TMOperating Instructions
Rev 0 - March 2005
 Loading...