

Page 1
The Experts in Digital Video Technology and Solutions.
Page 1 of 15
Quick Setup Guide
The Experts in Digital Video Technology and Solutions.
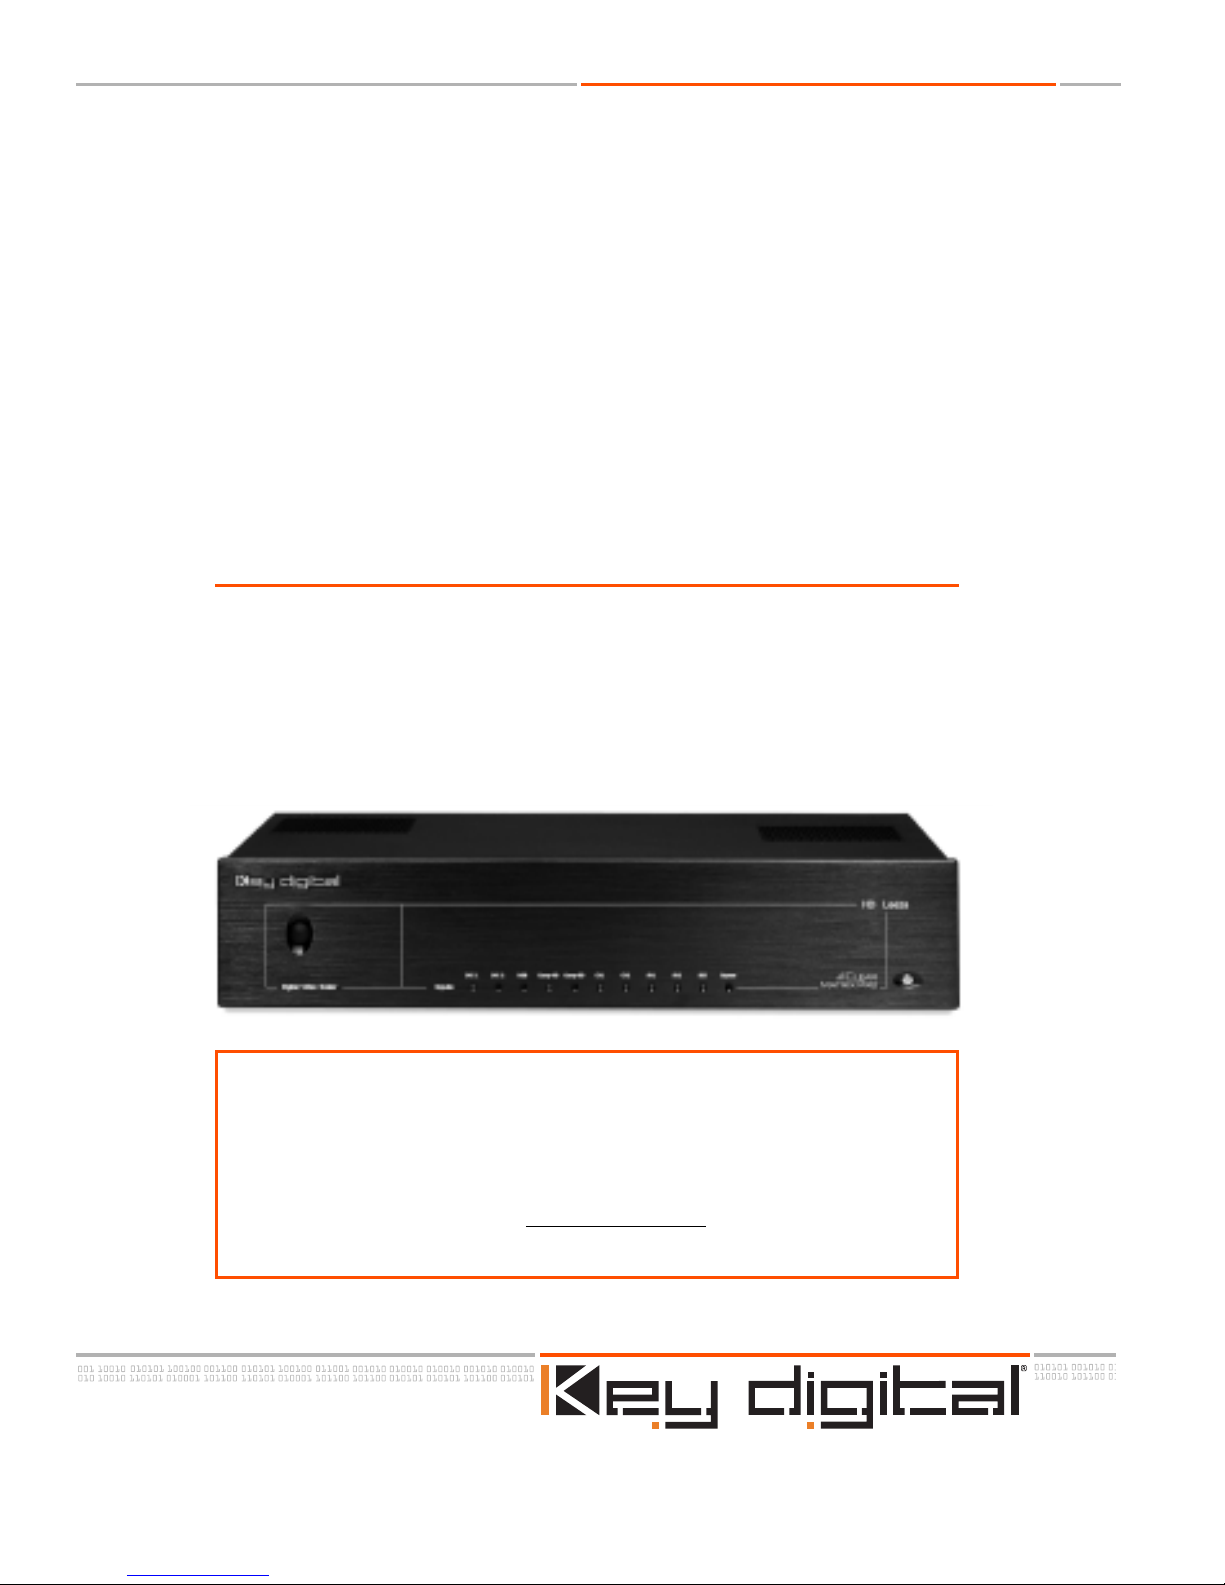
HD Leeza
Key Digital®Video Processor
Model KD-HD1080P
Have a question or a technical issue with your HD Leeza set-up?
n
Call the Key Digital®HD Leeza Hotline at: 866-439-8988 or 203-798-7187
n
E-mail the Key Digital®HD Leeza expert at: samuel@keydigital.com
n
Check the Key Digital®web site for the latest version of the complete
HD Leeza Users Manual at: www
.keydigital.com under
Literature>User Manuals>HD Leeza
Page 2
The Experts in Digital Video Technology and Solutions.
The Experts in Digi tal Video Technology and Solutions.
Page 3 of 15
HD Leeza Quick Setup Guide
The Experts in Digita l Video Technology and Solutions.
The Experts in Digita l Video Technology and Solutions.
HD Leeza Quick Setup Guide
Page 2 of 15
SETTING UP YOUR KEY DIGITAL®HD LEEZA (HDL)
IT’S AS EASY AS 1, 2, 3, 4, 5,...
1. CONNECT TO AC POWER WITH SUPPLIED CORD
2. CONNECT HD LEEZA TO YOUR DISPLAY
3. BRING UP HD LEEZA’S ON-SCREEN DISPLAY
(OSD), AND CONFIGURE HD LEEZA TO MATCH
THE OPTIMAL RESOLUTION OF YOUR DISPLAY
4. ADJUST HD LEEZA’S VIDEO PROCESSING
SETTINGS TO YOUR INDIVIDUAL PREFERENCES.
5. NOW CONNECT OTHER VIDEO SOURCES TO
THE INPUTS ON THE BACK OF THE HD LEEZA
2. CONNECT HD LEEZA TO YOUR DISPLAY
2.1 To connect the HD Leeza(HDL) OUTPUT to your VIDEO display.
Use appropriate cables and connect one of the following:
n
Digital DVI-D
n
VGA Video with BNC Connectors: RGBHV
n
Component Video with BNC Connectors: YPbPr
The preferred way of connecting HD Leeza to your display (in priority order):
1. DVI
2. HDMI using DVI-to-HDMI adapter (included)
3. RGBHV using BNC-to-BNC or BNC-to-VGA adapter cable (included)
4.YPbPr using BNC-to-RCA adapters (included)
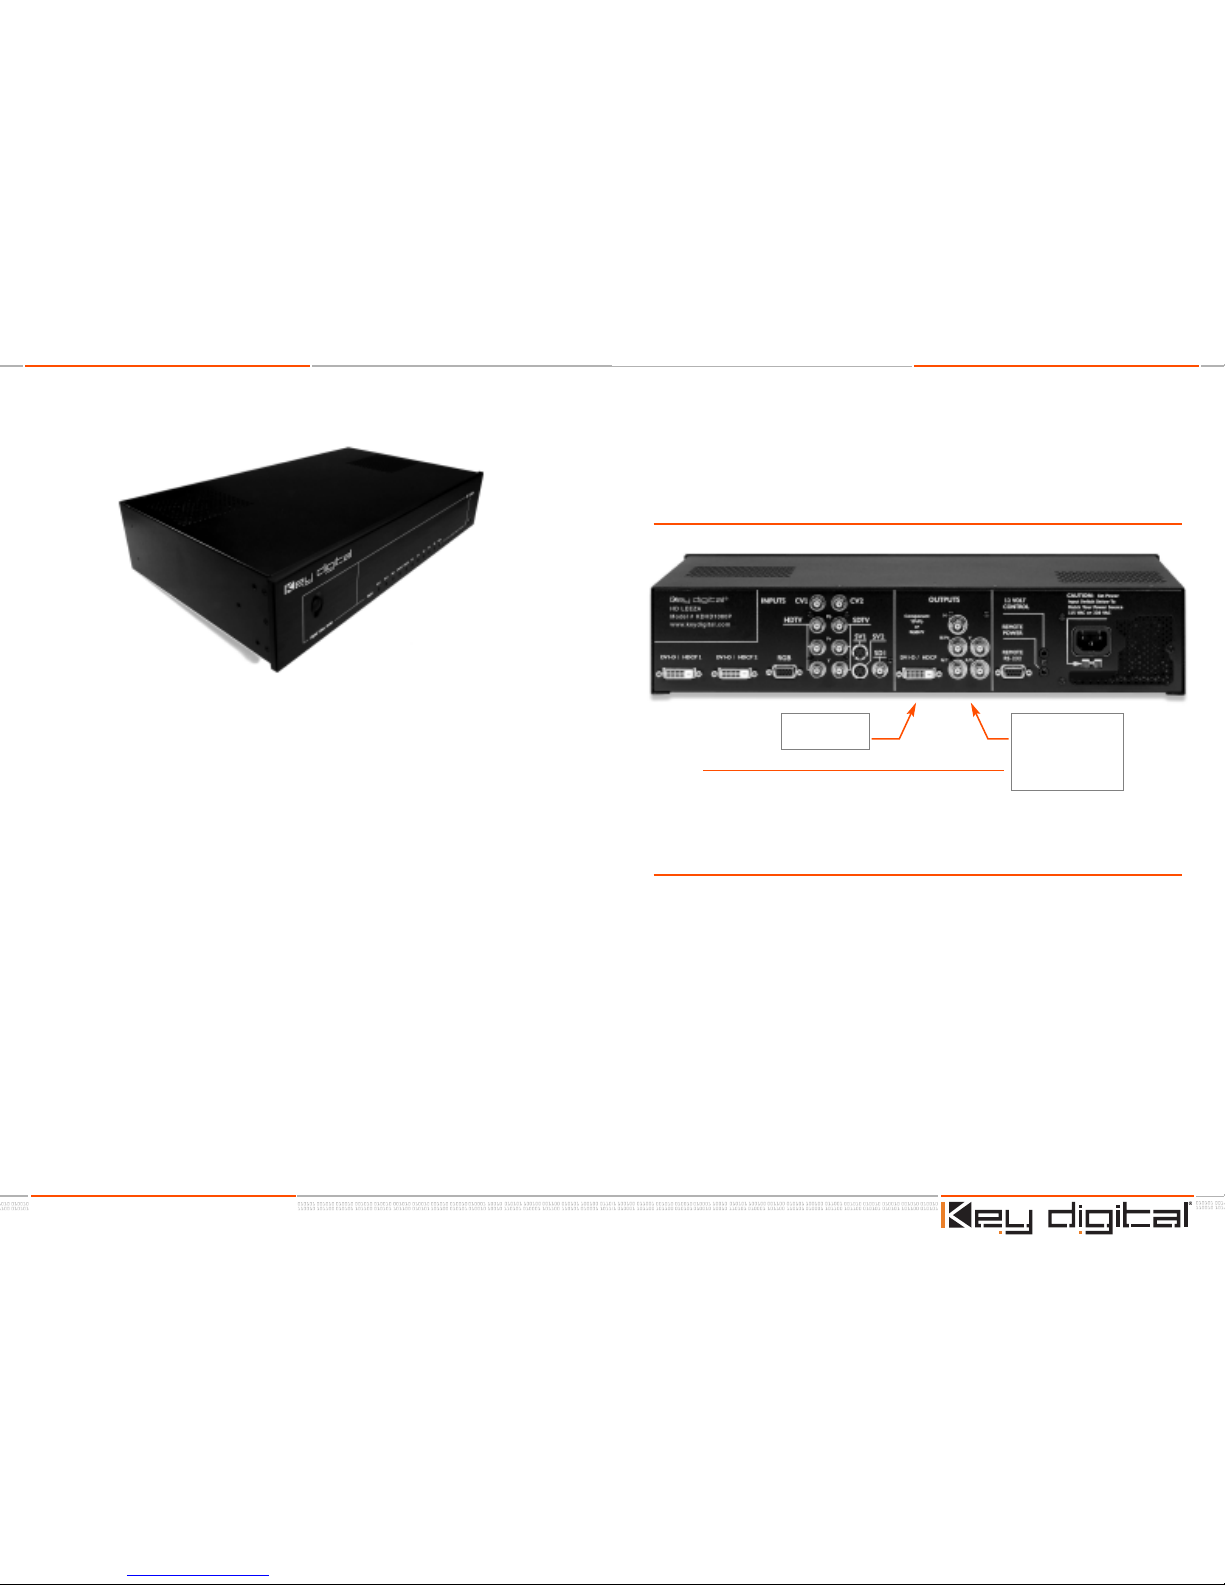
HD Leeza OUTPUTS to your DISPLAY
HD LEEZA (HDL) QUICK SET-UP
1. CONNECT TO AC POWER WITH SUPPLIED CORD
DVI-D / HDCP
or HDMI
Component (YPbPr)
or RGBHV (VGA)
Y = G
Pb = B
Pr = R
Page 3
The Experts in Digital Video Technology and Solutions.
The Experts in Digi tal Video Technology and Solutions.
Page 5 of 15
HD Leeza Quick Setup Guide
3.1.2 Next:
n
HDL is Output is pre-set at the factory to a format setting of “720 x 480p”
n
Your display may prefer some other format, like “1280 x 720p” (for example)
n
If you simply connect HDL’s Output (factory 720 x 480) to that Display’s Input (for
example, 1280 x 720), then:
n
The formats are different
n
You won’t get the best picture
n
The next step will allow you to set this correctly.
3.1.3 It’s simple to reconfigure HDL’s factory pre-set setting to match the
“native” format of your display. Follow these simple steps:
n
HDL is factor y-set to 720 x 480/60, RGB Out, CV1 In
n
RGB Out is the DVI, HDMI, and RGB output formats from HDL
(but NOT the Component Video, YPbPr outputs).
See below for handling Component Video Outputs.
n
When power is connected to HDL and no Inputs are used:
n
The CV1 LED should blink on HDL’s front panel, to indicate No Signal on CV1
Input. DVI, HDMI or RGBHV connections to your display should accept this
format.
n
If connecting to your display with YPbPr (Component Video), you’ll need to
reboot (reset) the HDL to Component Output as follows:
a. Press and release the green
GB (“Granny”)
button on the HDL remote control
b. COUNT TO 5, then press and release the large
Navigation Up-Arrow
or Down-Arrow key on the remote control, and HDL will reboot to
720 x 480/60 YPbPr Output
n
IF you need to get back to DVI, HDMI or RGBHV:
a. Press and release the green
GB (“Granny”) button on
the HDL remote control
b. COUNT TO 5, then press and release the large
Navigation Right-
Arrow
key on the remote control, and HDL will reboot to 720 x 480/60
RGB Output
The Experts in Digita l Video Technology and Solutions.
The Experts in Digita l Video Technology and Solutions.
HD Leeza Quick Setup Guide
Page 4 of 15
STEP 3: BRING UP HD LEEZA’S ON-SCREEN DISPLAY
(OSD), AND CONFIGURE HD LEEZA TO MATCH
THE OPTIMAL RESOLUTION OF YOUR DISPLAY.
3.1 Bring up HD Leeza’s (HDL’s) On-screen Display (OSD) by pressing and releasing
the menu button.
3.1.1 First, it’s a good idea to become familiar with HDL’s IR Remote Control, because this is a
simple and handy way to perform the initial set-up. This is an “IR” (infrared) remote, so
you need a clear line-of-site when aiming it towards theright side of the front panel HDL
(that is where the IR sensor is located).
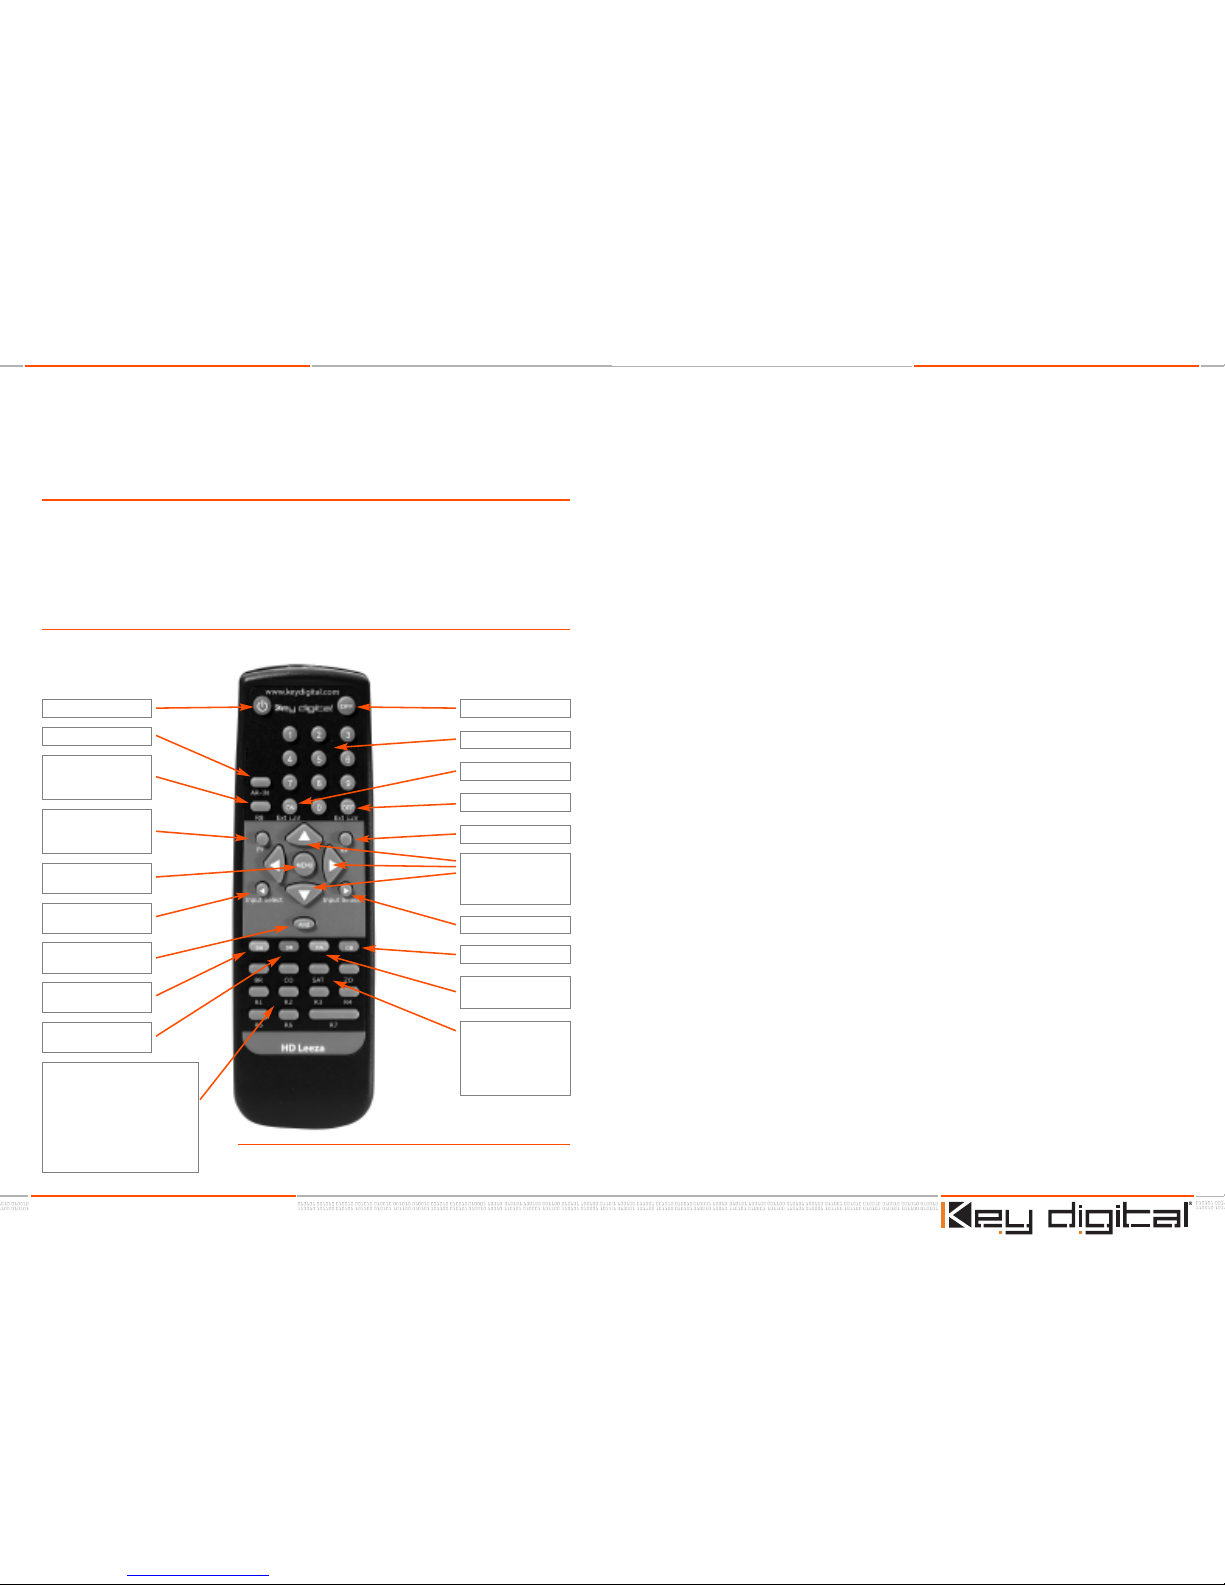
Learn the basics: Menu, Arrow Keys, GR “Granny” Button:
Power ON
Aspect Ratio Menu
“Hot” Button
<R8> Special DVI
out timing
PP Previous Page
ALW AYS moves
you OUT
MENU Brings up the
OSD Menu
Power OFF
Numeric KeyPad
Ext 12V ON
Ext 12V OFF
NP Next Page
GB Granny Button
PA Picture
Adjustment Menu Page
Input Select Next
Navigation Arrows
Up, Down, Left, Right
Input Select
Previous
AND DSX Hot Button
SH Ext 12V Control
On/Off Toggle
SR Scanning
Resolution Menu Page
SEE END OF THIS MANUAL FOR A SUMMARY OF THESE BUTTONS
“
HOT” Buttons:
<R1>
– Inhibit OSD
<R2> – S
D
I S
y
nc
<R3> – No operation
<R4> – Bypass RGBHV
<R6> – Direct Channel Access
<R7> – Inhibit OSD
<R8> – Special DVI out timing
MENU Pages for:
BR
– Brightness
CO – Contrast
SAT – Saturation
ZO – Zoom
HD Leeza IR Remote Control
Page 4

The Experts in Digital Video Technology and Solutions.
The Experts in Digi tal Video Technology and Solutions.
Page 7 of 15
HD Leeza Quick Setup Guide
STEP 4: ADJUST HD LEEZA’S VIDEO PROCESSING
SETTINGS TO YOUR INDIVIDUAL PREFERENCES.
4.1 Now that the resolution has been set, “Frame” the video on your display. This
process ensures that the picture from HDL is centered vertically and horizontally
on your display, and that it fills the entire screen.
4.1.1 To perform the “Framing” you’ll need to connect a DVD Player to HDL:
n
Use the YPbPr SDTV connection to HDL, and the BNC-to-RCA adapters (included).
n
The SDTV HDL input will not recognize 480p from DVD player.
þ Set your DVD player to 480i.
þ If your DVD player does not have a convenient front-panel button to select
480i, first connect your DVD player Composite output directly to your display
(do NOT connect through HDL!) and set your DVD player through its OSD to
480i.
þ Set the DVD Aspect ratio to 16:9. If you connected your DVD player directly to
the display, now connect the DVD player to the back of the HD Leeza.
n
Select a DVD movie or other DVD video material you are familiar with, so you know in
advance what the video should look like. Insert the DVD video disc in your DVD player and hit Play.
4.1.2 Set your Display and HDL to correct picture framing.
NOTE for the HDL OSD:
n
“SYSTEM SETUP”
refers to the OUTPUT side of HDL, that is connected to
your DISPLAY
n
“PICTURE ADJUST”
refers to the INPUT side of HDL, that is connected from
your video source (like a DVD player)
Follow these Steps in the following order:
1.
Set HDL Output Aspect Ratio to 1.78 (other Output Aspect Ratios can be used
for special applications). On the HDL IR remote control:
n
Press Menu
n
Use the large Navigation Right-Arrow to
þ Select System Setup,
press
right arrow
þ Select Output A-R. press right arrow
þ Select 1.7 8, press right arrow
The Experts in Digita l Video Technology and Solutions.
The Experts in Digita l Video Technology and Solutions.
HD Leeza Quick Setup Guide
Page 6 of 15
3.2 Bring up HD Leeza’s (HDL’s) On-screen Display (OSD) by pressing and releasing
the Menu Button. The Menu Navigation is achieved by using the Four Navigation
Arrow Buttons (Up, Down, Left, Right) and the PP (Previous Page) or NP (Next
Page) Button. The Right Arrow or NP Button will open the next display window to
the right and execute the command at the last open window. The Left Arrow or
PP Button will close the open display window. If the Left Arrow Button is used for
changing a setting, such as Horizontal Position, the PP Button should be used to
close the open window. The Up and Down Navigation Arrow Buttons are used to
change the value in each open display window.
3.2.1 When a connection is established between HDL and your display, set HDL to the best
resolution for the display.
Use the “Display Matrix” Table attached at the end of
this Quick Set-up Guide to determine the best HDL setting for your display.
If your display is not listed, consult the technical specifications in your display’s owners
manual for the native resolution of your display.
3.2.2 Once you’ve established the preferred setting from the Display Matrix Table, set HDL’s
resolution to provide the best match to your display:
CAUTION: In the following Step, if you select a resolution that is not displayable by your
display, then you will lose the picture and the HDL OSD. See Step 3.1.3 and reboot HDL
back to the factory default:
n
720 x 480p/60 RGB, for DVI/HDMI/RGBHV connections
n
720 x 480p/60 YPbPr, for Component Video connections
For your convenience, listed here are typical display resolutions permitted
for the following connections:
n
DVI Non HDCP: Many resolutions in the 768p, 960p, 1024p or 1050p categories are
permitted
n
DVI/HDCP: 720 x 480p/60, 1920 x 540p/60,1280 x 720p/60
n
HDMI: 720 x 480p/60, 1920 x 540p/60, 1280 x 720p/60
n
RGBHV: Many resolutions in the 768p or 1024p categories are permitted, and the range
of permitted resolutions is usually much larger than the DVI Non HDCP connection
n
YPbPr: 720 x 480p/60,1920 x 540p/60, 1280 x 720p/60
a. Press the SR button on the HDL IR remote control
b. Scroll down to the resolution desired
c.
Press the large Navigation Right-Arrowkey
d. Always select 60 Hz unless specified differently in
the Display Matrix Table
e.P
ress the large Navigation Right-Arrowkey again
f. The menu should reappear on your display,
with the new resolution specifications in your
display’s owners manual for the native resolution
of your display.
Page 5

The Experts in Digital Video Technology and Solutions.
The Experts in Digi tal Video Technology and Solutions.
Page 9 of 15
HD Leeza Quick Setup Guide
4.2 Now that the resolution has been set and your video has been “Framed” on your
Display, you can use HDL to adjust and save the picture settings for each input.
n
All eight (8) settings in the Picture Adjust menu can be individually set for each input:
þ Input Aspect Ratio
þ Brightness
þ Contrast
þ Saturation
þ Vertical Offset
þ Horizontal Offset
þ Edge Enhancement
þ Zoom
n
Three additional settings in the System Setup menu can be individually set for each
input: KD-PE, Horizontal Position, and Horizontal Size
n
To memorize individual Input preference setting:
a. Switch to your desired input using the OSD, IR remote control, or RS232
b. Adjust all Picture Adjustment settings and the three System Setup settings to
your preference
c.
Re-select the same input through the OSD ONLY
d. You will see secondary OSD MEMORIZE PA
e. Select
MEMORIZE PA and press large Navigation Right Arrow button in
the remote
STEP 5: NOW CONNECT YOUR OTHER VIDEO SOURCES
TO THE INPUTS ON THE BACK OF THE HD
LEEZA. FOR EXAMPLE A VCR OR CABLE BOX.
Please consult the complete and detailed HDL User Manual for all other features and settings.
The Experts in Digita l Video Technology and Solutions.
The Experts in Digita l Video Technology and Solutions.
HD Leeza Quick Setup Guide
Page 8 of 15
2.
Set HDL Input Aspect Ratio to 1.78 (other Output Aspect Ratios can be used for
special applications). On the HDL IR remote control:
n
Press Menu
n
Use the large Navigation Right-Arrow to
þ Select Picture Adjust, press right arrow
þ Select Input A-R, press right arrow
þ Select 1.7 8, press right arrow
3.
Adjust “SYSTEM SETUP” Picture Position and Size using HDL’s IR remote control
(you may need to go back-and-forth between size and position until the picture is
perfectly Framed):
n
For DVI and HDMI connections to your Display, adjust Position using the Position
settings control
ON YOUR DISPLAY (NOT HDL!). This is required because most
displays in the DVI or HDMI mode do NOT accept HD Leeza H and V position
adjustments.
n
Adjust Size using HDL so the picture fills the entire screen. Position (for VGA or
Component Video) and
Size adjustments are in HDL’s System Setup Menu.
Adjust Size using HDL so the picture fills the entire screen.
Image POSITION Adjust Image SIZE Adjust
Page 6

The Experts in Digital Video Technology and Solutions.
The Experts in Digi tal Video Technology and Solutions.
Page 11 of 15
HD Leeza Quick Setup Guide
Single digit Direct Access Input Switch:
The input can be switched as usual using (R6, #) as well as new Single key #. The single key
mode is activated once ALL OSD is automatically erased from the screen following 60 seconds
of remote-control inactivity. The single key mode will also activate after the user presses the PP
button (at most) 6 times – effectively erasing all OSD. The single key direct access works the
same way as (R6, #} or as the RS232 command (i, #). It switche s and plugs individual memories without displaying any OSD.
R7 – RGB/DVI Display Hot Button:
R7 is a hot button used together with the numbers 1, 2, or 3. (R7, 1) is the default setting.
n
With the (R7, 1) setting, the horizontal and vertical positions are zeroed out before
being moved to their normal values. This enables DVI displays to center the frame
correctly. For RGB display outputs, (R7, 1) is the best setting. With (R7, 1), the extra
operations needed for DVI displays are eliminated resulting in faster response.
n
(R7, 2) adds a sync-polarity “flip-flop” following (R7, 1) operation.
R8 - Direct DVI Phase Clock Configuration Hot Button:
You can manually configure the DVI phase clock for DVI output (direct DVI phase clock configuration may be necessary if your Display does not sync up when output resolutions at 1280 x
1024/75 Hz and higher are selected). This is done by pressing the
R8 button and then entering
the desired number, as follows:
n
0 = Phase 0
n
1 = Phase 1
n
2 = Phase 2
n
3 = Phase 3 (factory default)
n
4 = Phase 4
n
5 = Phase 5
n
6 = Phase 6
n
7 = Phase 7
Note: You will not see an adjustment menu on your Display when setting this configuration.
Special X or N DVI Input/Output Mode:
The remote commands (R8, 8) and (R8, 9) can be used to select a special X or N DVI
input/output mode respectively. Stick with the default DVI_PH_N (R8,9) if you have no issues
with DVI input/output.
The Experts in Digita l Video Technology and Solutions.
The Experts in Digita l Video Technology and Solutions.
HD Leeza Quick Setup Guide
Page 10 of 15
HANDY LIST OF HD LEEZA IR REMOTE “HOT” BUTTONS
Pressing one button on HD Leeza’s IR Remote performs the following functions
R1 - Inhibit OSD Hot Button:
R1 is a hot button used in conjunction with the numbers 1 and 2. (R1, 2) is the default setting.
n
(R1, 1) puts HD Leeza in a mode where the OSD is not displayed when the input
channel is changed.
n
(R1, 2) restores the default mode where OSD is displayed on channel changes.
R2 - Separate Sync on SDI Hot Button:
R2 is a hot button used in conjunction with the numbers 1 and 2. (R2, 2) is the default setting.
n
(R2,1) enables separate sync on SDI inputs. Then the frame can be moved
horizontally and vertically, exactly as with other input channels.
n
With (R2, 2), SDI inputs use embedded sync and cannot be moved
on the display screen.
R4 - RGBHV Bypass Hot Button:
R4 is a hot button working as a RGBHV bypass switch. It connects the input RGBHV to the
output RGBHV, bypassing HD Leeza processing.
R6 - Direct Input Access Hot Button:
You can select any of HD Leeza’s inputs directly by first pressing the R6 button and then the
desired input number, as follows:
n
0 = DVI Input #1
n
1 = DVI Input #2
n
2 = RGBHV Input
n
3 = Component HD Input
n
4 = Serial Digital Input
n
5 = Component SD Input
n
6 = S-Video Input #1
n
7 = S-Video Input #2*
n
8 = Composite Video Input #1
n
9 = Composite Video Input #2*
* I
f there is no video source connected to the selected input, its front panel LED will blink
(except for Composite Video #2 and S-Video #2 inputs, and the words "No Signal" will also
appear on screen).
Page 7

The Experts in Digital Video Technology and Solutions.
The Experts in Digi tal Video Technology and Solutions.
Page 13 of 15
HD Leeza Quick Setup Guide
The Experts in Digita l Video Technology and Solutions.
The Experts in Digita l Video Technology and Solutions.
HD Leeza Quick Setup Guide
Page 12 of 15
Preferred HD Leeza Resolution Settings for Popular Displays
HD LEEZA “DISPLAY MATRIX” TABLE
Preferred HD Leeza Resolution Settings for Popular Displays
The Table presented below is a “living document” based on actual user-experience with
HD Leeza and various types of displays. Please be sure to check the Key Digital web
site www
.keydigital.com, or contact tech@keydigital.com to be sure that you have the
latest and most complete and accurate version of this table.
Brand Name
&
Technology
Model #
HD Leeza
Non-default
Settings
Display
Non-default
Settings
Interface
from
HD Leeza
Refresh
Rate
(Hz)
Resolution
used by
HD Leeza
Brand Name
&
T
echnology
M
odel #
HD Leeza
N
on-default
Se
ttings
Display
N
on-default
Se
ttings
Interface
f
rom
HD
Leez a
Refresh
Ra
te
(Hz)
Resolution
use
d by
HD
Leez a
Page 8

The Experts in Digital Video Technology and Solutions.
The Experts in Digi tal Video Technology and Solutions.
Page 15 of 15
HD Leeza Quick Setup Guide
The Experts in Digita l Video Technology and Solutions.
The Experts in Digita l Video Technology and Solutions.
HD Leeza Quick Setup Guide
Page 14 of 15
Preferred HD Leeza Resolution Settings for Popular Displays
Brand Name
&
T
echnology
M
odel #
HD Leeza
N
on-default
Se
ttings
Display
N
on-default
Se
ttings
Interface
f
rom
HD
Leez a
Refresh
Ra
te
(Hz)
Resolution
use
d by
HD
Leez a
Setup Notes:
HD Leeza
Key Digital®Video Processor
Page 9

The Experts in Digital Video Technology and Solutions.
The Experts in Digital Video Technology and Solutions.
The Experts in Digital Video Technology and Solutions.
Web :: www.keydigital.com
Phone
:: 718.796.7178 Fax :: 718.796.6664
Key Digital™, led by digital video pioneer Mike Tsinberg,
develops and manufactures high quality, cutting-edge
technology solutions for virtually all applications where
high quality video imaging is important. Our products are
us
ed by professional broadcasters, corporations, custom
installers, home theater retailers, and consumers.
HD Leeza Quick Setup Guide
 Loading...