

Page 1
KERN & Sohn GmbH
Ziegelei 1
D-72336 Balingen
E-Mail: info@kern-sohn.com
Phone: +49-[0]7433- 9933-0
Fax: +49-[0]7433-9933-149
Internet: www.kern-sohn.com
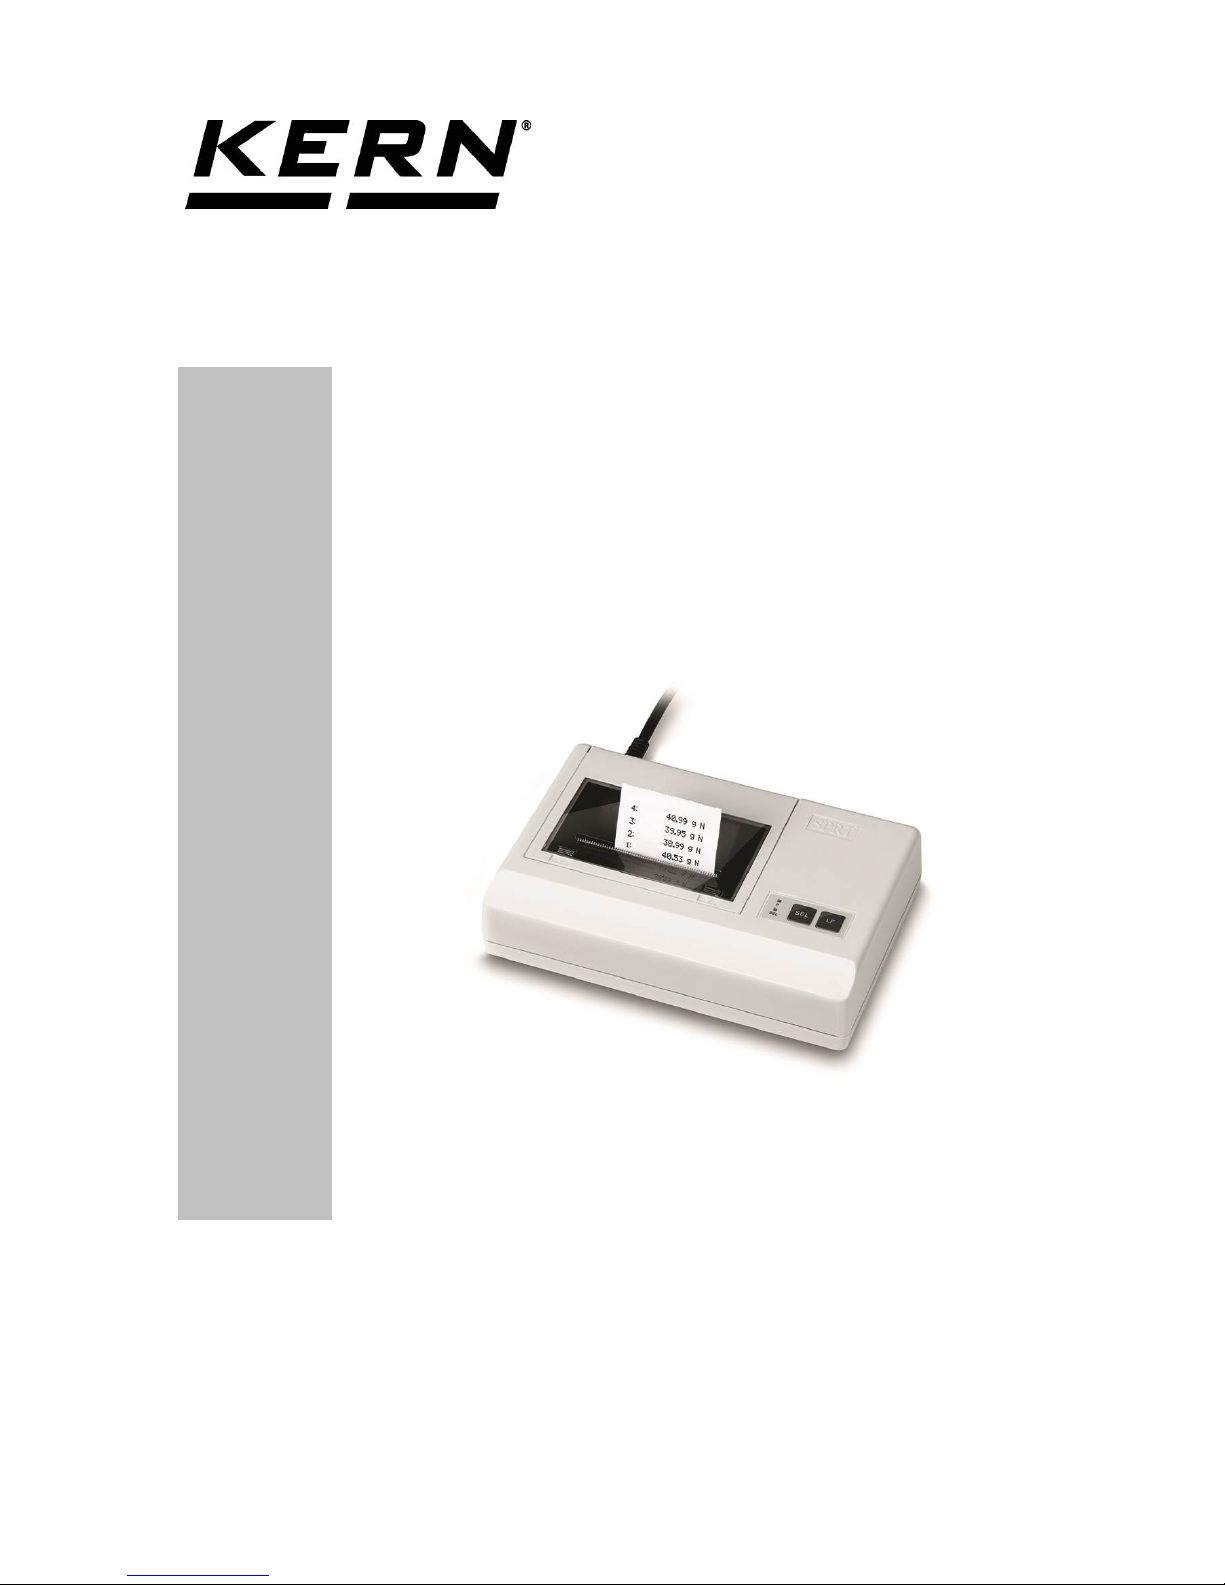
Operating Instructions Dot M at r ix Printer
KERN YKN-01
Version 1.1
04/2014
GB
YKN-01-e-1411
Page 2
GB
KERN YKN-01
Version 1.1 04/2014
Operating manual
Dot matrix pri nt e r
Contents
1 Technical data ................................................................................................... 3
2 Unpacking .......................................................................................................... 4
3 Set Up and commissioning .............................................................................. 4
4 Printer parts ....................................................................................................... 5
5 Description of buttons and LED displays ....................................................... 6
5.1 Self-test...................................................................................................................................... 6
5.2 Operating and standby mode .................................................................................................. 6
5.3 Line feed .................................................................................................................................... 7
5.4 Start-up ...................................................................................................................................... 7
5.5 Paper .......................................................................................................................................... 7
6 Micro switches .................................................................................................. 8
7 Instant help ........................................................................................................ 9
2 YKN-01-BA-e-1411
Page 3
1 Technical data
Character composition
Matrix 5x7 dots
Print speed
15 mm/sec.
Number of characters
per line
16
Character set
IBM set 2
Paper
On one ribbon, width 44 mm, lengths approx. 7.5 m
Electric Supply
5 V 1.5 A
External power supply
unit
100 V ~ 240 V 50 ~ 60 Hz
Energy consumption
7.5 W
Supply interface
Type Jack 2.1
Baud rate
150, 300, 1200, 2400, 4800, 9600, 19200 Baud
Parameter/data format
ASCII
Parity
Even, odd, none
Communication protocol
ASCII
Working life
500,000 lines
Operating temperature
5°C – 35°C
Humidity of air
max. 80 % relative (not condensing)
Dimensions
158 x 106 x 40 mm
Weight
307 g (excl. paper roll)
YKN-01-BA-e-1411 3
Page 4
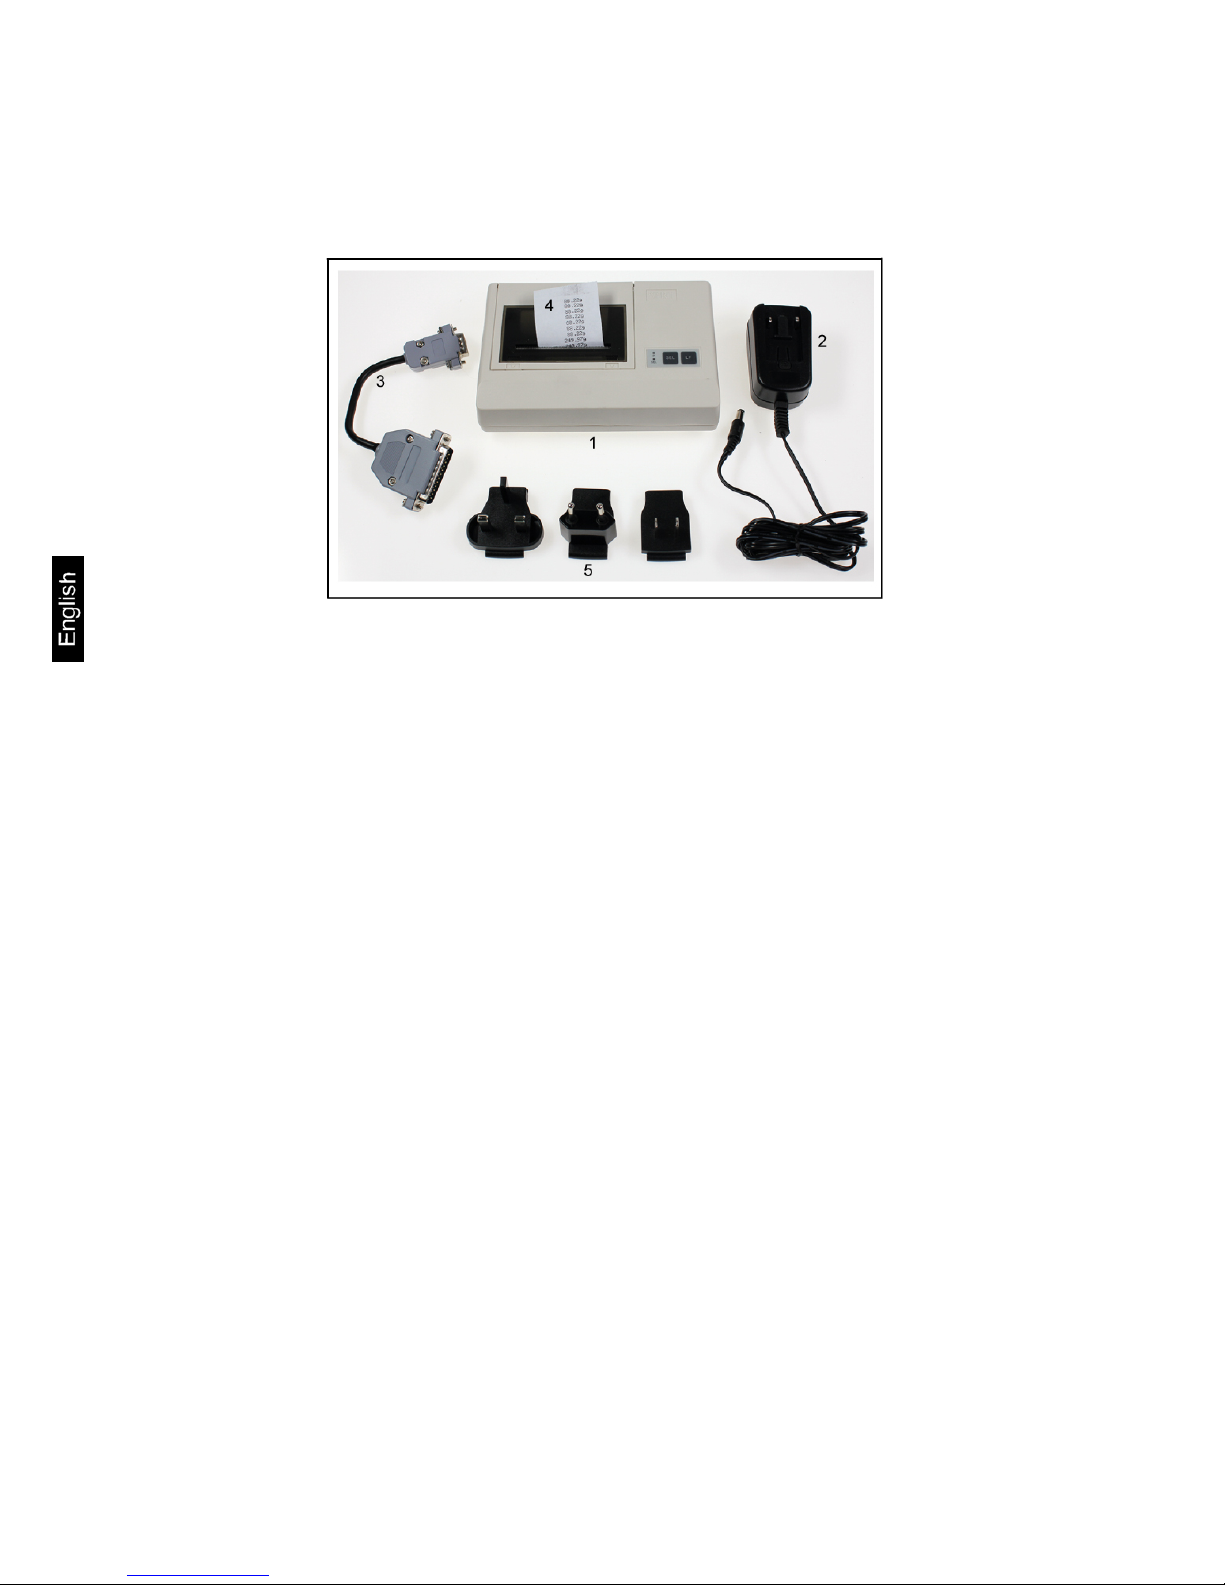
2 Unpacking
Delivery includes:
1. Printer
2. Mains adapter
3. Connection cable
4. 1 x roll of paper
5. Mains plug adapter (Europe, UK, US)
6. Operating instructions (without illustration)
If one the articles listed above is missing please contact your supplier immediately.
3 Set Up and commissioning
Environmental conditions at the workplace chosen for the printer must meet the
conditions stated below:
Temperature: 5°C – 35°C
Humidity: 10 – 80 % (excl. condensation)
Take notice of the following as regards to the site of operation:
Dust and humidity free
Do not place printer next to powerful sources of heat
Do not place the device within range of strong electric, magnetic,
electromagnetic impulse fields or planes that collect electrostatic charge.
Do not expose printer to direct sunlight or impacts.
Power is supplied via the external mains adapter.
The stated voltage value must be the same as the local voltage.
Only use original KERN mains adapters.
Using other makes requires consent by KERN.
4 YKN-01-BA-e-1411
Page 5

4 Printer parts
1. Cover for paper compartment (removable)
2. LED displays for power supply
3. Button „LF“
4. Button „SEL“
5. LED for display „SEL“
6. Paper output slot
7. RS232 interface
8. Mains connection
YKN-01-BA-e-1411 5
Page 6

5 Description of butt ons a nd LE D displays
1
LED display „P“
Display for power supply
2
LED display „SEL“
Display for standby mode
3
Button „SEL“
Turn on/off standby mode
Start self-test
4
Button „LF“ Line Feed
Line feed
Start self-test
5.1 Self-test
You can use the self-test for checking the printer’s settings.
To run a self-test, connect the printer to the power supply (LED display „P“ lights up
green), keep the „LF“ button pressed down and press the „SEL“ button at the same
time. A printout showing the data for the self-test will be issued.
Printout example:
RS232
Interface
Data transfer by RS232 interface
9600bps,
N,8,1
Baud rate 9600, 8 stop bits, 1 data bit
VER.T3.04-150
Version status
5.2 Operating and standby mode
When the printer is connected to the power supply, it is automatically in operating
mode and ready for receiving and printing data. It is also possible to switch the
printer to standby mode. To achieve this, press the „SEL“ button whereupon the
„SEL“ display will go off; the printer is now in standby mode and will no longer
receive data. To return to operating mode, press the „LED“ button, whereupon the
„SEL“ display lights up again.
Another function of the „SEL“ button allows you to introduce a pause. If you press
the „SEL“ button briefly while the printer is receiving data, the printer will pause after
having printed out the current line. This pause allows you to operate the line feed.
When you press the „SEL“ button again, the printer will continue printing the started
printout.
6 YKN-01-BA-e-1411
Page 7
5.3 Line feed
Press the „LF“ button in standby mode (“SEL” display off); this makes the line feed
start without data being printed. To stop the line feed, again press the „LF“ button.
5.4 Start-up
The printer will be ready for operation immediately after it has been connected to
the power supply; the LED “P” will light up.
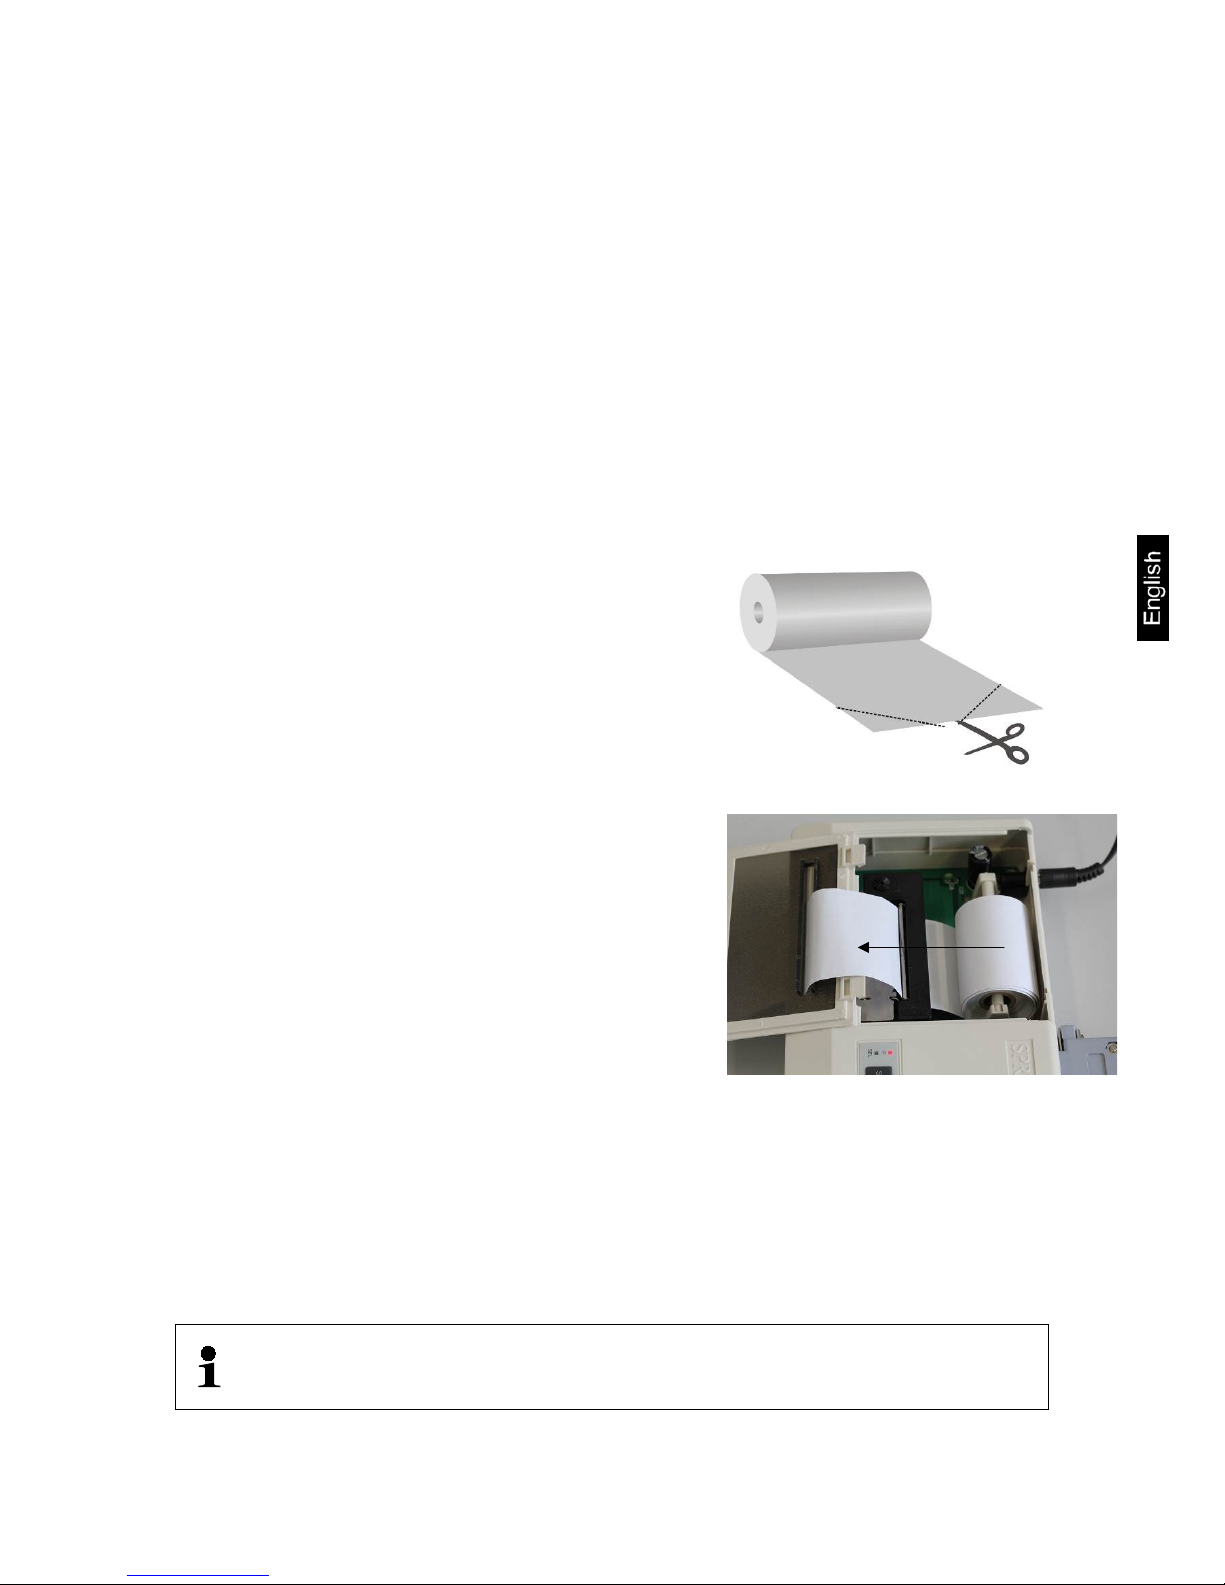
5.5 Paper
Inserting the paper
Tearing off paper
Do not pull printout upwards.
⇒ Fold over one end of the paper before
inserting it into the printer
⇒ Insert the folded-over end of the paper
into the mechanism
⇒ Turning on the printer supply
⇒ Press and hold the „LF“ key until the
paper emerges from t he out let slot of
the mechanism
⇒ Pull the printout across the direction of pr int out that
it rests on the cutter bar of the printer housing
YKN-01-BA-e-1411 7
Page 8

6 Micro swi t ches
The micro switches are used to set the operating mode for the printer.
• Changes to the settings for the micro switches must be made with
the power supply turned off. The changes are taken over when
started-up again.
• Always use KERN accessories and weighing balances when
working with your printer. Disconnect the printer from the mains
voltage before connecting the cable to the printer.
8 YKN-01-BA-e-1411
Page 9

7 Instant help
Symptom
Remedy
Power supply display
„P“ not lighting up.
Check whether the power supply unit is connected to the
printer and to the mains.
Paper does not
emerge.
Check whether the paper has been inserted correctly,
whether the output slot of the mechanism is free of
obstructions
No printing is taking
place and paper does
not emerge.
Check, whether the power cord is connected at both ends and
whether the printer prints a self-test.
If you are unable to remedy the error, please contact your supplier.
YKN-01-BA-e-1411 9
 Loading...