

Page 1
KERN & Sohn GmbH
Ziegelei 1
D-72336 Balingen
E-Mail: info@kern-sohn.com
Tel.: +49-[0]7433- 9933-0
Internet: www.kern-sohn.com
Operating manual
Precision balance
KERN EHA
Version 1.0
2019-07
GB
Fax: +49-[0]7433-9933-149
EHA-BA-e-1910
Page 2
KERN EHA
Precision balance
Item no./ Type
TEHA 500-2-A
TEHA 500-1-A
TEHA 1000-1-A
Batteries
2 x 1.5 V AA (Runtime rating 400 hrs)
GB
Version 1.0 2019-07
Operating manual
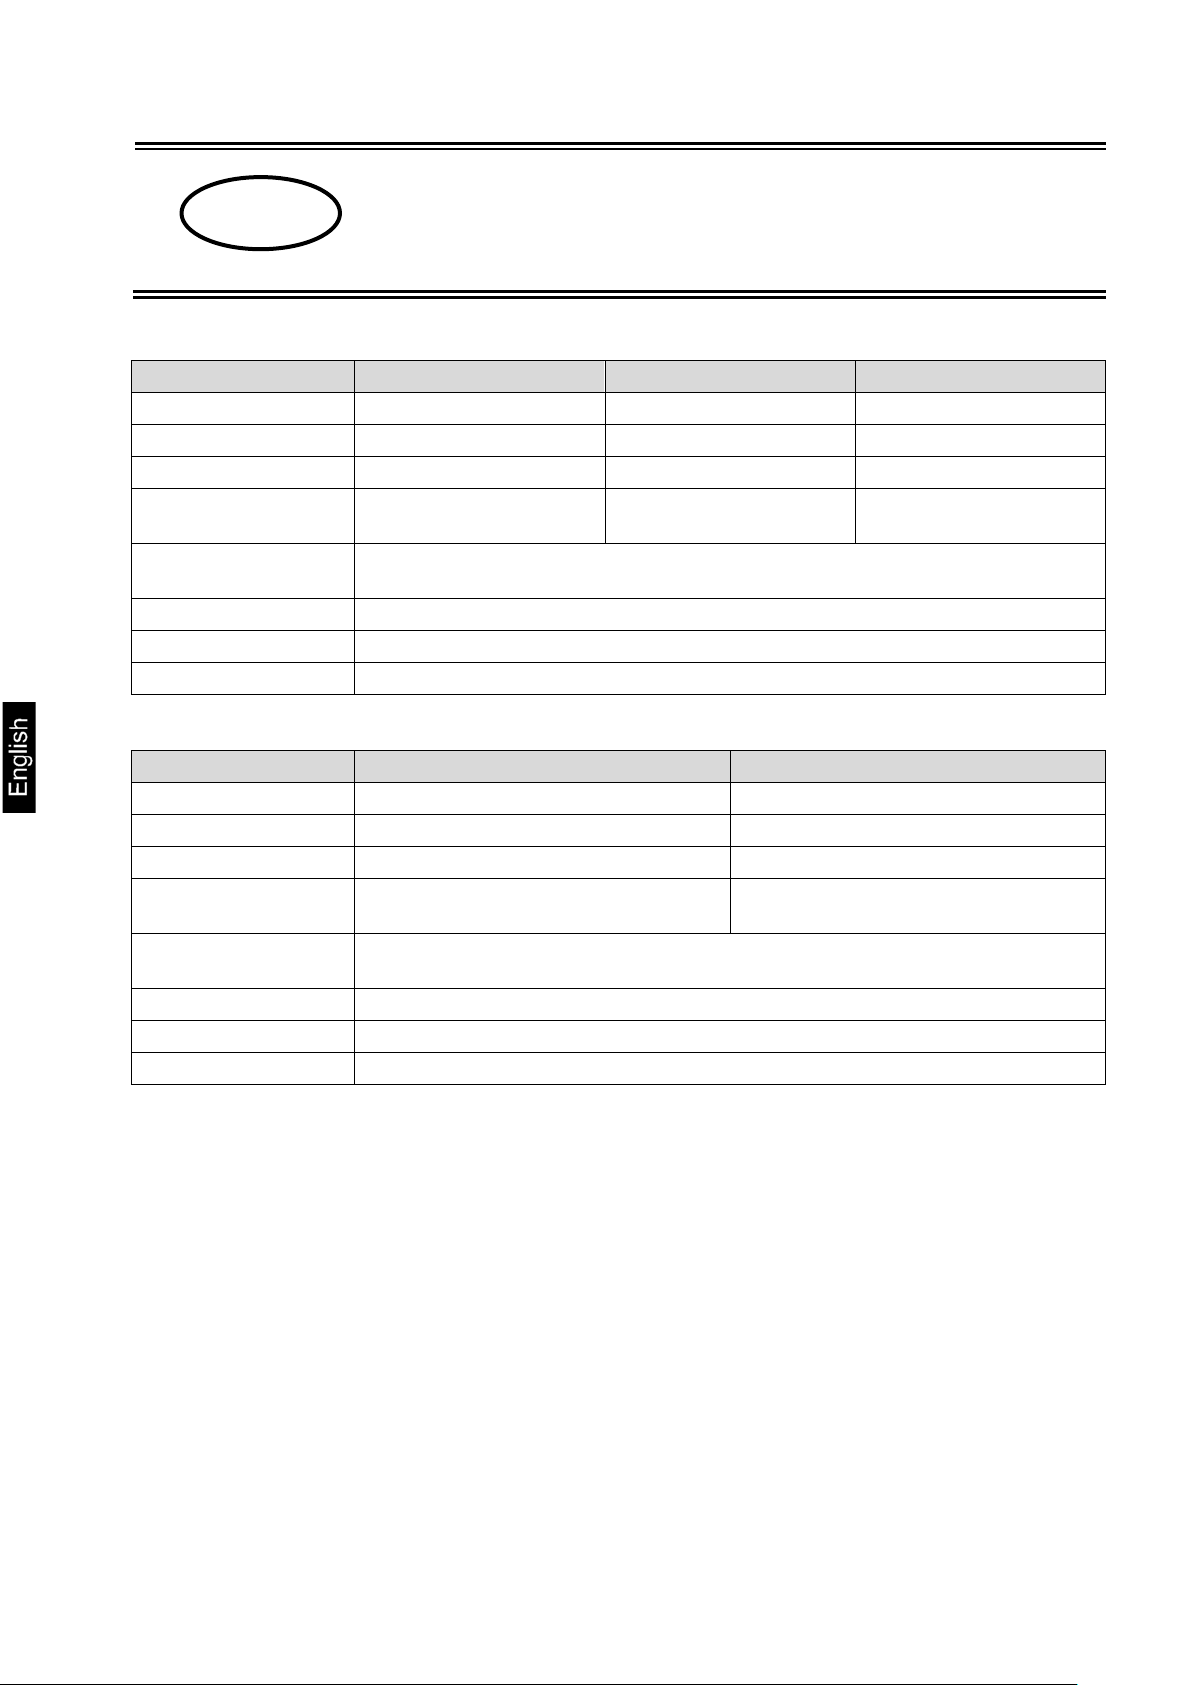
1. Technical data
KERN EHA 500-2 EHA 500-1 EHA 1000-1
Readability (d) 0.01 g 0.1 g 0.1 g
Weighing range (max) 500 g 500 g 1000 g
Adjustment weight,
not added (class)
Weighing surface
(mm)
Operating temperature + 5° C .... + 40° C
Humidity of air max 80% air humidity (non-condensing)
500 g (F2) 500 g (M1) 1 kg (M1)
Ø 105
KERN EHA 3000-1 EHA 3000-0
Item no./ Type TEHA 3000-1-A TEHA 3000-0-A
Readability (d) 0.1 g 1 g
Weighing range (max) 3000 g 3000 g
Adjustment weight,
not added (class)
Weighing surface
(mm)
Operating temperature + 5° C .... + 40° C
Humidity of air max 80% air humidity (non-condensing)
Batteries 2 x 1.5 V AA (Runtime rating 400 hrs)
3 kg (F2) 3 kg (M1)
120 x 120 (square)
2. Scope of delivery
• Pocket scale
• 4 Adjustment feet
• Mains adapter
• Operating manual
2 EHA-BA-e-1910
Page 3
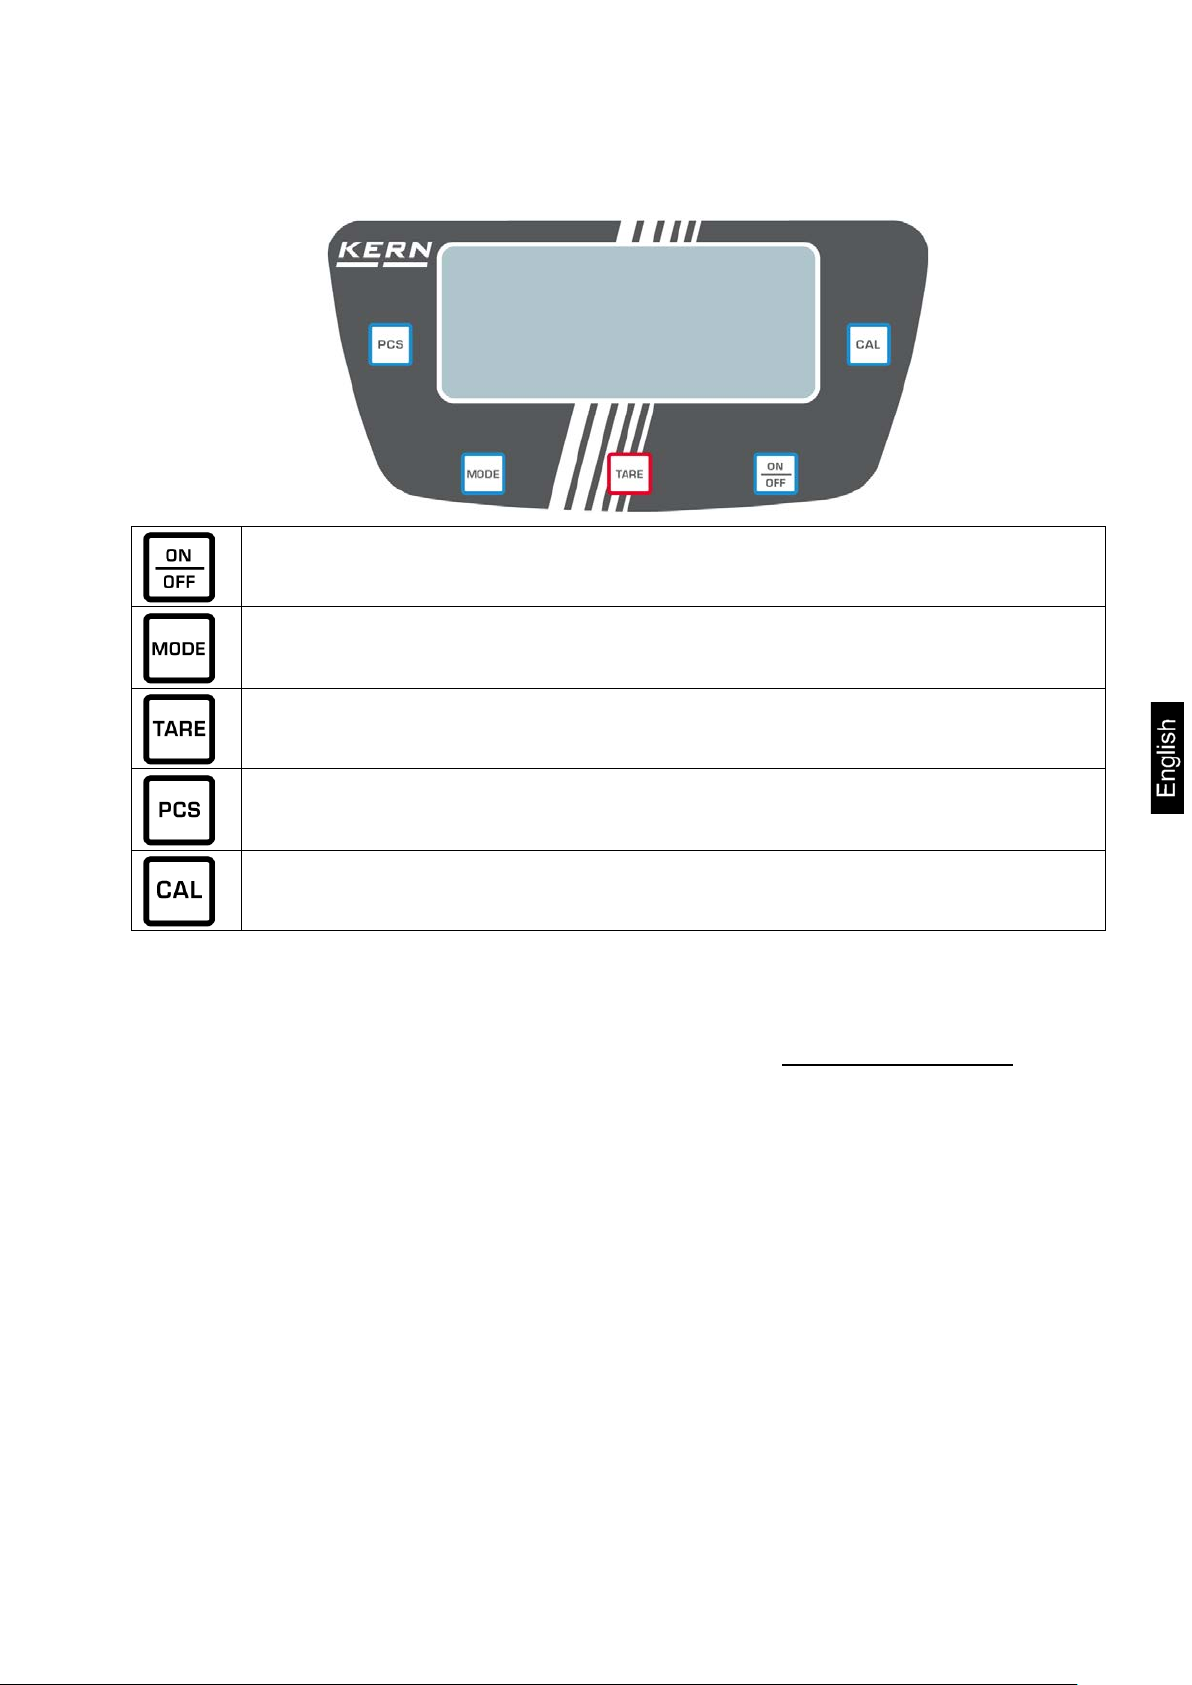
3. Keyboard overview
Switch on/off
Switch-over weighing unit
Taring / Setting to zero
Parts counting
Adjustment
4. Adjustment
Arrange adjustment weight (s ee chap. 1).
Info about adjustment weights can be found on the Internet at: http://www.kern-sohn.com
Ensure that there are no objects on the weighing pan.
In weighing mode keep CAL button pressed, the maximum weight of the balance is displayed.
Press CAL button again, CAL will be short l y displayed, after that a weight value will appear
flashing. Place a weight of this size. The weight value of the adjustment weight appears flashing.
Remove weight.
Place adjustment weight. Wait until PASS, followed by the weight value of the placed adjustment
weight will be displayed. After that the adjustment will be finished successfully. The balance is
now in weighing mode.
In case of a diverging display the adjustment has failed. Repeat adjustment process.
EHA-BA-e-1910 3
Page 4

5. Operation
Weighing:
Place the balance on a firm, level surface. Level balance with foot
screws until the air bubble of the water balance is in the prescribed
circle. Check levelling regularly
To switch-on, press the ON/OFF button, the maximum weight of the balance will be displayed for a
short time. After that the weight display appears, the balance is now ready for weighing.
If required, set to zero by using TARE button.
Place load on pan and read the weighing result.
Use the MODE button to switch over into the available weighing settings.
Taring:
Place the empty weighing container.
Press the TARE button, the zero display disappears.
Weigh the material, the net weight will be indicated.
When the balance is unloaded the saved taring value is displayed with negative sign.
To delete the stored tare value, remove load from weighing pan and press the TARE button.
Parts counting:
In weighing mode press the PCS button for 2 seconds, the balance changes into counting mode,
25 PCS will be displayed.
Press the MODE button to select the desired reference number of pieces (selectable options
include 25, 50, 75, 100)
While PCS is flashing, place a reference which corresponds to the selected number of pieces
Press PCS again
Remove reference.
If necessary, tare the empty balance container.
Place counted pieces on pan and read the quantity of pieces.
Use MODE button to return to the weighing mode.
6. Important Notes
• Do not overload balance.
• The occurrence of electromagnetic fields may result in major display deviations. Then change
location.
• Avoid high air humidity, vapours and dust.
• Do not bring the balance directly in contact with l iquids.
• Do not leave permanent load on the weighing pan.
• Never operate balance in explosi ve en viro nment. The serial version is not
explosion protected.
• Check the balance regularly with external test weights.
• Warranty claims will be voided when the housing is opened.
4 EHA-BA-e-1910
Page 5

7. Error reports
Error message Description Corrective measures
Load cell defective Replace load cell
Operating error Replace battery and readjust the balance
Load cell defective Replace load cell
Overload Weighing only within the maximum load
Adjustment with wrong adjustment
weight
Load cell defective Replace load cell
Balance not correctly levelled Place the balance on a level, even
The balance is in an environment
with strong air draught or
electromagnetic fields
Capacity of battery exhausted Insert new battery
Adjustment with correct adjustment weight
surface and level it using the four
adjustment feet in a way that the air
bubble of the spirit level is inside the
circle
Improve the environmental c ondit io ns
8. Declaration of conformity
The current EC/EU Conformity declaration can be found online in:
www.kern-sohn.com/ce
EHA-BA-e-1910 5
 Loading...