

Page 1

KENWOOD I
UNIVERSAL REMOTE CONTROL
RC-R0905
INSTRUCTION MANUAL
KENWOOD CORPORATION
About this remote control...
;,'c"iDared to staouara ^er^ote controls, this remote control has several operation modes. These modes
enable the re-^.ote control to control other audio/vicJeo components. In order to effectively use the remote
centro. T s imoortant to read the operating instructions and obtain a proper understanding of the remote
“ontroi and hov. to switch its ooeration modes (etc.!
.in ''o the control without completely understanding its design and how to switch the operation
'"Does mav 'es,. • m incorrect operations.
B60-3275-00 CH (K) .WSi
98/12 11 10987654321 97/12 11 10 9 8
Page 2

Introduction
Thank you for purchasing the RC-R0905 universal remote control unit from KENWOOD.
This remote control unit is an optional unit designed for use with KENWOOD audio video receivers 1090VR and 1060VR.
For customers with the 1090VR, you can use this remote control specifically for ROOM B, allowing you to leave separate remote
controls in each room. See the instruction manual supplied with your 1090VR for details.
For customers with the 1060VR, this remote control's FutureSet upgrade feature allows you to register and control components
that could not be registered with the supplied remote control.
The input names and display information shown in this manual are those corresponding to the 1090VR audio video receiver.
Likewise, the instructions regarding OSD operations are for 1090VR only. When using this remote control with the 1060VR,
some of the input names and display information will be different. For details regarding the input names and display
informations of the 1060VR, please refer to the instruction manual supplied with your receiver.
Precautions
Heat
• AvoiT. leav-g f'-e n a •'eel sunligh! r - near a source heat, sucf
as a heatef
Water and moisture
•.Avoiu leavihg the t where t may be subject to high humid.ty
Contents
Getting started
Special features
Names and functions of parts ^ ^ ^
Preparing the remote control » .
Operations .... ...
Set up code chart ™
In case of difficulty » » »
Specifications
Remote operation of other components
.......................................
Cleaning the unit
• When the unit becomes dirty, wipe u w‘th a dry silicon cloth or a sott
cioth Do not use thinnen benzine, etc., as these could lead to
discoloration.
introduction
Precautions
Registering setup codes for other components
Operating other components
ChtT'g'ng iconfimning) the operation mode
Preparing for automatic operations (MACRO play)
Execi-'ting an automatic operation................................................................................................... 12
Controlling the sound in another room (ROOM B) (for 1090VR}.........................................................13
FutureSet upgrade option....................................................................................................................14
Setup code correlation........................................................................................................................ 16
.......................
, , „ ™ .
................
...........
..................
............................................
......................
.............................
...............................................10
.23
2
3
4
5
6
.6
8
.9
17
23
24
Page 3

RC-ROaOñ [En¡
Universal IR (InfraRed) remote control
[n addition to the basic receiver operations, this remote control can also operate almost al! of your remote controllable audio ana
video components. Just follow the simple setup procedure to register the components you have connected.
Dual IR emitters
This remote control has two IR emitters: one to send commands in a straight line ove r long distances, allowing you to control the
receiver and your other components from farther away; and one for wide dispersion of commands in a closer proximity, for nearfield operation even when the remote control is not pointed directly at the respective component. -._5.
MACRO piay
The MACRO function lets you perform a senes of operations automatically, like turning ON the power of the receiver and connected
components, switching the input selectors, and starting playback. (Be sure to register your components before starting tne macro
set up procedure.)
FutureSet, automatic update feature
This tynction lets you update the remote control sc it can operate new components which do not appear m the setup code list at
the ena of the manual. Theretom tne remote control will always be compatible. “jC
For the U.S,A.
FCC WARNING
I " 5 generare c use ran
"'.an hcat O"? are exo'esslv acnroven
c-a-Qf. n'oa'h.r.atiO'' 's r^^ade
NOTE:
Tn;s eau'0'^’f’'n has Dee^' tested and fcune ’ ' nc'-itaiv W'*'' tp 'or a Class В digital device, pursuant to Part 1 5 of the FCC Rules. These limits
am oes g'leu :c crovoe reasor'iaoie pmie..: a,ga ' ■■'terference in a resiaential ¡r'-stailation. This equipment may cause harmful
■'teuemnce to maio communications. ■■ - -m '-s'a-eo а-п; ased m accordance with the instructions However, there is no guarantee that
mtederence w:'i not occur a particular '^'sta aonn • s m.o.ionie"’* does cause harmful interference to radio or television reception, which can
he oete^rr.-.ned bv turning tne eauipment of* am:; o". тгет s encouraged to tw to correctthe interference by one or more of the following measures'
— Reorient or relocate tne receiving anie''na
— increase me seoaration oetwee'" tne еаи-о'пе'Ч a''c 'ece'ven
— Connect tne eouicnient -nto an outlet o" a crcuh q.t'erent mom that to which the receiver is connected.
— Ccnsuit tne oea e' or an епоепепсео ran о ^ 'em'-nc a'' 'or he:p
ge:; or modifications to tnis equipment may cause harmful interference unless
Tne user could lose the authority to operate this equipment if an unauthorized
Page 4

RC-R09ÜS (Enl
0 POWER key -
Use to to''-' 'OP receiver on and o'’
Use coo'.omaticn wii'i the inp^^t se *-1 AUDIO V DEO. or TV.i Keys ar'd ■ . Pv
to t'.,!" va'icus ccvriDonents on ano c"
O MACRO key - ’o
usi- cn''"0 nat c" vvitn me Aof' O'
ODEO O' '"■■■■. f.eys to execute a sp'-p
conmoT'os aotori'at'CSi'y iWACRQ ^0 a ’
© VIDEO selector key - b
Selects t'le ymeo mpuTs (VIDEO ■. V-'O
2 VIDEOS VIDE04 AVAUX)anoset' "
rp^'ctp to ooe'a'.e the consponent -p,;
Ipre'ti at me 'esoective input
O Multi control keys ~ -’j
use m operate tr^e selecteo compor'--- ■
Use to operate me on-screer'. aispiay u- '
t090VRi
0 REC key -. 2-
Use to operate me selected compone":
O TUNING/SKIP key -„24
Use G'..ring me setup procedure to spec 'y
various settings. Use to operate The tunp"
O' selected component
0 SUBWOOFER key
Use in compmation with the VOLUME
ir e vs toad u St the volume of me subwoofer
O FUNCTION SHIFT key - 24
Use m corr.hrnation with the numeric keys
to execute alternate commands.
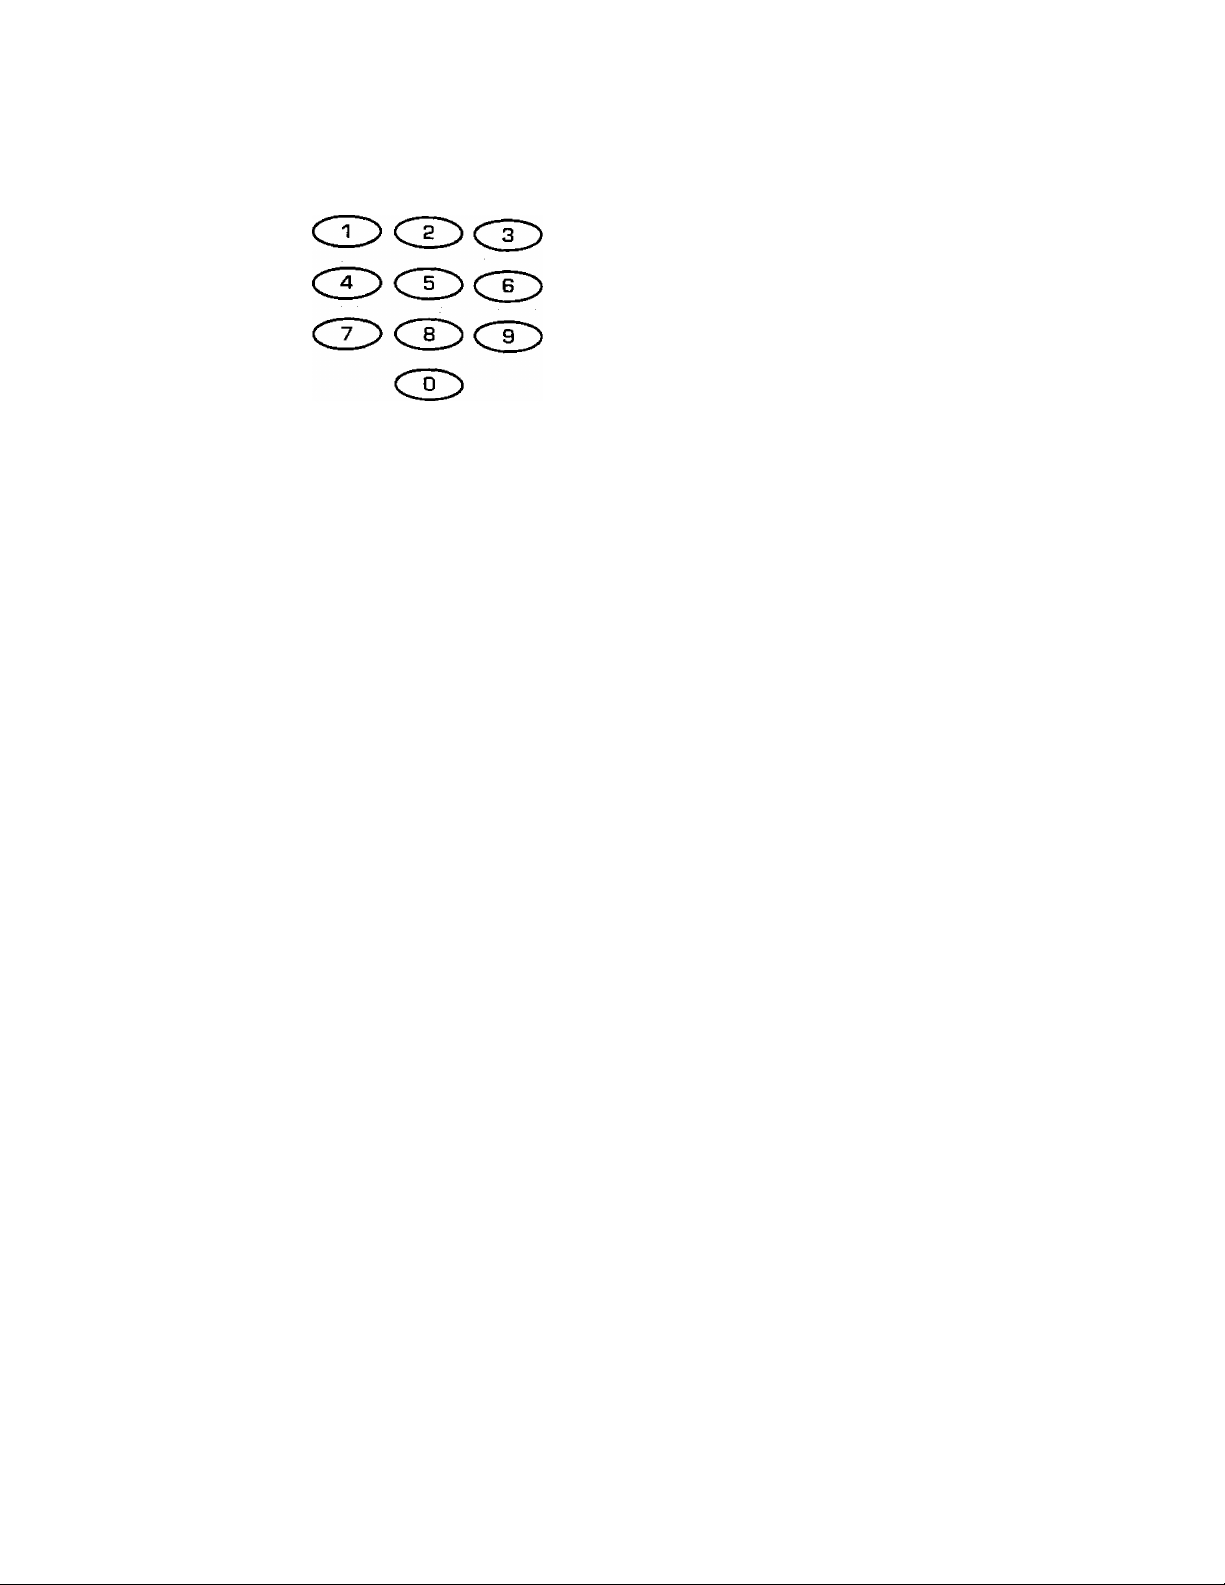
O Numeric keys
p'ov.oe functions Identical to those of the
o''a-''a' remote supplied with the compo
nen' you are controliing.
Tr .'.(■■•cess the functions printed above the
Press within 3 seconds of pressing
t'-n ' uijCTiOM SHIFT key. Function avall
an ty vanes for each component.
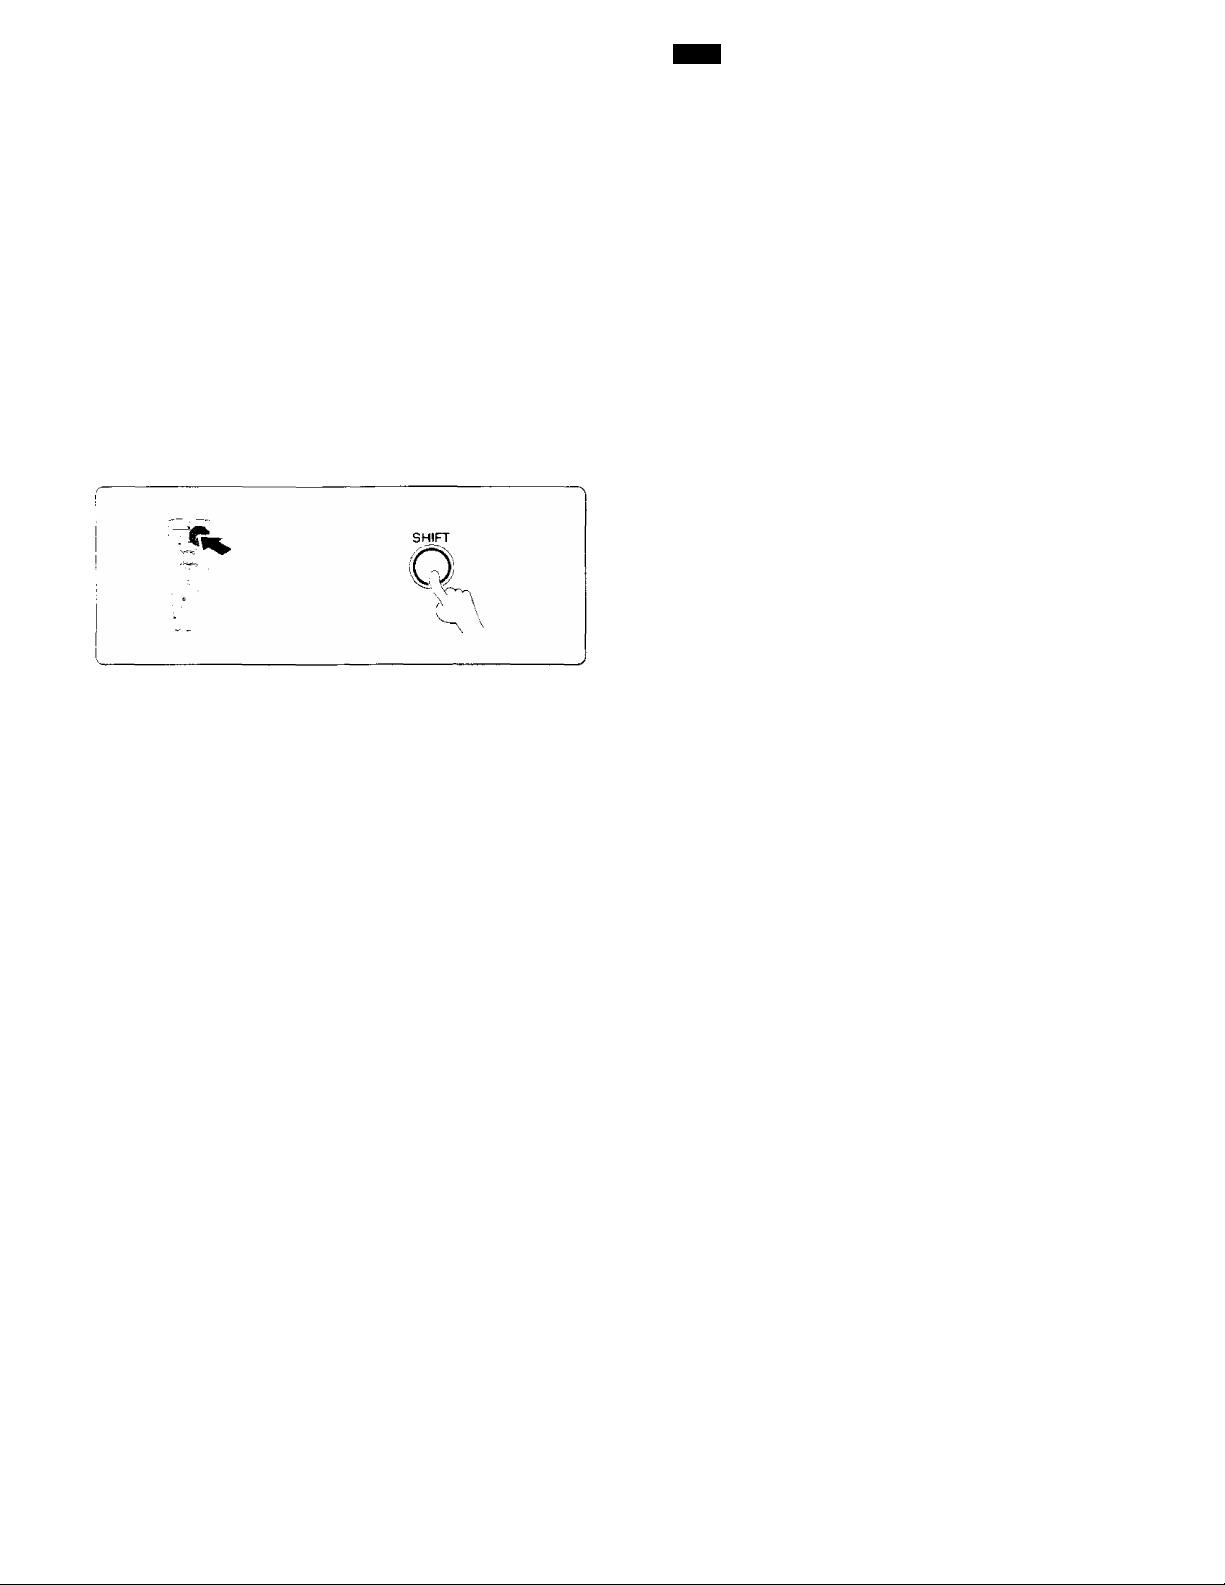
© SHIFT key
■jsn ■■ compmation with the AUDIO and
VIDEO keys to Change the remote control
mode without changing the input selector
or •’ cc'hDination with the POWER key to
tu'n on ano ott components programmed
into the remote.
© TV selector key C
Set'r the remote to operate a TV or cable
00' 'f \ 1. TV 2. CABLE). This key does not
ci'ia'’.ge me input selector on the receiver.
© AUDIO selector key ~
Selects the audio inputs (CD, TAPE1/MD.
TUNER, PHONO) and sets the remote to
operate the respective KENWOOD audio
component
If you connect audio components from
KENWOOD and other makers to the
TAPE1/MD or CD jacks, you can set the
remote to operate these components by
registering the appropriate setup code at
the respective input.
© GUIDE key -¿1
Use to activate the OSD menu functions of
registered components.
© VOLUME key
Use to adjust the receiver volume.
© MUTE key
Use to temporarily mute the sound.
© SOUND key
Use to activate the Sound OSD and set the
remote to OSD control mode (for 1090VR).
Use to adjust the bass, treble, and input
level (for 1060VR).
©LISTEN MODE key
Use to select the desired surround mode.
© SETUP key
Use to activate the Setup OSD and set the
remote to OSD control mode (for 1090VR).
Use to adjust the surround setup (for
1060VR).
Page 5
.............
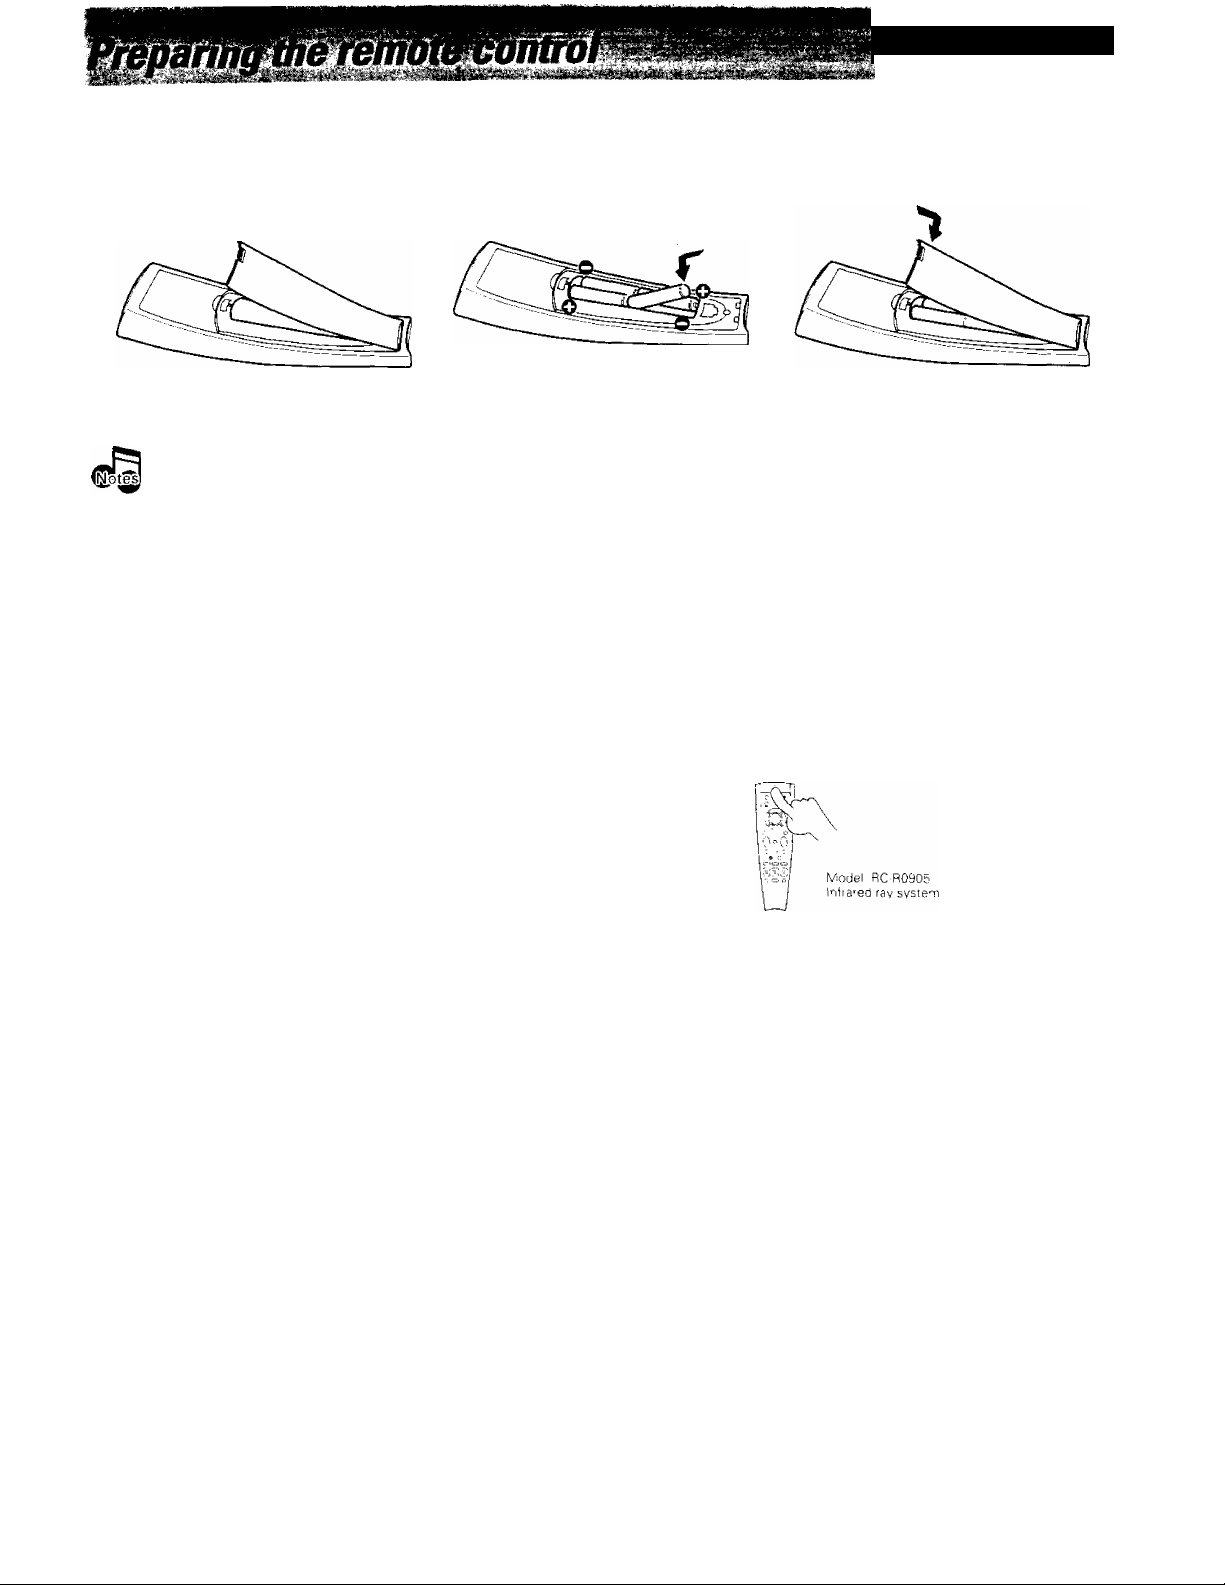
Loading the batteries
O Remove the cover.
1. Replace a.if four batteries with new ones when you notice a snortening of the distance from which the remote control will operate or if the
remote control bunks 5 times when you push a key Tne remote control is designed to retain set ud cooes in memory while you change
batteries.
2. Placing the remote sensor in direct sunlight, or n direct light from a high frequency fluorescent lamp may cause a malfunction.
In such a case, change tne location or tne systenn installation to prevent malfunction.
O Insert the batteries.
Insert four AAA-size (LR03) batteries as indicated by the polarity markings.
O Close the cover.
RC-RG905 [En]
Operating distance
This remote conirol has two IR emitters one to send commands
iri a suaighi line over long distances, allowing you to control the
'■eceiver a'^d your other comooneots from farther away; and one
tor wioe dispersion of commands m a closer prox-mity. for nearfield operaiion even when tne remott' cor^hrol is not pointed
o recfcy tne respective component
RerTiote sensoi
6 n- i
30 30
Page 6
Ipml70ll5
The remote control supplied with this receiver is also capable of controlling components from a variety of manufacturers once
0 you register the appropriate setup codes into the remote control unit.
Refer to "Remote operation of other components" for details about the operations available for each component. - 24
Wnen registering setup codes for KENWOOD audio components which are connected to this unit by system control cords, use the
following codes to insure proper system control operation: Cassette; 7000, CD; 8099, MD; 9000,
To control other KENWOOD components (VCRs, LD players, audio components not connected with system control coras, etc.) fo'low
the procedure described below.
Low battery warning
Replace all four paueries with new ones vv'hen yo.j notice a sr-iortening of the distance from wmch the '"er^mte connoi wih ooeraie or c me re-'-'Ote co”tro:
blinks 5 times vvhef' vou Dush a key The remote conrcl iS designed to retain set up codes m memory while 'vO'.j change catteries
Registering setup codes for other components
Find the setup code of the component to be registered.
Refer to the setup code lists to find the setup code for the
component to be registered. - 17
Example: To register a CD made by KENWOOD, you would
enter"8037"
If you own a new component that is not covered by the
setup code list, you can use the FutureSet upgrade feature.
Hold down the ENT key until the backlight flashes twice and remains lit.
ROOM B
Select the component to be registered.
input Component
(CD: CD piaver
VIDEO 1
VIDEO 2
VIDEO 3
VIDEO 4
TAPE1/MD
CD
PHONO
-
-
-
•.At tr"s time all inputs oecorne ava'iable regardless of any earlier
reo'stratio".
TV 1
TV 2
CABLE
Maker
KEN'WOOD
Code
6626, 8037 ,AUDIO
Perform each of the following steps within
5 seconds.
Key
Press the VIDEO, AUDIO, or TV
key repeatedly to select the de
sired component
VIDEO /'~N TV
AUDIO
o Q o
VIDEO key
1
VIDEOI (SAT)
2 VIDE02 (LD)
r
3 VIDE03 (VCR)
^ VIDE04(DSS)
Example : To register the component connected to the VIDEO 1 lacks.
select ''VIDEO 1 (SAT:i'.
I I
FiOOM P
r'i
AUDIO key
1
CD (CD)
2
TAPE1/MD
(TAPE)
_ 3 PHONO
r n T
.. I r"i I
TV key
1 TV1
I 2 TV2
L- 3
CABLE
Page 7
Enter the setup code.
Press POWER, and check to see that the component you want to control turns on.
POWER
Q
RC-RD905 iEn}
• ExarTiDle- Press 5258 to register a LD player maae by KENWOOD.
• Tne Dackiignt flasnes once eac'" time a number is eme'ed.
• P an invalid setuo code is e'^terea tne 'emote will output one long Dlm.iv
□isregara that coae a.”id mtur'' to tne beginning of steo 4.
• If you push an invalid Key, the remote wiH exit tne setup mode
• PLAY or TUNING/SKIP can also be used instead of POWER
• it tne cor^'iDonent ooes not react, and tnere is more thar" one setup
code, enter anotner setup coae and try again.
• It the component is already on. pressing POWER will turn it oft.
Press the ENT key to store the code you have just input
The backlight flashes twice
ROOM B
Repeat steps 3to6 for all components you
want to control.
Hold down the ENT key until the backlight flashes twice.
ROOM B
• Tnis code replaces any previous setup codes entered rorthe respective
component.
d you have comoonents that am not remote controllable, like a recora
olaver (etc.), you wi' need to register a Non-IR code at the respective
incut. This keens the respective mput rn the remote control's cyclic list
so vou can select it using the remote control Please consult the
owner's rrianual of the components you are connecting tor information
'egardiog mmote coi^trollabiliiy. The list of Non-IR cooes is included at
the beginning of the Set up code chart. -JL
• This operation should ta<e about 3 seconds.
• Once registerea, the display on tne receiver shows the component
type instead of the default input name.
Example: if you register a VCR at the VIDEO 1 sacks, "VCR" appears
nsteaa of "VIDEO KSAT)"
• Botn tne default input name and the component type (¡.e., " VIDE01
'VCR' ") are shown irr the on screen display when the OSD mode is set
to ON (for 1 090VRk
• After initial setup, any VIDEO (VIDEO 1,2, 3, 4) or TV 101/1, TV2, CABLE)
inputs that nave not been program,med with a setup code or Non-IR
coae are deleted Tom the cyclic list (except for the "AV AUX" VIDEO
inputi. The PHONO input will be deleted if a Non-IR code was not
registered
• The INPUT SELECTOR on the front panel ot the receiver always cycles
through 3'i inputs
eac" setL.p coae ,s oes c'en m w
tries mav 0"' V operate so'"^ of thr
s'umber of different models, certain coaes may not work with some moaels. (Also,
a-.-ailapie on a oiven m-odel.)
Page 8

RC-RD9D5 [En)
8
Keys or controls usea tn this ope-'anon
Operating other components
This operation lets you operate the registered components.
KENWOOD audio components with system control turn on and off automatically with the receiver via the system control
connections.
• Pressing the VIDEO or AUDIO key aiso cnanges the input selector on
tl'ie leoeiver. If you do not want to change the current input, press the
SHIFT key before step O. - .9..
VIDEO key
1
VIDEO! (VCR 1)
2 V1DE02 (VCR 2)
3 VIDEOS (LD)
-I VIDE04 (DVD)
5 AVAUX
• Pressing the SHIFT key is only required when turning the selected
component on or off. Pressing the POWER key directy turns the
receiver on ana off.
• See "Remote operation of other components" at the end of this manual
for a list of keys available with each component. ~JS.
AUDIO key
1 CD (CD)
2 TAPE1/MD
(TAPE)
3 TUNER
4 PHONO
TV key
1
2 TV2
[
3 CABLE
TV!
The remote control mode remains in the set at the compo
nent selected in step O mode until you select another
component (etc.).
Be su'p tc oom’ the remote ' r-.
INbt'^ svsten- co^'hoi co'ds Otnr-'.-,
01 at r'-e sensor O" the receiver wnen you want to operate KENWOOD components connected by
point tn.' re-nore contml at the component you want to operate.
Page 9
This operation lets you change the remote control operation
mode without changing the input selector.
You may find this useful when you want to control one
component while using another. {For example, if you want
to rewind the tape deck while listening to a CD.)
This operation is also useful if you don't know the which
mode the remote control is set to. Executing this operation
allows you to change or reconfirm the operation mode you
desire.
Press SHIFT.
RC-R0905 (En)
I'X-:
Keys or controls used in this operation.
• To operate a TV, start from, step S.
Go to step 2 within 3 seconds.
Select the component to be controlled.
Press the VIDEO, AUDIO or TV
key repeatedly to display the re
mote control mode for the com
ponent you want to control.
VIDEO /■'~N TV
AUDIO
O 2 O
Execute the desired operations.
Sf G
ROOM o
Tne component to be controlled is displayed n parenthesis
• Pressing any other keys after the SHIFT key cancels the shift function
and sends the .normal code associated with the respective key.
• The input selector does not change during this operation.
• The remote control mode is shown in the on screen display when the
OSD mode is set to ON (for 1090VR).
• If you press VIDEO or AUDIO key more than 3 seconds after pressing
the SHIFT key, the input selector changes together with the operation
mode.
• See "Remote operation of other components" for a list of keys available
with each component. - J4..
The operation mode remains set at the component specified
in step 2.
To return control to the original component, press SHIFT and
then press the VIDEO or AUDIO key to return to the original
control nnode.
Page 10

* The macro play function allows you to set the remote to
fQ control several components in succession. After completing
; this setup, you can perform a series of operations automati-
' ■' cally. Enter the setup codes for the components you want to
control beforehand.
Make a plan of the macro play you want to set up.
The order of the operations may be fairly complex and you may
not be remember all of the necessary commands during the
setup procedure.
Use the space provided below to write down the operations in
the order you are going to enter them.
Keys or contrors usee in th.'s oDeratior.
’ Up to 20 steps can be nnemorized for each macro
‘ The eyamplg below shov^rs the plan for step 4 (which occupies a total
of 9 steps) :
]
TV + SHIFT + POWER
2
FUNCTION SHIFT + 4
3
VIDEO + VIDEO 2 steps
4
SHIFT + POWER 2 steps
3 steps
2 steps
rons
RC-R0905 [En]
Activate the macro program mode.
Press and hold the MACRO key
until the backlight flashes twice.
MACRO
o
Total
' If you attempt to store more than 20 steps, the remote will output one
long blink and exit the macro programming mode.
' Enter channel numoers (for the monitor TV, etc.) exactly as you would
using the original remote.
9 steps
Perform each of the following steps within
5 seconds.
Page 11

lC3
I ■ 1 f* :Iv-ìs>mÌIÌ‘
=%v(.
iOBS'-
RC-R0905 iEn]
Select where the macro should be stored.
Press the VIDEO, AUDIO, or TV
key to select the macro location.
(MACR01, 2, and 3 respectively)
VIDEO /"“N TV
AUDIO
o Q o
Press the keys to be operated in order.
• You can store up to 3 different macros, one at eacn key
VIDEO -* "MACRO r, AUDIO "MACRO 2", TV -* "MACRO 3"
• The backlight flashes once wnen you select the macro location.
• Pressing a button otne^ than VIDEO. AUDIO, or TV cancels the macro
program mode.
When VIDEO is Dressed
l\/I I
sp O
BOOM f3
■ This example shows you how to create a macro that: turns on the TV,
sets the TV to the appropriate input, selects the receive^' s input
selector to LD, and turns on the LD player. AH you have to do is insert
the laser disci
' In order to allow verification of the remote control mode, the name of
the selected input appears in the receiver’s display when the VIDEO,
AUDIO or TV key is pressed When the VIDEO or AUDIO key is
pressed the receiver's input also changes.
I I I
It
Terminate the macro program mode.
Press the MACRO key so that the
backlight flashes twice.
MACRO
o
■ The macro is stored at the locations soecitied m step 3. If another macro
was previously stored at The same location, it is erased.
Repeat steps B through B to program up to 3 macros.
Page 12

Executing an automatic ^
Press the MACRO key.
Execute the macro play.
Keys or controls used m this operation.
Go to step 2 within 3 seconds.
Press the VIDEO, AUDIO, or TV
key to execute the correspond
ing macro play.
VIDEO
0^0
AUDIO
o
TV
• "MACRO" appears in the front panel and on-screen display and the pre
programmed macro is performed:
VIDEO — "MACRO 1", AUDIO — "MACRO 2", TV — "MACRO 3"
• The remote control flashes once for each command output.
• The remote control will output OSD information to tell you the status
of the macro {for 1090VR}.
• Some devices take up to 1 second to power on. The macro function has
an automatic delay after any power function output.
• Pressing a button other than AUDIO, VIDEO, or TV cancels the macro
program mode.
When VIDEO IS pressed
SP CD
BOOM CD
f\/I ( I I MM
I I r"i I I (
Page 13

' 'xiwi
If you make connections to another room, you can use the
remote control to select source components and to adjujst
the volume (etc.) output to the other room.
Controlling the sound in another nqm iROOfllBl^^
Select a speaker system.
* Audio and video signals are output from the SECOND ROOM PRE
OUT jacks regardless of the setting of the SP, A/B and ROOM A/
B indicators.
A ON ; Select to output sound to ROOM A from the speaker
connected to the SPEAKERS A terminals. This set
ting allows you to enjoy surround playback in ROOM
A while outputting sound to ROOM B via the SEC
OND ROOM PRE OUT jacks.
B ON : Select to output sound to ROOM B via the speakers
connected to the SPEAKERS B terminals. Be sure to
turn off the subwoofer in ROOM A if one is con
nected.
A+B ON : Select to output sound to ROOM A from the speakers
Set the remote control to the ROOM B operation mode.
Press the FUNCTION SHIFT key
and then press the ENT (ROOM
B) key within 3 seconds.
FUNCTION
SHIFT
O
A+B OFF No sound from the speakers. Use this setting when
ROOM B
connected to the SPEAKERS A terminals and output
sound to ROOM B from the speakers connected to
the SPEAKERS B terminals.
ROOM A automatically switches to stereo playback
(surround playback is not possible).
listening with headphones in ROOM A for stereo
sound mail playback modes or to listen in ROOM B via
the SECOND ROOM PRE OUT jacks
RC-H0905 [En)
13
Keys or conirots used irs ;his operaiion.
Select the desired component.
Press the VIDEO or AUDIO key
repeatedly to set the ROOM B
input selector to the component
you desire.
VIDEO TV
o Q o
Execute the desired operations.
•The MUTE and VOLUME +/- keys let you control the sound level m
ROOM B.
Ti r Tl
ROOM B input selector
AUDIO
• The setting of tne ROOM B input selector also appears in the on screen
display (for 1090VR).
• The component selected for ROOM B can also be operated using the
keys on the remote control. See "Remote operation of other compo
nents" for a list of keys available with each component,
The remote remains in the ROOM B operation mode until
you switch back to the ROOM A operation mode.
To return to the ROOM A operation mode, press the FUNCTION
SHIFT key and then press the +10 (ROOM A) key within 3
Page 14

$ ■ FutureSet allows you to update the remote control so it can
operate new components which do not appear in the setup
code list at the end of the manual.
'I.. This function allows you to register new setup codes for any
or all of the following command positions:
VIDE01, VIDE02, VIDEOS, VIDE04, TV1, TV2, CABLE, CD,
TAPE1/MD.
FutureSet codes are stored in memory. Each time a FutureSet
upgrade is performed, any previous information ^n the FutureSet
memory location is erased. Please inform your customer service
representative if FutureSet has been previously used.
FutureSet Upgrade option
--v’. Operations
RC‘RD905 [En]
Keys or controls used m this operation.
Write down the brand name and mode!
number of your component in the space
provided before you cati.
Call our Free-Phone Consumer Help-Line
and explain which components you would
like to add to your remote control.
USA: 1-800-753-9860
Canada: 1-800-644-0673
; ‘ Tms Питое" is aesigned spec* .v ■ . ’
I nons aoo jt system Gperat'O^: sc- .
I of t^urcnase
i-utures-i- ^pomaes. cues"St aco^esi'n'; n vcu' place
Hold down the ENT key until the backlight flashes twice.
Type
TV
1
2
3
• After our customer service representative records the brand name and
model number of your component, he/she will ask you to hold the
remote to the speaKer portion of your teleohone as shown below.
Your remote control ;s KENWOOD mode' number: RC-R0905
• Tne hours for cutomer service in USA and Canada currently are:
Monday-Thursday 9:00 am - 7:00 pm EST
Friday 9:00 am - 5:30 pm EST
Saturday 12:00 pm - 4:00 pm EST
Brand
KENWOOD
Nlodel No.
KV?-?7?7
Remote Model No,
RC-????
Complete steps 3 and 4 before holding the remote to the speaker portion of your telephone.
'At this time all inputs become available regardless o^ any earlier
registration.
Enter the 3 digit code '*997"
■
. Go to step 4 within 5 seconds.
• The backlight flashes twice.
• The remote is now in the upgrade mode. The remote will wait for 30
seconds for a valid telephone dov^'nioad signal. If nothing is received
within this time, it will revert to normal operation.
Go to step 5 within 30 seconds.
Page 15

RC-R0905 [Ert]
Hold your remote to the speaker portion of your telephone.
Code selection after mode download
step 5 above, the remote control automatically enters a special set*up mode which works.After successful completion of the downloa
as described below.
Select the component for which you want to register the information downloaded above.
Press the VIDEO, AUDIO, or TV
key repeatedly to select the de
sired component.
AUDIO
For each setup code the operator can supply a setup code numpen
Should you ever need to change your tnput configuration, this number
can be used. Please record tor your future reference. If for some reason
this information is lost, see -ChecKing a setup code" m the "Setup code
correlation" section for further into-'mation.
VIDEO key
r* 1 VIDEOI(VCRI)
2 V1DE02 (VCR 2)
3 VIDEOS (LD)
_ 4 V1DE04 (DVD)
AUDIO key
1 CD (CD)
2 TAPE1/MD
(TAPE)
_ 3 PHONO
TV key
1
TV1
2 TV2
3 CABLE
15
O 2 O
Press a numeric key.
Repeat steps 1 and 2 to register all of the
downloaded information.
Hold down the ENT key until the backlight
flashes twice.
Example 1 : To register a code at the component connected to the
VIDEO 1 lacks, select "VIDEO 1 (VCR)".
Perform each of the following steps within 5 seconds.
Press the 1 key to output the POWER code of the first component on
your list in step □ of the previous page. Continue to push buttons 2
Through 9 (and 0) until the component you want to register turns on.
■Though the FutureSet memory in your remote control is quite large,
only 10 setup POWER codes can be put on the 10 keypad at any one
time. If you require a larger download, the standard setup procedure
can be used. See "Registering setup codes for other components", your
customer service representative can supply you with the downloaded
setup code numbers.
■The setup code for the last POWER code to be sent in step B is
automatically registered at the location selected in step □.
■ At this time, the remote exits the special set-up mode and returns to
Its normal operation mode.
ROOM В
0
Page 16

Setup code correlation
Deleting a setup code
Keys or controls used m tnts operat^or
Hold down the ENT key until the backlight flashes twice.
(~o
© Select the component to be deleted.
Press the VIDEO, AUDIO, or TV key repeatedly to select the
desired component.
O Enter the 3 digit code "991".
O Hold down the ENT key until the backlight flashes twice.
Checking a setup code
O Hold down the ENT key until the backlight flashes twice.
© Select the component with setup code you want to check.
Press the VIDEO, AUDIO, or TV key repeatedly to select the
desired component.
O Enter the 3 digit code "990"
O Press the 1 key and count the number of times the backlight
blinks. This is the first number of the 4 digit setup code.
O Press the 2 key and count the number of times the backlight
blinks. This is the second number of the 4 digit setup code.
'At this time all inputs become available regardless any earlier
registration.
’ Example 1 : To delete the registration of the component connected to
the VIDEO 1 jacks, select "VIDEO t".
Perform each step within 5 seconds.
'To resume the factory settings, proceed step 1, then enter "981".
' The backlight flashes twice tnnmediately after the "O' Is Input to confirm
input.
’ It the backlight does not blink, the first digit in the setup code is 0.
If The backlight does not bimk, the second digit in the setup code is 0.
O Press the 3 key and count the number of times the backlight
blinks This is the third number of the 4 digit setup code.
O Press the 4 key and count the number of times the backlight
blinks. This is the fourth number of the 4 digit setup code.
If the backlight does not blink, the third digit in the setup code is 0.
If the backlight does not blink, the fourth digit m the setup code is 0.
J6i Perform each step within 5 seconds.
Page 17

RC-R0905 (En)
Non-iR codes
CD player
Cassette deck
LD player
Phono
8900
7900
5900
0900
VCR Set up codes
Maker
Action
Adventura
Aiko
A1 Vv a
Aka'
Ak lbs
Al D3
ArT'encan HiQh
AmsTrad
Ana"Ana"- Na’-C'-'ia:
A"::ec"
ASA
As"a
As-.ka
Aug 0.0'
Ba n:
Ba- :- ^ '■■■
.nBf ■ £. M ■.K3 ■ r . [ ■ ^ ^ ^
B'a- n k 404'
■Sa: '
Ca"0'
'Ca'VC
,'^r' u
lI
CGE
C.m :n.Citizen
Colt 4072
Craig
Croc'
Curtis Mathes 4035, 404 n 4060
Cyberne\ 4240
Daewoo
Dansa: 4072
Set up codes
4317
4000
427B
4000. 4307.. 4406
4041. 4315
4072
4278. 4295
4035
4000
4162. 4240
4162. 4454
4072
4037. 40S1
4240
4037
4037
4000 4041. 4104
4072. 4278
4240
4104
4034 4162
4'21 4184 4211.
4255 436'
4072. 4278
4337
b 031
40S 1
4072. 4278
4000
4072
4037. 4278
4037. 4047, 4072.
4240
4072. 4278
4045. 4046. 4278
Satellite
TV
VCR
Maker
De Graaf
Decca
Dual
Dumont
Dynatech
Elcatech
Electrohome
Electrophonic
Emerex
Emerson 4000. 4002, 4037,
ESC
Ferguson 4041
Fidelity 4000
Finlandia 4081, 4104
Finlux
Firstline
Fisher
‘=UII
Fujitsu
Funai
Garrard
GE
GEC 4081
Go Video
■G 01 d H a n d
'Goldstar 4037. 4038
Goodmans
Gradiente
Graetz
Granada
Granair
Grundig
Hanseatic 4037
Harley Davidson
2900
1900
4900
..............
Set up codes
4042
4000. 4081
4041
4000. 4081. 4104
4000
4072
4037
4037
4032
4043, 4121, 4184,
421 1. 4278, 4295,
4361
4240, 4278
4000. 4042. 4081,
4104
4037. 4043. 4045,
4072
4046, 4047, 4066,
4104
4033, 4035
4000
4000
4000
4035. 4060
4232, 4350
4072 ■
4000. 4037. 4072,
4278
4000
4041, 4104, 4240
4046, 4081, 4104
4000, 4037, 4072
4034, 4072, 4081
4000
DVD
6900
DSS 3900
MD 8900
........ ...........
Maker
Harmon/Kardon
Harwood
HCM 4072
Headquarter
HFQ 4047
Hinan
Hitachi
Hypson 4072
Imperial 4000
Interfunk
ITT
ITV
Jensen
JVC
Kaisui
KEC 4037. 4278
Kenwood
KLH
Kodack
Korpel 4072
Lenco
Leyco
Lloyd 4000
Loewe
Logik
Luxor
LXI 4037
M Electronic 4000
Magnavox
Magmn
Manesth
Marantz
Marta 4037
Matsui
Matsushita 4035, 4162, 4454
MEI
Set up codes
4038
4072
4046
4072,4240
4000, 4041, 4042,
4240
4081
4041,4046. 4104,
4240
4037. 4278
4041
4008, 4041, 4067
4072
4038. 4041, 4067
4072
4035, 4037
4278
4072
4037, 4081
4072, 4240
4043, 4046, 4048,
4104
4035, 4039. 4081,
4149
4240
4045, 4072
4035, 4081, 4295
4295
4035
Ш
Page 18

jß VCR Set up codes (continued)
Maker Set up codes
Memorex
Memphis 4072
Metz
MGA
MGN Technology
Minolta 4042
Mitsubishi
Motorola
MTC
Muitiiech
Murpny 4000
NAD
NEC
NeckernTann
Nesco
ko 4037
N1 ‘ 0
Ncoie-. 4240
NokiC
Norm''t.-'me
Ocea'’'c:
Ov''4J^.s
'Cm ..s
. .
, . --.Л''-;
-r r ; /'
k':1' ' ..
k'pr';'
■
Perom
Pni'CO
Phu
Pcr:'''o:a
P lo*
4000, 4035, 4037,
4039, 4046, 4047,
4048, 4104, 4240,
4307
4162, 4454
4043
4240
4043, 4067, 4081,
4173
4035, 4048
4000, 4240
4000. 407?
4104
4038, 4041, 4067,
4104
4081
4072
4034
4041,4046. 4048,
4104.4240
4041
4000. 4041
4315
4035
4037, 4048. 4104.
4162. 4454
4:21 4295
4000. 4037. 4072
4 08'
403'1' 4041. 4072
4035 4077, 4162.
4454
404 1
4035. 4037, 4038.
4042. 4240
4042
4000
4035. 4038
4035. 4081
4081
4037
Maker Set up codes
Pioneer
Profitronic
Proline
Protec
Pulsar
Pye
Quarter 4046
Quartz
Quasar 4035, 4077, 4162,
Quelle
Radio Shack
Radtola
Radix
Randex 4037
RCA
Realistic 4000, 4035, 4037,
Rex
Ricoh
Roaasta'
Runco
Sa Da
Salora
Samsung
Sanky
Sansui 4041, 4067
Sanyo
SBR
Schaub Lorentz
Sch neide'
Scot’
Sears
SEG
SE;
Se I CO
Sharp
Shin tom
Shogun 4240
SierTiens
4067, 4081
4240
4000
4072
4039
4081
4046
4454
4081
4000, 4037
4081
4037
4042, 4060, 4077,
4149, 4225
4046. 4047, 4048,
4066, 4104, 4240
4041
4034
4037, 4072, 4240,
4278
4039
4041
4043, 4046
4045. 4240
4039, 4048
4046, 4047, 4104,
4240
4081
4000. 4041, 4104
4000, 4072, 4081
4043, 4045, 4121,
4184. 421 1
4035. 4037, 4042,
4046. 4047, 4066,
4104
4240
4081
4041
4048
4072, 4104
4037, 4081.4104
Maker
Silva
Singer
Stnudyne
Sontec
Sony
STS
Sunstar
Suntronic
Sylvania
Symphonic
Tandy 4000, 4104
Tashiko
Tatung
Teac
Technics
Teknika
Teleavia
Telefunken
Tenosal 4072
Tensai
Thomson
Thorn
TMK
Toshiba
Totevision
Uher
Unitech
Universum
Vector
Vector Research 4038
Victor
Video Concepts 4045
Videosonic 4240
Wards
XR-1000
Yamaha
Yamishi
Yokan
Yoko
Zenith
Set up codes
4037
4045, 4072
4081
4037
4032, 4033, 4034,
4035
4042
4000
4000
4000, 4035, 4043,
4081
4000
4000
4000, 4041, 4081
4000, 4041
4035, 4162
4000, 4035, 4037
4041
4041
4000
4041
4041, 4104
4240
4041, 4043, 4045,
4060, 4066, 4081
4037, 4240
4240
4240
4000, 4037, 4081,
4240
4045
4008, 4041, 4067
4000. 4035. 4042,
4047, 4048, 4060,
4072, 4149. 4240
4000, 4035, 4072
4038
4072
4072
4240
4033, 4034. 4039
Page 19

RC-RQ905 [En]
TV Set up codes
Maker
Adm ir al
Adv en tu ra
Aik o
Aka i
Alie ro n
Am ba ss ad or
Am str ad
Ana m
Ana m N at ion al
AO C
Aud io vo x
Belc o r
Bel; & H ow e ll
Blu e S ta -BPL
B-a cto rc :
Br O C X w oo d
Bust]
Ca^ 'd ^e
d ■ V 0 "
Ce'X i oriv
C'T îZ “''
Cr''-:'-'*-:
C, 8
■x^rd 8
N'-u ' e c
Cx.
L ' r. • ' ■
U ‘
Ee:.w:_ owm
E;e cT 'r'' C'' ''e
Ervier Sü-
E n v'S 'O "'
Fm iLi^
Fish e r
Fo'' Tr e? c
FujlSv^ ' 1 79
Fun aFut ure te c'-
Set up codes
1093
1046
1092
1030
1179
1177
1177
1180
1055,
1019.
1180
1019
1016,
1282
1282
1180
1019
1232
1030,
1186
1 030
105-
1000
1030.
1056.
1 186. 1280
1056
1 1 SO
1180
1039, 1 180
1030. 1035 Ì06Q,
'180
1015 1035. '092,
1019
1017,
ICOO
1381
1019.
' 1 77.
1 180, 1236, 1280,
1282,
1030
w79
1154.
1093
1 179.
1 180
1250
1030, 1137
1154
1046, 1056,
1039, 1046,
1060 1092,
1019
1039, 1 154.
1 178, 1179.
1463
1159
1180
Maker
GE
Set up codes
1027,
1021,
1051, 1055, 1135,
1178, 1282, 1451
General
1186
Gibralter 1017, 1019,
Goldstar
1019,
1030,
1056, 1178
Goodmans
Grandm
Grunpv
Hallmark
Harvard
HCM
НшаГ'
Hisawa
Hitachi
Hypsoh
Infinity
Janeil
JBl
JCB
JVC
Kaisu.
KEC
KenwooG
Kloss
KT\."
1179
1282
1179, 1180
1178
1180
1282
1179
1282
1056, 1145, 1151
1282
1054
1046
1054
1000
1053
1282
1180
1030
1019,
1024,
1046
1030,
1039, 1180,
1280
Logik
Luxmar':
i_XI
Magna vox
Maiestic
Marentz
Matsu
Matsusnua
Mega iron
Memorex
MG A
1016
1056
1047, 1054, 1154,
11 78
1 156,
1024,
1030, 1054,
1187
1186,
1016
1030, 1054
1177
1250
1145, 1178
10.16, 1056,
1154,
1 178
1019,
1030, 1150,
1178
Midlant;
1017,
1039,
1051, 1135
Minutz
Mitsubisni
Motorola
MIC
1021
1019,
1055,
1019,
1150, 1178
1093
1030,
1060
Multitech
NAD
1180
1156,
1166,
1047,
1030
1039,
1150,
1047,
1056,
1178
Maker Set up codes
NEC
Nesco
Nikko
Noshi
NIC
Onwa
Optimus
Optonica
Onon
Panasonic
Penny
Philco
Philips
Pilot
Pioneer
Portland
Prism
ProScan
Proton
Pulsar
Quasar
Radio Shack
RCA
Realistic
Runco 1017, 1030
Saisho
Sampo
Samsung
Samsux
Sanyo 1154, 1159
Scimitsu
Scotch
Scott
Sears 1047, 1054, 1056,
SEI
Sharp
Shogun
Signature
Simpson
1019, 1030, 1056
1179
1030, 1092, 1 178
1018
1092
1180
1 154, 1166, 1250
1093, 1 165
M77, 1236
1051, 1055, 1250
1018, 1019, 1021,
1027. 1030, 1039,
1047, 1051, 1060,
1135, 1 156, 1178
1019. 1030, 1054
1054
1019, 1030, 1039
1166
1019, 1039, 1092
1051
1047
1031, 1 178, 1466
1017, 1019
1051, 1055, 1165,
1250
1019, 1030, 1039,
1047, 1056, 1154,
1165, 1 178, 1180
1018, 1019, 1047,
1090, 1135
1019, 1030, 1039,
1056, 1154, 1165,
1178, 1180
1177
1030, 1039
1019, 1030, 1039,
1056, 1060, 1 178,
1427
1039
1019
1178
1019, 1 178, 1179,
1 180, 1236
1154, 1156, 1159,
1178, 1179
1177
1039, 1093, 1165
1019
1016
1186, 1187
19
Page 20

Щ TV Set up codes (continued)
Maker Set up codes
Sinudyne
Sony
Soundesign
Spectricon
1177
1000
1178,
1186
1137
1179, 1180,
sss 1019, 1180
Starlite 1180
Supra 1056
Supre-Macy
Supreme
Sylvania
Tandy
Sateilite Set up codes
Maker
Echosta-' 2280
General Instrument
1046
1000
1054. 1381
1030,
1039, 1093
Set up codes
2361
Maker Set up codes
Tatung 1055
Technics
Technol Ace
Tech wood
Teknika
Tera
TMK
Tomashi
Tosniba
Totevisron
Maker
Jerrold
Primestar
1051, 1250
1179
1051, 1056
1016, 1019, 1039,
1054, 1056, 1060,
1092, 1150, 1179,
1180, 1186, 1312
1031
1056, 1177, 1178
1282
1060, 1154, 1156
1039
Set up codes
2361
2361
Maker
Triumph 1177
Universal
Vector Research
Victor
Vidikron
Vidtech
Viking
Wards
Yamaha
Zenith
Maker
Realistic 2052
Uniden
Set up codes
1027
1030
1053, 1250
1054
1019, 1178
1046, 1312
1016, 1019, 1021,
1027, 1030, 1054,
1056, 1165. 1 178,
1179
1019, 1030
1016. 1017
Set up codes
2052
LD player Set up codes
Maker
Carver
D;?co
нпatc^'i
Ke'^vood
i v L-'i VC'
CCi-a-t; 519-
Set up codes
5194
5023
5023
5258
5194
DSS Set up codes
Maker
Arenas tcT
Ectnosiar
HTS
Set up codes
3772
3775
3775
Svs’ers3749
DVD Set up codes
Maker Set up codes
Mitsubishi
NAD
Panasonic
Pniiips 5194
Pioneer
Maker
Jerroio 3627
Panasonic
Primesta^
5059
5059
5204
5023, 5059
Set up codes
3701
3627
Maker
Quasar
Sega
Sony
Telefunken
Theta Digital
Maker
RCA
Sony
Toshiba 3790
Set up codes
5204
5023
5201
5059
5194
Set up codes
3566
3639
Maker
Panasonic
Toshiba
Set up codes
6490
6503
Page 21

Cable Set up codes
RC-R09G5 (En)
Maker
ABC
Antronix
Archer
Belcor
Cab le S ta r
Cab le te nn a
Cab le vie w
Cen tu ry
Citiz e n
Col ou r V o !ce
Com t ron ic s
Con te c
Dae ry un g
Eas te rn
Eve rq ue st
Gar ra rd
GC E lec t.'r rr nc s
G e m i n
Gen e 'U ' ir 's’ cu ^'^ ien :
Gol dS iz i'
Hann:n
Set up codes
0001, 0003, 0007,
0008, 0011, 0013,
0014, 0017
0022
0022, 0153, 0797
0056
0056
0022
0022
015 3
015 3
002 5
004 0
001 9
000 8
0002
001 5, 00 4 0
015 3
005 6
00^ 5
001 1 , 0 27 6. 0 47 6
004 0. 01 4 4
000 9, 00 2 0, 0 0 34 .
025 9
Maker
Hitachi
Hytex
Jasco
Jerrold
Set up codes
0011
0007
0153
0003, 001 1, 0012,
0014, 0015, 0276,
0476
Memorex
Movie Time
NSC
Oak
Panasonic
Paragon
Philips
Pioneer
Prelude
Pulsar
0000
0063, 0156
0063, 0156
0007, 0019
0000. 0021, 0107
0000
0025, 0153
0144, 0753
0770
0000
PyP Stereo Visual Matrix 0003
Radio Shack
0797
RCA 0021
Regal
Regency
Remorandi
Runco
Samsung
0020. 0259
0002
0011
0000
0040, 0144
Maker
Scientific Atlanta
Set up codes
0008, 0017, 0477
Signal 0015, 0040
Signature
SL Marx
Sprucer
Starcom
Stargate
Starquest
0011
0040
0021
0003, 0015
0015, 0040, 0770
0015
STS 0156
Sylvania
Tandy
Teleview
Texscan
Tocom
Toshiba
0001
0258
0040
0001
0012, 0013
0000
Tusa 0015
TV86 0063
Unika
0022, 0153
United Artists 0007
United Cable
Universal
Viewstar
Zenith
0003
0022, 0056, 0153
0063, 0258
0000, 0525
CD Player Set up codes
Maker
A c.i. 8 t2 .:, 81 57
Arc;V’
A^^g gTnr 6^ 57
Cai 'C n- .r A, .:: 80 29
СсГ'V-C\- [ ..n
De no r--
ПКе 8 00 0
Dyna'v b nn.
E ie kt '^1
E n ier so '
Eisho'
Gar ra rn
oO'i ew e
Gon q ’na r's
Hita cn -
JVC
Ken vv oo G
Set up codes
S1 57
8'57 . 6'7 9
8‘ 5'.'
800 3
L; " 7 q
839 3
330 6
804 8. 80 8 8, 81 79
839 3
803 2. 83 0 5
830 5
815 7
803 2
807 2. 86 5 5
802 8. S03 7, 804 8 .
809 9, 8 19 0. 8 85 8,
8 В 59
Maker Set up codes
Krell
Linn
LXI
Magnavox
Marantz 8029, 8157
Matsu:
MCS 8029
Memorex 8032. 8305
Meridian! 8157
Micromega
Mission 8157
NAD
Naim
NSM
Onkyo
Optimus 8000, 8032. 8037,
Panasonic 8029, 8303
Philips 8157
Pionee.'
Proton
8157
8157
8305
8157
8157
8157
8000
8157
8157
8101
8179, 8305, 8468
8032, 8305. 8468
8157
Maker
QED
Quad
Quasar
RCA
Realistic
Revox
Set up codes
8157
8157
8029
8053, 8179, 8305
8179
8157
Hotel 8157
SAE 8157
Sansui 8157. 8305
Sanyo 8179
Scott 8305
Sears 8305
Sharp 8037
Sony
8000, 8185, 8604,
8605
Soundesign
Tandy
Teac
Technics
Universum
Victor
Yamaha
8145
8032
8393
8029, 8303
8157
8072
8036. 8187
Page 22

77 DAT deck Set up codes
mJm
nC-RQ905 lEn}
Maker
Carver 7158
Denon 7031
Grundig
Set up codes
7158
Cassette deck Set up codes
Maker
Aiwa 7029, 7197
Arcana
Carver
Denon 7076
Fisner 7074
Garrard
Grundig 7029
inKe’
MD Set up
Set up codes
7076
7029
7308. 7309
7071
codes
Maker
Marantz
Philips
Maker
JVC
Kenwood
Magnavox
Marantz 7009, 7029
Onkyo
Optimus 7027, 7220
Panasonic 7229
Philips
Pioneer
Set up codes
7158
7158
Set up codes
7244.7273. 7274
7000, 7071, 7183
7029
7136
7029
7027, 7220
Maker
Sony
Technics 7158
Maker
Revox
Sansui 7009, 7029
Sony
Teac 7308, 7309
Technics
Victor
Wards
Yamaha 7094, 7097
Set up codes
7093
Set up codes
7029
7170. 7243, 7291
7229
7244, 7273, 7274
7027
*
Maker
Kenwood
Sony
Set up codes
9000. 9820
9490
Mise, audio Set up codes
Maker
W-'O 0 8459 652F.
Set up codes
Maker
Scient'fic Atlanta
Set up codes
8460
Maker
Starcorn
Set up codes
8459
Page 23

if)-';-' Syn^itom;;
■ • m£i\
23
The backlight flashes five times during nor
mal operation.
Certain inputs cannot be selected using
the remote control.
Remote control operation is not possible.
• The batteries are nearing exhaustion.
• No preset codes registered at for the respec
tive inputis'l.
• The remote control is set to a different opera
tion mode.
• Batteries are exhausted.
• The remote control unit is too far away from
the mam system, controlling angle is too large,
or there is an obstacle between the receiver
and the remote.
• The audio cords and system control cords are
not connected properly
• No software is loaded in the source compo
nent
• An attempt is nnade to play a tape which is
being recorded in the cassette deck.
• The remote control has not been set to the
operation mode for the component you wish
to control.
• The rem.ote control is m the Room B (A)
operation mode.
• The nmcroprocessor of the remote control
malfunctions
• Replace with new batteries to preserve the
currently registered setup information.
• Register a preset code or Non-IR code at the
respective input(s).
• Press VIDEO, AUDIO, or TV to select the
approriate operation mode.
• Replace with new batteries. If the backup is
exhasted before you can replace the batter
ies, redo the setup procedure.
* Operate the remote control unit within the
controllable range.
• Connect properly.
• Place software m the source component you
want to play.
• Wait until recording has completed.
• Press the VIDEO, AUDIO, or TV key to activate
the operation mode tor the component you
want to control before operation.
• Change the operation mode. - JT,
• Reset the microprocessor. —
Do ocv 056 contact cleaning age-’'- tiecaose mev couic cause a malfunction. Be specifically careful against using contact cleaning agents
cc''i:am''g o: . since tney "^lav an’ ■■'o tne plascc c:-"'ponents
Specifications
Remote control system
Transmitter power supply..............................................6 V DC
Dimensions..............................................W : 62 mm (2-7/16")
.......................................................
...........................................................
Weight (Excluding batteries)
................................................
Infrared
H : 227 mm (8-15/16")
D : 37 mm (1-7/16")
..............................
^cD’■.^uGD tQ. O'.vs a policy of co’'t '' .n-.c'- aovancer”e''*s m aevelopnnent. For this reason specifications may be changed without notice.
170 g (0.4 lb)
Page 24

Refer to the following for the type of remote cont
Th. setup code for each component must be entemd bXehMd,''““®*“* '»"’Po-ent.
- ^-,*й«Л[ ; .V 1{••^^‘■^^Z'Ж.
RC-R09D5 lEnl
O Use the AUDIO, VIDEO, o r TV keystoselecrth#"nnZi ^ ^
vouwottocontro,. -»..comp.„e„, 1 '^evs success., p,es. eacr. ,
© Press the keys c o rr e s p o n d in g to t h e operations vo.i ■
R e f e r to the fo llo w in g s e c ti o n s for details ^ desire.
Although each setup coae is designed to work witn a number of different models, certain codes may not work with some modeis. I'Aiso,
rtain codes may omy operate som^e o^ tne functions available on a given mode!.)
The charts below show the typical functions available to" each component. Some manufacturers use different key compmations to perform
s milar functions. For that reasor-., we. have programmed extra functions on some of tne unuseo number Keys to help you control your
eauipmenl. To fmd if your componer’t nas extra functions, press the FUNCTION SHIFT кеу, then press a number key. Repeat this procedure
Tor each number key.
Tuner operations
to wait at least 1 second before pressing the next key.
' Numeric keys function the same as the numeric keys on the original
remote.
'To execute a FUNCTION SHIFT command, press the FUNCTION
SHIFT key, then press tne corresponding key w'lthin 3 seconas.
Cassette deck operations
e®
+ (► Play)
- (-^ Play)
REC
О
(• Record)
► /II (► Play)
II (Pause)
■ (Stop)
►►f Fast forward)
TUNING
ROOM В mode: P.CALL +/- only
► /II (BAND)
■ (AUTO)
(P.CA^l -}
►►1 (P.CAl.l +)
сз
FUNCTION SHIFT commands
DISPLAY (Dimmer)
fKmiy ana be Sure
(•♦^ Rewind)
CD player operations
+ (Disc Sx'p
- (D s.;. S. p
► II (Play/Pn use {for SL1 6))
► II (► Piav other})
II (Pausn otneU)
■ (Stop)
(Skip)
►►I (Skip)
MD recorder operations
(►► Search)
Search)
► II
II
1^^
(► Play)
(Pause)
(Stop)
(Skip back)
(Skip :orv\'ard)
CD CD GO
CD CD CD
CD CD CD
© CD ©
Numeric keys
CID dD CjD
СЕЭ C£^
© C©> ©
Numeric keys
сзсзсз
REPEAT RANDOM
Q
FUNCTION SHIFT commands
REPEAT (Repeat)
RANDOM (Random)
DISPLAY (Dimmer)
FUNCTION SHIFT commands
+ 100 (+100)
REPEAT (Repeat)
RANDOM (Random)
DISPLAY (Dimmer)
Page 25

RC-H0905 [En)
Page 26

DSS receiver operations
+ (Channel +)
- (Channel -)
► /II (Select)
II (t)
■ (4)
{'^)
(^)
CÜ^ d^CH>
CE^ C£>C£^
0) ©
IMumeric keys
FUNCTION SHIFT commands
MENU (Menu)
THEME (Theme)
FAV. (Favorite)
TV/SAT./VID (Input selector)
INFO (Information)
ALT AUDIO (Alternate audio)
+100 (+100)
KENWOOD
For your records
Record the serial number, found on the back of the unit, m the spaces
designated on the warranty card, and m the space provided below. Refer
to the model and serial nunnoers whenever you call upon your dealer for
infomiation or service on this product.
Model Serial Mumber
Page 27

bptíMhnóf other conip^^^^
RC'R0905 ÍEnl
25
 Loading...