

Page 1

CD PLAYER
DP-M4010
INSTRUCTION MANUAL
KENWOOD CORPORATION
n COMPACT
(oJDS©
DIGITAL AUDIO
Dcn O/ICO nn /Li' D 1 I t tc T n
\f\\
Page 2
Introduction
Your choice of this product indicates that you are a
devotee to excellence in sound reproduction.
We appreciate your patronage and take pride in the long
tradition of quality components, that our company
represents.
So that you can get the most out of your unit, we suggest
that you take the time to read through this manual before
you hook up and operate your system.
This will acquaint you with operating features, and system-
connection considerations, so that your listening pleasure
will be enhanced right from the start. You will notice that
in all aspects of planning, engineering, styling, operating
convenience and adaptability, we have sought to antici
pate your needs and desires.
Keep this manual handy for future reference.
For your records
Record the serial number, found on the back of the unit,
in the spaces designated on the warranty card, and in the
space provided below. Refer to the model and serial
numbers whenever you call upon your dealer for informa
tion or service on this product.
Model DP-M4010 Serial Number_______________________
Unpacking
Unpack the unit carefully and make sure that all accesso
ries are put aside so they will not be lost.
Examine the unit for any possibility of shipping damage,
(f your unit is damaged or fails to operate, notify your dealer
immediately. If your unit was shipped to you directly, notify
the shipping company without delay. Only the consignee
{the person or company receiving the unit} can file a claim
against the carrier for shipping damage.
We recommend that you retain the original carton and
packing materials for use should you transport or ship the
unit in the future.
CAUTION:
mance of procedures other than those specified herein
may result in hazardous radiation exposure.
In compliance with Federal Regulations, following are
reproductions of labels on, or inside the product relating
to laser product safety.
1 KENWOOD CORPORATION
i SHIONOGI SHIBUYA BUILDING 17-5, 2-CHOME,
' SHIBUYA, SHIBUYA-KU. TOKYO. JAPAN
KENWOOD CORP. CERTIFIES THIS EQUIPMENT
CONFORMS TO DHHS REGULATIONS NO, 21 CFR
1040, 10. CHAPTER i, SUBCHAPTER J.
Location: Back Panel
Use of controls or adjustments or perfor
DANGER
INVISIBLE LASER RADIATION WHEN OPEN |
AND INTERLOCK FAILED OR DEFEATED. i
_AY9’9 I? _ J
Location: Inside, near the Laser mechanism.
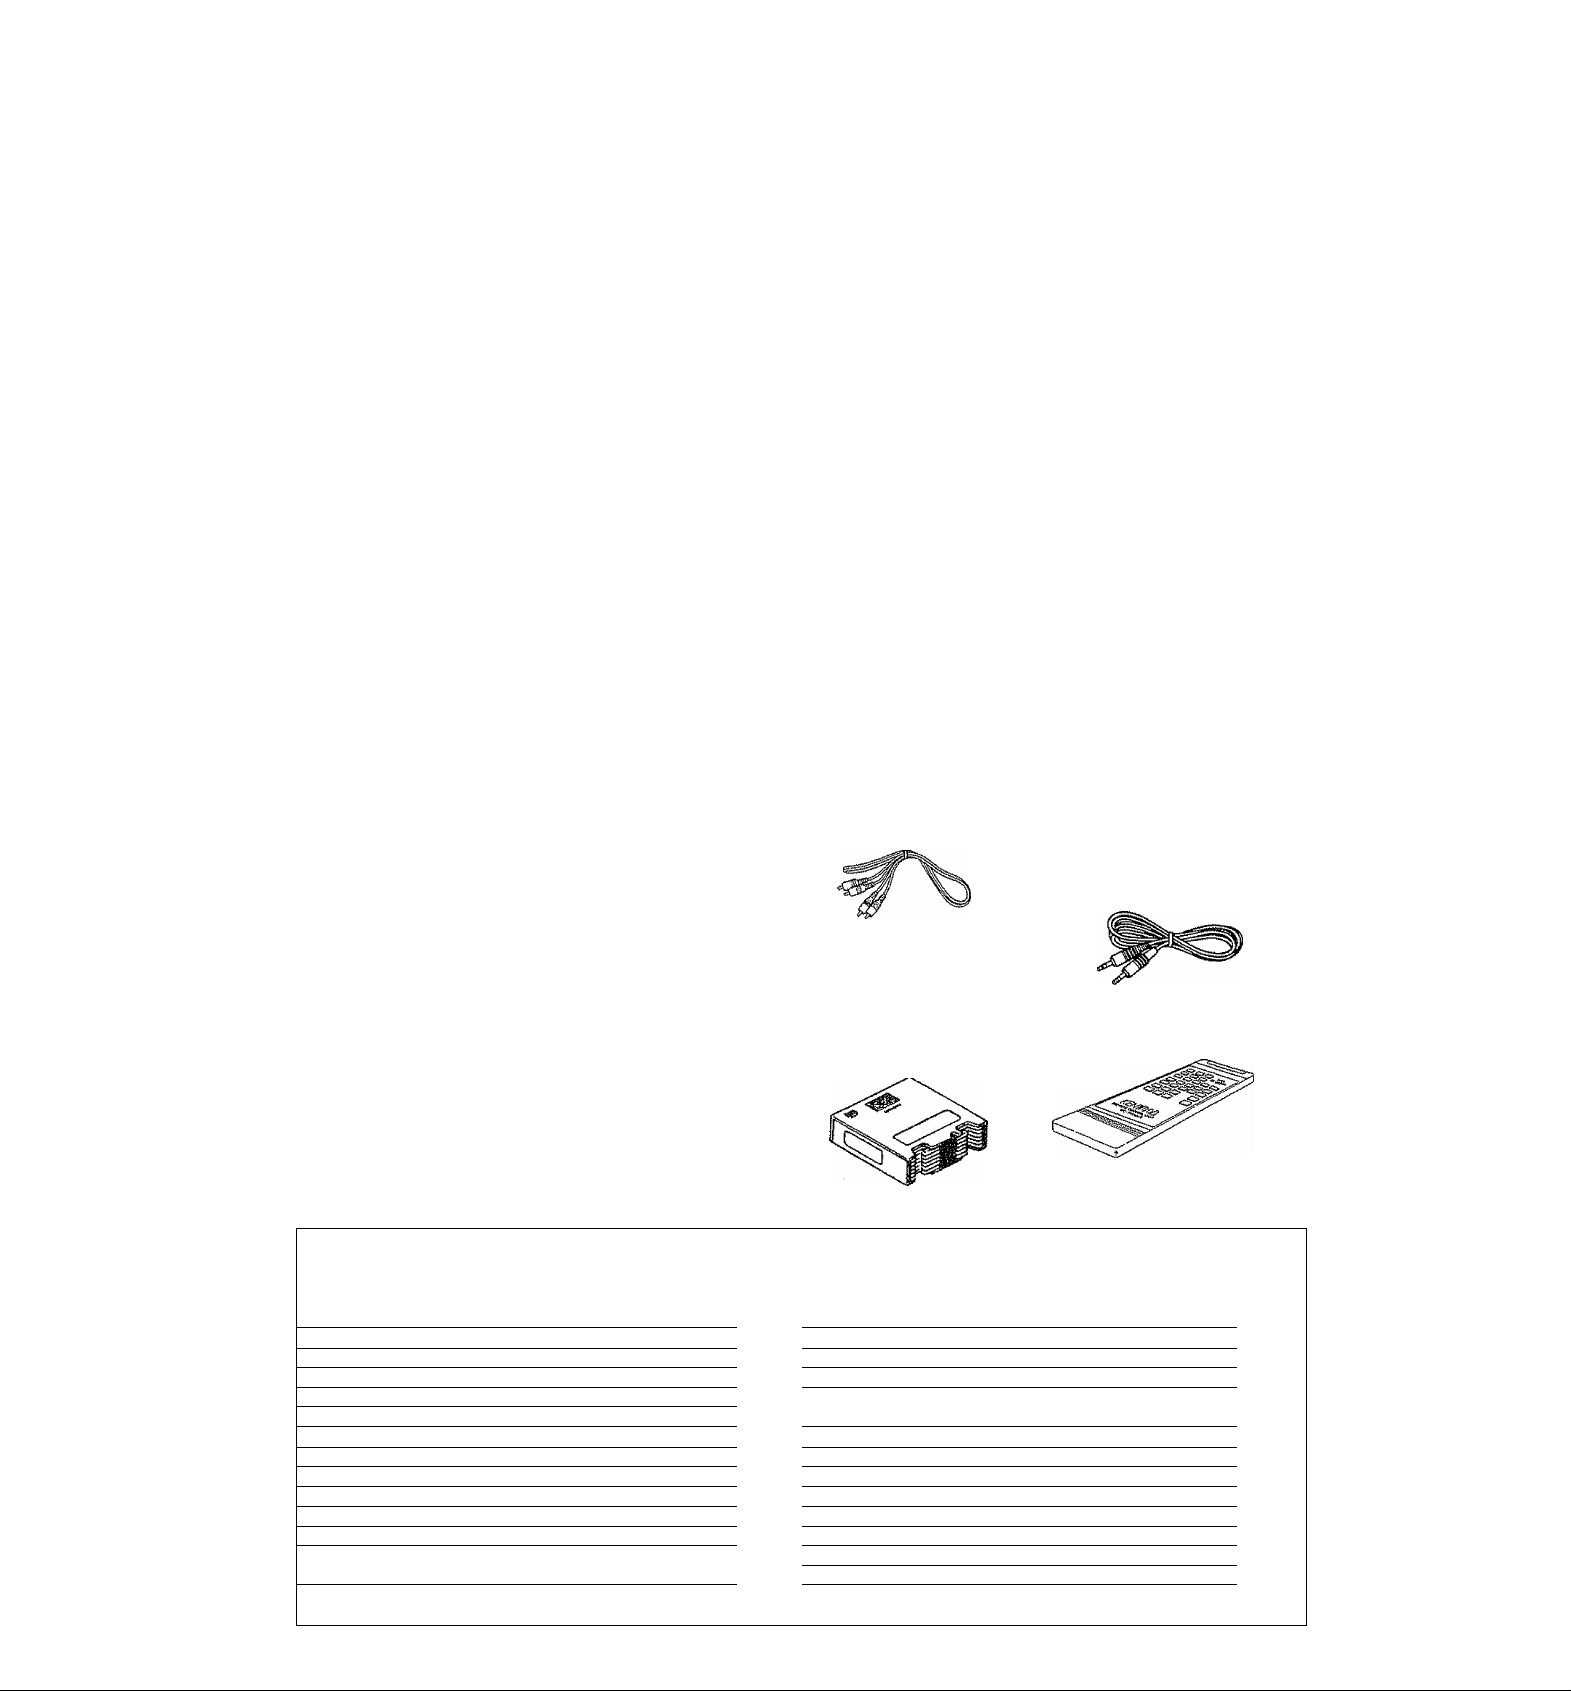
Accessories
® Audio cord
Battery
("AA" or "R6")
« Magazine ....................1 (BC-PM4010)
(with 6 disc trays)
.............
1 « System control cord ... 1
(with mini plugs)
(Except for the U.K. and
Europe)
2
® Remote control unit ... 1
OO11 to fits Caution: Read the following pages marked in A carefully to keep your safety.
A Before applying power
A Important safeguards ..............................................
Before operation
System connections
Controls and Indicators
Remote control unit
Preparing to play .........................................................
Manual play (Track mode)
Playing all the discs in the magazine
Pausing play
Stopping play
Playing from a desired track
Listening to the next track or previous track ..
Forward and reverse searching
Programmed play (Program mode)
.........................................................
..........................................................
.........................................................
............................................
...................................................
..............................................
....................................................
.........................................
...................
.................................
...........................
..........................
. 3
. 4
. 6
. 7
. 8
. 9
10
12
12
12
12
. 13
. 13
. 13
. 14 Specifications
Programming
Checking a program
Changing a program ..............................................
Playing a program
Playing from a particular track of a program .
Stopping programmed play ...................................
Adding a track
Erasing a program
Repeated playing
To repeat all the tracks ..........................................
To repeat play of a single track
Random playing .........................................................
Time display switching and timer playing
In case of difficulty .....................................................
.........................................................
.................................................
........................................................
................................................
.......................................................
.............................................................
..............................................
...........................
................
14
15
15
. 15
. 15
. 15
. 15
. 1 5
. 16
. 16
. 16
. 17
. 18
. 19
. 20
Page 3
Before applying power A Caution: Read this page carefully to keep your safety.
For the U.S.A, and Canada
Important!
Units shipped to the U.S.A. and Canada are designed for
operation on 1 20 volts AC only.
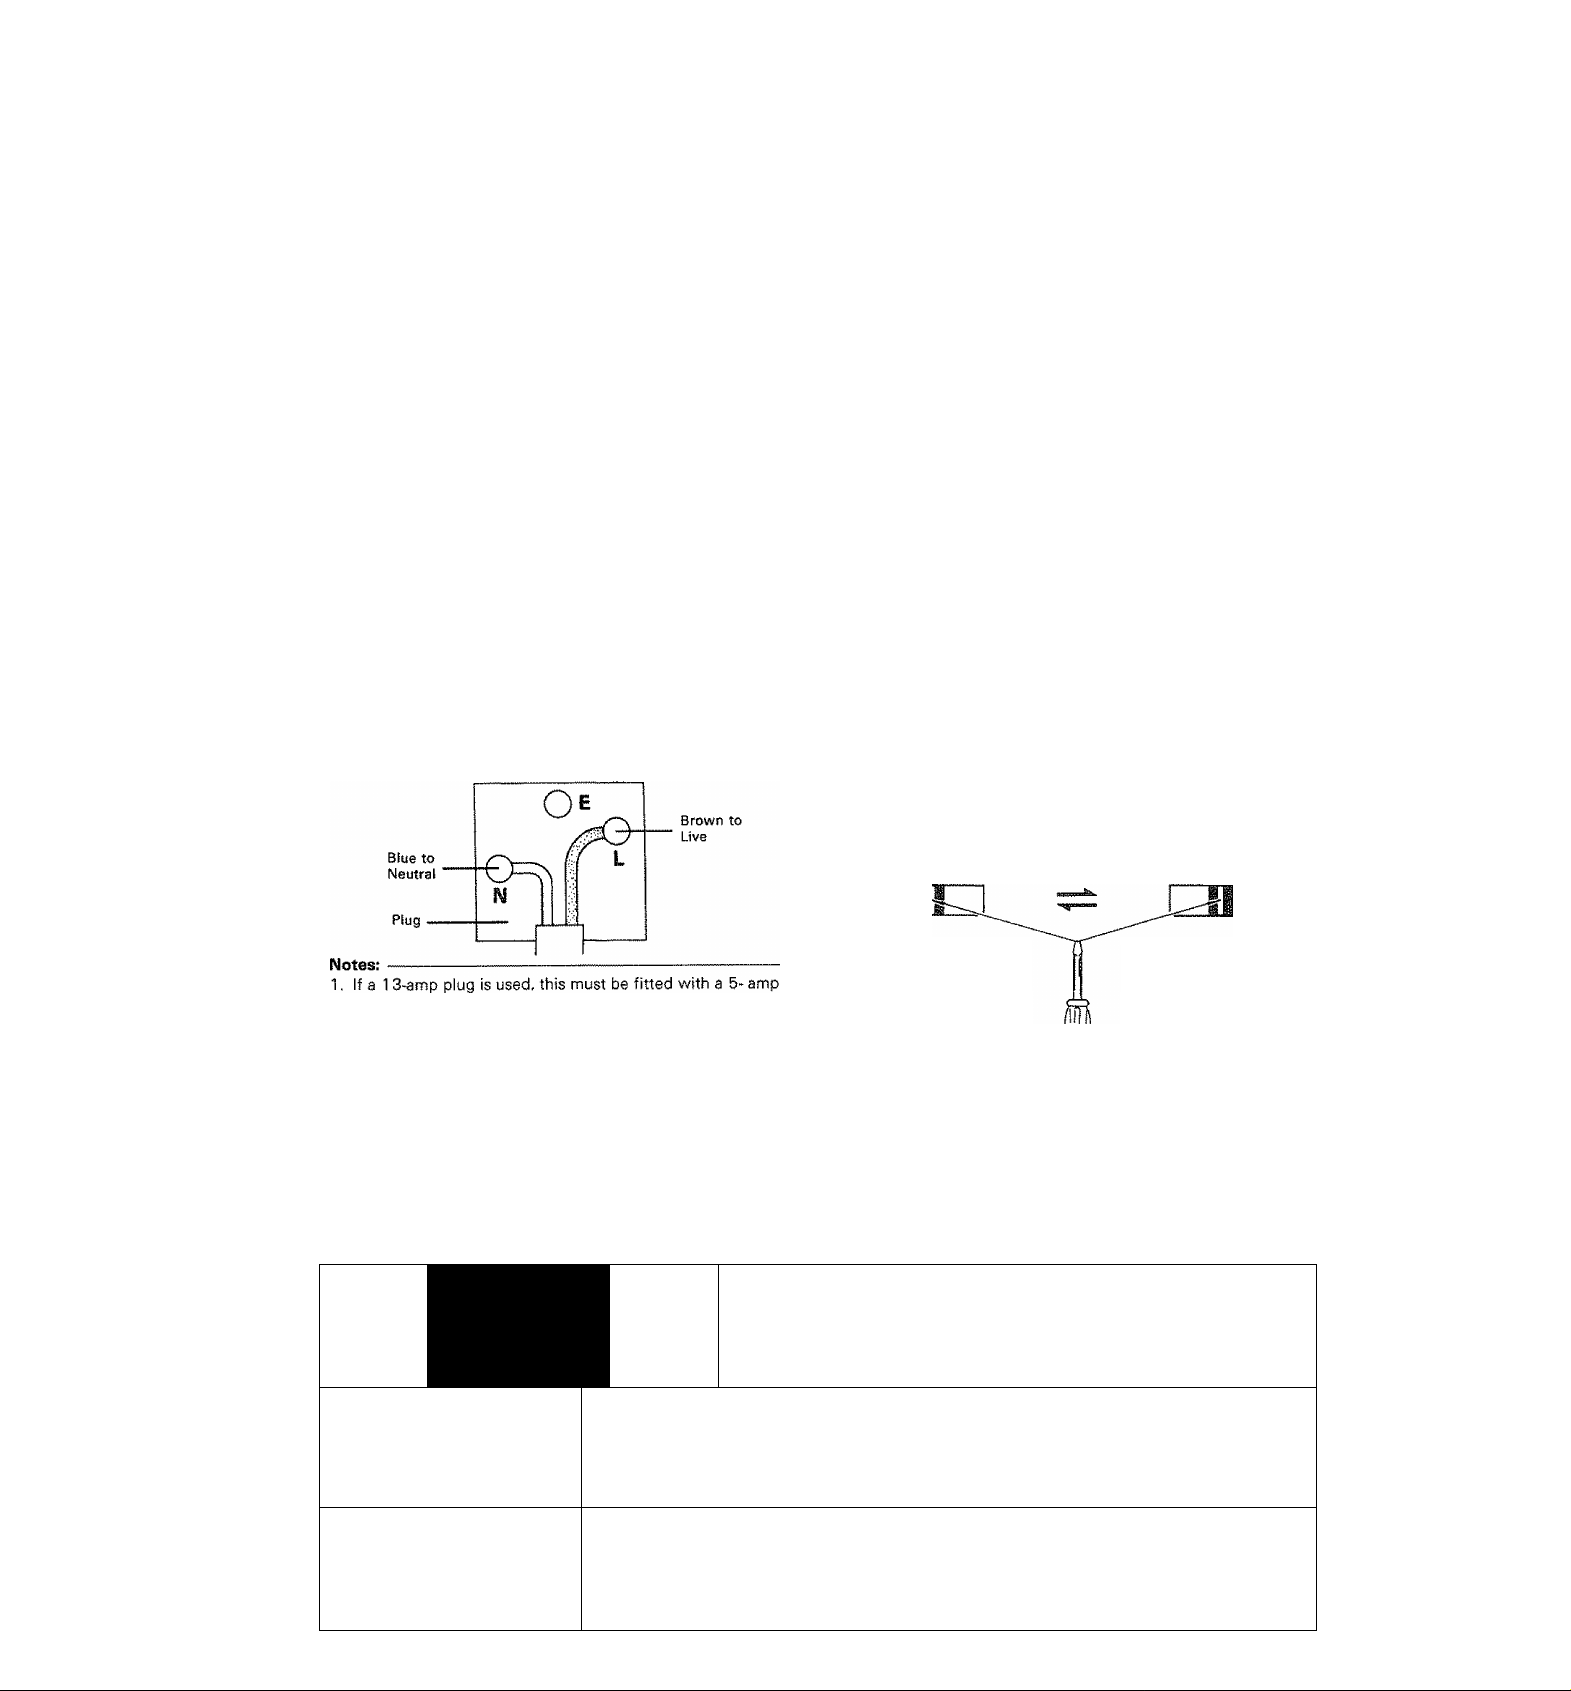
For the United Kingdom
Important!
Units shipped to the U.K. are designed for operation on 240
volts AC only.
The mains plug must be removed from the wall socket prior to
any internal examination.
The wires in this mains lead are coloured in accordance with
the following code:
Blue
...............................................
Brown
.............................................
The wires in this mains lead must be connected to the
terminals in the plug as follows;
Wire colour Plug terminal marking
Blue
...............................................
Brown
.............................................
Neutral
Live
N or Black
L or Red
For Australia and Europe
Important!!
Units shipped to Australia are designed for operation on
240 V AC only.
Units shipped to Europe are designed for operation on 220 V
AC only.
For other countries
Important!
Units shipped to countries other than the above countries are
equipped with an AC voltage selector switch on the rear
panel. Refer to the following paragraph for the proper setting
of this switch.
AC voltage selection
This unit operates on 110-1 20 or 220-240 volts AC. The AC
voltage selector switch on the rear pane! is set to the voltage
that prevails in the area to which the unit is shipped. Before
connecting the power cord to your AC outlet, make sure that
the setting position of this switch matches your line voltage,
if not, it must be set to your voltage in accordance with the
following directions.
Note:------------------------------------------------------------------------Our warranty does not cover damage caused by excessive line
voltage due to improper setting of the AC voltage selector
switch.
ACn0-120VO/-^^AC220-240V^ AC1 10-120VO/-<4fr'AC220-240VA/
This shows switch
lever is locked in the
110-120V Ay position.
fuse.
2. If a 3-pin plug with earthing contact is used, no wire must
be connected to the E terminal.
Move switch lever to match your line voltage
with a small screwdriver or other pointed tool.
AC voltage selector switch
Safety precautions
WARNING: TO PREVENT FIRE OR SHOCK HAZARD, DO NOT EXPOSE THIS APPLIANCE
TO RAIN OR MOISTURE.
CAUTION: TO REDUCE THE RISK OF ELECTRIC SHOCK, DO NOT REMOVE
COVER (OR BACK). NO USER-SERVICEABLE PARTS INSIDE, REFER SER
VICING TO QUALIFIED SERVICE PERSONNEL
^1
R)SK 0F £l£CTR1C SHUCK.;
DONOTOPFry,,;.
lA
THE LIGHTNING FLASH WITH ARROWHEAD SYMBOL, WITHIN AN EQUILATERAL TRIAN
GLE. IS INTENDED TO ALERT THE USER TO THE PRESENCE OF UNINSULATED "DAN
GEROUS VOLTAGE" WITHIN THE PRODUCT'S ENCLOSURE THAT MAY BE OF SUFFICIENT
MAGNITUDE TO CONSTITUTE A RISK OF ELECTRIC SHOCK TO PERSONS.
This shows switch
lever is locked in the
220-240V '\j position.
A
THE EXCLAMATION POINT WITHIN AN EQUILATERAL TRIANGLE IS INTENDED TO ALERT
THE USER TO THE PRESENCE OF IMPORTANT OPERATING AND MAINTENANCE (SER
VICING) INSTRUCTIONS IN THE LITERATURE ACCOMPANYING THE APPLIANCE,
Page 4
Acaytlom ; Bead this page carefuHy to keep your safety.
Please read all of the safety and operating instructions
before operating this unit. For best results, follow all
warnings placed on the unit and adhere to the operat
ing and use instructions. These safety and operating in
structions should be retained for future reference,
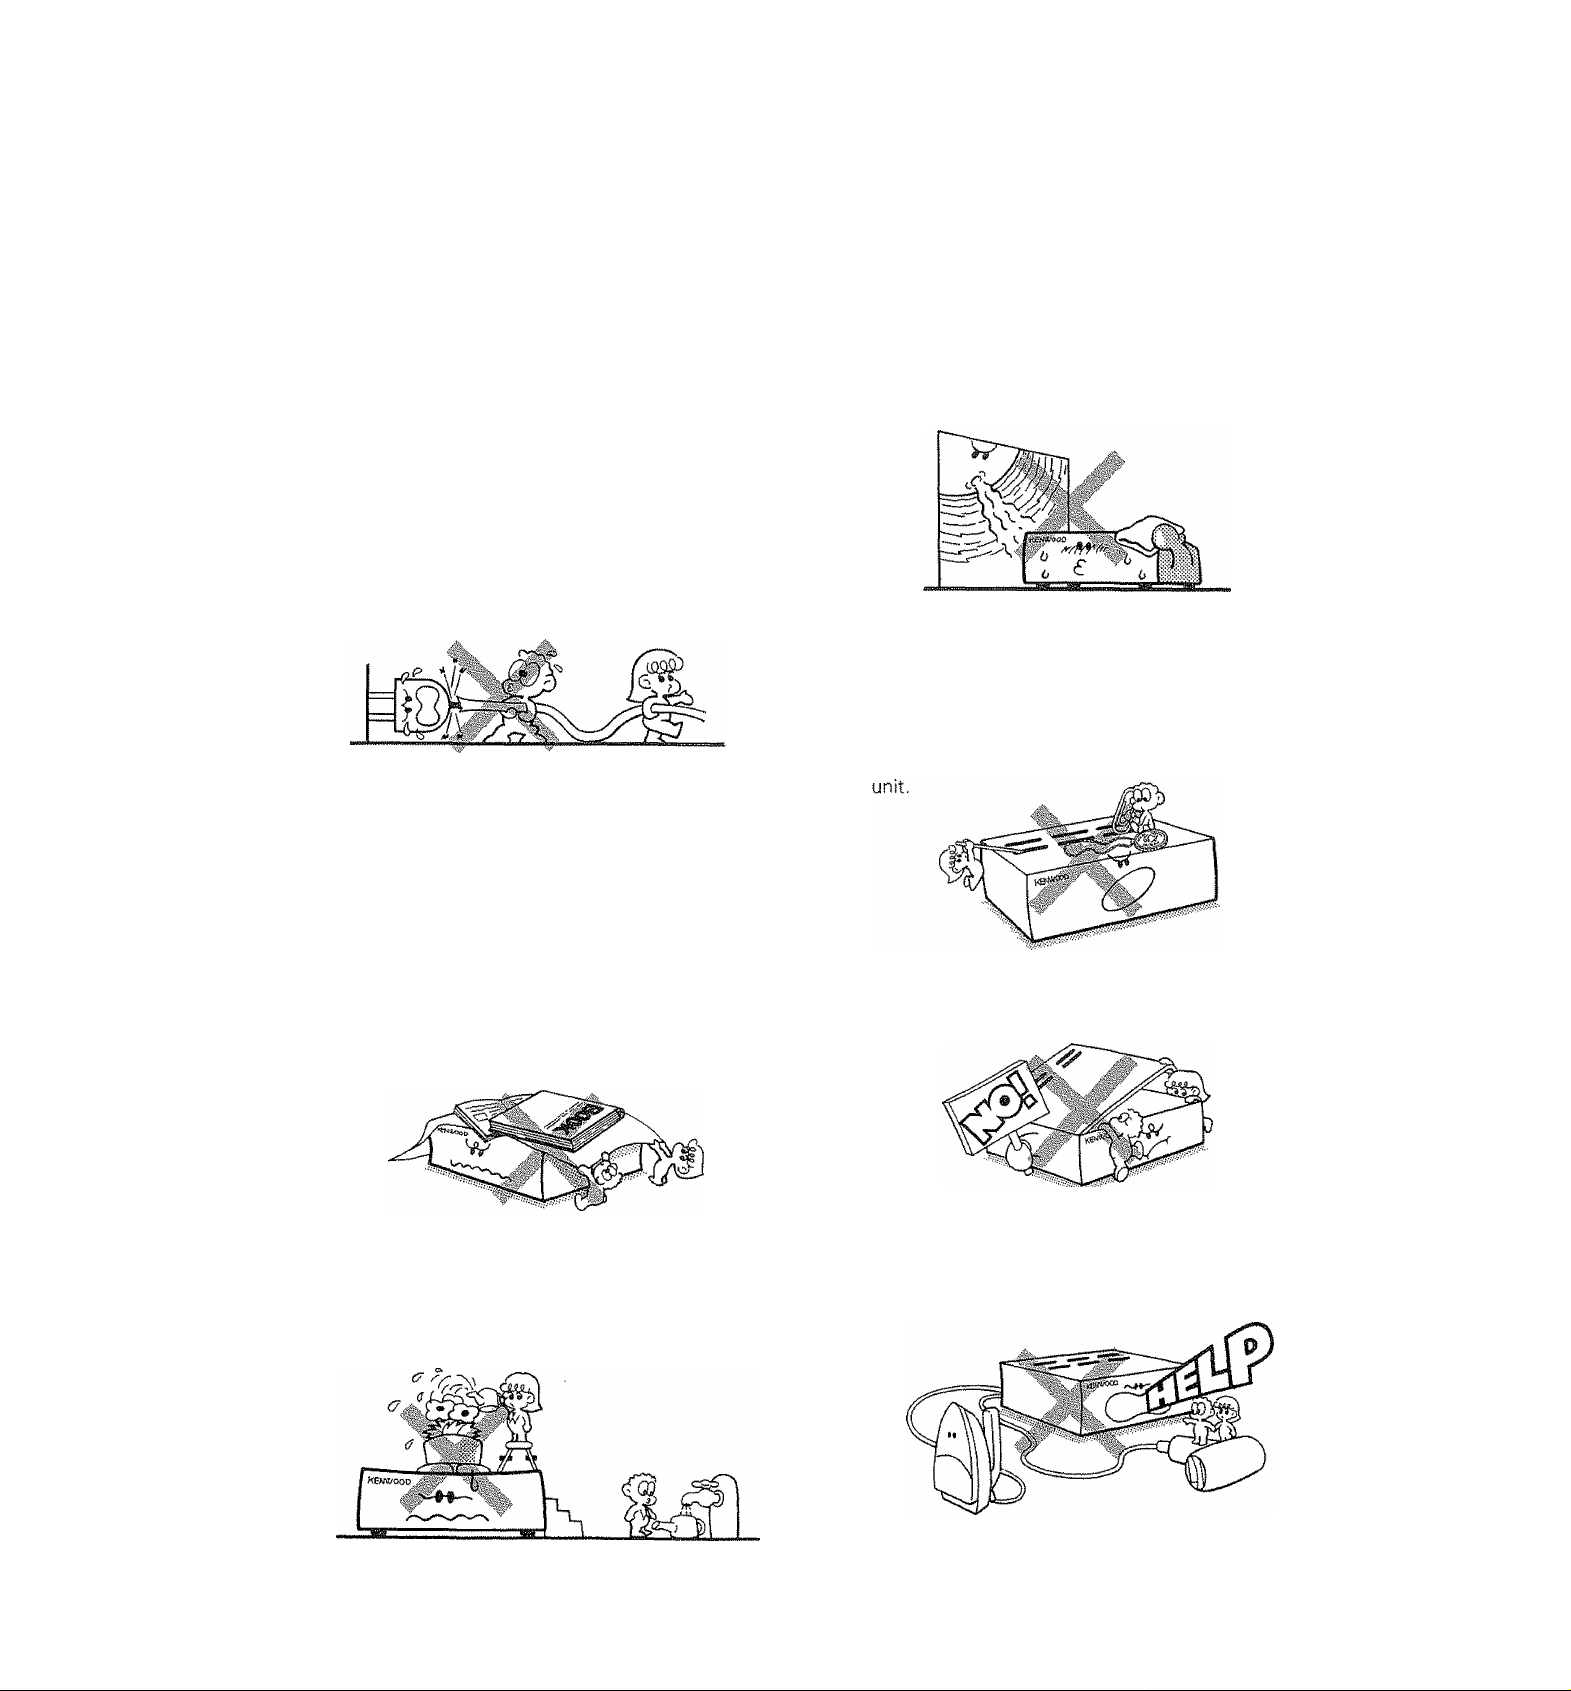
1. Power sources — The unit should be connected
to a power supply only of the type described in the
operating instructions or as marked on the appliance.
2. Power-cord protection Power-supply cords
should be routed so that they are not likely to be
walked on or pinched by items placed upon or
against them, pay particular attention to cords at
plugs, convenience receptacles, and the point where
they exit from the unit.
Never puil or stretch
the cord.
3, Grounding or polarization — The precautions
should be taken so that the grounding or polarisa
tion means of this unit is not defeated,
6. Temperature — The unit may not function pro
perly if used at extremely low, or freezing tempera
tures. The ideal ambient temperature is above 4(41^F).
7. Heat ~ The unit should be situated away from
heat sources such as radiators, heat registers,
stoves, or other units (including amplifiers) that
produce heat.
8. Electric shock — Care should be taken so that ob
jects do not fall and liquid is not spilled into the en
closure through openings. If a metal object, such as
a hair pin or a needle, comes into contact with the
inside of this unit, a dangerous electric shock may
result. For families with children, never permit chil
dren to put anything, especially metal, inside this
4. Ventilation — The unit should be situated so that
its location or position does not interfere with its
proper ventilation.
To maintain good ventilation, do not put records or
a table-cloth on the unit. Place the unit at least
10 cm away from the wails.
Do not use the unit on a bed, sofa, rug or similar
surface that may block the ventilation openings.
5. Water and moisture The unit should not be
used near water — for example, near a bathtub,
washbowl, kitchen sink, laundry tub, in a wet base
ment, or near a swimming pool, etc.
9. Enclosure removal ■— Never remove the en
closure. If the internal parts are touched accidentally,
a serious electric shock might occur.
10. AC outlets — Do not connect other audio equip
ment with a power consumption larger than that
specified to the AC outlet on the rear panel. Never
connect other electrical units,' such as an iron or
toaster, to it to prevent fire or electric shock.
Page 5
ACautîon : Read this page carefully to keep your safety.
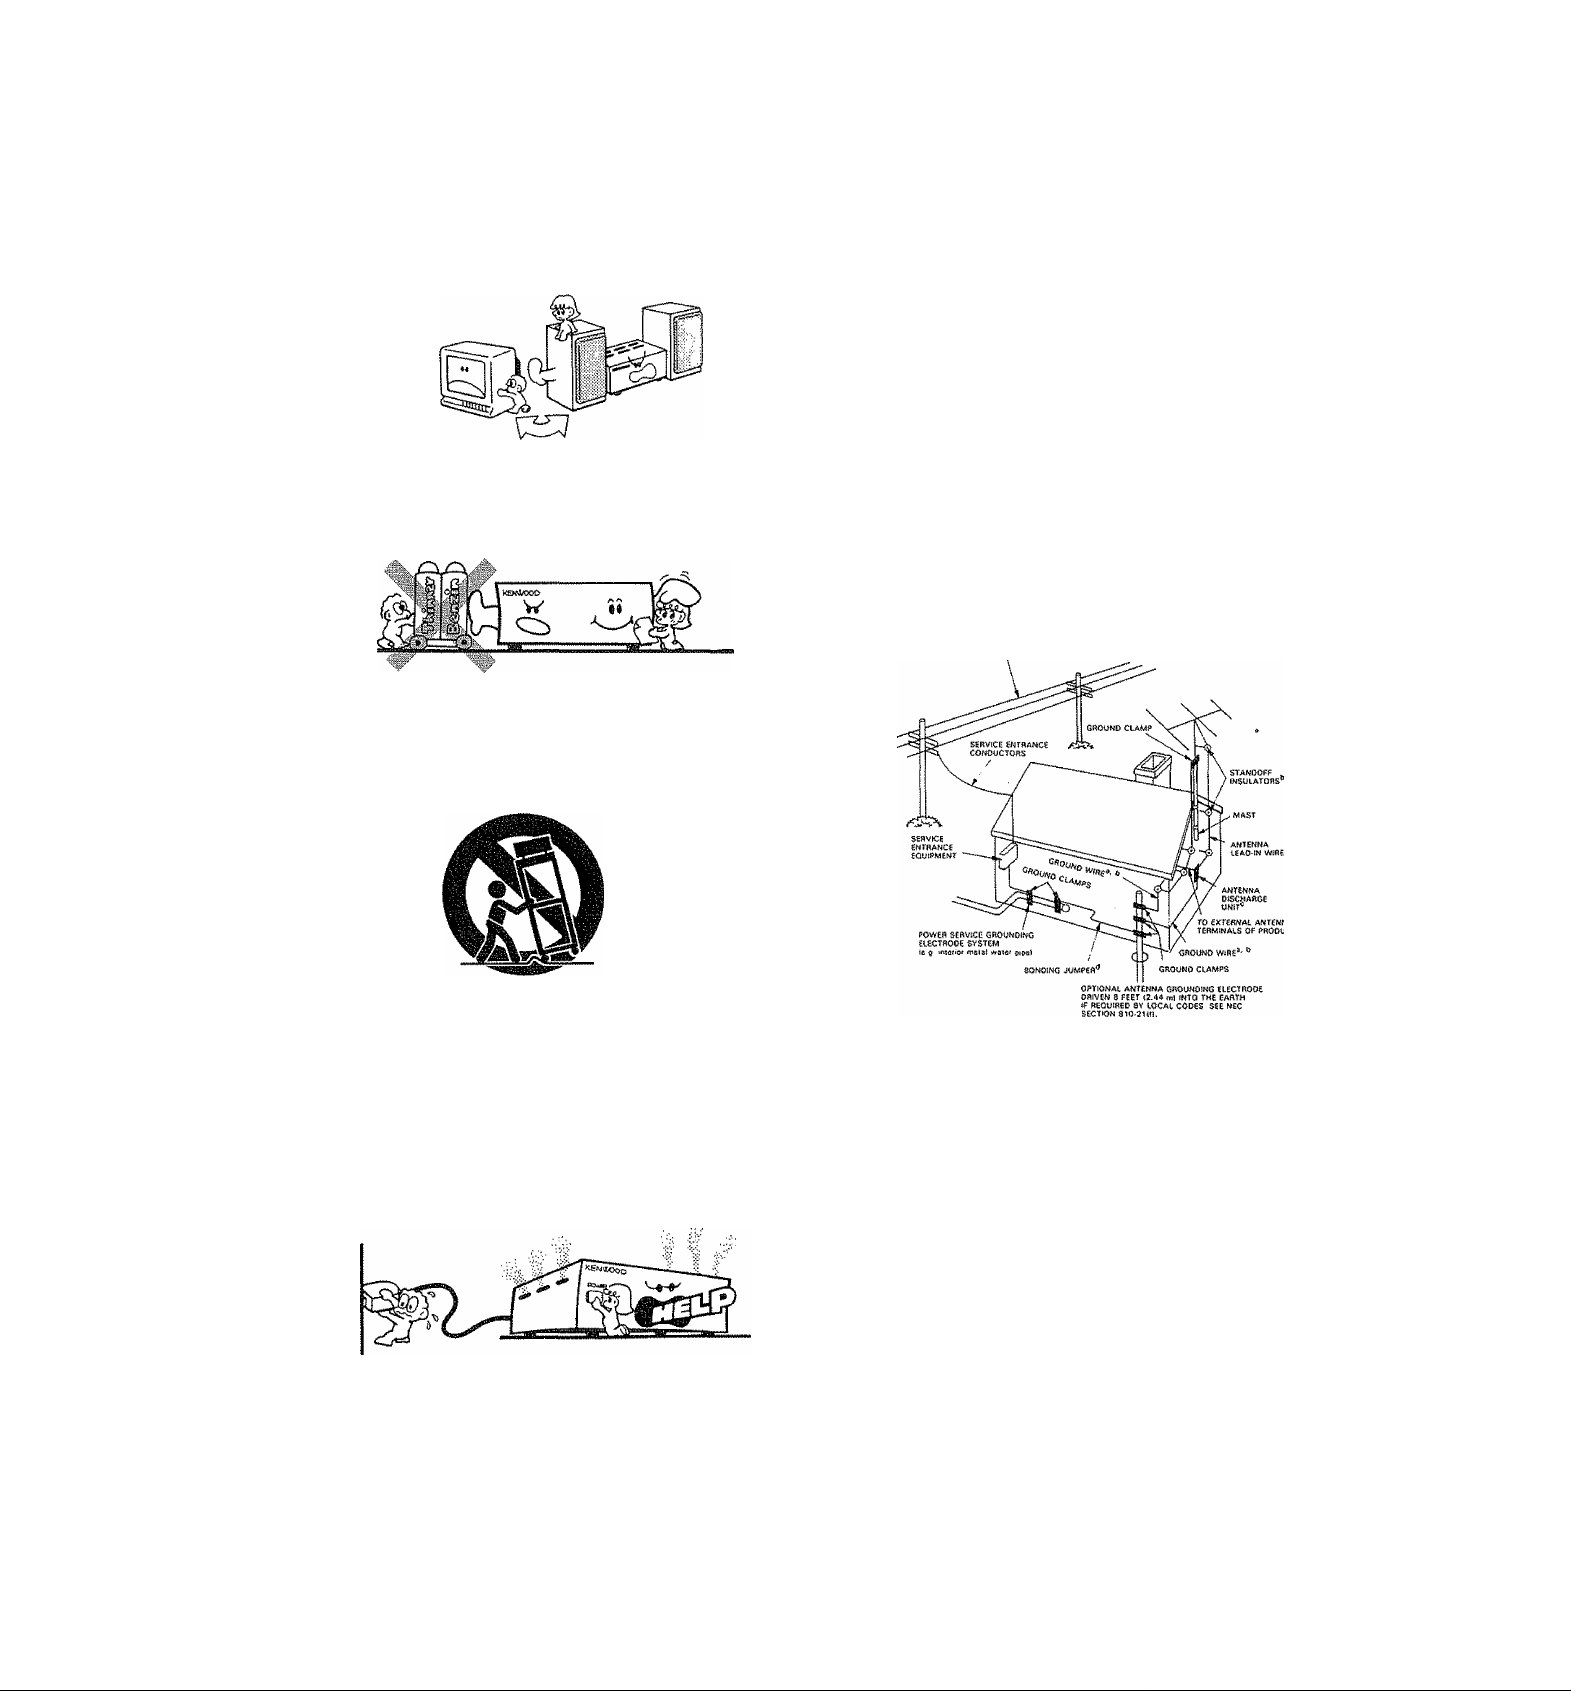
11. Magnetic fields — Keep the unit away from
sources of magnetic fields such as TV sets, speaker
systems, radios, motorized toys or magnetized
objects.
12. Cleaning — Do not use volatile solvents such as
alcohol, paint thinner, gasoline, or benzine, etc. to
clean the cabinet. Use a clean dry cloth.
13. Carts and stands An appliance and cart com
bination should be moved with care. Quick stops,
excessive force, and uneven surfaces may cause the
appliance and cart combination to overturn.
17, Servicing The user should not attempt to ser
vice the unit beyond that described in the operating
instructions. All other servicing should be referred
to qualified service personnel.
18. Outdoor antenna grounding ~ If an outside an
tenna is connected to the receiver, be sure the an
tenna system is grounded so as to provide some
protection against voltage surges and built up static
charges. Section 810 of the National Electrical Code,
ANSI/ NFPA No. 70—1984, provides information
with respect to proper grounding of the mast and
supporting structure, grounding of the lead-in wire
to an antenna discharge unit, size of grounding con
ductors, location of antenna-discharge unit, connec
tion to grounding electrodes, and requirements for
the grounding electrode. See Figure,
POWÇB (.EN6S
14. Nonuse periods The power cord of the unit
should be unplugged from the outlet when left un
used for a long period of time,
15. Abnormal smell If an abnormal smell or smoke
is detected, immediately turn the power OFF and pull
out the power cord. Contact your dealer or nearest
service center. POWER OFF!
10. Damage requiring service The unit should be
serviced by qualified service personnel when:
A. The power-supply cord or the plug has been
damaged; or
B. Objects have fallen, or liquid has been spilled into
the unit; or
C. The unit has been exposed to rain; or
D. The unit does not appear to operate normally or
. exhibits a marked change in performance; or
E. The unit has been dropped, or the enclosure
EXAMPie OF ANTENNA GROUNDING ACCORDING TO
THE NATIONAL ELECTRICAL CODE iNSTRUCTiONS
CONTAINED IN ARTICLE 810 - "RADIO AND
^ Use No. 10 AWG (5.3 mm^i copper, No, 8 AWG (8.4 alomtnuro,
No, 17 AWG i1 0 mm^} copper-clad steel or bronze wire, or larger, as
a ground wire.
‘’Secure antenna tead-in and ground wires to house with stand-off in
sulators spaced from 4 -- 6 feet (1.22 — 1.83 m) apart.
Mount antenna discharge unit as close as possible to where lead-in enters
house.
‘‘Use jumper wire not smaiier than No. 6 AWG (13.3 mm^) copper, or
the equivalent, when a separate antenna-grounding electrode is used.
See NEC Section 8t0'21if}
FIGUSe
TELEVISION EQUIPMENT"
19. Power lines — An outdoor antenna should be lo
cated away from power lines.
Notes:
1. item 3 is not required except for grounded or polarized
equipment.
2. Item 10 is not required except for units provided with AC outlets.
3. item 18 and 19 are not required except for units provided with
antenna terminals.
4. Item 18 complies with Ut-1270 in the U.S.A.
Page 6
Before operation
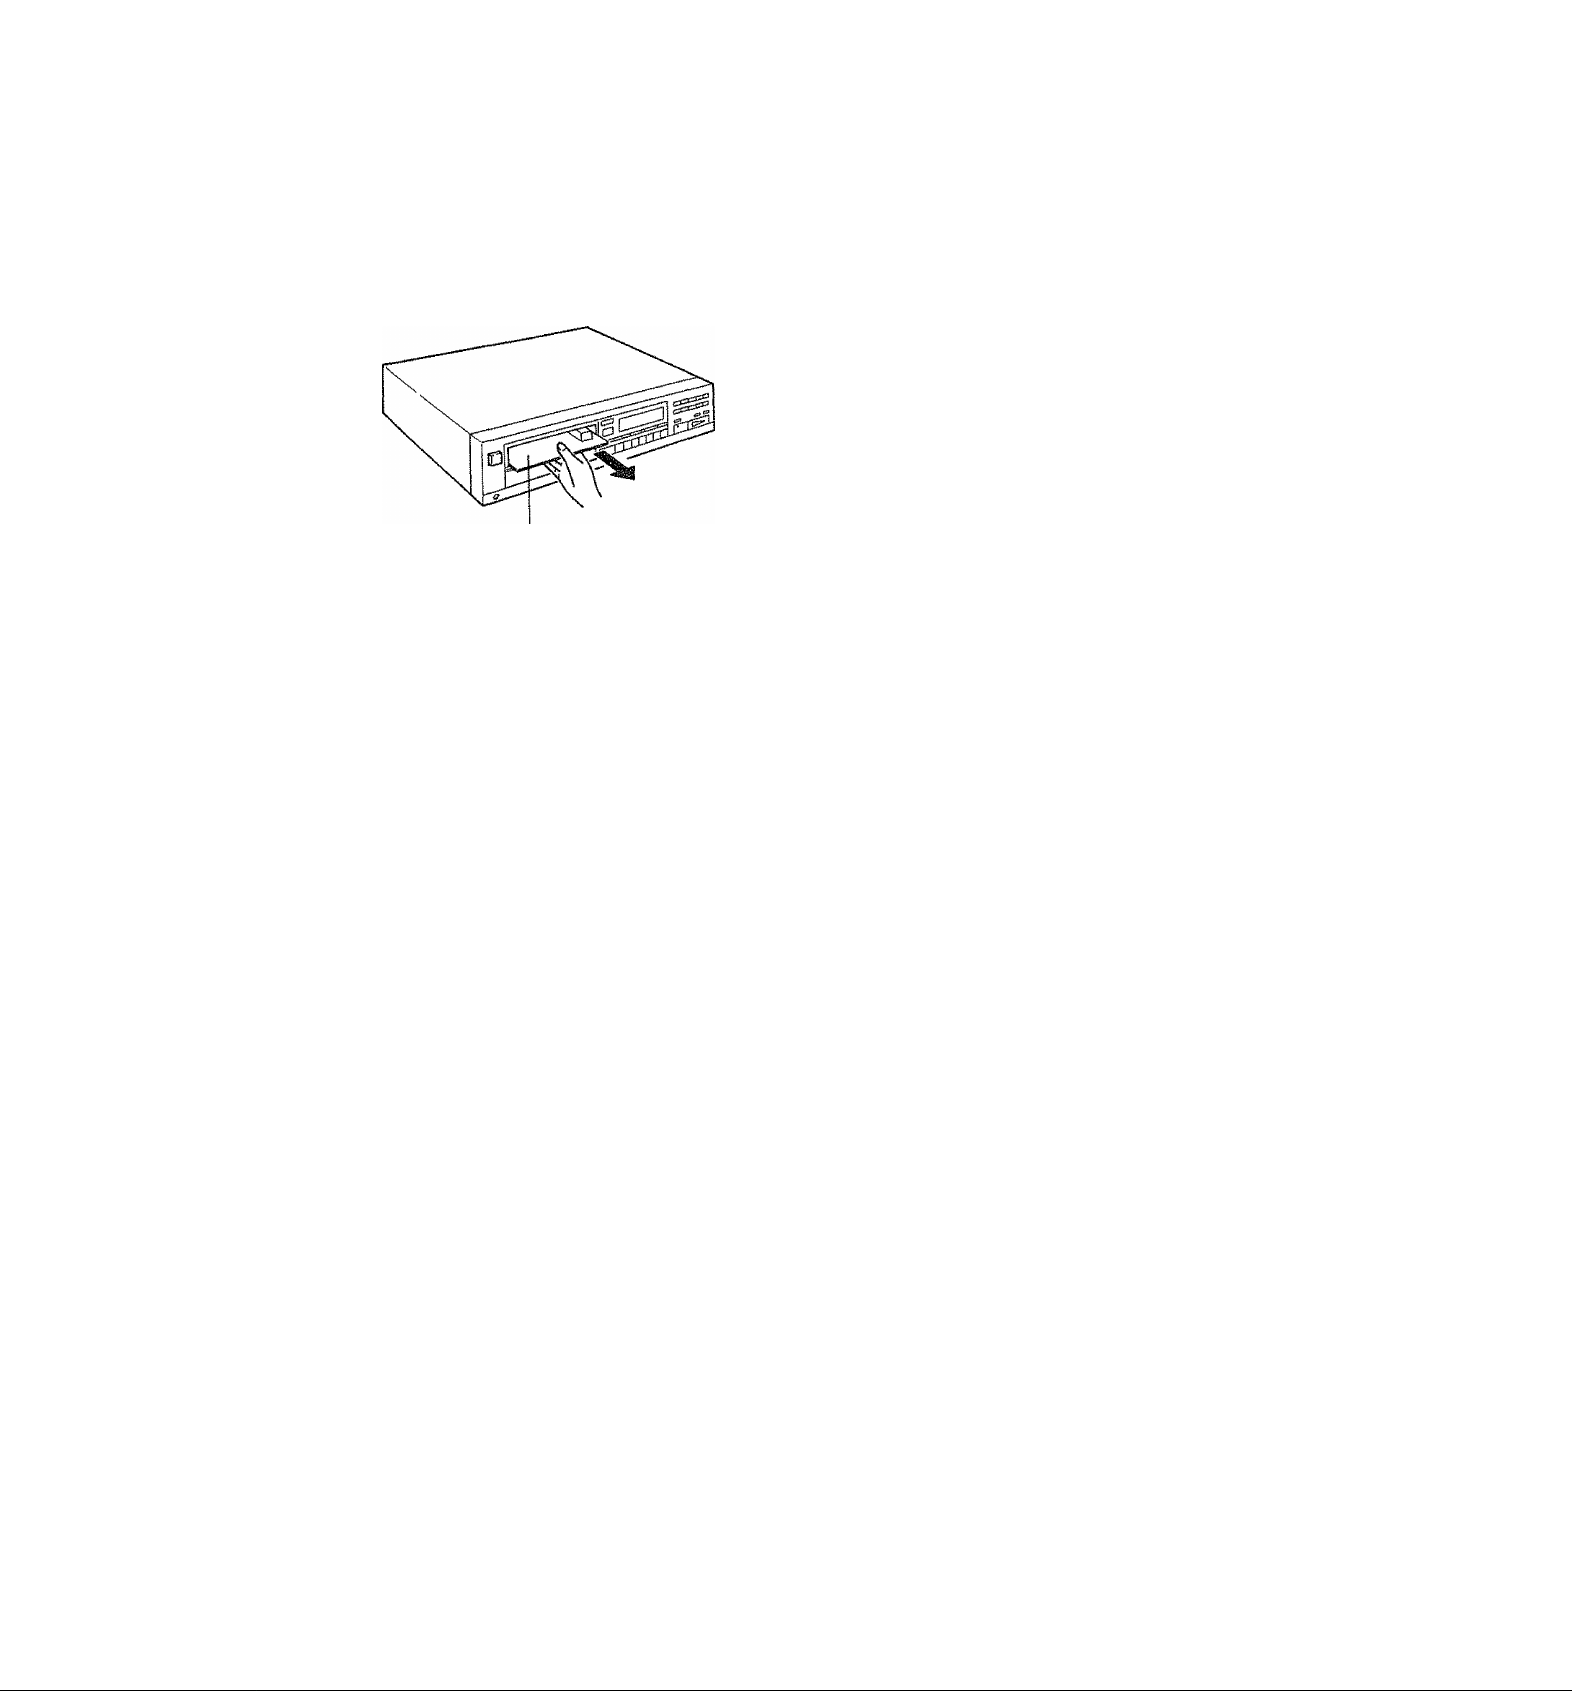
Removal of packing materials (protec
tive material) for transportation
Packing material
The packing material shown in the diagram has been
placed in the unit to protect it during tarnsprotation.
Remove the packing material before using. Do not throw
it away but keep for later use.'
When this unit is being transported, be certain to remove
the magazine from the unit and insert the original packing
material again.
Beware of condensation
Water vapor in the air may condense on cold parts, forming
"dew" on its surface.
For example, when a bottle is taken out of the refrigerator
and brought into a warm room, droplets of water will form
on the bottle surface. This phenomenon is called "conden
sation". If this occurs inside the unit the player may operate
incorrectly or may not function at ail.
This is not a malfunction, however, the player should be
left until it is dry, (Turn the power of this unit ON and leave
the playerfor a while. After several hours, even in the worst
case, the player will stabilize and correct playback will be
possible.) Be especially careful in the following cases:
e When the unit Is suddenly brought from a cold place to
a warm place (causing rapid temperature change).
« When the temperature of the room is raised suddenly
using a heater, etc.
« When the unit is brought from a well-cooled (aircondi-
tioned) room to a damp and hot room.
® In conditions where the temperature difference be
tween the surroundings and this unit might cause
condensation.
Page 7

System connections
Do not insert the power piug into the socket untii all connections are completed.
Connect the output terminals of this unit to the amplifier or receiver input terminals {CD, AUX etc.} by the supplied audio
cord.
Also refer to the manual for the amplifier to which the connection is to be made.
AC voltage selector switch
{Except for some areas}.
DP-M4010
.
......
11
"OljiPijT .......
_ SY$tiM _
a
Audio cord
When connected to an amplifier or receiver having
KENWOOD System Control terminals, system operation
such as remote control is made possible. For details, refer
to the instruction manual of the amplifier or receiver.
If your amplifier or receiver is not equipped with the
S
SYSTEM CONTROL terminals, do not connect anything to
any SYSTEM CONTROL terminal.
Do not connect the unit In any system configuration other
than specified.
Amplifier or receiver
a
Notes:-------------------------------------------—-----------------------------
1. Be sure that all the cords are connected properly. If they
are not, the sound may not be produced or there may be
noise interference.
2, When taking out and putting in the connecting cords, be
sure to turn the power of this unit OFF and turn the
amplifier's volume to minimum. If this is not done, it can
lead to errors in functioning.
To AC outlet
M Connecting power cord
It is useful to connect the power cord for this unit to the
linking power socket (SWITCHED) of an amplifier (Except
for some areas).
Page 8

Controls and ¡ocficators
8 DP-M4010(En)
Page 9

Remote control unit
All the keys have the same functions as the front panel controls.
M Operating range of remote control
unit
This functions as shown in the diagram below, although
there can be variations depending on the temperature,
humidity and place of use.
DP-M4010
Note:
..........................................................................................
Press the remote control operating keys at intervals of at
least one second. If you press the next key too quickly,
incorrect operation may sometimes occur.
M Supplying batteries for the remote
control unit
Load two ”R6", "AA” type batteries in the remote control
unit as shown in the illustration.
1. Remove the cover.
2. insert batteries with correct polarity, and close the
cover.
Mote:----------------------------------------------------------------------------
The provided batteries are to be .used for checking the
operation of the remote control unit, and they may have
shorter life than normal.
When the remote control unit becomes effective only for
shorter distance or Is not effective for operation, replace
them with two new batteries.
Page 10

Preparing to play
M Inserting a disc into the magazine
1. Press the magazine lock button and take out the
disc tray.
2. With the label upwards, corrctly insert the disc into
the disc tray.
3. Slide the disc tray horizontally along the left side
and right side grooves of the magazine and insert
it completely.
* It is not necessary to press the lock button.
Notes on handling the magazine:
1. If the disc tray is inserted aslant into the magazine
the unit will not operate.
Magazine
--------------------------------------
Magazine
......
~ * 1 “
z ^iSC tray^- Z
2. The disc must be only inserted in the magazine
after it has been inserted in the tray, if it is inserted
directly the unit will not operate.
z D^£y z
Types of disc which cam be played with this unit
Disc type Disc size
CD (general compact disc)
«■ CDV (CD with video) audio section
1 2 cm
12 cm
Notes om handlimg compact discs
3. Always keep the magazine loaded with six disc
trays.
4. After playing the disc, remove it from both the
magazine and tray. Store avoiding places of direct
sunlight high temperature and high humidity.
5. Do not alter the magazine or tray in any manner.
6. Do not drop, apply excessive force or subject to
shock the magezine or tray.
7. Do not use benzine, paint thinner or cleaning
detergents. It is possible that surface will dissolve.
The 8 cm CD adaptor on sale cannot be used with this unit
If it is used with this unit, it is possible that the disc or CD
player will be damaged.
In the case of CDV, the time display and music calendar
displays are all for the audio section only.
Haridliing
Compact discs are made of plastic (polycarbonate). When
the recorded side of the compact disc is dirty or scratched,
playback may be noisy or sound may be missed. Even when
the label side is scratched, the recording may be damaged.
Handle compact discs carefully. Do not stick tape, etc. to
compact discs.
Labeled side
Recorded side
Sticky tape
1 A no /t O 1 A
Cleaning
When a compact disc is contaminated with fingerprints,
etc., wipe with a dry cloth in a radial direction. Never use
chemical solvents, such as thinner, benzene, etc. and
conventional record cleaners or aerosols.
Storage
Always replace the compact disc In its case and store it
Corhpact discs are adversely affected by heat and mois
ture. Do not store compact discs in a place exposed to
direct sunlight or where humidity is high.
Page 11

When the power has been turned on
[s i
-----
J otsc
[=1—1 n
[41 —/ / TRACK
(i]~3 till
[ , ¡ ^ 1 u U
13 3 4 5
6 7 a g 10
11 12
IS 17 ia 19
■Ail indicator ijluminated whether
or not a disc is present.
When putting in magazine
[si
-----
) Qigç;
1 /
i / TRACK
(îj—] / / /
01-) U 1
SriMGie TiM=
n
n -n n
U
U 'U
Displays as above and remains at standby.
6 7
11
U
ie
3 3
12 13 14 15
17
13 14 1S
d
0310
18 ig 20
20
M How to insert the magazine
1. Press the POWER switch to turn on.
2 . Insert a magazine containing discs.
3. Firmly press the magazine until a click can be
heard.
Disc indicator t-] display
All of the disc indicator [ - ] of this unit iiluminates, whether
or not a disc is present, when the power is switched on
or a magazine is inserted.
When about to play a desired disc, it informs you that a
disc is not inserted by going out.
Even when a disc is not present, it remains
illuminated until normal play pr program paly
is selected.
-3
OISC
[si[=l--3 _/
rO.
5
[^1—3 / / /
C'i , 3 L/
t
n n n
U u -u U
— Shows no disc present
(it will not operate even if the key of a non-illuminaied DISC
NO. is pressed)
i TRACK 1 S S
8
Sl^H5U& TirviG;
7 B
11 ia
a
s
9 10
M How to remove the magazine
1. Press the EJECT key [§ .
2. Remove the magazine towards you.
Notes:
---------------------------------------------------------------------------
1. When the power Is switched on, if a magzine and disc are
already inserted, this unit will automatically start to play.
2. Hold the magazine by the central section when inserting
or removing it.
3. When the unit is to be transported, be sure to remove the
magazine pack from the main body.
Page 12

Manual play (Track mode)
B Playing all the discs in the magazine
1. Press the POWER switch to turn on,
track numbers
Example of pausing play at the third track
2. insert a magazine containing discs.
3. Check that the piay mode indicator is on ¡ TRACK],
® If it is on IPG1^, press the P-MODE key to make
IfRACKliiqht up,
4. Press the PLAY/PAUSE key r^7n l,
® The play indicator {6»^) illuminates and play starts
from the first track on the first disc.
® If there is no disc present, play begins with the next
disc.
® When playing of the last disc has finished, it stops.
Pausing play
Press the PLAY/PAUSE key .
« The pause indicator ( ii ) will light up and play will
stop at that point
e When the PLAY/PAUSE key is pressed
again, play will resume from that point.
12 nP- M 40 10 fF ni
played are erased in order
M Stopping play
Press the STOP key [Ml •
« The play indicator { } goes out and the play
stops.
® To stop piay, press the POWER switch after pressing
STOP key g].
Page 13

-DESc setecraFi-
1 a 3 <3 SS 8 RANGCM PLAY
Select desired disc.
ii Playing from a desired track
1. Select the desired DISC No. with the DISC SELEC
TOR keys ID^E.
0 If a number with no disc is loaded, it will move on
to the next disc.
Example: When starting play from 13th track
S 7 S 9 O
11 lii m
...................
After pressing [ 4-10 \ once \ \\\\
V '
3 3
..
Press
Example of starting play from 13rd track
[c!
-------
1
Disc ¡Kh. t TfwCK (
Csi
------
]
1 1
U]~]
1 TPACK
1 J u u u u
TIMS
/ / r'l . i^i
Indicates elapsed time
2. Within 5 seconds after the disc is selected, input
the track number of the desired track by the
numeric keys [T] ~ [^, [+ id].
Input example:
For the 40th tune, after pressing [+10 j four times,
press [3.
0 Play starts from the seiected track number of the
selected disc. When the last disc has finished playing,
it stops.
® If the numeric keys are not pressed after selecting
a disc, play starts from the first tune of the seiected
disc.
Mote:----------------------------------------------------------------------------
If a track number is specified for which there does not exist
a tune on the disc, it is possible that it wiit automaticaliy play
from either the last or first tune. However, if the non-existent
track number key is pressed during play, it will have no
effect.
When this key is pressed while
the player is stopped, play will
start from the beginning of the
second track.
When this key is pressed while
the player is stopped, play will
start from the beginning of the
last track.
When one of these keys is
pressed during play you will
hear a cueing sound as the
pickup moves forward or-backward across the disc. If you
release the key referring to this
sound, normal play will be re
turned from that point.
Listening to the next track or previous
track
Press the SKIP keys
the TRACK number on the display.
® Press once to select to the next track {or the previous
track). Press repeatedly or keep the key depressed
to-select several tracks ahead (or several tracks back
ward).
® Play will start from the beginning of the selected
track.
9 When the
the track starts again from the beginning.
® Play can also be started during a pause by operating
the SKIP keys and pressing the PLAY/PAUSE key
M Forward and reverse searching
During play you can search forward {or backward) at
high speed by pressing the SEARCH keys
to»* ® )•
9 If the s key is pressed continuously and it
returns to the beginning of that disc, it enters the
pause state.
I HH ]
I
HH I key is pressed once during play,
(or j HH
|)
white looking at
after selecting the track.
Page 14

Programmed play (Program mode)
It is possible to program and play a maximum of 32 tunes in a desired sequence.
OiSPH.Ay P"WODe REPEAT CHECK CLEAR
Program No.
Blinks
E"1—j 05C ^
¡Ji—j j
5
j «Q 3H40U! T<Mfi
!'i—) 1 1 L n n -n n
AUTO SPACE function
When in the program mode, intervals with no sound of
about 4 seconds are created between the programmed
tracks. This function is for making use of the DPSS system
on the cassette deck.
M PrograiTsmiing
1. Press the P-MODE key to put in the program mode.
2. Select the desired disc number by the DISC SELEC
TOR keys [T] ~ [U.
® Example: If the [2] is pressed, the indicator be
comes as shown on the left diagram.
3. Select the desired track numbers with numeric
[U ~ [S 1 + 101 within 5 seconds after
the disc is selected.
« Example; While the display is as indicated in the
diagram on the left when [B] is pressed, you can
program the next track without waiting for the
display to change.
« You can specify up to 32 programs in the same
operation as steps 2 and 3. ,
« When programming tunes on the same disc, selec
tion can be made by only using the numeric keys
E'-iSland FPTol.
« If you select a wrong track number, press the clear
key once, then select the desired track again.
« When disc numbers or track numbers are specified
which do not exist, these numbers are initially
programmed. But when the play starts, they are
automatically canceled.
Page 15

Checking a program
Exampto of when the CHECK key is pressed
j P^cT] ¡jluminates and goes out
after several minutes.
{oi—1 disc
J
[.j™) I
[^1-) _ _
—3 / i L. n
m-i U J ■ r
tggL
/"( /
u >
Track number being checked
The display shows the program numbers
being checked and then returns to 00:00 after
several seconds.
Example of when a program is changed
(si—3
t-!~3
[31—.}
[=1
------
]
CJJSC
n
u
/
r~i
/
TfiACK
NO,
/
SlwGLG riMe
n n -n n
u u -u u
Number of the track after
the change
Press the CHECK key to confirm program contents,
® Each time you press the CHECK key, the display
shows DISC No. and track number in programmed
sequence.
H Changing a program
1. Press the CHECK key until the display shows the
track number that you wish to change.
2. While the i P;C.l is lit up, select your desired track
by using the DISC SELECTOR key and the numeric
keys.
« Track being played cannot be changed.
m Playing a program
After completing the programming, press the PLAY/
PAUSE key |.
« The play indicator (>-} blinking while programming
stops blinking and lights up continuously. Then your
tracks are played as you programmed them.
Playing from a particular track of a program
1. Press the SKIP key i M1 to advance to the next
program.
2. Press the SKIP key to go back to the
previous program.
« The play starts from the beginning of the selected
track.
* if you press the 1 1 key once during play, it starts
from the beginning of that track.
M Stopping programmed play
___
ii Adding a track
During the program mode you can add programs to
the end by selecting the appropriate track numbers
using the DISC SELECTOR key and the numeric keys.
H Erasing a program
Press the CLEAR key.
® To erase the program contents from the last one in
order, press the CLEAR key each time.
« All program contents will be erased if you perform
any of the following operations.
® Pressing the P-MODE key and switching into the
TRACK mode, _
(D Pressing the EJECT key [4).
@ If the player is stopped and you press the CLEAR key
as many times as there are tracks on the program.
(^Turning off the power.
Press the STOP key @.
® if you then press the PLAY/PAUSE key ,
the play starts once more from the beginning of
the program.
Page 16

Repeated playing
When REPEAT key is pressed
OtSPLAY P~MCDE REPEAT CHECK CLEAR
j TftACK 3 i HGPeAT \
CISC ^
—]
fa;—1
/
—]
/ TtiACK
[il—]
[si
------
]
n /
n / ■ P ~i
—3
; / /
REPEAT I lights up.
S 7 0 9
11 ia
mio repeat a IS the tracks
1. Press the REPEAT key.
2. Press the PLAY/PAUSE key
9 When in the track mode, tracks of ail the disc are
I .
piayed repeatedly,
9 When in the program mode, aii the tracks pro
grammed are played repeatedly.
3, Press the REPEAT key again to cancel the repeated
play.
m To repeat play of a single track
1. Press the P-MODE key to put in the program mode.
2. Select the DISC No. you want to hear by DISC
SELECTOR [I]-®.
3. Select the number of the single track you want to
hear.
4. Press the REPEAT key.
5. Press the PLAY/PAUSE key I ^/11
i.
6. Press the REPEAT key again to cancel the repeated
play.
Page 17

Random playing
This function allows for random selection of the tracks each time and continuous playing in any order. It is
particularly useful for playing so that people wilt not get tired of the same sequence of music when hearing it
for a long time.
RANDOM PLAY key
OtSPLAY P-MODE REPEAT CHECK CLEAR
X30
Example of when 8th track of disc No.2
fci
------
) DISC CH
“/
/ TRACK
— wroCUi TiMW.
t3|—) __ _
{,1—) / I I I p . p,
[,¡„3 u i_i i_i ij -ij j
When the track is selected, RANDOM
changes from blinking to lighting up
and play starts.
Random playing
1. Press the P-MODE key to switch to the track mode.
lights up.
2- Press the BAMDOM PLAY key.
® Oban DOM I blinks, when tracks are randomly se
lected, the disc No. and track number light up and
the play starts.
* Press the SKIP key | »H1 or jliTi to select another
track.
9 When the play of one track is completed, another
track is again selected automatically and the play of
that track starts.
® If you press RANDOM PLAY key when repeated
playing is set (when j REP EAT] is lit up}, random play
takes priority and I REPEAT I is cancelled.
H Stoppirig random play
Press the STOP key W.
» The random play will be cancelled.
Page 18

Time display switching and timer playing
TIME DISPLAY key
Changing time display
Each time you press the TIME DISPLAY key during play in any play mode, the time display changes in the order
as below.
While playing in track mode
Kp The elapsed time for the track
SINGLS TIME
n I . Zl ”/
U I -L _/
(|)The remaining time for the track
SiNGLE TIME
^ n Zl ' D ”/
LI L • L I
•
The elapsed time for the whole disc
TOTAL TIMS
J D -U r
L J ’ ./ U
<I)The remaining time for the whoie disc
TOTAL Tíme
I r
1 n
Note:----------------------------------------------------------------------------—
This player stores time information for up to 29 tracks stored in the disc. When discs having 30 or more tracks recorded on
them are played, the time may not be displayed. In such a case the display may show
I c
I
.........
While playing in program mode or
random playing in track mode
“Kp The elapsed time for the track
SINGLE TPMS
n I - ~!
u I ■ r
The remaining time for the track
SINGLE TIM^
„ n Zl ■ J ~I
U L ■ L I
.......
— ------------------------------------------------------—————
m Timer playing
Plug the CD player's AC power plug into the audio
timer. Load a disc. Leave the CD player's power
switch turned on and set the audio timer to the
desired time.
e Play will begin from the first track on the disc. (The
track mode is selected automatically when the power
turns on.)
Notes:-
----
1. Refer to the instruction manual for the timer.
2. Be careful of your amplifier volume setting when using
an audio timer.
3. When operating the unit other than the CD player using
an audio timer, be sure to remove the disc from the CD
——----------------------------------------------------------------
player.
Page 19

In case of difficulty
What appears to be a malfunction may not always be serious. Firstly, check the following items before consulting
the service personnel.
Symptom
No power is applied with the POWER
switch ON.
Disc is loaded, player does not play.
(DISC indicator turns off.)
No sound.
Music is interrupted. (Sound is skipped.)
Play starts when POWER is turned ON.
Cause
1, Power plug is loosely connected.
2. With the power plug connected to the
linking power socket of an amplifier, the
power of the amplifier is turned off.
1. Disc is loaded upside down,
2. Disc is dirty.
3.
Disc is cracked.
4. Condensation occured on the optical
lens unit.
1. Disc is not loaded in the magazine.
2. Play mode is not entered, (The play/
pause indicator is not lit.)
3.
Disc is too dirty.
4. Disc is cracked.
5.
The connection cords are inserted
loosely.
1. Disc is too dirty.
2. Disc is cracked.
3.
Oscillation is applied to this unit.
If the disc is loaded, this player will play from
the beginning of the first tune when the
power is turned ON,
Remedy
1, Insert the power plug firmly to the AC
outlet,
2. Turn the amplifier's power ON.
1. Load the disc again with its label side up.
2. Wipe off the dust on the surface of the disc
referring to "Cleaning of compact disc."
3.
Replace the disc with a new one.
4. Leave the player for about 1 hour so that
the condensation is removed.
1. Load a disc and press the PLAY/PAUSE key
2. Press the PLAY/PAUSE key
3.
Wipe off the dust on the disc surface
■
1^/111 .
referring to "Cleaning of compact disc".
4. Replace the disc with a new one,
5.
Connect all connection cords firmly.
1.
Wipe off the dust on the disc surface
referring to "Cleaning of compact disc".
2. Replace the disc with a new one.
3.
Try selecting a place where no strong
vibration occur by changing the installation
place, etc.
If automatic play is not required, remove the
magazine from the player before turning the
power OFF.
Page 20

Specifications
[Format]
Type: ..............................................
Read system:
Rotational speed: .......................... About 200 to 500 rpm
.................................
Compact disc player
Non-contact optica! pickup
[Audio]
Frequency response:
Signal-to-noise ratio:
Total harmonic distortion:
Channel separation;
Wow flutter:
Output tevel/impedance:
Headphone jack output:
....................................
.....................
...................... more than 98 dB
............... 0.007% at 1 kHz
.......................
................
.................
10 Hz 20 kHz, ±1 dB
more than 92 dB at 1 kHz
Below measurable limit
1.2 V/2.2 kn
31 mW (32 Ù)
[General]
Power consumption:
Dimensions;
Weight:
...................................
....................................... 5.5 kg (12.1 ib)
......................
15 W
W: 440 mm (17-5/16")
H: 1 14 mm (4-1/2")
D: 345 mm (13-9/16")
[Wireless remote control unit]
Model: ............................................. RC-PM4010
Type:
............................. ................
Power supply:
Dimensions:
Weight:
Note:
--------------------------------------------------------------------------------------------------------------------------------------------------------------------------
KENWOOD follows a policy of continuous advancements tn development. For this reason specifications may be changed
without notice.
............................. DC 3 V (two R6/AA
...................................
...........................................
infrared pulse
batteries)
W: 176 mm (6-15/16")
H: 64 mm (2-1/2")
D: 18 mm (11/16")
121 g (with batteries)
(0.27 Ib)
 Loading...