

Page 1
PRO SUPER HUB-SHARKTMSYSTEM SAFETY AND USE INSTRUCTIONS
Safety Instructions
!
Warning – Never apply force to the tool that will cause the jaws or body to bend or
distort. Serious injury may result. If the jaws or the body of the tool begin to bend or
distort, stop immediately. Relieve some of the pressure on the tool by backing off the
screw. Then strike the large nut on the back of the tool with a soft-faced hammer to
break it loose.
!
Warning – Never use damaged or sprung components or tools. Damaged parts can
cause injuries. Inspect components before each use. Discard and replace damaged
components.
!
Warning – Always wear safety goggles that comply with OSHA regulations when
using tools or in an area where tools are used.
!
Warning – Always use a soft-faced hammer when striking hardened surfaces.
Surfaces can chip and cause severe eye damage. Caution - Well lubricate the center
screw. Damage to components may result if the screw is not lubricated.
®
No. 7326
Pro Super Hub-SharkTMSystem Instructions, Standard Bearing Removal
1. Well lubricate the center screw and the thrust bearing of the Hub-Shark every
time it is used.
2. Lift the vehicle so that both front wheels are not bearing weight.
Keep the tires close to the ground.
3. Remove the front wheel and brake caliper.
4. Remove the brake rotor.
5. Remove the axle nut. Check for washers, snap rings, etc. and remove.
6. Remove the steering knuckle from the lower control arm.
7. Push the drive shaft out of the steering knuckle.
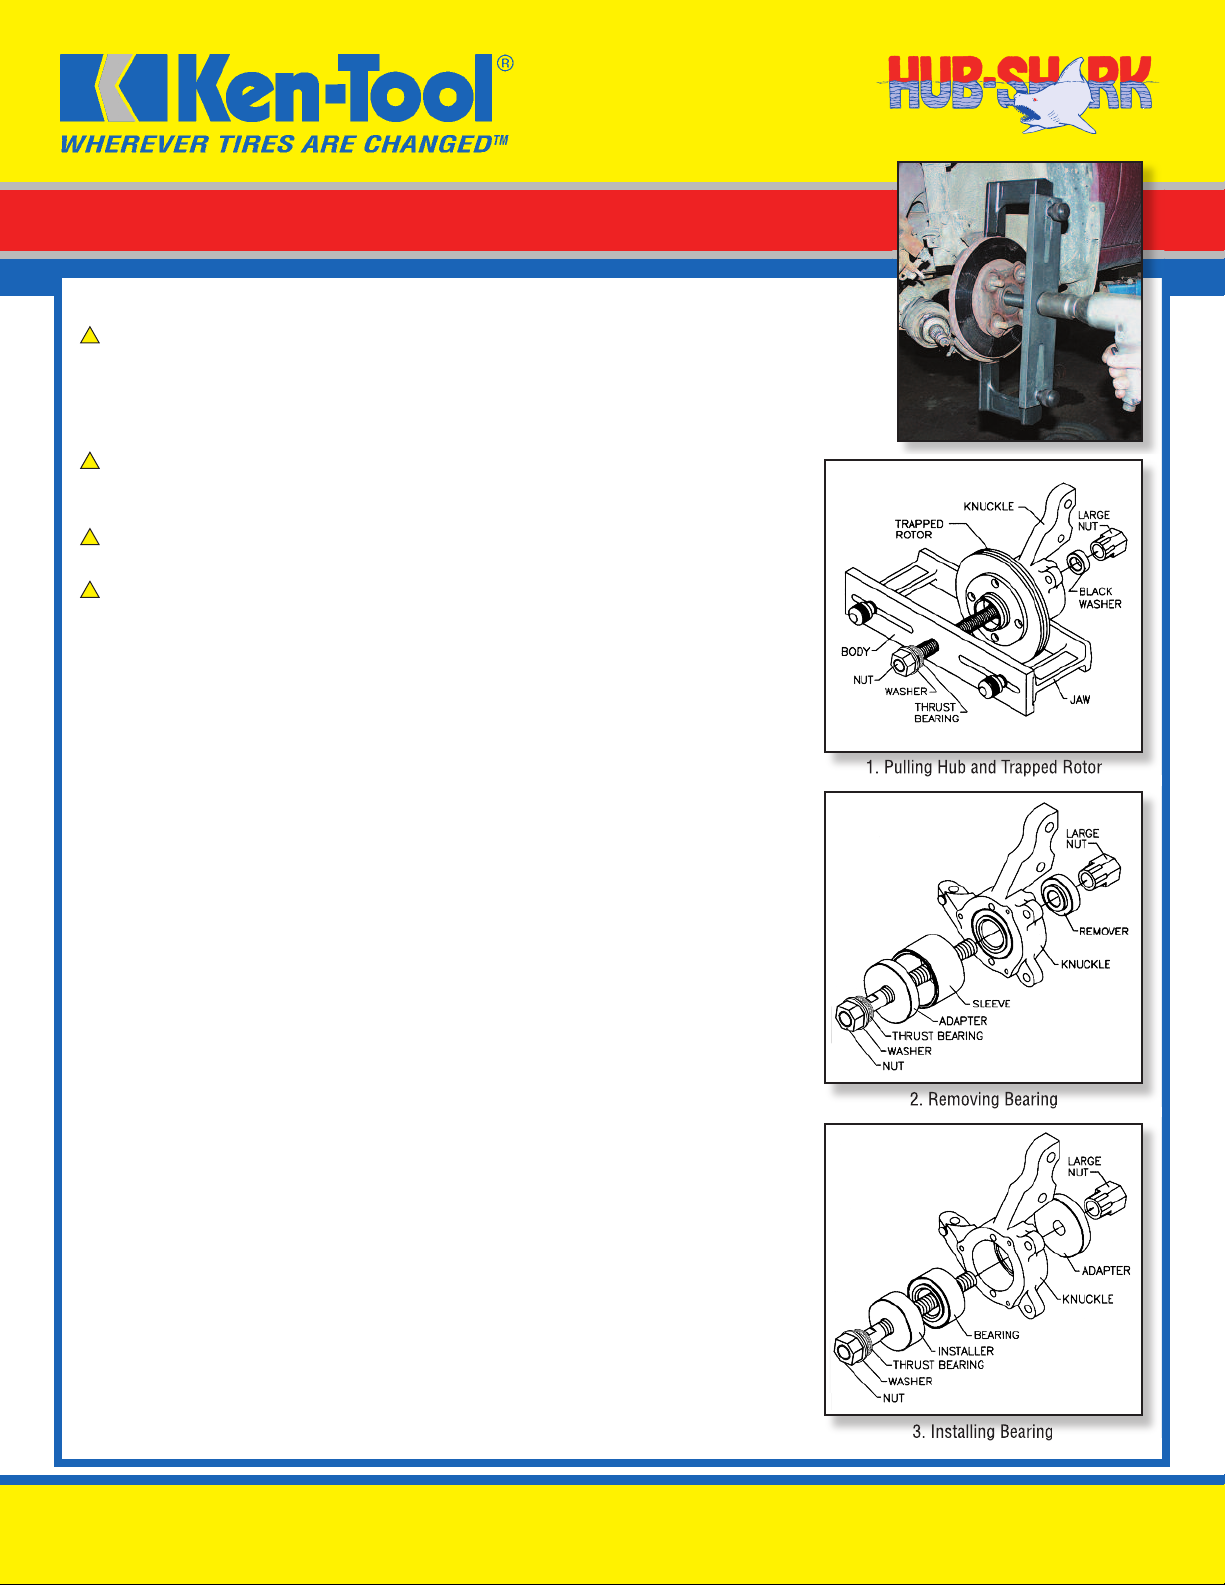
8. Select largest main screw and large nut that fits the drive shaft hole. Place the
thrust washer between the body and small nut. See figure1.
9. See figure 1. Position the Hub-Shark puller with the center screw through the
hub and the jaws behind the hub flange or the trapped rotor resting against the
knuckle or the dust cover. Keep the center screw as square as possible.
On some vehicles, the jaws may be resting on bolt heads. Place the HPA Adapter
on the center screw behind the hub and ahead of the large nut. Use the larger
HPA Adapter for domestic vehicles and the smaller adapter for international
vehicles. See warning of excessive pressure applied to the tool.
10. Turn the small nut on the Hub-Shark puller with an impact wrench, while
holding the large nut with a wrench. The hub will move out of the bearing and
onto the center screw.
11. Check for snap rings holding the bearing.
12. See figure 2. (See step 15 for oversized bearings.) Select a sleeve and adapter
that are slightly larger than the bearing. Put the center screw through the adapter
and bearing. Place the remover behind the bearing on the center screw with the
large nut. The adapter and sleeve form a cup and the bearing will be pushed from
the back into the cup by the center screw, remover and nut. Turn the small nut
with an impact wrench, while holding the large nut with a wrench. Some sleeves
have notches to clear lands on the knuckle.
PARTS LIST
1. Pulling Hub and Trapped Rotor
2. Removing Bearing
3. Installing Bearing
KEN-TOOL • 768 E. North Street, Akron, OH 44305
Toll Free: 888-536-8665 • Fax: 800-872-4929 • Phone: 330-535-7177 • Fax: 330-535-1345
E-mail: sales@kentool.com • www.kentool.com
© 2010 Ken-Tool
KTHSI0510
Page 2
Standard Bearing Installation
13. See figure 3. (See step 16 for oversized bearings.) Position the new bearing in
the pocket of the steering knuckle. Place the installer against the bearing, with
the center screw through the installer and bearing. Place an adapter on the back
of the knuckle with the large nut to square the center screw and bearing. Turn the
small nut with an impact wrench and the bearing will move into the knuckle.
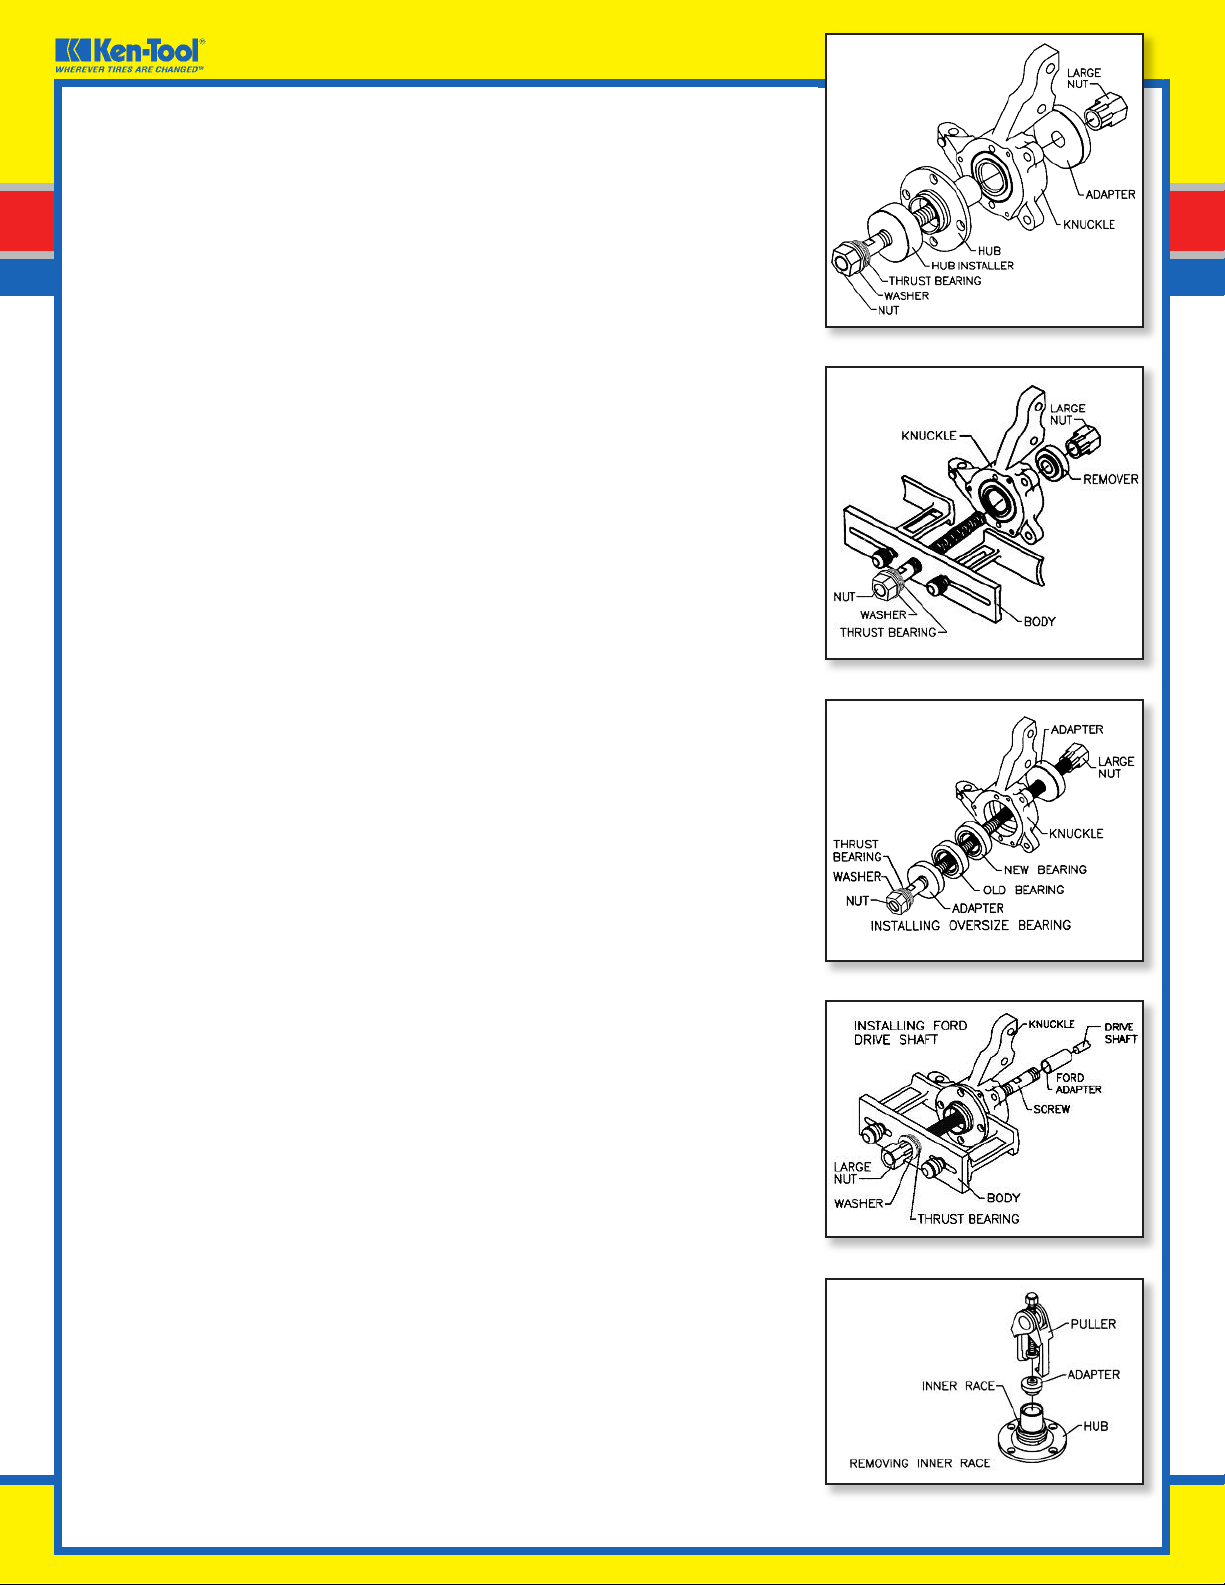
14. See figure 4. Place the hub and trapped rotor in position. Using the same installer
on the center screw put the center screw through the bearing. Use the adapter
again on the back of the knuckle to square the hub with the knuckle. Turn the
center screw with an impact wrench and the hub and trapped rotor will rotate
into the bearing.
15. The Hub-Shark installation is now complete.
Pro Super Hub-Shark
TM
System Instructions, Oversized Bearings
Follow steps 1-10 above.
16. See figure 5. Rarely, you may encounter a bearing that is larger than the biggest
cup. Use the hub puller to pull the bearing. Reverse and spread the jaws so the
bearing will pass between them. Position the remover behind the bearing with the
large nut and the bearing will come out onto the center screw.
17. See Figure 6. To install a bearing that is larger than our largest installer, place the
new bearing in the pocket and use the old bearing to push the new bearing into
the knuckle. Use an adapter to push the old bearing and another adapter to square
and block the large nut. The old bearing will push the new bearing into the pocket
without damaging the new bearing.
Follow steps 13 and 14 above.
4. Installing Hub
5. Pulling Oversized Bearing
Ford Vehicles
A. Note: The bearings on many Ford vehicles are removed to the back of the knuckle,
toward the engine. Simply reverse the process, with the cup toward the engine
and the bearing and installer going into the knuckle from the engine side and the
adapter on the outside of the knuckle.
B. See figure 7. An adapter is included for pulling the Ford tapered shaft back into the
taper hub. Using your second center screw, thread the black Ford adapter on the
short threads of the center screw. Put the Ford adapter through the hub and
thread it onto the Ford short shaft. Position the hub puller with the jaws behind
the hub flange and the center screw through the puller center screw hole. Place
the large washer over the center screw and thread on the large nut. Turn the large
nut on the center screw with a wrench to pull the drive shaft through the hub.
Remove Old Bearing Race From The Hub
See figure 8. Often, when the hub is pulled from the bearing, the inner bearing
race will separate from the bearing and stay on the hub. Included in the
Hub-Shark are an adapter and puller that will pull the race from the hub. Most
hubs have flats machined into them, which will allow the puller to get behind the
bearing race and lift the race from the hub. Turn the center screw to lift and
remove the bearing race.
Additional Tools Required:
1. Safety Goggles
2. Impact Gun with 1-5/16” Impact Socket
3. Box/Open End Wrench
4. Soft-Faced Hammer
6. Installing Oversized Bearing
7. Installing Ford Drive Shaft
8. Removing Inner Race
 Loading...